Configure Okta Advanced Server Access (ASA) for GCP + Jenkins Service Account
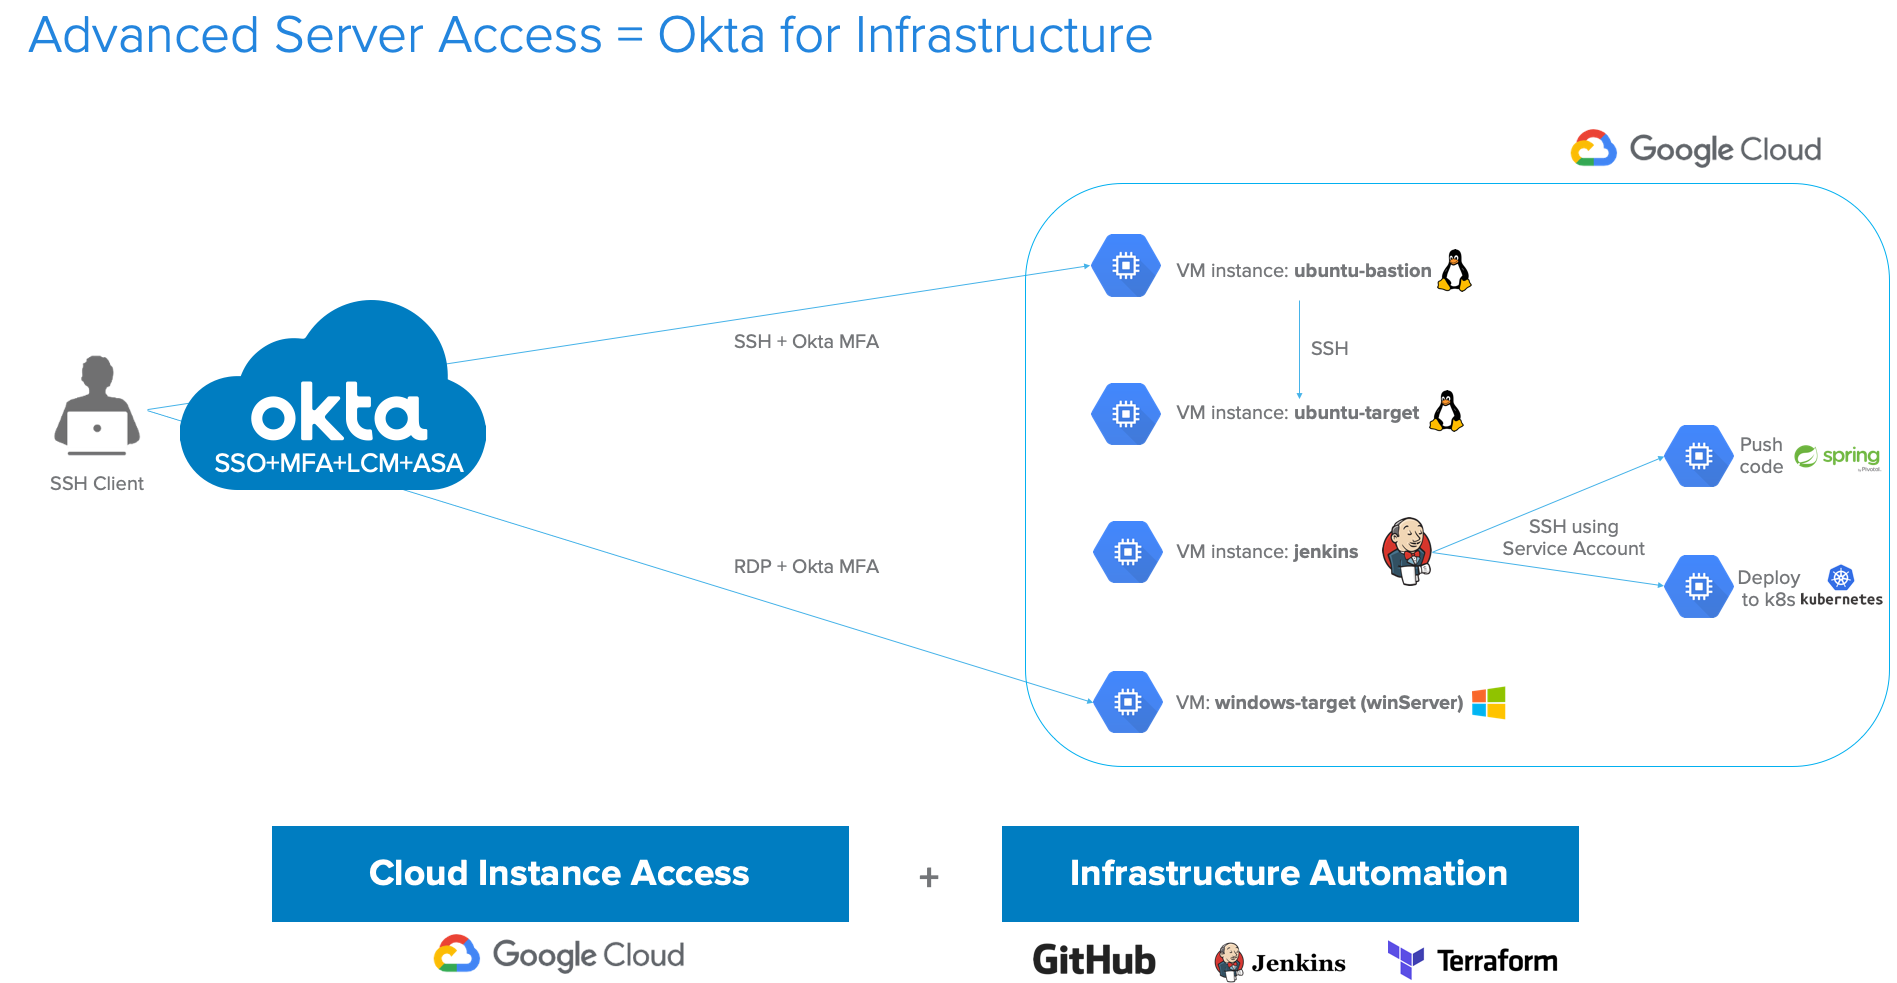
In this tutorial, we’ll configure Okta Advanced Server Access (aka ‘ASA’) so our DevOps team can securely access Virtual Machines (aka ‘VMs’) on Google Cloud Platform (aka ‘GCP’). We’ll also configure a service account so our Jenkins instance can connect to other VMs to run remote commands.
This tutorial highlights the steps you should complete to manually deploy those servers on GCP and enroll them in ASA. At the end of this tutorial, we’ll point to resources you can leverage to automate all those steps (including our Terraform ASA provider).
Below is the target architecture you’ll be deploying:
Table of Contents
- What is Okta’s Advanced Server Access (ASA)?
- Who This Guide is For
- Getting Started Prerequisites
- How to Configure Okta ASA + Google Cloud Platform (GCP) + Jenkins
- How to Block SSH Public Keys and Force ASA Authentication to VMs
- Automate ASA enrollment with existing CI/CD tools
What is Okta’s Advanced Server Access (ASA)?
In July of 2018, Okta acquired a San Francisco-based startup working on Zero Trust access solutions named ScaleFT. Okta rebranded the ScaleFT Server Access product as Okta Advanced Server Access (ASA).
ASA is an Okta application that manages access to Linux and Windows servers over SSH (Secure Shell) & RDP (Remote Desktop Protocol). It brings continuous, contextual access management to secure cloud infrastructure. It offers centralized access controls for organizations leveraging on-premises, hybrid, and cloud infrastructure in a seamless manner to mitigate the risk of credential theft, credential reuse, password sprawl, and abandoned administrative accounts.
ASA takes a modern approach to server access by entirely eliminating the need for static keys. Through a revolutionary ephemeral credential mechanism, ASA offers centralized access controls across any cloud environment supporting Linux and Windows servers (public, private, or hybrid), and cloud instances across AWS, GCP, and Azure.
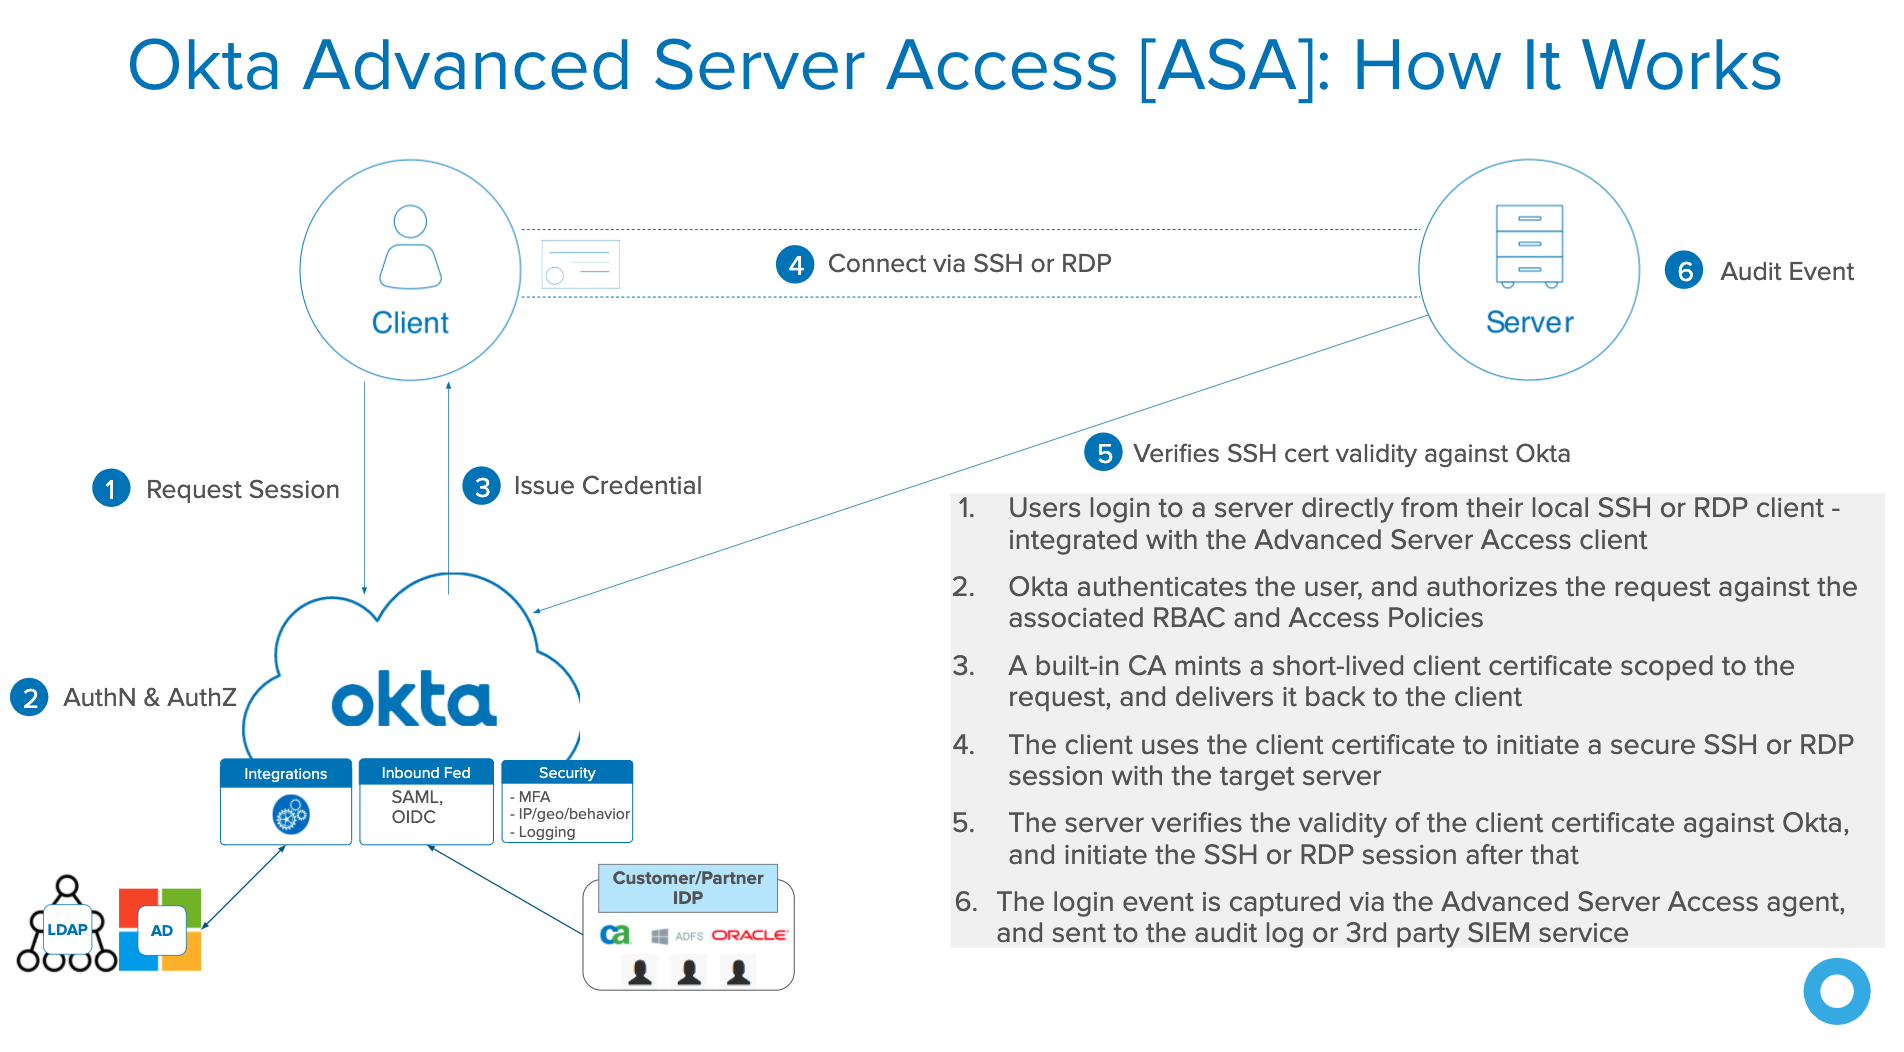
Here’s how ASA works when you try to SSH or RDP into a VM:
Who This Guide is For
This tutorial is intended for Okta administrators and technical teams as a quick-start guide to deploy ASA for Linux and Windows servers with their existing Okta organizations. Anyone with an interest in Okta’s zero-trust technology can read this guide, but it assumes at least some knowledge of:
- Okta org functionality and administration, with features such as Okta Universal Directory, Okta Integration Network, and multifactor authentication
- Server endpoint (e.g. Windows, Linux) administration and configuration
- Cloud provider (e.g. Amazon Web Services, Google Cloud Platform) administration and provisioning/deprovisioning
- End-user workstation (e.g. MacOS, Windows, Linux) administration and configuration
Getting Started Prerequisites
The prerequisites to complete this tutorial are:
- An existing Okta org (trial or active customer). If you don’t have an existing Okta org, you can create a new one here.
- One or more Okta administrative user(s)
- One or more Okta test user(s)
- Okta administrator rights
- Workstation(s) running a supported version of MacOS, Windows, or Linux
- Installation permissions
- SSH terminal application
- MacFreeRDP client (MacOS clients only)
- HTTPS web browser (recommended)
How to Configure Okta ASA + Google Cloud Platform (GCP) + Jenkins
Let’s start by configuring:
- An Okta ASA team
- A GCP project
- A gcp-ubuntu-bastion VM
- A gcp-ubuntu-target VM behind the gcp-ubuntu-bastion
- A gcp-jenkins VM with an ASA service-account, so Jenkins can run some builds
- A gcp-windows-target
How to Configure Okta’s ASA Team
Your existing Okta org contains:
- Users and groups within Okta Universal Directory (UD). You can create those users and groups directly within Okta or you can pull them in from your HR system (e.g.: Workday) or your enterprise directory (AD/LDAP)
- App sign-in policies and MFA factors
To configure ASA with Okta, we’ll have to create a new ASA team and federate that ASA team with your Okta org.
To create a new ASA team:
- Visit the ScaleFT signup page
- Enter your username, first name, last name, and pick a team name (we’ll use
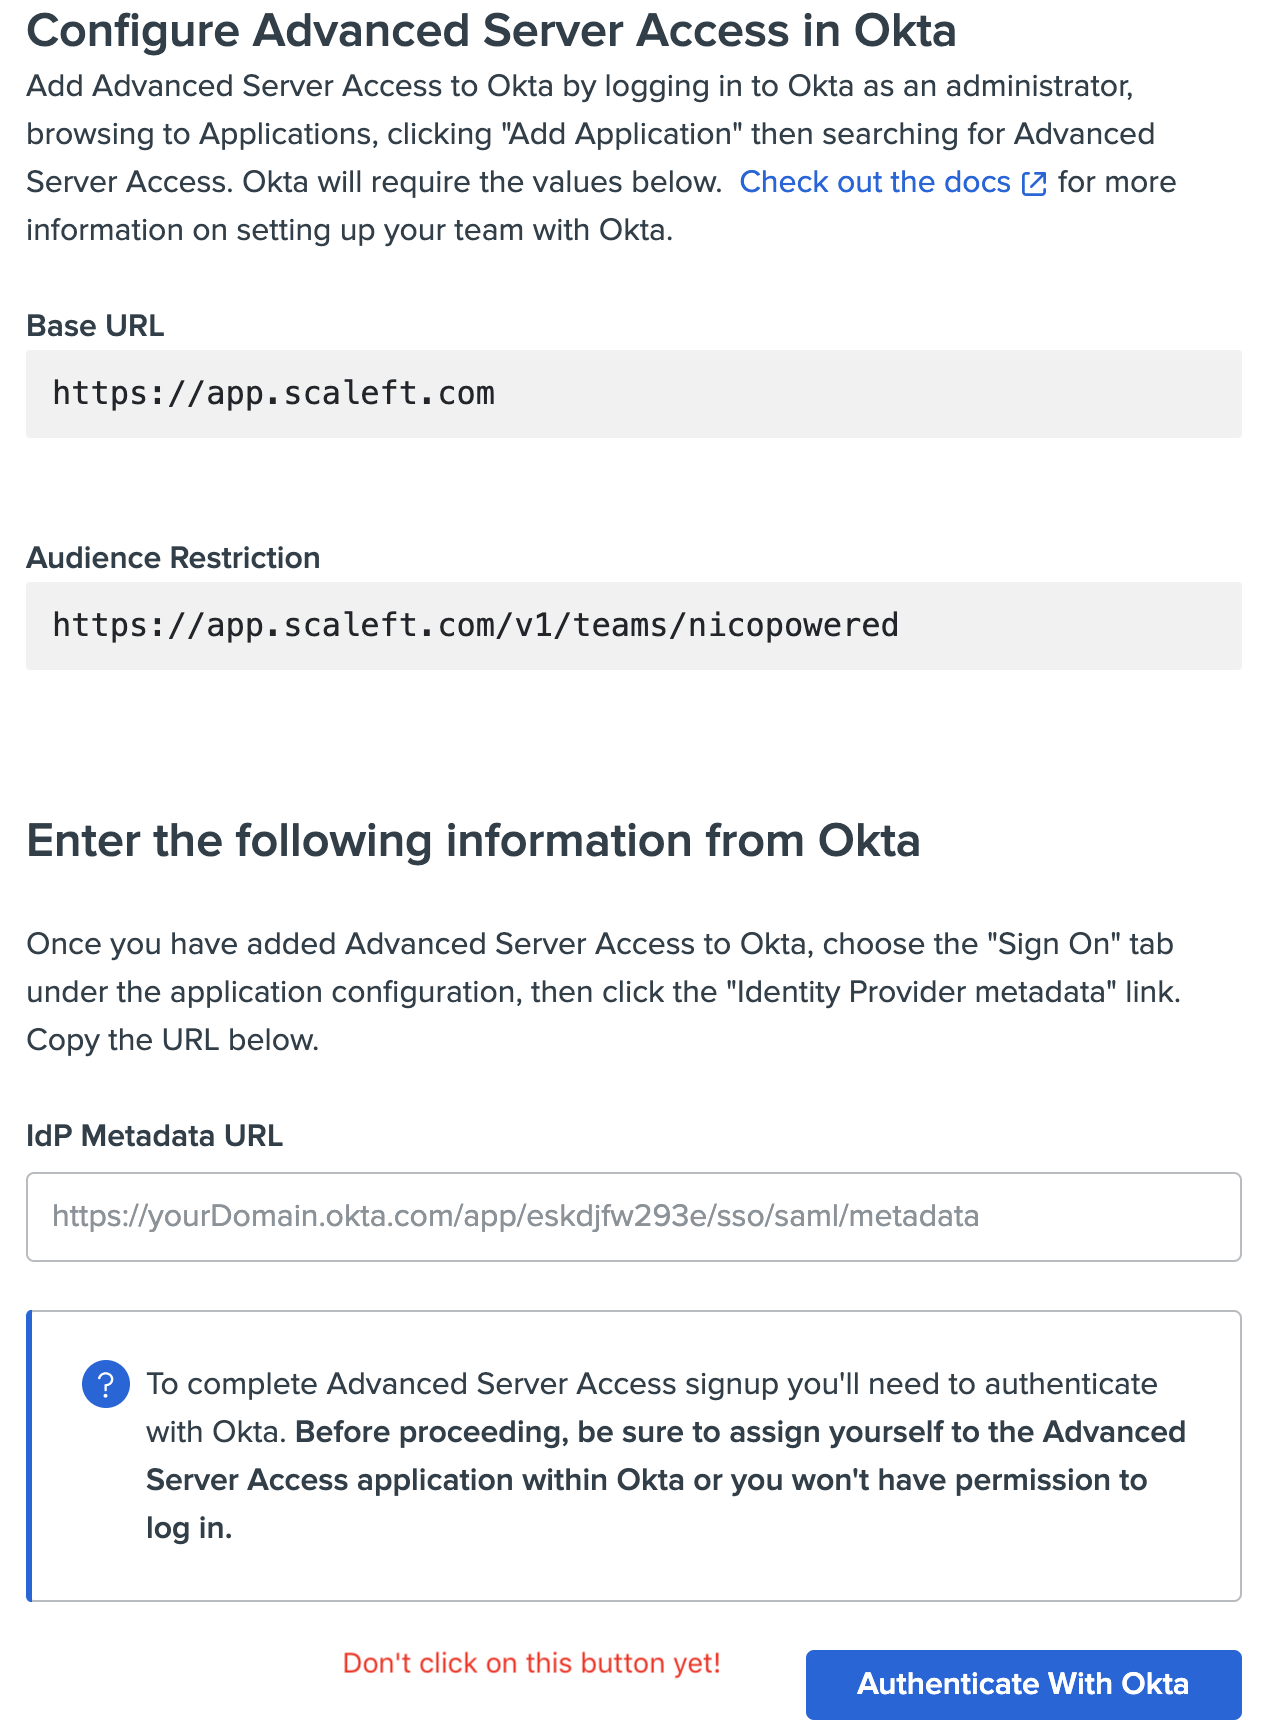
nicopoweredfor this example) - You’ll then see an ASA screen asking you to go back to your Okta org and enter details about your ASA team. Don’t click on ‘Authenticate with Okta’ yet.
- Keep your ASA sign up tab open and open your Okta org in a new tab. Go to your Okta admin console > Applications > Applications > Search for “Okta Advanced Server Access” > click on the matching result
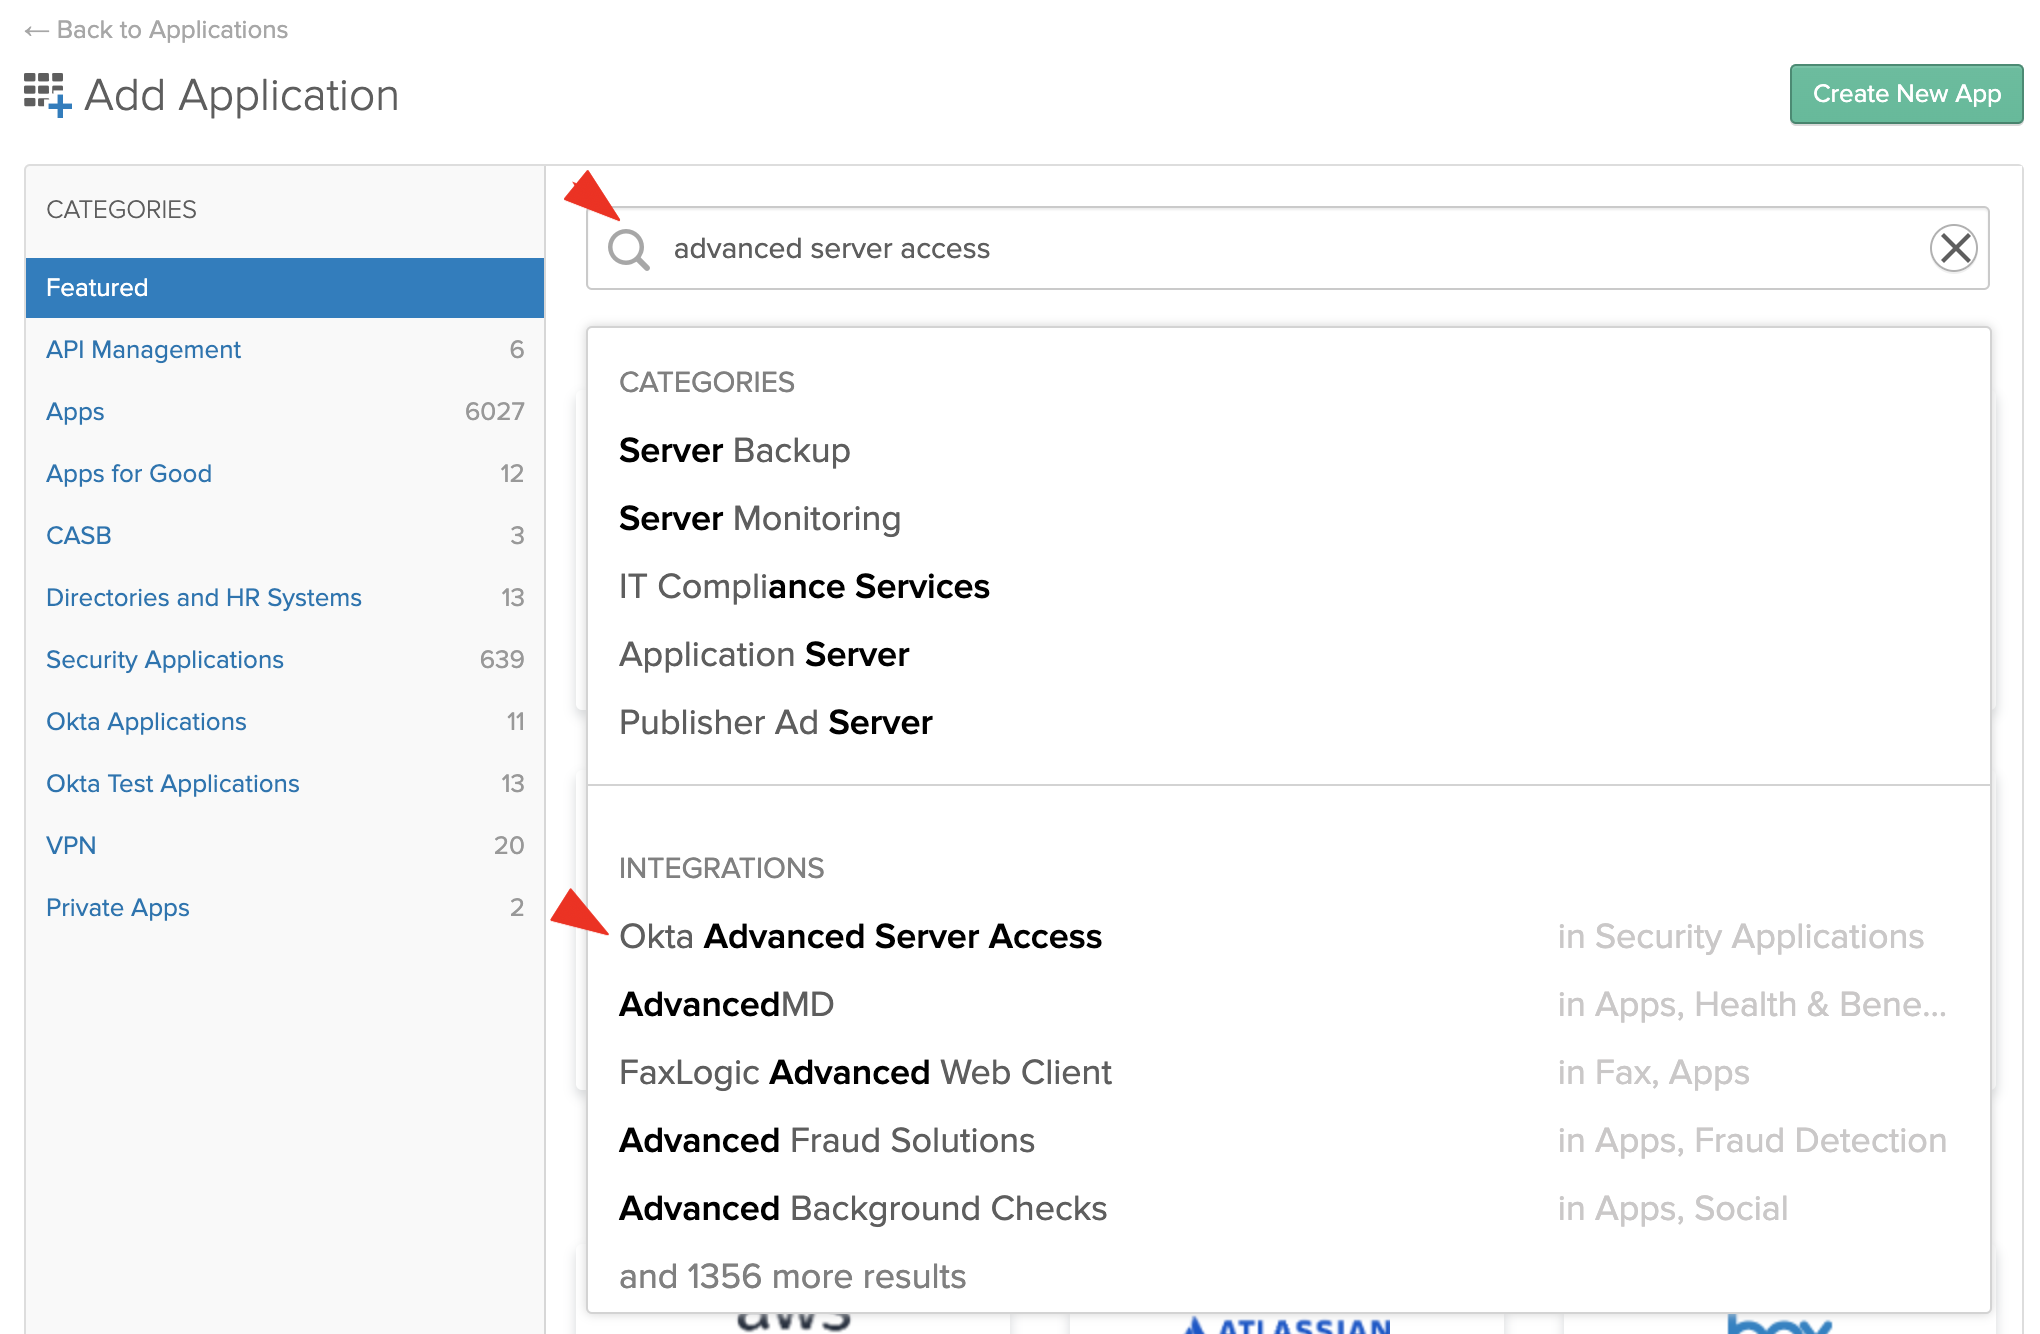
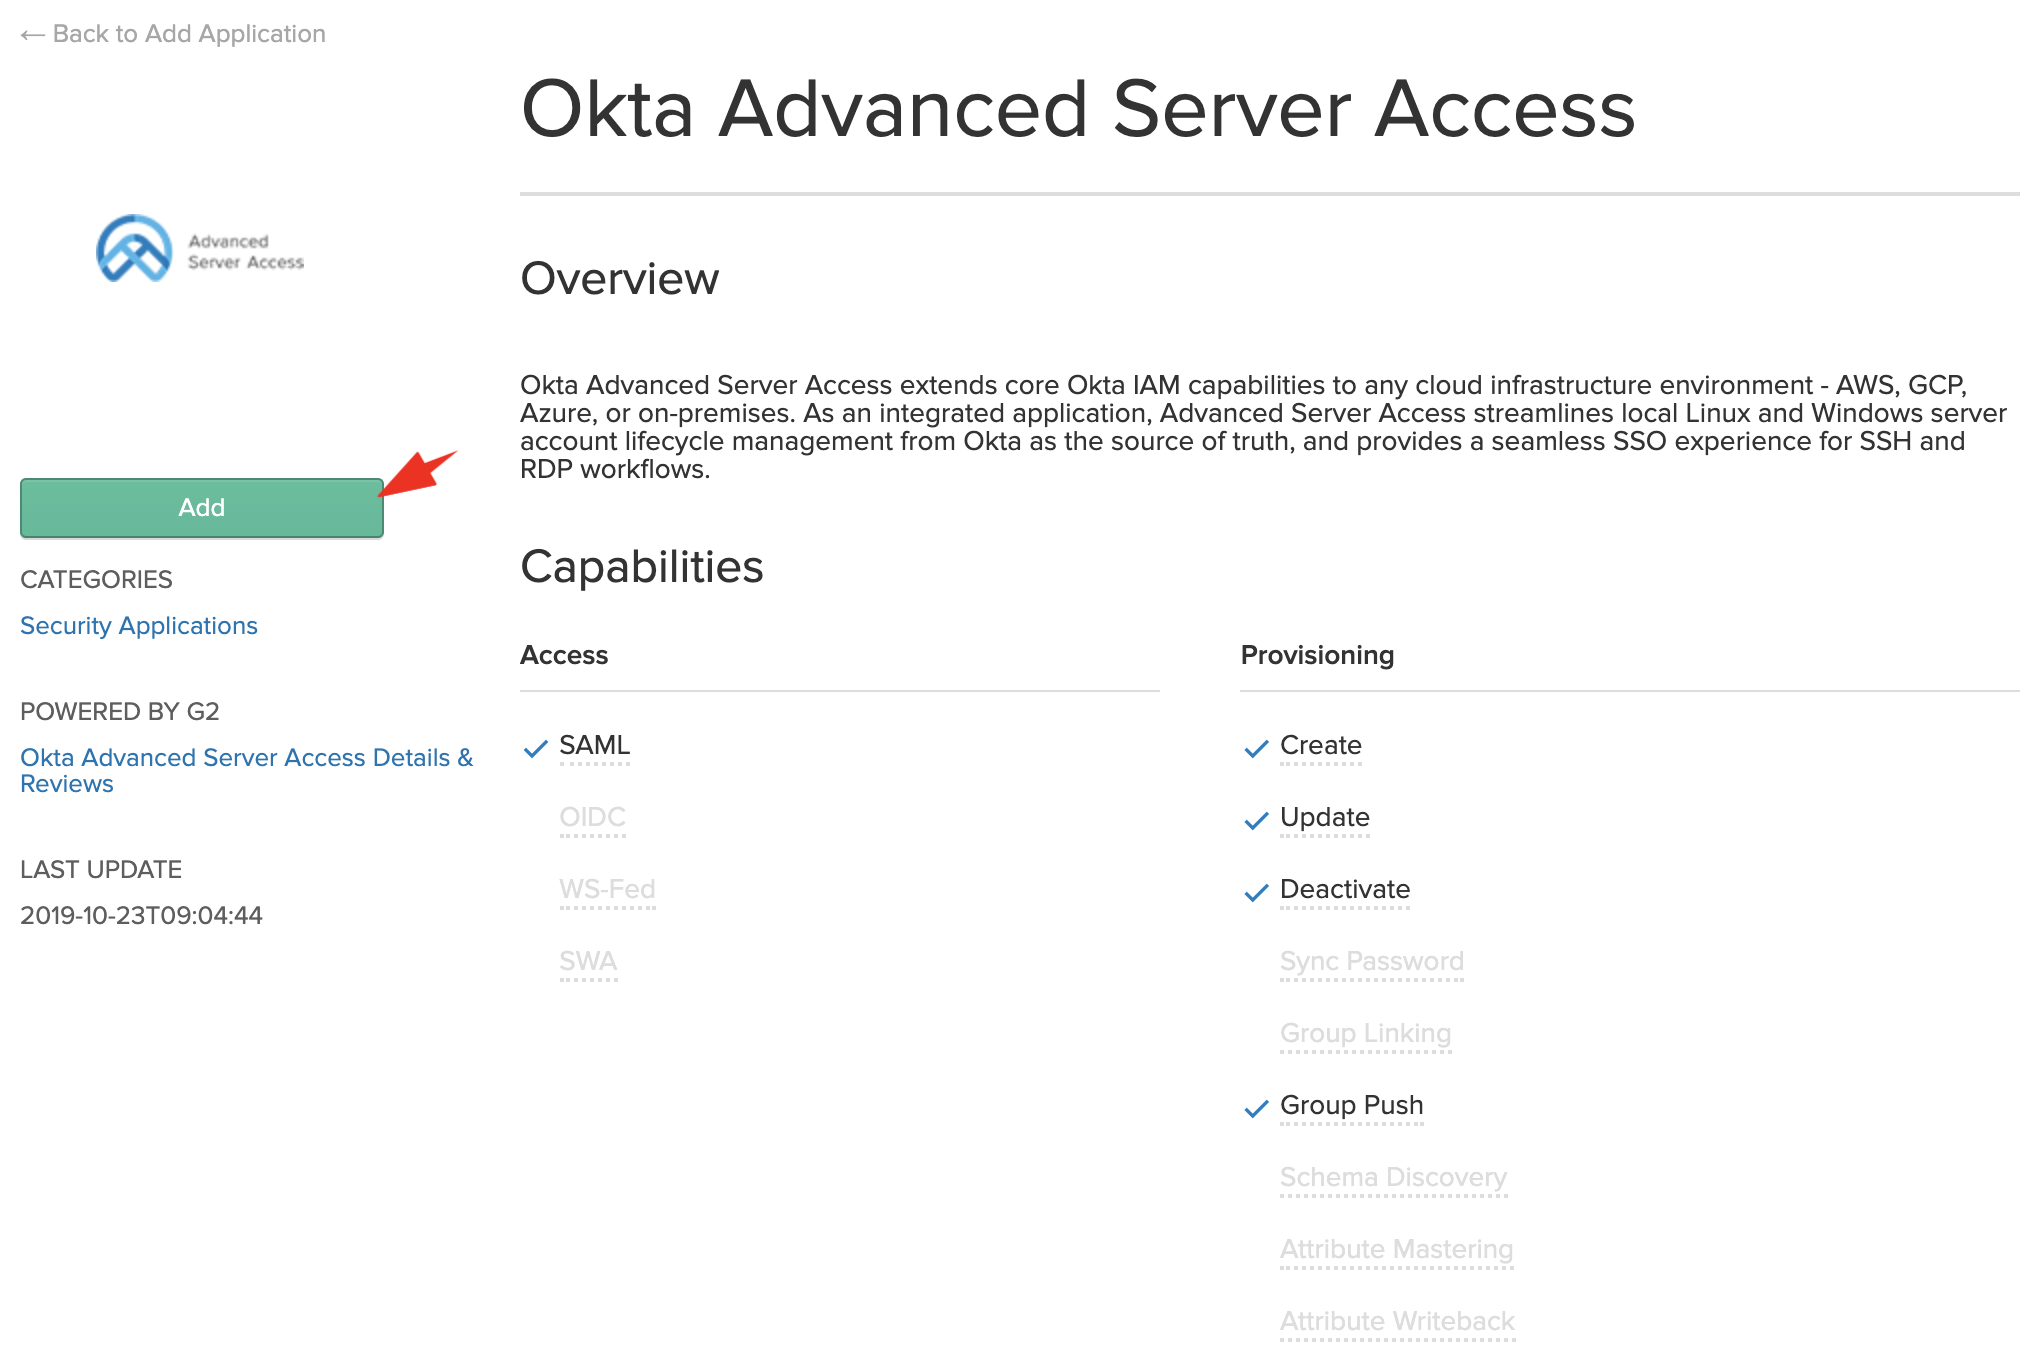
- Click on Add:
- Follow the configuration wizard. Enter an Application label (we’ll use ‘ASA team:nicopowered’ here), then click on Done:
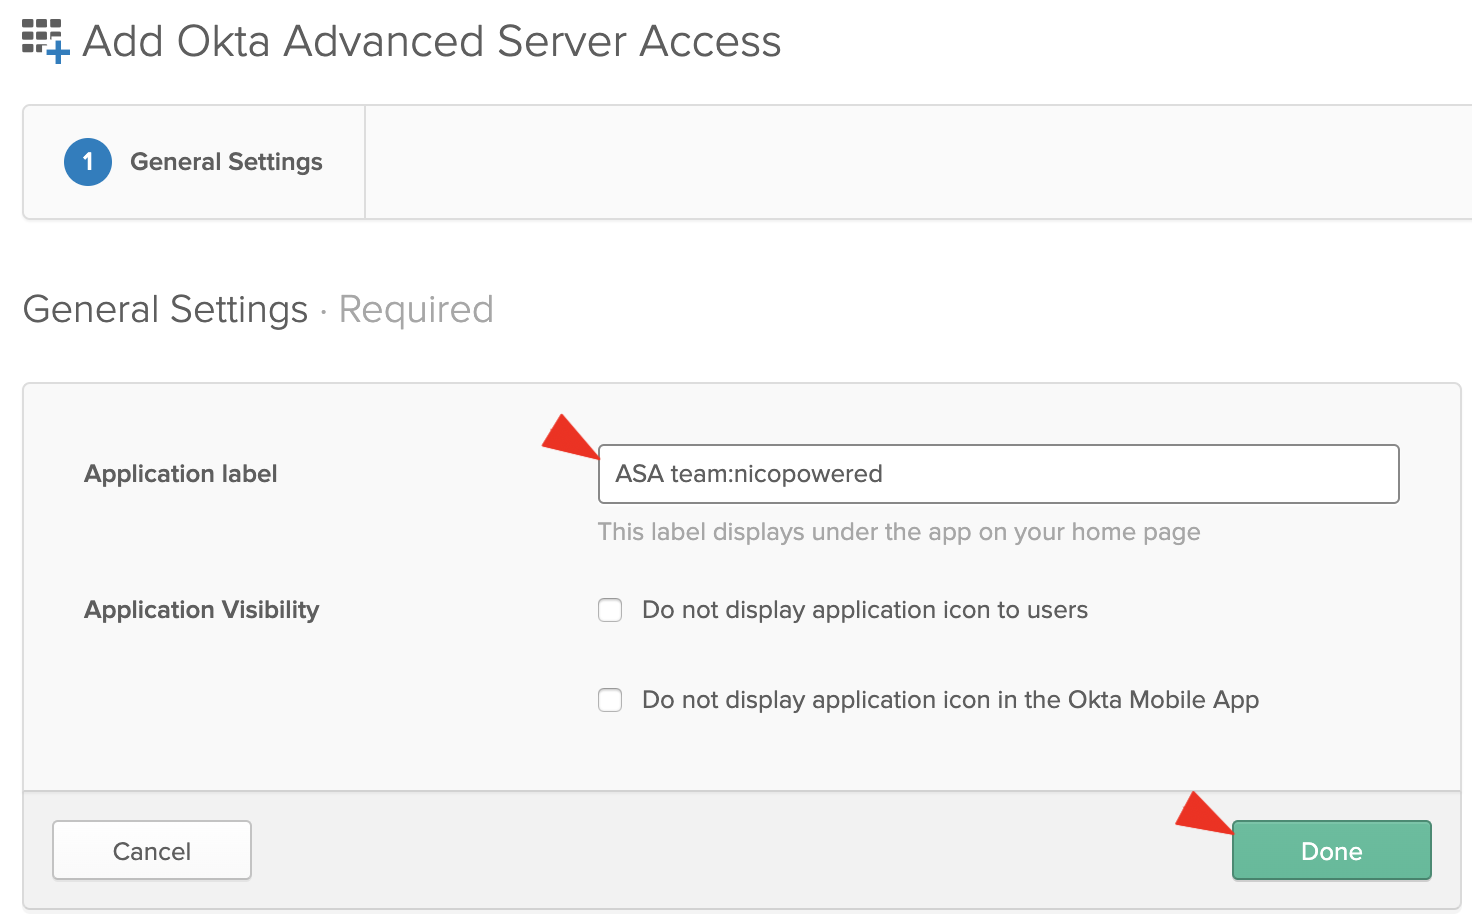
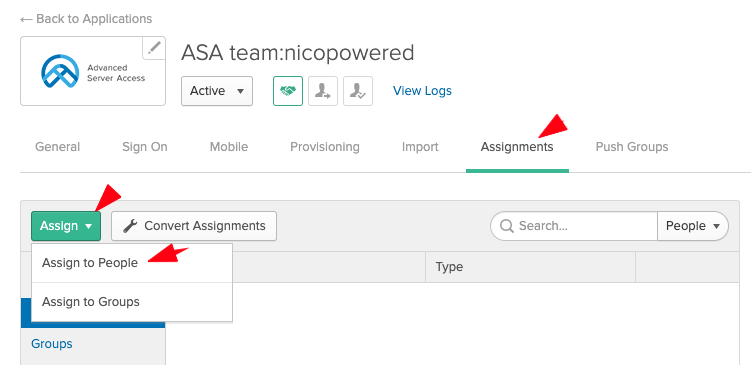
You should see this:
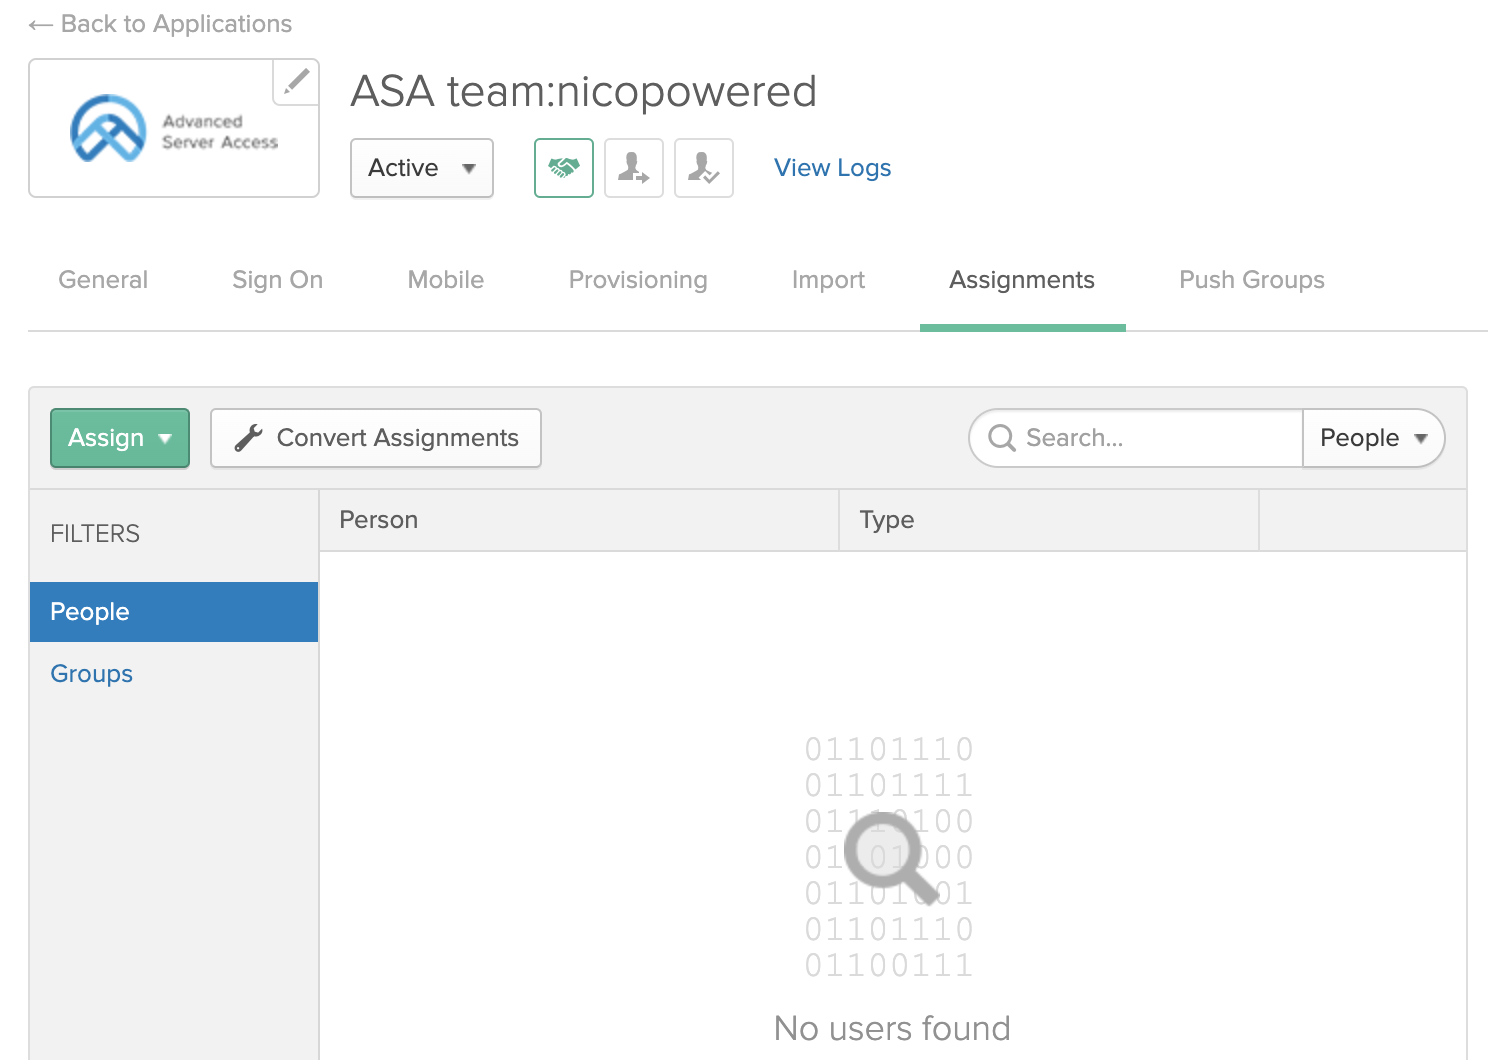
- Go to the Assignments tab > click on Assign > Assign to People:
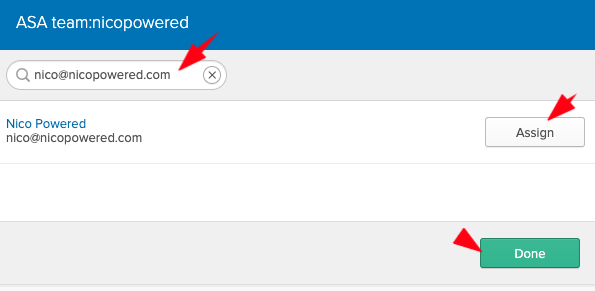
- Search for your user, click on Assign in front of the matching item, then click on Done:
- Now go to the Sign On tab:
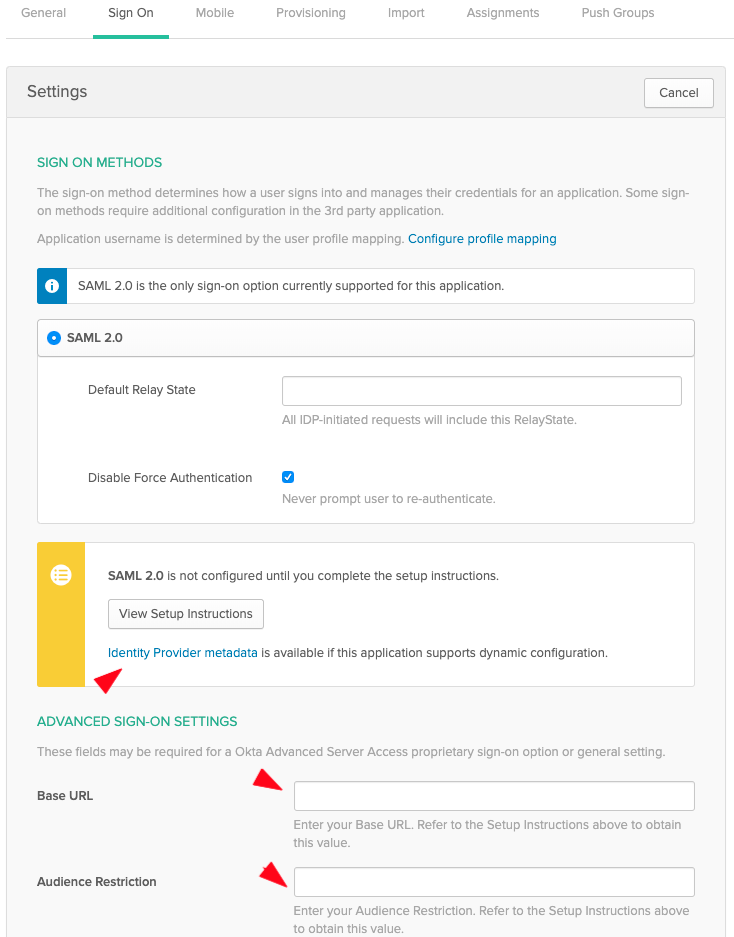
-
Enter the Base URL and Audience Restriction values from your ASA sign up page. Then click on Save.
-
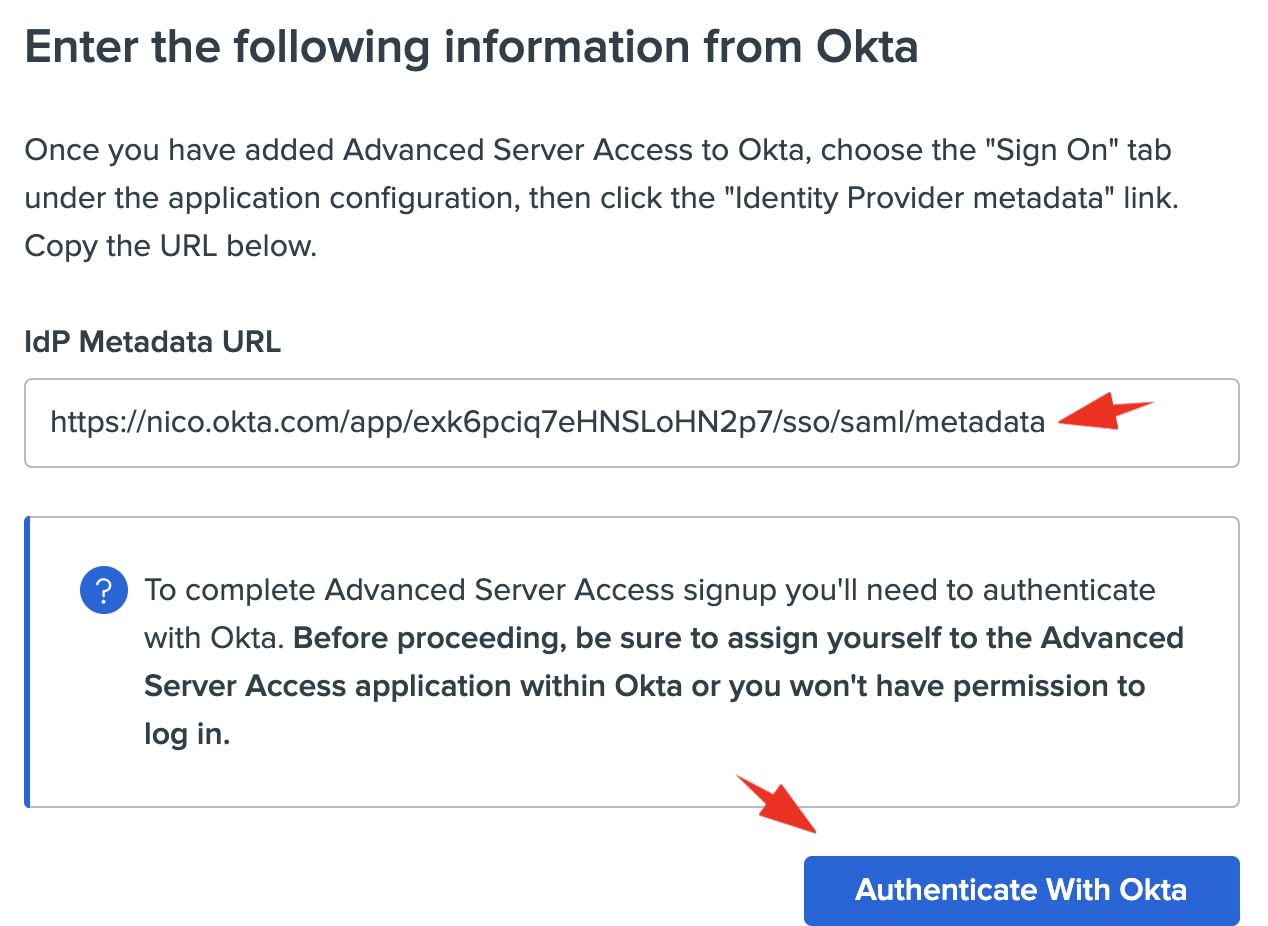
Still on the Sign On tab, right-click then copy the Identity Provider metadata link:
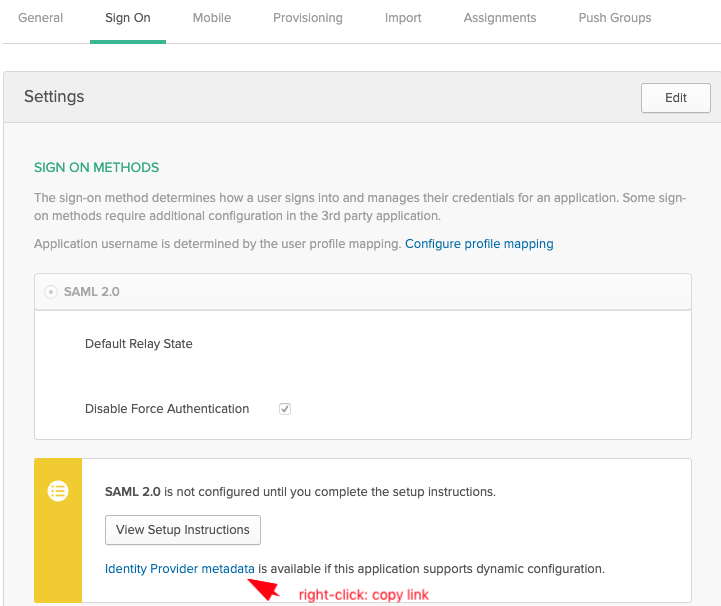
- Go back to your ASA sign up page, paste the Identity Provider metadata link Okta generated, and click on Authenticate With Okta
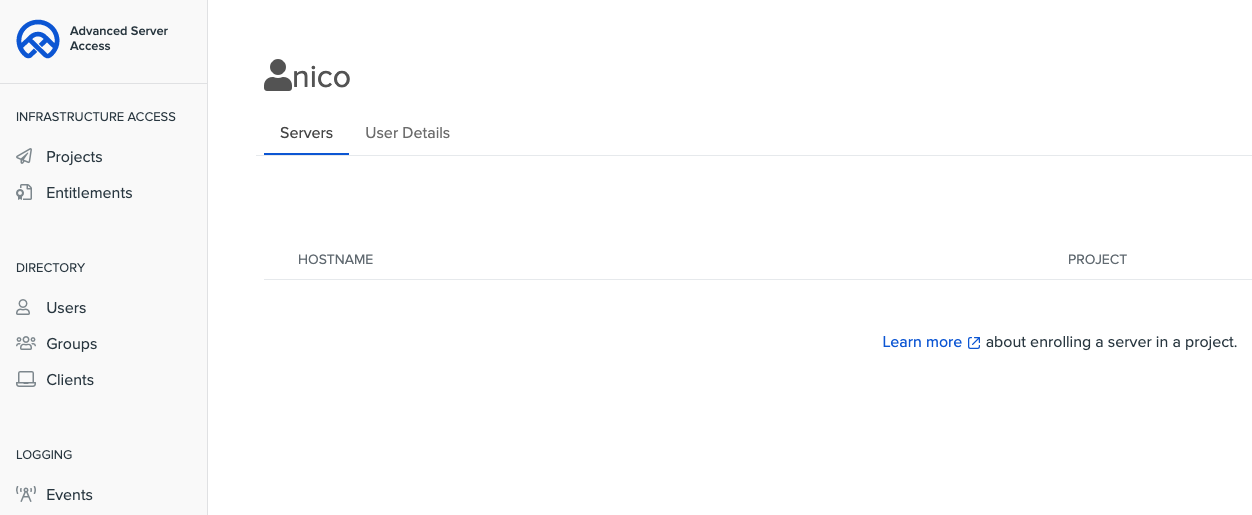
At this stage, you should be able to SSO into the ASA dashboard as an admin. You should see this:
Now, let’s configure the ASA app to automatically push new users and groups to ASA from the Okta org.
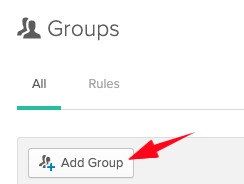
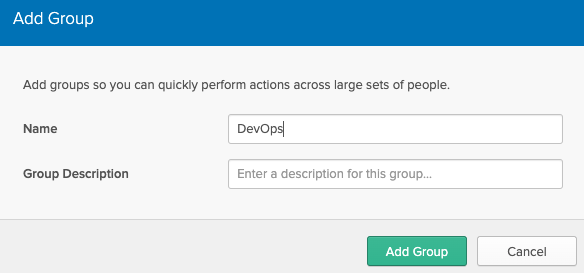
- Create a group in Okta UD. Go to your Okta admin console > Directory > Groups. Click Add group. Pick a name and description. Here we’ll use “DevOps”
- Then add yourself to this group. Open the freshly created group > click on Manage People

- Search for your user, click on your matching user in the left column, then click on save
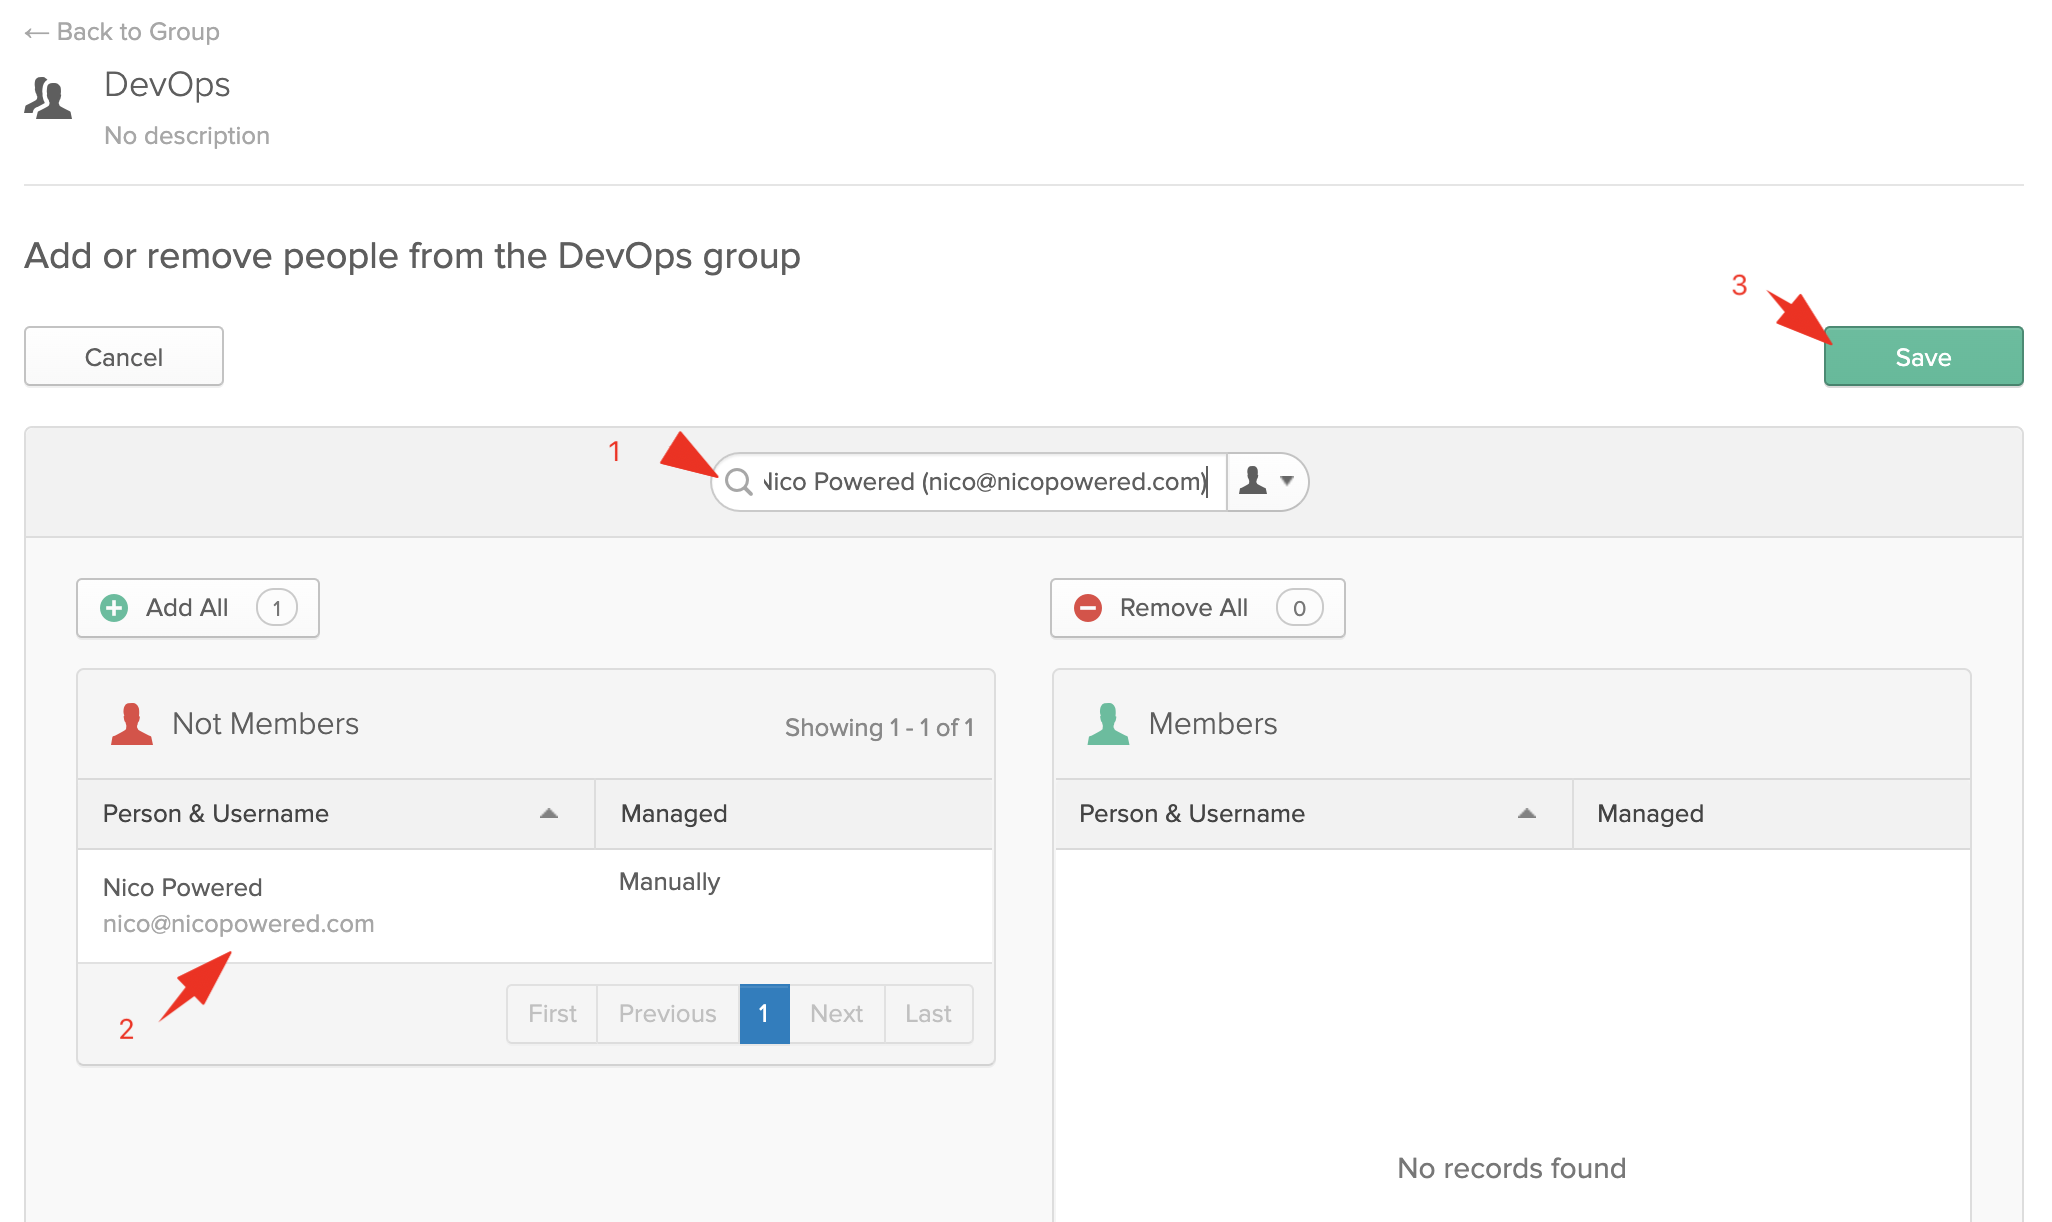
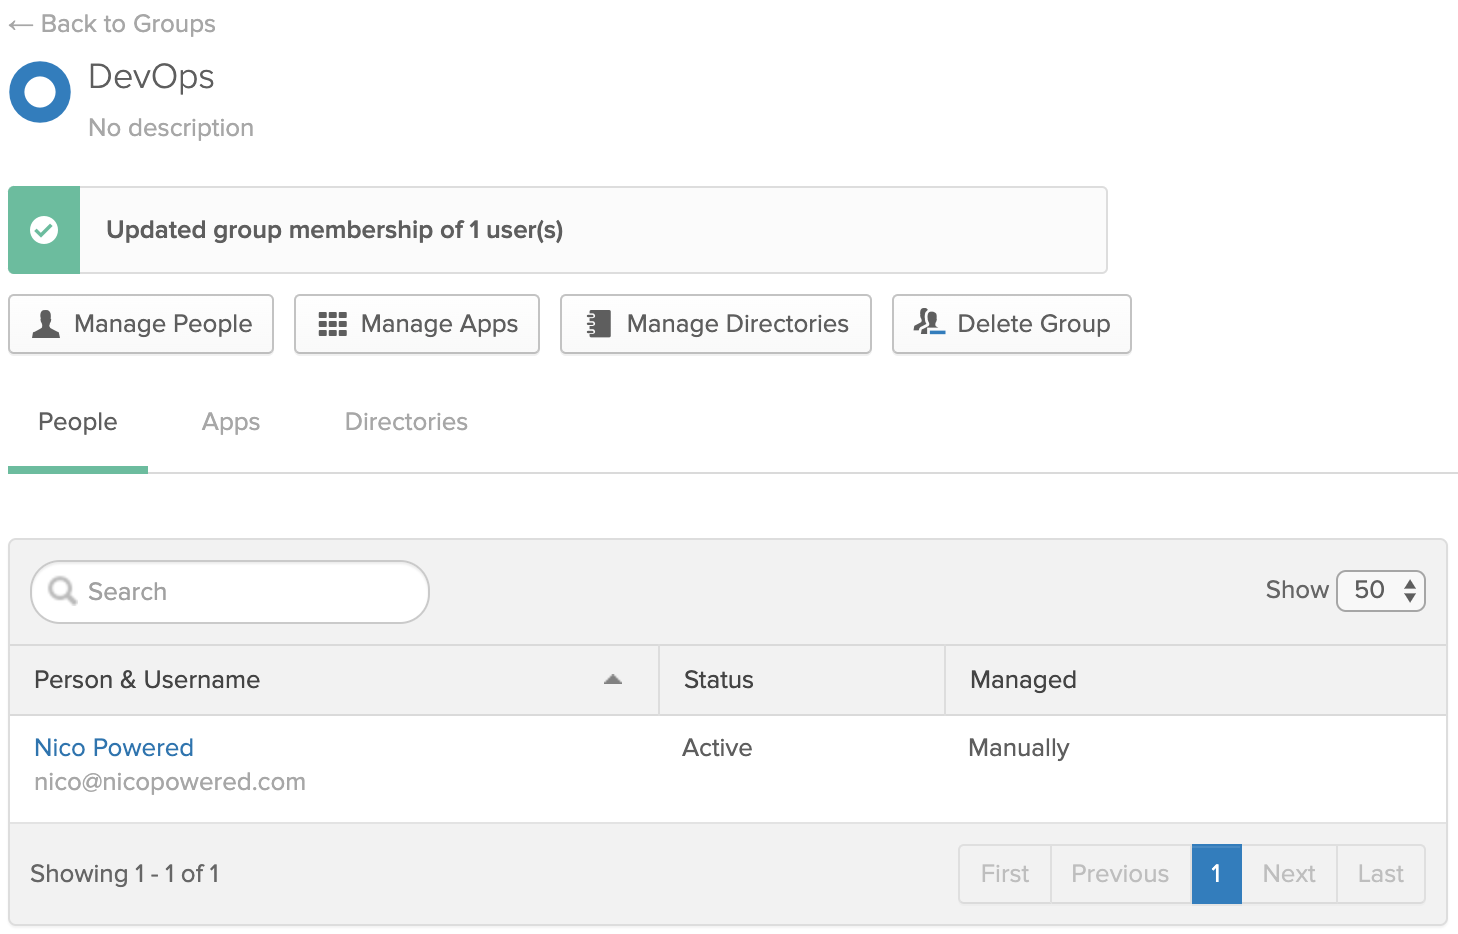
You should see this:
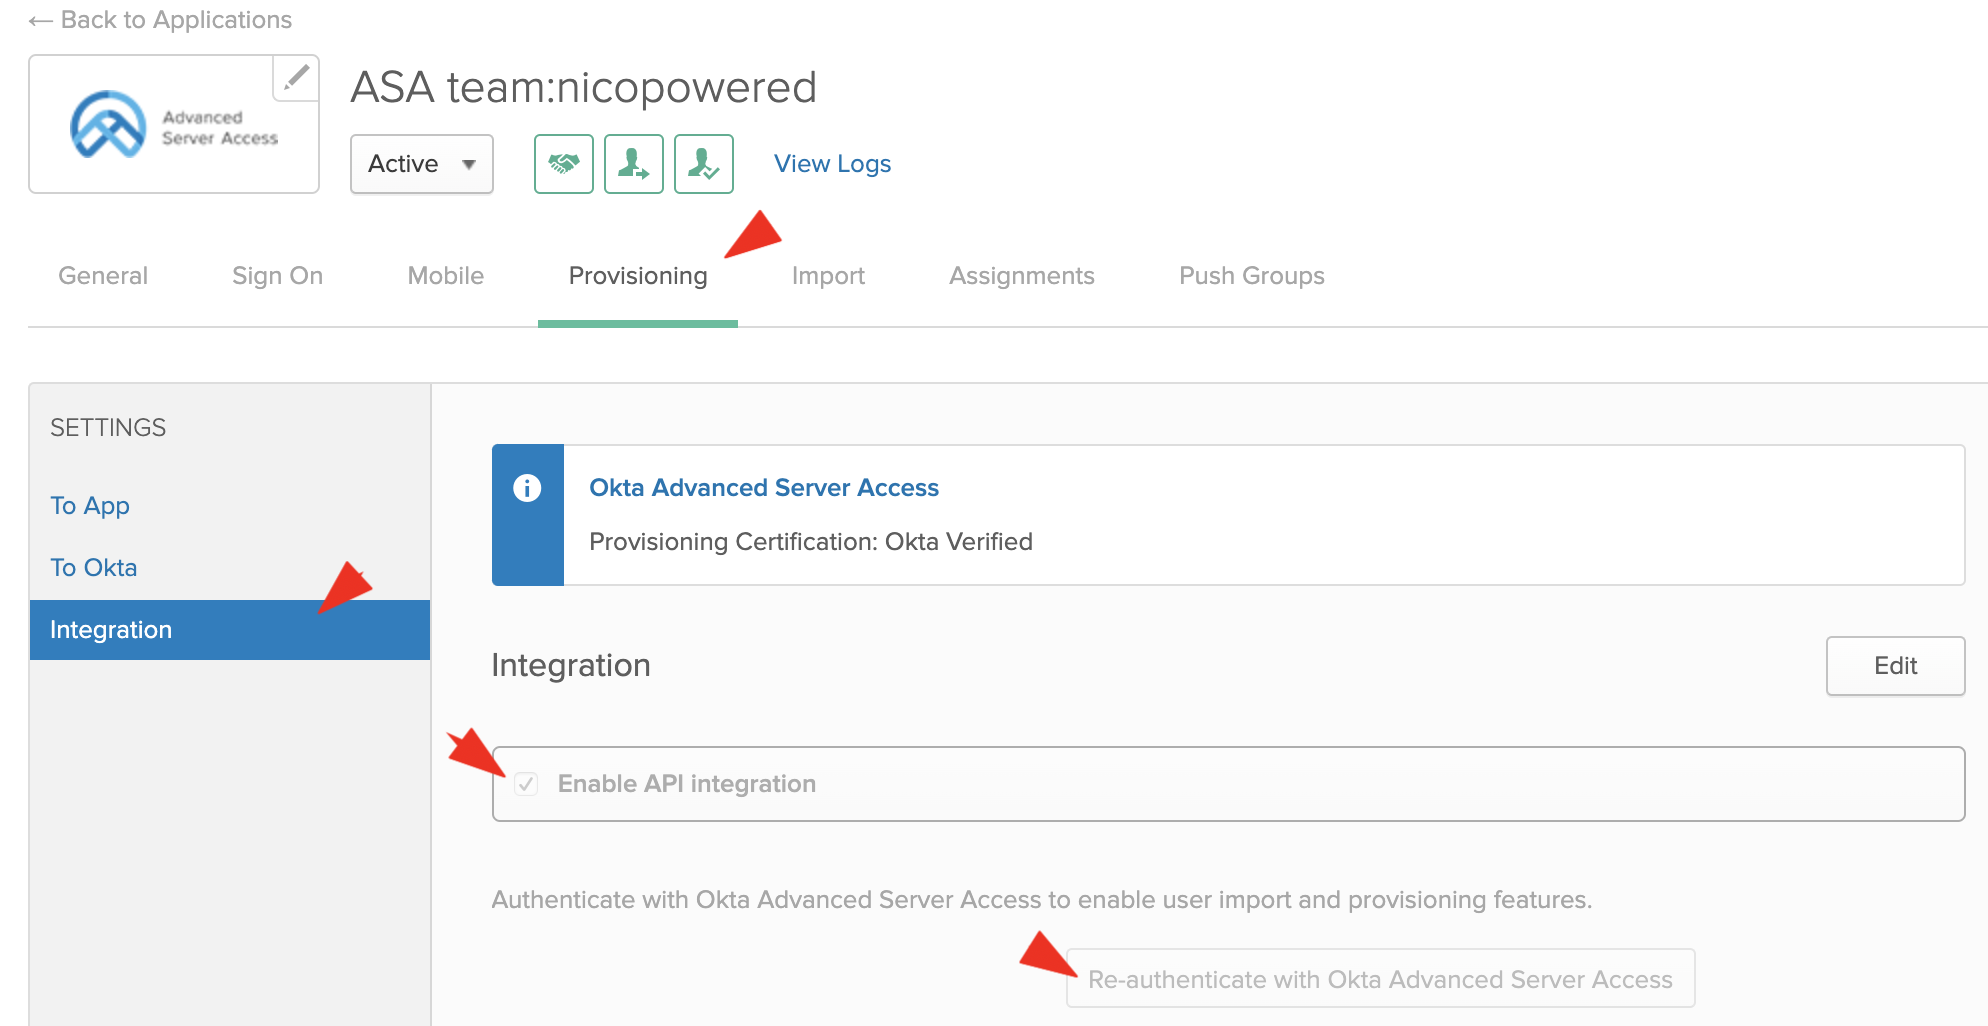
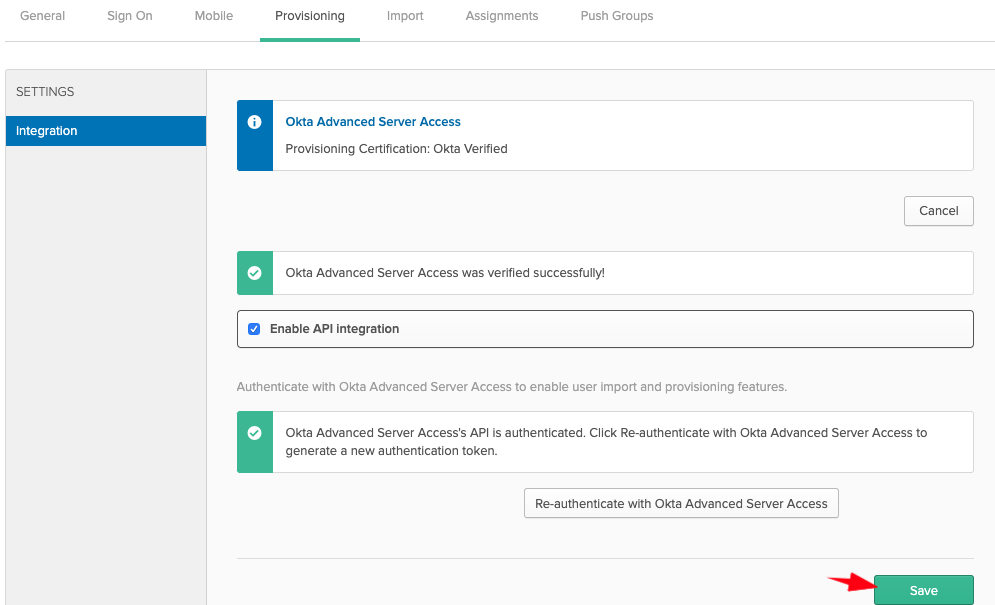
- Go back to Applications > Applications > your ASA app. Go to the Provisioning tab > Integration. Select Enable API integration > click on Re-authenticate with Okta Advanced Server Access:
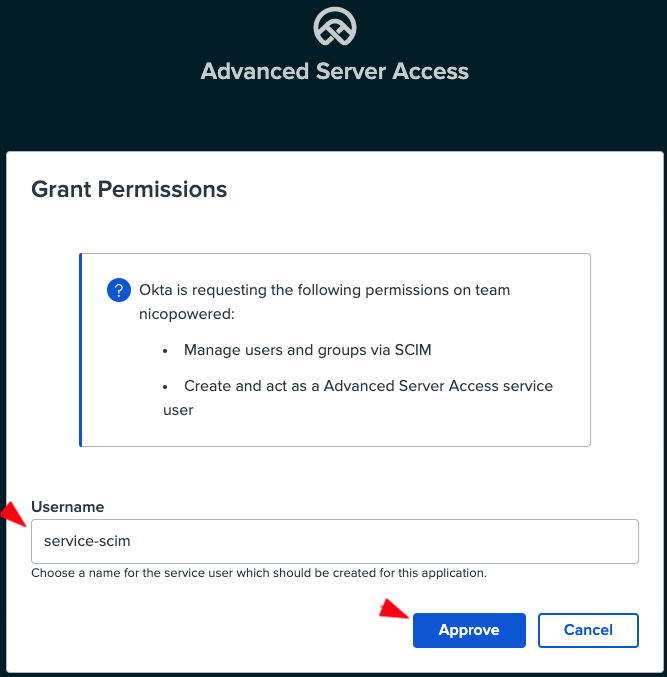
- Okta should redirect you to a screen to consent to the API scopes Okta requires for provisioning. Pick a service account name (ex: service-scim):
- Okta should redirect you back to the Okta Provisioning tab > Integration. Click Save:
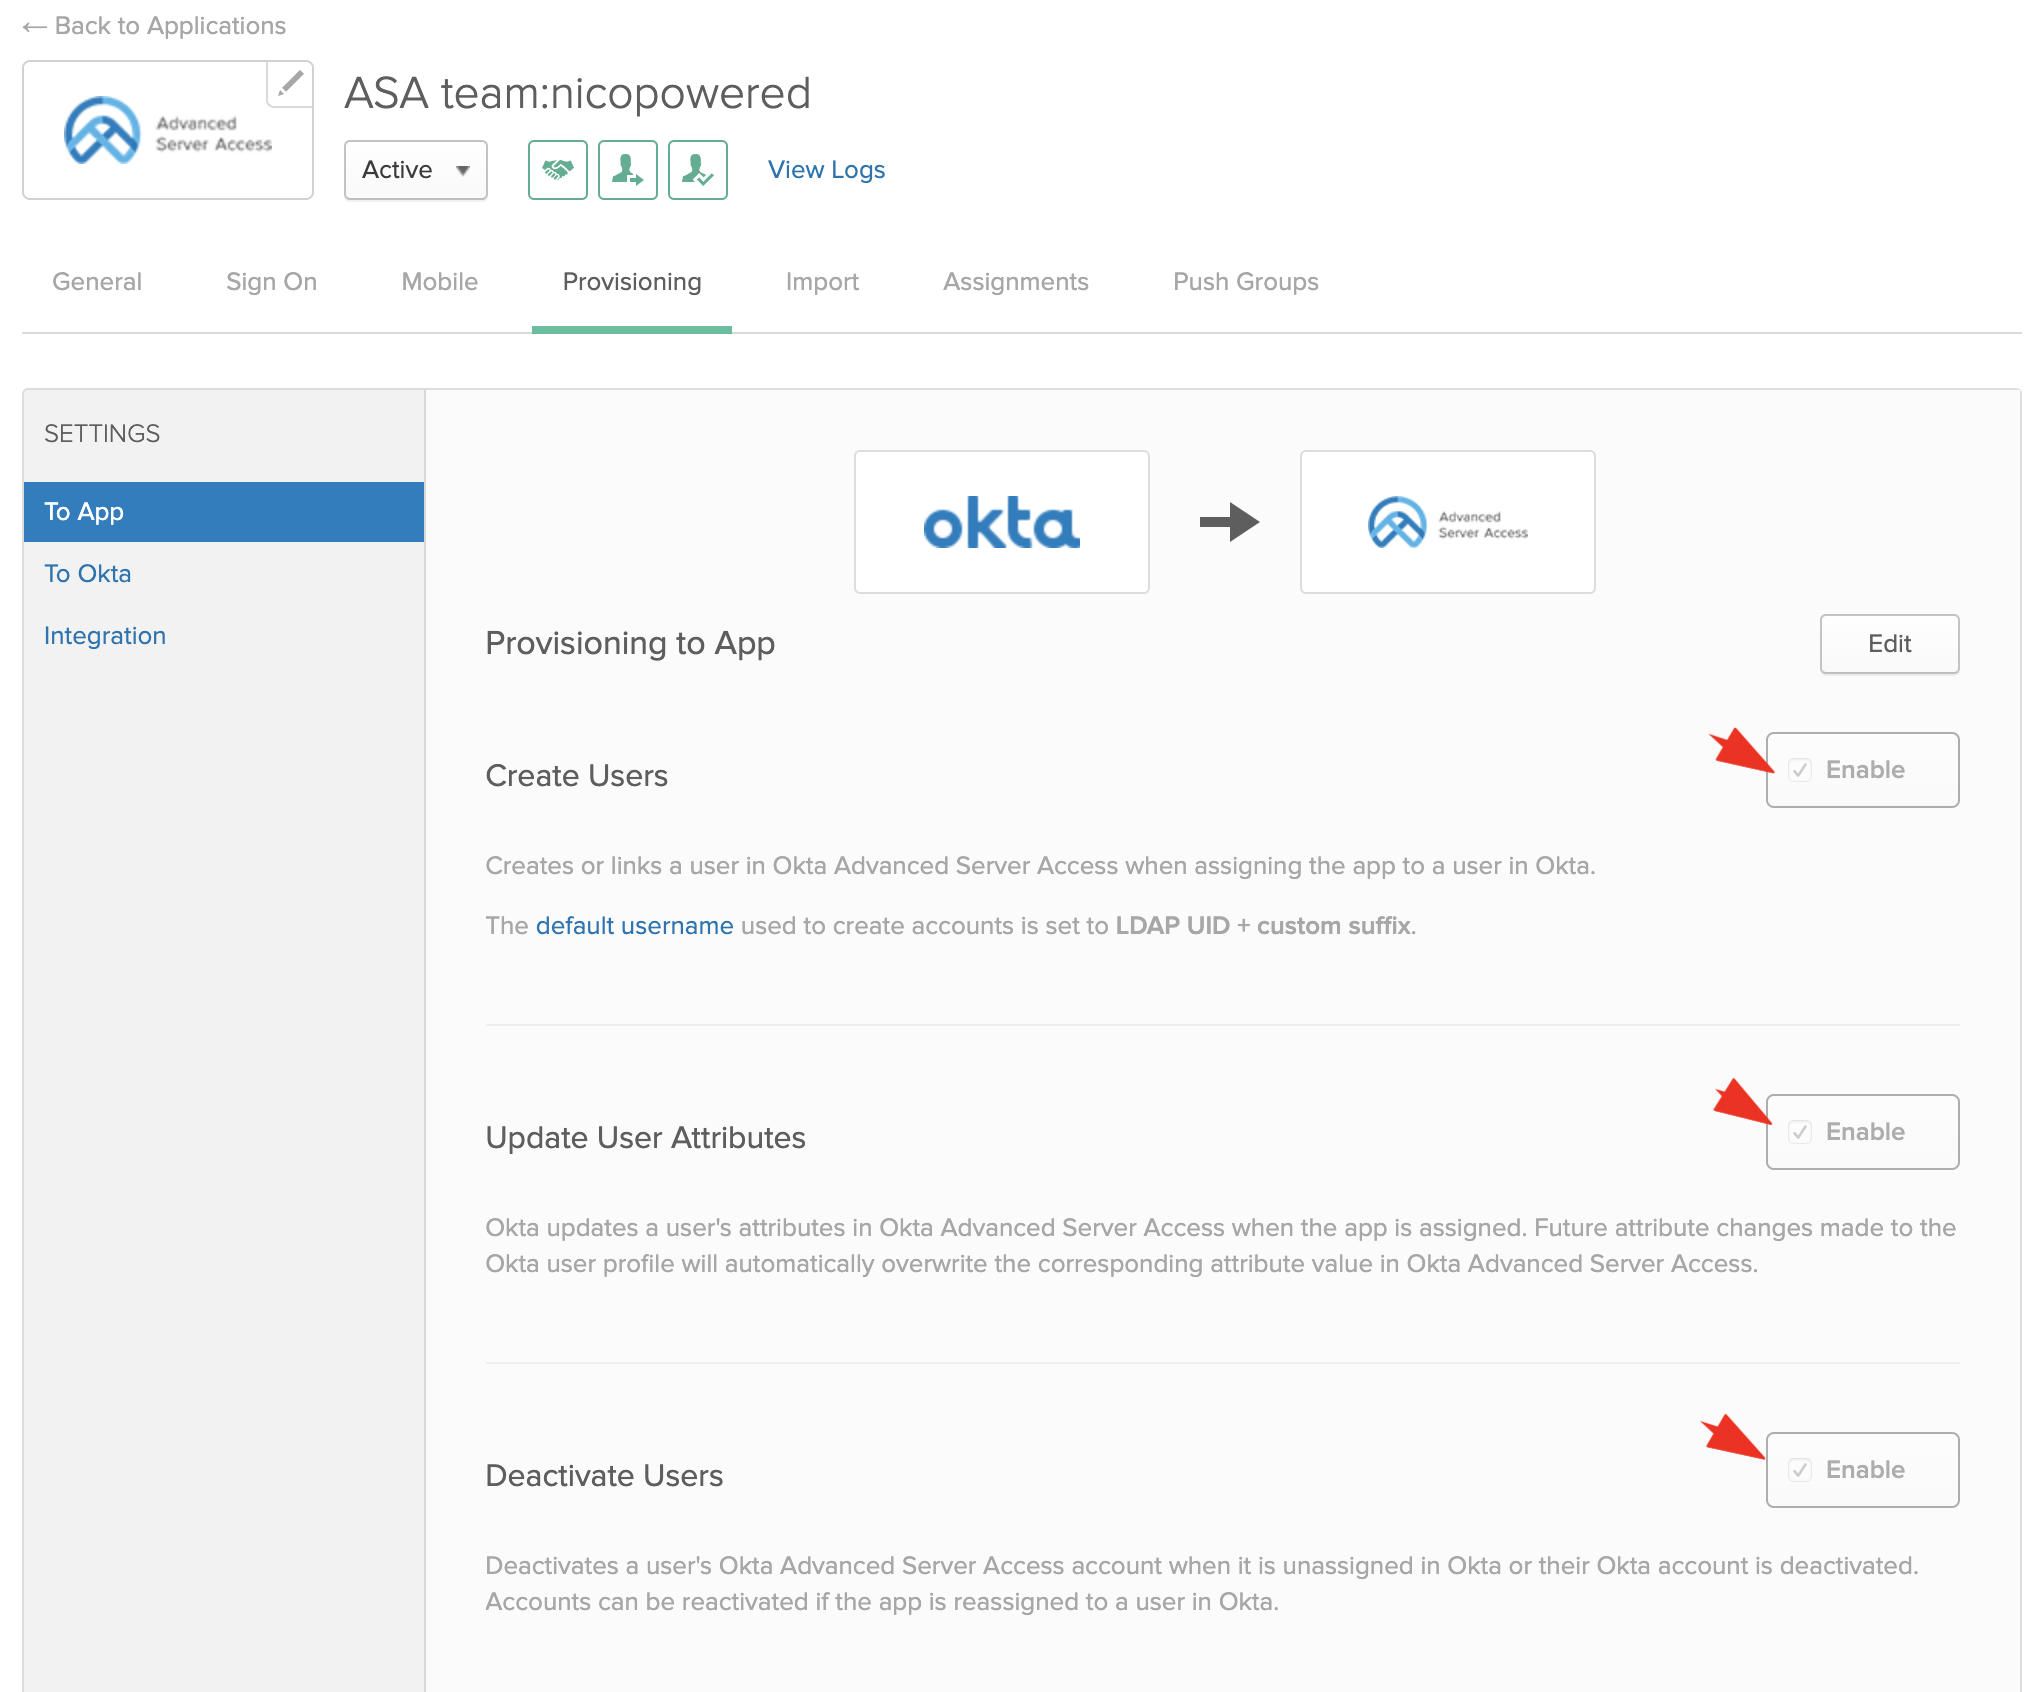
- Then go to the To App section, click on Edit, select the Create/Update/Deactivate options, and click Save:
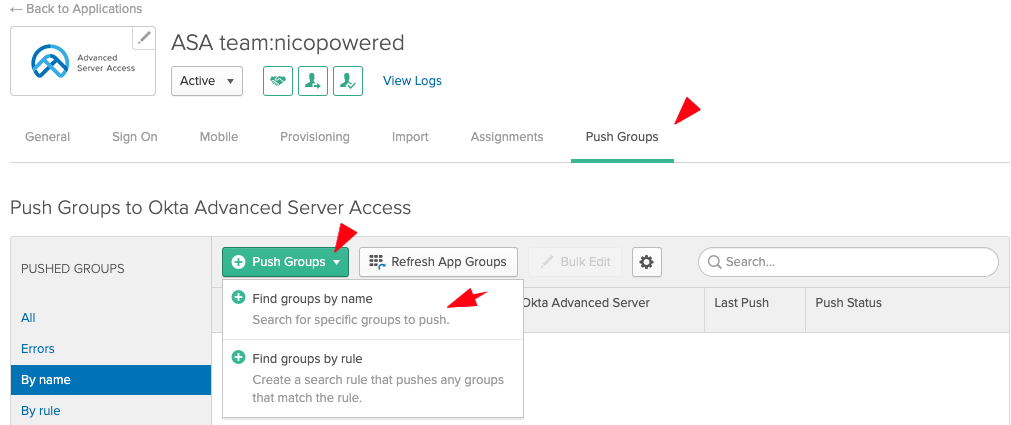
- Go to the Push Groups tab > click on Push Groups > Find groups by name:
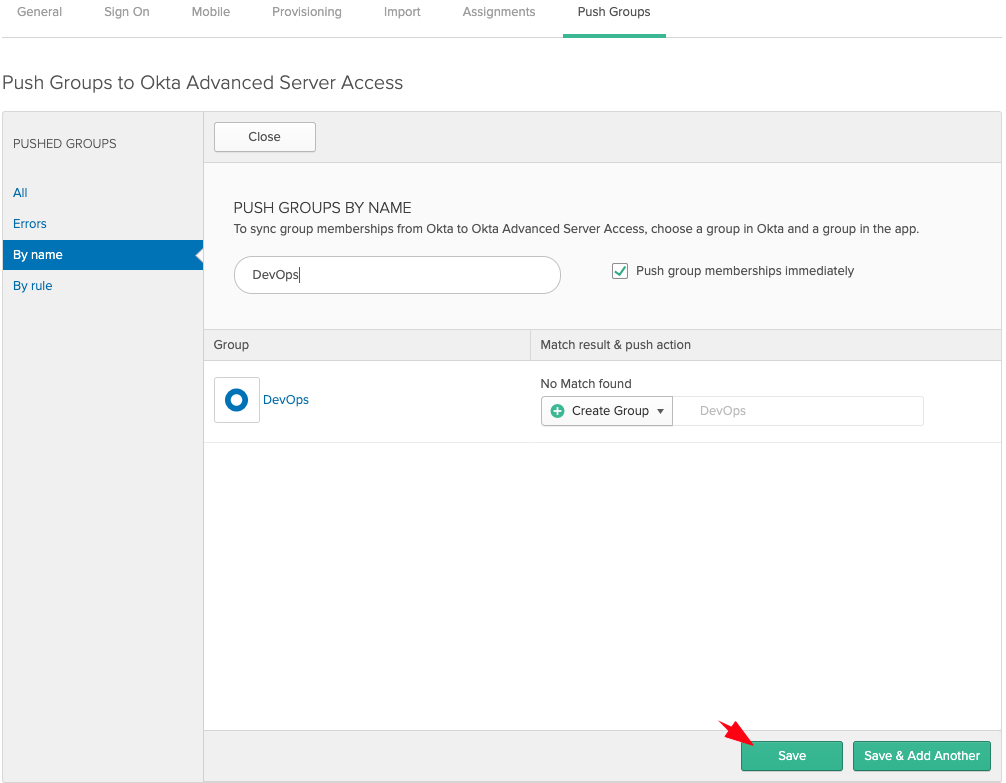
- Enter your group name and select the matching result:

- Leave the Create Group option selected, and click Save:
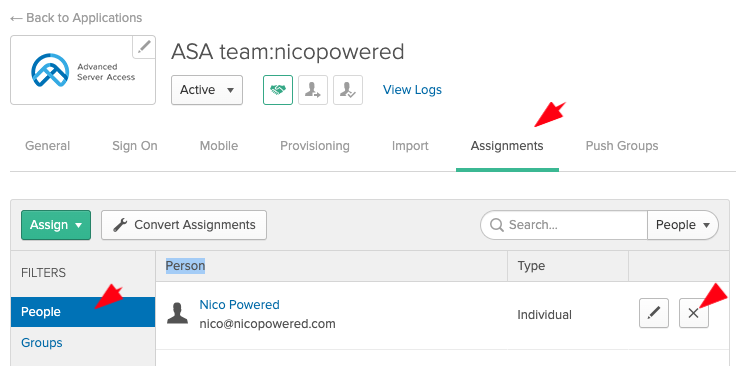
- Now we’ll unassign our individual user from the ASA app (since we want to use group assignment instead). Go to the Assignments tab > People > unassign your user:
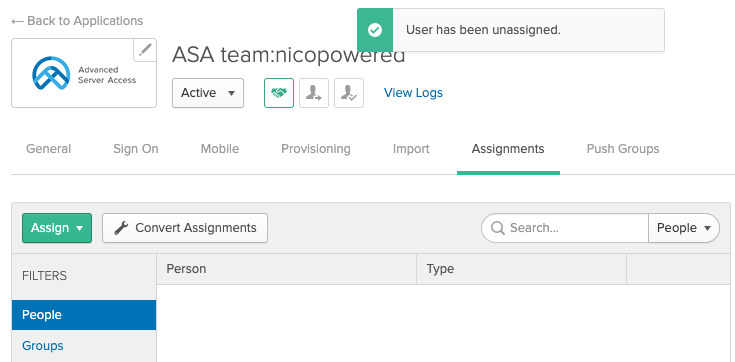
You should see this:
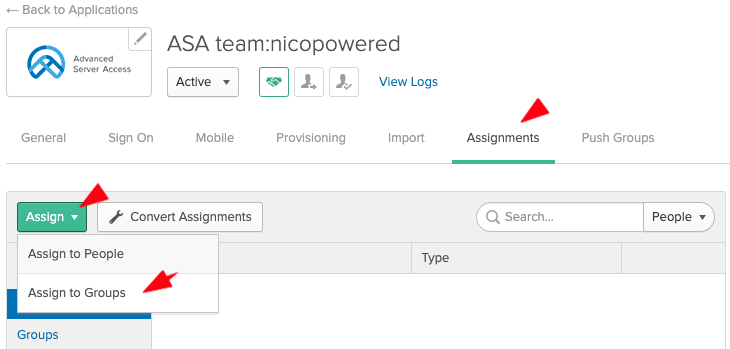
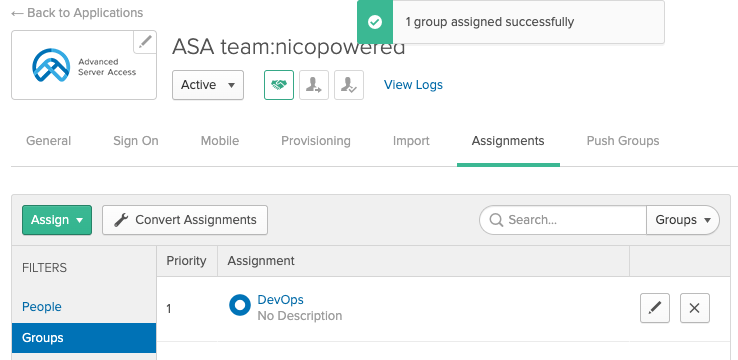
- Still on the Assignments tab > click Assign > Assign to Groups
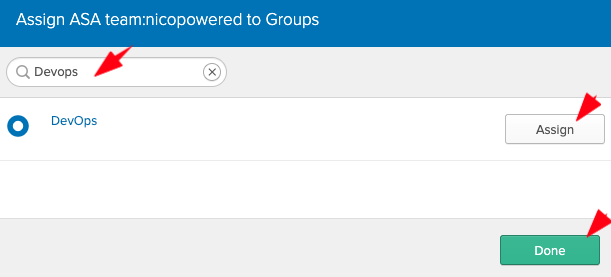
- Search for your group, click Assign in front of the matching group, then click Save:
Okta should redirect you to that view:
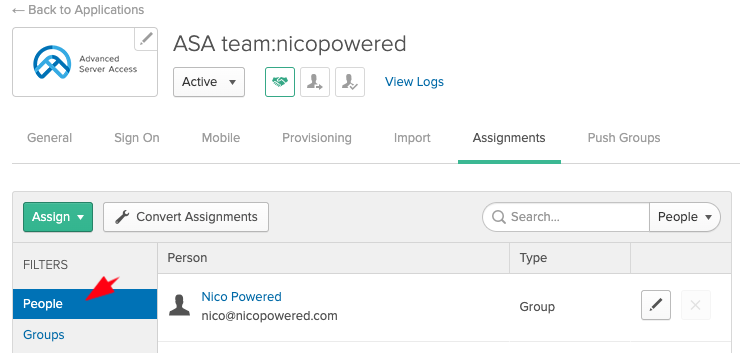
- Because your user is a member of that group, if you switch to the People tab, you should see your user:
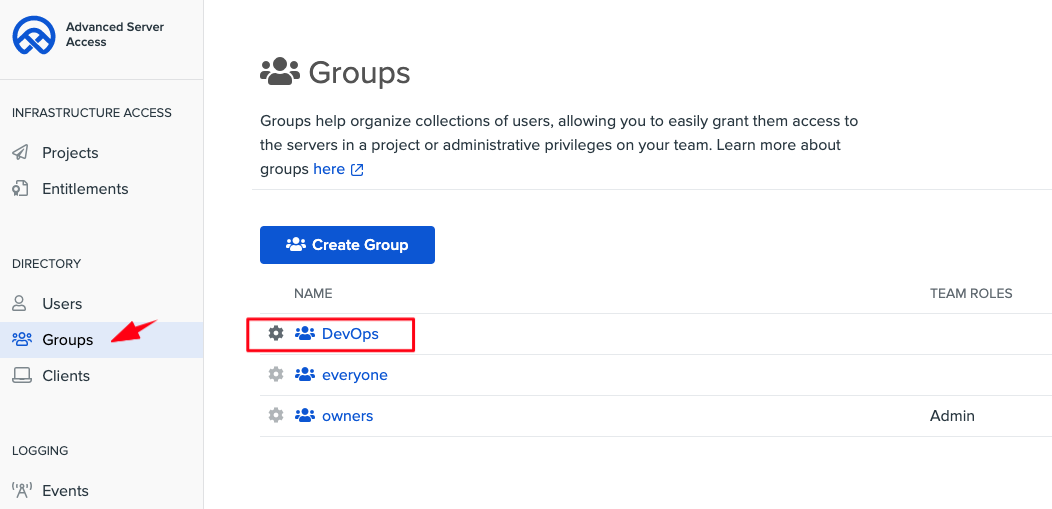
- Go to your ASA dashboard > Groups tab and double check that Okta pushed your DevOps groups to ASA:
The configuration between your Okta org and your ASA team is complete. Now let’s create the GCP VMs and enroll them into ASA.
Configure a Google Cloud Platform (GCP) Project
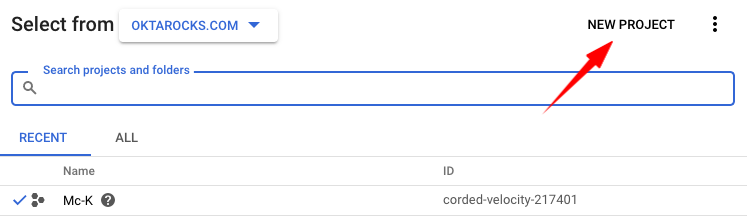
- Go to the GCP web console
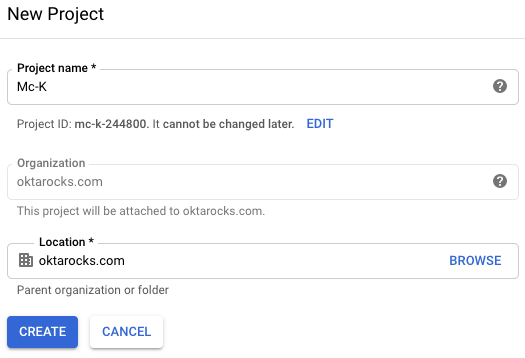
- Create a new GCP project:
- Select a name for your project:
- Make sure your GCP project is selected in the top left before you start creating VMs:

- Open the left menu, and then go to Compute Engine > VM instances
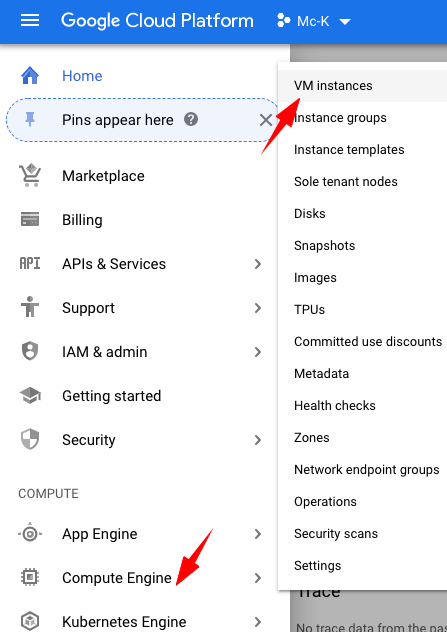
- You should land on the list of the VMs for that GCP project:

Create Google Cloud VMs
gcp-ubuntu-bastion
- Click on Create Instance

-
Enter a name for your instance: gcp-ubuntu-bastion
-
Select Machine type drop-down list: choose micro
-
Go to Boot disk > select change > select Ubuntu 16.04 LTS
-
Optionally, select Firewall http/https traffic (not required for bastion and target, but required for the Jenkins VM to view the web console)
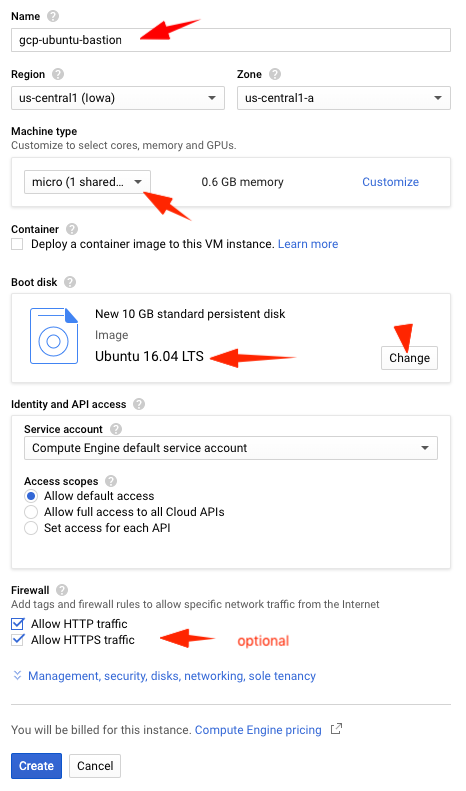
- Click on Create
gcp-ubuntu-target
Follow the same steps as above, and choose gcp-ubuntu-target as the VM name on Ubuntu 16.04 LTS.
gcp-jenkins
Follow the same steps as above, but choose gcp-jenkins as the VM name on Ubuntu 18.04 LTS and machine type g1-small (1 vCPU, 1.7 GB memory).
Then you will assign a static public IP for your VM, since you will want to load the Jenkins admin web panel, and bookmark that link in your web browser.
- Reserve a static public IP and assign it to your VM
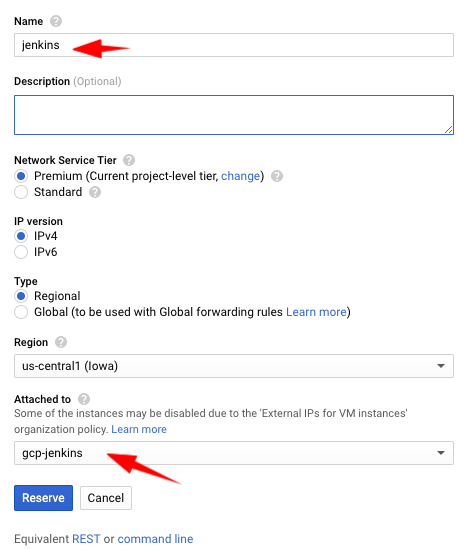
- After 20 seconds, you should see your new static IP and verify that it’s assigned to your VM:
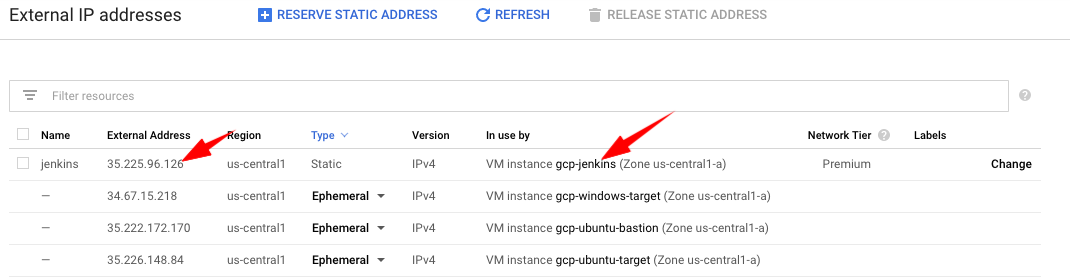
Note: if you already have a static IP to assign to your VM, read: https://cloud.google.com/compute/docs/ip-addresses/reserve-static-external-ip-address#IP_assign
Then, you’ll have to make that VM reachable from the internet over http 8080 to access the Jenkins web console:
- Open your left side bar > VPC network > Firewall rules
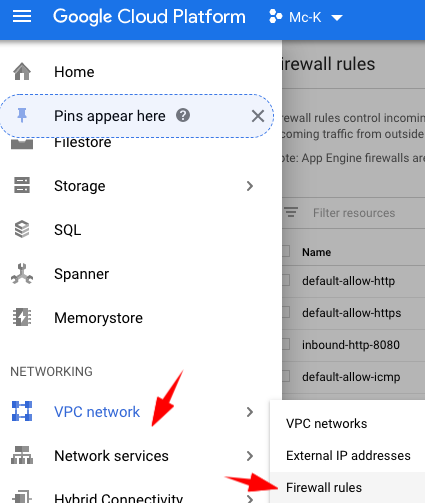
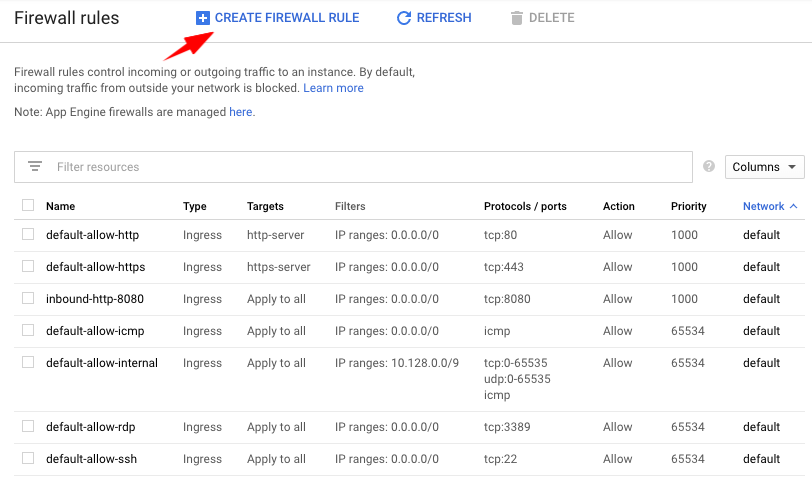
- Click on Create Firewall Rule
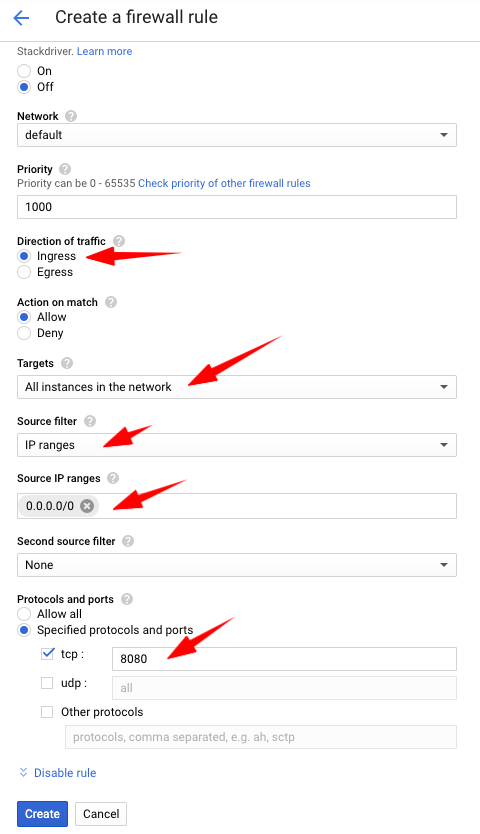
-
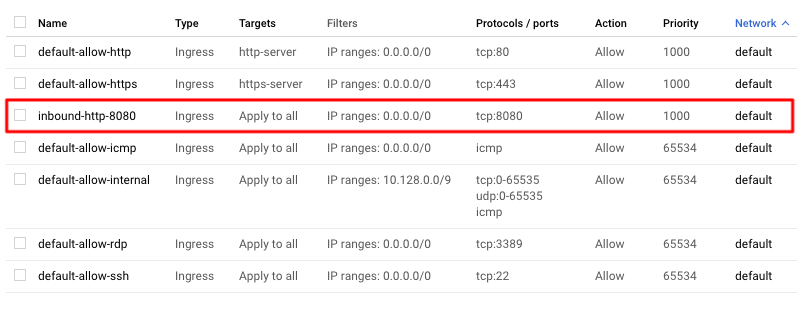
Name the rule “inbound-http-8080” Direction: Ingress Incoming IP ranges: 0.0.0.0/0 select tcp port 8080 click on Create
- You should see the new Firewall rule in the list now:
gcp-windows-target
- Create a new VM
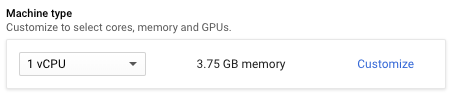
- Leave the default Machine type: 1vCPU + 3.75GB memory
- Go to Boot disk > select change > select Windows Server 2016 Datacenter
- Click on Create
Next, we’ll set a username and password to be able to access that VM over RDP.
- Go back to the list of VMs, and next to your gcp-windows-target instance, click on the arrow down next to RDP, then click on Set Windows password

- On the next screen, keep the default username, and click on Set

- On the next screen, copy/save the Windows password that GCP generated
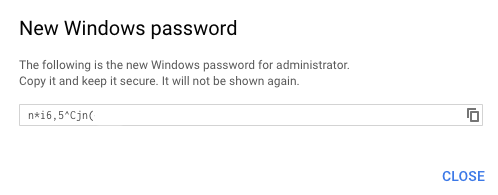
We’ll later use those Windows credentials to RDP to the VM and start the ASA enrollment.
-
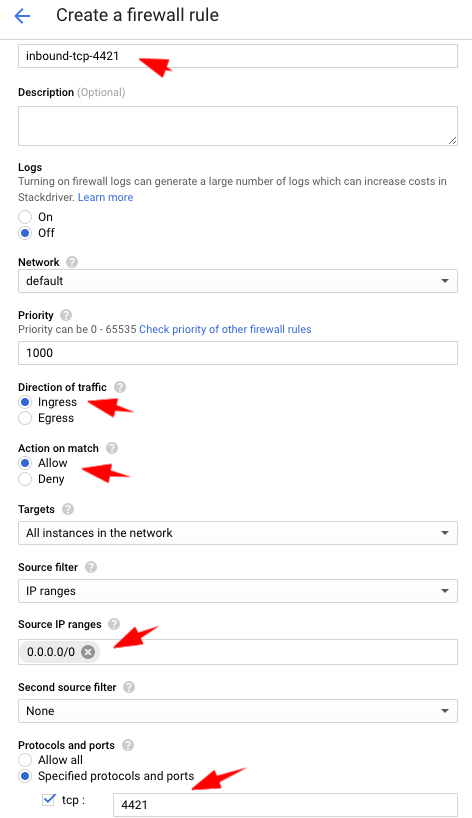
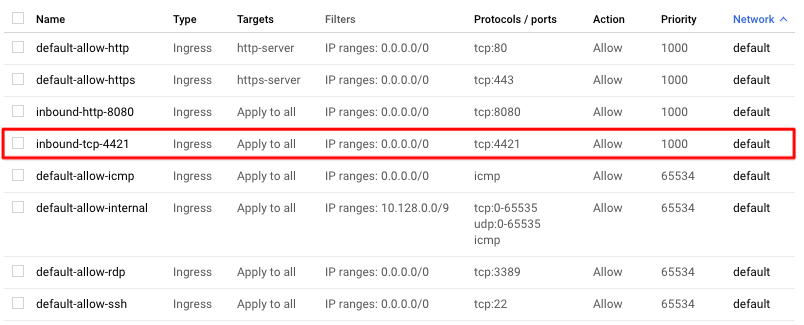
Then, go to VPC Network > Firewall rules > New Firewall rule > Name the rule “inbound-tcp-4421” Direction: Ingress Incoming IP ranges: 0.0.0.0/0 select tcp port 4421 click on Create
- You should see the new Firewall rule in the list now:
Configure the Okta ASA Project
- Go to your ASA web console > Projects
- Click on Create Project
- Choose gcp-demo as project name > click on Submit

- Configure the Groups and Users tab (see Prerequisites section above)
- Go to the Enrollment tab
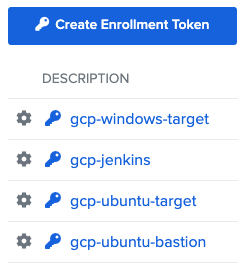
- Click on Create Enrollment Token
- Create 4 tokens with the following names:
- gcp-ubuntu-bastion
- gcp-ubuntu-target
- gcp-jenkins
- gcp-windows-target
You should see this:
Enroll VMs with Okta ASA
gcp-ubuntu-bastion
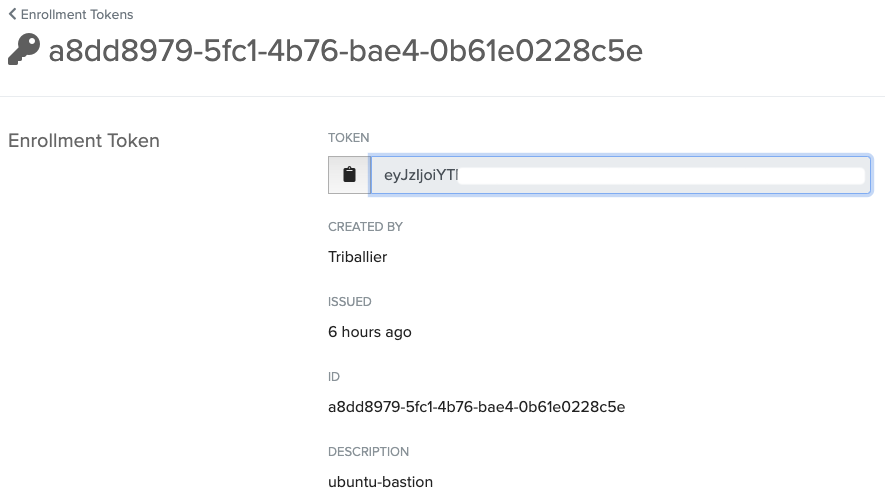
- Go to your ASA admin console
- Copy the value of your enrollment token for your gcp-ubuntu-bastion. You’ll need it later.
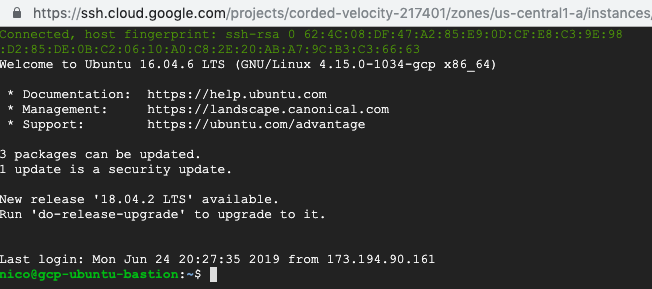
- Go to your GCP console > list of VMs and click on SSH in front of your bastion VM
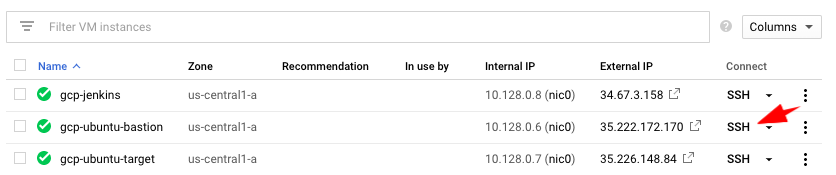
- That should open an SSH connection to your VM, in a browser window:
- Type
cd /var/cd /lib/ls
- This is where we’ll then create a folder “sftd”, and create an enrollment key that the ASA agent can read to start the enrollment of that server

- Create the sftd folder, type
sudo mkdir -p /var/lib/sftd
- Then, create the enrollment.token file that contains the value you got from the ASA console, type (don’t forget to replace the XXXX with the value of your enrollment token)
echo "XXXXXXXXXXXX" | sudo tee /var/lib/sftd/enrollment.token
- Add the ScaleFT apt repo to your
/etc/apt/sources.listsystem config file, typeecho "deb http://pkg.scaleft.com/deb linux main" | sudo tee -a /etc/apt/sources.list
- Trust the repository signing key, type
curl -C - https://dist.scaleft.com/pki/scaleft_deb_key.asc | sudo apt-key add -
- Retrieve information about new packages, type
sudo apt-get update
- Then, install the scaleft-server-tools package, type
sudo apt-get install scaleft-server-tools
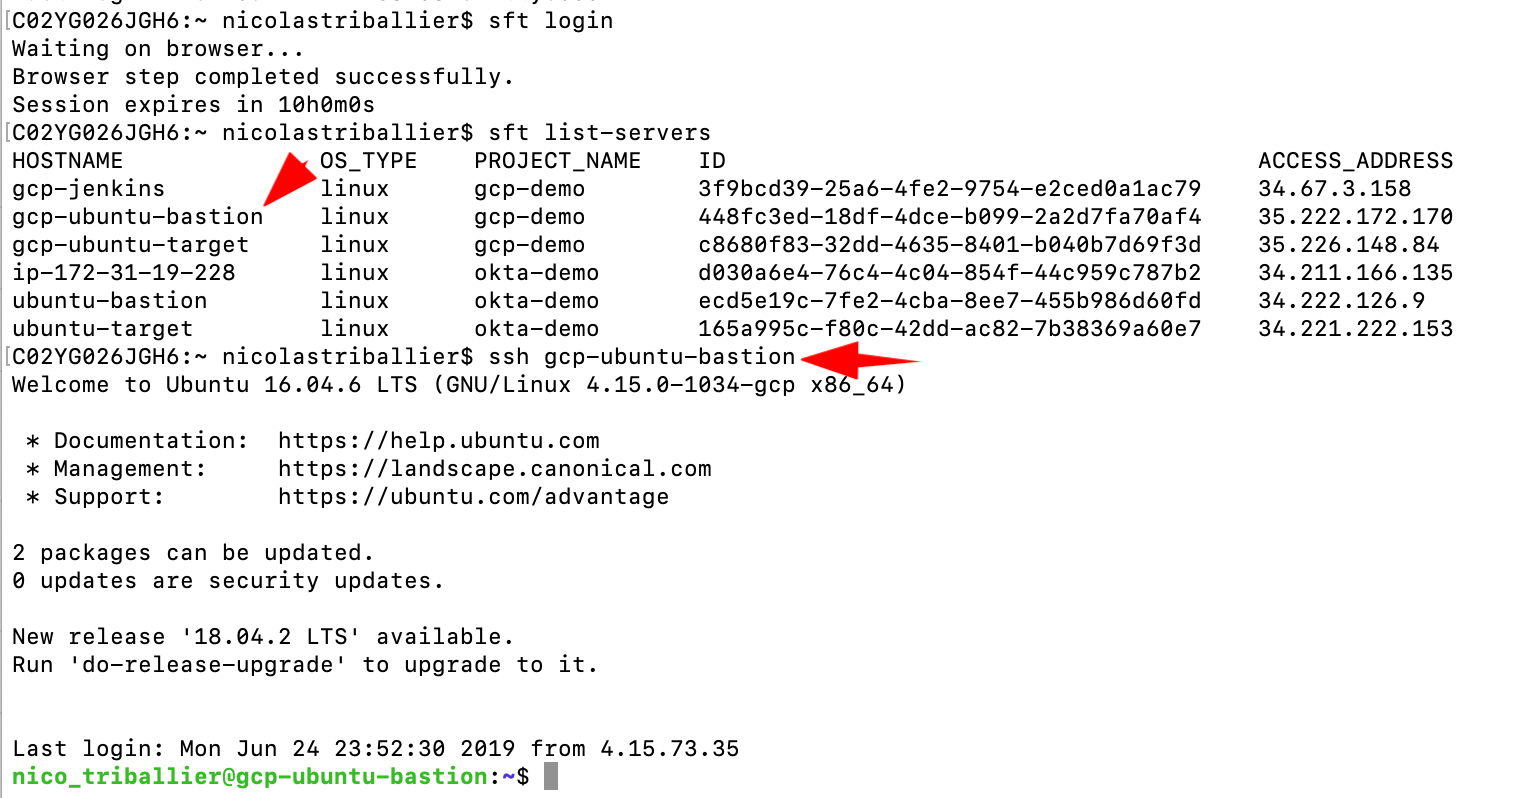
- Then, you can come back to your ASA console and check that your server shows up in the Servers tab
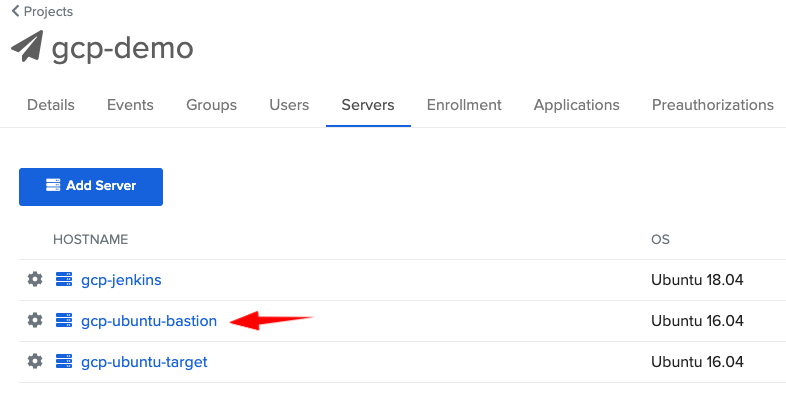
At this stage, you should be able to SSH into your bastion using ASA:
gcp-ubuntu-target
For the target, there will be an extra step, as we need to configure it so we can access it through the bastion.
Technically, the flow should be: SSH into the bastion, and from the bastion SSH into the target.
As part of the target enrollment, we’ll have to create a .yaml configuration file that the ASA agent can understand to start the enrollment.
- Go to your ASA admin console
- Copy the value of your enrollment token for your gcp-ubuntu-target. You’ll need it later
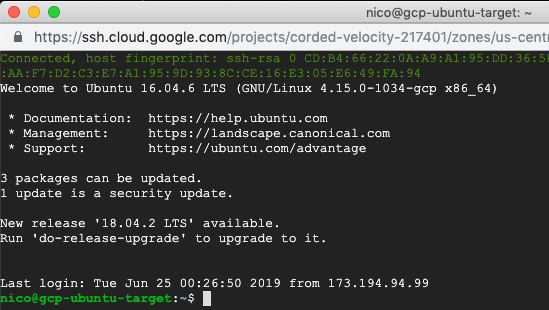
- Go to your GCP console > list of VMs and click on SSH in front of your target VM
- That should open an SSH connection to your VM, in a browser window:
- Type
cd /etc/
-
Create a new folder, where we’ll put the .yaml config file, type
-
sudo mkdir -p /etc/sft -
Create a new empty file in that folder, type
-
echo -e "" | sudo tee /etc/sft/sftd.yaml -
Edit the file
-
sudo nano /etc/sft/sftd.yaml - Copy and paste that content (4 lines). Use CTRL-O then ENTER to save, and then CTRL-X to exit
---
# CanonicalName: Specifies the name clients should use/see when connecting to this host.
CanonicalName: "gcp-ubuntu-target"
Bastion: "gcp-ubuntu-bastion"
- Once you close the file, go to the
/var/lib/folder, typecd /var/cd /lib/ls
From that point, the steps are similar to the enrollment of the bastion.
- Create the sftd folder, type
sudo mkdir -p /var/lib/sftd
- Then, create the enrollment.token file that contains the value you got from the ASA console, type (don’t forget to replace the XXXX with the value of your enrollment token)
echo "XXXXXXXXXXXX" | sudo tee /var/lib/sftd/enrollment.token
- Add the ScaleFT apt repo to your
/etc/apt/sources.listsystem config file, typeecho "deb http://pkg.scaleft.com/deb linux main" | sudo tee -a /etc/apt/sources.list
- Trust the repository signing key, type
curl -C - https://dist.scaleft.com/pki/scaleft_deb_key.asc | sudo apt-key add -
- Retrieve information about new packages, type
sudo apt-get update
- Then, install the scaleft-server-tools package, type
sudo apt-get install scaleft-server-tools
- Then, you can come back to your ASA console, and check that your server shows up in the Servers tab
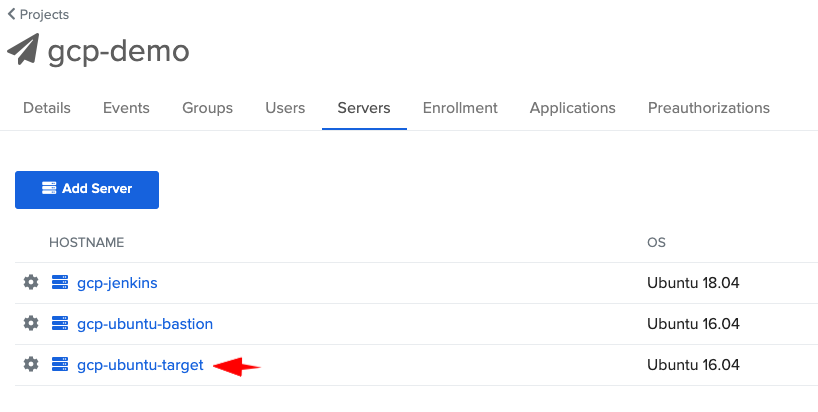
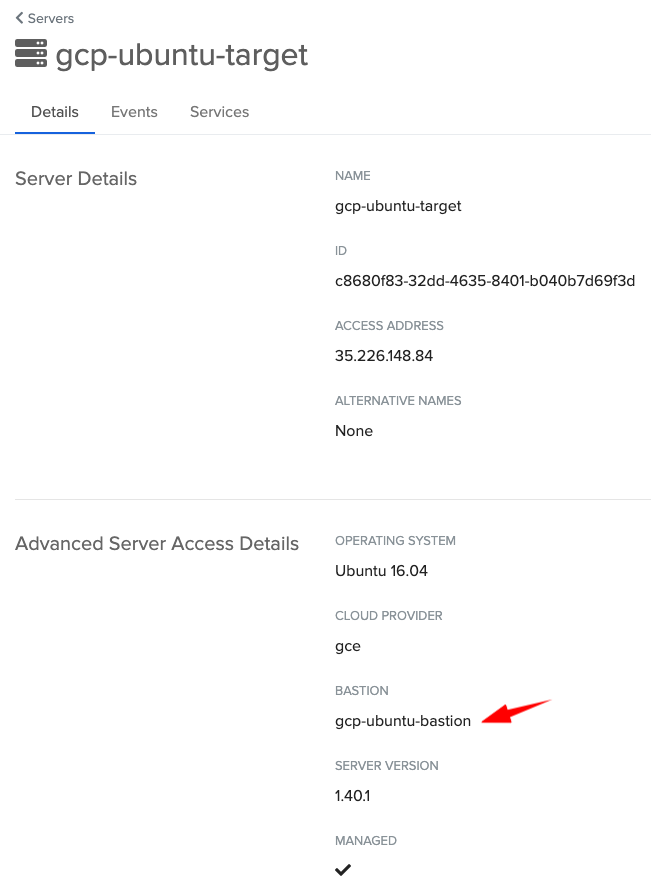
- Then click on your gcp-ubuntu-target, and verify that it’s configured behind the bastion:
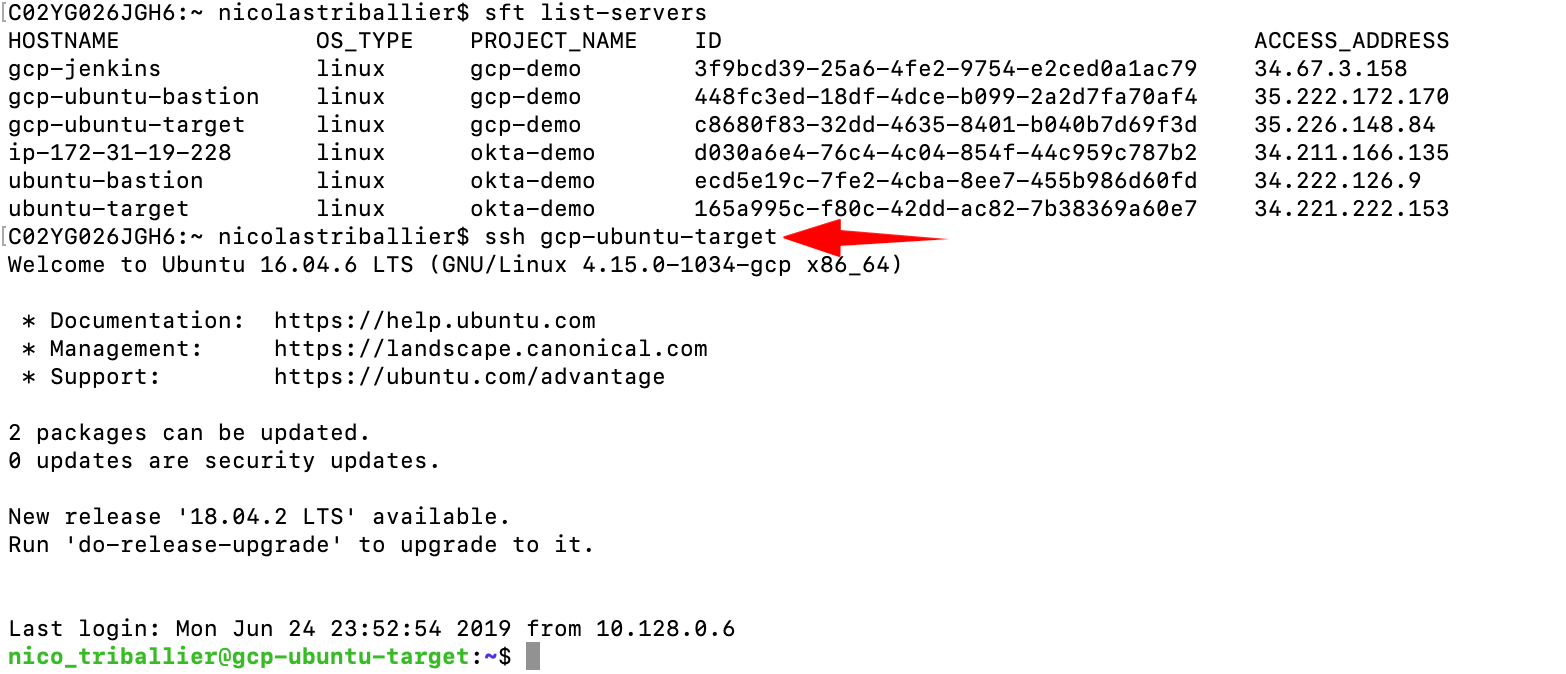
At this stage, you should be able to SSH into your target through the bastion:
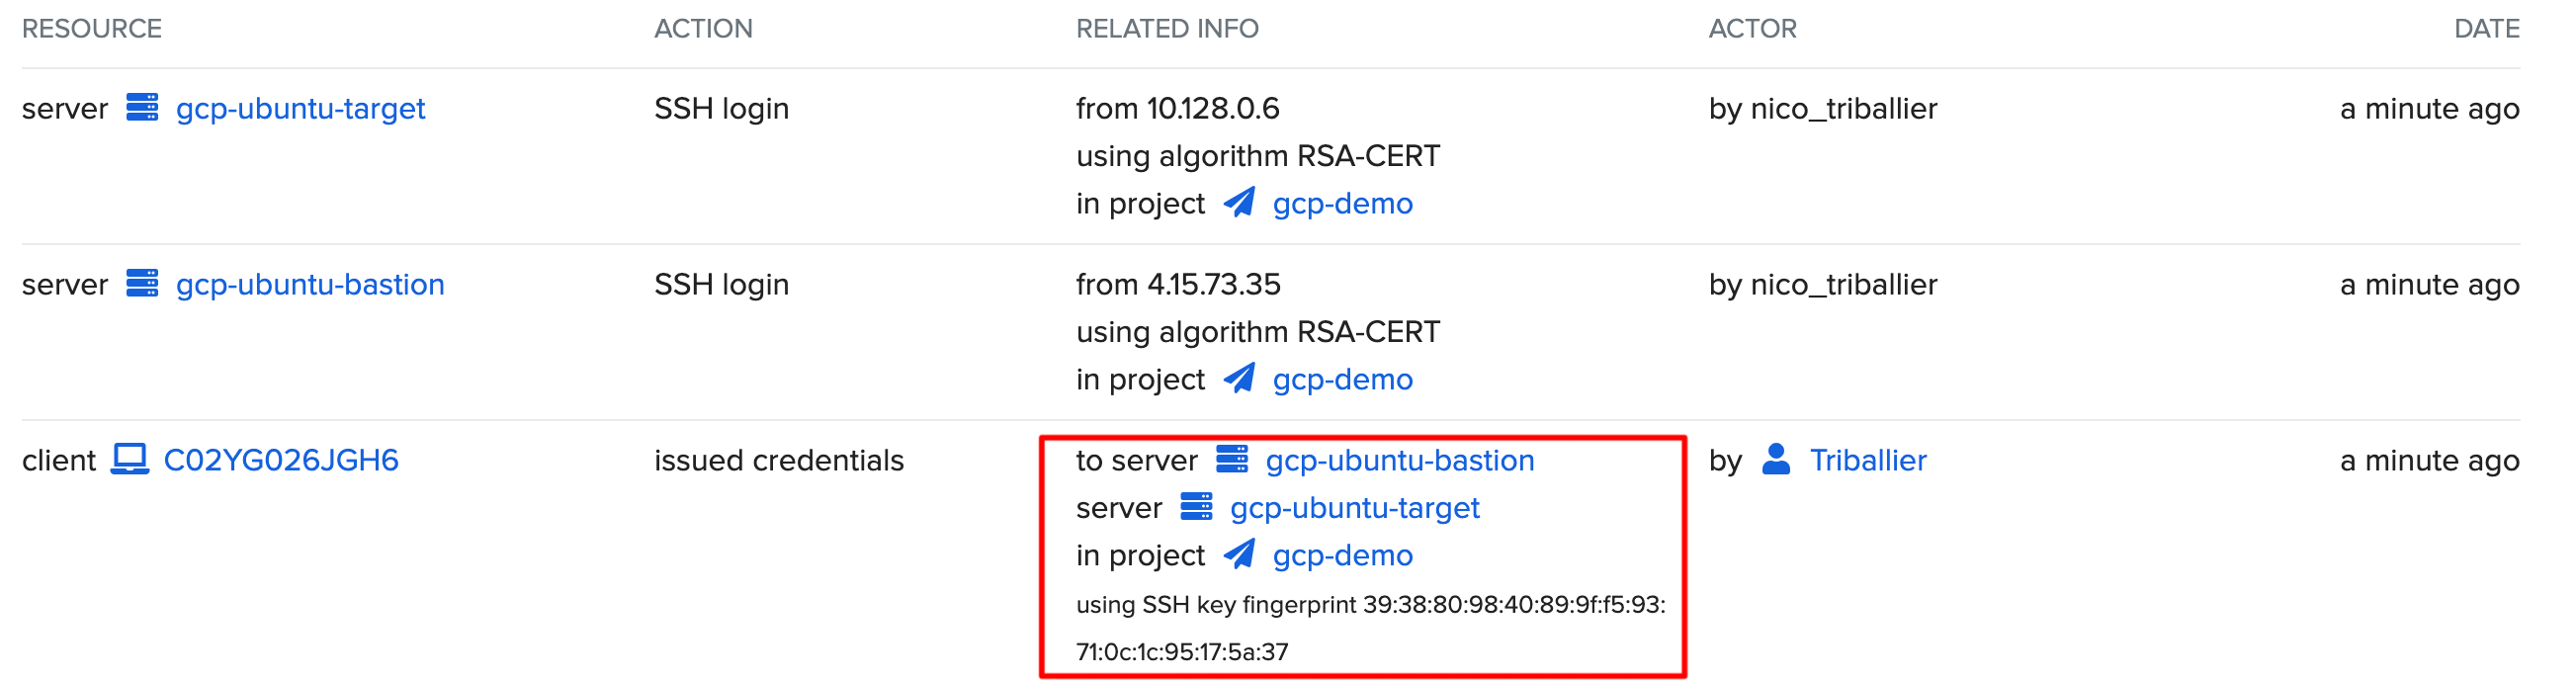
Also, verify the 2 hops in ASA event logs:
gcp-ubuntu-jenkins
In that section, we’ll config the VM so we can SSH into it using ASA.
Then we’ll install a Jenkins server on that VM, and we’ll create an ASA service account so Jenkins can run its builds and SSH into other VMs to push code or execute remote commands.
As an example, Jenkins will SSH into the gcp-ubuntu-target and run sudo apt-get update.
Technically the ASA enrollment part for the gcp-jenkins VM is similar to the enrollment of gcp-ubuntu-target.
- Go to your ASA admin console.
- Copy the value of your enrollment token for your gcp-jenkins. You’ll need it later.
- Go to your GCP console > list of VMs and click on SSH in front of your target VM.
- That should open an SSH connection to your VM, in a browser window:
- Once you close the file, type
cd /var/cd /lib/ls
- Create the sftd folder, type
sudo mkdir -p /var/lib/sftd
- Then, create the
enrollment.tokenfile that contains the value you got from the ASA console, type (don’t forget to replace the XXXX with the value of your enrollment token)echo "XXXXXXXXXXXX" | sudo tee /var/lib/sftd/enrollment.token
- Add the ScaleFT apt repo to your
/etc/apt/sources.listsystem config file, typeecho "deb http://pkg.scaleft.com/deb linux main" | sudo tee -a /etc/apt/sources.list
- Trust the repository signing key, type
curl -C - https://dist.scaleft.com/pki/scaleft_deb_key.asc | sudo apt-key add -
- Retrieve information about new packages, type
sudo apt-get update
- Then, install the scaleft-server-tools package, type
sudo apt-get install scaleft-server-tools
- Then, you can come back to your ASA console, and check that your server shows up in the Servers tab

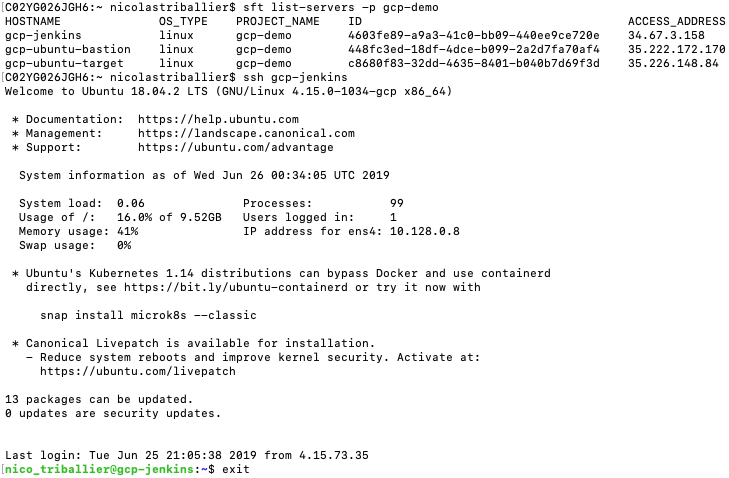
At this stage, you should be able to SSH into gcp-jenkins VM using ASA:
Now that we can SSH into our VM, let’s install the Jenkins server (according to instructions from Linuxize). Recap:
-
Make sure you’re SSHed into the VM
- First we’ll install a Java Runtime Environment - Jenkins needs it:
sudo apt updatesudo apt install openjdk-8-jre
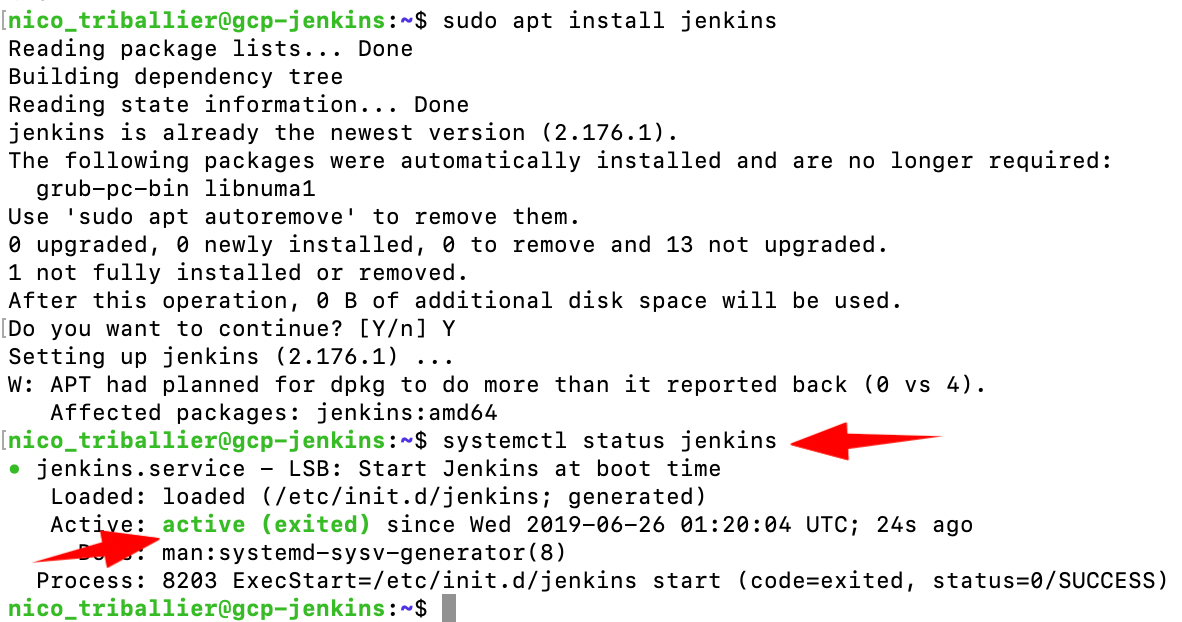
- Then download the Jenkins repo and install it:
wget -q -O - https://pkg.jenkins.io/debian/jenkins.io.key | sudo apt-key add -sudo sh -c 'echo deb https://pkg.jenkins.io/debian-stable binary/ > /etc/apt/sources.list.d/jenkins.list'sudo apt-get updatesudo apt-get install jenkinssystemctl status jenkins
You should see that the Jenkins instance is running:
Now let’s access the Jenkins admin web console:
- Open
http://YOUR-GCP-JENKINS-VM-STATIC-IP:8080
You should see the prompt to unlock Jenkins.
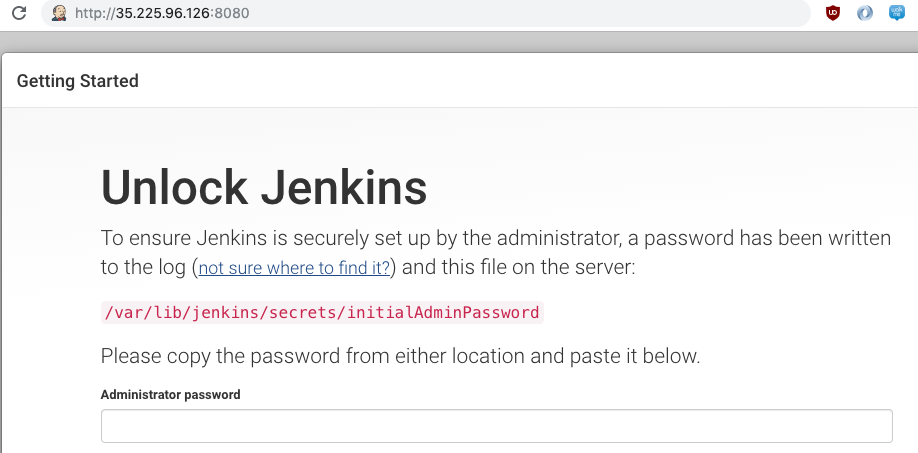
- Get back to your terminal, and run
sudo nano /var/lib/jenkins/secrets/initialAdminPassword
- Copy the value on your screen, then CTRL-X to close the editor
- Paste the value into the Unlock Jenkins screen
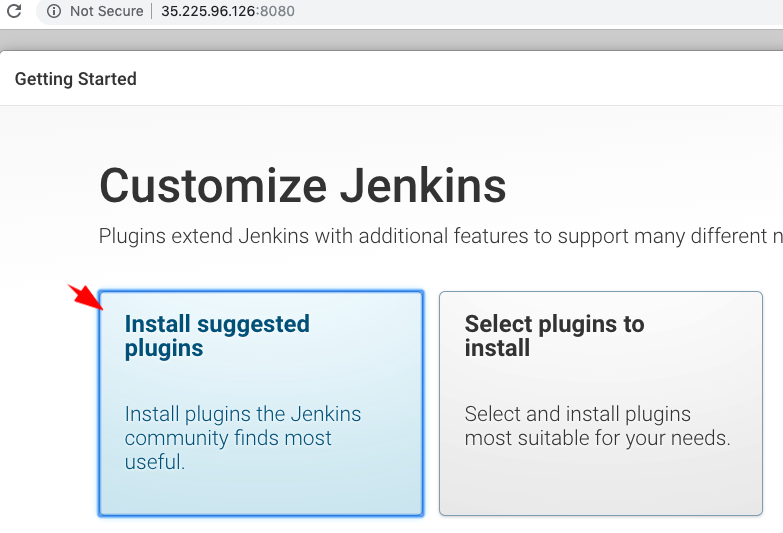
- On the next screen, select the default option: Install suggested plugins
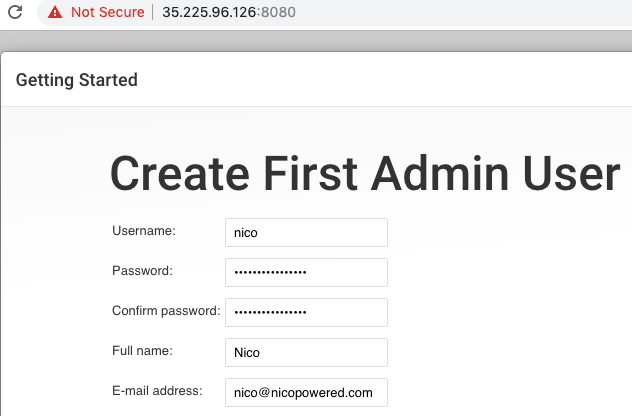
- Enter details for your first admin user, then click Save and Continue
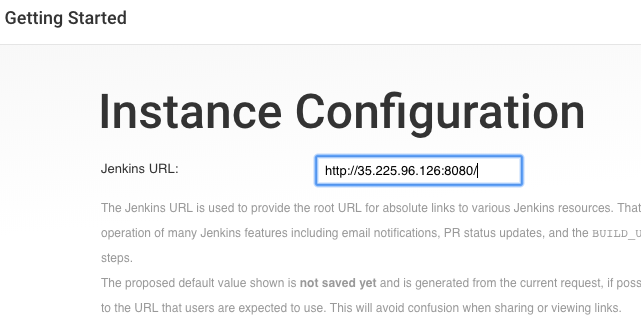
- On the next screen, keep the default URL (it should be your static IP over http 8080)
- Click on Start using Jenkins
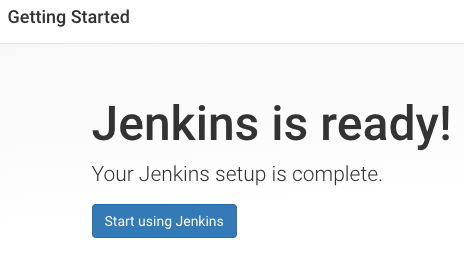
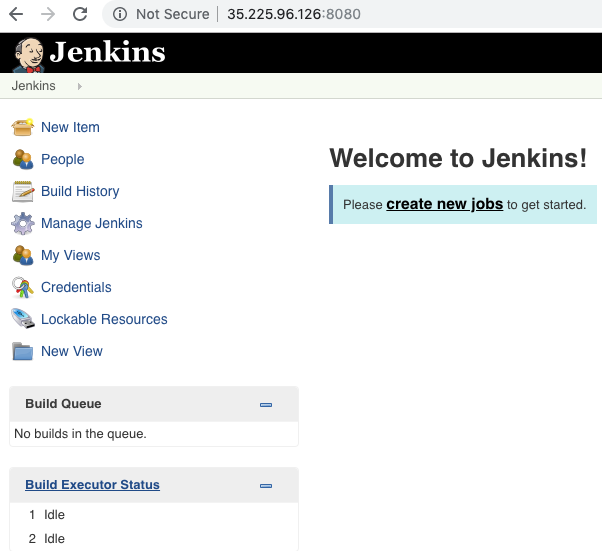
- You should land on that page:
- Optionally, you can verify the Jenkins status, and stop and start it using those commands:
sudo service jenkins statussudo service jenkins stopsudo service jenkins start
Now that you’ve installed Jenkins, let’s configure an ASA service account so Jenkins can connect to remote servers and run commands.
First, let’s install the ASA client tool on the VM where Jenkins is running. Indeed, Jenkins will act as an SSH client that will connect to remote servers over SSH.
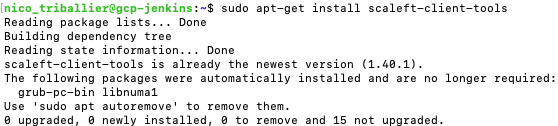
- Get back to your terminal and run:
echo "deb http://pkg.scaleft.com/deb linux main" | sudo tee -a /etc/apt/sources.listcurl -C - https://dist.scaleft.com/pki/scaleft_deb_key.asc | sudo apt-key add -sudo apt-get updatesudo apt-get install scaleft-client-tools

- Let’s get the ID for the Jenkins user that comes with the Jenkins install
id -u jenkins

Now, we’ll create a service account in ASA, mapped to that Jenkins user.
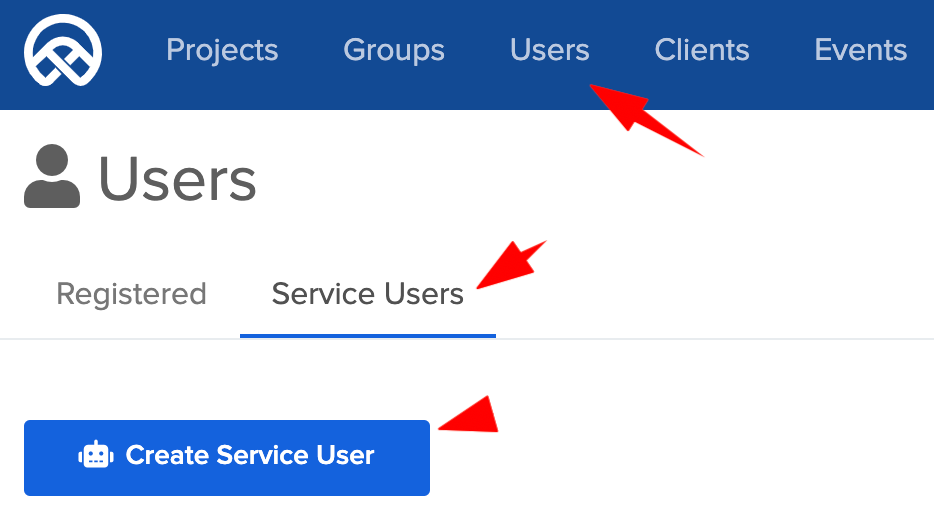
- Go to the ASA web console > Users > Service Users tab and click on Create Service User
-
Enter as name
service-gcp-jenkins -
Then go to Groups and add the service-gcp-jenkins user to a group with admin privileges (on your GCP VMs in your ASA project)
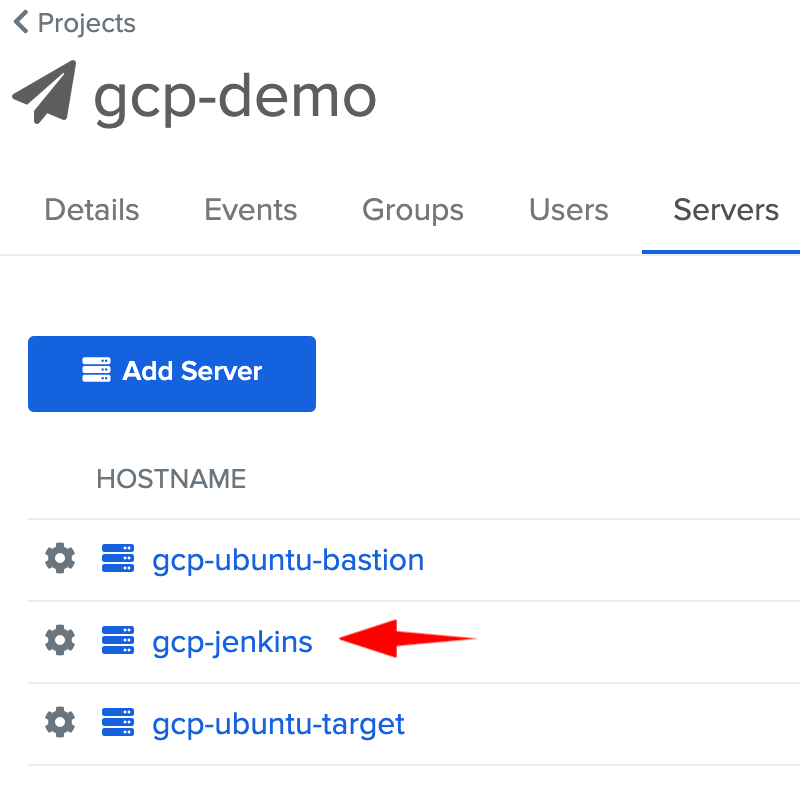
-
Then go back to your list of servers and click on your gcp-jenkins instance
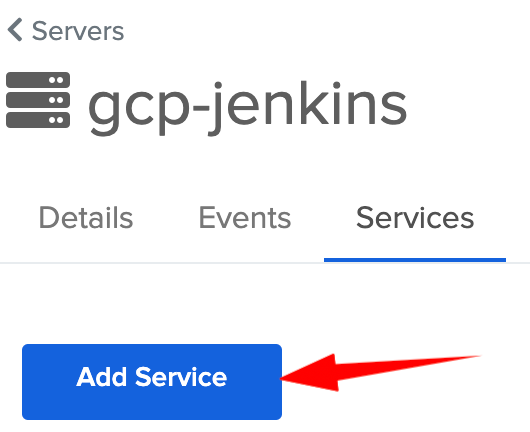
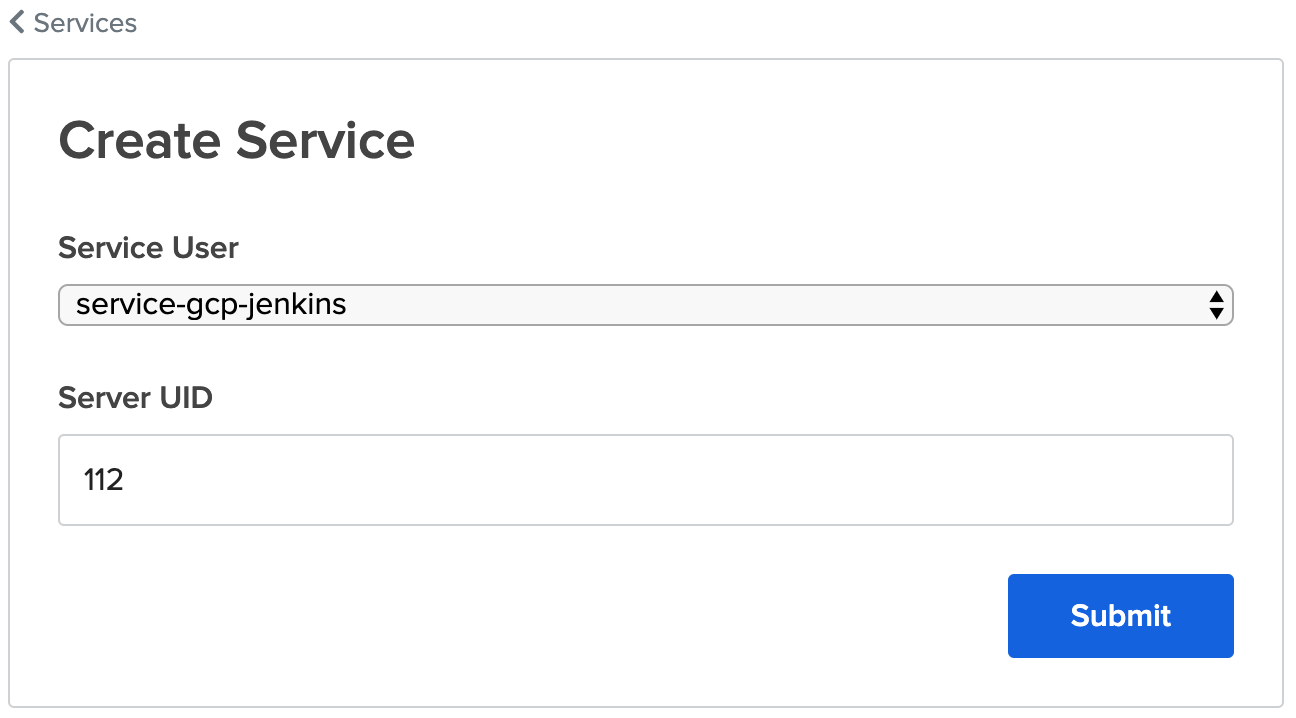
- Go to Services tab > Add Service
- Enter your Jenkins user ID. In our case above, that was 112. Then click Submit.
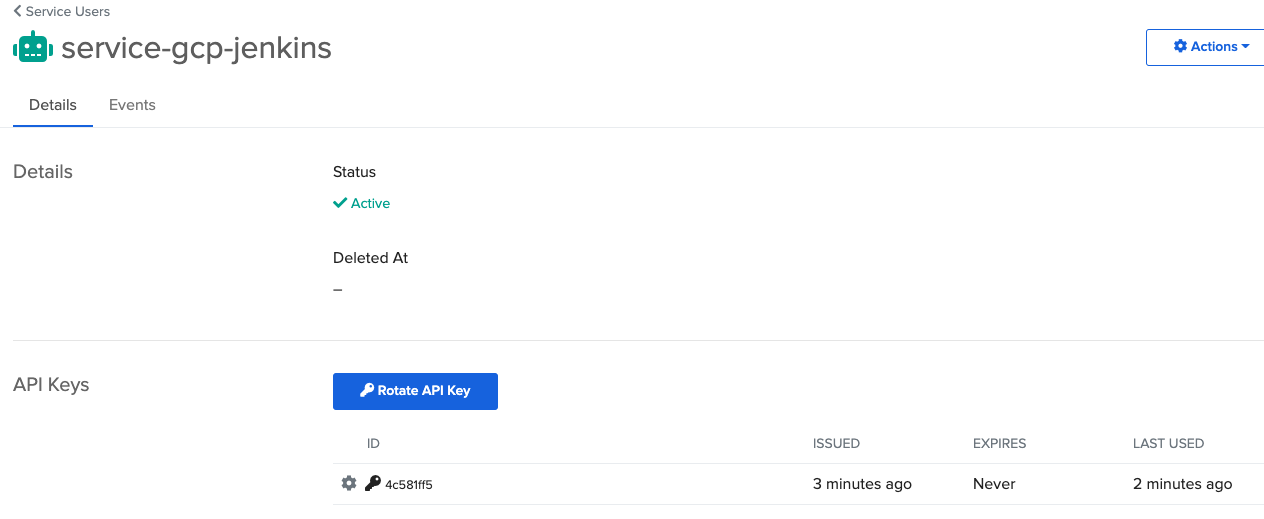
- On the next screen, click on Create API Key

- Click Ok. You should see this:
Let’s get back to the Jenkins server to configure the Jenkins user to SSH using the ASA service account.
-
Get back to your terminal where you’ve SSHed in your Jenkins VM
-
Switch your user to Jenkins, type:
sudo su jenkins
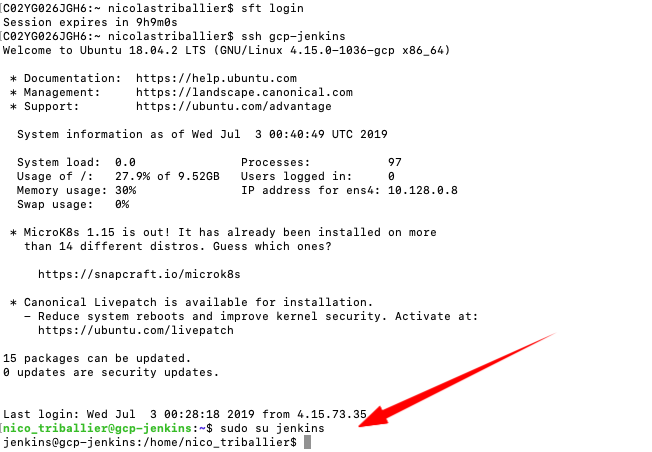
At this stage, you are acting as the local Jenkins user. We’ll now configure the Jenkins server to enable authentication via the ASA Service User when performing SSH commands.
- Run
sft config service_auth.enable true

Note: Jenkins maps the Jenkins user (112) to the corresponding ASA service account. When performing sft ssh xxxx, the Jenkins user will authenticate using the corresponding API key that you’ve created above.
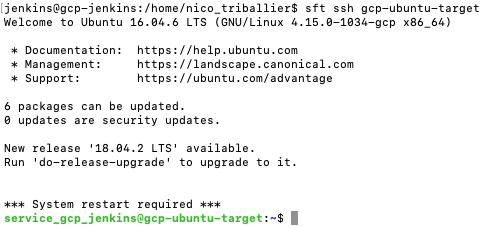
- Verify that, as the Jenkins user, you can ssh into the gcp-ubuntu-target. Type
sft ssh gcp-ubuntu-target
Now, we can add a build configuration in Jenkins and test if the SSH connection via service user from Jenkins to another VM works fine.
Get back to Jenkins.
-
Open http://YOUR-GCP-JENKINS-VM-STATIC-IP:8080
-
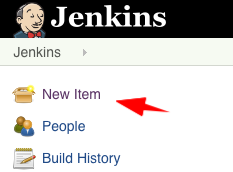
Click on New Item
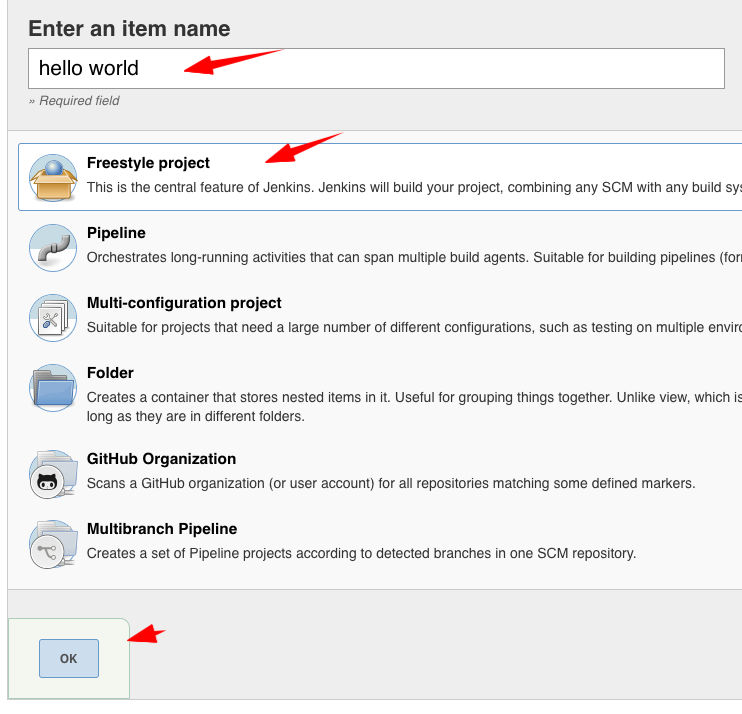
- Enter Hello World as the title, and select “Freestyle project” as the type, then click Ok
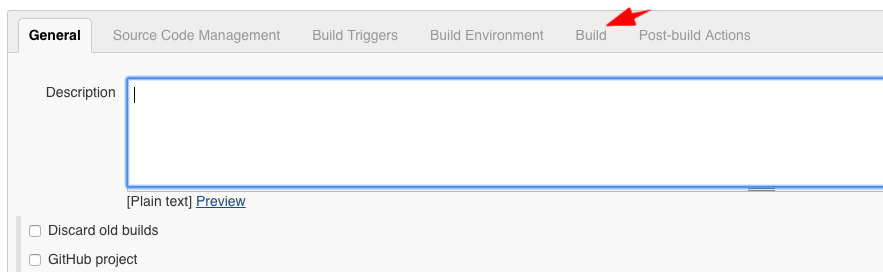
- Go to the Build tab
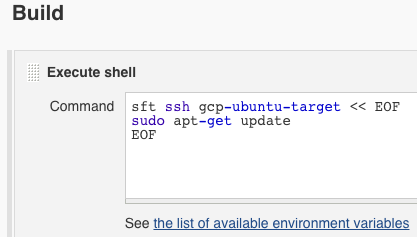
- Click on Add build step, then Execute shell

-
Paste the following code
sft ssh gcp-ubuntu-target << EOFsudo apt-get updateEOF -
It should look like this:
- Click on Save
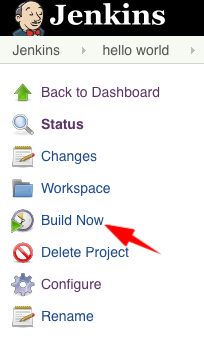
- On the next screen, click on Build Now
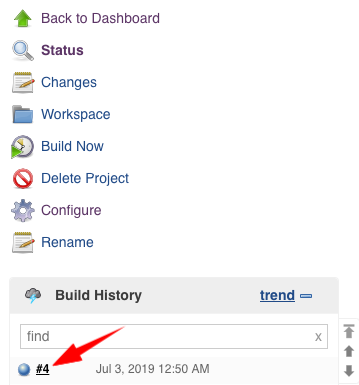
- Open the latest build (it should have a blue dot icon)
- Click on Console Output in the left side bar
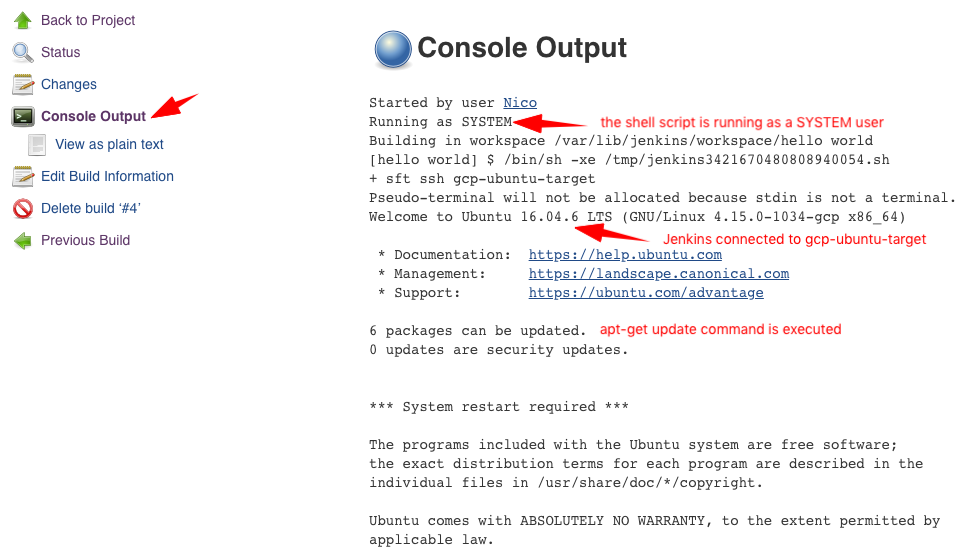
Congrats, your Jenkins instance is properly configured with an ASA service account!
gcp-windows-target
Let’s enroll our Windows VM with ASA.
-
Go to your ASA admin console
-
Copy the value of your enrollment token for your gcp-windows-target—you’ll need it later
-
Go to your GCP console > list of VMs, and copy the external IP in front of your VM
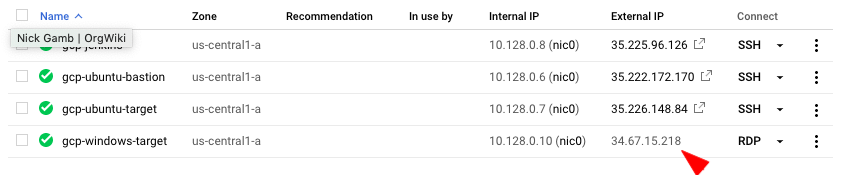
- Open your preferred RDP client, and connect to the external IP above with the GCP-generated username and password
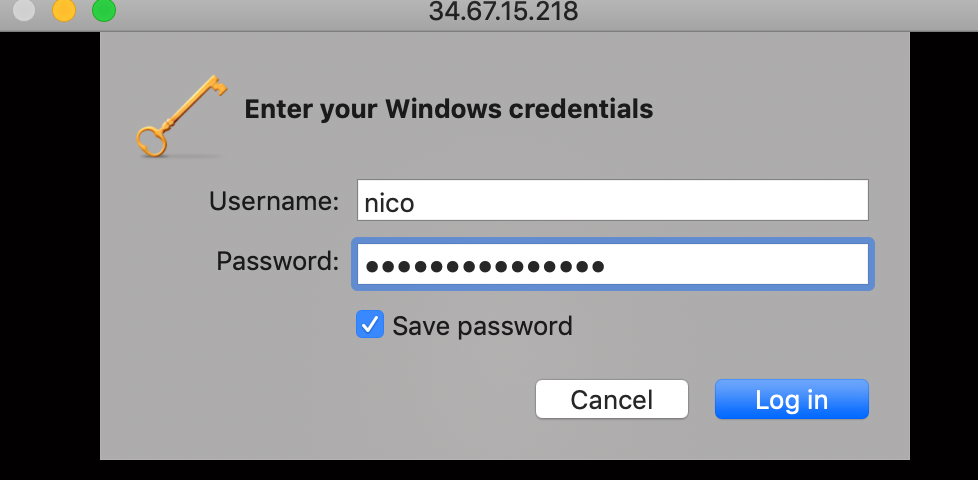
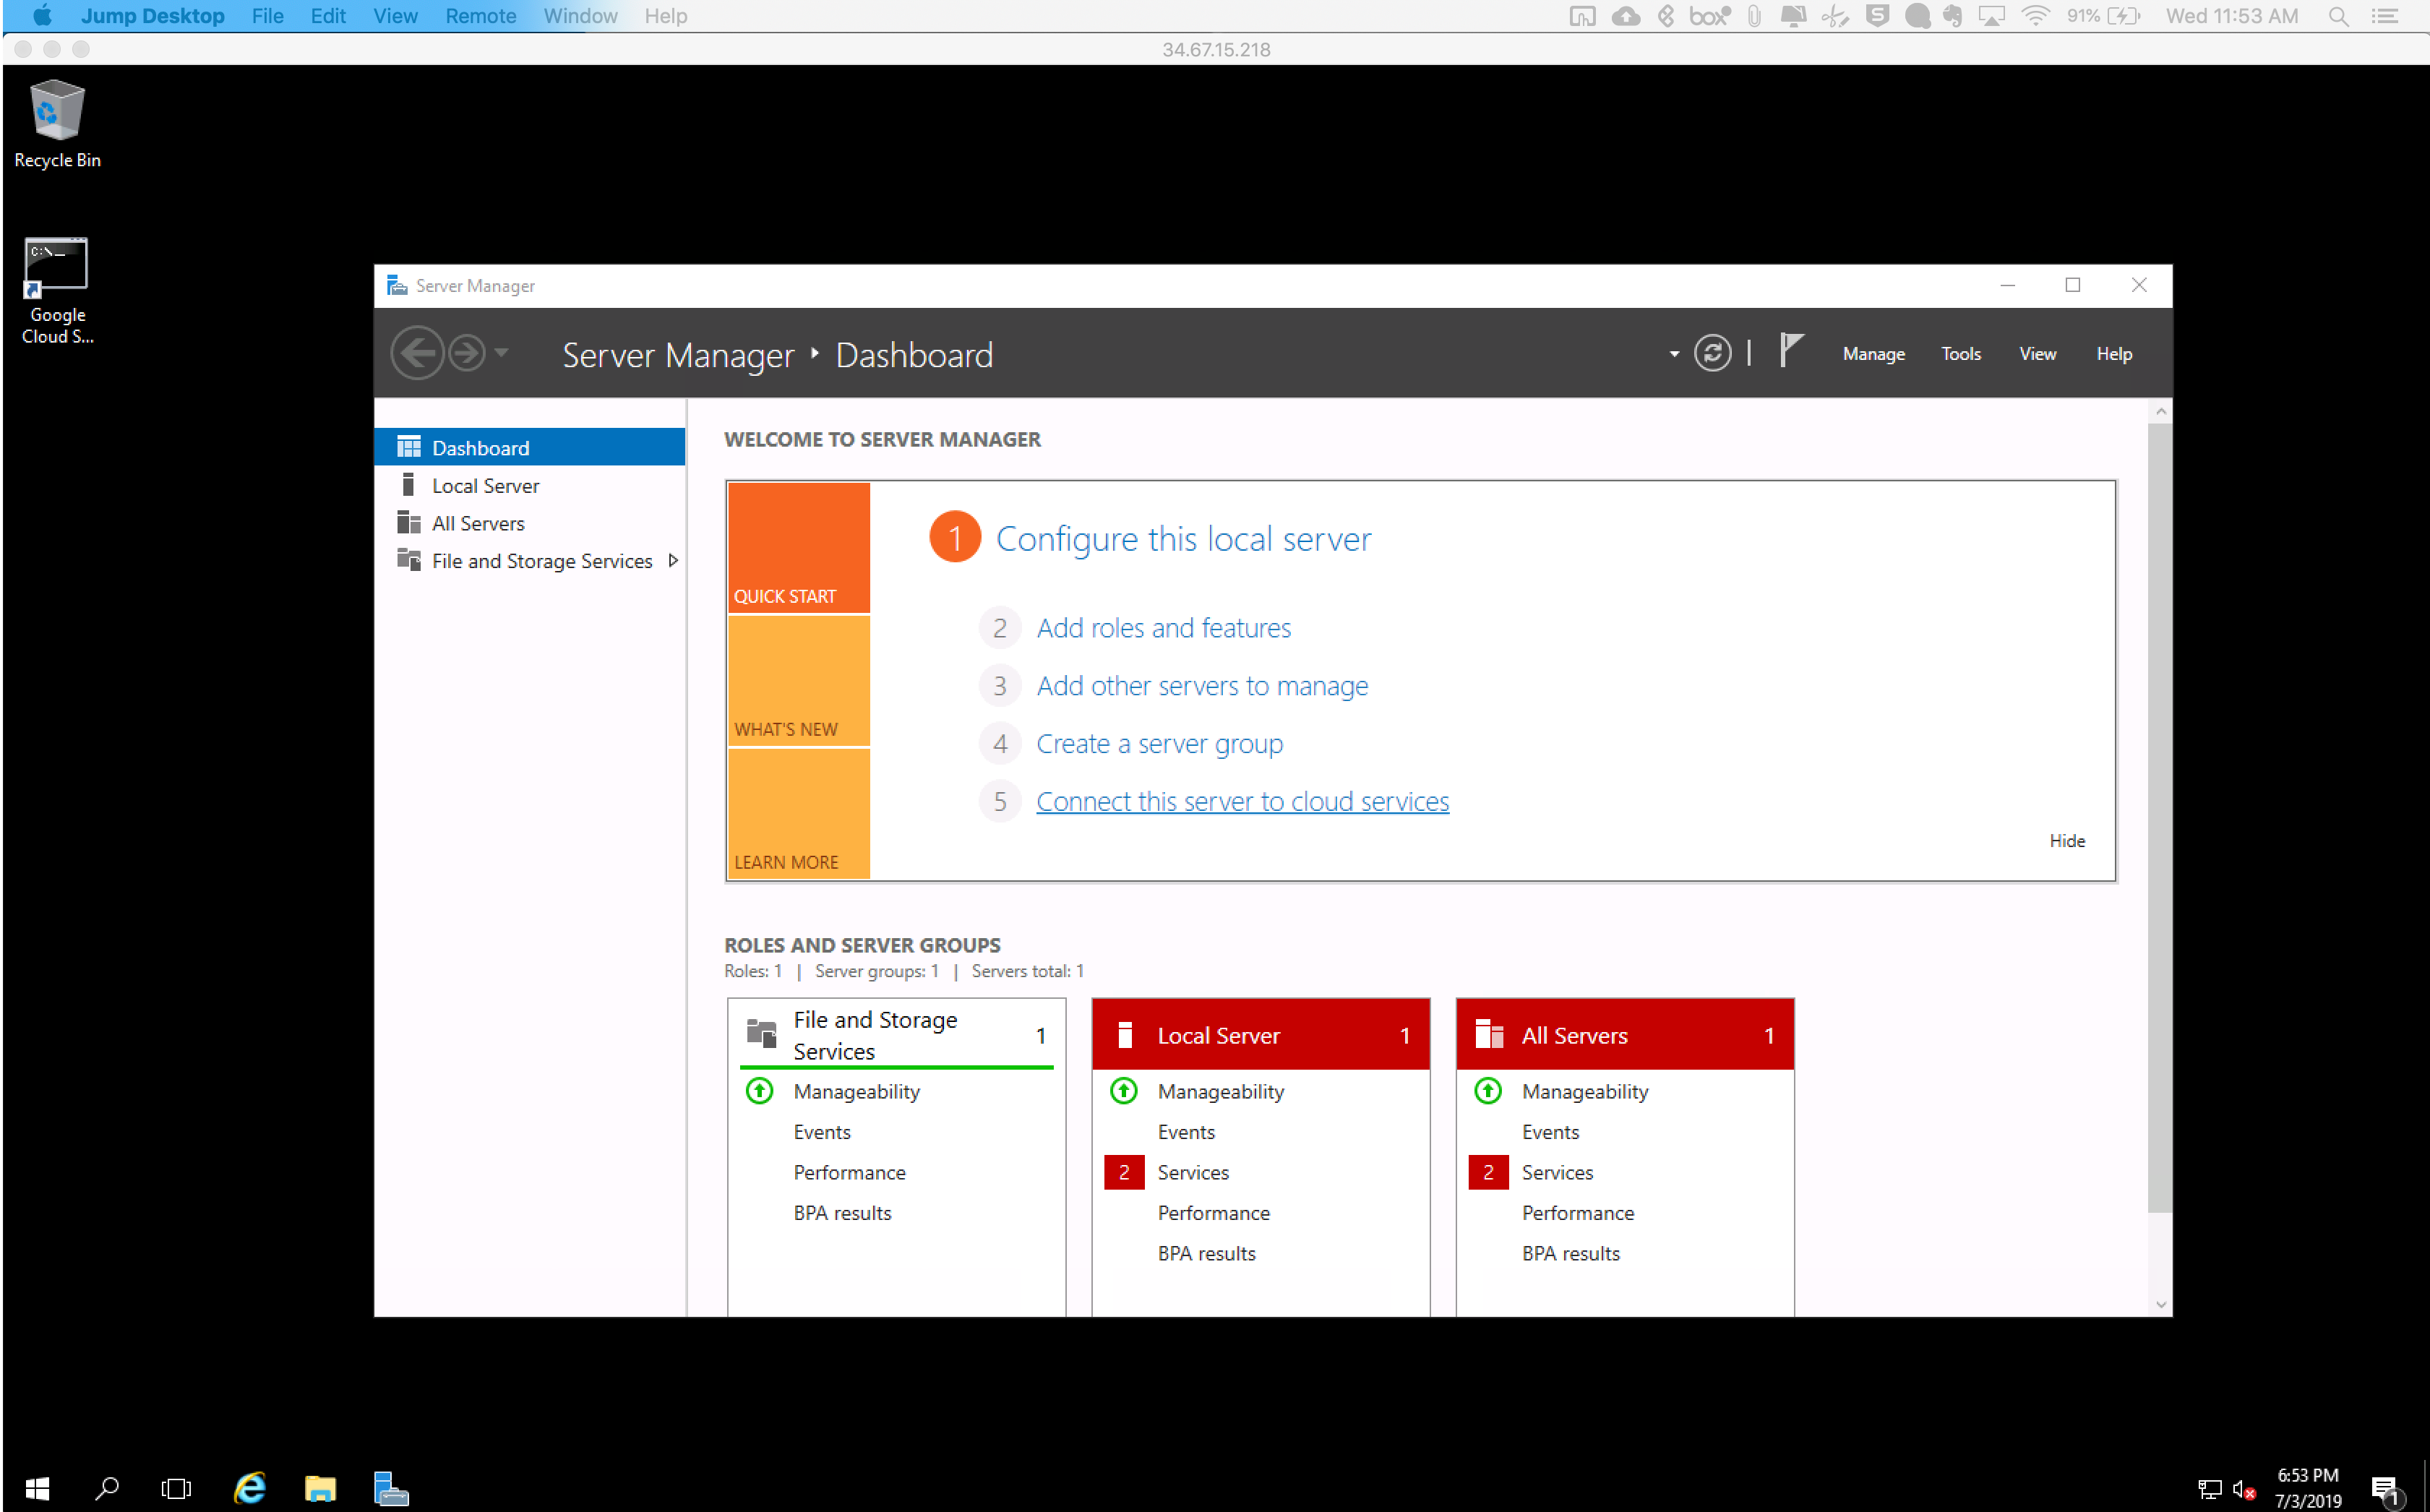
You should be connected to your windows server now.
- Navigate to `C:\Windows\System32\config\systemprofile\AppData\Local
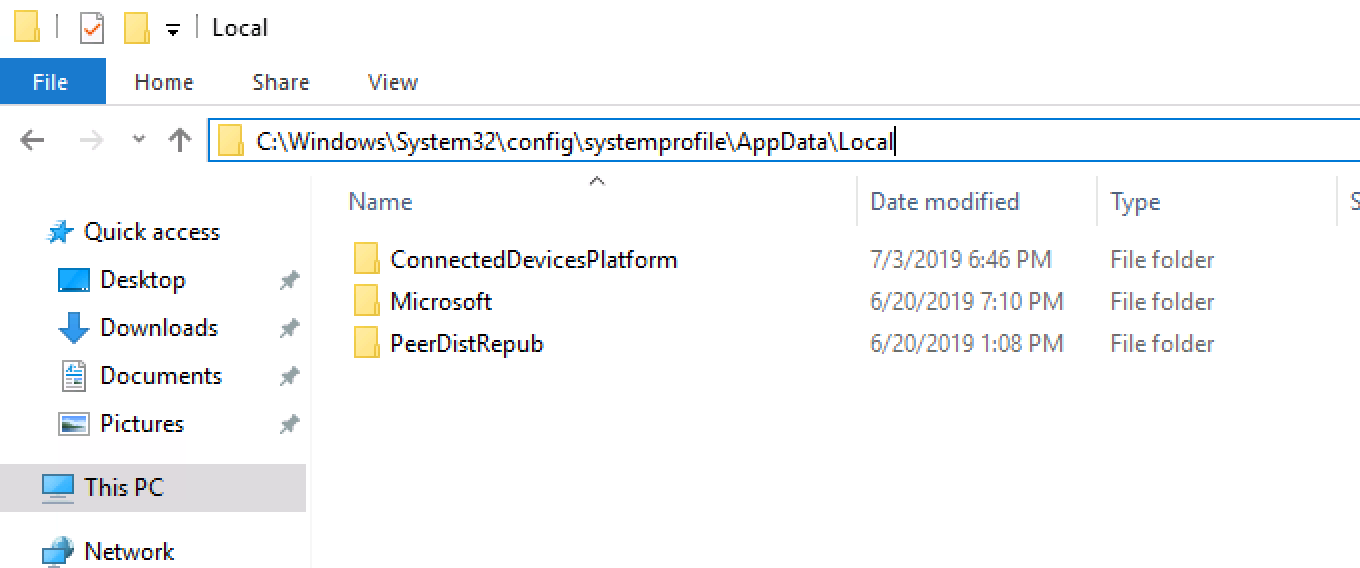
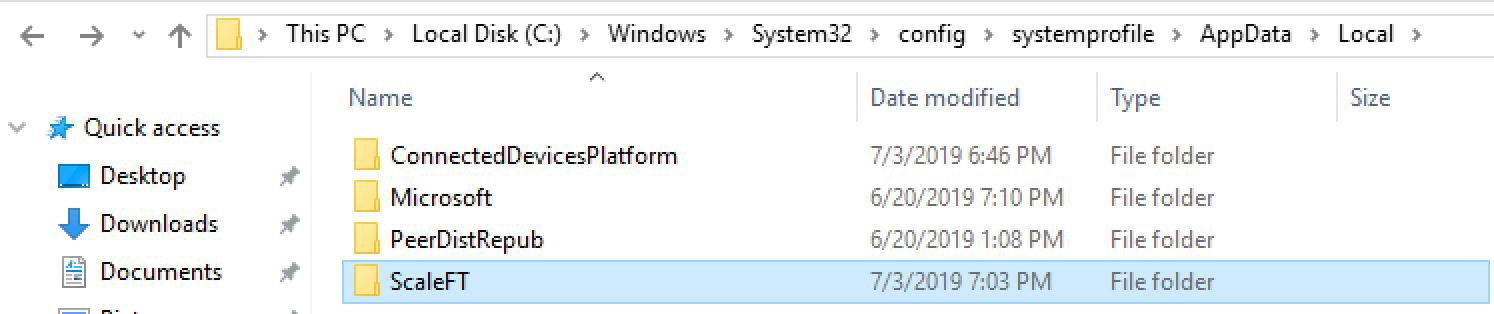
- Create a new folder called ScaleFT, then open that folder
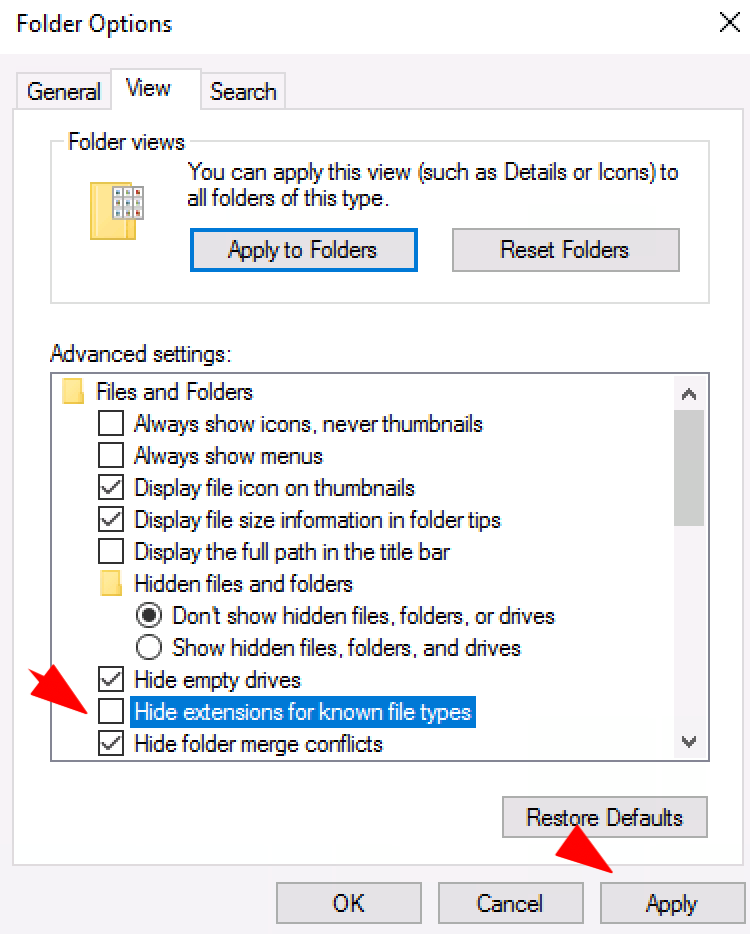
- Go to View > Options

- Unselect Hide extensions for known file types, then click on Apply + OK
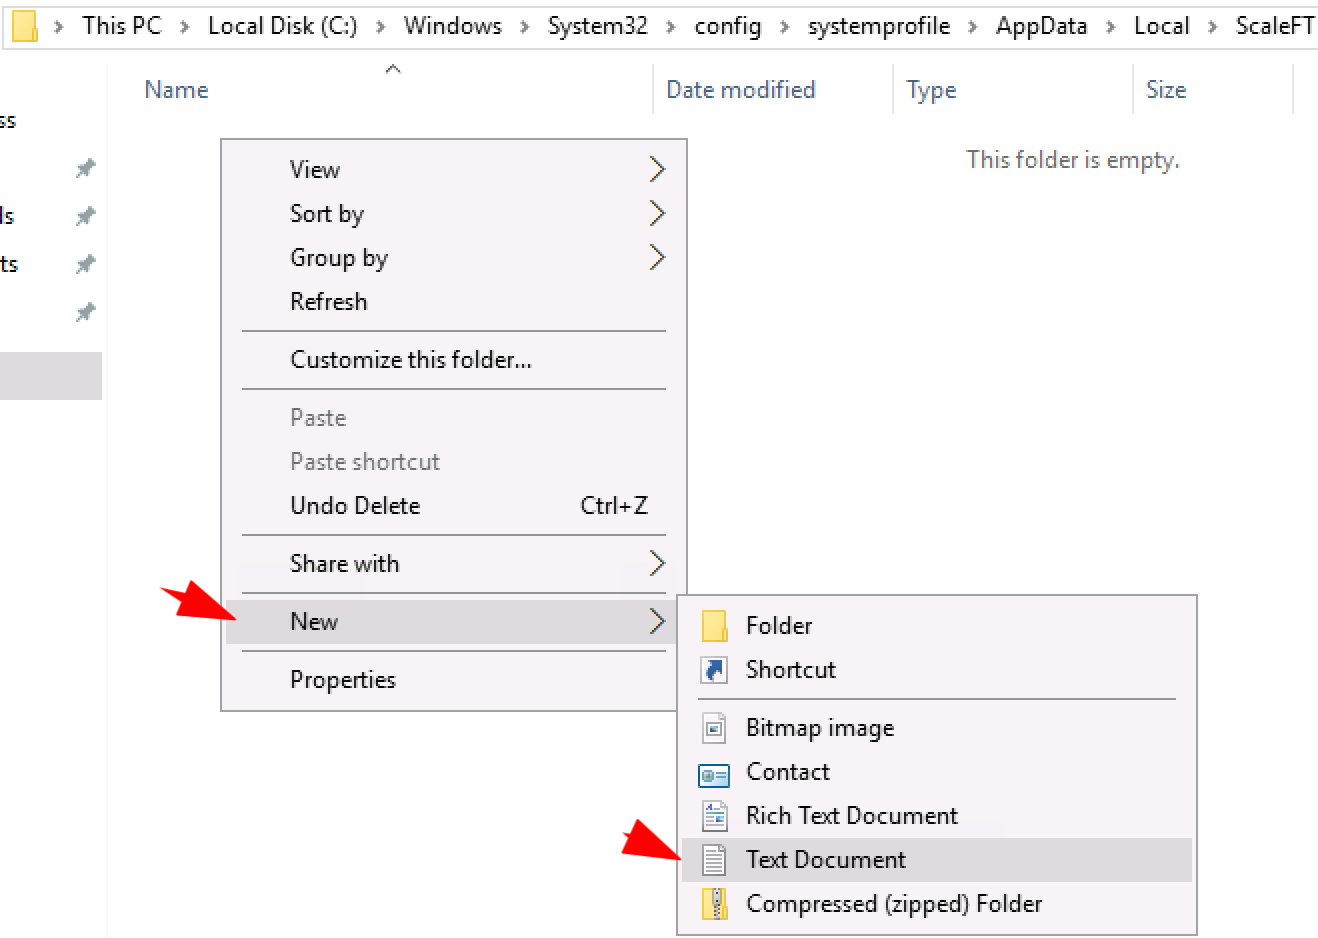
- In your ScaleFT folder, right click > New > Text Document
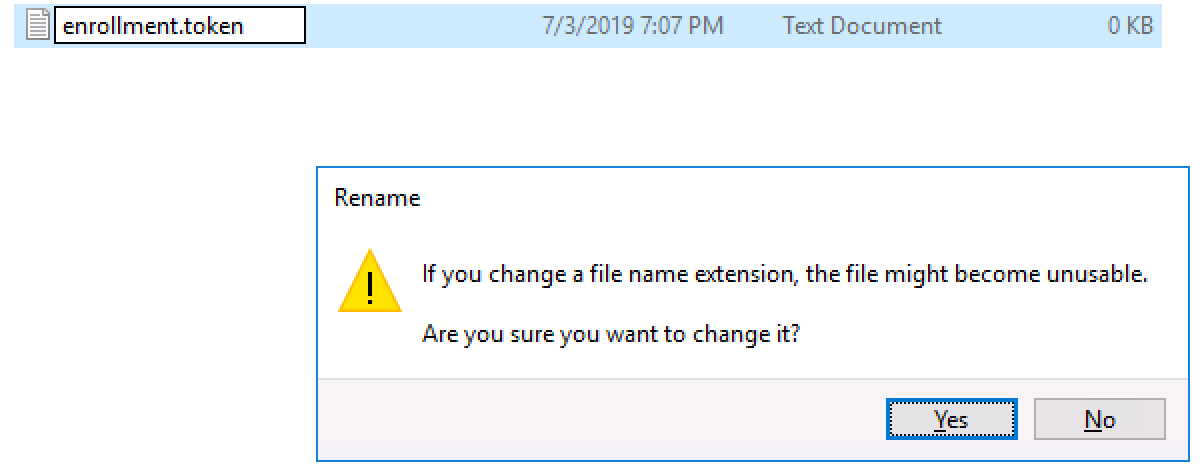
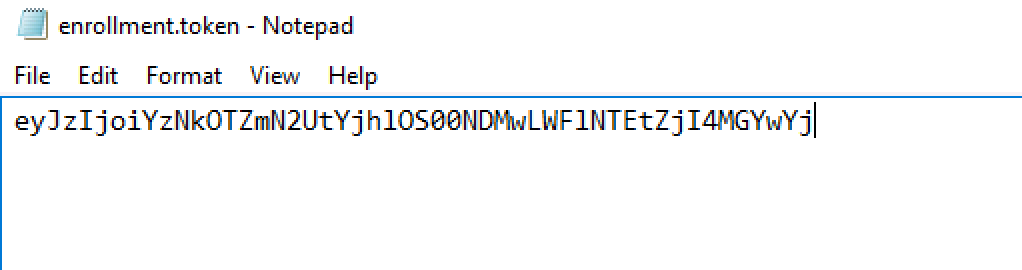
- Rename the file enrollment.token, and accept the file extension change
- Right click on the file > Open with > Notepad
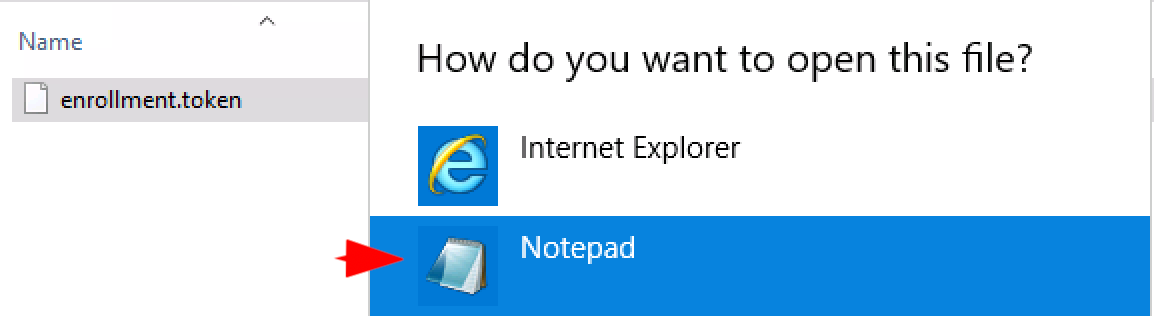
- Paste the enrollment token you got from the ASA console, and save the file
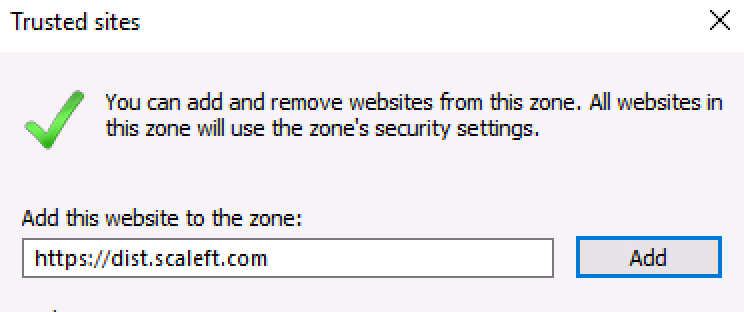
- Open a web browser, download this file
Note, if you’re using IE, you may have to whitelist https://dist.scaleft.com as Trusted site.
- Run the MSI. This will install the ASA/ScaleFT Server Tools

After the install is complete, your WinServer should now be enrolled in ASA. Go to the ASA console > gcp-demo project > Servers tab and verify that you can see gcp-windows-target.

-
Close your RDP session (where you used the GCP-generated username and password)
-
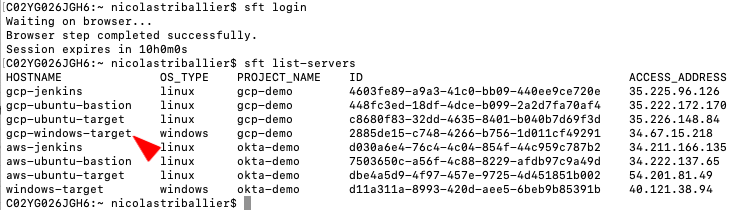
Open your terminal
sft loginsft list-servers
You should see your gcp-windows-target.
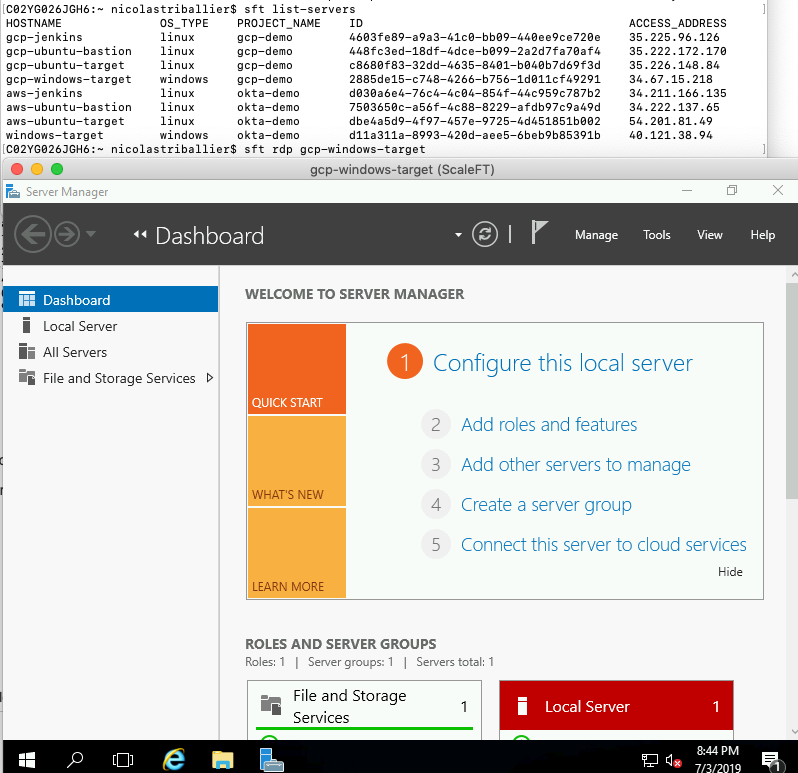
- Now RDP to gcp-windows-target
sft rdp gcp-windows-target
That will leverage your native RDP client to connect to the gcp-windows-target instance.
Note: in that example, we’re accessing the gcp-windows-target directly, but we could have configured it so the access is via the gcp-ubuntu-bastion.
You can use the configuration steps for gcp-ubuntu-target and the custom .yaml file format if you want the WinServer behind the bastion.
Troubleshooting
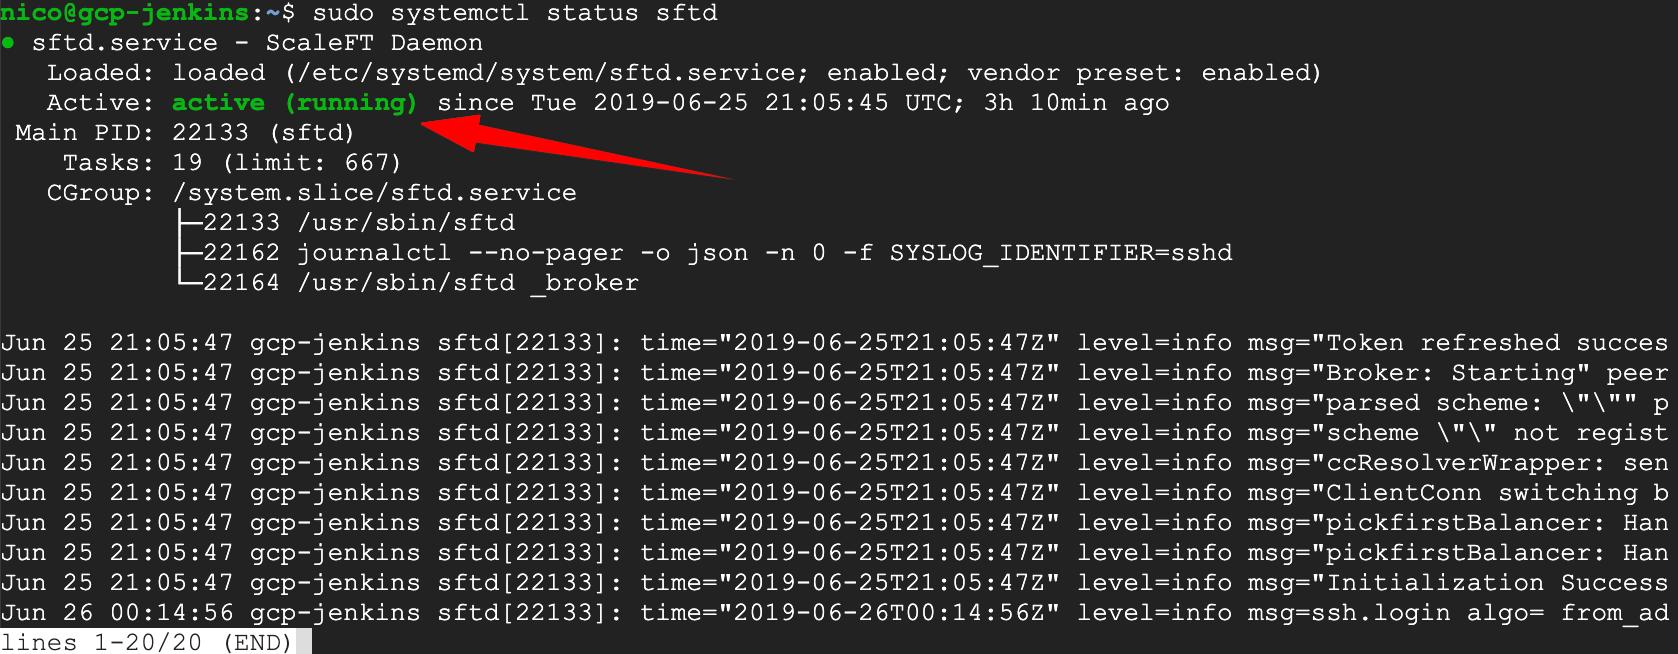
If you’re facing issues during the ASA server enrollment, check the health of the sftd agent. Here are couple of useful commands:
sudo systemctl status sftd
sudo systemctl stop sftdsudo systemctl start sftd
If you deleted a server from the ASA console that was previously enrolled in ASA and you want to re-enroll it with the same hostname, follow these steps:
- Stop the sftd agent
sudo systemctl stop sftd
- Remove the sftd state folder
sudo rm -rf /var/lib/sftd
-
Re-create the sftd folder
-
Re-add your enrollment key
- Restart the sftd agent
sudo systemctl start sftd
The server should appear again in your ASA web console.
How to Block SSH Public Keys and Force ASA Authentication to VMs
Advanced Server Access doesn’t restrict the authentication methods available on servers. Inherently, SSH public keys can be used to bypass Okta sign-on and MFA. This simple SSH configuration can be used to force certificate-based authentication for all, or for groups of users.
Instructions / Examples
After making changes to sshd_config, restart sshd.
Append the following lines to /etc/ssh/sshd_config to restrict members of the sft-admin group from being able to log in with anything but ASA certificates.
Match Group sft-admin
  PubkeyAcceptedKeyTypes ssh-rsa-cert-v01@openssh.com
Append the following lines to /etc/ssh/sshd_config to restrict members of the sft_everyone group from being able to log in with anything but ASA certificates. Please ensure the group is being synced to the server as part of the project.
Match Group sft_everyone
  PubkeyAcceptedKeyTypes ssh-rsa-cert-v01@openssh.com
Append the following lines to /etc/ssh/sshd_config to restrict members of sft-admin and sft_everyone from being able to log in with anything but ASA certificates. Please ensure the group is being synced to the server as part of the project.
Match Group sft_everyone
  PubkeyAcceptedKeyTypes ssh-rsa-cert-v01@openssh.com
Match Group sft-admin
  PubkeyAcceptedKeyTypes ssh-rsa-cert-v01@openssh.com
Place the following line in /etc/ssh/sshd_config above any Match lines to restrict all users from logging in with anything but ASA certificates. Note: This will break access to any service accounts using public key authentication.
PubkeyAcceptedKeyTypes ssh-rsa-cert-v01@openssh.com
Automate ASA enrollment with existing CI/CD tools
- Terraform: Okta ASA Terraform Provider, Tutorial
- Ansible: Tutorial
- Puppet: Tutorial
- Chef: Tutorial
And… That’s all! Have any questions? Please leave a comment below. Or, if you’d like to see more content like this, consider following us on Twitter or subscribing to our YouTube channel.
Okta Developer Blog Comment Policy
We welcome relevant and respectful comments. Off-topic comments may be removed.