Managing Multiple Okta Instances with Terraform Cloud
Congratulations, you’ve chosen to use Okta to solve your identity problems. Welcome to the happy sunny utopia of a managed identity solution! But wait! How do you manage your environments? Your applications all have separate production, staging, and development environments. How do you manage that in Okta without writing a ton of custom scripts?
In this post, you’ll learn how to manage multiple Okta instances using Terraform and our Okta Terraform Provider. I’ll walk you through everything you need to know to keep all your Okta environments in sync and manageable.
PS: The rest of this post assumes you already have at least one Okta account. If you don’t, you can create a free-forever developer account by visiting https://developer.okta.com/signup/.
Table of Contents
- Use Terraform to Manage Okta State
- Get Started with Terraform and Okta
- Get Started with Terraform Cloud
- Manage Multiple Okta Environments with Terraform
- Promoting Changes Using Terraform
- Learn more about Terraform and Okta
Note: In May 2025, the Okta Integrator Free Plan replaced Okta Developer Edition Accounts, and the Okta CLI was deprecated.
We preserved this post for reference, but the instructions no longer work exactly as written. Replace the Okta CLI commands by manually configuring Okta following the instructions in our Developer Documentation.
Use Terraform to Manage Okta State
You have many options when it comes to picking a solution in the configuration management space: Chef, Puppet, Ansible, Salt, etc. Throughout this post, you’ll be working with Terraform as it sits in the sweet spot between orchestration and automation.
Instead of using the Okta Admin UI to configure all of your Okta settings and resources, you’ll define your Okta configuration in Terraform configuration files using the declarative HashiCorp Configuration Language (HCL). Terraform will then make the necessary API calls to Okta to configure things in the way you’ve defined, enabling you to automate the provisioning, deployment, and configuration of your Okta org.
Suppose another administrator modifies your resources from the administrative console. In that case, you’ll be able to see the changes at a glance and revert them to your defined state if you so choose.
To follow this guide, make sure that Terraform is installed and available on your machine. If you don’t have Terraform installed and set up already, read through the official Hashicorp installation guide and set it up before continuing.
Get Started with Terraform and Okta
To get started, let’s create a simple Terraform script to update Okta’s user schema and define some custom attributes.
Before continuing, you’ll need to know your Okta organization name. Your Okta org will have a name like dev-1234.okta.com. Make a note of this org name (dev-1234), as you’ll need it through this tutorial.
First, create a new local directory to hold your Terraform configuration files, then initialize Terraform. To do this, run the following commands:
mkdir okta-user-schema
cd okta-user-schema
Next, create a file named okta.auto.tfvars and insert the code below. This file will hold your Okta configuration values that Terraform will use to talk to the Okta APIs.
org_name  = "<your-org>"
base_url  = "okta.com"
Replace each of the placeholder values above with those from your Okta org. For example, you should use the subdomain of your Okta org to fill in the org_name value. If the address of your Okta instance is dev-1234.okta.com, then your org_name would be dev-1234. The value for base_url should be everything that comes after the org name (e.g., okta.com) so be sure to update this value if you are using an okta-emea or oktapreview org.
Next, you will need to generate the api_token value. To generate a new Okta API token, log into your Okta administrator console as a superuser and select Security > API > Tokens (tab) from the navigation menu. Next, click the Create Token button, give your token a name, click Create Token, and copy the newly generated token. Save this in a separate secret.auto.tfvars file excluded from Git or in an environment variable named TF_VAR_api_token.
Next, create a new file named identity.tf and add the following:
variable "org_name" {}
variable "api_token" {}
variable "base_url" {}

# Enable and configure the Okta provider
terraform {
  required_providers {
    okta = {
      source  = "okta/okta"
      version = "~> 3.15"
    }
  }
}

provider "okta" {
    org_name = var.org_name
    base_url = var.base_url
    api_token = var.api_token
}
This enables the latest version of Okta provider for Terraform and configures it using the three variables from our okta.auto.tfvars.
Now, run terraform init to initialize the Terraform state file in your directory that tracks the configuration Terraform has applied to your resources.
Now, add the following to identity.tf:
resource "okta_user_schema_property" "dob_extension" {
  index  = "date_of_birth"
  title  = "Date of Birth"
  type   = "string"
  master = "PROFILE_MASTER"
}
This will extend the Okta user schema by adding a field to store users’ date of birth.
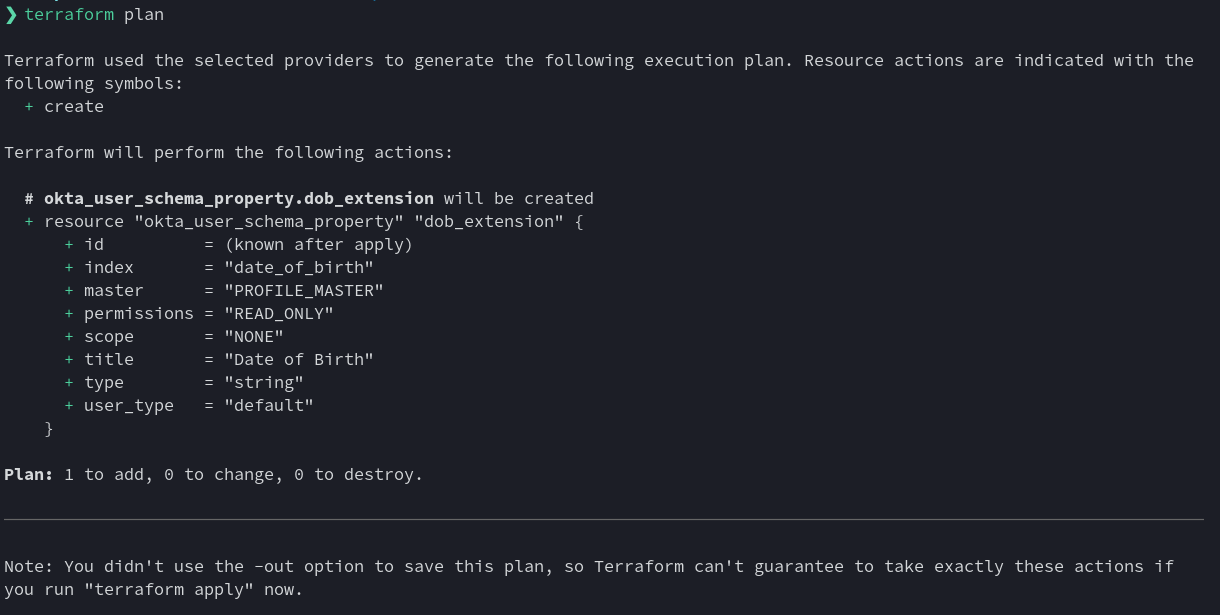
To test this script, run terraform plan from the command line. This should print a list of the changes the Terraform will make to your Okta org:
Before you change anything, you’ll want to version control your new configuration. From the command line, run:
git init
git add identity.tf okta.auto.tfvars
git commit -m "Initial commit. Adding the date of birth extension"
NOTE: Don’t push your
secret.auto.tfvarsfile that contains theapi_tokento source control. Add it into your.gitignorefile, so you don’t accidentally include it. You can also ignore.tfstateand.hclfiles and the.terraformfolder.
Now that you’ve defined your Terraform rules, you can apply these changes by running terraform apply on the command line. If you do this, Terraform will actually modify your user schema as defined above by talking to the Okta APIs. It will also update the state file on your local machine and keep track of the resources it creates.
Get Started with Terraform Cloud
Although working on your local machine is fine if you’re building a simple project solo, in many cases, you’ll want to use Terraform Cloud, which allows you to have a nice Terraform workflow without needing to track state files locally. It’s incredibly convenient to use for any real project.
Now let’s set up Terraform Cloud so you can configure your infrastructure without needing to worry about storing and managing local files.
If you don’t already have a Terraform Cloud account, you can sign up for a (free account)[https://app.terraform.io/signup/account], which you can use with a team of up to five people.
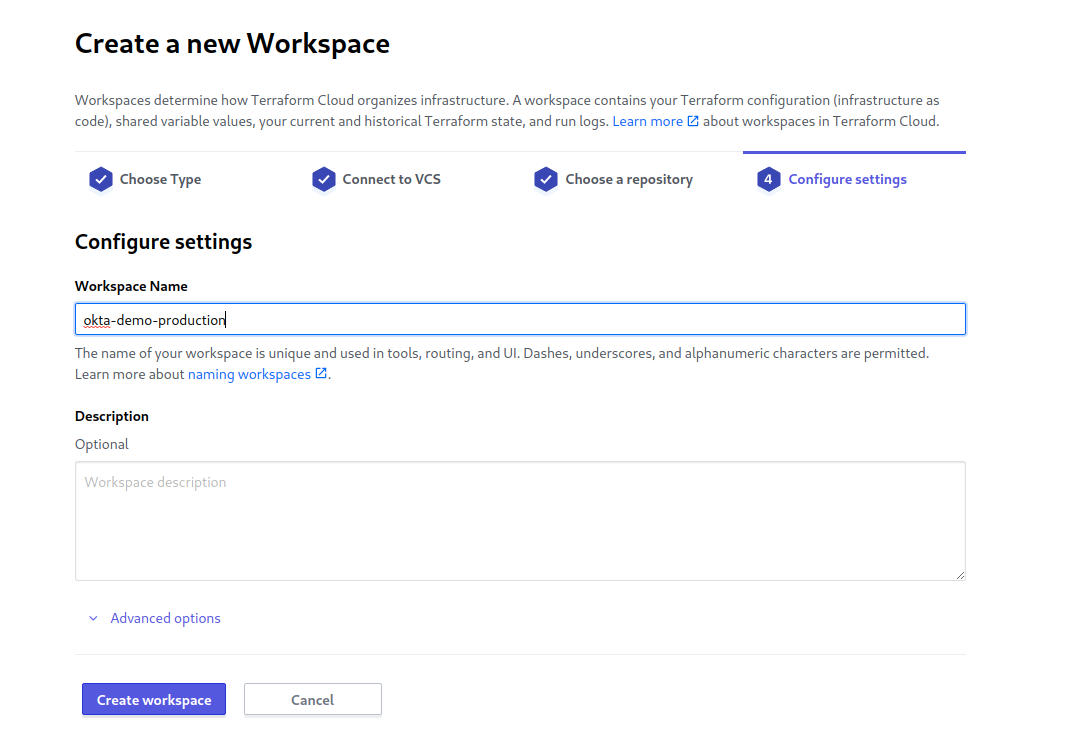
Once you create an account and sign in, you must choose the Start from scratch option on the welcome screen. On the next screen, create an organization and proceed. Now, you are going to create a “Workspace”. Workspaces describe your environments (production, staging, development, etc.). The environment you’ll create below will be a “production” environment (we’ll create others later).
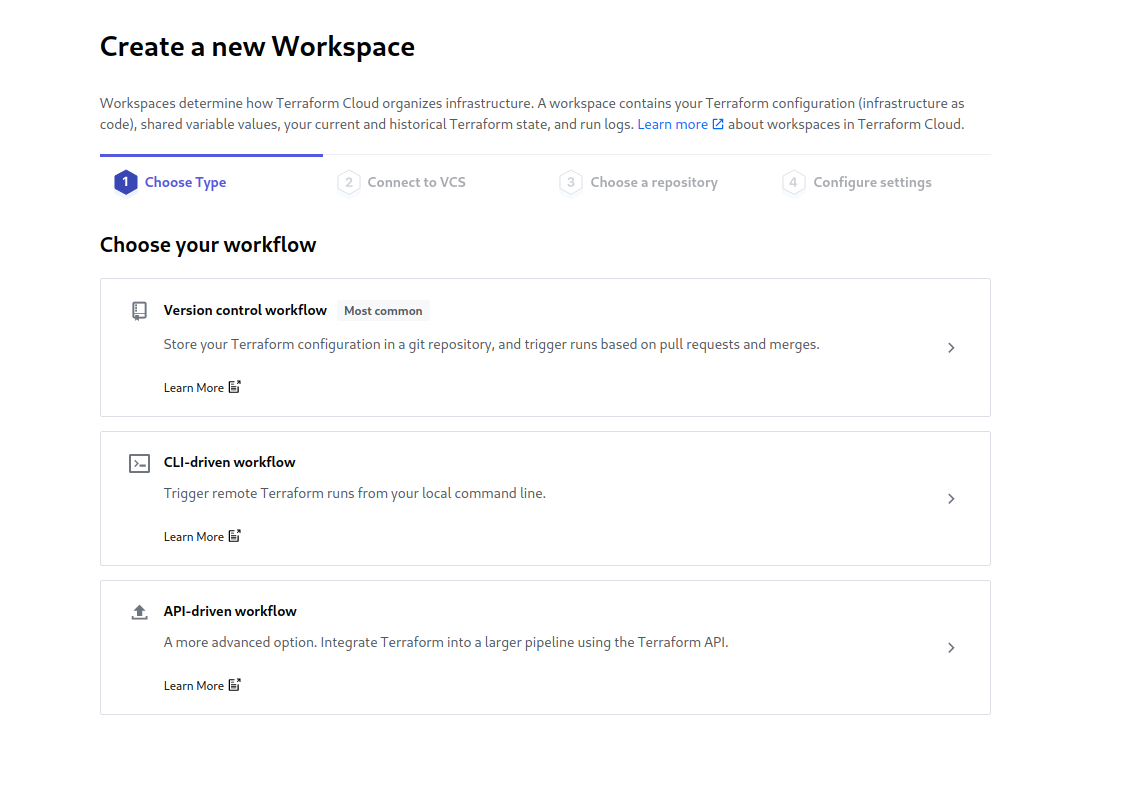
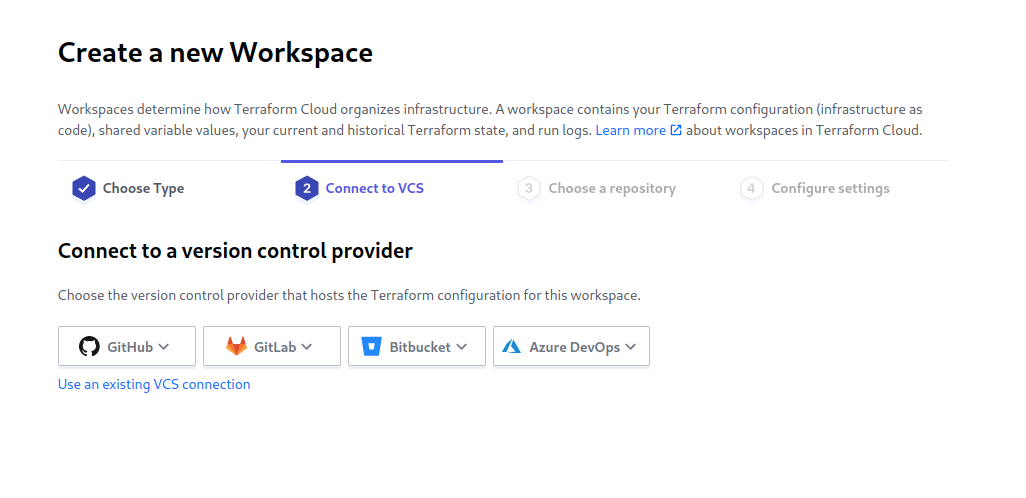
On the first page of the Workspace creation flow, select Version control flow, as we will be saving our configuration in a Git repository. Next, you need to select your source control provider. In my case, I’m using GitHub to store my code, so I’ll select GitHub and grant permission for Terraform Cloud to access my project. When GitHub prompts to select repositories to install Terraform cloud, choose one or more repositories where you intend to store Terraform configurations.
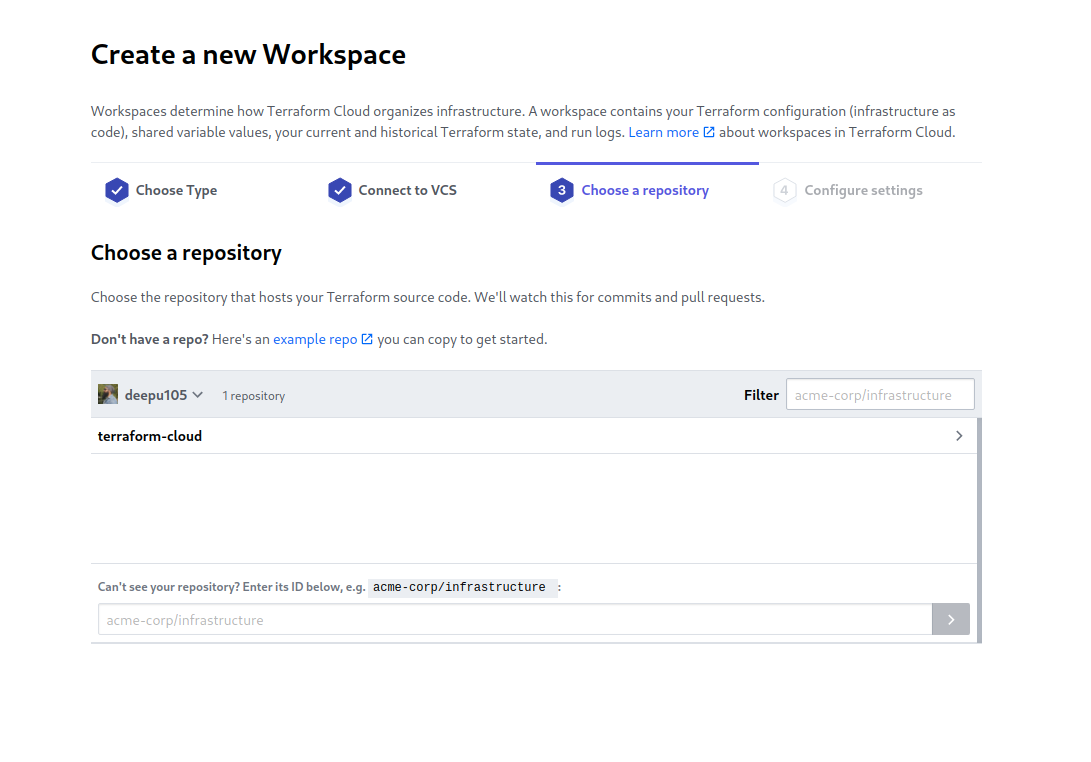
After authorizing with GitHub, click the GitHub button again to choose the repository that holds the project we created. If you haven’t already, push the okta-user-schema project to this repository.
Give your new workspace a descriptive name. We’re defining our production environment in this example, so use the repository’s name with -production added to the end for clarity. For example, my-project-production.
Locally you defined variables in the okta.auto.tfvars file. But we didn’t add the api_token variable to that file for obvious security reasons; hence the variable is not stored in source control. Therefore, you have to define the variable explicitly in the Terraform workspace. Click the Variables tab in the top navbar of the workspace, then define the api_token variable.
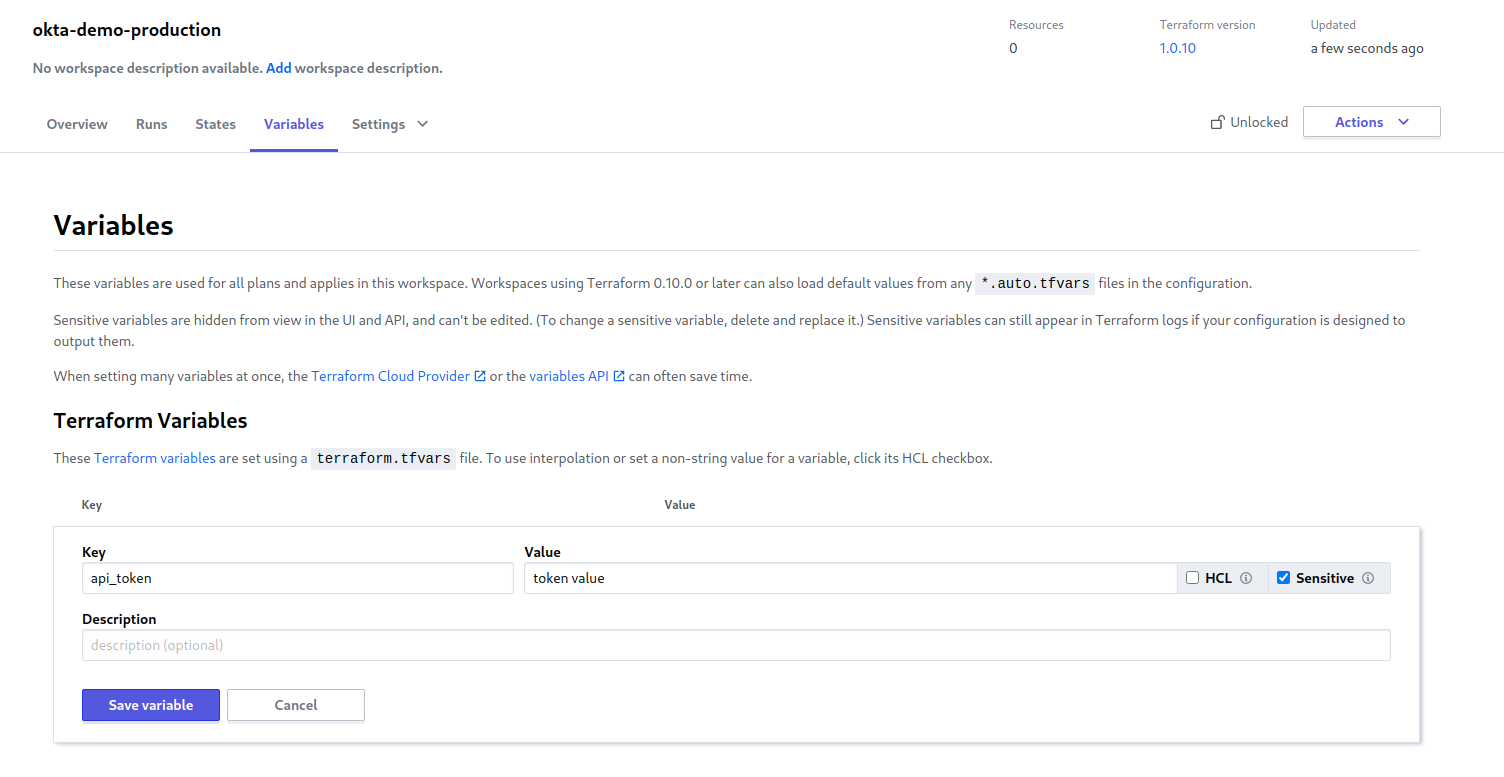
For your API token, instead of using the same Okta SSWS token you used locally, you may want to create a separate token or even create a service account to issue a token so you can distinguish Terraform Cloud’s API usage from your own in your Okta logs. Whatever you do, make sure you mark the API token value as Sensitive when you define it, so it isn’t exposed to anyone with access to your Terraform console.
Now that you’ve configured your workspace, select Start new plan from the top right Actions menu, enter a reason, and then press Start plan.
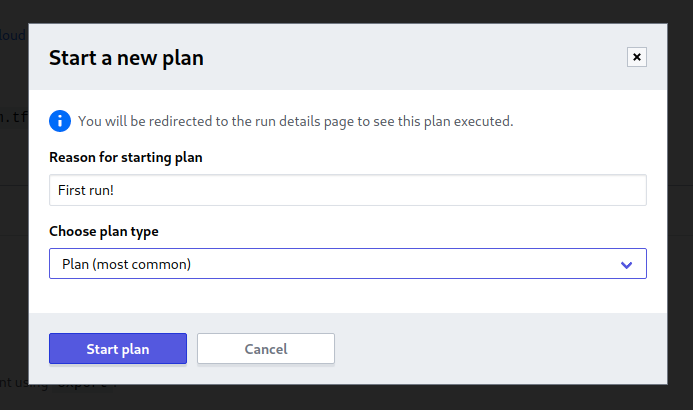
Your Terraform plan will now run as it did in your local environment.

To apply the changes, click Confirm & Apply at the bottom of the plan result and add a comment when prompted.

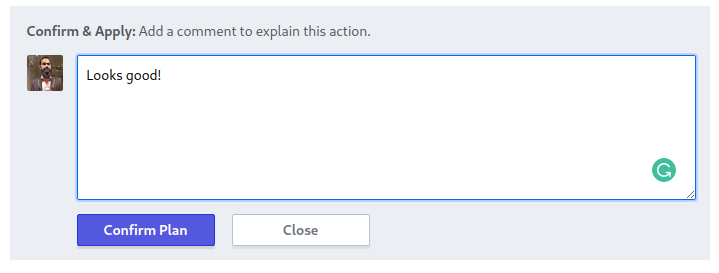
Once you click Confirm Plan, Terraform will run and apply your changes.
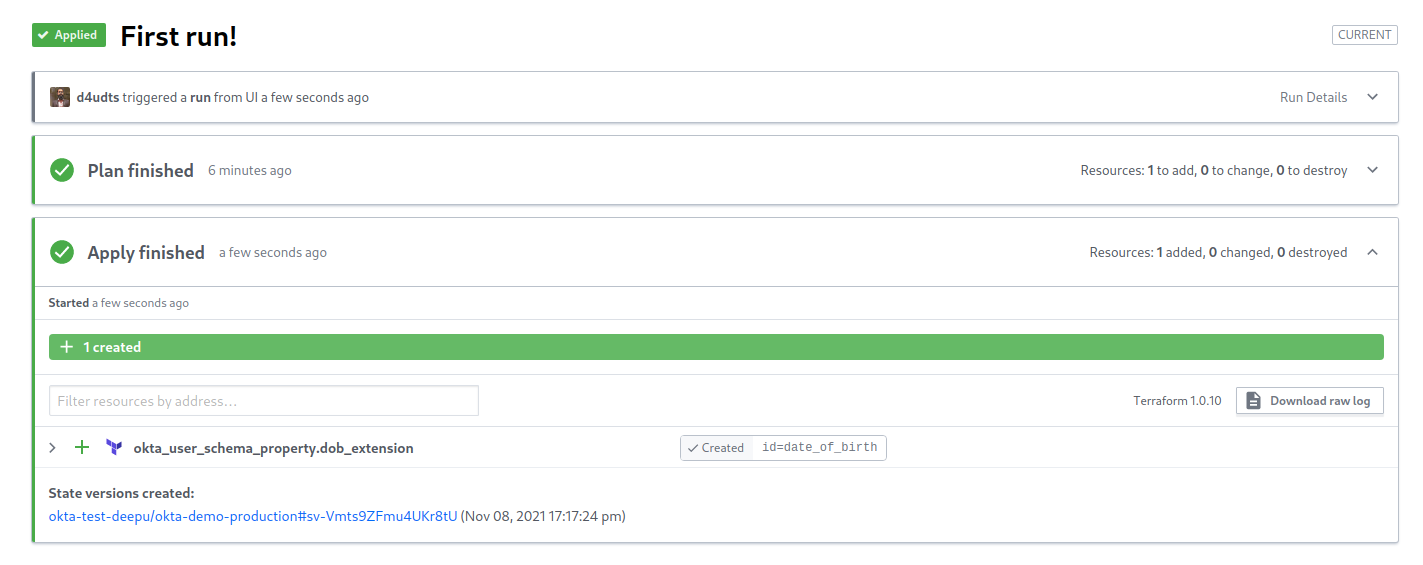
If you now look at your Okta user schema by clicking Directory > Profile Editor > Okta > Profile in your Okta Admin Console, you’ll be able to see that Terraform has added the date of birth attribute at the end of the list.

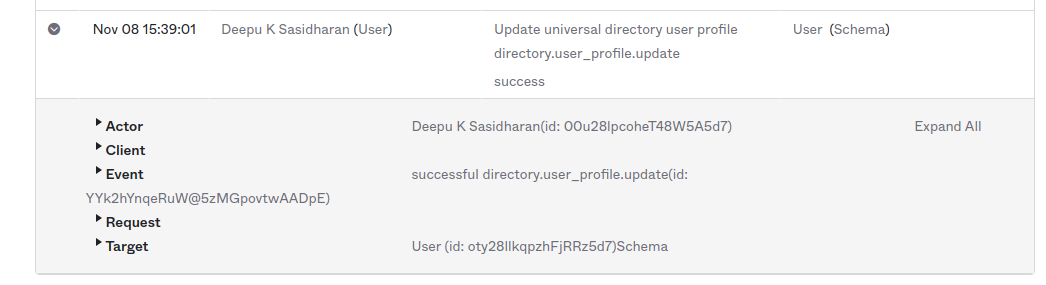
Click Reports > System Log in your Okta Admin Console and scroll down to look at the latest log entry. You’ll now see that the configurations changes are logged as the user who minted the API token. Nice, right?
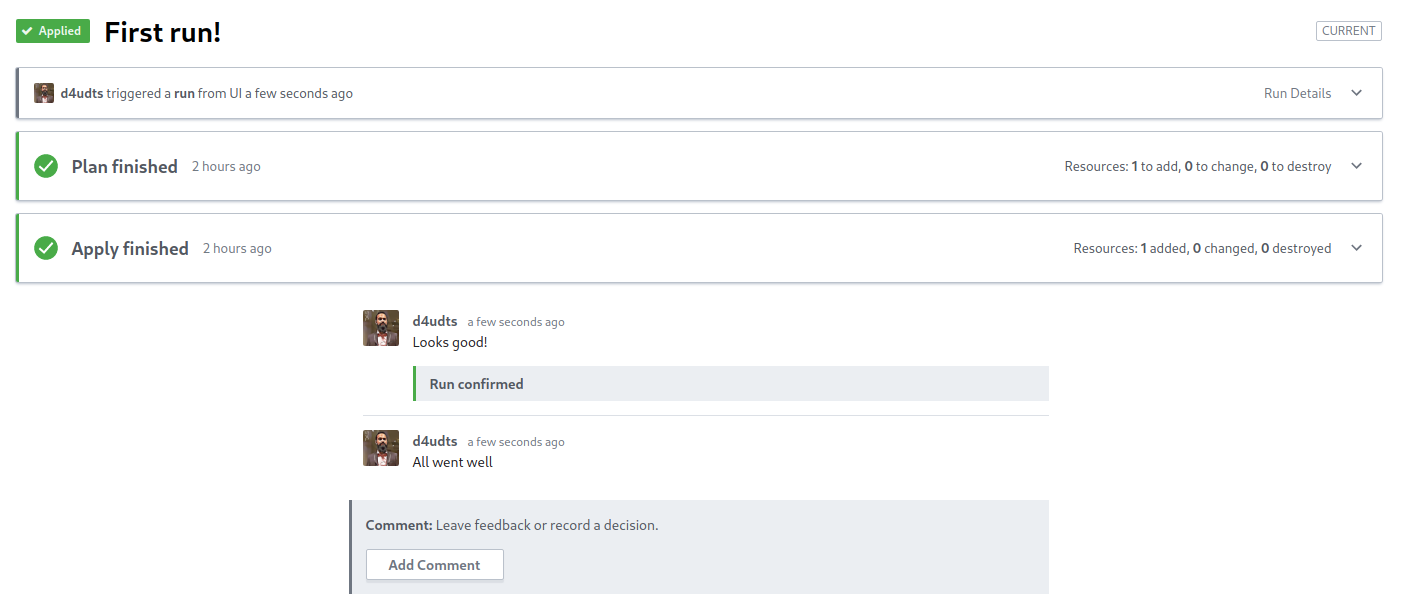
Another nice collaboration feature of Terraform Cloud is that you can leave comments on completed runs. This can be useful for discussing configuration changes with your team.
Manage Multiple Okta Environments with Terraform
Now that you’re using Terraform Cloud to manage a single environment (production), let’s add a second environment (development). Doing so will make it easy for your developers to run tests against this new Okta environment without impacting production.
If you don’t have a second Okta org yet, go create one, and then go through the steps to create an API token once more.
Next, create a new Git branch in your project called dev. This is where you’ll work on your product before releasing it to production (the main branch).
git checkout -b dev
git push origin dev
In Terraform Cloud, create a new workspace to represent this new environment. Target the same repository as before but set the branch specifier to dev.
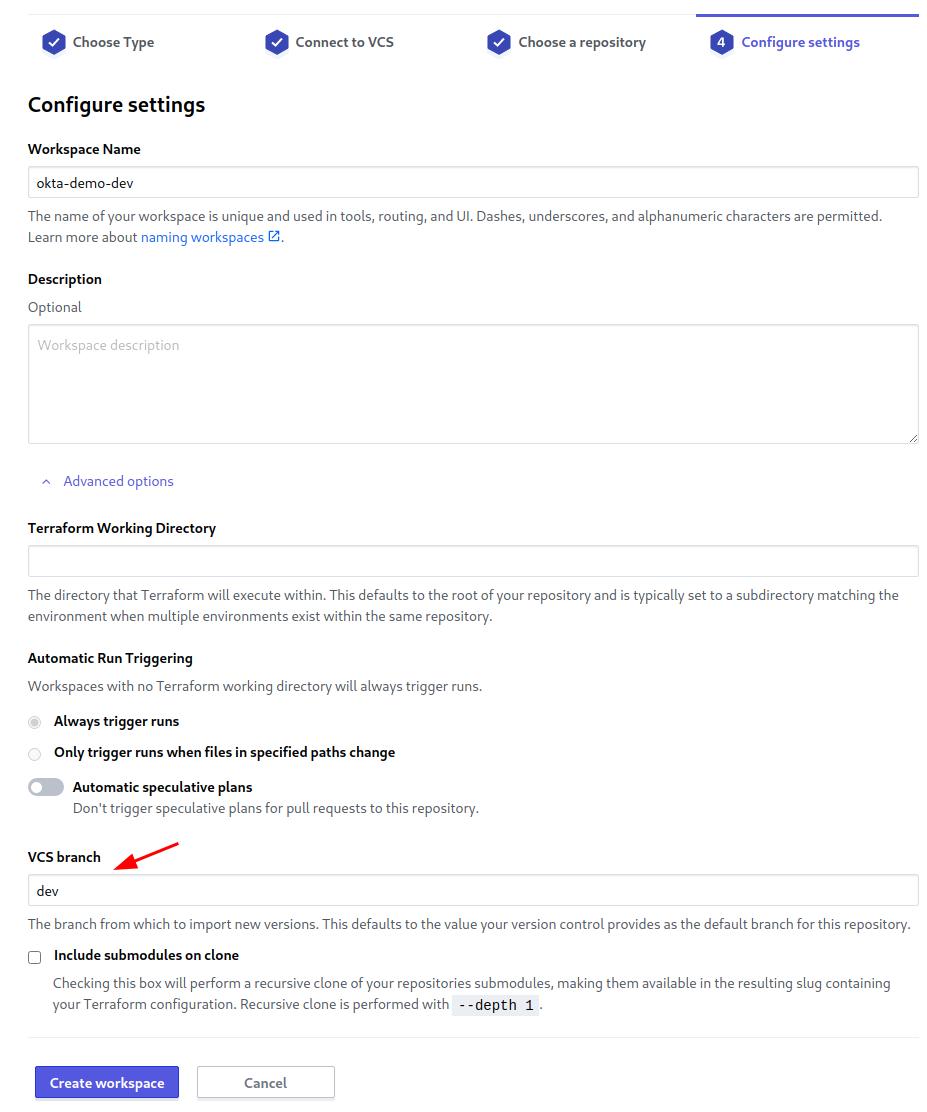
For this environment, set the apply method in Terraform Cloud to auto so changes will be applied to the environment immediately if the planning stage is successful without you needing to confirm anything manually.

Update the okta.auto.tfvar file using your new Okta org’s org_name and base_url. Create a new Terraform Cloud workspace variable for api_token and make sure to use the API Token from the new Okta org. Click Start new plan and just like that, Terraform replicates your production Okta configuration from your first Okta org into the second Okta org!
Promoting Changes Using Terraform
Now that you’ve set up Terraform to manage your development and production environments, let’s imagine your development team wants to change how Okta is configured. You’d like them to be able to do this, but you’d also still like to control and review these changes before they make their way into production. What do you do?
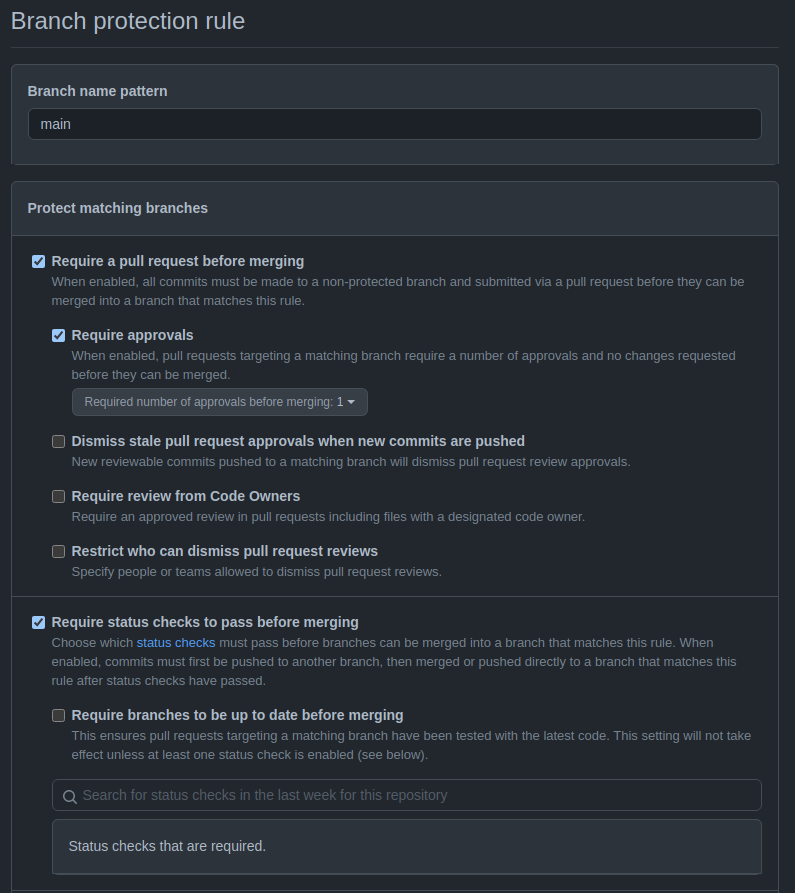
To control this, you can use GitHub’s branch protection rules feature to ensure that you review any changes going onto our main branch that controls production before they are applied. This feature is only available on pro or public repos, so you will need to make your repository public to follow along.
In your GitHub repository, click Settings > Branches > Add Rule and enter main as the branch name pattern to protect. You can then combine the rules you wish to use to protect the production configuration. Here we’re going to apply the Require a pull request before merging > Require approvals and Require status checks to pass before merging rules. With these two flags, you can ensure that one of the repository owners reviews changes before a merge into the main branch is performed and that the dev environment is in a good state.
Let’s try the new change control process. On your dev branch, add the following change to the identity.tf file:
resource "okta_user_schema_property" "crn_extension" {
  index  = "customer_reference_number"
  title  = "Customer Reference Number"
  required = true
  type   = "string"
  master = "PROFILE_MASTER"
  depends_on = [okta_user_schema_property.dob_extension]
}
Now save and push these changes to your remote repository.
Terraform will trigger and run your plan (and apply it if successful) to the dev environment.
If you go to Directory > Profile Editor > Okta > Profile in your Okta Admin Console of the development org, you should see that Terraform applied both your schema extensions.
Once you’re happy with the changes you have made to the development environment, you’ll want to promote them to the production environment. To do this, you’ll need to create a pull request from your dev branch to the main branch that controls production. As you have branch protection enabled, this provides an opportunity for others to review the changes and for any discussion to take place before you change the production configuration.
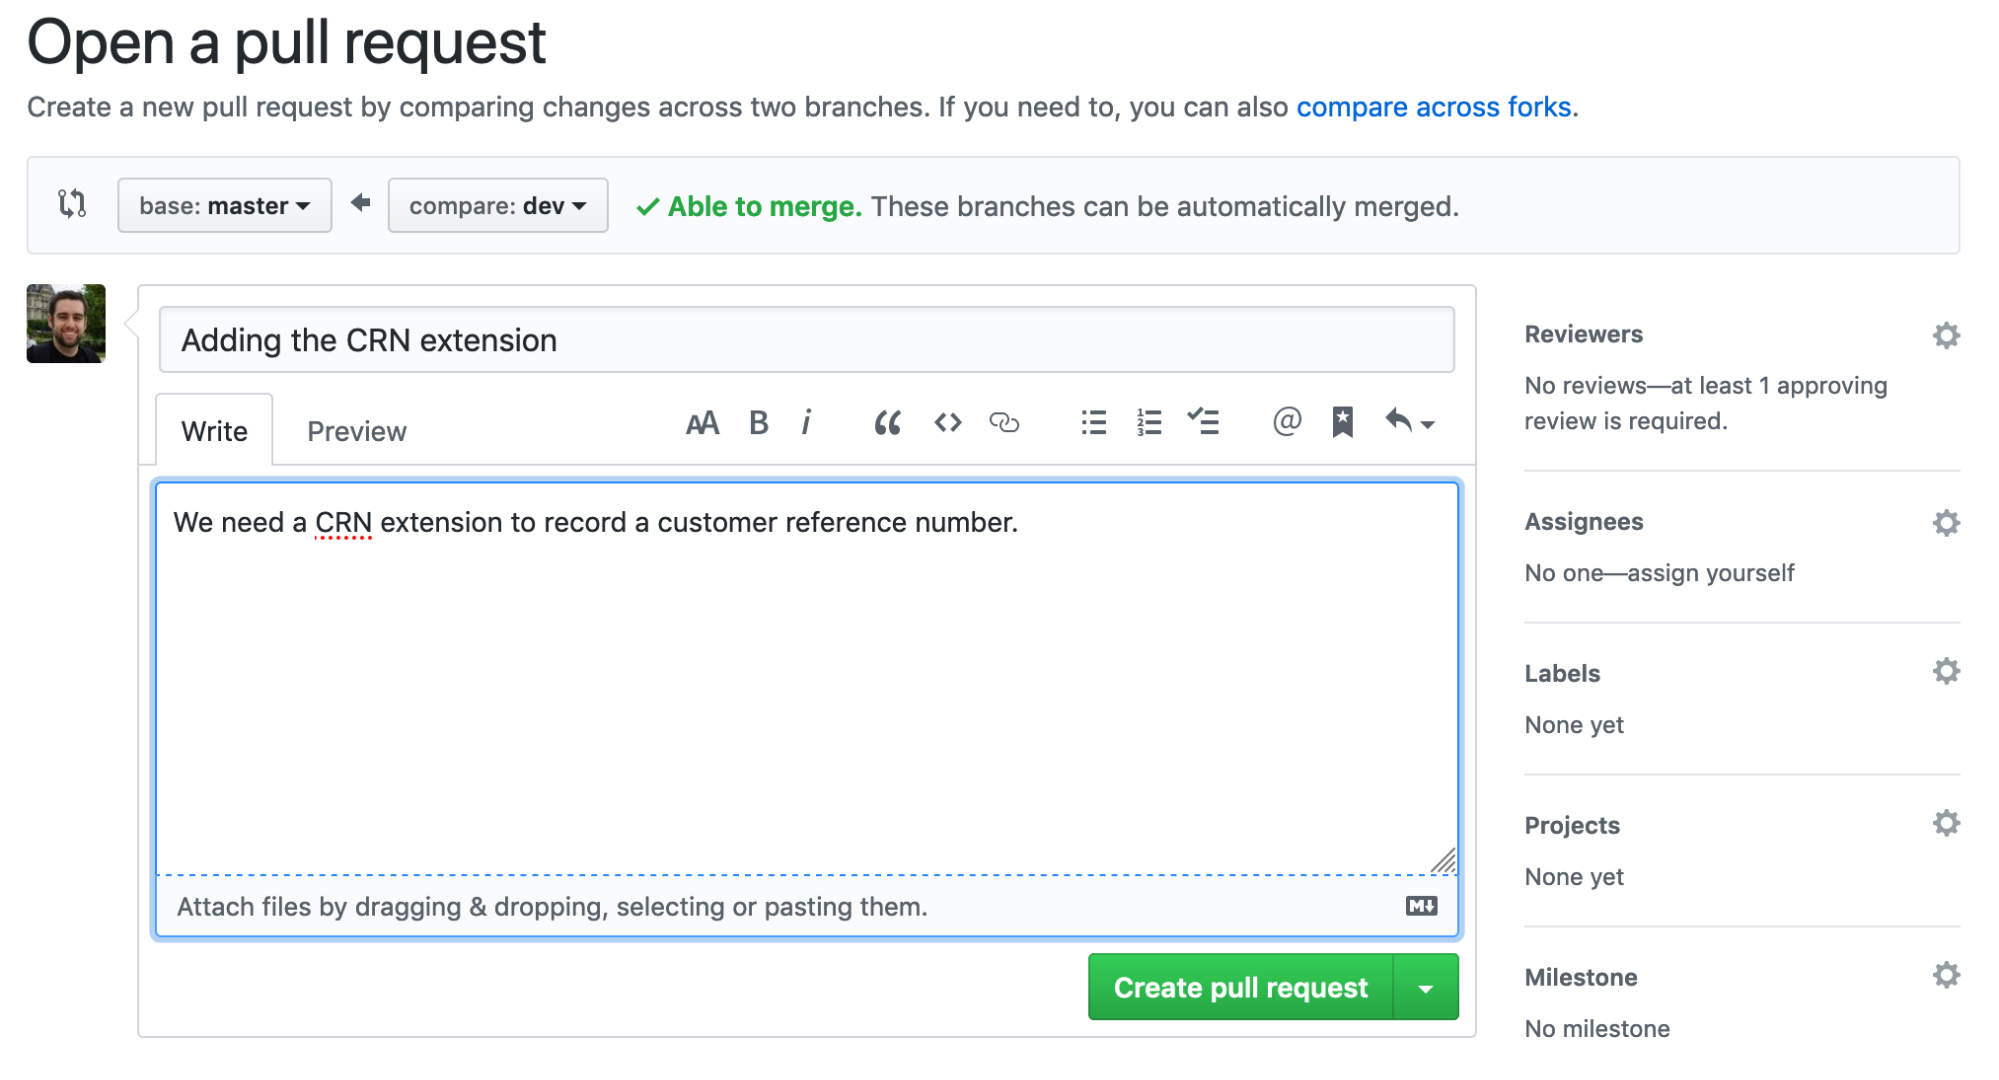
Once you create the pull request, GitHub provides a nice UI experience that shows the branch protection in action.
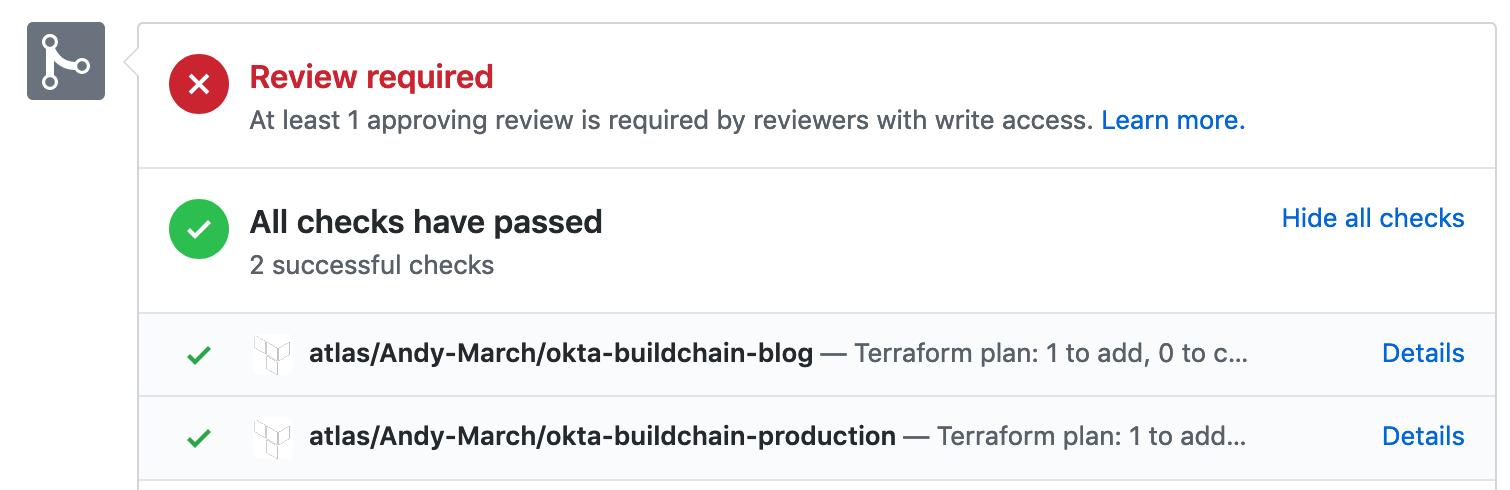
The status checks run plans against your two Okta instances so the reviewer can verify what the change will do. Clicking details on either of these will open Terraform Cloud and show the output of the plan.
In this case, the change proposed to the schema may have an unintended side effect, so the reviewer asked for a modification before applying.
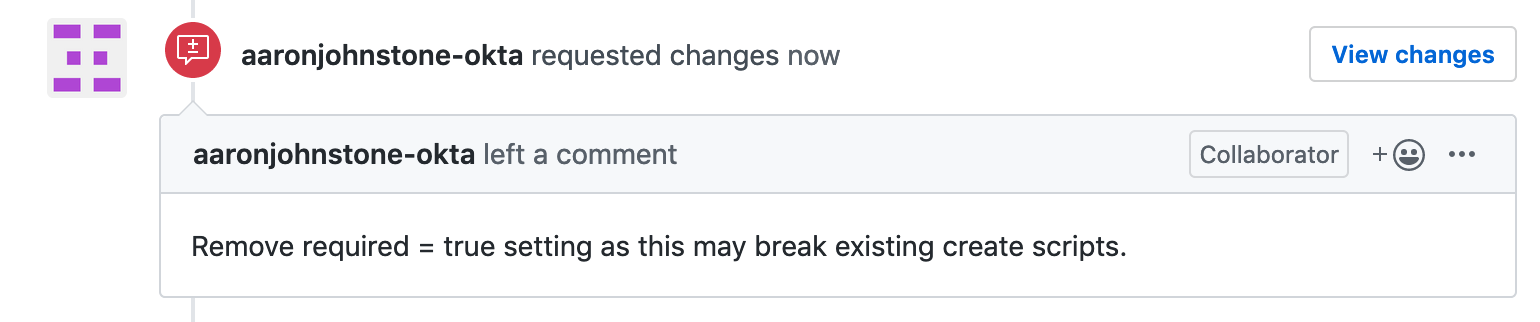
Once you have made corrections and pushed the changes to the dev branch, Terraform will run the plan again to validate the change. Once you are satisfied, the reviewer can approve the pull request and merge the change to main.
NOTE: If you are an administrator of the repository, you can force the merge through without needing someone else to review it.
Now that the pull request is merged to the main branch, the production workspace will automatically rerun the Terraform plan, and you will be given one last chance to confirm the changes.

And that’s all!
Learn more about Terraform and Okta
You now have a simple multi-stage build pipeline that allows you to review and deploy changes to each of your Okta environments simply and reliably. This enables you to manage your identity service just like you would any other infrastructure component.
To continue learning about Terraform, Okta security, and DevOps, check out the links below:
- How to Secure Your Kubernetes Cluster with OpenID Connect and RBAC
- The Things to Keep in Mind about Auth
- A Developer’s Guide to Docker
- Container Security: A Developer Guide
- Kubernetes to the Cloud with Spring Boot and JHipster
If you liked this tutorial, chances are you will like the others we publish. Please follow @oktadev on Twitter and subscribe to our YouTube channel to get notified when we publish new developer tutorials.
Changelog:
- Nov 8, 2021: Updated the post to align with the latest Terraform version, latest Okta Terraform provider, and Okta Admin Console. Changes to this article can be viewed in oktadev/okta-blog#958.
Okta Developer Blog Comment Policy
We welcome relevant and respectful comments. Off-topic comments may be removed.