Use Vue and GraphQL to Build a Secure App

When you develop a new web application, you most likely split the application into two parts. The server-side provides access control and data persistence, while the client-side is mostly presentational. The two parts have to communicate, and your first idea may be to implement a REST API. However, a number of flaws have been identified with the RESTful pattern, mostly related to the flexibility and speed of the request-response pattern.
At Facebook, these problems were recognized, and a new alternative called GraphQL was developed and made public in 2015. GraphQL allows flexible queries but does not suffer from the design and security flaws of earlier approaches, such as OData.
GraphQL replaces the multiple endpoints of a REST server with a single endpoint. The server defines a set of possible operations and data definitions. Each client request can execute one or more requests at a time. This saves time because it avoids multiple round trips over the network. GraphQL can also return a selected subset of the result fields, and thereby reduces the data load between the client and the server. What’s more, GraphQL servers can use WebSockets to communicate, which reduces latency and allows the server to push live data to the client.
In this tutorial, I will show you how to implement a Node-based server using GraphQL and a client using Vue. Vue has been growing in importance over the last few years as a serious contender to Angular and React. I will also show you how to secure both the client and server using Okta’s authentication and authorization service using OAuth and OpenID Connect (OIDC).
Table of Contents
- Develop a GraphQL Server with Node.js and Express
- Authentication with Okta
- Create the GraphQL Client App with Vue
- Learn More About GraphQL and Vue
Note: In May 2025, the Okta Integrator Free Plan replaced Okta Developer Edition Accounts, and the Okta CLI was deprecated.
We preserved this post for reference, but the instructions no longer work exactly as written. Replace the Okta CLI commands by manually configuring Okta following the instructions in our Developer Documentation.
Develop a GraphQL Server with Node.js and Express
In this tutorial, you will build a simple search tool for Olympic sporting events. I will assume you have some familiarity with JavaScript and that Node is installed on your system.
To create the server application, open a terminal and navigate to a directory of your choice to house your application. Create a new directory called olympics-server and navigate into that directory. Now initialize the Node project by running this command:
npm init -y
You will need several packages to help implement the server. In the same terminal, run the following command:
npm i -E express@4.17.1 body-parser@1.19.0 cors@2.8.5 express-bearer-token@2.4.0 \
    graphql@14.4.2 express-graphql@0.9.0 csv-parser@2.3.0 @okta/jwt-verifier@1.0.0
The next step is to obtain the data of Olympic events. You can obtain this data from Kaggle. You will have to register with Kaggle to download the data, but the registration process is simple and gives you access to many datasets for future projects. Once registered, navigate to the link above and click the Download button at the top. Unzip the file, and you will obtain two CSV files, athlete_events.csv and noc_regions.csv. Create a data folder inside your server application directory and copy the files into that folder. If you don’t want to register with Kaggle right now, but want to get on with this tutorial, I have created a small data sample. Just copy the following into a new file called data/athlete_events.csv:
"ID","Name","Sex","Age","Height","Weight","Team","NOC","Games","Year","Season","City","Sport","Event","Medal"
"3055","Glory Alozie Oluchi","F",22,155,51,"Nigeria","NGR","2000 Summer",2000,"Summer","Sydney","Athletics","Athletics Women's 100 metres Hurdles","Silver"
"12946","Ato Jabari Boldon","M",26,176,75,"Trinidad and Tobago","TTO","2000 Summer",2000,"Summer","Sydney","Athletics","Athletics Men's 100 metres","Silver"
"42669","Maurice Greene","M",26,176,80,"United States","USA","2000 Summer",2000,"Summer","Sydney","Athletics","Athletics Men's 100 metres","Gold"
"67335","Tayna Lawrence","F",24,163,61,"Jamaica","JAM","2000 Summer",2000,"Summer","Sydney","Athletics","Athletics Women's 100 metres","Silver"
"82292","Melissa Renee Morrison (-Howard)","F",29,164,56,"United States","USA","2000 Summer",2000,"Summer","Sydney","Athletics","Athletics Women's 100 metres Hurdles","Bronze"
"90007","Merlene Joyce Ottey-Page","F",40,175,62,"Jamaica","JAM","2000 Summer",2000,"Summer","Sydney","Athletics","Athletics Women's 100 metres","Bronze"
"109895","Olga Vasilyevna Shishigina (-Kutsakova)","F",31,165,57,"Kazakhstan","KAZ","2000 Summer",2000,"Summer","Sydney","Athletics","Athletics Women's 100 metres Hurdles","Gold"
"119503","Aikaterini Thanou","F",25,165,56,"Greece","GRE","2000 Summer",2000,"Summer","Sydney","Athletics","Athletics Women's 100 metres","Silver"
"119943","Obadele Olutosin Thompson","M",24,182,78,"Barbados","BAR","2000 Summer",2000,"Summer","Sydney","Athletics","Athletics Men's 100 metres","Bronze"
Then copy the following content into data/noc_regions.csv.
NOC,region,notes
NGR,Nigeria,
TTO,Trinidad,Trinidad and Tobago
USA,USA,
JAM,Jamaica,
KAZ,Kazakhstan,
GRE,Greece,
BAR,Barbados,
For both CSV files, make sure you have a single newline at the end of the content. Additional empty lines will create empty CSV records that will cause errors later on.
Now, open your favorite IDE and create a file index.js in the project root directory. I like using the async/await syntax to implement asynchronous calls with less code. You can achieve this by wrapping the whole application inside an async function. Paste the following into index.js:
const fs = require('fs');
const csv = require('csv-parser');

async function startApplication() {
  const nocRegions = {};
  const athleteEvents = [];

  await new Promise((resolve, reject) => {
    fs.createReadStream('data/noc_regions.csv')
      .pipe(csv())
      .on('data', data => nocRegions[data.NOC] = {
        code: data.NOC,
        region: data.region,
        notes: data.notes || undefined
      })
      .on('end', resolve);
  });

  await new Promise((resolve, reject) => {
    fs.createReadStream('data/athlete_events.csv')
      .pipe(csv())
      .on('data', data => {
        if (data.ID) {
          athleteEvents.push({
            id: data.ID,
            name: data.Name,
            sex: data.Sex,
            age: parseInt(data.Age, 10),
            height: data.Height!=="NA" ? parseInt(data.Height, 10) : undefined,
            weight: data.Weight!=="NA" ? parseInt(data.Weight, 10) : undefined,
            team: data.Team,
            noc: nocRegions[data.NOC],
            games: data.Games,
            year: parseInt(data.Year),
            season: data.Season,
            city: data.City,
            sport: data.Sport,
            event: data.Event,
            medal: data.Medal!=="NA" ? data.Medal : undefined,
          });
        }
      })
      .on('end', resolve);
  });
}

startApplication();
This piece of code reads the two CSV files containing the Olympic events data and stores them in an object with the National Olympic Committee regions (nocRegions) and an array for the events. The csv-parser library parses the file before normalizing the individual fields. I have decided to use a simple array instead of a database for storage to keep things simple.
Set Up An Express.js Server
Next, set up the server application using the Express framework. Add the following imports to the top of the file.
const express = require('express');
const cors = require('cors');
const bodyParser = require('body-parser');
const bearerToken = require('express-bearer-token');
const oktaAuth = require('./auth');
Now, inside the startApplication() function, add the following code.
const app = express()
  .use(cors())
  .use(bodyParser.json())
  .use(bearerToken())
  .use(oktaAuth);
You can see one of the imports refers to a local file auth.js, which will contain the authentication middleware you will implement in the next section.
Now create the GraphQL schema to define the queries available on the endpoint. First, add another require to the top of index.js:
const { buildSchema } = require('graphql');
Then, at the bottom of the startApplication() function, add the following definition.
const schema = buildSchema(`
  type Query {
    events(offset:Int = 0, limit:Int = 10, name:String = "", sport: String = "", event: String = "", medal:String = "", year:Int = -1): [AthleteEvent]
  }

  type AthleteEvent {
    id: ID
    name: String
    sex: String
    age: Int
    height: Int
    weight: Int
    team: String
    noc: NationalCommittee
    games: String
    year: Int
    season: String
    city: String
    sport: String
    event: String
    medal: String
  }

  type NationalCommittee {
    code: String
    region: String
    notes: String
  }
`);
The schema definition is passed to buildSchema() as a string. Query defines the available queries, which here includes only the events query and its several optional parameters. events returns an array of AthleteEvent objects. The type definition for AthleteEvent defines some fields and their types, which can be nested. For example, AthleteEvent contains a field noc with a type NationalCommittee. This type is defined further down in the schema.
Now you have defined the schema and the events query, it is time to create an object to handle the queries. Paste the following code below the schema definition.
function searchFilter(args) {
  return (event) => {
    if (args.name && !event.name.toLowerCase().includes(args.name.toLowerCase())) return false;
    if (args.sport && !event.sport.toLowerCase().includes(args.sport.toLowerCase())) return false;
    if (args.event && !event.event.toLowerCase().includes(args.event.toLowerCase())) return false;
    if (args.medal && args.medal !== event.medal) return false;
    if (args.year > 0 && args.year !== event.year) return false;
    return true;
  }
}

const root = {
  events: (args) => {
    return athleteEvents.filter(searchFilter(args))
                        .slice(args.offset, args.offset+args.limit);
  },
};
The main player here is the root object. For each query, root contains a function to take the query arguments inside a data object. The simple helper function searchFilter() creates a filter function from the arguments. Now you are ready to add the GraphQL middleware and start the application. Add another import to the top of the file:
const graphqlHTTP = require('express-graphql');
Then, at the bottom inside startApplication(), paste the following.
app.use('/graphql', graphqlHTTP({
  schema,
  rootValue: root,
  graphiql: true,
}));

app.listen(8081, (err) => {
  if (err) {
    return console.log(err);
  }
  return console.log('Olympic Results server listening on port 8081');
});
The graphiql option creates a separate route to present the developer with a convenient visual interface for manually querying the server endpoint. This is useful for development, but should probably be disabled during production. Before you can test the server, you will need to implement the authentication middleware.
Authentication with Okta
Almost every web application will need some sort of user management and authentication, but implementation and security can be tricky. Fortunately, Okta provides a simple and easy way to add authentication to your application with just a few lines of code.
Before you begin, you’ll need a free Okta developer account. Install the Okta CLI and run okta register to sign up for a new account. If you already have an account, run okta login.
Then, run okta apps create. Select the default app name, or change it as you see fit.
Choose Single-Page App and press Enter.
Use http://localhost:8080/callback for the Redirect URI and set the Logout Redirect URI to http://localhost:8080.
What does the Okta CLI do?
The Okta CLI will create an OIDC Single-Page App in your Okta Org. It will add the redirect URIs you specified and grant access to the Everyone group. It will also add a trusted origin for http://localhost:8080. You will see output like the following when it’s finished:
Okta application configuration:
Issuer:    https://dev-133337.okta.com/oauth2/default
Client ID: 0oab8eb55Kb9jdMIr5d6
NOTE: You can also use the Okta Admin Console to create your app. See Create a Vue App for more information.
In the base directory of the server project, create a file auth.js with the following content:
const OktaJwtVerifier = require('@okta/jwt-verifier');

const oktaJwtVerifier = new OktaJwtVerifier({
  clientId: '{yourClientId}',
  issuer: 'https://{yourOktaDomain}/oauth2/default'
});

module.exports = async function oktaAuth(req, res, next) {
  try {
    const token = req.token;
    if (!token) {
      return res.status(401).send('Not Authorized');
    }
    await oktaJwtVerifier.verifyAccessToken(token, 'api://default');
    next();
  }
  catch (err) {
    return res.status(401).send(err.message);
  }
};
In the code above, replace {yourClientId} with the client ID from your application settings created with the Okta CLI. {yourOktaDomain} should be your Okta domain.
The module in auth.js defines the oktaAuth middleware that queries the authorization bearer token from the HTTP header and verifies it. If the token is valid, the next() function is called to continue processing the request. When the authentication fails, a 401 code is returned to the client.
You can now start the server. In the terminal run the following command.
node index.js
Create the GraphQL Client App with Vue
It’s time to create the client. The first step is to install the Vue command-line tool. Open the terminal and run the following command.
npm install -g @vue/cli@3.11.0
Now navigate to a directory of your choice and create a new Vue project.
vue create olympics-client
This will start the wizard to create a new Vue application. Make sure you choose Manually Select Features and then select the Babel and the Router options. You might also want to deselect the Linter / Formatter option for this tutorial. Your options should look something like the following.
? Check the features needed for your project:
 ◉ Babel
 ◯ TypeScript
 ◯ Progressive Web App (PWA) Support
❯◉ Router
 ◯ Vuex
 ◯ CSS Pre-processors
 ◯ Linter / Formatter
 ◯ Unit Testing
 ◯ E2E Testing
After you press return, you can accept the default options for all the following questions. You will also need a client-side GraphQL package. The most popular choice for this is probably the Apollo library. This can be installed using the vue command-line tool. Navigate into the newly created folder olympics-client and run the following command.
vue add apollo
This will present you with a few configuration options before installing the library. Accept the default option for each of the questions. Now install some packages by running the following command:
npm install -E bootstrap-vue@2.0.4 bootstrap@4.3.1 @okta/okta-vue@1.1.1 apollo-link-http@1.5.15
The Bootstrap libraries control the layout of the application, and the okta-vue library handles the client-side of the authentication process. Next, open src/main.js and replace its contents with the following code:
import Vue from 'vue';
import App from './App.vue';
import router from './router';
import BootstrapVue from 'bootstrap-vue';
import 'bootstrap/dist/css/bootstrap.css';
import 'bootstrap-vue/dist/bootstrap-vue.css';
import Auth from '@okta/okta-vue';
import { createProvider } from './vue-apollo';
import { setContext } from "apollo-link-context";
import { createHttpLink } from "apollo-link-http";

Vue.use(BootstrapVue);

Vue.use(Auth, {
  issuer: 'https://{yourOktaDomain}/oauth2/default',
  client_id: '{yourClientId}',
  redirect_uri: 'http://localhost:8080/callback',
  pkce: true
});

const authMiddleware = setContext(() =>
  Vue.prototype.$auth.getAccessToken().then((token) => {
    return {
      headers: {
        Authorization: `Bearer ${token}`
      }
    };
  })
);

new Vue({
  router,
  apolloProvider: createProvider({
    httpEndpoint: 'http://localhost:8081/graphql',
    link: authMiddleware,
    wsEndpoint: undefined
  }),
  render: h => h(App)
}).$mount('#app');
After the imports, the next step is to include the Bootstrap libraries. Then, Auth from okta-vue provides the authentication flow. Just like above, {yourOktaDomain} is your Okta domain, and {yourClientId} should be replaced with the client ID from Okta’s application settings.
The pkce: true setting will cause the Okta Vue SDK to use authorization code flow with PKCE. It’s recommended to use this flow over implicit when you have the opportunity. See Is the OAuth 2.0 Implicit Flow Dead? for more information.
For the authentication work with Apollo, you need to create authentication middleware for the Apollo client. The authMiddleware link retrieves the access token and attaches it to the Authorization header. Now, the global Vue object can include an apolloProvider with the authentication middleware linked with the endpoint of the server.
Next, open public/index.html and paste the following two lines in the <head> tag.
<link rel="stylesheet" href="https://fonts.googleapis.com/icon?family=Ubuntu">
<link rel="stylesheet" href="https://maxcdn.icons8.com/fonts/line-awesome/1.1/css/line-awesome-font-awesome.min.css">
The first line includes the Ubuntu font from Google Fonts. The second includes the Line Awesome icon set. Now, open src/App.vue and replace the contents with the code below:
<template>
  <div id="app">
    <nav class="navbar navbar-expand navbar-light bg-light">
      <router-link class="navbar-brand" to="/">
        <i class="fa fa-trophy"></i>
      </router-link>
      <ul class="navbar-nav mr-auto">
        <li class="nav-item">
          <router-link class="navbar-brand" to="/">
            Home
          </router-link>
        </li>
        <li class="nav-item">
          <router-link class="nav-link" to="/olympics">
            Olympics
          </router-link>
        </li>
      </ul>
      <span>
        <button class="btn btn-primary" v-if="!isAuthenticated" v-on:click="login"> Login </button>
        <button class="btn btn-primary" v-else v-on:click="logout"> Logout </button>
      </span>
    </nav>
    <router-view/>
  </div>
</template>

<script>
export default {
  data: () => ({
    authenticated: () => { return false; },
  }),
  computed: {
    isAuthenticated: function () {
      return this.$data.authenticated
    }
  },
  created () {
    this.$data.authenticated = this.$auth.isAuthenticated()
  },
  watch: {
    '$route': 'authenticated'
  },
  methods: {
    login () {
      this.$auth.loginRedirect('/')
    },
    async logout () {
      await this.$auth.logout()
      this.$data.authenticated = await this.$auth.isAuthenticated()

      this.$router.push({ path: '/' })
    }
  }
}
</script>

<style>
#app {
  font-family: 'Ubuntu', sans-serif;
}
</style>
Each .vue file has three parts. The <template> contains the HTML template of the view or component. Here, you have created a Bootstrap navigation bar with links and buttons to log in or out. The <script> section contains the component logic. In this case, most of the code handles authentication. Finally, the <style> section contains the CSS styles for the component.
When the Vue application was created, the wizard initialized several default views and components. In this application, you will not use any components outside the src/views folder, so you can delete src/components/HelloWorld.vue. Now, open src/views/Home.vue and replace the contents with the following code:
<template>
  <div class="container">
    <div class="row">
      <div class="col-sm">
        <h1>{{name}}</h1>
        <h2>{{subtitle}}</h2>
      </div>
    </div>
  </div>
</template>

<script>
export default {
  data: () => ({
    name: 'Home',
    title: 'Olympic Events',
    subtitle: 'Using Vue, Node, and GraphQL'
  }),
}
</script>

<style scoped>
.container {
  padding-top: 50px;
}

h1, h2 {
  text-align: center;
}
</style>
This view provides a static splash screen for the application. The main code is contained in the Olympics component. Rename the existing src/views/About.vue to src/views/Olympics.vue and delete all existing content. Paste the following template into the file:
<template>
  <div class="container">
    <h2>Events</h2>
    <p><label>Name:
      <input v-model="nameInput" />
    </label></p>
    <p><label>Sport:
      <input v-model="sportInput" />
    </label></p>
    <p><label>Event:
      <input v-model="eventInput" />
    </label></p>
    <p><label>Year:
      <input type="number" v-model="yearInput" />
    </label></p>
    <p><label>Medal:
      <input v-model="medalInput" >
    </label></p>
    <table class="table">
      <thead>
        <tr>
          <th scope="col">Sport</th>
          <th scope="col">Event</th>
          <th scope="col">Name</th>
          <th scope="col">Year</th>
          <th scope="col">Medal</th>
        </tr>
      </thead>
      <tbody>
        <tr v-for="event in events" v-bind:key="event.id">
          <td>{{event.sport}}</td>
          <td>{{event.event}}</td>
          <td>{{event.name}}</td>
          <td>{{event.year}}</td>
          <td>{{event.medal}}</td>
        </tr>
      </tbody>
    </table>
    <div class="row prev-next">
      <div class="col-sm-12 col-md-6 col-lg-3" v-if="$route.params.offset && parseInt($route.params.offset)>=10">
        <router-link :to="'/olympics/' + (parseInt($route.params.offset || 0) - 10)" class="btn btn-primary">Prev</router-link>
      </div>
      <div class="col-sm-12 col-md-6 col-lg-3">
        <router-link :to="'/olympics/' + (parseInt($route.params.offset || 0) + 10)" class="btn btn-primary">Next</router-link>
      </div>
    </div>
  </div>
</template>
The first part of the template contains form fields for defining query filters. The second part shows a table of Olympic events obtained from the server. Now add the component implementation to the bottom of src/views/Olympics.vue, as shown below.
<script>
import gql from 'graphql-tag';

export default {
  data: () => ({
    name: 'Olympics',
    nameInput: '',
    sportInput: '',
    eventInput: '',
    medalInput: '',
    yearInput: '',
    events: []
  }),
  apollo: {
    events: {
      query: gql`query Events($offset:Int, $limit: Int, $name: String, $sport: String, $event: String, $medal: String, $year: Int) {
        events(offset: $offset, limit: $limit, name: $name, sport: $sport, event: $event, medal: $medal, year: $year) {
          id, name, sport, event, year, medal
        }
      }`,
      variables() {
        return {
          offset: parseInt(this.$route.params.offset) || 0,
          limit: 10,
          name: this.nameInput,
          sport: this.sportInput,
          event: this.eventInput,
          medal: this.medalInput,
          year: this.yearInput ? parseInt(this.yearInput) : -1
        }
      },
    }
  }
}
</script>
The component contains an apollo property that defines the GraphQL query. The main query is defined by the gql string tag. The variables() callback defines the variables that enter the query, taking them from the form fields. This has the effect that the GraphQL query is run every time a form field changes. The search results are updated automatically when the server responds.
Finally, add the following style into the Olympics view.
<style scoped>
.prev-next {
  margin-bottom: 50px;
}
</style>
Now the views are defined, they need to be registered with the router. Open src/router.js and replace the content with the following code:
import Vue from 'vue'
import Router, { NavigationGuard } from 'vue-router'
import Home from './views/Home.vue'
import Olympics from './views/Olympics.vue'
import Auth from '@okta/okta-vue'

const authGuard = async function(to, from, next) {
  const authenticated = await router.app.$auth.isAuthenticated();
  if (authenticated) {
    next();
  } else {
    router.app.$auth.loginRedirect(to.path);
    next(false);
  }
}

Vue.use(Router)

const router = new Router({
  mode: 'history',
  base: process.env.BASE_URL,
  routes: [
    {
      path: '/',
      name: 'home',
      component: Home
    },
    {
      path: '/olympics/:offset?',
      name: 'olympics',
      component: Olympics,
      beforeEnter: authGuard
    },
    {
      path: '/callback',
      component: Auth.handleCallback()
    }
  ]
});

export default router;
The authGuard constant defines a navigation guard that redirects an unauthenticated user to the Okta login page. In the router definition, the navigation guard protects the /olympics route from access by unauthorized users.
This completes the implementation of the client. You can start the client by opening the terminal and running the following command.
npm run serve
Navigate to http://localhost:8080 and you should be able to log in and view Olympic events. The screenshot below shows event results when using all the Olympic events from Kaggle.
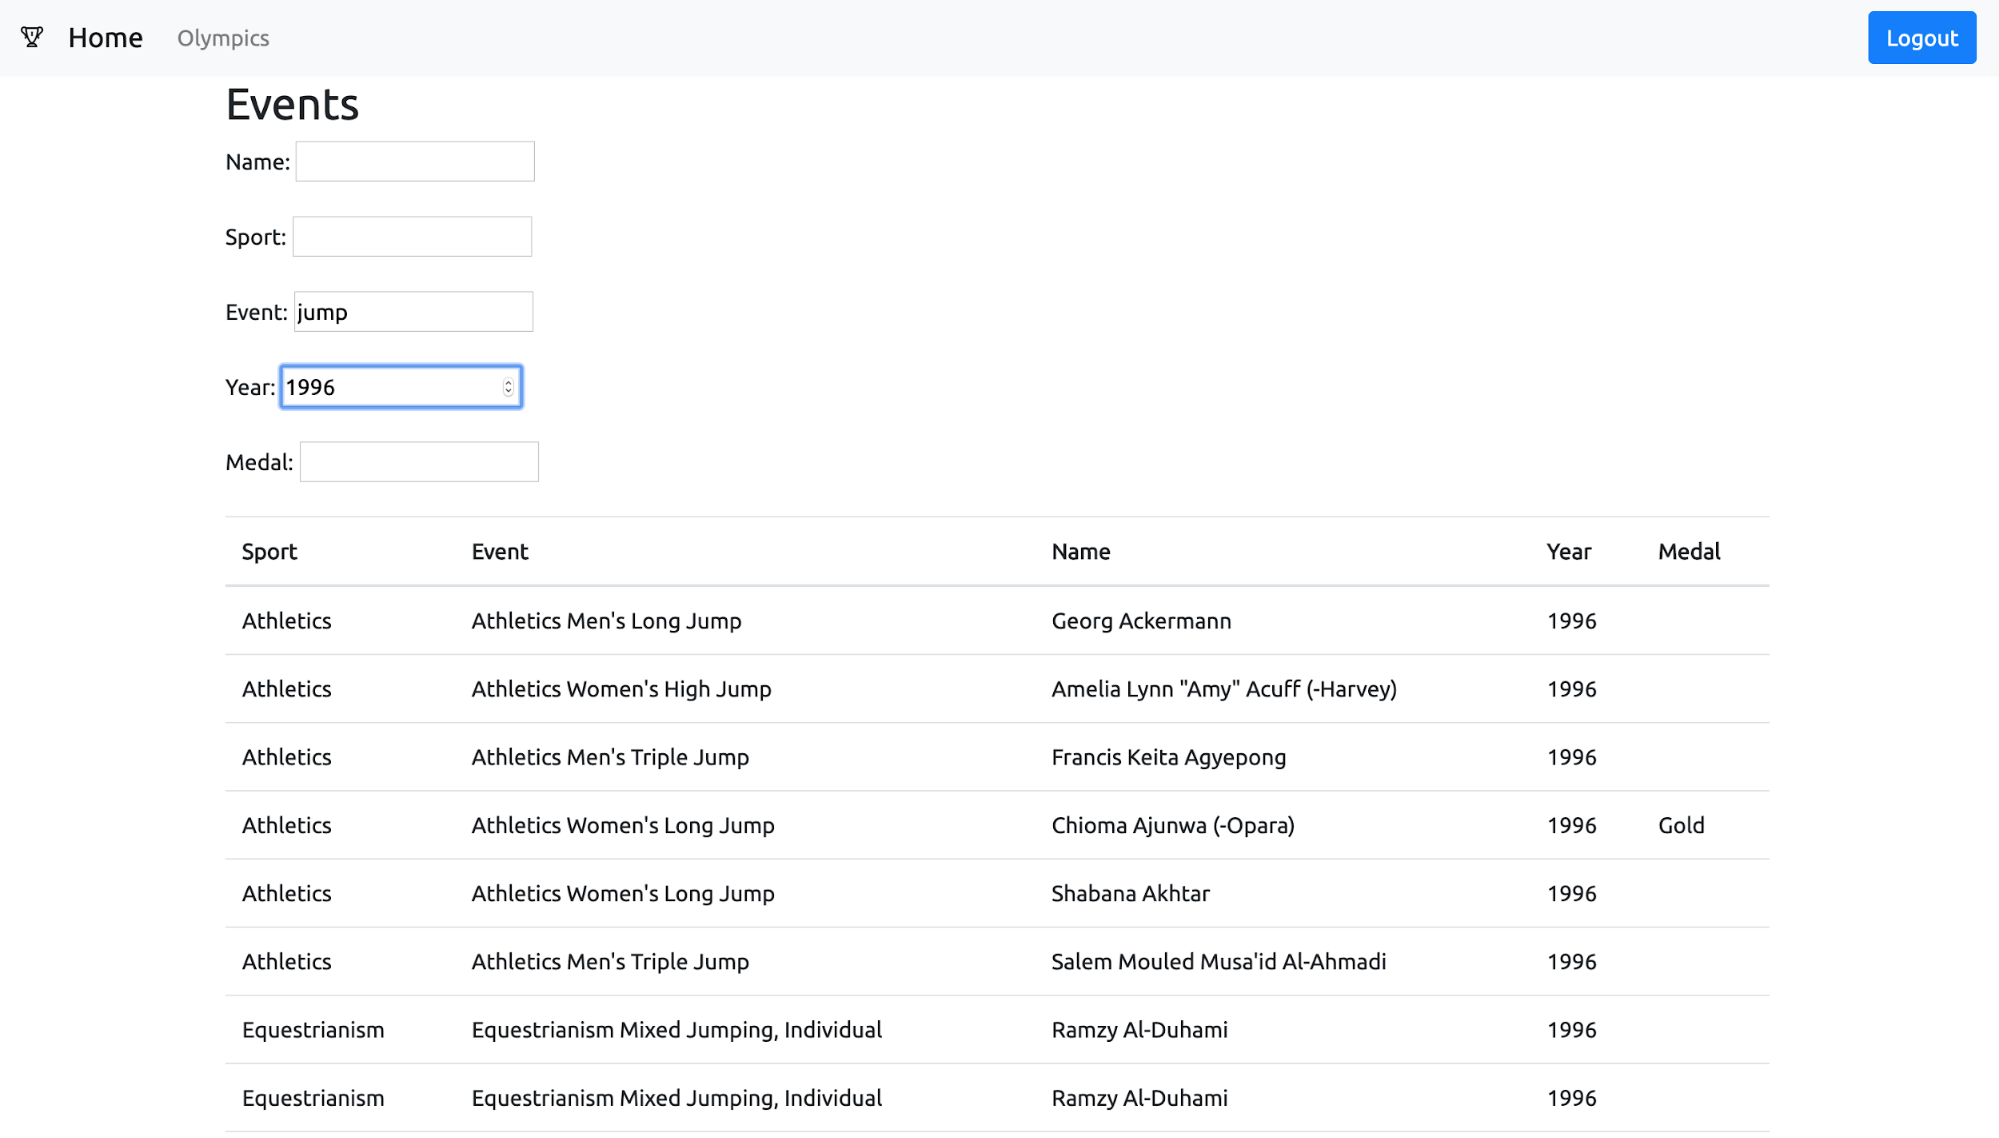
Congratulations! You have just created a full web application with Vue and GraphQL.
Learn More About GraphQL and Vue
In this tutorial, you developed a web application that uses GraphQL to communicate between the client and the server. GraphQL sends all requests through a single endpoint and bundles multiple queries into a single request. This makes GraphQL a flexible and fast replacement for traditional REST APIs. Finally, you integrated GraphQL into a client based on Vue. Okta was used to authenticate the user, both in the client as well as the server application.
You can find all the source code created in this tutorial on GitHub in the oktadeveloper/okta-graphql-vue-olympics-example repository.
If you want to find out more about GraphQL, I recommend Sebastian Eschweiler’s great post about REST vs GraphQL.
To find out more about building GraphQL, Vue, and Node applications using Okta, I recommend the following articles.
- Build a CRUD App with Node.js and GraphQL
- Build a Simple Web App with Express, Angular, and GraphQL
- Build Your First PWA with Vue and TypeScript
- Modern Token Authentication in Node with Express
If you’d like to be notified when we publish new posts like this one, please follow @oktadev on Twitter. We also regularly publish videos to our YouTube channel.
Okta Developer Blog Comment Policy
We welcome relevant and respectful comments. Off-topic comments may be removed.