Build Mobile Apps with Angular, Ionic 4, and Spring Boot
I’m a big fan of Ionic. I started using it several years ago when it was based on AngularJS. As a developer, I really liked it because I knew Angular. I found didn’t have to learn much more to be a productive developer with Ionic.
What is Ionic? I’m glad you asked! Ionic is an open source project that allows you to build mobile apps using web tech.
Technically, this is called a "hybrid" app because it’s not using native SDKs. Hybrid mobile apps are distributed just like native apps: they can be installed on mobile devices, and they’re listed in app stores. As an end user, there’s a good chance you can’t tell the difference between a hybrid mobile app and a native mobile app.
Not only that, but Ionic supports PWAs! This means you can deploy the same app to the web that you package up and ship to an app store. Maximum discoverability FTW!
If you know me, you’ll know I’m a big fan of Java, Spring Boot, and JHipster as well. If you don’t know what JHipster is, I’m sorry. That’s my fault. I’ve been doing my best to spread the word, but you somehow missed it. It’s the best thing ever! If you know me from AppFuse, or you’re familiar with Ruby on Rails, it’s that times 10. JHipster is an application generator, and platform, for building Java apps with JavaScript frontends.
Note: In May 2025, the Okta Integrator Free Plan replaced Okta Developer Edition Accounts, and the Okta CLI was deprecated.
We preserved this post for reference, but the instructions no longer work exactly as written. Replace the Okta CLI commands by manually configuring Okta following the instructions in our Developer Documentation.
Spring Boot is the only backend framework currently supported, with .NET and Node.js implementations currently in development. On the frontend, Angular, React, Vue, React Native, and Ionic are all supported.
In this brief tutorial, I’ll show you to use Ionic for JHipster v4 with Spring Boot and JHipster 6.
Prerequisites: To complete this tutorial, you’ll need to have Java 8+, Node.js 10+, and Docker installed. You’ll also need to create an Okta developer account.
Create a Spring Boot + Angular App with JHipster
You can install JHipster via Homebrew (brew install jhipster) or with npm.
npm i -g generator-jhipster@6.4.1Once you have JHipster installed, you have two choices. There’s the quick way to generate an app (which I recommend), and there’s the tedious way of picking all your options. I don’t care which one you use, but you must select OAuth 2.0 / OIDC authentication to complete this tutorial successfully.
Here’s the easy way:
mkdir app && cd app

echo "application { config { baseName oauth2, authenticationType oauth2, \
  buildTool gradle, testFrameworks [protractor] }}" >> app.jh

jhipster import-jdl app.jh
The hard way is you run jhipster and answer a number of questions. There are so many choices when you run this option that you might question your sanity. At last count, I remember reading that JHipster allows 26K+ combinations!
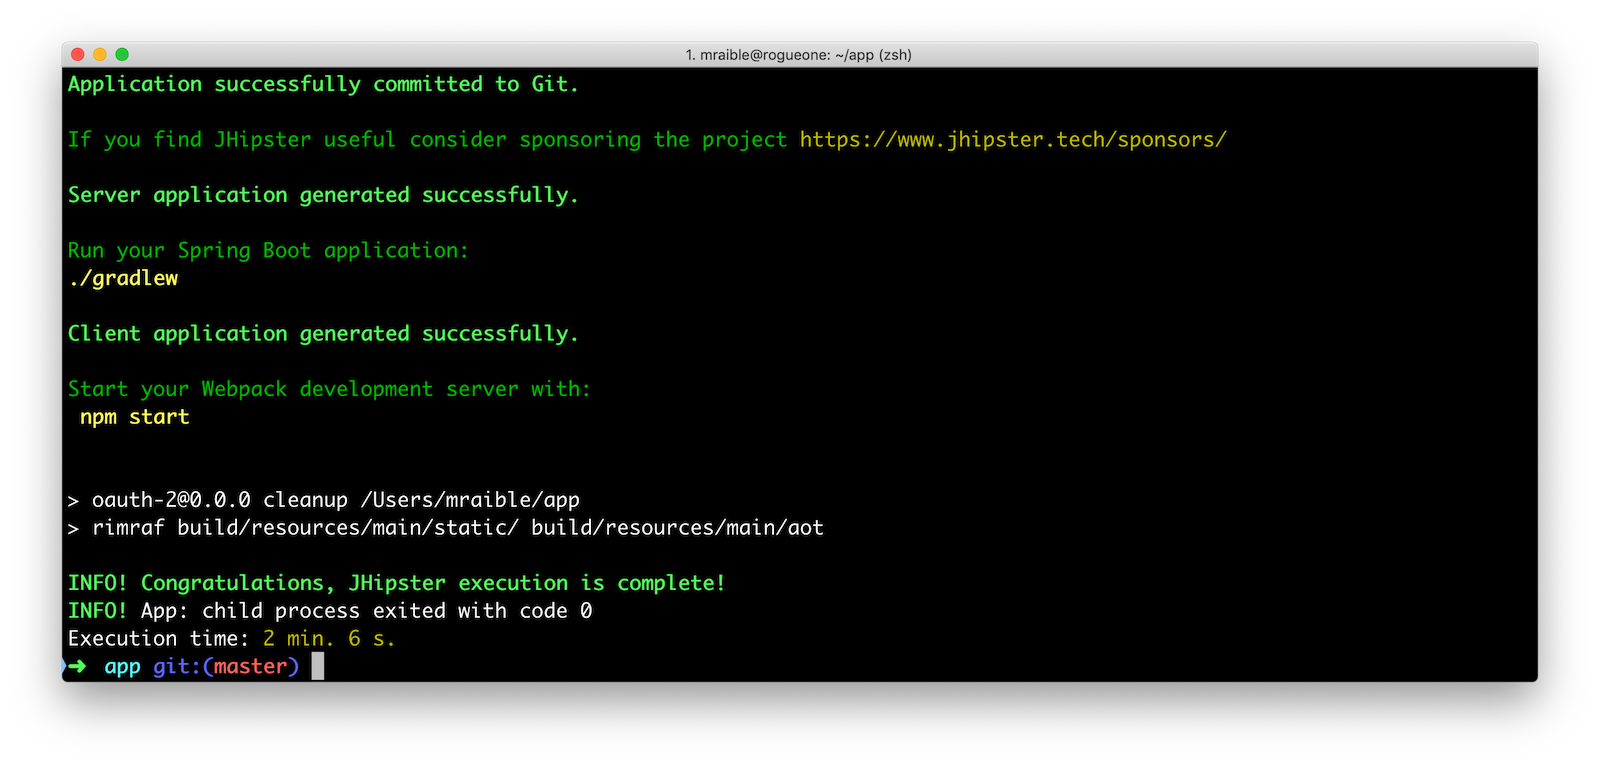
The project generation process will take a couple of minutes to complete if you’re on fast internet and have a bad-ass laptop. When it’s finished, you should see output like the following.
OIDC with Keycloak and Spring Security
JHipster has several authentication options: JWT, OAuth 2.0 / OIDC, and UAA. With JWT (the default), you store the access token on the client (in local storage). This works but isn’t the most secure. UAA involves using your own OAuth 2.0 authorization server (powered by Spring Security), and OAuth 2.0 / OIDC allows you to use Keycloak or Okta.
Spring Security makes Keycloak and Okta integration so incredibly easy it’s silly. Keycloak and Okta are called "identity providers" and if you have a similar solution that is OIDC-compliant, I’m confident it’ll work with Spring Security and JHipster.
Having Keycloak set by default is nice because you can use it without having an internet connection.
To log into the JHipster app you just created, you’ll need to have Keycloak up and running. When you create a JHipster project with OIDC for authentication, it creates a Docker container definition that has the default users and roles. Start Keycloak using the following command.
docker-compose -f src/main/docker/keycloak.yml up -dStart your application with ./gradlew (or ./mvnw if you chose Maven) and you should be able to log in using "admin/admin" for your credentials.
Open another terminal and prove all the end-to-end tests pass:
npm run e2eIf your environment is setup correctly, you’ll see output like the following:
> oauth-2@0.0.0 e2e /Users/mraible/app
> protractor src/test/javascript/protractor.conf.js

[16:02:18] W/configParser - pattern ./e2e/entities/**/*.spec.ts did not match any files.
[16:02:18] I/launcher - Running 1 instances of WebDriver
[16:02:18] I/direct - Using ChromeDriver directly...


  account
    ✓ should fail to login with bad password
    ✓ should login successfully with admin account (1754ms)

  administration
    ✓ should load metrics
    ✓ should load health
    ✓ should load configuration
    ✓ should load audits
    ✓ should load logs


  7 passing (15s)

[16:02:36] I/launcher - 0 instance(s) of WebDriver still running
[16:02:36] I/launcher - chrome #01 passed
Execution time: 19 s.
OIDC with Okta and Spring Security
To switch to Okta, you’ll first need to create an OIDC app. If you don’t have an Okta Developer account, now is the time!
Why Okta instead of Keycloak?
Keycloak works great in development, and Okta has free multi-factor authentication, email support, and excellent performance for production. A developer account gets you 15000 monthly active users for free! You can see other free features and our transparent pricing at developer.okta.com/pricing.
Install the Okta CLI and run okta login.
Then, run okta apps create jhipster. Select the default app name, or change it as you see fit.
Accept the default Redirect URI values provided for you.
What does the Okta CLI do?
The Okta CLI streamlines configuring a JHipster app and does several things for you:
- Creates an OIDC app with the correct redirect URIs:
- login:
http://localhost:8080/login/oauth2/code/oidcandhttp://localhost:8761/login/oauth2/code/oidc - logout:
http://localhost:8080andhttp://localhost:8761
- login:
- Creates
ROLE_ADMINandROLE_USERgroups that JHipster expects - Adds your current user to the
ROLE_ADMINandROLE_USERgroups - Creates a
groupsclaim in your default authorization server and adds the user’s groups to it
NOTE: The http://localhost:8761* redirect URIs are for the JHipster Registry, which is often used when creating microservices with JHipster. The Okta CLI adds these by default.
You will see output like the following when it’s finished:
Okta application configuration has been written to: /path/to/app/.okta.env
Run cat .okta.env (or type .okta.env on Windows) to see the issuer and credentials for your app. It will look like this (except the placeholder values will be populated):
export SPRING_SECURITY_OAUTH2_CLIENT_PROVIDER_OIDC_ISSUER_URI="https://{yourOktaDomain}/oauth2/default"
export SPRING_SECURITY_OAUTH2_CLIENT_REGISTRATION_OIDC_CLIENT_ID="{clientId}"
export SPRING_SECURITY_OAUTH2_CLIENT_REGISTRATION_OIDC_CLIENT_SECRET="{clientSecret}"
NOTE: You can also use the Okta Admin Console to create your app. See Create a JHipster App on Okta for more information.
Start your JHipster app using a command like the following:
source .okta.env
./gradlew
Create a Native App for Ionic
You’ll also need to create a Native app for Ionic. The reason for this is because Ionic for JHipster is configured to use PKCE (Proof Key for Code Exchange). The current Spring Security OIDC support in JHipster still requires a client secret. PKCE does not.
Run okta apps create. Select the default app name, or change it as you see fit.
Choose Native and press Enter.
Use dev.localhost.ionic:/callback,http://localhost:8100/callback for the Redirect URI and set the Logout Redirect URI to dev.localhost.ionic:/logout,http://localhost:8100/logout
.
What does the Okta CLI do?
The Okta CLI will create an OIDC Native App in your Okta Org. It will add the redirect URIs you specified and grant access to the Everyone group. You will see output like the following when it’s finished:
Okta application configuration:
Issuer:    https://dev-133337.okta.com/oauth2/default
Client ID: 0oab8eb55Kb9jdMIr5d6
NOTE: You can also use the Okta Admin Console to create your app. See Create a Native App for more information.
You’ll also need to add a trusted origin for http://localhost:8100. Run okta login, open the URL in a browser, sign in to the Okta Admin Console, and navigate to Security > API > Trusted Origins > Add Origin. Use the following values:
-
Name:
http://localhost:8100 -
Origin URL:
http://localhost:8100 -
Type: Check both CORS and Redirect
Click Save.
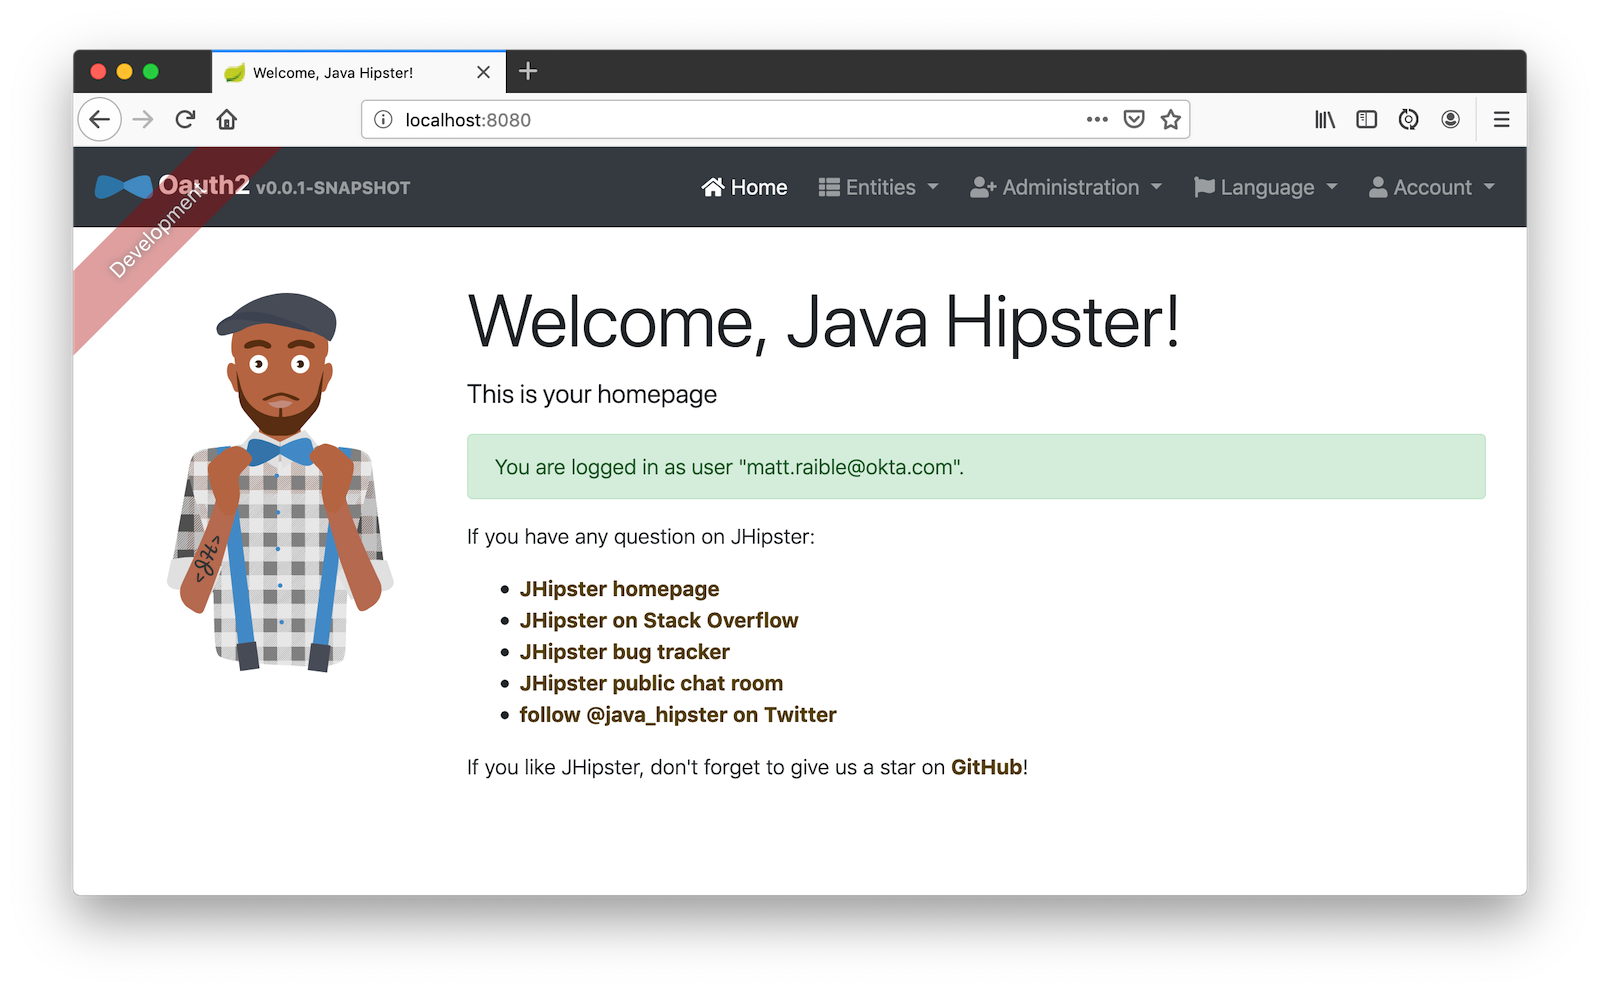
Navigate to http://localhost:8080, click sign in and you’ll be redirected to Okta to log in.
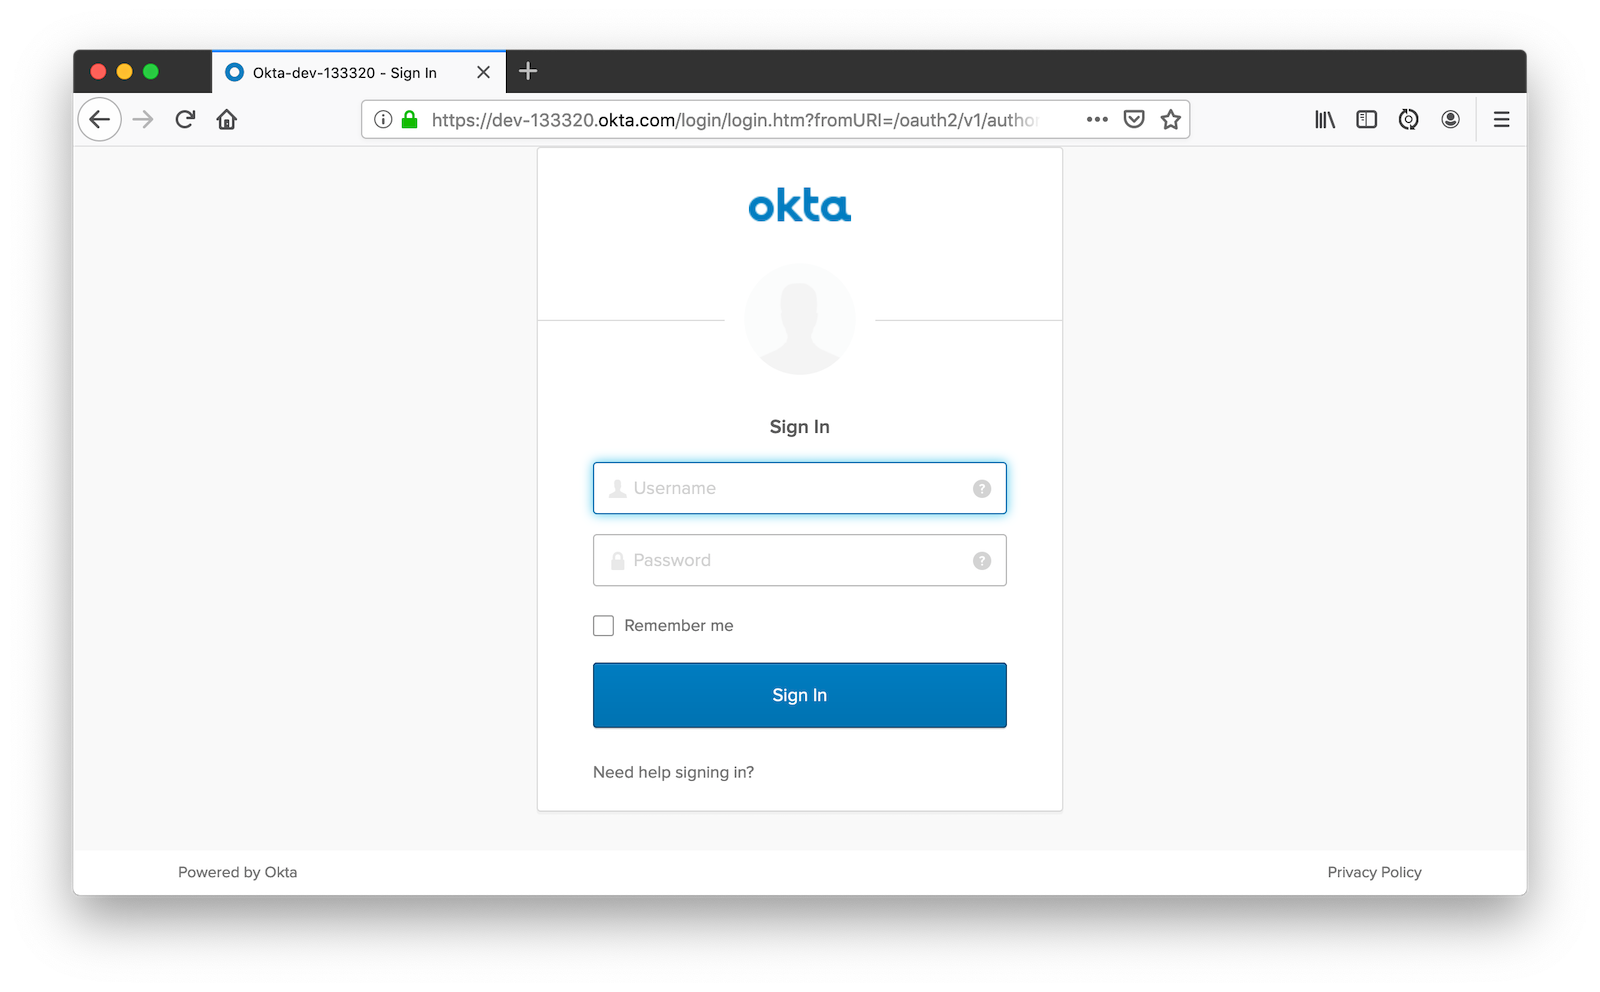
Enter the credentials you used to signup for your account, and you should be redirected back to your JHipster app.
Generate Entities for a Photo Gallery
Let’s enhance this example a bit and create a photo gallery that you can upload pictures to. Kinda like Flickr, but waaayyyy more primitive.
JHipster has a JDL (JHipster Domain Language) feature that allows you to model the data in your app, and generate entities from it. You can use its JDL Studio feature to do this online and save it locally once you’ve finished.
I created a data model for this app that has an Album, Photo, and Tag entities and set up relationships between them. Below is a screenshot of what it looks like in JDL Studio.
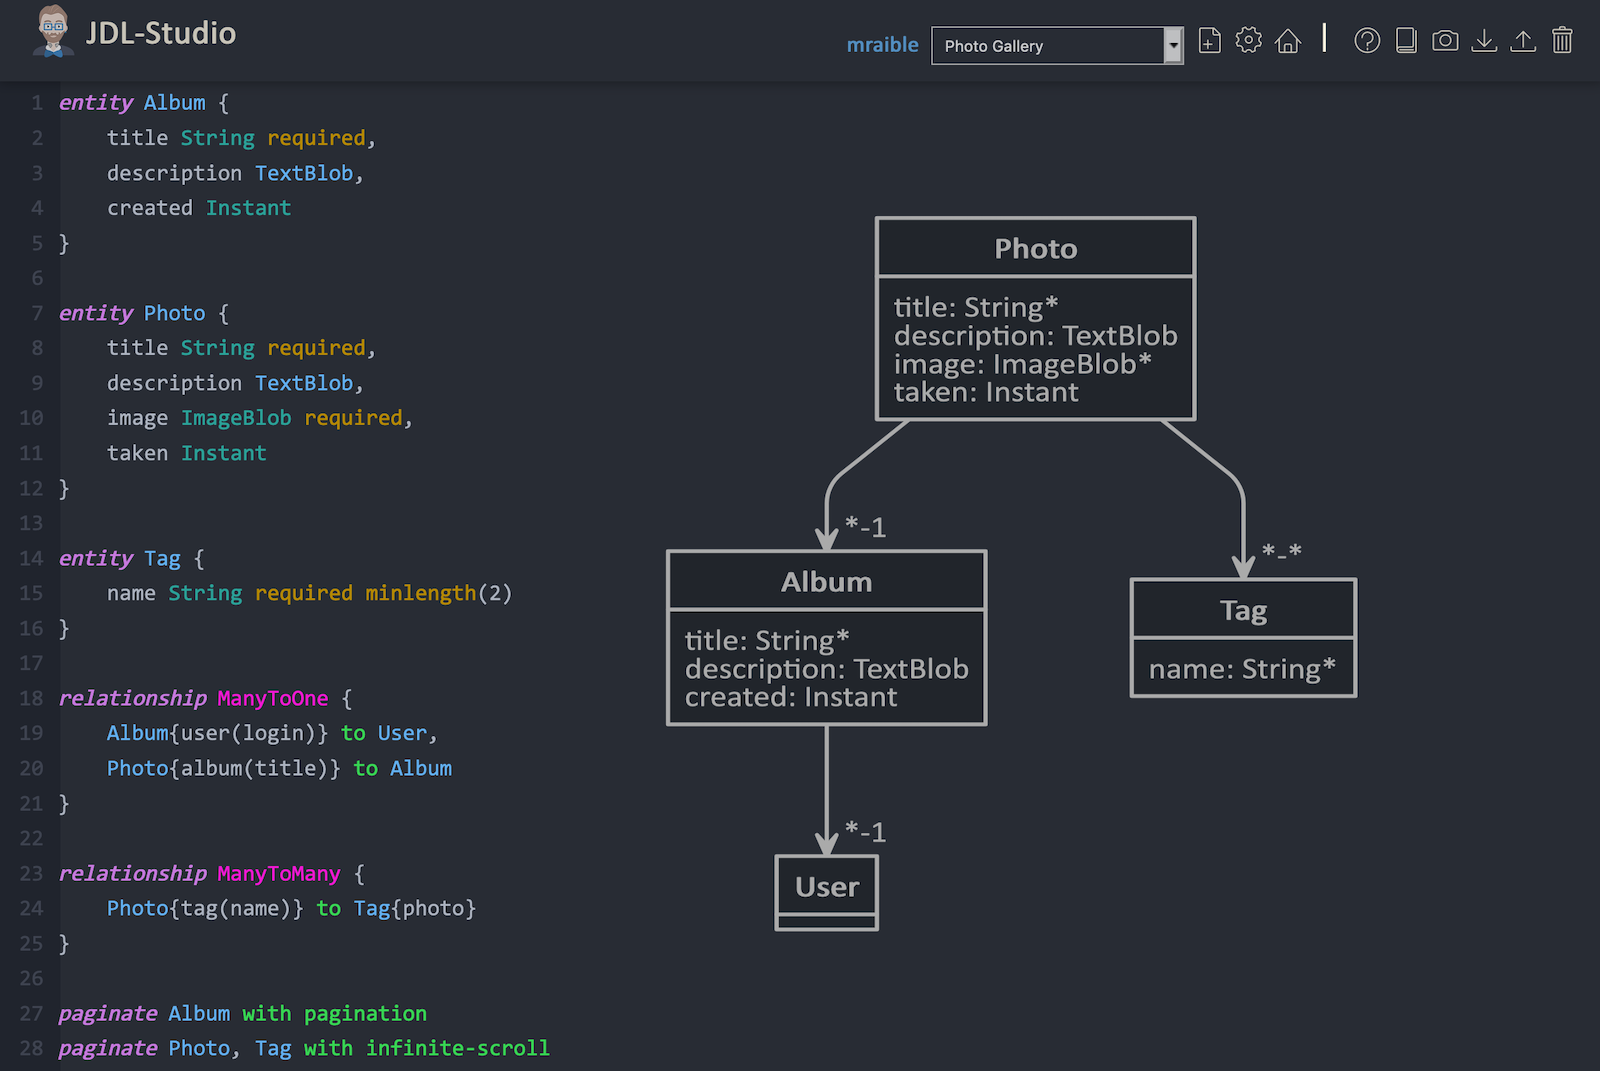
Copy the JDL below and save it in a photos.jdl file in the root directory of your project.
entity Album {
  title String required,
  description TextBlob,
  created Instant
}

entity Photo {
  title String required,
  description TextBlob,
  image ImageBlob required,
  taken Instant
}

entity Tag {
  name String required minlength(2)
}

relationship ManyToOne {
  Album{user(login)} to User,
  Photo{album(title)} to Album
}

relationship ManyToMany {
  Photo{tag(name)} to Tag{photo}
}

paginate Album with pagination
paginate Photo, Tag with infinite-scroll
You can generate entities and CRUD code (Java for Spring Boot; TypeScript and HTML for Angular) using the following command:
jhipster import-jdl photos.jdlWhen prompted, type a to update existing files.
This process will create Liquibase changelog files (to create your database tables), entities, repositories, Spring MVC controllers, and all the Angular code that’s necessary to create, read, update, and delete your data objects. It’ll even generate Jest unit tests and Protractor end-to-end tests!
When the process completes, restart your app, and confirm that all your entities exist (and work) under the Entities menu.
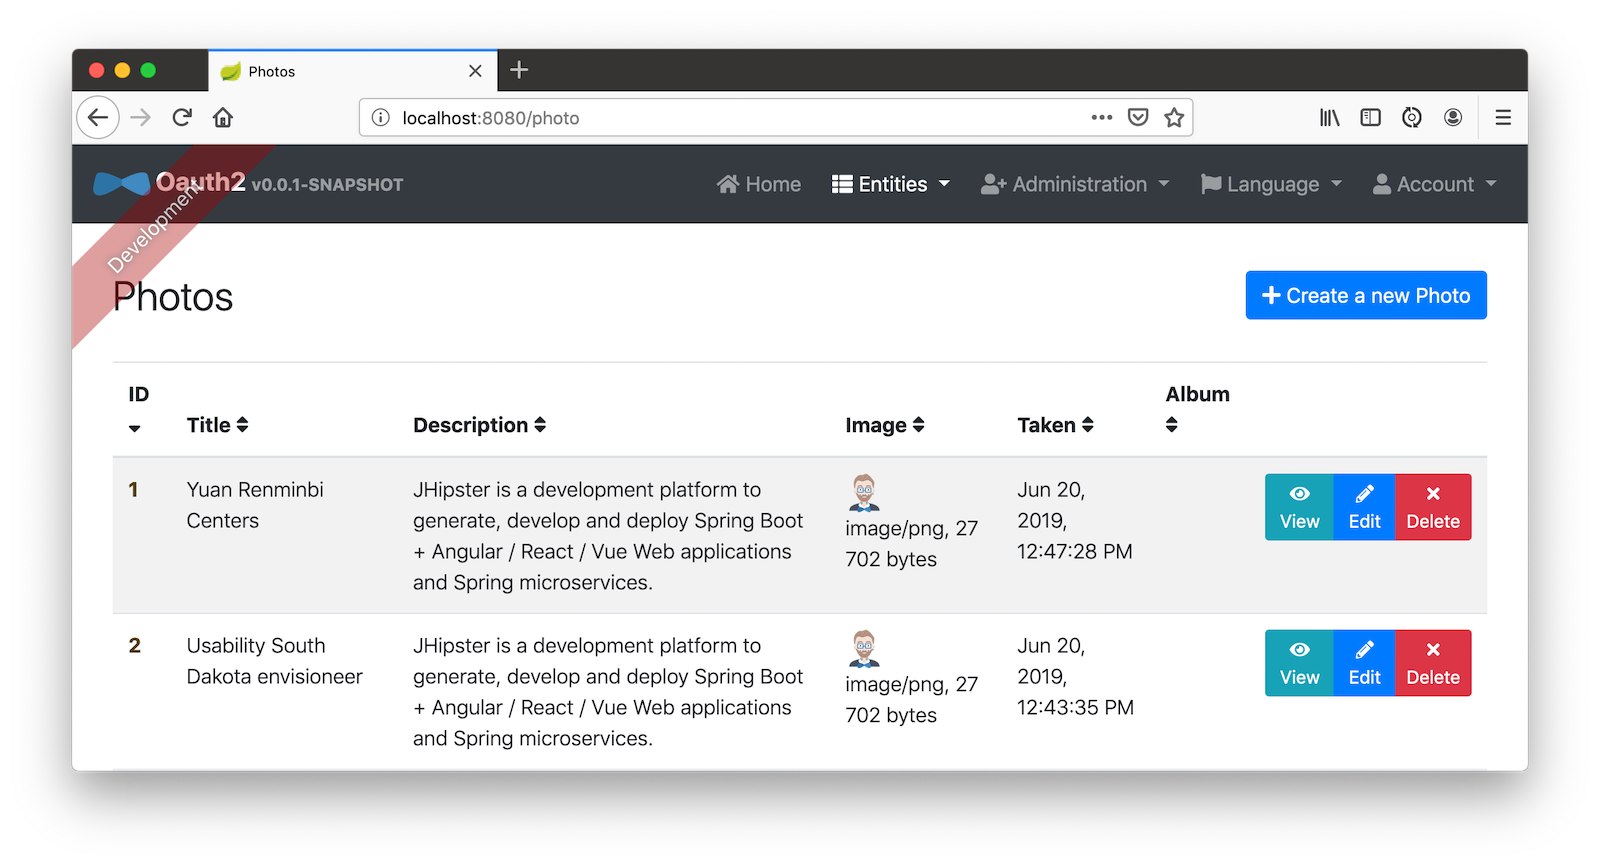
You might notice that the entity list screen is pre-loaded with data. This is done by faker.js. To turn it off, edit src/main/resources/config/application-dev.yml, search for liquibase and set its contexts value to dev. I made this change in this example’s code and ran ./gradlew clean to clear the database.
liquibase:
  # Add 'faker' if you want the sample data to be loaded automatically
  contexts: dev
Develop a Mobile App with Ionic and Angular
Getting started with Ionic for JHipster is similar to JHipster. You simply have to install the Ionic CLI, Yeoman, the module itself, and run a command to create the app.
npm i -g ionic@5.4.4 yo generator-jhipster-ionic@4.3.0
yo jhipster-ionic
If you have your app application at ~/app, you should run this command from your home directory (~). Ionic for JHipster will prompt you for the location of your backend application. Use mobile for your app’s name and app for the JHipster app’s location.
Open mobile/src/app/auth/auth.service.ts in an editor, search for data.clientId and replace it with the client ID from your Native app on Okta.
// try to get the oauth settings from the server
this.requestor.xhr({method: 'GET', url: AUTH_CONFIG_URI}).then(async (data: any) => {
  this.authConfig = {
    identity_client: '{yourClientId}',
    identity_server: data.issuer,
    redirect_url: redirectUri,
    end_session_redirect_url: logoutRedirectUri,
    scopes,
    usePkce: true
  };
  ...
}| When using Keycloak, this change is not necessary. |
Add Claims to Access Token
In order to authentication successfully with your Ionic app, you have to do a bit more configuration in Okta. Since the Ionic client will only send an access token to JHipster, you need to 1) add a groups claim to the access token and 2) add a couple more claims so the user’s name will be available in JHipster.
In the Okta Admin Console, go to Security > API > Authorization Servers, click the Authorization Servers tab and edit the default one. Click the Claims tab and Add Claim. Name it "groups" and include it in the Access Token. Set the value type to "Groups" and set the filter to be a Regex of .*. Click Create.
Add another claim, name it given_name, include it in the access token, use Expression in the value type, and set the value to user.firstName. Optionally, include it in the profile scope. Perform the same actions to create a family_name claim and use expression user.lastName.
Run the following commands to start your Ionic app.
cd mobile
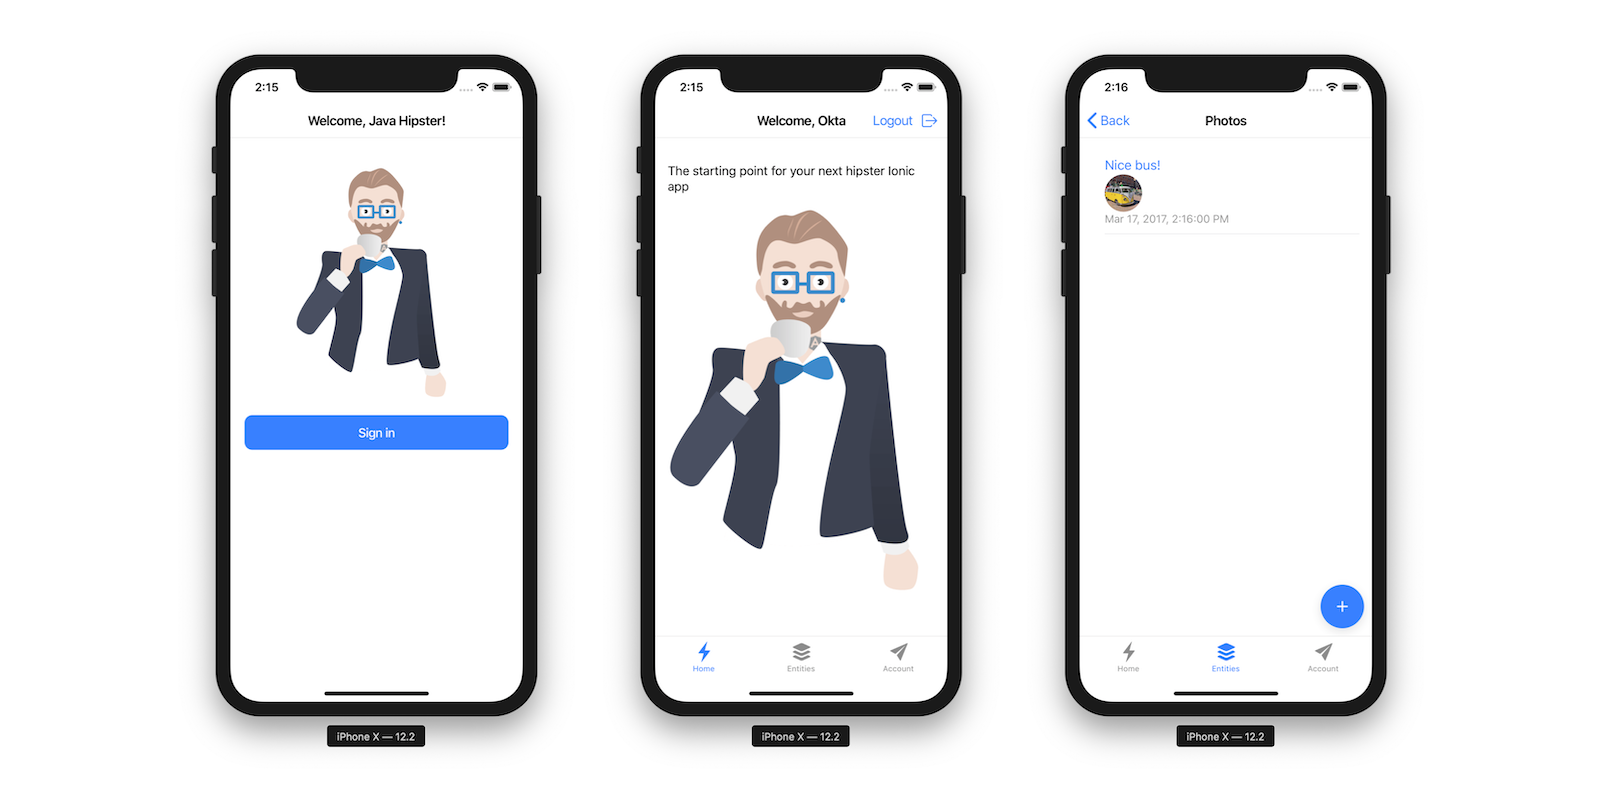
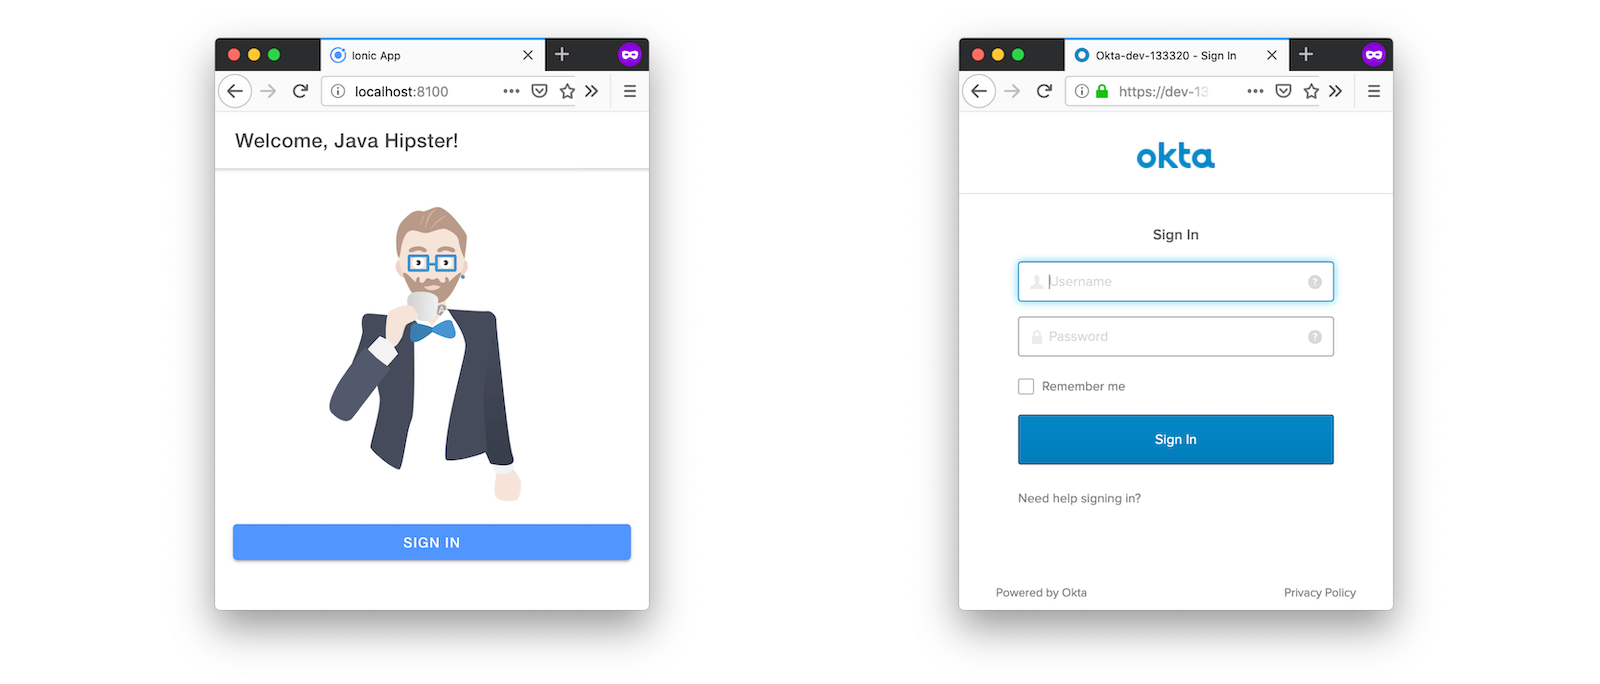
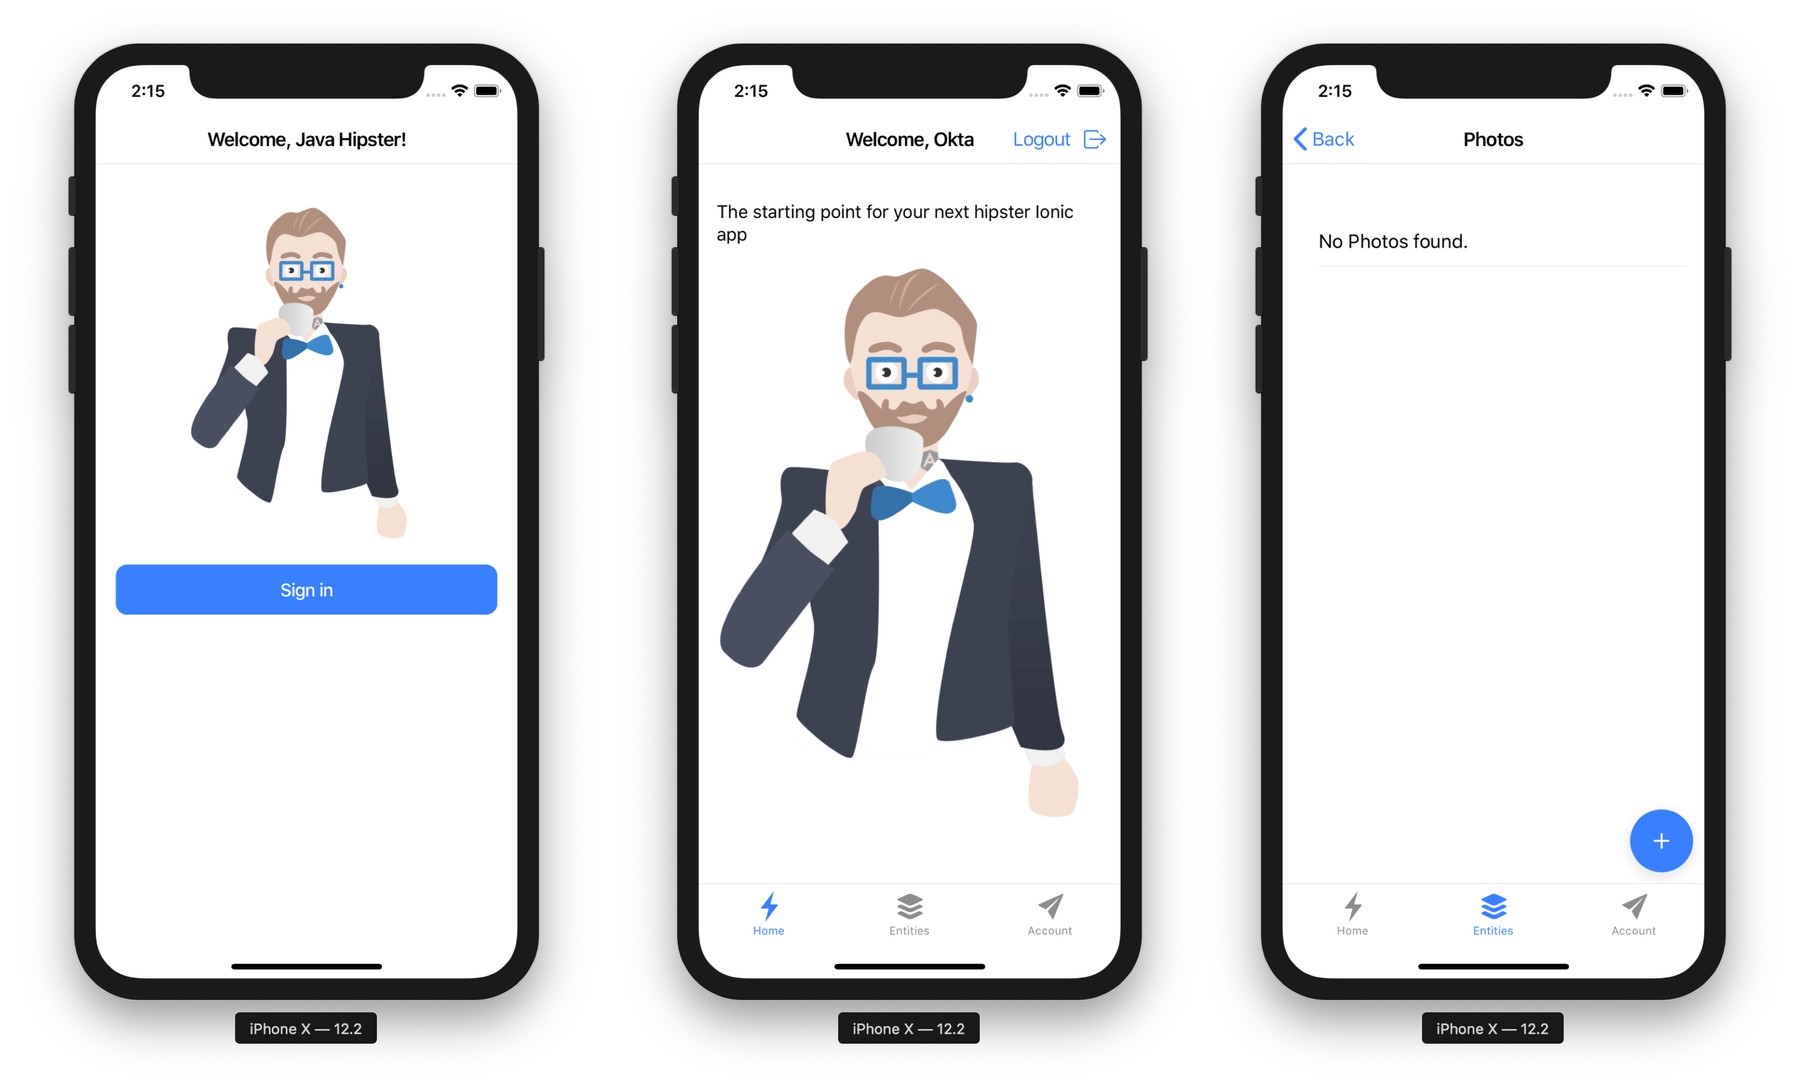
ionic serveYou’ll see a screen with a sign-in button. Click on it, and you’ll be redirected to Okta to authenticate.
Now that you having log in working, you can use the entity generator to generate Ionic pages for your data model. Run the following commands (in your ~/mobile directory) to generate screens for your entities.
yo jhipster-ionic:entity albumWhen prompted to generate this entity from an existing one, type Y. Enter ../app as the path to your existing application. When prompted to regenerate entities and overwrite files, type Y. Enter a when asked about conflicting files.
Go back to your browser where your Ionic app is running (or restart it if you stopped it). Click on Entities on the bottom, then Albums. Click the blue + icon in the bottom corner, and add a new album.
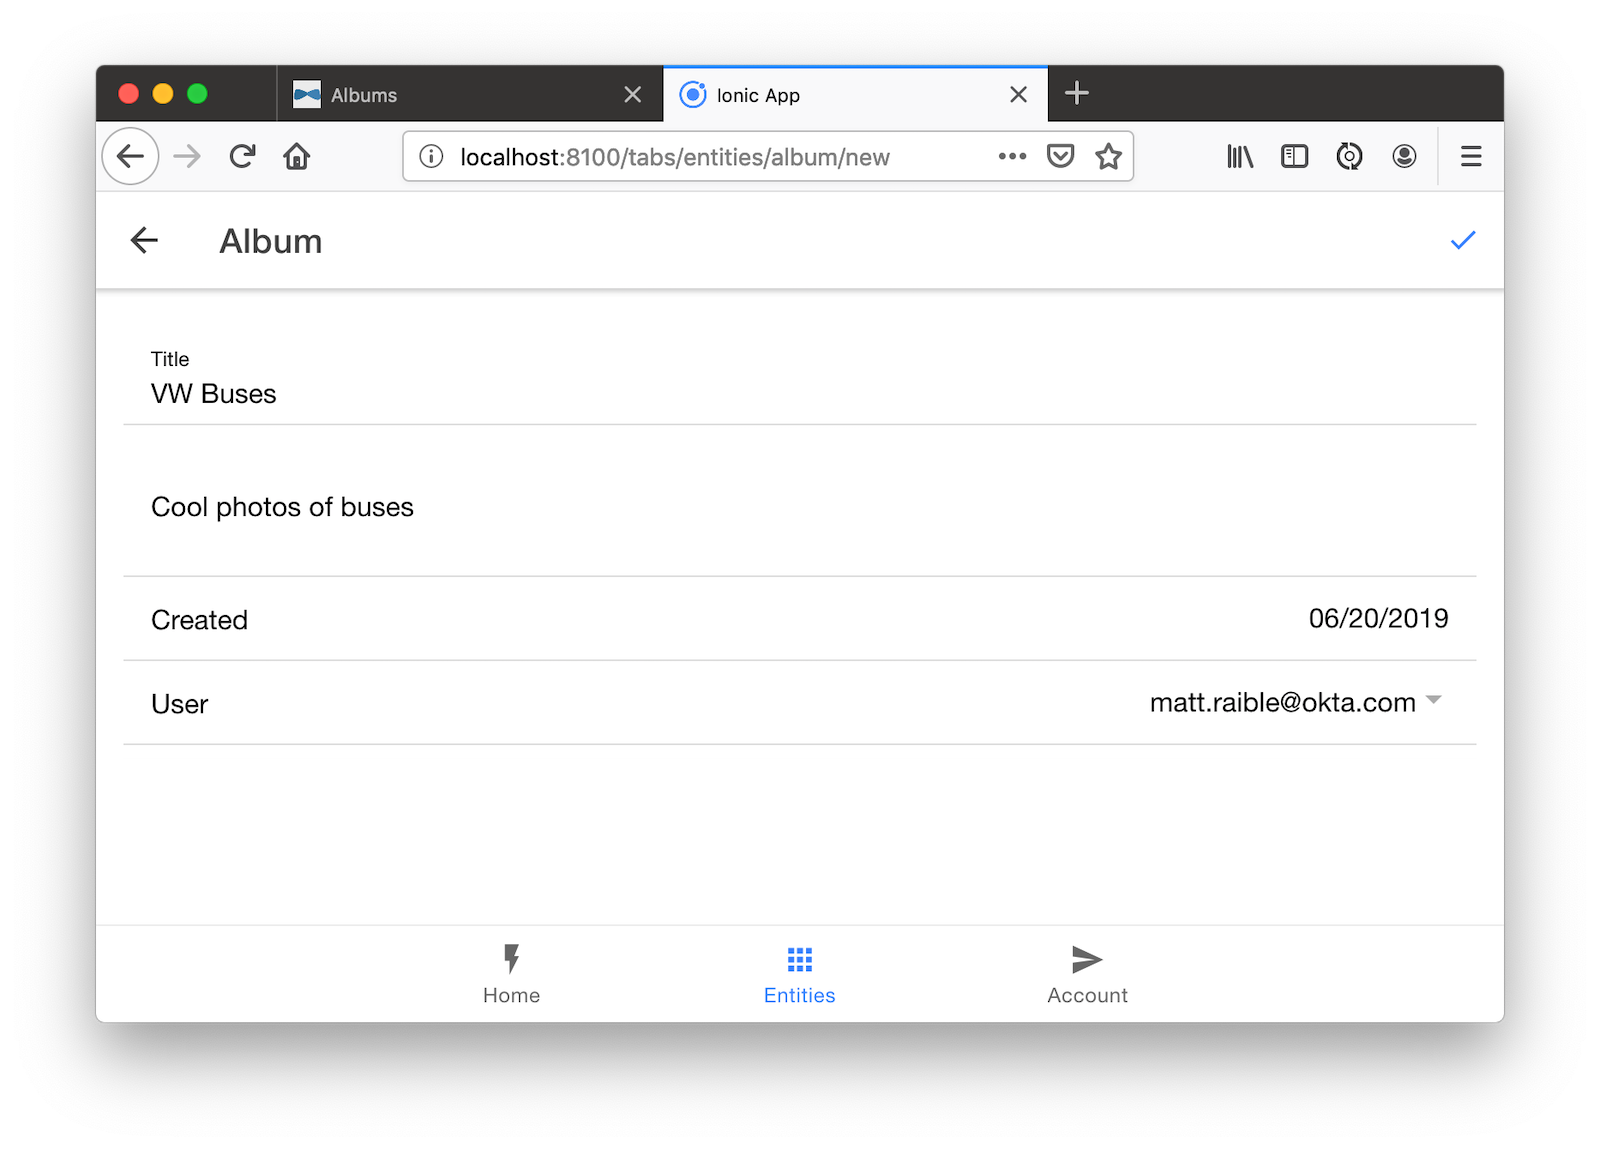
Click the ✔️ in the top right corner to save your album. You’ll see a success message and it listed on the next screen.
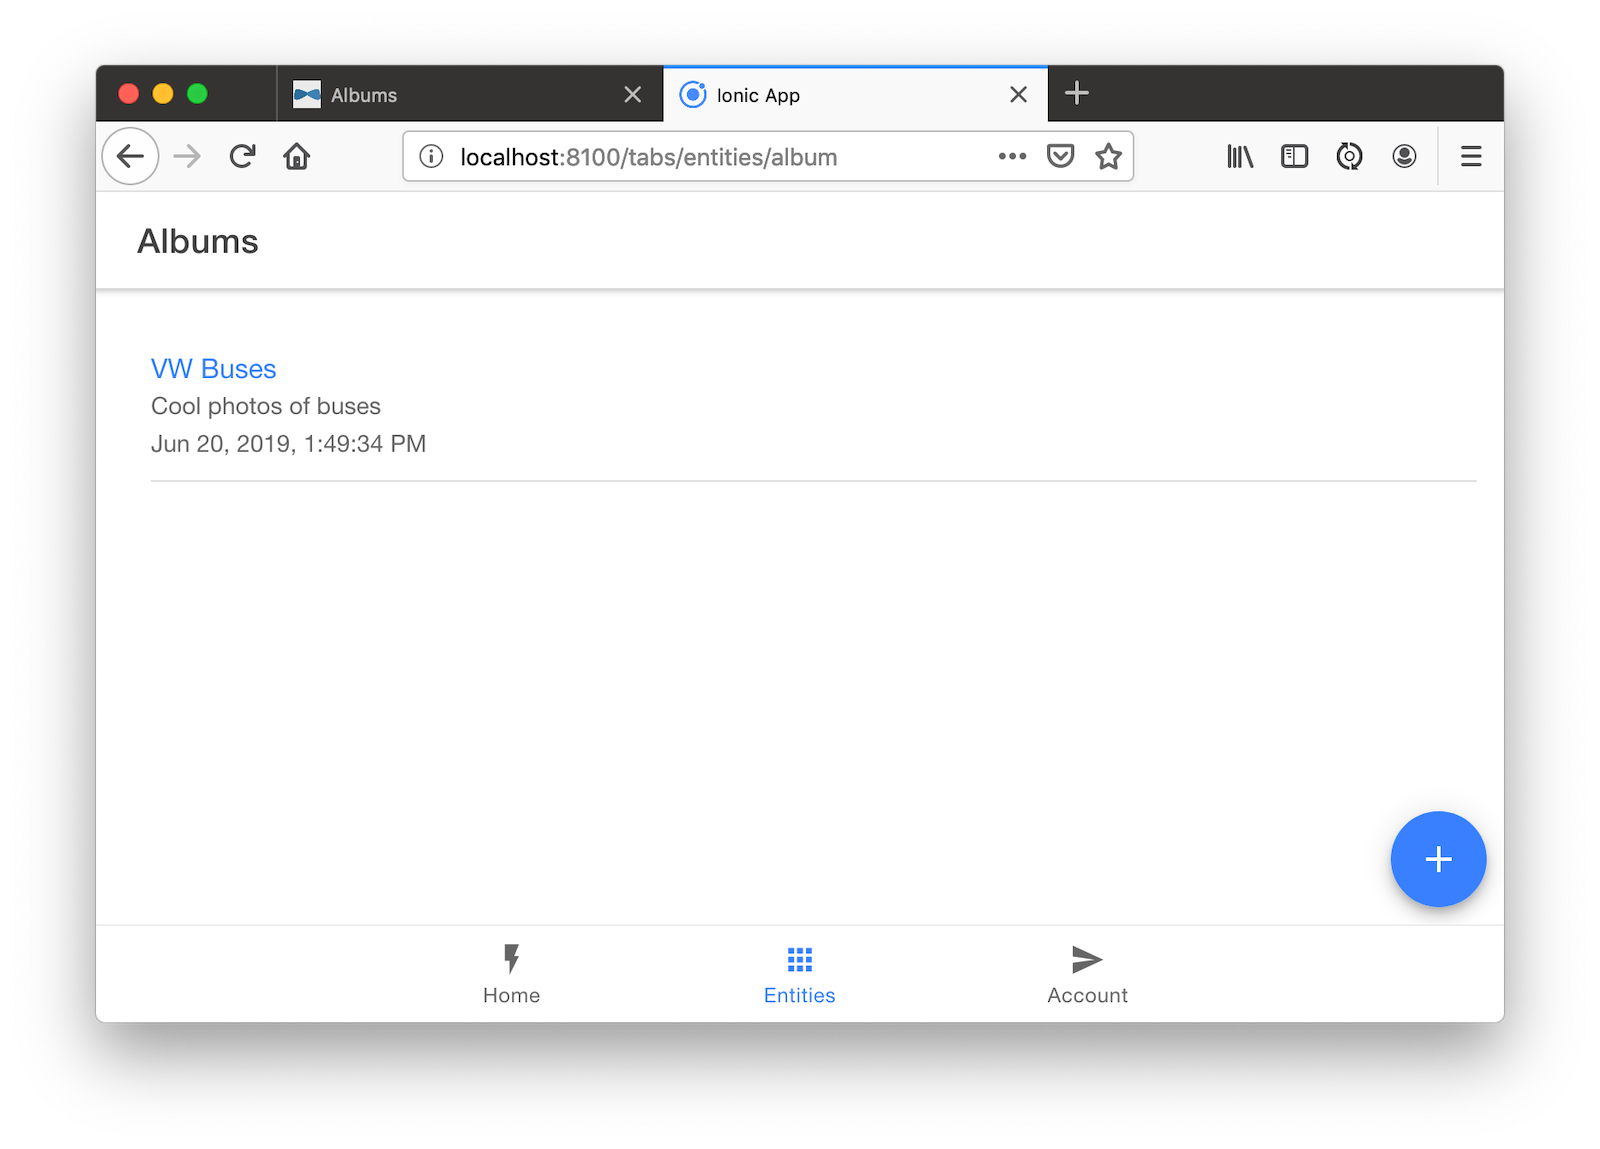
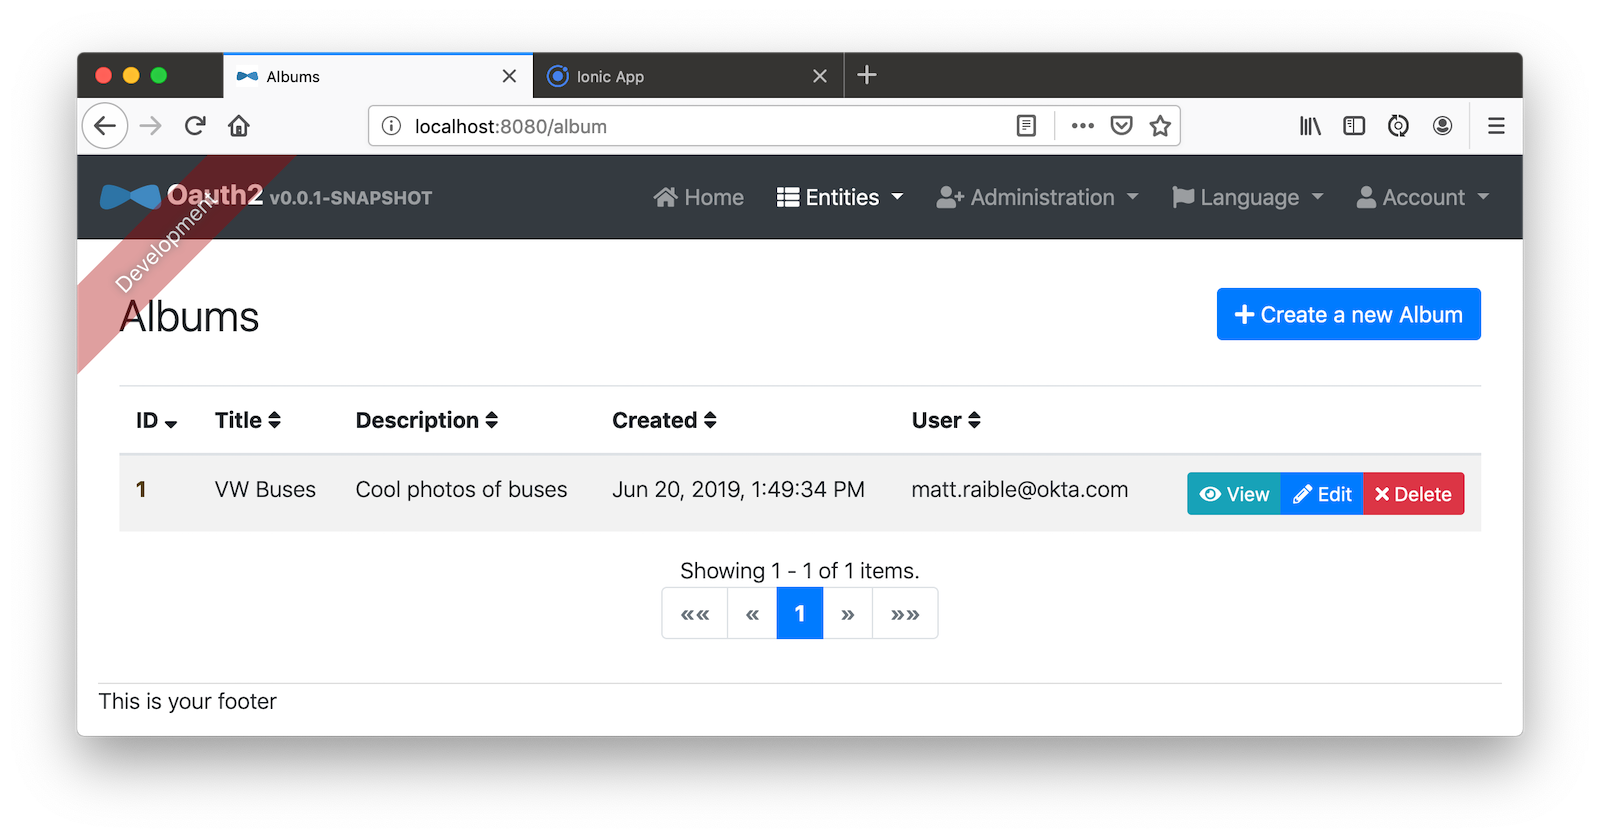
Refresh your JHipster app’s album list and you’ll see it there too!
Stop the ionic process and generate code for the other entities using the following commands. Use the same answers as above.
yo jhipster-ionic:entity photo
yo jhipster-ionic:entity tag
Run Your Ionic App on iOS
To generate an iOS project for your Ionic application, install Cordova.
npm i -g cordovaThen run the following command:
ionic cordova prepare iosWhen prompted to install the ios platform, type Y. When the process completes, open your project in Xcode:
open platforms/ios/MyApp.xcworkspace| If you don’t have Xcode installed, you can download it from Apple. |
You’ll need to configure code signing in the General tab (or Signing & Capabilities if you’re on Catalina), then you should be able to run your app in Simulator.
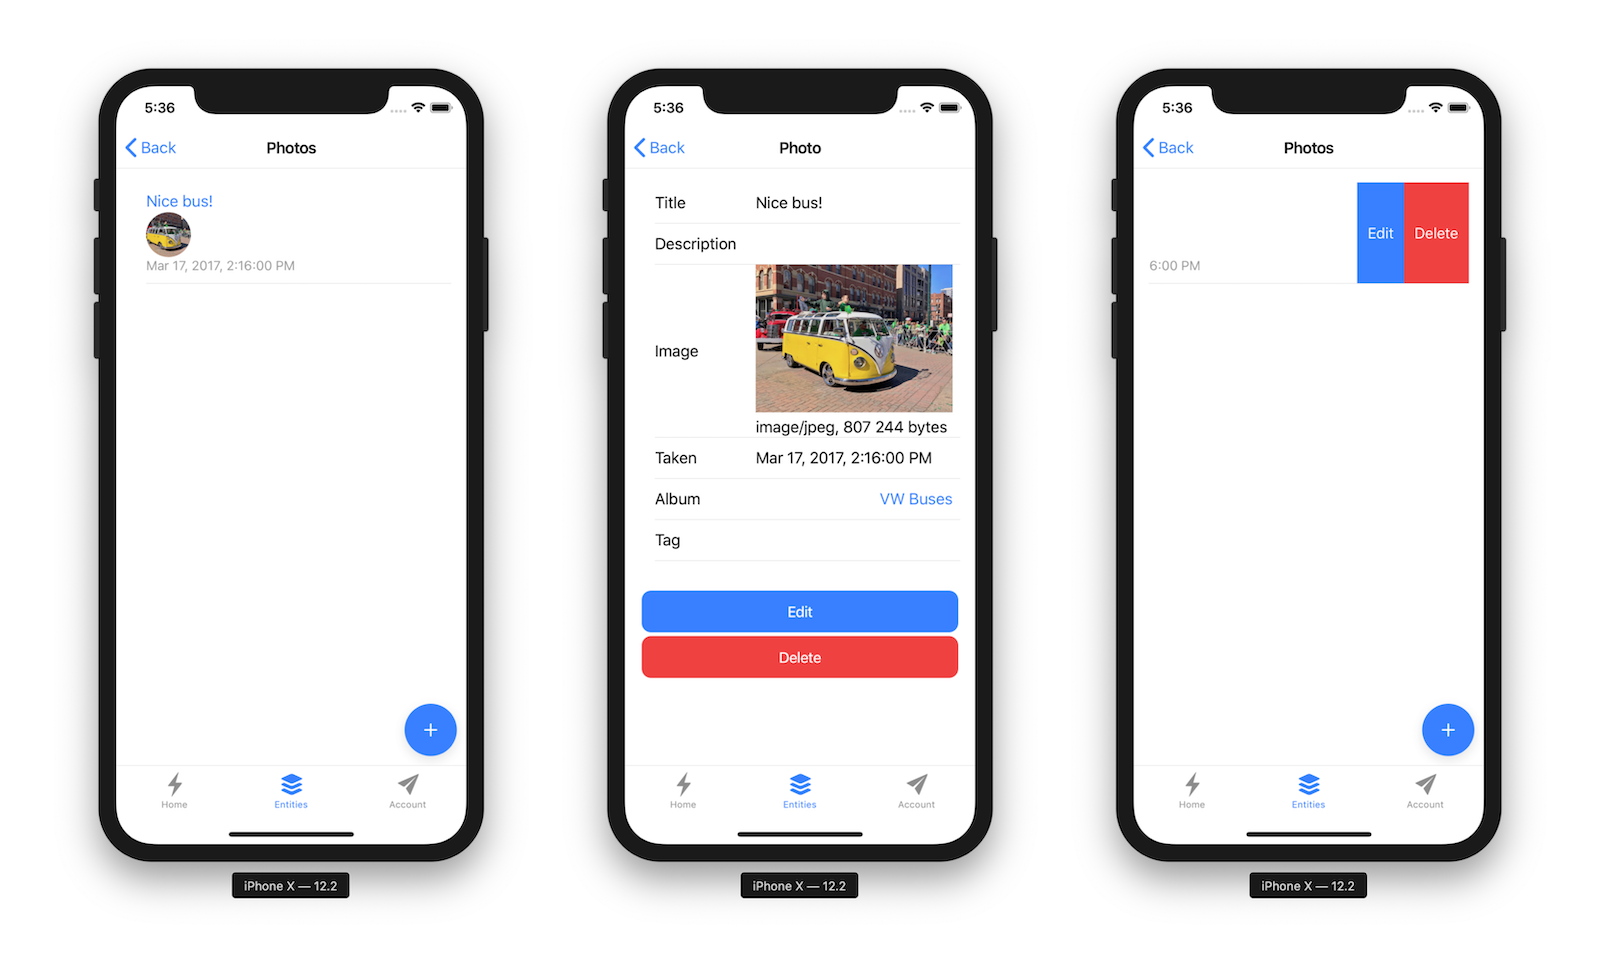
Log in to your Ionic app, tap Entities and view the list of photos.
Add a photo in the JHipster app at http://localhost:8080.
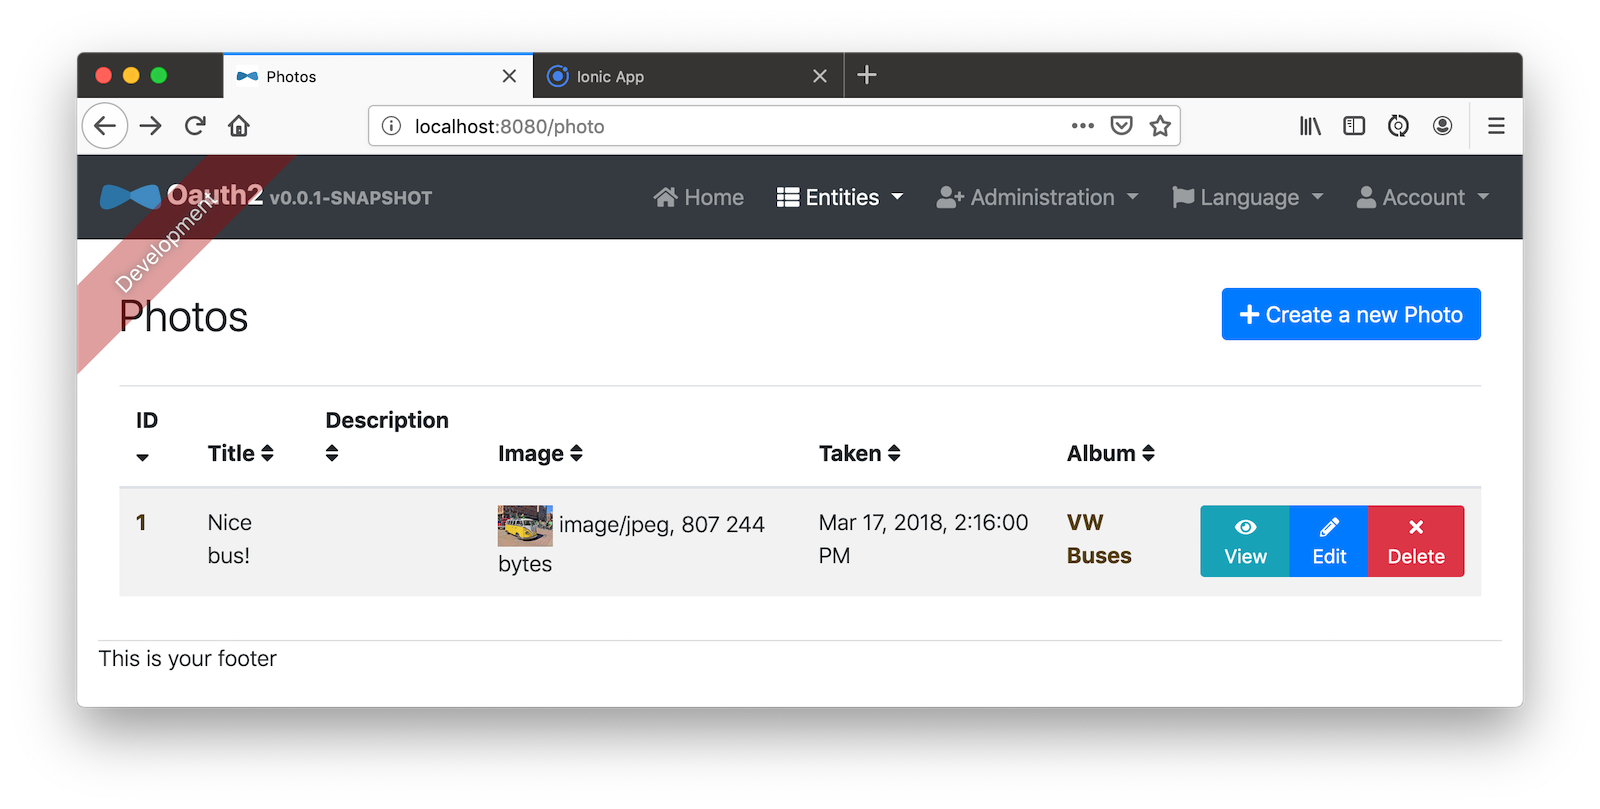
To see this new album in your Ionic app, pull down with your mouse to simulate the pull-to-refresh gesture on a phone. Looky there - it works!
There are some gestures you should know about on this screen. Clicking on the row will take you to a view screen where you can see the photo’s details. You can also swipe left to expose edit and delete buttons.
Run Your Ionic App on Android
Deploying your app on Android is very similar to iOS. In short:
-
Make sure you’re using Java 8
-
Run
ionic cordova prepare android -
Open
platforms/androidin Android Studio, upgrade Gradle if prompted -
Set
launchModetosingleTaskinAndroidManifest.xml -
Start your app using Android Studio
-
While your app is starting, run
adb reverse tcp:8080 tcp:8080so the emulator can talk to JHipster
For more thorough instructions, see my Ionic 4 tutorial’s Android section.
Learn More About Ionic 4 and JHipster 6
Ionic is a nice way to leverage your web development skills to build mobile apps. You can do most of your development in the browser, and deploy to your device when you’re ready to test it. You can also just deploy your app as a PWA and not both to deploy it to an app store.
JHipster supports PWAs too, but I think Ionic apps look like native apps, which is a nice effect. There’s a lot more I could cover about JHipster and Ionic, but this should be enough to get you started.
You can find the source code for the application developed in this post on GitHub at @oktadeveloper/okta-ionic4-jhipster-example.
I’ve written a few other posts on Ionic, JHipster, and Angular. Check them out if you have a moment.
Give @oktadev a follow on Twitter if you liked this tutorial. You might also want to subscribe to our YouTube channel. If you have any questions, please leave a comment or post your question to Stack Overflow with a jhipster tag.
Changelog:
- Apr 18, 2021: Updated to use the Okta CLI to streamline setup. See changes to this post in okta-blog#737.
- May 20, 2020:
Updated to remove
/implicitfrom redirect URIs since auth code flow is used. Changes to this post can be viewed in okta-blog#302. Updates to the example application are in okta-ionic4-jhipster-example#10. - Oct 30, 2019: Updated to use JHipster 6.4.1 and Ionic for JHipster 4.3.0. Changes to this post can be viewed in okta-blog#64. Updates to the example application are in okta-ionic4-jhipster-example#7.
Matt Raible is a well-known figure in the Java community and has been building web applications for most of his adult life. For over 20 years, he has helped developers learn and adopt open source frameworks and use them effectively. He's a web developer, Java Champion, and Developer Advocate at Okta. Matt has been a speaker at many conferences worldwide, including Devnexus, Devoxx Belgium, Devoxx France, Jfokus, and JavaOne. He is the author of The Angular Mini-Book, The JHipster Mini-Book, Spring Live, and contributed to Pro JSP. He is a frequent contributor to open source and a member of the JHipster development team. You can find him online @mraible and raibledesigns.com.
Okta Developer Blog Comment Policy
We welcome relevant and respectful comments. Off-topic comments may be removed.