Build a CRUD App with ASP.NET Core 2.2 and Entity Framework Core

If you’re like me, you love music. Music is always streaming somewhere in my house at all times. I especially like going to see live music, but it can be hard to know where and when live music is happening. LiveMusicFinder is a web application that allows users to enter when and where some live music is going down. This beta version is very rough, but I will show you how I built it with ASP.NET Core 2.2 and Entity Framework Core.
ASP.NET Core 2.2 is a cross-platform version of Microsoft’s ASP.NET Framework that run on any platform. For example, I’ll be developing this on an Ubuntu laptop using Visual Studio Code. I’ll also be using Entity Framework Core for interacting with the data store. Entity Framework Core is the easiest way by far for .NET developers to interact with a database which for expedience sake will be SQLite, a super light-weight database. Let’s get to it!
Note: In May 2025, the Okta Integrator Free Plan replaced Okta Developer Edition Accounts, and the Okta CLI was deprecated.
We preserved this post for reference, but the instructions no longer work exactly as written. Replace the Okta CLI commands by manually configuring Okta following the instructions in our Developer Documentation.
Scaffold an ASP.NET Core 2.2 Web Application
Start by creating the base application. In a terminal shell run:
dotnet new mvc -n LiveMusicFinder
This will scaffold an ASP.NET Core 2.2 MVC application in a folder called LiveMusicFinder and that will be the main namespace you’ll be working in.
Just open that folder in Visual Studio Code.
cd LiveMusicFinder
code .
You’ll be prompted to add some missing assets. This is the .vscode folder that allows you to launch and debug the application with F5, just click the Yes button.

If you’ve developed in ASP.NET Core before, there are significant changes to the look and feel of the base application in .NET Core 2.2, so fire it up and check it out!
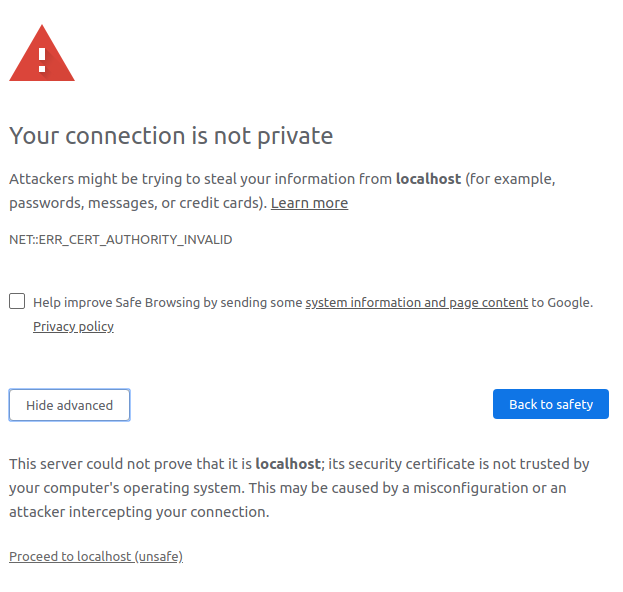
You may see a screen come up that tells you that your connection is not private. This is because in the latest .NET Core, the development application runs over https, but you don’t have a certificate for localhost. You could either get a local certificate, which is fairly easy to do, or you can proceed. It won’t warn you every time so for now, just click the Advanced button and click Proceed to localhost (unsafe).

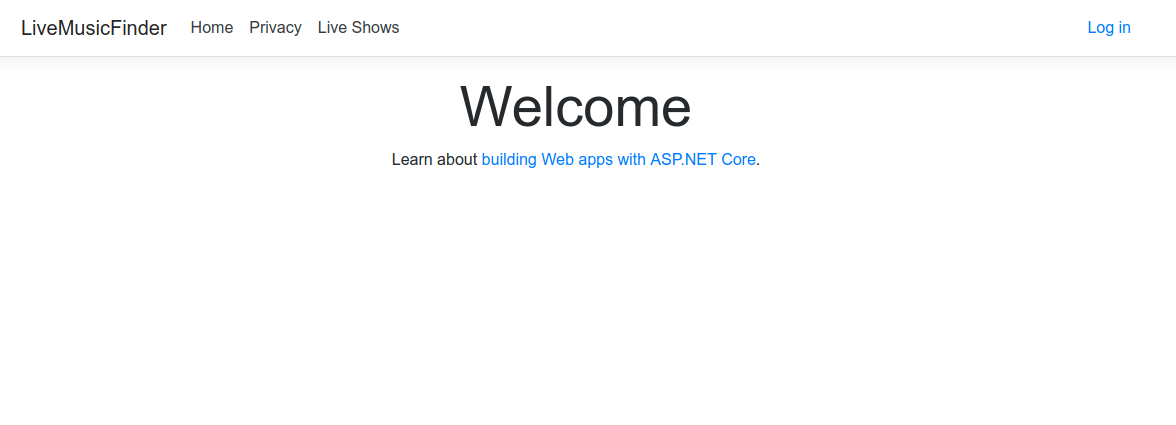
Then you can see the new design of the base application in .NET!

I know, right? No big images in a carousel. No chunks of text with links to the .NET Documentation. It’s really sparse. That’s a great thing. Now you won’t have to start by deleting images and content from the application before you can start building!
Add Entity Framework Core Classes to Your ASP.NET Core 2.2 Application
Now that you have a solid foundation, start by adding the model that you’ll use for live music shows. In the Models folder add a class called “LiveShow”.
using System;

namespace LiveMusicFinder.Models
{
  public class LiveShow
  {
    public int Id { get; set; }
    public string Artist { get; set; }
    public string Venue { get; set; }
    public DateTime ShowDate { get; set; }
    public string EnteredBy { get; set; }
  }
}
This class is pretty straight-forward and certainly could use some more details in the future, but for now it has everything you need: Who is playing? Where are they paying? and When is the show?
Next, you’ll need a database context to save the shows to the database. For simplicity’s sake, just use a SQLite database. When the application goes live, it will be easy to change the connection to a more “production-appropriate” database.
Before you can use SQLite, you’ll need the Entity Framework NuGet package for connecting to it.
dotnet add package Microsoft.EntityFrameworkCore.SQLite -v 2.2.3
Now you’re ready to create the database context for SQLite. Create a folder called Data in the root of the project and add a class file called ApplicationDbContext.cs with the following contents.
using LiveMusicFinder.Models;
using Microsoft.EntityFrameworkCore;

namespace LiveMusicFinder.Data
{
  public class ApplicationDbContext : DbContext
  {
    public ApplicationDbContext(DbContextOptions<ApplicationDbContext> options) : base(options)
    {

    }

    public DbSet<LiveShow> LiveShows { get; set; }
  }
}
This brings in the LiveMusicFinder.Models namespace, so you can reference the LiveShow model class. It derives from Microsoft.EntityFrameworkCore’s DbContext and passes all appropriate options to the base class. The public handle for the LiveShows collection in the database is the DbSet<LiveShow> property. Now all you have to do is tell the application to inject this context into any class that needs it by adding it to the Startup.cs class. In the ConfigureServices() method, just before the SetCompatibilityVersion() call, add the line:
services.AddDbContext<ApplicationDbContext>(options => options.UseSqlite("Data Source=LiveMusicFinder.db"));
You’ll need to add two using statements to your Startup.cs file. You could just paste the line above in and then put your cursor on the ApplicationDbContext type and use CTRL+. to see the menu item that will add the LiveMusicFinder.Data namespace using statement and do the same with the UseSqlite() method that needs Microsoft.EntityFrameworkCore, or you can just cut and paste them from here.
using LiveMusicFinder.Data;
using Microsoft.EntityFrameworkCore;
This will inject the newly created context into our controllers and make it easy to work with the database and to change it later for production.
Scaffold the Entity Framework Core Controller for Live Shows in Your ASP.NET 2.2 Application
To make life easier, and so you don’t have to write all the actions for the controller by hand, you’ll use the dotnet CLI and scaffold a controller. This could be done in Visual Studio 2017/2019 by navigating the File>New menus and options. You can also just run two commands. The first command will install the code generator templates.
dotnet add package Microsoft.VisualStudio.Web.CodeGeneration.Design
Then just use those templates to generate a data controller.
dotnet aspnet-codegenerator controller -name LiveShowsController -async -m LiveMusicFinder.Models.LiveShow -dc LiveMusicFinder.Data.ApplicationDbContext -namespace Controllers -outDir Controllers -udl
Now there’s a lot to unpack here and as you use these templates in the future, it’s helpful to know that dotnet aspnet-codegenerator controller --help exists to help you figure out which switches you need.
The command above told the aspnet-codegenerator tool that you want to use the controller code generator, that you wanted to call it LiveShowsController, and that you want the action methods to be asynchronous (with the -async switch). You also told the generator that the controller will be a data controller and that it will use the LiveMusicFinder.Models.LiveShow model and the LiveMusicFinder.Data.ApplicationDbContext database context for database interaction. The next couple of switches are really housekeeping for the generator: what namespace the controller will go in and what folder the generated controller will go in. The final switch deals with the views that will be generated (Yes! This generated views to go with the controller actions!!). The -udl switch tells the view generators to “Use the Default Layout” for the views it generates. Sweet, huh?
Once you’ve run the commmand, you should see a new folder in the Views directory called LiveShows (to match the controller). Inside that folder should be five new views! One for each of the different ways to “view” the LiveShow model: Create.cshtml, Delete.cshtml, Details.cshtml, Edit.cshtml, and Index.cshtml (the listing).
You’ll also have the LiveShowsController in the Controllers directory with ApplicationDbContext injected through the constructor and actions for each of the views already wired up to list, create, update, and delete LiveShow objects! You could run it, and it’s all wired up!
Now you just need a menu item to get you to the Index view. In the _Layout.cshtml file in Views/Shared, add a menu item to the ul with the navbar-nav class on it.
<li class="nav-item">
    <a class="nav-link text-dark" asp-area="" asp-controller="LiveShows" asp-action="Index">Live Shows</a>
</li>
NOTE: I usually just copy one of the other menu items and change the controller, action, and menu item text.
You can now run your application and click on the Live Shows menu item and it will take you to the list of live shows.

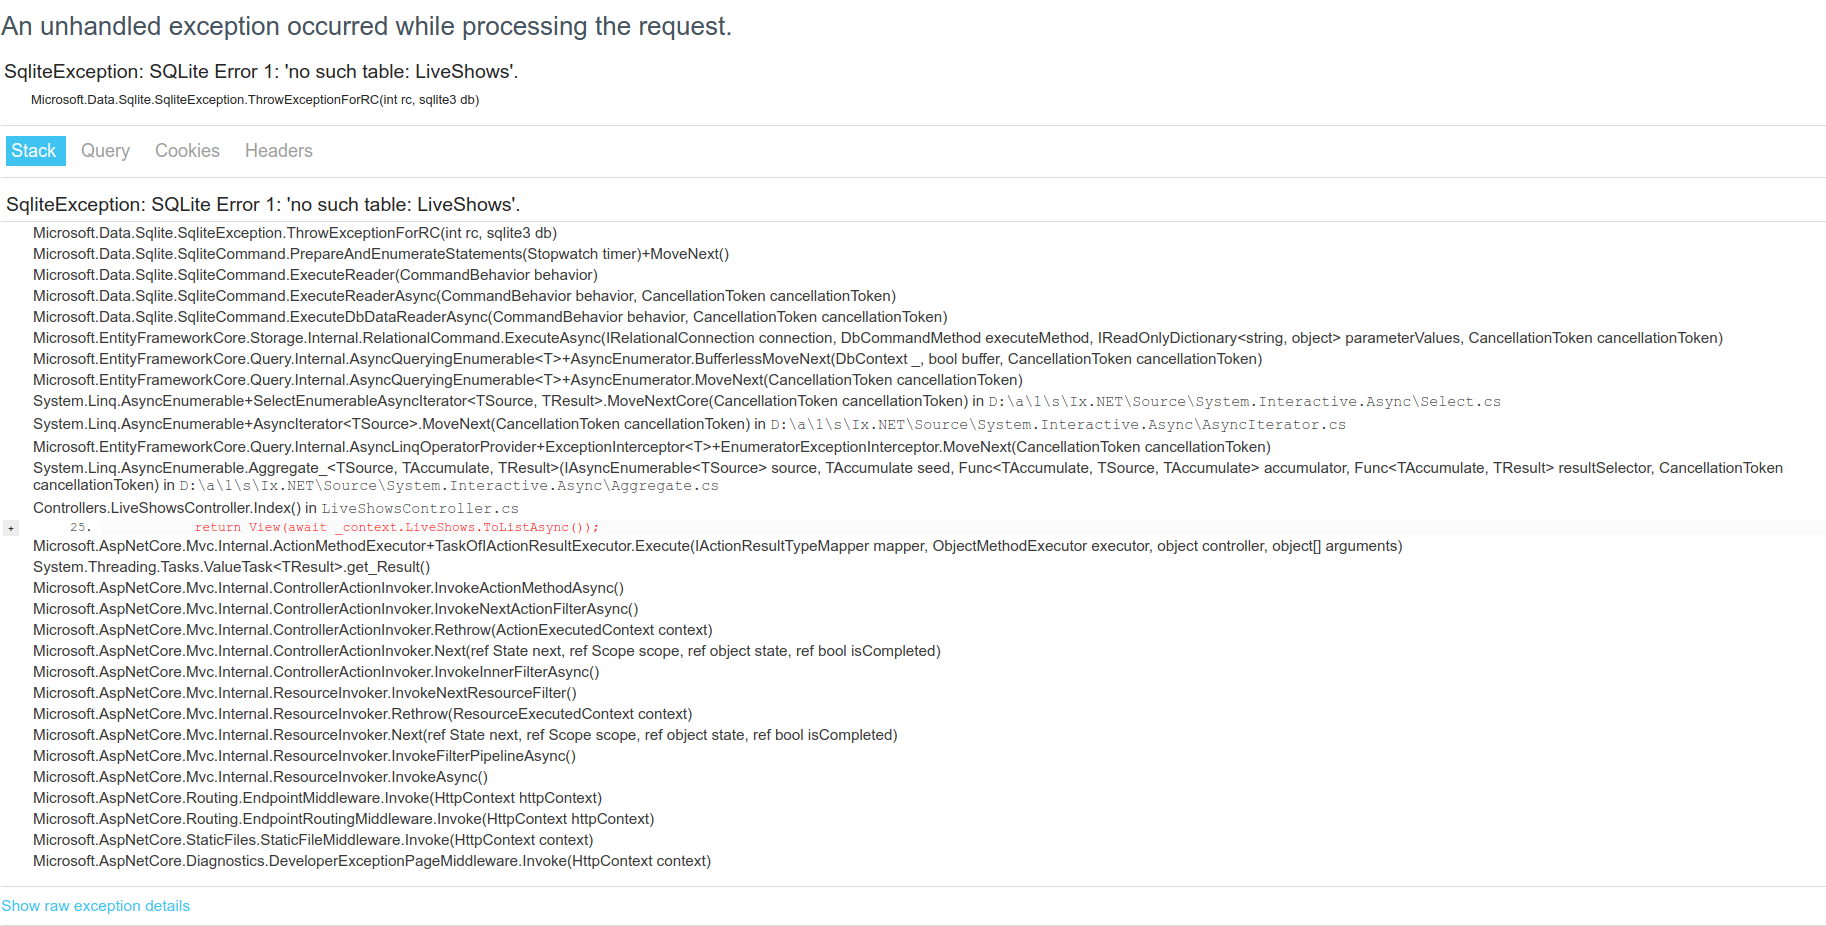
But Houston, we have a problem. If you actually try and run it right now it will fail. The error message is almost helpful. It tells you that the “LiveShows” table doesn’t exist, but the real problem is that the database doesn’t actually exist yet. To get your application to ensure that it exists when you run it, add the database context to the Configure() method of your Startup.cs and tell it to ensure that the database is created.
public void Configure(IApplicationBuilder app, IHostingEnvironment env, ApplicationDbContext dbContext)
{
  dbContext.Database.EnsureCreated();
  // ...the rest of the method
When you fire up the app this time, everything would be working!!

While this is an okay start, anyone can not only enter shows, but edit anyone else’s. And since the form allows users to enter their own name in the EnteredBy field, there’s really no set way to track people’s submissions. You need authentication! But friends don’t let friends write auth. They use Okta!
Adding Authentication to Your ASP.NET Core 2.2 Application
Why wouldn’t you write the authentication piece yourself? The login screen is the thing that fools most developers into thinking that authentication will be easy. Then they realize they need a “forgot password?” email workflow and user management screens. Not to mention if you ever need multi-factor authentication. Just don’t do that to yourself. Use a provider. Okta makes authentication simple to add and it has all those features already built in! You can get your free forever developer account here.
Once you’ve signed up, go to your dashboard and take note of your Org URL on the right side of the screen just below the pink Upgrade button.

Click on the Applications menu and click Add Application to add a new application. Choose Web as the platform for your application, then click Next.
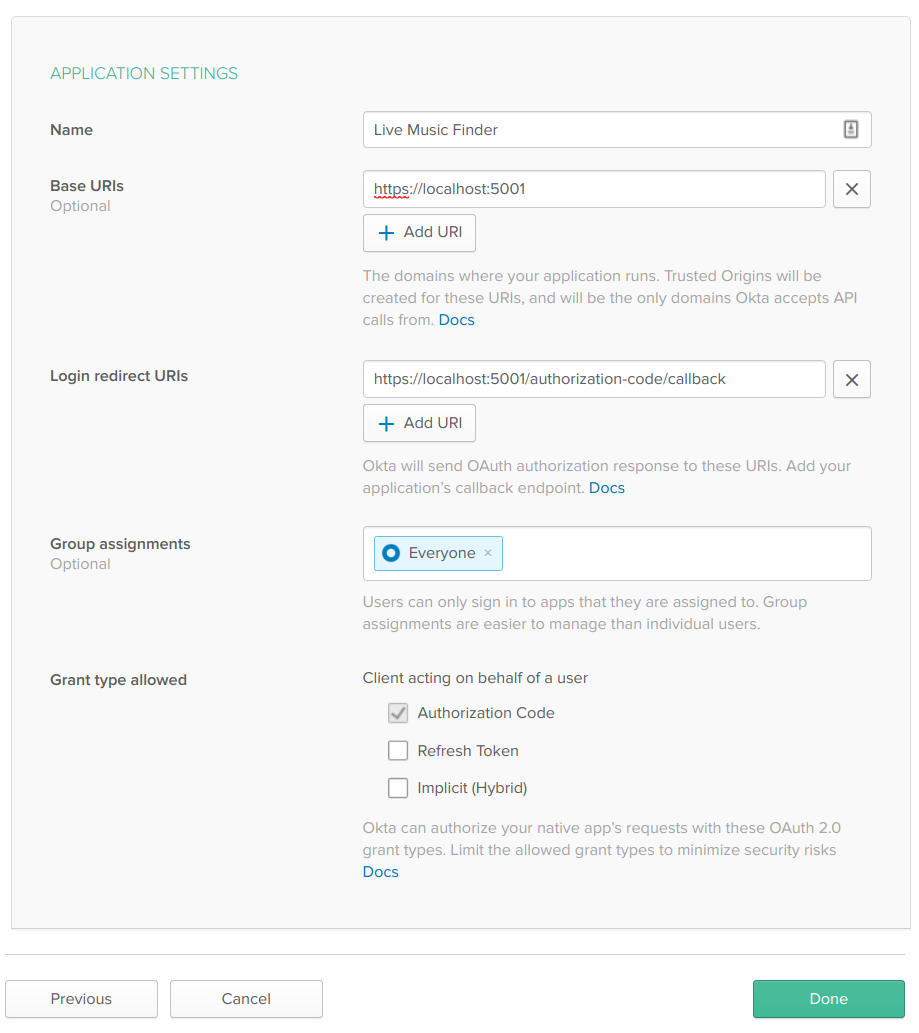
On the Application Settings page name it “Live Music Finder” and set the ports for the Base URIs and Login redirect URIs to 5001 and change the scheme to https. You can leave everything else at the default values. and click Done.

Once you’re done, you will see a General Settings tab for your app. On that tab click the Edit button and add a Logout redirect URIs entry as https://localhost:5001/signout/callback. That is the URL that the middleware will handle when the logout from Okta occurs.
Copy your Client ID and Client Secret from the Client Credentials section of the page.
Configure Authentication in Your ASP.NET Core 2.2 Application
The next portion is back in your code. You’ll need the Okta ASP.NET SDK. You can install it by running the following command.
dotnet add package Okta.AspNetCore --version 1.1.5
In the appsettings.json file so that the final version looks like below.
{
  "Logging": {
    "LogLevel": {
      "Default": "Warning"
    }
  },
  "Okta": {
    "ClientId": "{yourClientId}",
    "ClientSecret": "{yourCliientSecret}",
    "OktaDomain": "https://{yourOktaDomain}",
    "PostLogoutRedirectUri": "https://localhost:5001/"
  },
  "AllowedHosts": "*"
}
Back in your Startup.cs you’ll need some using statements.
using Okta.AspNetCore;
using Microsoft.AspNetCore.Authentication.Cookies;
At the very top of the ConfigureServices() method add the following.
var oktaMvcOptions = new OktaMvcOptions();
Configuration.GetSection("Okta").Bind(oktaMvcOptions);
oktaMvcOptions.Scope = new List<string> { "openid", "profile", "email" };
oktaMvcOptions.GetClaimsFromUserInfoEndpoint = true;

services.AddAuthentication(options =>
{
  options.DefaultAuthenticateScheme = CookieAuthenticationDefaults.AuthenticationScheme;
  options.DefaultSignInScheme = CookieAuthenticationDefaults.AuthenticationScheme;
  options.DefaultChallengeScheme = OktaDefaults.MvcAuthenticationScheme;
})
.AddCookie()
.AddOktaMvc(oktaMvcOptions);
While this looks complex, it’s really quite simple. First, it just creates a new OktaMvcOptions() object. Then it binds all those appsettings.json settings you just created. The options then have the list of scopes you want to get back when someone authenticates, and sets the boolean value for GetClaimsFromUserInfoEndpoint to true. This just tells the middleware that you want to use the OIDC endpoint for figuring out what the URL is for getting user information.
The next section is actually setting up the middleware to add authentication (with some options for setting cookies, etc.) and to use the Okta SDK for authentication with our configured options.
You’ve configured the service, but you still need to tell the application to use this service that you’ve just configured. In the Configure() method, add one line of code right before the UseMvc() line.
app.UseAuthentication();
Now authentication is wired up, you just need to add some user interface elements to trigger login and logout.
Add a new file to the Controllers folder called AccountController.cs with the following contents.
using Microsoft.AspNetCore.Authentication.Cookies;
using Microsoft.AspNetCore.Mvc;
using Okta.AspNetCore;

namespace LiveMusicFinder.Controllers
{
  public class AccountController : Controller
  {
    public IActionResult Login()
    {
      if (!HttpContext.User.Identity.IsAuthenticated)
      {
        return Challenge(OktaDefaults.MvcAuthenticationScheme);
      }
      return RedirectToAction("Index", "Home");
    }

    public IActionResult Logout()
    {
      return new SignOutResult(new[]
      {
        OktaDefaults.MvcAuthenticationScheme,
        CookieAuthenticationDefaults.AuthenticationScheme
      });
    }
  }
}
The Login() method just checks to see if the user is already logged in. If they aren’t, it calls Challenge() which will redirect to an Okta-hosted login page for them to authenticate. Once they’ve successfully logged in, the action will redirect to the home page.
The Logout() action will call the log out endpoint in Okta with some scheme options set. Once that is done, Okta will redirect to that /signout/callback endpoint that the OIDC middleware handles and the user will be redirected to the URL in the PostLogoutRedirectUri setting from the application’s configuration.
The only thing left is adding log in and log out buttons to the user interface. To do that, create a partial view in Views/Shared called _LoginPartial.cshtml with the following contents.
@if (User.Identity.IsAuthenticated)
{
<ul class="navbar-nav">
<li>
<span class="navbar-text">Hello, @User.Identity.Name</span>
<a onclick="document.getElementById('logout_form').submit();" style="cursor: pointer;">Log out</a>
</li>
</ul>
<form asp-controller="Account" asp-action="Logout" method="post" id="logout_form"></form>
}
else
{
<ul class="navbar-nav">
<li><a asp-controller="Account" asp-action="Login">Log in</a></li>
</ul>
}
This just checks if the user is logged in and shows the appropriate buttons.
Add this partial to the _Layout.cshtml file after the existing navigation so that the whole navigation section looks like this.
<div class="navbar-collapse collapse justify-content-between">
  <ul class="navbar-nav mr-auto">
    <li class="nav-item">
      <a class="nav-link text-dark" asp-area="" asp-controller="Home" asp-action="Index">Home</a>
    </li>
    <li class="nav-item">
      <a class="nav-link text-dark" asp-area="" asp-controller="Home" asp-action="Privacy">Privacy</a>
    </li>
    <li class="nav-item">
      <a class="nav-link text-dark" asp-area="" asp-controller="LiveShows" asp-action="Index">Live Shows</a>
    </li>
  </ul>
  <partial name="_LoginPartial" />
</div>
NOTE: Notice that some of the classes have changed. This is to push the authentication menu to the right while leaving the regular navigation items where they are.
Well? What’re you waiting for? Fire that puppy up and bask in the glory of authentication!!

There’s still one thing left to fix. Right now users still enter their own name in the EnteredBy field and anyone can edit or delete anyone else’s posts.
Add Authorization to Your ASP.NET Core 2.2 Application
First things first, add the [Authorize] attribute to every action on LiveShowsController except the Index and Details actions.
NOTE: This will require a
usingstatement forMicrosoft.AspNetCore.Authorization
Change the Edit and the Create views to not ask the user for their name. Remove the EnteredBy form groups of both files. You can get it in the controller when they’ve logged in and add it there. In the LiveShowsController change the Create() method by removing the EnteredBy from the Bind list in the method signature, then add the following line to the beginning of the Create() method.
liveShow.EnteredBy = User.Identity.Name;
In the Edit() method, change the code inside the try block to:
var existingShow = await _context.LiveShows.FindAsync(id);
if(existingShow.EnteredBy != User.Identity.Name)
{
  return Unauthorized();
}
existingShow.Artist = liveShow.Artist;
existingShow.Venue = liveShow.Venue;
existingShow.ShowDate = liveShow.ShowDate;
_context.Update(existingShow);
await _context.SaveChangesAsync();
This just gets the existing show in the database with the associated ID and makes sure the logged in user is the one who entered it. If not, it just returns a 401 Unauthorized response. If the current user does own the record, it just updates all the values in the existing show, and saves the changes. Everything else in the method stays the same.
Lastly, change the Index and Details views to hide edit and delete buttons for users that are not the owner of that show. In the Index view, change the last td in the view to this.
<td>
  <a asp-action="Details" asp-route-id="@item.Id">Details</a>
  @if (User.Identity.IsAuthenticated && item.EnteredBy == User.Identity.Name)
  {
    <span> |</span>
    <a asp-action="Edit" asp-route-id="@item.Id">Edit</a><span> |</span>
    <a asp-action="Delete" asp-route-id="@item.Id">Delete</a>
  }
</td>
In the Details view do the same thing by changing the ending div to this.
<div>
  @if (User.Identity.IsAuthenticated && Model.EnteredBy == User.Identity.Name)
  {
    <a asp-action="Edit" asp-route-id="@Model.Id">Edit</a><span> |</span>
    <a asp-action="Delete" asp-route-id="@Model.Id">Delete</a><span> |</span>
  }
  <a asp-action="Index">Back to List</a>
</div>
Now you’re ready to rock like Beethoven! Fire the app up one more time and confirm that you can only change and delete your own records. Ain’t it cool?

Taking Your ASP.NET Core Skills to the Next Level
If you want to learn more about ASP.NET Core, check out some of the other great content on our blog!
- Build a CRUD App with ASP.NET Core and Typescript
- Build Secure Microservices with AWS Lambda and ASP.NET Core
- Build Your First Azure Function in Visual Studio Code
As always, leave comments below and don’t forget to follow us on Twitter and YouTube. Until next time, rock on!
Okta Developer Blog Comment Policy
We welcome relevant and respectful comments. Off-topic comments may be removed.