Add User Authentication to Your Spring Boot App in 15 Minutes
Heads up... this blog post is old!
For an updated version of this blog post, see OAuth 2.0 Java Guide: Secure Your App in 5 Minutes.

When’s the last time you had fun building a web application? We love Spring Boot because it makes it super easy to build a rich Java web application, and it can even be pretty fun. By combining Spring, Spring Boot, and Gradle, we have a complete build system that can develop, test, run, and deploy Spring applications in minutes.
But what about user authentication and authorization, you’re probably thinking. Maybe with a sneer. Surely that’s not easy. That’s never easy. A morass of boilerplate code, subtle opportunities for horrendous bugs, and security flaws. Let’s not even mention IE 8. Bottom line? Web application security is a real pain.. Or it can be. Or it was.
Along with building a modern web app with modern tools like Spring Boot and Thymeleaf, we’re also going to deploy Okta to make security a snap. Okta has professional web security developers that work full time to ensure their authentication and authorization code base is up-to-date on the latest best practices.
So don’t reinvent the wheel.
In this 15-minute tutorial you are going to build a complete web application that includes:
- Login and registration pages
- Password reset workflows
- Group-based access control
- Thymeleaf templates
- All kinds of Spring Boot + Okta goodness
If you haven’t already, head on over to developer.okta.com and sign up for a free account. Sign up is quick and easy - and did I mention? - free.
You’ll also want to go ahead and download the project code from our GitHub repository and checkout the start branch by running the following commands from the terminal in the repo root directory:
git clone -b start https://github.com/oktadeveloper/okta-spring-boot-app-with-auth-example.git
Note: In May 2025, the Okta Integrator Free Plan replaced Okta Developer Edition Accounts, and the Okta CLI was deprecated.
We preserved this post for reference, but the instructions no longer work exactly as written. Replace the Okta CLI commands by manually configuring Okta following the instructions in our Developer Documentation.
Start with Spring Boot and Thymeleaf
The starting point of the project is a very simple Spring Boot application without any Okta integration (we’ll add this later). The important files are:
- Three Java class files in
src/main/javaApplication.java:- The entry point for the entire app
- Loads the Spring Boot framework
SimpleAppController.java- Our basic controller class
- Maps requests to Thymeleaf template files
SpringSecurityWebAppConfig.java- Subclass of Spring’s WebSecurityConfigurerAdapter
- Override point that allows us to customize web application behavior
- Thymeleaf template files in
src/main/resources/templates build.gradlefile- This is the build script that tells Gradle how to build and run the app
src/main/resources/application.yml- application properties configuration file
src/main/java/Application.java is the entry point for the entire app, and is super simple. SpringApplication.run() bootstraps the Spring application from the Java main method. Notice that the Application class is the argument. This class contains the @SpringBootApplication annotation, which tells Spring to load the Spring Boot application support structure.
@SpringBootApplication
public class Application {
    public static void main(String[] args) {
        SpringApplication.run(Application.class, args);
    }
}
src/main/java/SpringSecurityWebAppConfig.java is (at the moment) a trivial subclass of Spring’s WebSecurityConfigurerAdapter class. You will use this class to configure some global security options. Right now it’s pretty boring.
@Configuration
public class SpringSecurityWebAppConfig extends WebSecurityConfigurerAdapter {
    @Override
    protected void configure(HttpSecurity http) throws Exception {
    }
}
src/main/java/SimpleAppController.java is the controller class. You’ll use this class to define mappings between request URLs and Thymeleaf templates, as well as to define some method-level authorization options.
Currently there is only one mapping: /, which maps to our “home” template. Part of Thymeleaf’s auto-magic-ness is that when a simple string is returned from a controller, it’s assumed to be a Thymeleaf template name (an .html file) found in the src/main/resources/templates directory.
@Controller
class SimpleAppController {
    @RequestMapping("/")
    String home() {
        return "home";
    }
}
Thus the a request to the home of our URL maps to a Thymeleaf template found at src/main/resources/templates/home.html. If you want to learn more about Thymeleaf templates, check out their documentation.
The home.html file is here:
<html xmlns:th="http://www.thymeleaf.org"
xmlns:sec="http://www.thymeleaf.org/thymeleaf-extras-springsecurity4">
<head>
<!--/*/ <th:block th:include="fragments/head :: head"/> /*/-->
</head>
<body>
<div class="container-fluid">
<div class="row">
<div class="box col-md-6 col-md-offset-3">
<div class="okta-header">
<img src="img/logo.png"/>
</div>
<!--/* displayed if account IS NOT null, indicating that the user IS logged in */-->
<div th:if="${#authorization.expression('isAuthenticated()')}">
<h1 th:inline="text">Hello, <span th:text="${#authentication.name}"></span>!</h1>
</div>
<!--/* displayed if account IS null, indicating that the user IS NOT logged in */-->
<div th:unless="${#authorization.expression('isAuthenticated()')}">
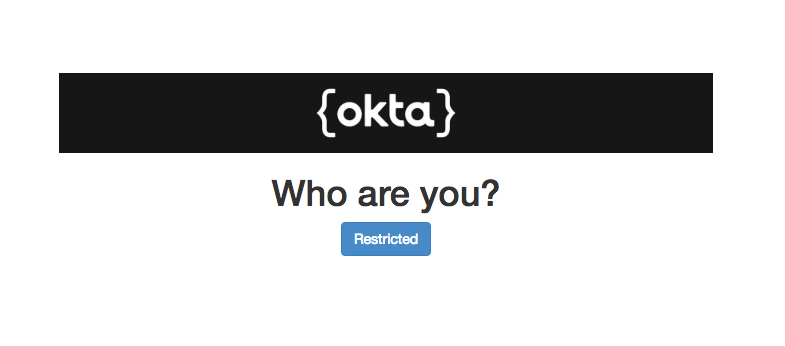
<h1>Who are you?</h1>
</div>
<a href="/restricted" class="btn btn-primary">Restricted</a>
</div>
</div>
</div>
</body>
</html>
Notice the two XML namespace declarations at the top of this template file. We need these to use Thymeleaf-specific HTML/XML elements. The first is for generic Thymeleaf support; the second is to add the Spring Security helpers that allow us to do things like check for authentication status and get the name of the authenticated user.
For example, these lines includes a check that only displays the div element if a user is authenticated, and also has a special <span> element that is autofilled with the authenticated user’s name.
<div th:if="${#authorization.expression('isAuthenticated()')}">
    <h1 th:inline="text">Hello, <span th:text="${#authentication.name}"></span>!</h1>
</div>
These security-dependent features are added by the thymeleaf-extras-springsecurity4 dependency and are NOT part of the basic Thymeleaf package.
Also notice the line that looks like a comment in the <head> block. This is, in fact, special notation that brings in another Thymeleaf template file located at src/main/resources/templates/fragments/head.html.
Start Your Spring Boot Application
Start the application using the command ./gradlew bootRun. You will need to run this command from a terminal window from the project’s root directory.
You’ll see a lot of text that looks like the following.
> Task :bootRun

  .   ____          _            __ _ _
 /\\ / ___'_ __ _ _(_)_ __  __ _ \ \ \ \
( ( )\___ | '_ | '_| | '_ \/ _` | \ \ \ \
 \\/  ___)| |_)| | | | | || (_| |  ) ) ) )
  '  |____| .__|_| |_|_| |_\__, | / / / /
 =========|_|==============|___/=/_/_/_/
 :: Spring Boot ::        (v2.0.5.RELEASE)

[main] INFO com.okta.springbootwithauth.Application - Starting Application on andrew-mpb.local with PID 37412 (started by cantgetnosleep in
...
[main] INFO org.springframework.boot.web.embedded.tomcat.TomcatWebServer - Tomcat initialized with port(s): 8080 (http)
...

[http-nio-8080-exec-1] INFO org.springframework.web.servlet.DispatcherServlet - FrameworkServlet 'dispatcherServlet': initialization completed in 27 ms
Once the task has finished running the application, navigate a browser to http://localhost:8080.
You will see the following:
Configure User Authentication in Your Spring Boot App with OAuth 2.0
So far we have a super basic “hello world”-ish Spring Boot application without any security configured at all (although we do have the necessary dependencies already in the build.gradle file).
Let’s add some OAuth 2.0 single sign-on OpenID Connect goodness!
What did I just say? Let me pause and break down that language a bit. OAuth 2.0 is Open Authentication: an industry standard protocol for authorization. “2” means that it is the 2.0 version of the protocol. Single Sign-on, or SSO, allows web applications to share authentication, such as the “Sign in with Google” or “Sign in with Facebook” buttons you see all over the web. OIDC, or OpenID Connect, is an authentication and identity layer built on top of OAuth 2.0. Remember that authorization deals with determining if a user is allowed to perform an action or access a resource while authentication deals with ensuring that a user is who they say they are.
Whew! If you get the sense that there are a lot of moving parts in all that, you’re correct. The beauty of Okta is that we’ve made this super simple for you.
Let’s set up your OIDC application on Okta for OAuth 2.0 SSO!
Before you begin, you’ll need a free Okta developer account. Install the Okta CLI and run okta register to sign up for a new account. If you already have an account, run okta login.
Then, run okta apps create. Select the default app name, or change it as you see fit.
Choose Web and press Enter.
Select Okta Spring Boot Starter.
Then, change the Redirect URI to http://localhost:8080/login and use http://localhost:8080 for the Logout Redirect URI.
What does the Okta CLI do?
The Okta CLI will create an OIDC Web App in your Okta Org. It will add the redirect URIs you specified and grant access to the Everyone group. You will see output like the following when it’s finished:
Okta application configuration has been written to:
  /path/to/app/src/main/resources/application.properties
Open src/main/resources/application.properties to see the issuer and credentials for your app.
okta.oauth2.issuer=https://dev-133337.okta.com/oauth2/default
okta.oauth2.client-id=0oab8eb55Kb9jdMIr5d6
okta.oauth2.client-secret=NEVER-SHOW-SECRETS
NOTE: You can also use the Okta Admin Console to create your app. See Create a Spring Boot App for more information.
That’s all you need to do to set up Okta for OAuth! Now let’s return to the Spring Boot app and hook our new OIDC application into the Spring Boot application.
Add User Authentication via OAuth 2.0 to the Spring Boot Project
The first thing you need to do is edit SpringSecurityWebAppConfig to 1) add the @EnableOAuth2Sso annotation, and 2) use the configure() method to set up some global security rules.
@EnableOAuth2Sso
@Configuration
public class SpringSecurityWebAppConfig extends WebSecurityConfigurerAdapter {

    @Override
  protected void configure(HttpSecurity http) throws Exception {
        http.authorizeRequests()
            .antMatchers("/").permitAll()
            .antMatchers("/img/**").permitAll()
            .anyRequest().authenticated();
    }

}
The @EnableOAuth2Sso does a whole lot of work behind the scenes auto-magicking and bootstrapping things so that the Spring Boot project is configured for OAuth SSO. This is, incidentally, why we need the spring-security-oauth2-autoconfigure dependency.
Another thing that’s happening behind the scenes is that the Okta Spring Boot Starter dependency (okta-spring-boot-starter) is simplifying and configuring things to make the whole process even simpler. There’s a lot going on with this and it’s worth checking out its GitHub project page if you want to dig deeper.
If you look at the configure() method, you’ll see a series of lines following the http.authorizeRequests() call. This is using Spring Security’s fluent API.
What we’re saying is this:
- Permit anyone to access the home page
- Permit anyone (or any request, really) to access the
/imgsubfolder - Force any other requests to be authenticated
Start Your Spring Boot App with OAuth 2.0 SSO
Use ./gradlew bootRun to start the app. Open the app page in your browser: http://localhost:8080.
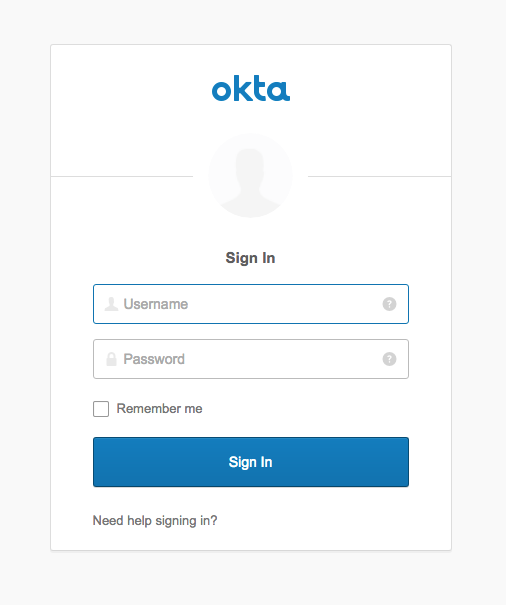
Click the Restricted button.
You will be directed to the Okta login page. If you actually log in, you’ll be directed to a simple error page. That’s because you haven’t configured a /restricted controller route or an associated template.
Create the Restricted Controller Method and Thymeleaf Template
Add the restricted() method to your SimpleAppController.java class file:
@Controller
class SimpleAppController {

    /* omitted for brevity */

    @RequestMapping("/restricted")
    String restricted() {
        return "restricted";
    }
}
Create a restricted.html file in the src/main/resources/templates directory:
<html xmlns:th="http://www.thymeleaf.org" xmlns:sec="http://www.thymeleaf.org/thymeleaf-extras-springsecurity4">
<head>
    <!--/*/ <th:block th:include="fragments/head :: head"/> /*/-->
</head>
<body>
<div class="container-fluid">
    <div class="row">
        <div class="box col-md-6 col-md-offset-3">
            <div class="okta-header">
                <img src="img/logo.png"/>
            </div>

            <!--/* displayed if account IS NOT null, indicating that the user IS logged in */-->
  <div th:if="${#authorization.expression('isAuthenticated()')}">
                <h1 th:inline="text"><span th:text="${#authentication.name}"></span>, You are allowed here.</h1>
            </div>

            <!--/* displayed if account IS null, indicating that the user IS NOT logged in */-->
  <div th:unless="${#authorization.expression('isAuthenticated()')}">
                <h1>How did you get here, anonymous?!</h1>
            </div>

            <a href="/" class="btn btn-primary">Go Home</a>

        </div>
    </div>
</div>
</body>
</html>
Run (or restart) the app again. This time click on the Restricted button and log in through Okta SSO.
You’ll see a page that says something like, “andrew@gmail.com, you are allowed here.”
This point in the tutorial corresponds to the okta-oauth branch in the git repository.
Right now any authenticated user can access this page. There is no differentiation between types of users or specific users. What you’re going to do next is add Group-based authorization.
Add Group-based Access Control to Your Spring Boot App
You have a /restricted path that requires users to be authenticated. But it’s any user. Now you need to add an admin section of the web application that can only be accessed by admins. Admin here is an example of a “Group” - a collection of users to which specific permissions are applied.
First, create a new Java class file AdminService.java.
@Service
public class AdminService {
    @PreAuthorize("hasRole(@roles.ADMIN)")
    public boolean ensureAdmin() {
        return true;
    }
}
The AdminService provides a programmatic way of checking for group membership. Now, you might be asking yourself: wait? Why is it hasRole if you’re implementing group-based access control? Well, you’d be right to ask. It’s confusing. The short answer is that while Roles and Groups do have different definitions technically, functionally they can be assigned and checked for in the same way. Spring uses the abstraction of “authority” to communicate with the OAuth OIDC app about both groups and roles.
Next, create another Java class file Roles.java.
@Component
public class Roles {
    public final String ADMIN = "Admin";
}
This file simply maps the Admin role as an immutable entity (a property on the Roles class) to a string. We’ll be using this string behind the scenes to communicate between Okta and Spring about the Admin role.
If this seems like a lot of boilerplate, you’d be correct. It’s overkill for this example. You could totally skip the AdminService class and Roles class and just use the @PreAuthorize annotation directly on the controller class using the string name for the role. However, in larger applications with potentially dozens of groups that are being dynamically assigned, having the ability to define them using Java objects and methods is pretty useful.
Also, to be using best practices, you should have an interface defined for the AdminService class instead of using the implementation class directly as a dependency. This would be useful in testing, for example, if you wanted to swap out the bean with a test bean. This step has been omitted for brevity in this tutorial.
The next thing you need to do is override a Spring default behavior. you do this by adding some lines to the SpringSecurityWebAppConfig class.
@Bean
GrantedAuthorityDefaults grantedAuthorityDefaults() {
    return new GrantedAuthorityDefaults(""); // Remove the ROLE_ prefix
}
The behavior we are overriding here is Spring’s standard role prefix. Spring REALLY, REALLY wants to add “ROLE_” to the beginning of every role name. Unfortunately, I don’t like naming my roles using the “ROLE_” prefix. I want my admin role to be named “Admin”, not “ROLE_Admin”, so you’re going to change this behavior with the lines above.
You also need to add a new annotation to the SpringSecurityWebAppConfig class: @EnableGlobalMethodSecurity(prePostEnabled = true)
The SpringSecurityWebAppConfig class code should now look like this:
@EnableOAuth2Sso
@Configuration
@EnableGlobalMethodSecurity(prePostEnabled = true)
public class SpringSecurityWebAppConfig extends WebSecurityConfigurerAdapter {

    @Bean
    GrantedAuthorityDefaults grantedAuthorityDefaults() {
        return new GrantedAuthorityDefaults(""); // Remove the ROLE_ prefix
    }

    @Override
    protected void configure(HttpSecurity http) throws Exception {
        http.authorizeRequests()
            .antMatchers("/").permitAll()
            .antMatchers("/img/**").permitAll()
            .anyRequest().authenticated();
    }
}
You’re nearly done. At least with the Java part. Add the following code to the SimpleAppController class.
final AdminService adminService;

@Autowired
SimpleAppController(AdminService adminService) {
    this.adminService = adminService;
}

@RequestMapping("/admin")
String admin() {
    adminService.ensureAdmin();
    return "admin";
}
Above you’re not only adding a new /admin controller mapping, but you’re also using dependency injection to inject the AdminService bean into the class as a class property, and you’re using the AdminService to protect the method based on user membership in the Admin group. Pretty cool, huh?
Finally, add a new Thymeleaf template file called admin.html.
<html xmlns:th="http://www.thymeleaf.org">
<head>
    <!--/*/ <th:block th:include="fragments/head :: head"/> /*/-->
</head>
<body>
<div class="container-fluid">
    <div class="row">
        <div class="box col-md-6 col-md-offset-3">
            <div class="okta-header">
                <img src="img/logo.png"/>
            </div>

            <h1 th:inline="text">Hello admin!</h1>

            <a href="/" class="btn btn-primary">Go Home</a>
        </div>
    </div>
</div>
</body>
</html>
The next thing we have to do is configure the Admin group on Okta, and assign our user to it.
Create an Admin Group
Run okta login and open the resulting URL in your browser. Go to Directory and select Groups.
Click on the Add Group button.
Name the group “Admin” and give it a description (I put “Administrators”, but it doesn’t matter what you put here really, just something descriptive).
Add a Groups Claim to the Default Authorization Server in Your Spring Boot App
The next thing you’ll need to do is add a “groups” claim to the default authorization server.
Navigate to Security > API and click on Authorization Servers.
Click on the default authorization server.
Click on the Claims tab.
Click the Add Claim button.
Use the following values for the new claim:
- Name:
groups - Include in token type: Access Token
- Value type: Groups
- Filter: Regex:
.* - Include in: Any scope
This last step tells Okta to send the groups information to your application (the groups “claim”).
At this point you’ve created the Admin group, but you haven’t added any members to it. If you run the app, ./gradlew bootRun, you’ll be able to access the /restricted endpoint but not the /admin endpoint because you’re user is not a member of the Admin group.
Test Your User Authentication: Attempt to Navigate to the Admin Endpoint
Go ahead, give it a try!
Boot the app, and navigate to http://localhost:8080/admin.
You should see the very exciting Whitelabel Error Page. Notice that you can still navigate to the /restricted endpoint.
# Whitelabel Error Page
This application has no explicit mapping for /error, so you are seeing this as a fallback.
Wed Oct 03 09:49:20 PDT 2018
There was an unexpected error (type=Forbidden, status=403).
Forbidden
Add a User to an Admin Group
You’re getting a 403 because your Okta user is not in the Admin group. Let’s fix that!
In the Okta Admin Console, go to Directory > Groups.
Click on the Admin group. Click on the Add Members button. Use the search box to find your user in the pop up and add yourself to the group!
Sign out (or use an incognito window) and try again.
This time you’ll see our super fancy “Hello Admin!” page.
Enable Self-Service Registration in Your Spring Boot App
You’ve accomplished almost all of your goals! Great job. Your life is complete. Or–at least, your tutorial is almost complete. The last thing to be done is to enable Okta’s Self-Service Registration (SSR).
Navigate to Directory > Self-Service Registration.
Enable the feature. I unchecked the box for email verification just to save time in this tutorial.
This point in the tutorial corresponds to the group-auth branch in the git repository.
Log In or Register a New User
Log out of Okta, or open an incognito window, and navigate to http://localhost:8080/restricted.
Click the Sign Up button at the bottom of the login panel.
Register a new user! A pro-tip: if you use GMail, you can add “+01” (or any number) to the end of your email address before the “@” symbol, and it will look like a different address but still go to the same email address. For example, if your email address is “andrew@gmail.com” you can use “andrew+01@gmail.com”. This allows you to register as a new user with a “different” email address that will actually go to the same email address. I’ve found this super helpful for testing.
Complete the form. Choose your security question and image on the next page. And that’s it! You’ve registered a new user and they’re automatically authenticated and authorized for the /restricted endpoint.
Now try and access the /admin endpoint. You won’t be able to. Your new user is not in the Admin group.
Learn More About User Authentication and Spring Boot
Okta and Spring Boot make it super easy to make professional web applications. In this tutorial we demonstrated how to create a basic Spring Boot project, how to quickly add Okta OAuth 2.0 SSO to it, and how to configure Group-based authorization both on Okta and with Spring Security. We also looked at Okta’s Self-Service Registration feature that makes it super simple to let users self-register.
This tutorial used an AdminService object and an Roles class to define the Group-based authorization behavior. This method makes sense for larger projects that require flexibility and programmatic authorization. Simpler projects can use the @hasAuthority annotation directly on controller methods. Take a look at this tutorial to see how this is accomplished: Build a Web App with Spring Boot and Spring Security in 15 Minutes.
If you’d like to learn more about Spring Boot, Spring Security, or Okta, check out any of these great tutorials:
- Get Started with Spring Boot, OAuth 2.0, and Okta
- Add Single Sign-On to Your Spring Boot Web App in 15 Minutes
- Secure Your Spring Boot Application with Multi-Factor Authentication
- Build a Secure API with Spring Boot and GraphQL
If you want to dive deeper, take a look at the Okta Spring Boot Starter GitHub page.
If you have any questions about this post, please add a comment below. For more awesome content, follow @oktadev on Twitter, like us on Facebook, or subscribe to our YouTube channel.
Okta Developer Blog Comment Policy
We welcome relevant and respectful comments. Off-topic comments may be removed.