Build a Simple CRUD App with ASP.NET Framework 4.x Web API and Vue
ASP.NET Web API was released in 2012. Today, it’s a mature framework for building ReST-ful APIs to back any modern app. It pairs nicely with the newcomer on the client-side block, Vue In this tutorial, you’ll use Vue with .NET Framework 4.7.1 Web API and Visual Studio 2017 to build a simple CRUD app to track your weight and achieve your fitness goals, but really you could use these technologies to do just about anything.
Let’s get started!
You’ll need to have a few additional tools installed, starting with Node and npm. In your favorite terminal do the following:
node -v
Make sure you have Node 8.9 or greater installed. If you don’t have Node at all, you should download it and install from the following page: Node.js download.
You will also need Vue CLI tools.
To install, simply execute the following command in PowerShell or in your favorite terminal:
npm install -g vue-cli@2.9.6
After that, make sure you have the latest Visual Studio 2017 installed with .NET Framework 4.7.1.
Create a root folder for all of your source files, including backend and frontend code, and name the folder WeightTracker. After that, inside of that folder create a folder named Vue and folder named AspNetWebApi.
Note: In May 2025, the Okta Integrator Free Plan replaced Okta Developer Edition Accounts, and the Okta CLI was deprecated.
We preserved this post for reference, but the instructions no longer work exactly as written. Replace the Okta CLI commands by manually configuring Okta following the instructions in our Developer Documentation.
Get Started with ASP.NET Web API
First, create an API using a built-in template within Visual Studio from scratch.
In Visual Studio, select File -> New Project
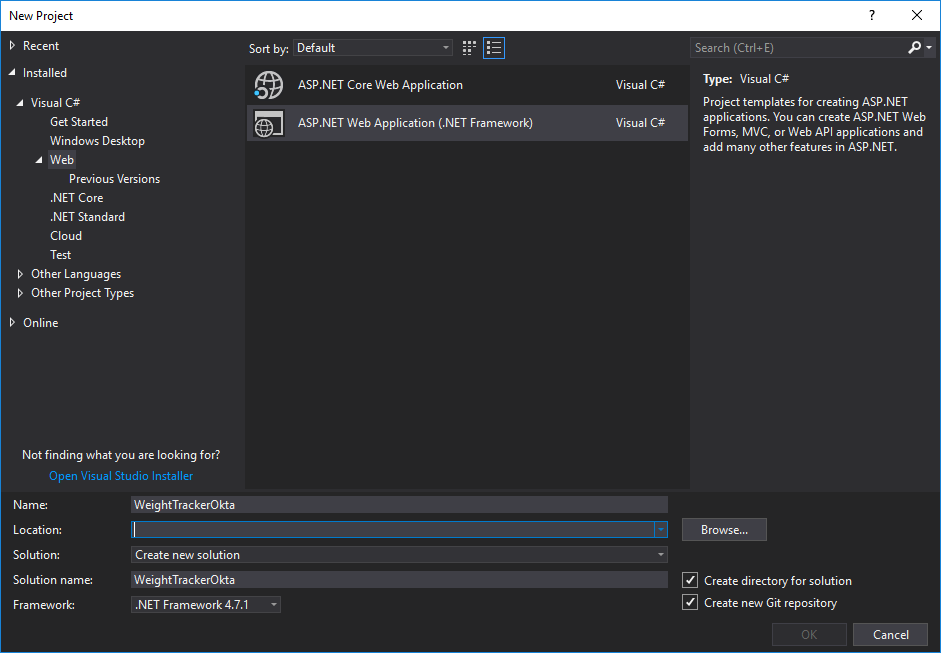
For location you should choose the AspNetWebApi folder inside of the main folder.

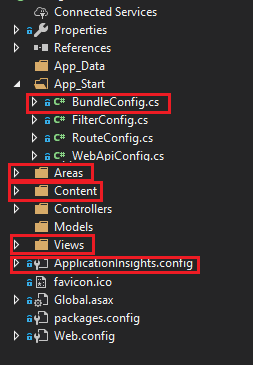
At this moment, you have a lot of boilerplate code that you really don’t need in your application. You can clean up the boilerplate code and remove all redundant files and NuGet packages.
Start by removing all unnecessary NuGet packages: Microsoft.ApplicationInsights related packages like Modernizr, WebGrease, Antlr, bootstrap, and jQuery by running the following script into your Package Manager Console:
Uninstall-Package Microsoft.ApplicationInsights.Web
Uninstall-Package Microsoft.ApplicationInsights.WindowsServer
Uninstall-Package Microsoft.ApplicationInsights.WindowsServer.TelemetryChannel
Uninstall-Package Microsoft.ApplicationInsights.PerfCounterCollector
Uninstall-Package Microsoft.ApplicationInsights.DependencyCollector
Uninstall-Package Microsoft.ApplicationInsights.Agent.Intercept
Uninstall-Package Microsoft.ApplicationInsights
Uninstall-Package Microsoft.AspNet.Web.Optimization
Uninstall-Package bootstrap
Uninstall-Package jQuery
Uninstall-Package WebGrease
Uninstall-Package Antlr
Uninstall-Package Modernizr
Since you are building an API, you don’t need UI related files or folders. You can remove all the following:
After you have done this, go to your Global.asax file and remove the using statement:
using System.Web.Optimization;
And also remove the Bundles registration part, since you will not be needing these for API:
BundleConfig.RegisterBundles(BundleTable.Bundles);
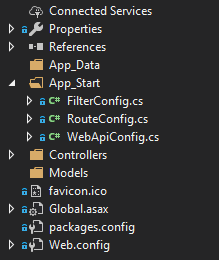
After finishing you should have a clean project solution and perfect starting ground. Your solution should look like this:
Install the Required Dependencies for ASP.NET Web API
To install the dependencies you need you can make use of Package Manager Console again and execute the following:
Install-Package Microsoft.Owin.Host.SystemWeb -Version 4.0.0
Install-Package Microsoft.IdentityModel.Protocols.OpenIdConnect -Version 5.2.1
Install-Package Microsoft.IdentityModel.Tokens -Version 5.2.1
Install-Package Microsoft.Owin.Security.Jwt -Version 4.0.0
Install-Package EntityFramework -Version 6.2.0
Install-Package Microsoft.AspNet.WebApi.Cors -Version 5.2.6
Install-Package Microsoft.AspNet.Identity.Owin -Version 2.2.1
Set Up the Database for Your ASP.NET Web API
For this tutorial you’ll use Entity Framework 6 as your database solution, mostly because it’s easy to set up and it doesn’t require you to know any SQL. It also maps its DbSet properties to tables and lets you work with them as you would with regular collections. You can also make use of Language Integrated Query (LINQ) and execute LINQ commands against the table like you would with a regular list and use its migration feature to tracks changes to your classes and then update the database schema accordingly.
Setting up the database connection is fairly easy. Just add a connection string to Web.Config. Make sure to add it inside of <configuration>, after <configSections></configSections>
  <connectionStrings>
    <add name="OktaConnectionString"
      connectionString="Data Source=(LocalDb)\MSSQLLocalDB;Initial Catalog=WeightTracker;Integrated Security=SSPI;AttachDBFilename=|DataDirectory|\WeightTracker.mdf"
      providerName="System.Data.SqlClient"
    />
  </connectionStrings>
Create Your DbContext Class and Model
First, you will want to add a model for tracking your weights. Create a file in the Models folder called WeightMeasurement.cs.
using System;
using System.ComponentModel.DataAnnotations;

namespace WeightTrackerOkta.Models
{
    public class WeightMeasurement
    {
public int Id { get; set; }

public string Name { get; set; }

public decimal Value { get; set; }

public DateTime MeasuredAt{ get; set; }
    }
}
As you can see, you have a standard property for unique identifier - Id, which will be picked up by Entity Framework and used as primary key. You need Value to store your trackings and Description to associate a name with them. You’ll also use MeasuredAt so you can retroactively add weight measurements.
Next, create an ApplicationDbContext class inside of a new folder called Data. It will be pretty simple:
using System.Data.Entity;
using WeightTrackerOkta.Models;

namespace WeightTrackerOkta.Data
{
    public class ApplicationDbContext : DbContext
    {
        public ApplicationDbContext() : base("OktaConnectionString")
        {
        }

        public static ApplicationDbContext Create()
        {
            return new ApplicationDbContext();
        }

        public DbSet<WeightMeasurement> WeightMeasurements{ get; set; }
    }
}
You are using the base() call to the constructor of the parent class and sending the connection string name. You also need the DbSet property that you will use to handle the updates and read from the table in the database.
Enable and Run Migrations in Your ASP.NET Web API
Open the Package Manager Console, and run the following to enable migrations:
Enable-Migrations
Now you can add your initial migration, which will contain the creation of WeightMeasurements table:
Add-Migration Initial
Now, you can update the database:
Update-Database -Verbose
A verbose flag will allow you to see the generated SQL statements, and this can help you in resolving errors, if any occur.
Build Endpoints for Your ASP.NET Web API
Because our simple ASP.NET Web API + Vue CRUD appwill handle only basic CRUD functionality, you will need only the following endpoints.
-
Get All
-
Get by ID
-
Update
-
Create
-
Delete
To build these endpoints, you can make use of the scaffolding feature within Visual studio. This will create a controller with all the CRUD actions for you. You need to specify the model that you want to use and the matching DbContext class.
Right click on Controllers folder, and choose Add -> Controller.
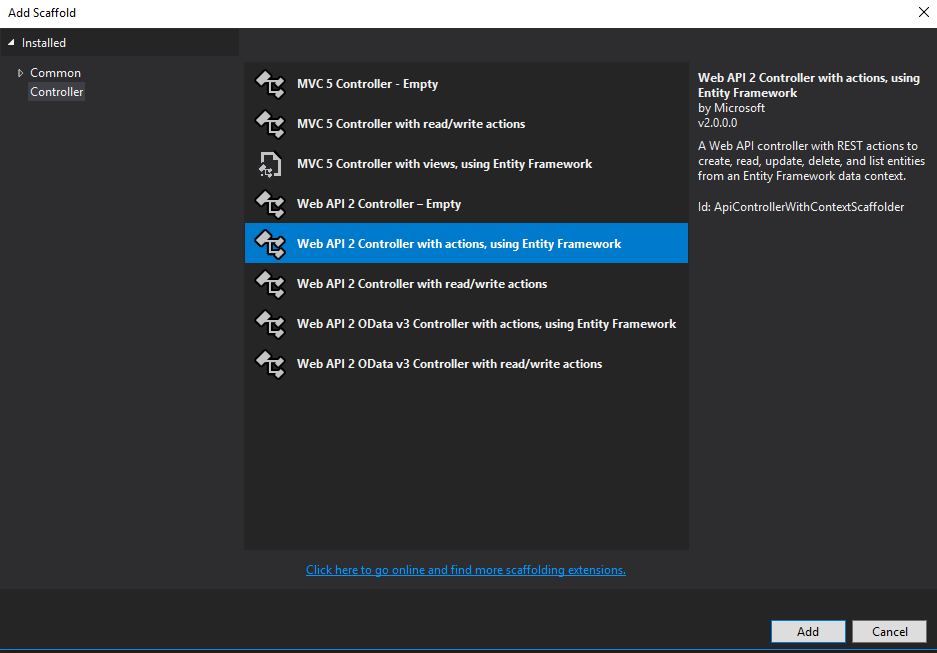
You will want to pick Web API 2 Controller with actions, using Entity Framework. On the next screen, choose your model and DbContext classes, and select Use async controller actions.
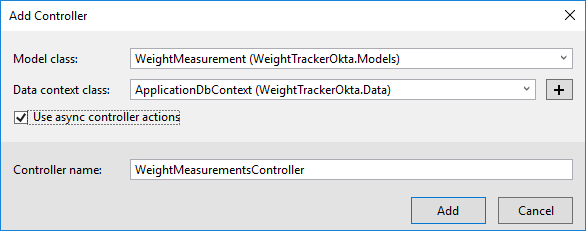
You should use async controller actions since it’s standard today and helps with IO heavy work. When used properly, the async/await pattern also makes sure that you aren’t blocking the application with any synchronous calls. It’s a really powerful feature since it allows you to write asynchronous code in synchronous manner. However, you do need to make sure that you are using async/await in all layers that come after the controllers.
Enable CORS for Your ASP.NET Web API + Vue App
Cross-Origin Resource Sharing (CORS) is a mechanism that uses additional HTTP headers to tell a browser to let a web application running at one origin (domain) have permission to access selected resources from a server at a different origin.
At some point you will want your API to be able to work with various clients. In case of web browsers, by default they are not allowed to access hosts that have a different origin (domain, protocol, and port) than their own. Since you want your Vue web application to be independent, it will be running on different port, hence a different origin from your ASP.NET Web API.
To resolve this issue, you will have to enable CORS on your Web API.
You can do it by adding the following piece of code to the Register method of your WebApiConfig.cs file, which is located in the App_start folder.
You will first need to add this using statement for CORS:
using System.Web.Http.Cors;
Then add the following to the end of the Register() method.
// Enable CORS for the Vue App
var cors = new EnableCorsAttribute("http://localhost:8080", "*", "*");
config.EnableCors(cors);
The client-side application will be served by Vue CLI and by default will be running on the 8080 port. That is why you added http://localhost:4200 as the allowed origin. Since you will be running both the frontend and backend locally, you know you can trust this origin. Therefore, you can use the * as a wildcard for headers and methods, allowing all headers and methods from this origin. In production environment, you would want to only allow only the needed headers and methods to your clients (origins).
Set the JSON Formatter for ASP.NET Web API 2
Unfortunately, even today, ASP.Net Web API 2 has an XML formatter as default one, meaning that API responds in the form of XML to requests, unless the client specifically asks for JSON. You probably want to make life easier for your clients and set the JSON formatter as default one and get rid of the XML formatter.
Add the following code at the end of Register method inside of WebApiConfig class:
// Set JSON formatter as default one and remove XmlFormatter

var jsonFormatter = config.Formatters.JsonFormatter;

jsonFormatter.SerializerSettings.ContractResolver = new CamelCasePropertyNamesContractResolver();

// Remove the XML formatter
config.Formatters.Remove(config.Formatters.XmlFormatter);

jsonFormatter.SerializerSettings.DateTimeZoneHandling = Newtonsoft.Json.DateTimeZoneHandling.Utc;
You’ll also need to add the using statement for the JSON serializer to the file:
using Newtonsoft.Json.Serialization;
Also, be sure to specify the port the API will be running on so that your clients can access it. To do so, right click on the project in the solution explorer and click properties. In the main properties window, choose Web from the left-hand menu and set the Project Url property to http://localhost:5000.
Build a Single Page Application with Vue
For this tutorial, you’ll use the official Vue CLI to make the process of bootstrapping a new template application as smooth as possible. You’ll use the PWA template for Vue.js applications.
Inside of Vue folder you’ll initialize the new Vue application:
vue init pwa weight-tracker .
Make sure you install the vue-router as well when you are asked to. You can simply leave all the defaults (and press enter) except for last four:
? Install vue-router? Yes
? Use ESLint to lint your code? No
? Setup unit tests with Karma + Mocha? No
? Setup e2e tests with Nightwatch? No
You can now proceed with the instructions you get from the CLI:
cd weight-tracker
npm install
npm run dev
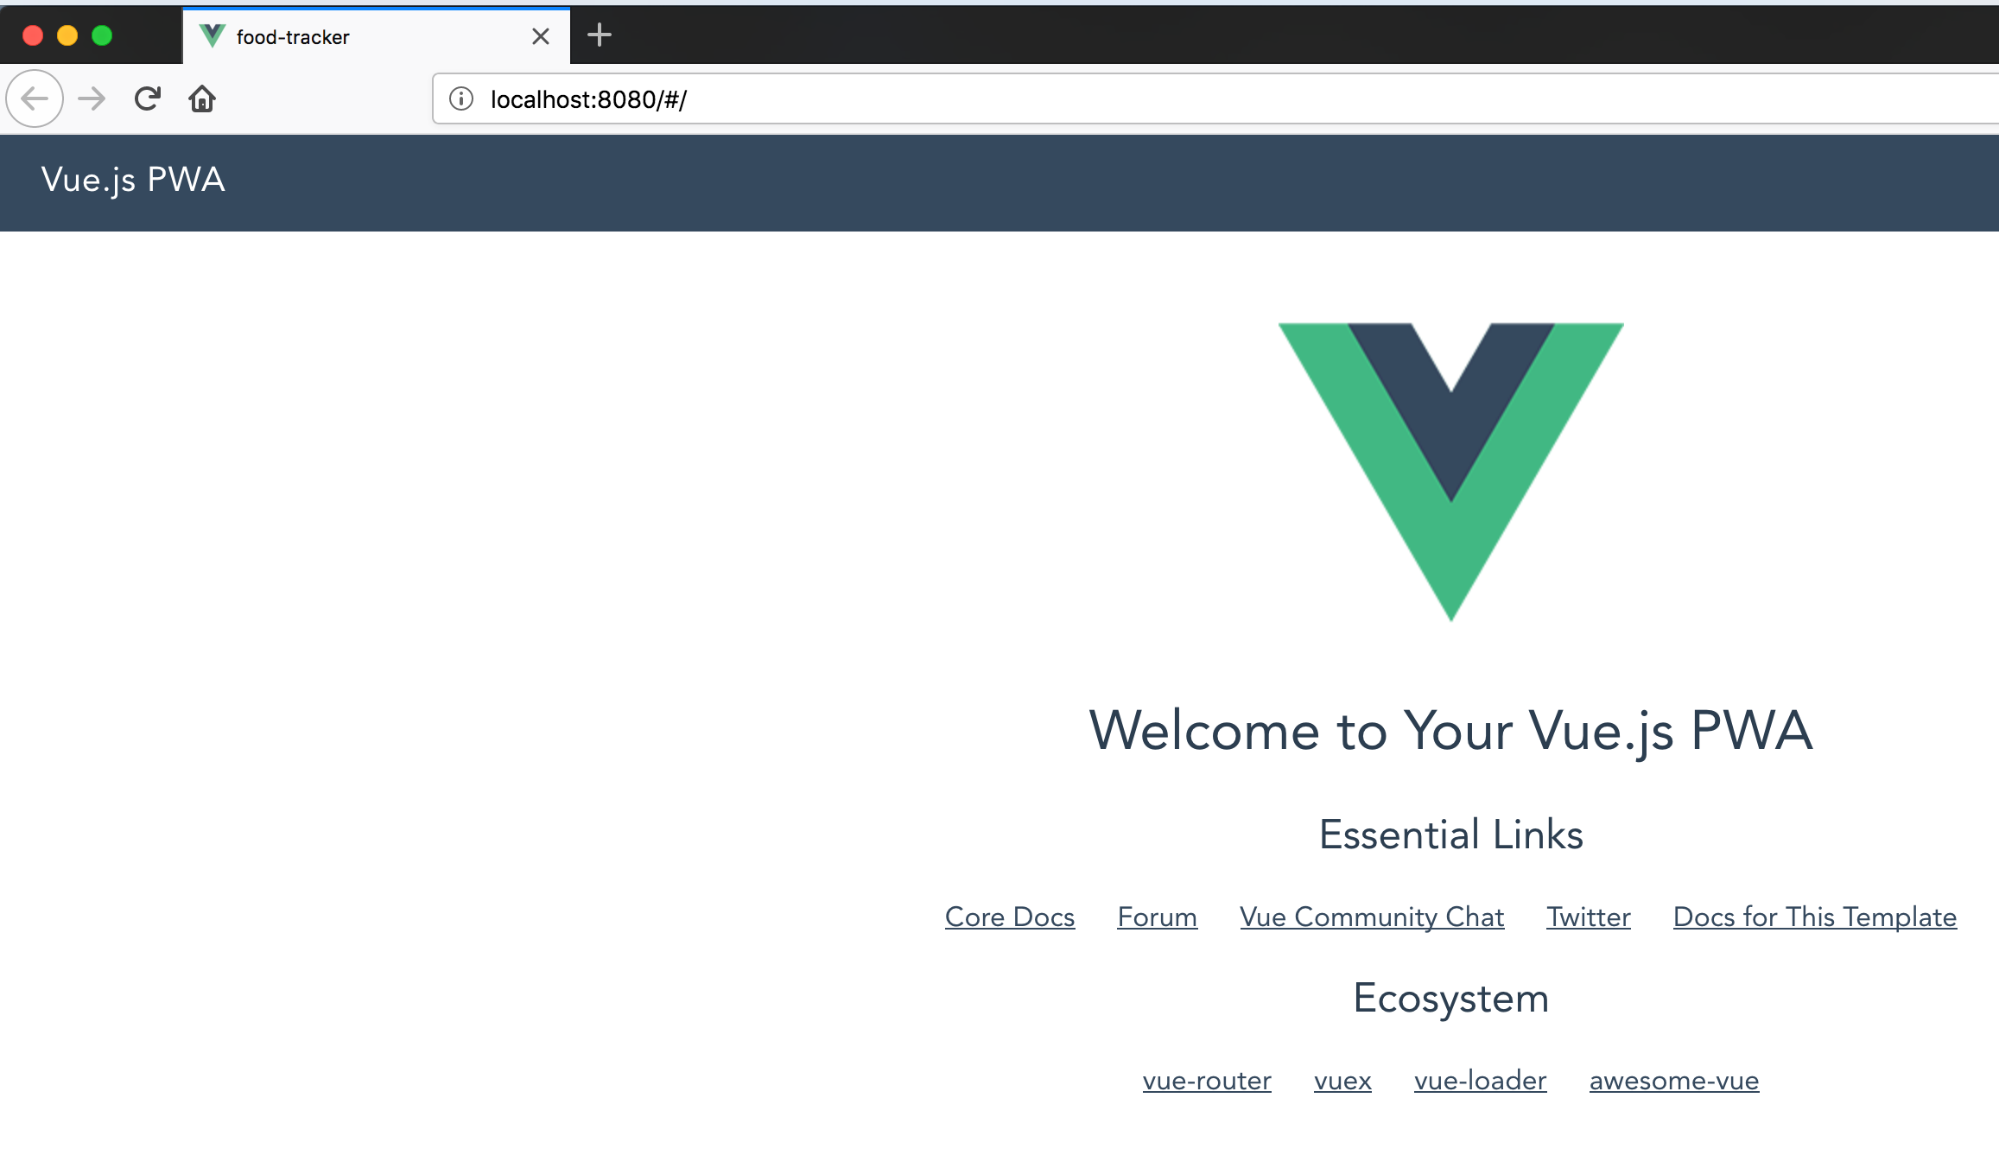
Your default browser should now open up at http://localhost:8080/#/ and display the homepage of starter Vue.js PWA template.
Add Bootstrap to Your Vue Project
You will install the most popular Bootstrap package for Vue, bootstrap-vue. It might not be the official package since there is no official Bootstrap Vue plugin, but with 6k stars and over 150 contributors, it’s a great choice.
The latest version at the time of writing this post is 2.0 RC11:
npm i bootstrap-vue@2.0.0-rc.11 --save
Now you want to register the BootstrapVue plugin inside your main.js file (inside src folder):
import BootstrapVue from 'bootstrap-vue'
import 'bootstrap/dist/css/bootstrap.css'
import 'bootstrap-vue/dist/bootstrap-vue.css'
And after that, make sure Vue is making use of the plugin:
Vue.use(BootstrapVue);
After you apply those changes, this is how your main.js file is supposed to look:
// The Vue build version to load with the `import` command
// (runtime-only or standalone) has been set in webpack.base.conf with an alias.
import Vue from 'vue'
import App from './App'

import BootstrapVue from 'bootstrap-vue'
import 'bootstrap/dist/css/bootstrap.css'
import 'bootstrap-vue/dist/bootstrap-vue.css'

import router from './router'

Vue.use(BootstrapVue)

Vue.config.productionTip = false

/* eslint-disable no-new */
new Vue({
  el: '#app',
  router,
  template: '<App/>',
  components: { App }
})
Create the Layout for Your ASP.NET Web API + Vue Application
You can find the main layout for your Vue template inside the App.vue file, which is located in src folder. The template uses the router-view component to render appropriate component for the current location.
Replace the content of your App.vue file with the following code:
<template>
  <div id="app">
    <header>
      <b-navbar toggleable="md" type="light" variant="light">
        <b-navbar-toggle target="nav-collapse"></b-navbar-toggle>
        <b-navbar-brand to="/">Weight Tracker</b-navbar-brand>
        <b-collapse is-nav id="nav-collapse">
          <b-navbar-nav>
            <b-nav-item href="#" @click.prevent="login" v-if="!user">Login</b-nav-item>
            <b-nav-item href="#" @click.prevent="logout" v-else>Logout</b-nav-item>
          </b-navbar-nav>
        </b-collapse>
      </b-navbar>
    </header>
    <main>
      <router-view></router-view>
    </main>
  </div>
</template>

<script>

  export default {
    name: 'app',
    data () {
      return {
        user: null
      }
    },
    methods: {
      login () {

      },
      async logout () {

      }
    }
  }
</script>

<style>
body {
  margin: 0;
}

#app {
  font-family: 'Avenir', Helvetica, Arial, sans-serif;
  -webkit-font-smoothing: antialiased;
  -moz-osx-font-smoothing: grayscale;
  color: #2c3e50;
}

main {
  text-align: center;
  margin-top: 40px;
}

header {
  margin: 0;
  height: 56px;
  padding: 0 16px 0 24px;
  background-color: #f8f9fa;
  color: #ffffff;
}

header span {
  display: block;
  position: relative;
  font-size: 20px;
  line-height: 1;
  letter-spacing: .02em;
  font-weight: 400;
  box-sizing: border-box;
  padding-top: 16px;
}
</style>
While you are changing the files for layout, you should also clean up your Hello component which is used for the main page. Replace the content of Hello.vue with the following:
<template>
  <div class="hello">
    <h1></h1>
    <h2>Track your weight measurements</h2>
  </div>
</template>

<script>
export default {
  data() {
    return {
      title: 'Weight Tracker Application'
    };
  }
};
</script>

<!-- Add "scoped" attribute to limit CSS to this component only -->
<style>
h1,
h2 {
  font-weight: normal;
}

ul {
  list-style-type: none;
  padding: 0;
}

li {
  display: inline-block;
  margin: 0 10px;
}

a {
  color: #35495e;
}
</style>
Add Authentication to Your Vue Application
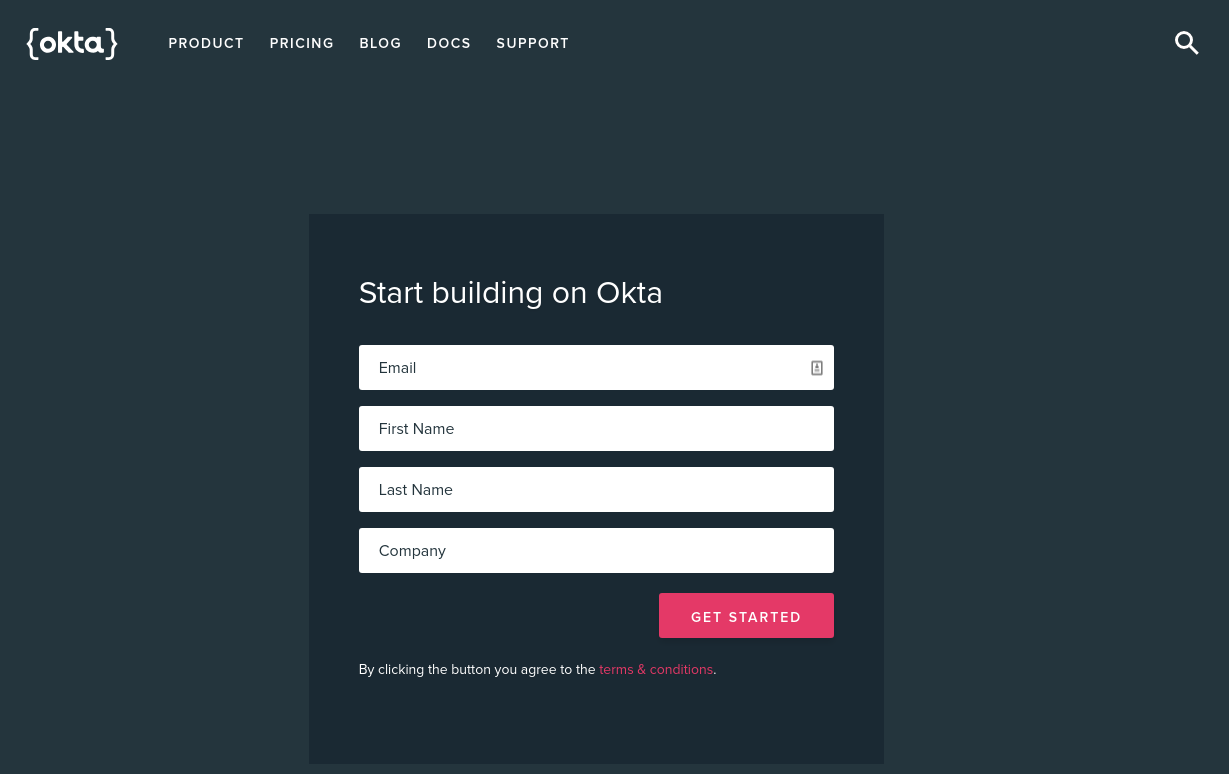
Handling the authentication is never an easy or comfortable task. If you want to quickly and easily take care of authentication for your application you’re likely in the market for a solution like Okta.That’s why so many developers love and use Okta, they never want to build auth again, and are happy to leave it to us.
To get started with Okta, sign up for a forever-free developer account or (log in if you already have one).
You should see the Dashboard and in the upper right corner, there should be your unique Org URL. Save it for later.
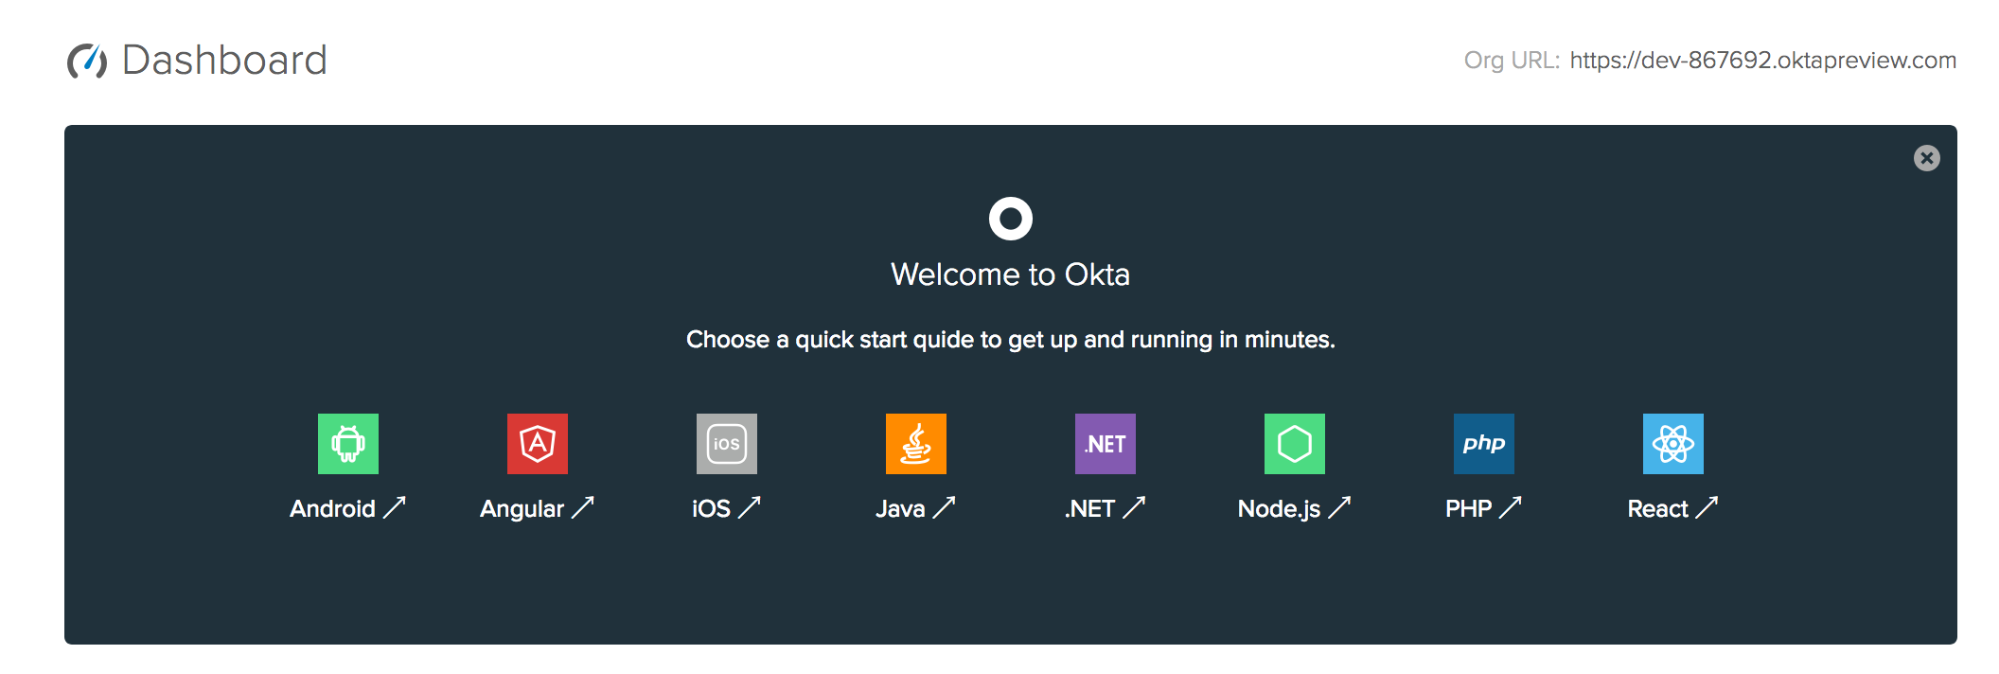
Now you need to create a new application by browsing to the Applications tab and clicking Add Application, and from the first page of the wizard choose Single-Page App.
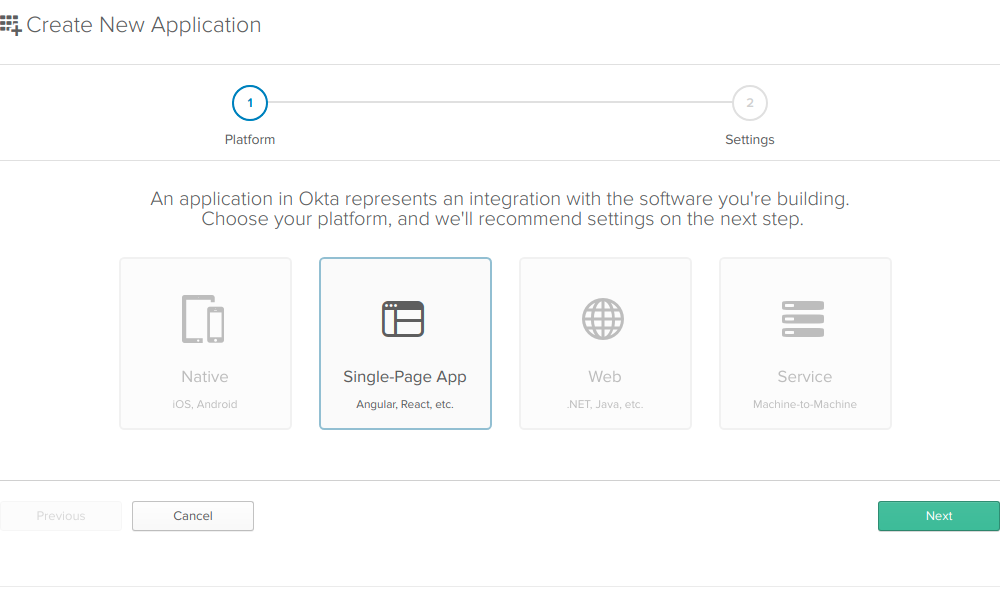
On the settings page, enter WeightTracker as your name value.

You can leave the other default values unchanged, and click Done.
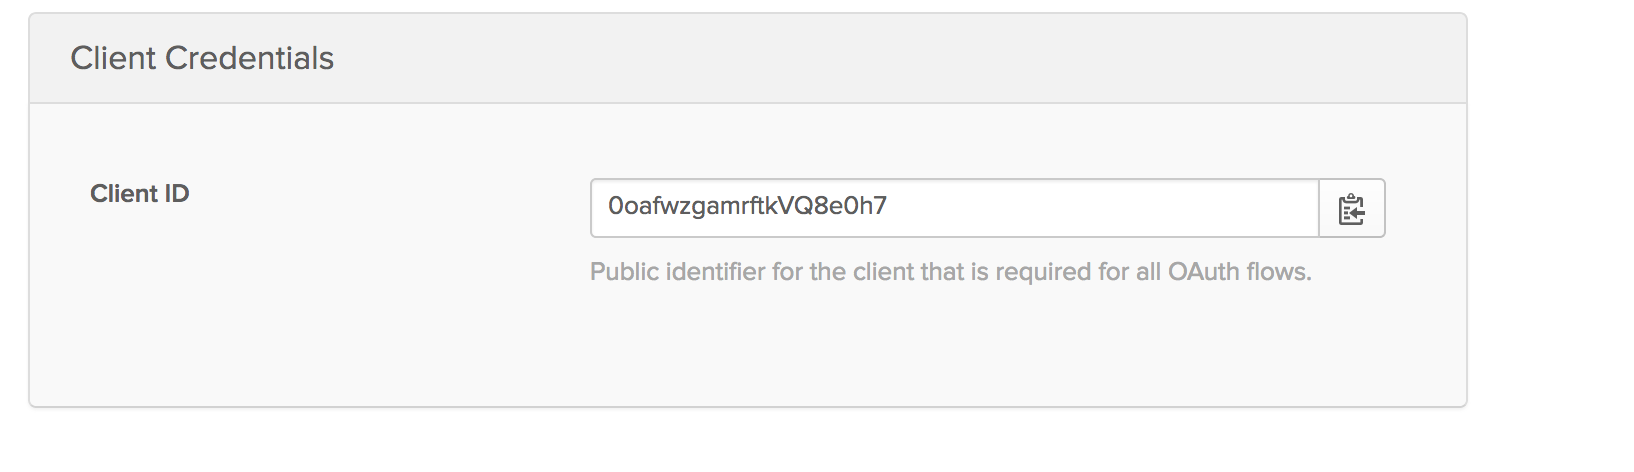
Now that your application has been created, copy down the Client ID from the following page, you’ll need it soon (of course, yours will be different).
Before proceeding you will need to install the Okta SDK for Vue:
npm install @okta/okta-vue@1.0.1 --save
With this installed, you can handle authentication for Vue and add the necessary routes. Locate the index.js file inside of src/router folder and replace its content with this code:
// Vue imports
import Vue from 'vue'
import Router from 'vue-router'

// 3rd party imports
import Auth from '@okta/okta-vue'

// our own imports
import Hello from '@/components/Hello'

Vue.use(Auth, {
  issuer: 'https://{yourOktaDomain}/oauth2/default',
  client_id: '{yourClientId}',
  redirect_uri: 'http://localhost:8080/implicit/callback',
  scope: 'openid profile email'
})

Vue.use(Router)

let router = new Router({
  mode: 'history',
  routes: [
    {
      path: '/',
      name: 'Hello',
      component: Hello
    },
    {
      path: '/implicit/callback',
      component: Auth.handleCallback()
    },
  ]
})

router.beforeEach(Vue.prototype.$auth.authRedirectGuard())

export default router
Take a look at the code and specifically the part of the code where you make use of Auth import:
Vue.use(Auth, {
  issuer: 'https://{yourOktaDomain}/oauth2/default',
  client_id: '{yourClientId}',
  redirect_uri: 'http://localhost:8080/implicit/callback',
  scope: 'openid profile email'
})
You will notice that you need to replace {yourClientId} with the Client ID from your Okta application and {yourOktaDomain} with your Okta domain which you saved previously. This adds the Okta’s Auth plugin to your Vue application, ensures, that your application is using Okta for authentication, and also makes sure that users get redirected to the correct login page when they try to log in.
Since redirect_uri is the value that OpenID Connect (OIDC) providers use to redirect the user back to the original application, you will need to handle that case within your routes. Therefore, you needed to add implicit/callback as a separate route, which will trigger the Okta component:
{
  path: '/implicit/callback',
  component: Auth.handleCallback()
}
When dealing with authentication and authorization for frontend applications you also need to handle your protected routes. Vue’s router is powerful enough to allow you to do global and individual navigation(auth) guards. Navigation guards are used to secure navigations(routes) either by redirecting to somewhere else or cancelling the navigation. You can hook into the navigation process globally, per-route or in-component.
Okta’s Vue SDK comes with predefined means to check if the user can access the route or not:
Vue.prototype.$auth.authRedirectGuard()
That is what you addedbeforeEach guard to the global:
router.beforeEach(Vue.prototype.$auth.authRedirectGuard())
After this, if you want some routes to be guarded you can simply add auth metadata to them:
meta: {
  requiresAuth: true
}
Secure Your ASP.NET Web API + Vue Application
If you don’t already have a Startup.cs file (OWIN Startup class), create one by right-clicking on your project and choosing Add -> Class. Pick the OWIN Startup template and name the new class Startup.
Make sure you have these using statements at the top of your Startup.cs file:
using Microsoft.IdentityModel.Protocols;
using Microsoft.IdentityModel.Protocols.OpenIdConnect;
using Microsoft.IdentityModel.Tokens;
using Microsoft.Owin;
using Microsoft.Owin.Security;
using Microsoft.Owin.Security.Jwt;
using Owin;
using System.Threading.Tasks;
Add the following code to your Configuration method:
public void Configuration(IAppBuilder app)
{
  // Configure JWT Bearer middleware
  // with an OpenID Connect Authority

  var authority = "https://{yourOktaDomain}/oauth2/default";

  var configurationManager = new  ConfigurationManager<OpenIdConnectConfiguration>(
    authority + "/.well-known/openid-configuration",
    new OpenIdConnectConfigurationRetriever(),
    new HttpDocumentRetriever());

  app.UseJwtBearerAuthentication(new JwtBearerAuthenticationOptions
  {
    AuthenticationMode = AuthenticationMode.Active,
    TokenValidationParameters = new TokenValidationParameters
    {
      ValidAudience = "api://default",
      ValidIssuer = authority,
      IssuerSigningKeyResolver = (token, securityToken, identifier, parameters) =>
      {
        var discoveryDocument = Task.Run(() => configurationManager.GetConfigurationAsync()).GetAwaiter().GetResult();
        return discoveryDocument.SigningKeys;
      }
    }
  });
}
Now you can protect your endpoints by adding an authorization attribute to your controller. Go to WeightMeasurementsController.cs file, above the WeightMeasurementsController class add the following attribute:
[Authorize]
Complete Layout for Your Vue App
After you’ve added Okta to your Vue application, it’s time to make changes inside your layout page to ensure that login and logout actually work.
Locate the App.vue file inside of src folder and replace code inside of script tags with the following:
export default {
  name: 'app',
  data() {
    return {
      user: null
    }
  },
  async created() {
    await this.refreshUser()
  },
  watch: {
    '$route': 'onRouteChange'
  },
  methods: {
    login() {
      this.$auth.loginRedirect()
    },
    async onRouteChange() {
      // every time a route is changed refresh the user details
      await this.refreshUser()
    },
    async refreshUser() {
      // get new user details and store it to user object
      this.user = await this.$auth.getUser()
    },
    async logout() {
      await this.$auth.logout()
      await this.refreshUser()
      this.$router.push('/')
    }
  }
}
Here you are watching for route changes and then refreshing the user details every time a route change happens. You are making use of the this.$auth.getUser() mechanism to get current user details. You can also use Okta to redirect a user to the login page, via the this.$auth.loginRedirect() method.
At logout, you can call the this.$auth.logout() method, and it will handle the logout process for you.
Add a Weight Records Page to Your ASP.NET Web API + Vue App
Before actually building the Weight Records page you’ll want to make a file that will serve as an API service for your weight records.
First, you will install a HTTP client for our Vue application. Run the following in your bash:
npm install axios --save
Inside of src folder create a new file named WeightRecordsApiService.js and paste the following inside:
import Vue from 'vue'
import axios from 'axios'

const client = axios.create({
  baseURL: 'http://localhost:5000/api/WeightMeasurements',
  json: true
})

export default {
  async execute(method, resource, data) {
    const accessToken = await Vue.prototype.$auth.getAccessToken()
    return client({
      method,
      url: resource,
      data,
      headers: {
        Authorization: `Bearer ${accessToken}`
      }
    }).then(req => {
      return req.data
    })
  },
  getAll() {
    return this.execute('get', '/')
  },
  create(data) {
    return this.execute('post', '/', data)
  },
  update(id, data) {
    return this.execute('put', `/${id}`, data)
  },
  delete(id) {
    return this.execute('delete', `/${id}`)
  }
}
With WeightRecordsApiService now available you can create a component for weight records. Inside the src/components folder create a new file called WeightRecords.vue and paste the following code:
<template>
<div class="container-fluid mt-4">
<h1 class="h1">Weight Records</h1>
<b-alert : show="loading" variant="info">Loading...</b-alert>
<b-row>
<b-col>
<table class="table table-striped">
<thead>
<tr>
<th>ID</th>
<th>Name</th>
<th>Value</th>
<th>Date Time</th>
<th> </th>
</tr>
</thead>
<tbody>
<tr v-for="record in records" : key="record.id">
<td></td>
<td></td>
<td></td>
<td></td>
<td class="text-right">
<a href="#" @click.prevent="updateWeightRecord(record)">Edit</a> -
<a href="#" @click.prevent="deleteWeightRecord(record.id)">Delete</a>
</td>
</tr>
</tbody>
</table>
</b-col >
<b-col lg="3">
<b-card : title="(model.id ? 'Edit Weight Record ID#' + model.id : 'New Weight Record')">
<form @submit.prevent="createWeightRecord">
<b-form-group label="Name">
<b-form-input type="text" v-model="model.name"></b-form-input>
</b-form-group>
<b-form-group label="Value">
<b-form-input rows="4" v-model="model.value" type="number"></b-form-input>
</b-form-group>
<b-form-group label="Date Time">
<b-form-input rows="4" v-model="model.dateTime" type="datetime-local"></b-form-input>
</b-form-group>
<div>
<b-btn type="submit" variant="success">Save Record</b-btn>
</div>
</form>
</b-card>
</b-col>
</b-row>
</div>
</template>
<script>
import api from '@/WeightRecordsApiService';
export default {
data() {
return {
loading: false,
records: [],
model: {}
};
},
async created() {
this.getAll()
},
methods: {
async getAll() {
this.loading = true
try {
this.records = await api.getAll()
} finally {
this.loading = false
}
},
async updateWeightRecord(weightRecord) {
// you use Object.assign() to create a new (separate) instance
this.model = Object.assign({}, weightRecord)
},
async createWeightRecord() {
const isUpdate = !!this.model.id;
if (isUpdate) {
await api.update(this.model.id, this.model)
} else {
await api.create(this.model)
}
// Clear the data inside of the form
this.model = {}
// Fetch all records again to have latest data
await this.getAll()
},
async deleteWeightRecord(id) {
if (confirm('Are you sure you want to delete this record?')) {
// if you are editing a weight record you deleted, remove it from the form
if (this.model.id === id) {
this.model = {}
}
await api.delete(id)
await this.getAll()
}
}
}
}
</script>
Now you need to add this component to the main menu and make sure your router renders the component once you navigate to /weight-trackings. Inside your Vue application, update the src/router/index.js file. Add the following import
import WeightRecords from '@/components/WeightRecords'
And then add the following to the list of routes:
{
  path: '/weight-trackings',
  name: 'WeightRecords',
  component: WeightRecords,
  meta: {
    requiresAuth: true
  }
},
That could be placed under the following:
{
  path: '/implicit/callback',
  component: Auth.handleCallback()
},
After adding the route to your router you can add a link to this route. Do this by changing your layout. Locate the src/App.vue file and add the following above the link for Login:
<b-nav-item to="/weight-trackings">Weight Records</b-nav-item>
Your navbar should now look like this:
<b-navbar toggleable="md" type="light" variant="light">
  <b-navbar-toggle target="nav-collapse"></b-navbar-toggle>
  <b-navbar-brand to="/">Weight Tracker</b-navbar-brand>
  <b-collapse is-nav id="nav-collapse">
    <b-navbar-nav>
      <b-nav-item to="/weight-trackings">Weight Records</b-nav-item>
      <b-nav-item href="#" @click.prevent="login" v-if="!user">Login</b-nav-item>
      <b-nav-item href="#" @click.prevent="logout" v-else>Logout</b-nav-item>
    </b-navbar-nav>
  </b-collapse>
</b-navbar>
Test Your ASP.NET Web API + Vue Application
By now your app should be ready for testing. Run the ASP.NET Web API by starting it from Visual Studio.
Next, you can start the Vue application by running the following in your bash inside the Vue/food-tracker folder:
npm run dev
Your default browser should now open and show a page like this:
![]()
You should first login, and you can do that by using your Okta account. After, navigate to the Weight Records page:
![]()
You can try out the application by adding new records, updating, and deleting existing records.
Learn More About Vue, ASP.NET, and Okta
You can find the source code for complete application on GitHub: https://github.com/oktadeveloper/okta-aspnet-webapi-vue-example.
This post was not-so-loosely based on Build a Basic CRUD App with Vue.js and Node, which I would definitely recommend checking out if you’re interested in learning more about Vue.js.
Here are some other great articles that can extend your knowledge of ASP.NET, Vue, and modern app development:
- The Ultimate Guide to Progressive Web Applications *The Lazy Developer’s Guide to Authentication with Vue.js
- How to Secure Your .NET Web API with Token Authentication
- Use OpenID Connect for Authorization in Your ASP.NET MVC Framework 4.x App
And as always, we’d love to hear from you. Hit us up with questions or feedback in the comments, or on Twitter @oktadev.
Okta Developer Blog Comment Policy
We welcome relevant and respectful comments. Off-topic comments may be removed.