Set Up the Private Key JWT Flow in Three Python Commands
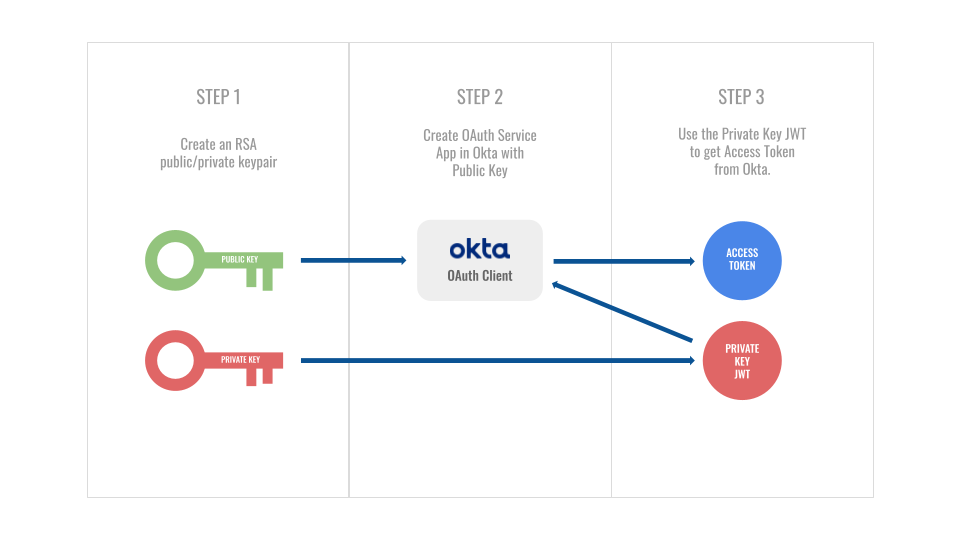
The Private Key JWT flow is one of the more complicated OIDC flows to set up. At Okta, it’s commonly used to get OAuth4Okta access tokens which enable you to perform managementr tasks on your org. If you already know HOW it works and just want to get to the code, click here to skip ahead. If you’re looking to gain a better understanding of how it works, here’s a high level explanation:
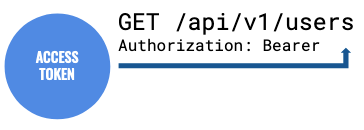
Once you’ve obtained the access token from this flow, you can throw it into the Authorization header of requests to your Okta APIs:
But let’s break it down a bit more:
Step 1: Generate keypair
Typically, one may think of JWTs as strictly being in the realm of the identity provider (IdP) - and in most cases that’s correct. When an IdP grants tokens to a service provider (SP), it is signing those tokens with a private/secret key. Part of the responsibility of the SP when validating tokens is to use a public key provided by the IdP to verify the signature.
The Private Key JWT flow flips this on its head - at least at the start. It’s now the SP’s turn to generate a public/private keypair, share the public key with the IdP (more on that in Step 2), create a JWT, and sign it with their private key (more on that in Step 3).
But I digress…Step 1 is really just about generating the keypair. (In this case, RSA keys with a 2048-bit key size).
Step 2: Register public key
The next step is registering your public key with the IdP. With Okta, that’s done through our clients API. With this step, Okta will create an application integration and generate a unique client ID - this value will be important when it comes time to create the Private Key JWT. It will be this client ID as well as the working public key decryption that validates your request.
In other flows like the popular Authorization Code flow, the identity provider generates a secret value called the client secret. In the Private Key JWT flow, the burden is on the service provider to generate a secret value for the same purpose - albeit by different means.
Step 3: Get access token
There are two components to this step (creating the private key JWT and then submitting it to the IdP to obtain an access token), but the Python command get_access_token.py performs both at once so we can treat this as a single operation.
Using the private key created in step 1, you sign a JWT with the following claims:
'iss': {client ID generated in step 2},
'sub': {client ID generated in step 2},
'aud': {okta_url}/oauth2/v1/token,
"exp": {epoch expiration at future time}
This token is sent to the /token endpoint of the IdP:
  POST /token HTTP/1.1
  Host: server.example.com
  Content-Type: application/x-www-form-urlencoded

  grant_type=client_credentials&
    scope={scopes}&
    client_id={client ID generated in step 2}&
    client_assertion_type=
    urn%3Aietf%3Aparams%3Aoauth%3Aclient-assertion-type%3Ajwt-bearer&
    client_assertion={private key JWT}
Assuming everything is set up correctly, the IdP should respond with an access token that you can use to access scoped resources.
For an even deeper look at this flow, you can check out our walkthrough. For now, it’s time to set this up with Python!
Python private key JWT setup
- Clone the OktaDev Private Key repo, open terminal, and
cdinto the project root. - Create a new virtualenv in the root folder with
virtualenv env. - Run the virtual environment with
source env/bin/activate. - Install necessary Python packages with
pip install -r requirements.txt. - In the root folder, create a new
.envfile and paste the following values into it:
PRIVATE_KEY=
PUBLIC_KEY=
MODULUS=
CLIENT_ID=
OKTA_URL=
API_KEY=
SCOPES=
Scripts will generate values for the first 4 vars once you’ve run the first two commands. You will need to fill out the other values. Note: the API key is needed for creating the OAuth client in Okta, so make sure the token you use has permissions to create applications.
- OKTA_URL=https://{your_okta_domain}
- API_KEY={okta_api_key}
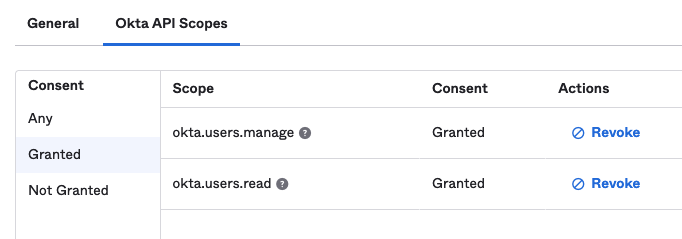
- SCOPES=’okta.users.read okta.users.manage’
The SCOPES var is an string of scopes (seperated by spaces) granted to your eventual access token that you will be using for management tasks. I put in a couple common ones as a placeholder. In your Okta application, it would look like this:
Running the scripts
To run these scripts, make sure you are still in the root folder of the cloned repository.
Step 1: Generate keypair
Run the following command in terminal:
python generate_keys.py
You should see confirmation printed to the terminal:
///////////////// Keys generated and added to .env file.
Sure enough, you can pop over to the .env file to see the PRIVATE_KEY, PUBLIC_KEY and MODULUS values populated there.
Step 2: Create OAuth service app in Okta
Now that you have the keypair, you can create the OAuth app in Okta with the public key. The scopes you defined in the .env file will also be granted in the application. Type the following into the terminal:
python create_okta_service_app.py
You will get confirmation in the terminal of the created app, that the client ID of the app was updated in your .env file, as well as scopes granted.
///////////////// Okta Service app created:

{application object}

///////////////// Setting CLIENT_ID in .env:

{client ID of newly created app}

///////////////// Scopes granted:

{scopes granted to the application}
If you navigate to your applications in Okta, you will see this newly created app under the name Private Key JWT Service App.
Step 3: Create PKJ and get access token
The two scripts above should only need to run once for setup. From hereon out, you can run the following command to get an access token from Okta:
python get_access_token.py
You should see the access token printed to terminal:
///////////////// Access Token:

{access_token}
You can now use this token to perform management tasks on your Okta org based on your defined scopes by passing it in the Authorization header as Bearer {access_token}.
In conclusion: Keep it secret, keep it safe
The Private Key JWT flow is complicated to set up, but once the pieces are in place it should be pretty automated. As always, the private key is the key to the castle. So…

Got questions? You can leave them in the comments below! Want to stay in touch? Follow our social channels: @oktadev on Twitter, Okta for Developers on LinkedIn, Twitch, and YouTube.
Okta Developer Blog Comment Policy
We welcome relevant and respectful comments. Off-topic comments may be removed.