Use Okta like a Rockstar

Rockstar chrome extension is a third-party, Non-Okta Application (as defined in Okta’s Master Subscription Agreement). Okta is not involved in making this chrome extension available, and we have neither oversight nor input into its security features and functionality. For questions regarding this, or any other, Non-Okta Application(s) your organization uses in connection with the Okta Service, please contact the application provider directly for more information.
Rockstar is a Chrome extension that adds features to the Okta dashboard. What sort of features, you might ask? The most popular ones include:
- Exporting Okta data like Users, Groups, and Apps
- Debugging SAML
- Exploring the Okta API
- The ability to assign admin privileges to a user from the user page
You’ll need to be an Okta administrator to use rockstar. If you don’t already have an Okta account where you’re an administrator, you can sign up for a free developer account from Okta here.
Once you’re logged in to your Okta account, you can follow along with the rest of this blog post to learn how to use rockstar!
CSV Export for Okta Users, Groups, and Apps
While Okta can import users from a CSV, it doesn’t have the ability to export them in that same way.
The ability to export data from Okta is one of the most used capabilities in rockstar. While there are several other methods of exporting data from Okta, rockstar has some unique capabilities that set it apart from other solutions.
To export data from Okta in a CSV format, you’ll need to navigate to the location in the Okta that has the data you want to export. For example, to export the users from Okta, do the following:
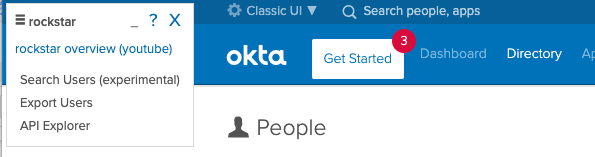
- From the Directory menu, select People
- In the hovering rockstar menu, click “Export Users”
You should now see a window that looks like the one below:
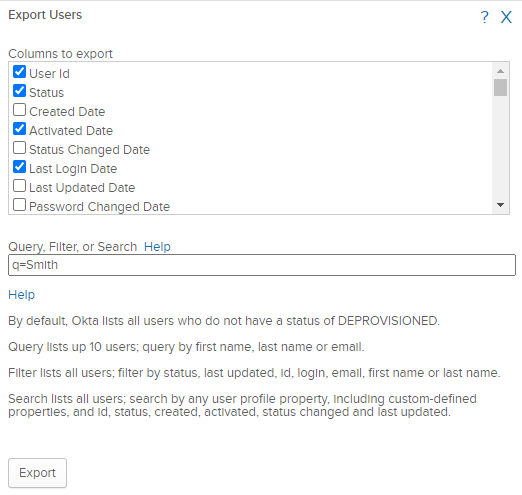
In this window, you can select the columns that you want to have exported to CSV. For example, in the image above, the columns “User Id”, “Status”, etc are selected to be exported.
Additionally, you can filter the things that Okta will export to CSV using a query filter. Because the query box is just a thin wrapper around the Okta API, it requires a specific format in order to do the searches - i.e. q=, or filter=status … etc.
To export all of your users from Okta, just leave the query box blank.
Once you are ready to export users from Okta, click the “Export” button. When you’ve done this, rockstar will start exporting data from Okta, taking care to respect the concurrent and per-minute rate limits that Okta sets on the APIs that rockstar uses for exporting data.
Once your export is completed, you should see a downloaded file in Chrome with a name that looks like Exported Users YYYY-MM-DD HH-MM-SS.csv
Note that rockstar is able to export more than just users, groups, and apps from Okta. Rockstar can also export other types of data like group members, group rules, directory users, apps, app users, app groups, app notes, network zones, YubiKeys, mappings, admins, and more.
Note: In May 2025, the Okta Integrator Free Plan replaced Okta Developer Edition Accounts, and the Okta CLI was deprecated.
We preserved this post for reference, but the instructions no longer work exactly as written. Replace the Okta CLI commands by manually configuring Okta following the instructions in our Developer Documentation.
Exporting Apps
For another example of exporting data from Okta using rockstar; here is how you can use rockstar to export a list of your Okta apps. This is useful when you want to have a holistic view of what apps are currently being used, what type of sign-on Method they’re using (SAML, OIDC, SWA, etc), and whether the app is active. On a deeper level, you can see what the template of the user name is.
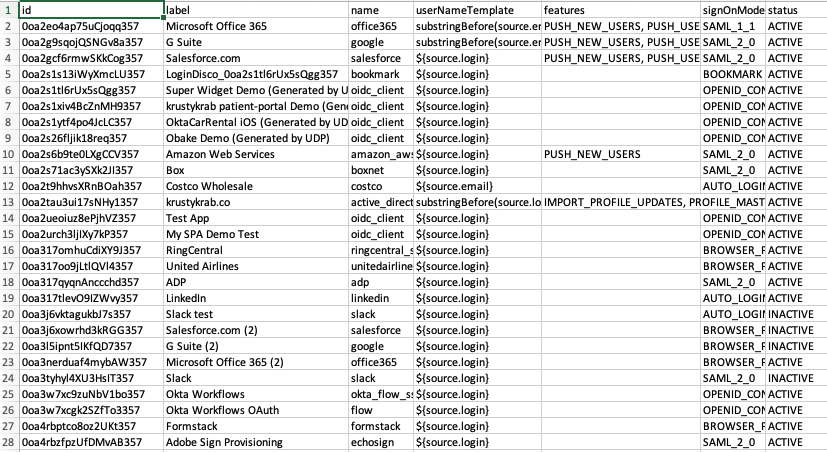
Having an overview of the apps in your Okta tenant allows for easy auditing and management. Because the file is exported in .CSV format, you can manipulate it to make it easy for you to read and use.
SAML Debugger
If a SAML application isn’t working as expected, the typical approach is to use a tool like “SAML Tracer” to decode the SAML Assertion that Okta is sending to another application. However, there are two issues with using SAML Tracer to debug SAML:
- The extension requires that you give it permission to inspect data from every website you visit
- Once you have a decoded SAML Assertion from SAML Tracer, it can be tricky to find the parts of the SAML Assertion that matter.
Rockstar addresses both of those concerns:
- It only requests permission from Okta-related domains (okta.com, oktapreview.com, etc)
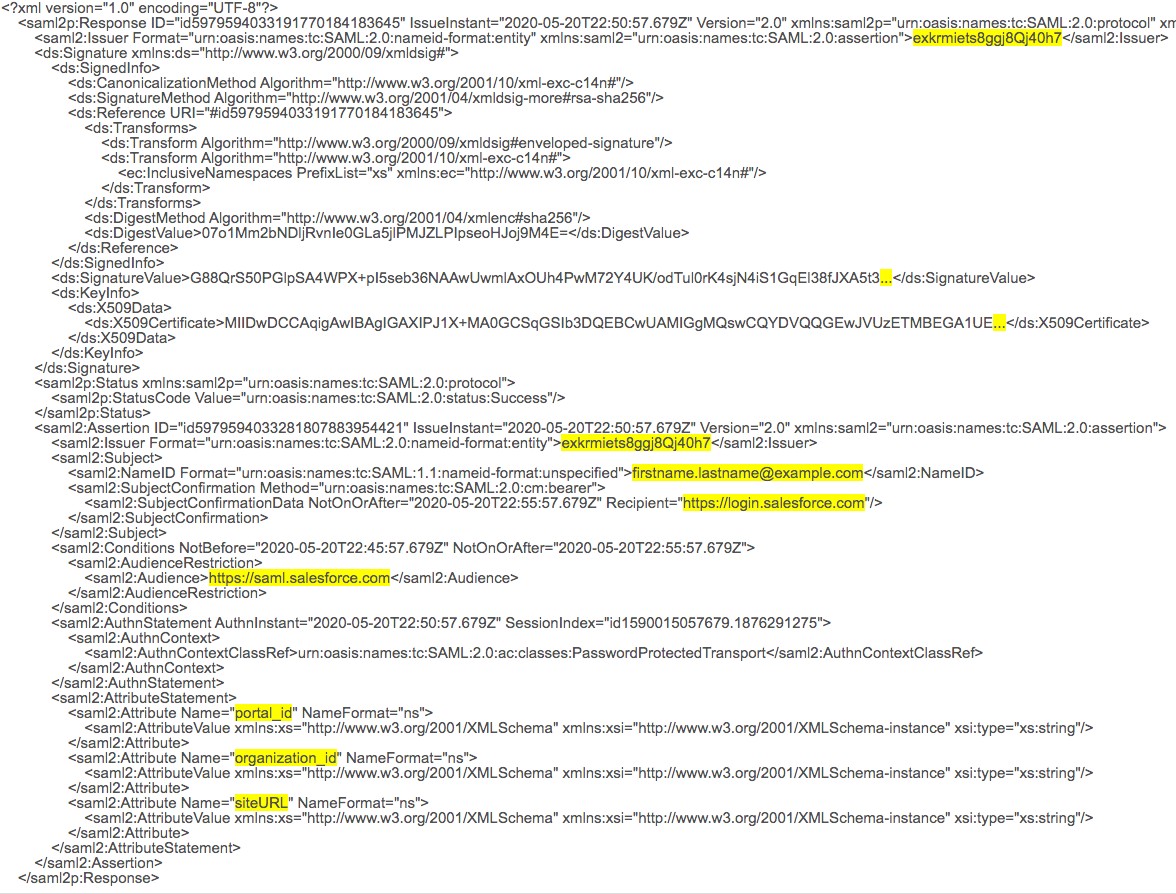
- The SAML Assertion that rockstar displays comes with helpfully highlighted sections, as seen above
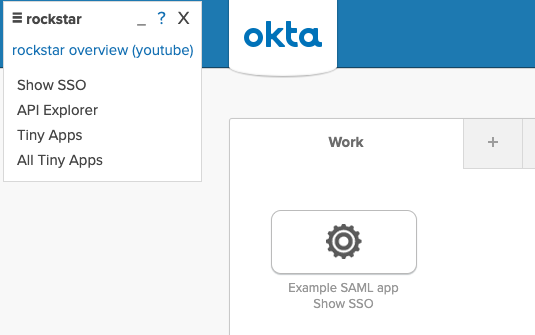
To use the SAML debugging capabilities in rockstar, visit the end user dashboard, and in the rockstar menu, select “Show SSO”. Doing this will add a “Show SSO” link below your apps. To see the SAML assertion that a SAML app would generate, click on the “Show SSO” link for that app.
Once you click on the “Show SSO” link, rockstar will fetch a SAML assertion for that app from Okta and then display it in a window, helpfully highlighting the most important parts of the assertion. It will look like this:
Exploring the Okta API
Learning a RESTful API like the Okta API can be daunting, especially if you haven’t spent time with a RESTful API before. The usual way to learn an API is to use a tool like Postman, or maybe even open a terminal on your computer and use a command-line tool like curl. However, doing either of those things requires setting up your environment, putting in variables, your API keys, client secret, client id, etc. And for someone starting out, that is a very intimidating thing to do.
Furthermore, because tools like Postman and curl depend on an API key, that API key will expire after 30 days of non-use. This means that you’ll often find yourself needing to regenerate an API key, usually when you’re in a hurry and would rather be doing something else.
By using rockstar, you can quickly start exploring the Okta API. This is because rockstar will make use of your existing Okta session. Because of that, you’ll never need to worry about generating an API key, or having an API key expire.
Inside of rockstar, you get a list of dropdown commands that will allow you to see what type of GET commands are available for you to choose from. Then, you will be able to see the response directly below; all within the Chrome window.
To open the API explorer, simply click on the “API Explorer” link in the rockstar window. This will open a window that gives you a simplified interface to make API requests to Okta. If you haven’t yet memorized every single Okta API endpoint, rockstar helpfully lists the most commonly used endpoints for you!
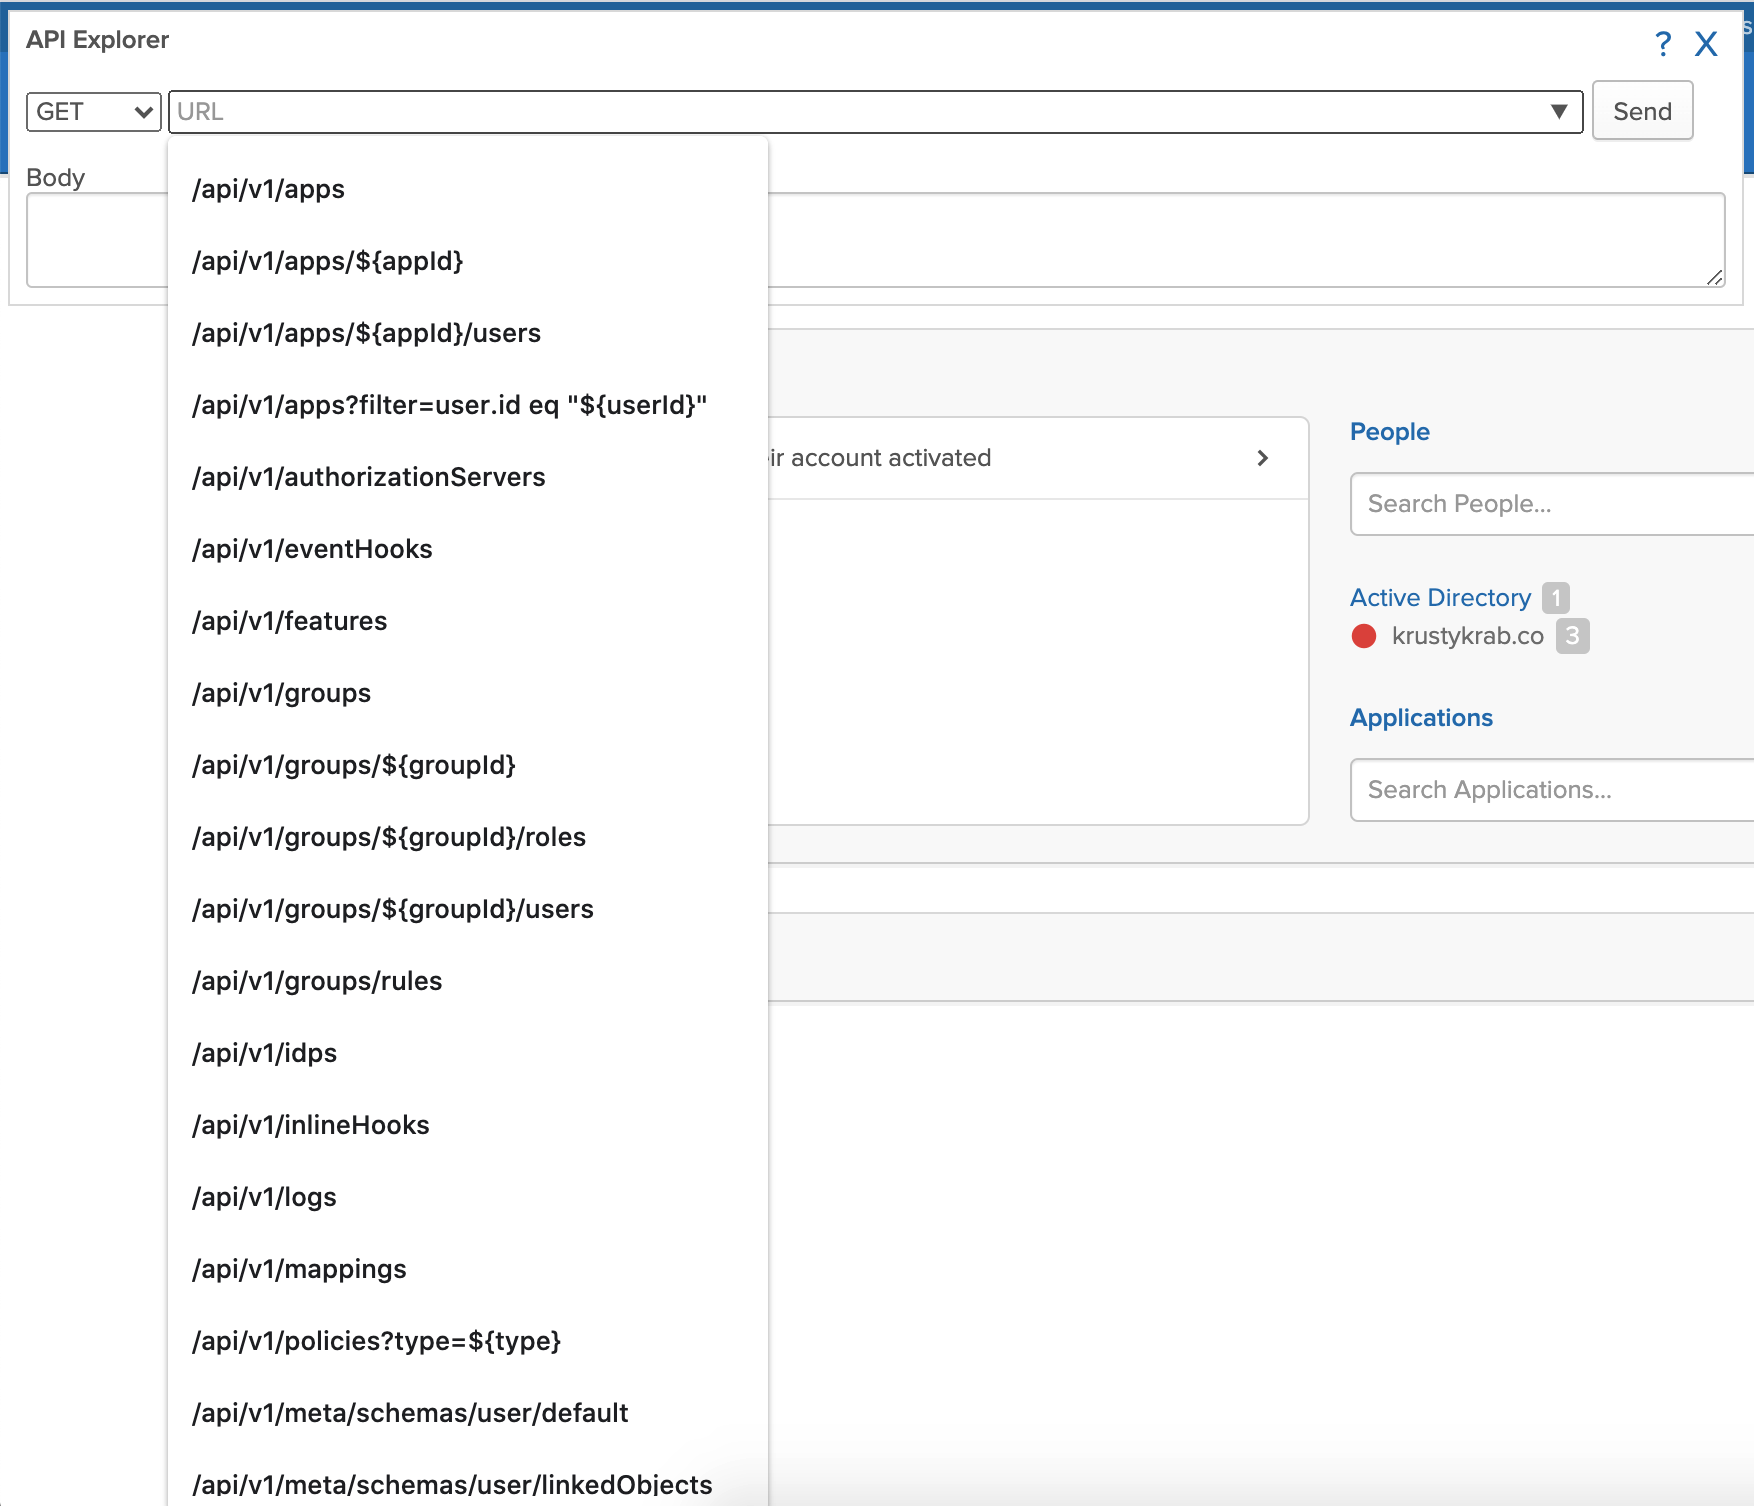
Here are some examples of using rockstar to explore the Okta API:
Getting a list of users
To get a list of users, open the API Explorer, click on the URL endpoint box, select /api/v1/users from the menu, then click the Send button. You should see a list of users, like in the screenshot below:
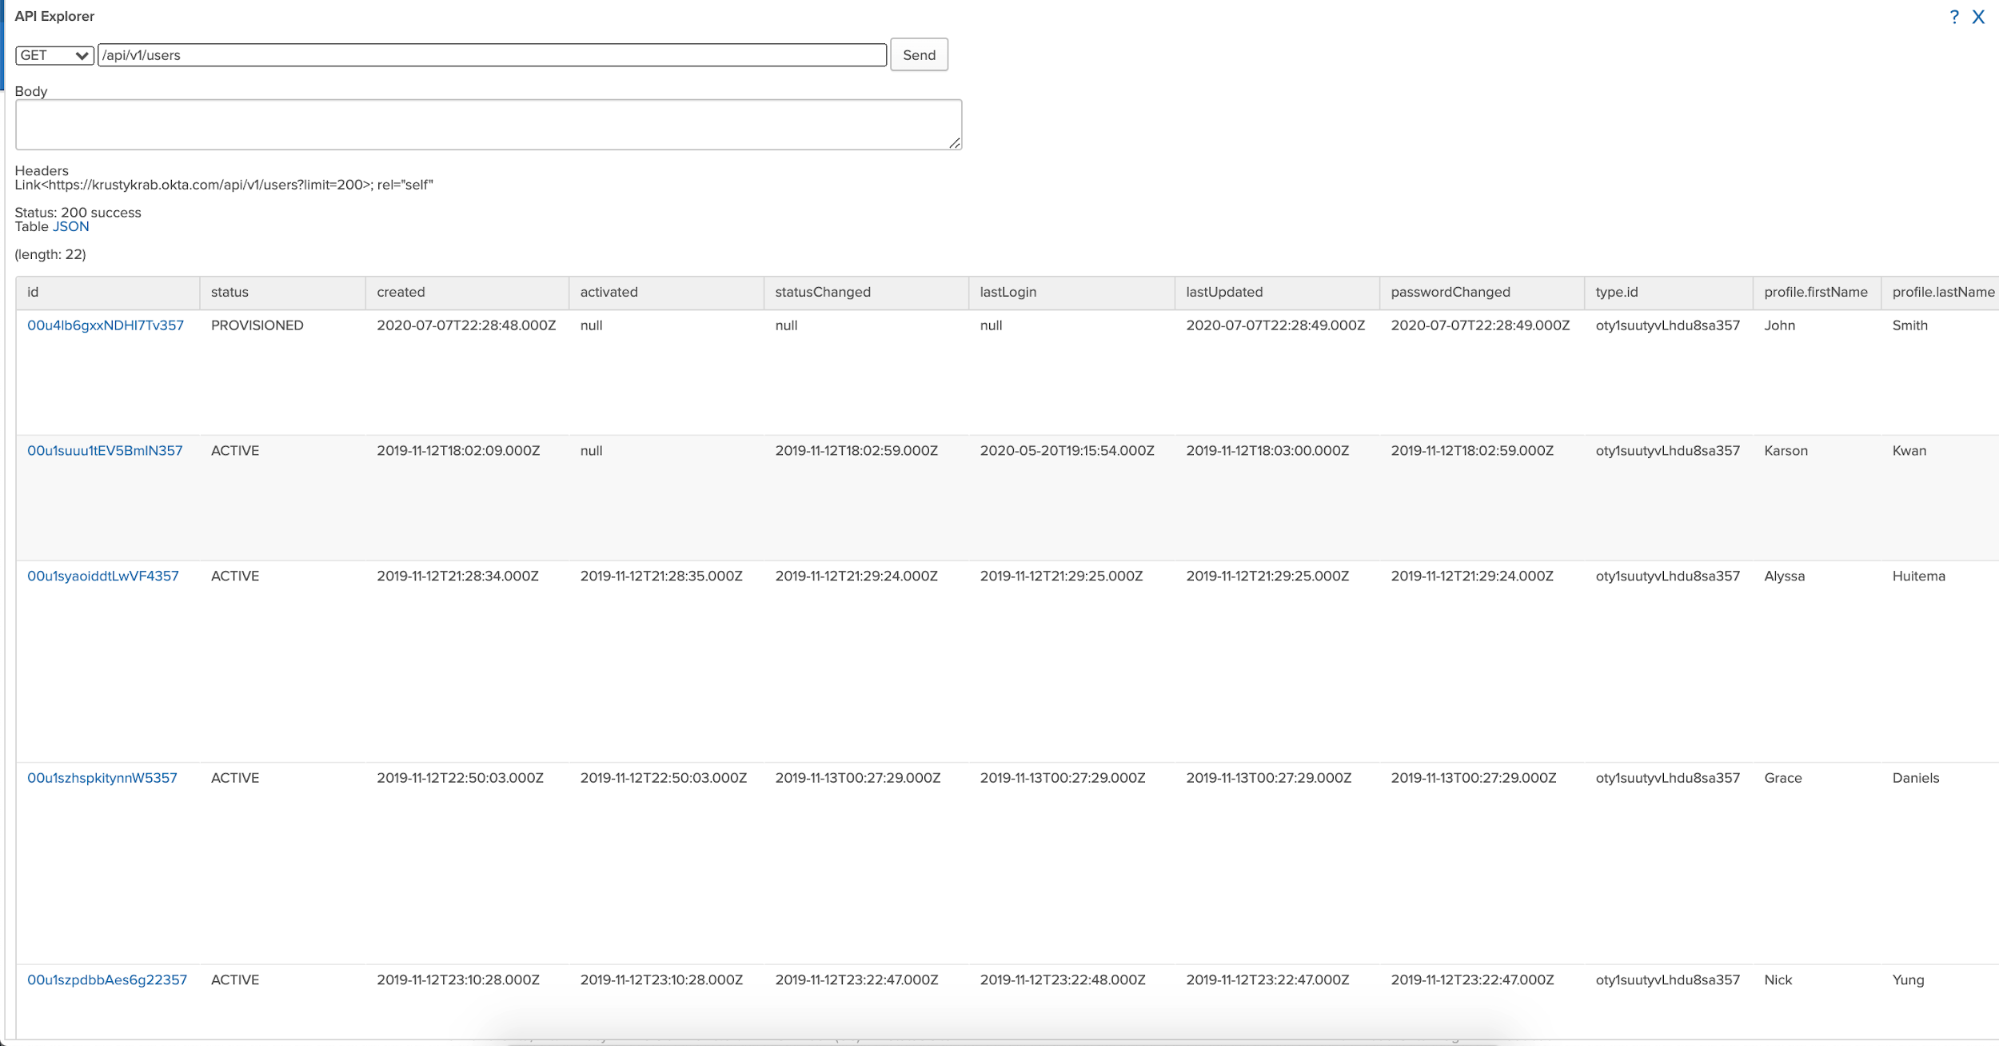
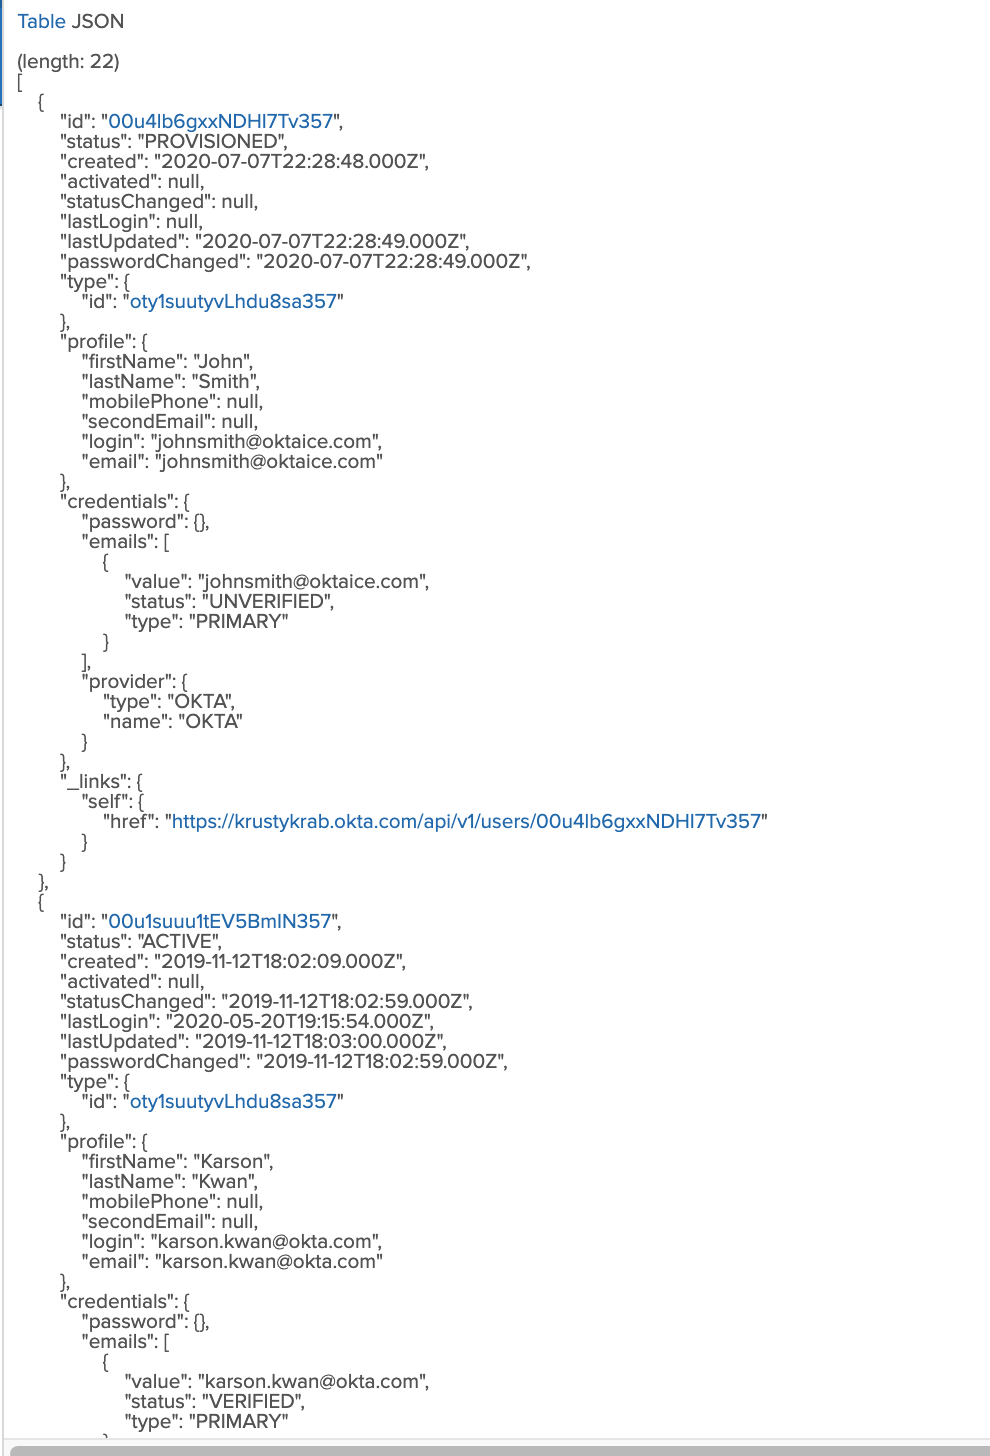
As you might have noticed, every Okta API endpoint returns data in the JSON format, but for some kinds of data, JSON can be unwieldy to look at visually. Because of that, when possible, rockstar will helpfully format some JSON data into a table, while still returning the JSON underneath as well. You can see the original JSON response by clicking on the “JSON” link in the output:
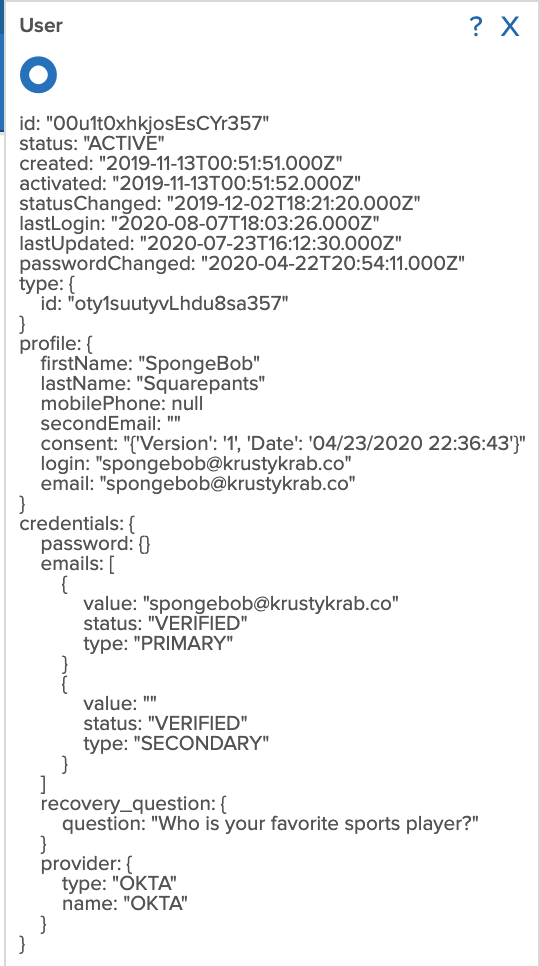
Getting information on a single user
To get detailed information on a particular user, navigate to that user in the Okta interface, and then click the “Show User” link in rockstar
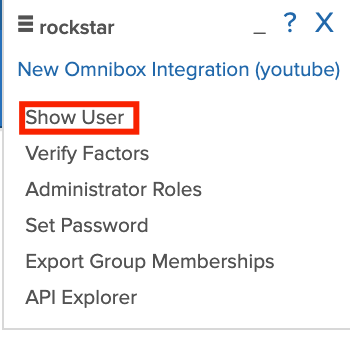
Clicking that link will provide you with the API response for that user, which contains a detailed list of attributes for that particular user.
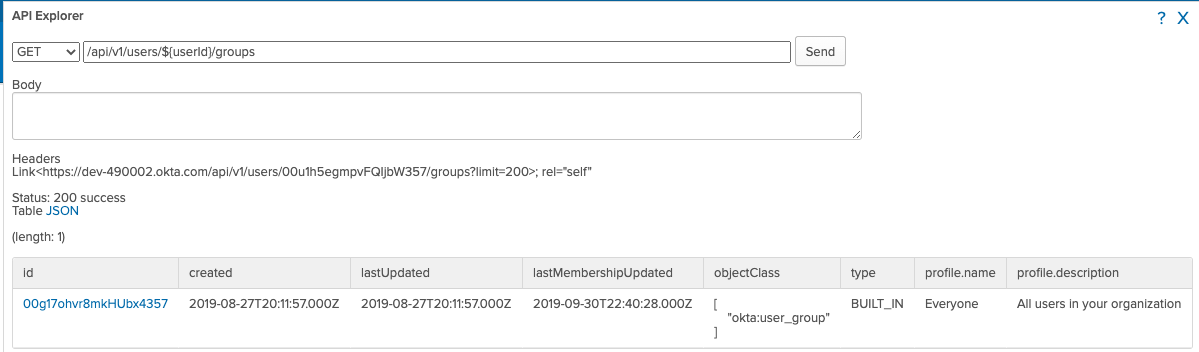
Getting group membership for a user
To make an API request that fetches the group membership information for a user, navigate to a user in the Okta interface, click the “API Explorer” link in rockstar, then select the /api/v1/users/${userId}/groups URL. You will now see a list of groups that your user is a member of:
Easier assignment of admin privileges to users
In Okta, assignment of admin privileges is a multi-step process, requiring you to open the Security menu, select Administrators, click the “Add Administrator” button, enter in the user you want to grant privileges to, select which privileges you want to grant the user, then clicking the “Add Administrator” button. I’m feeling exhausted just typing all of that!
With rockstar, we address this by directly granting the user administrator privileges directly from within the user’s individual profile page!
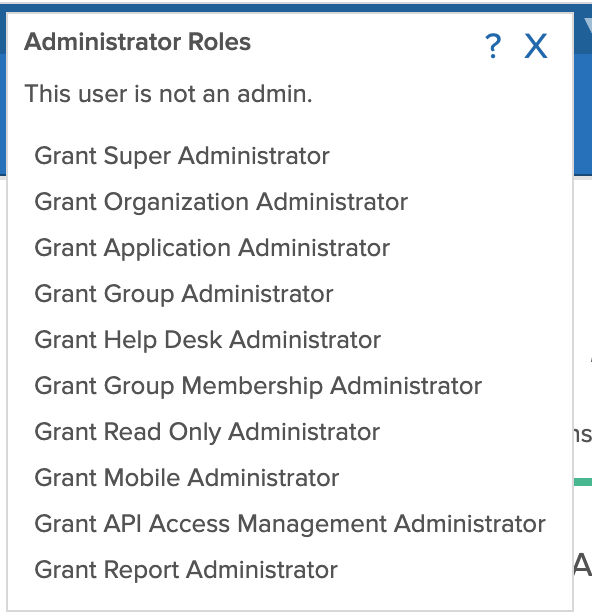
To do this, navigate to the user you want to grant administrator privileges to, then in rockstar click the “Administrator Roles” link:

Assuming that you are logged into Okta as an administrator, you will be presented with a list of admin privileges that you could be assigning to this user. Click on any of the links to grant the user that particular administrator privilege. For example, to grant a user “Read Only Administrator” privileges, click on the “Grant Read Only Administrator” link.
In addition to granting permissions, rockstar also allows you to instantly revoke admin privileges; reducing the need to dive deep into the Admin console.

Simpler and quicker workflows make rockstar a very handy tool to have when administering a large set of users in Okta. Reducing the need to deep dive into the product menus is continuing to prove to be a beneficial feature for Okta admins out there.
How do you get it?
Now that you have an idea of some of the things that you can do with rockstar, it’s time for you to install it and try it out for yourself! Here’s how:
- Visit the home page for rockstar.
- Click on the “rockstar” link that will send you to the Chrome Web Store
- Follow the instructions on the Chrome Web Store to install the extension. Note: You’ll need to grant the extension permissions to read data from Okta domains like *.okta.com and *.oktapreview.com
Once you have rockstar installed, you can learn more by visiting the website for rockstar or by watching the YouTube videos that cover some of the features that rockstar has.
If you enjoyed reading this post, you might also like these posts from our blog:
- Grep for System Admins: Using Grep to Automate Daily Tasks
- Secure Your API with OAuth, Mulesoft, and Okta in 20 Minutes
- Securing REST APIs
As always, if you have any questions please comment below. Never miss out on any of our awesome content by following us on Twitter and subscribing to our channel on YouTube!
Lastly, I’d like to thank Gabriel Sroka for his help in writing this blog post.
Okta Developer Blog Comment Policy
We welcome relevant and respectful comments. Off-topic comments may be removed.