Secure Your API with OAuth, Mulesoft, and Okta in 20 Minutes
If you’re building or managing an API, you’re probably using an API gateway to help you manage it. Hopefully, you’re also using OAuth and an identity provider (IdP) like Okta to secure your API through the gateway. Maybe you’ve also discovered that getting the “OAuth dance” working properly among the gateway, IdP, and application can be tricky.
I’ve worked with a lot of different API gateways and want to provide some guidance and tools to help you get a reference architecture up and running between an authorization server and your API gateways. I’ll start with Mulesoft, but will add more gateways on a regular basis. This sample workflow will give you a working example that you can modify to suit your own use-case.
To facilitate implementing this reference architecture across many different gateways, I developed two tools: a bootstrapping tool for Okta and a web application (Node.js + Express) to illustrate the OAuth workflow. The bootstrapping tool is meant for prototyping and is not required to complete this exercise (though it will help tremendously in meeting that 20-minute time limit!). My hope is that you will find it useful in this context and perhaps others. Bug reports and pull requests are welcome via the Okta Bootstrapper GitHub repo.
The Okta API Center application is intended for prototyping, and again, bug reports and pull requests are welcome via the Okta API Center GitHub repo.
Prerequisites to Secure your API
- An Okta account. If you don’t already have one, you can get a free-forever account at developer.okta.com
- An Okta API Token. Once you’ve activated your Okta tenant, you can follow the instructions here to get an API token.
- An API Gateway. In this example we’ll be using Mulesoft. If you don’t already have a Mulesoft Anypoint account, you can get a free 30-day trial version from Mulesoft.
What You’ll Build
At the end of this setup, you’ll have an architecture where:
- Users will be able to authenticate against Okta and receive an access token (via the app)
- Users will have different scopes in their access token, depending on their group assignments. The application will send the access token to the API gateway
- The API gateway will check the validity of the access token - including scopes - against Okta
- If the token and scopes are valid, the gateway will send the request on to the API
- The API will send the data payload to the gateway, which will send it on to the application
Download and Install the Okta API Center Application
Clone the Okta API Center Node.js application.
git clone https://github.com/tom-smith-okta/okta-api-center.git
Then follow through the README instructions to get it installed.
Configure the Node.js Application
The Okta API Center application only needs a few settings configured to launch.
You have two approaches to initialize these settings, and more importantly, to set up the policies, rules, scopes, group memberships, etc. on the Okta side:
You can use the Okta bootstrapping tool. That’s what I’m going to assume for the bulk of this article. Or, you can set up your Okta tenant manually. Instructions are provided at the end of this article.
Set up the Application Environment
Now let’s configure your environment. The Okta API Center uses the dotenv npm package to help manage environment variables, so you can add these values to a .env file if you wish. There is a .env_example file included in the repo for reference, which looks like this:
# Okta settings

# example: https://dev-511902.oktapreview.com
OKTA_TENANT=""

OKTA_API_TOKEN=""
AUTHN_CLIENT_ID=""
AUTHN_CLIENT_SECRET=""

# example: https://dev-511902.oktapreview.com/oauth2/ausfqw42xrkmpfDHI0h7
OKTA_AZ_SERVER_ISSUER=""

# Gateway/Proxy base url
# example: http://52.14.100.89:8080/solar-system
PROXY_URI=""

# App settings
PORT="8080"
REDIRECT_URI="http://localhost:8080"
SILVER_USERNAME=""
SILVER_PASSWORD=""
GOLD_USERNAME=""
GOLD_PASSWORD=""
SESSION_SECRET="some random phrase"
SESSION_MAX_AGE=60000

# Supported values: aws, kong, mulesoft, swag, tyk
# swag = Software AG
GATEWAY=""
Update the following values in the .env file now:
OKTA_TENANTOKTA_API_TOKENREDIRECT_URIPORTGATEWAY
NOTE: The value for PORT should be the same value from REDIRECT_URI.
Configure your Okta Account
To set up your Okta tenant with all of the components needed for this example such as users, groups, authorization servers, etc., we’ll run a couple bootstrap scripts.
NOTE: if you’d like to set up your tenant manually, rather than using the bootstrap tool, there are step-by-step instructions at the end of this article.
The first bootstrap script will configure a number of objects in your Okta tenant. The objects we need right away are an authorization server and an introspection client so that we can set up Okta as an external identity provider in Mulesoft.
node okta_bootstrap.js --mulesoft
The Okta bootstrap tool will find an input file, which contains the inputs required for initial setup.
node okta_bootstrap --mulesoft

Found a valid input file at ./okta_bootstrap/input/mulesoft.json
sending a request to Okta to test the api token...
the token works

now, reviewing all values...

looking for TAG...
cannot find a final value for TAG yet
calculating/retrieving default value...
this is a generated value...
'autogen20180625-1247'
Do you want to:
(C) continue with this value
(p) provide a new value
(a) auto-accept and generate all remaining values
(q) quit
Press C (or enter) to continue.
The bootstrap tool iterates through the values in the input file, pausing to ask if you want to accept each value. You can enter “a” to accept all remaining values without pausing.
We now have values that we can enter into Mulesoft Anypoint to set up Okta as an identity provider.
We’ll use a tool to pull out these settings from the bootstrap output file in a moment.
Configure your Mulesoft Account
In your Mulesoft Anypoint tenant, go to: Management Center->Access Management->External Identity->Client Management->OpenID Connect Dynamic Client Registration
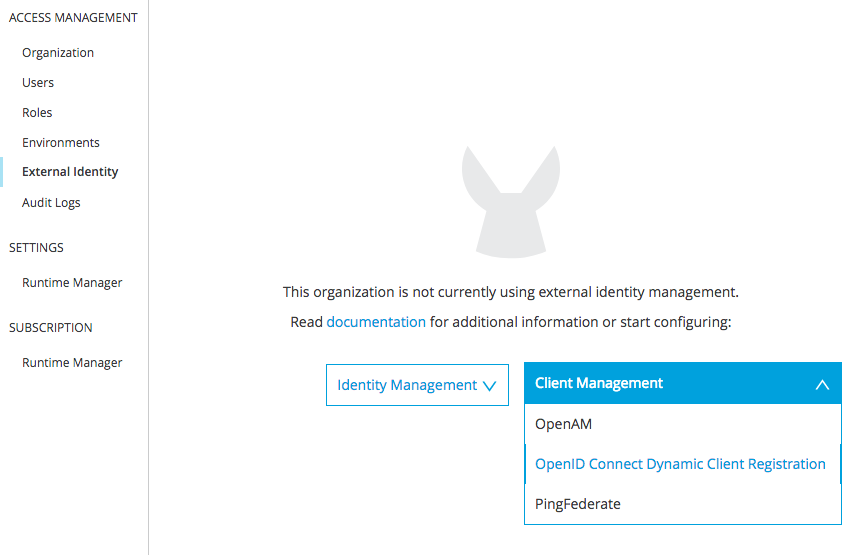
Click on “advanced settings” to expose the Authorization Header field.
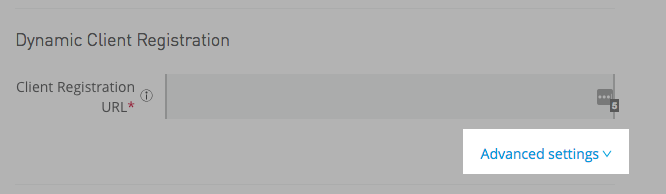
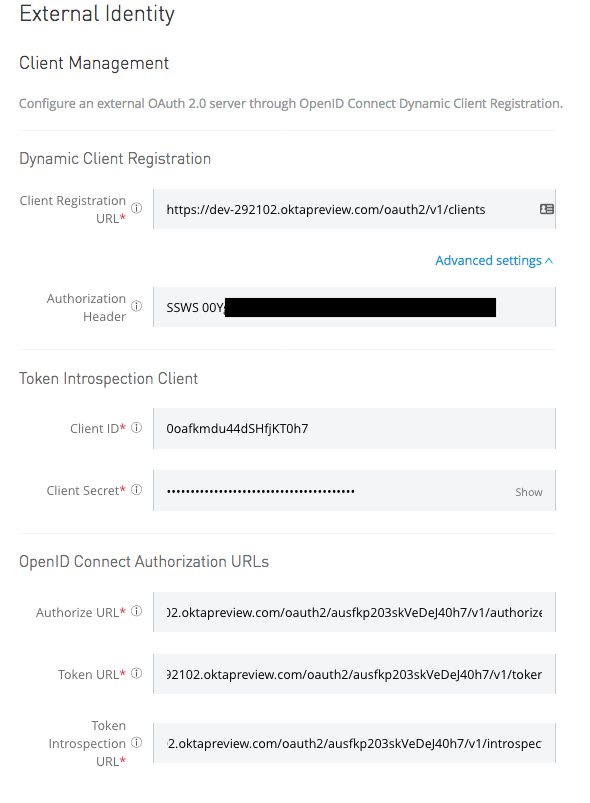
You can retrieve the values needed for this screen with the following command:
node get_settings --mulesoft_introspect
Paste the values into the form. Note: For the authorization header field, use this value: SSWS OKTA_API_TOKEN and replace OKTA_API_TOKEN with your actual token.
Click Save.
Keep the values for AUTHORIZE_URL and TOKEN_URL handy, because you will need them in a moment.
Deploy Your Mulesoft API
In your Mulesoft Anypoint tenant, go to:
Design Center->Create->API Specification
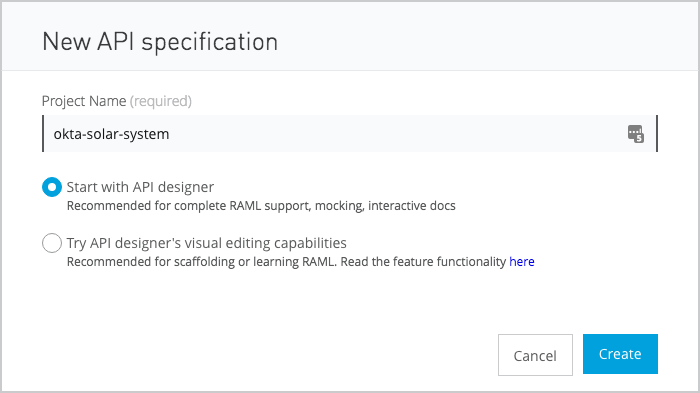
Give your API a name (like “okta solar system”) and click “Create”.
You now have an (almost) empty RAML file to design your API.
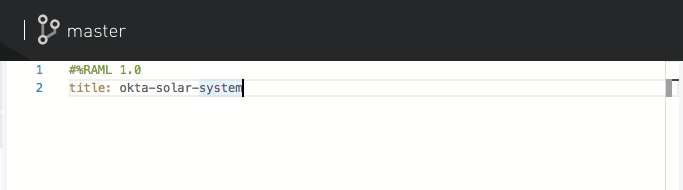
Next, copy the RAML template from the Okta API Center repo into the Mulesoft editor.
/api_specs/okta_mulesoft.raml
Update the values for AUTHORIZE_URL and TOKEN_URL.
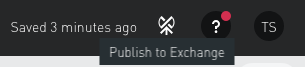
The file should save automatically; you can do command-s to force the save.
Now click the “Publish to Exchange” icon in the upper right.
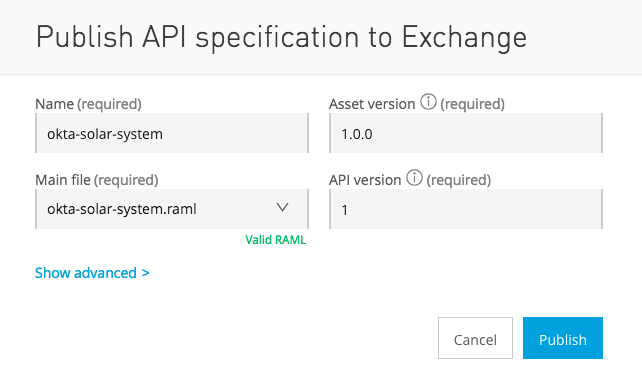
And click publish again:
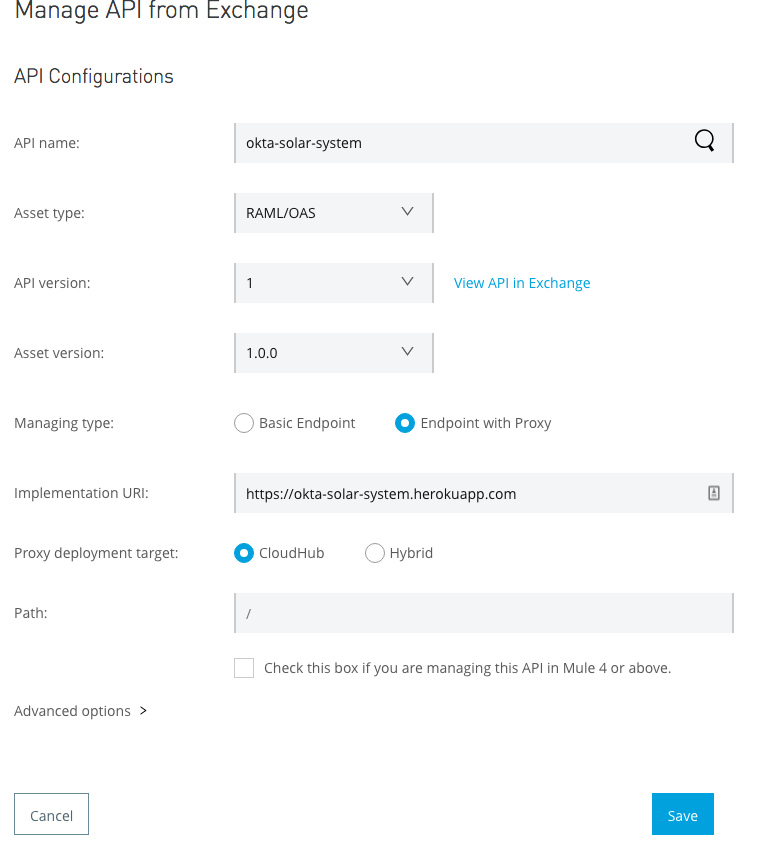
Now go to the Anypoint API Manager. Click the “Manage API” dropdown, and then “Manage API from Exchange”.
Start typing your API name (“okta-solar-system”) in the API name field to search for it.
Choose the following options and click “Save”. (Note that you might need to click somewhere in the Path field to activate the Save button.)
Asset type: RAML/OAS
API version: 1
Asset version: 1.0.0
Managing type: Endpoint with Proxy
Implementation URI:
Proxy deployment target: CloudHub
Path: /
You now have a Settings screen for your API. Next, go to the Deployment Configuration section, choose a runtime version (3.9.x works well), and enter a unique name for your cloudhub deployment. Make sure you save this url now.
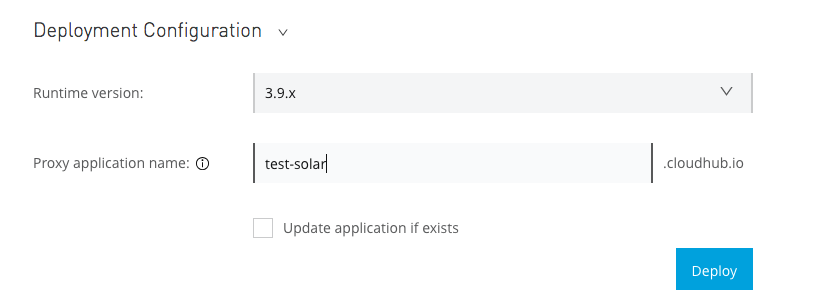
Click “deploy” to deploy your API to cloudhub. The deployment can take a few seconds or sometimes longer. You should see a successful deployment message when you are done:
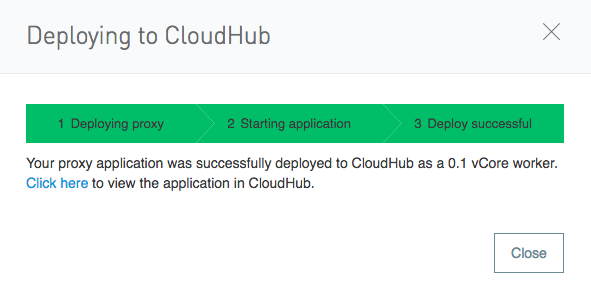
Save the path of your cloudhub.io deployment (example: http://my-api.cloudhub.io) - you’ll need it later.
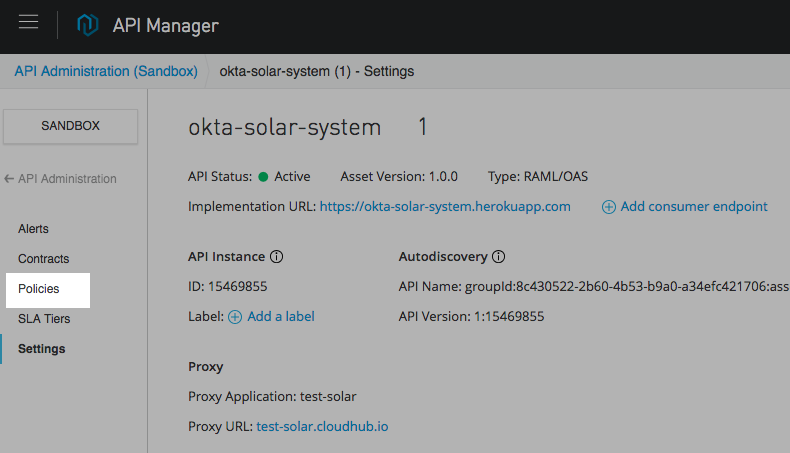
Set up Mulesoft Access Policies for Your API
On the main settings screen of your API, click on “Policies”,
Then, click on “Apply New Policy” and select “OpenID Connect access token enforcement”.
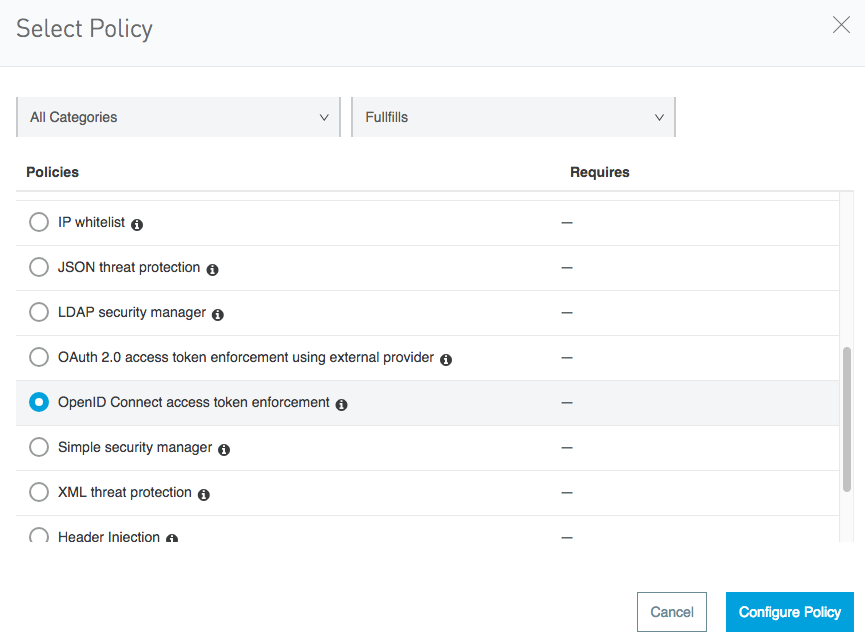
Click “Configure Policy” to set up a policy and add one scope to the list of scopes:
http://myapp.com/scp/silver.
Select “Apply configurations to specific methods & resources”.
For Methods, choose GET and for the URI template regex, enter:
/planets
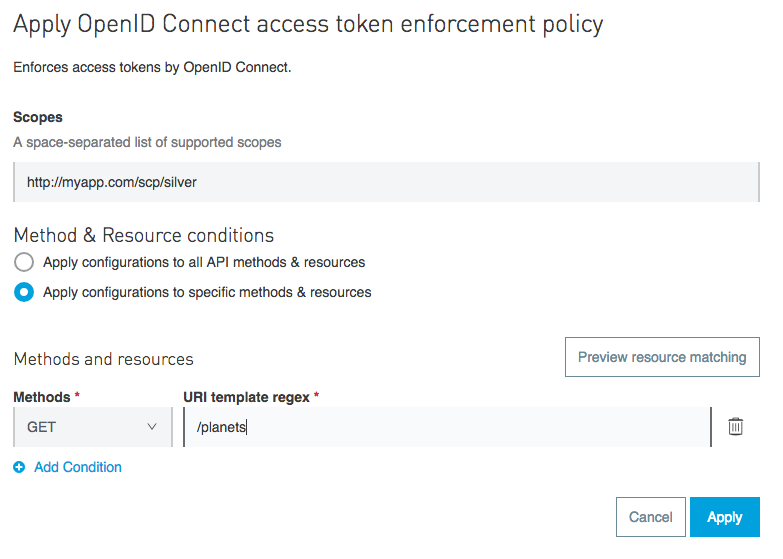
Be sure to click “Apply”.
We need to set up one more policy to show how different users get different access. Click “Apply New Policy” and this time use the scope http://myapp.com/scp/gold and the resource:
/moons
Set up a Mulesoft Authentication Client
Any access tokens sent to Mulesoft need to be minted by a client that Mulesoft recognizes. Mulesoft supports dynamic client registration with Okta, which is pretty cool.
In Mulesoft Anypoint, go to Exchange, where you will see a list of assets. Generally, the quickest way to find your API is to click on your organization name in the left-hand column.
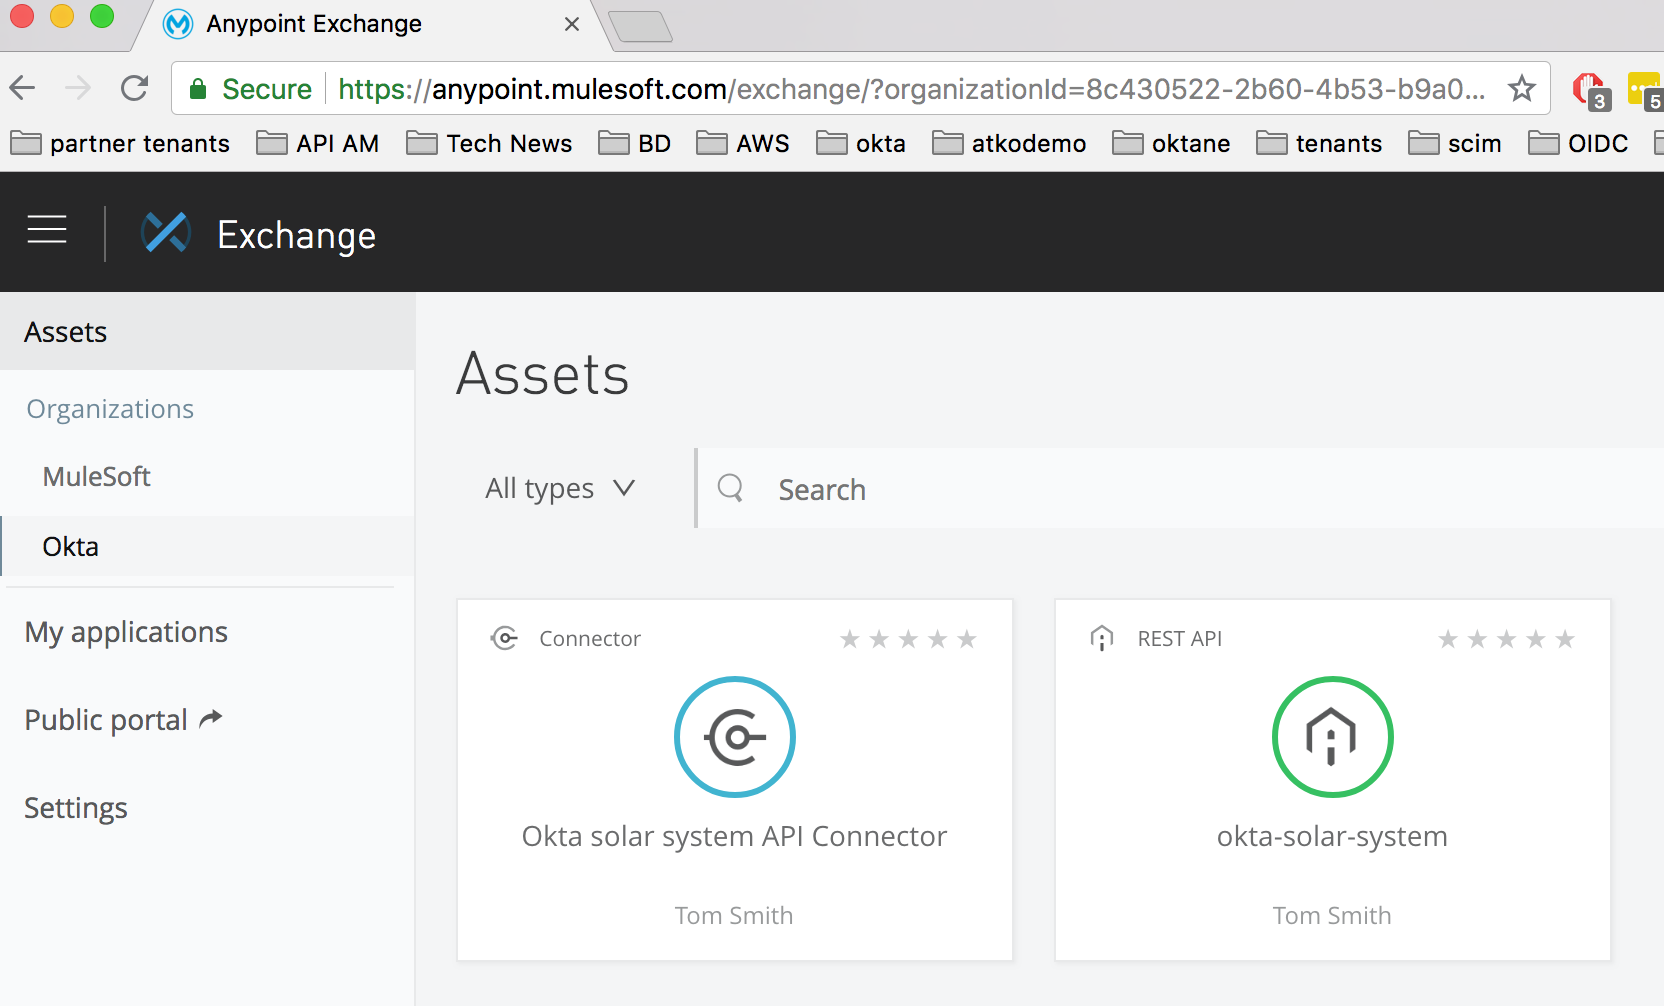
Click on your REST API.
You will see the portal home screen of your API. Click on the menu drop-down in the upper right and select “Request access”.
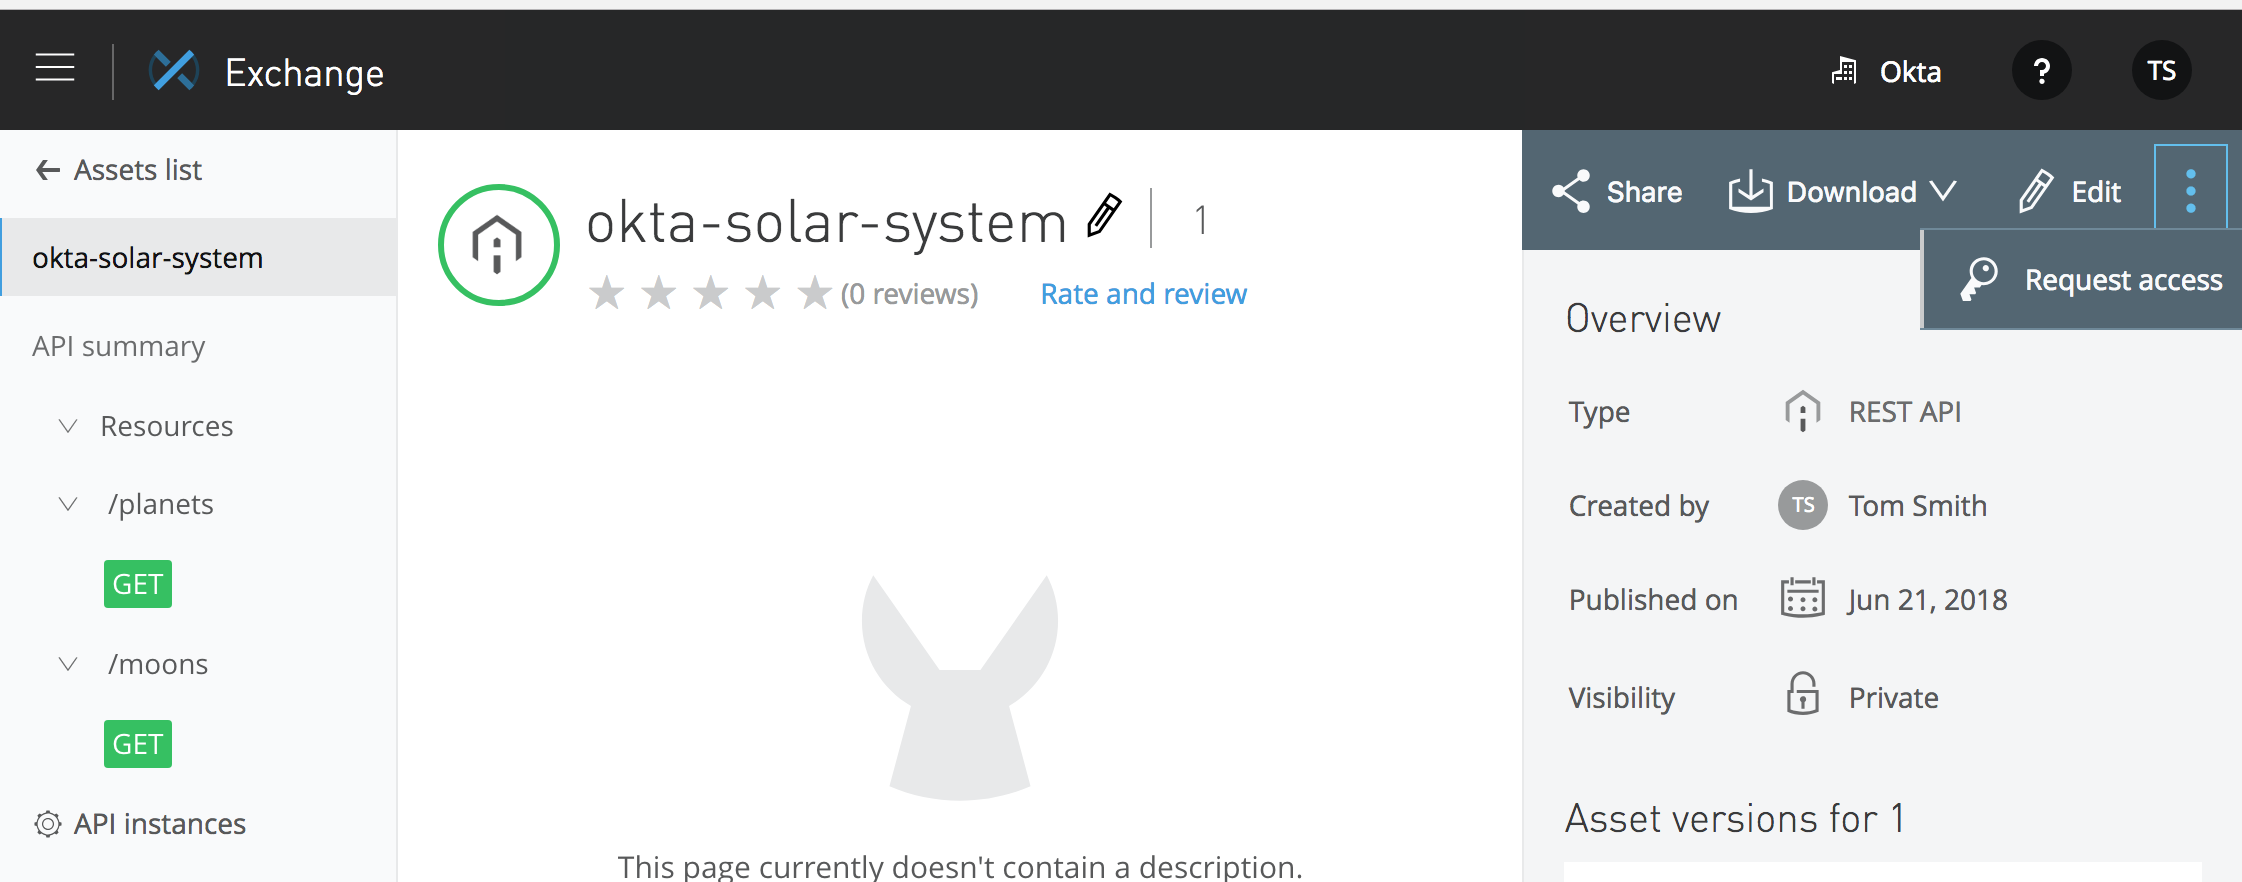
You will now see the “Request API access screen”:
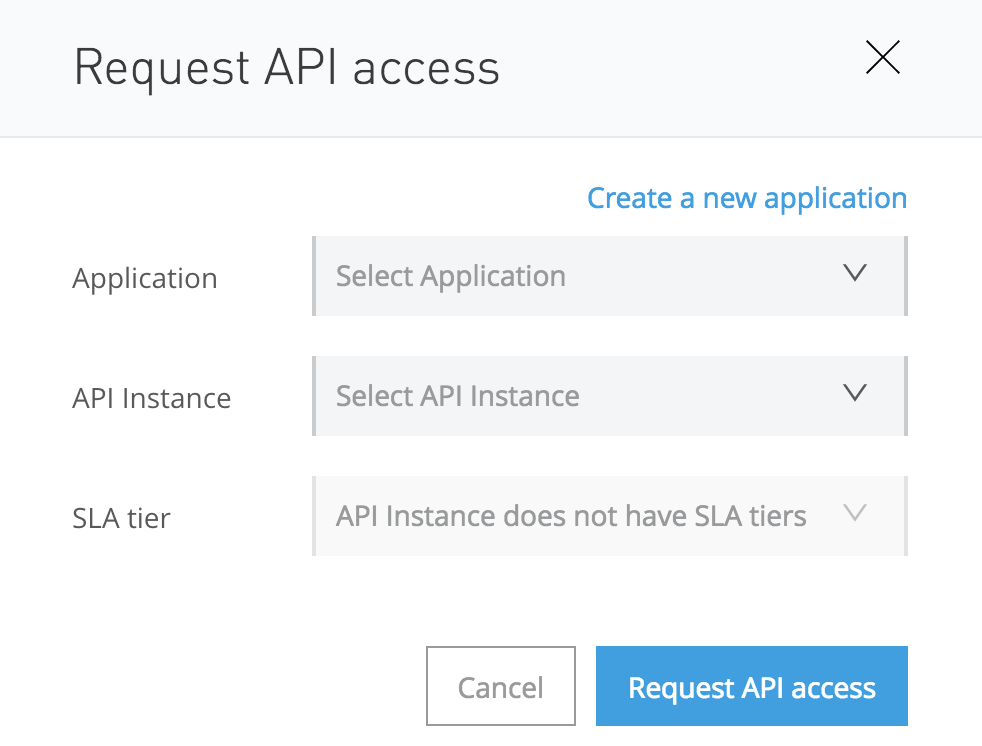
Click “Create new application” and enter the following values when prompted:
- Name:
Solar System Auth - OAuth 2.0 Grant type:
Authorization Code Grant - OAuth 2.0 redirect URIs:
http://localhost:8080(or whatever REDIRECT_URI you established at the beginning of the process).
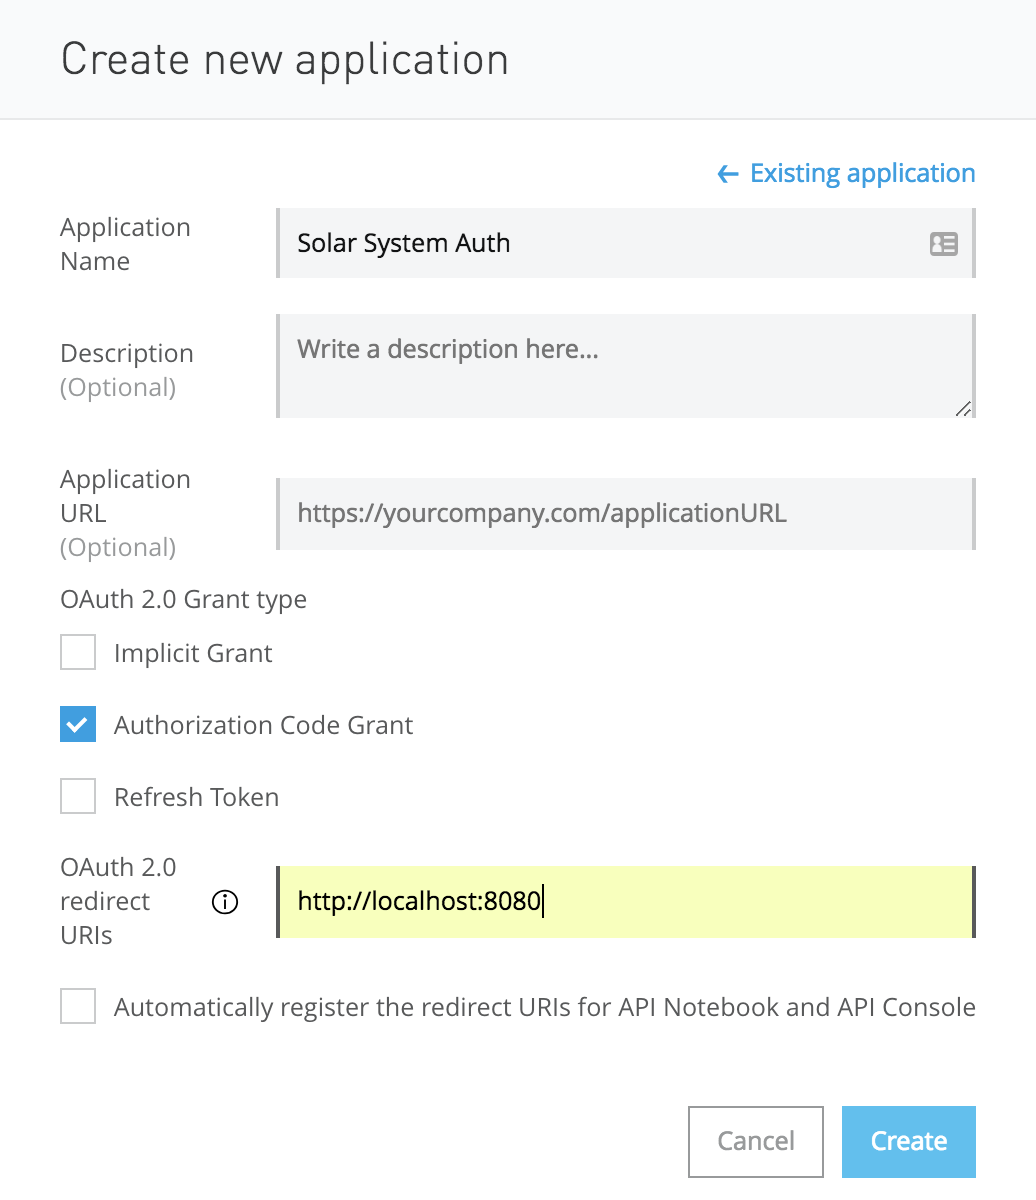
Click “Create” to create your new client.
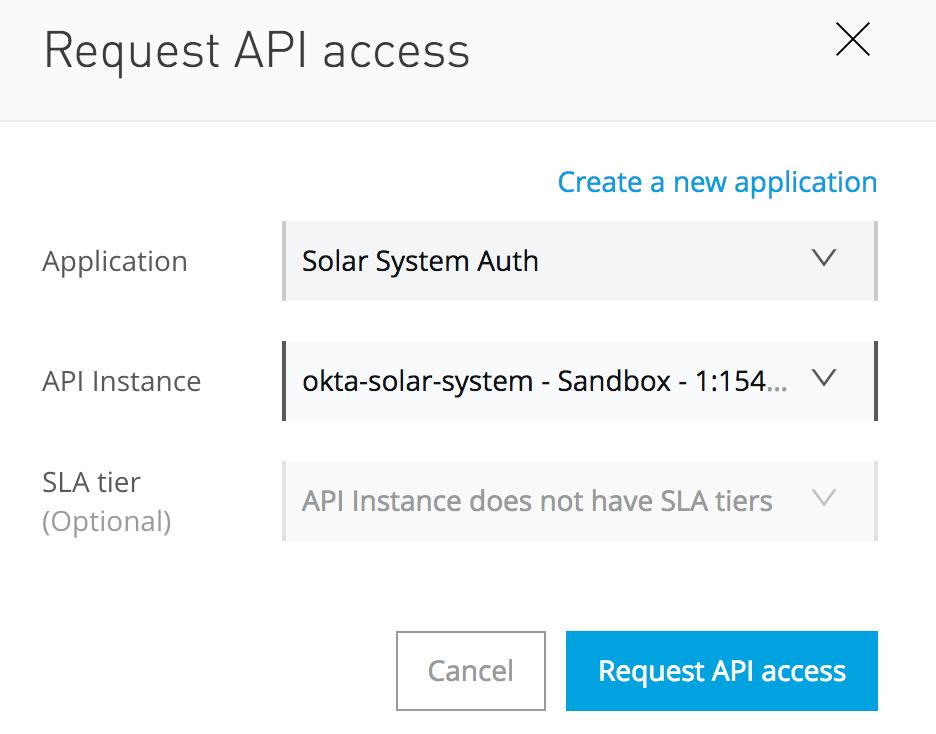
You will see the Request API access screen. Select your API instance and click “Request API access”.
You will see an “API Access has been successful!” screen.
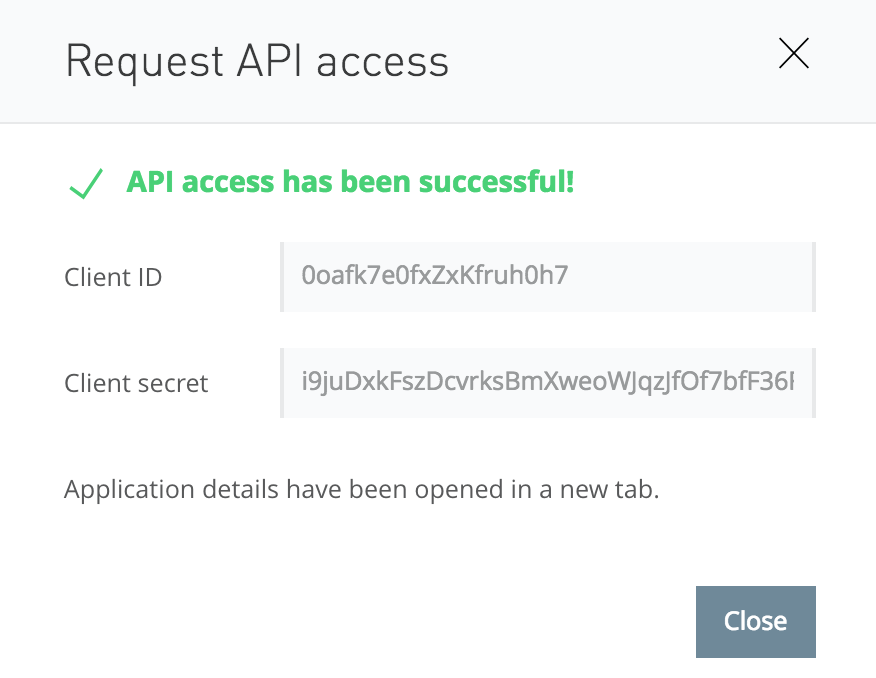
Add the client_id and client_secret to your .env file (in the AUTHN_CLIENT_ID and AUTHN_CLIENT_SECRET fields) so that they will be available to the next bootstrap script and the web app later.
And, while you have the .env file open, copy your Mulesoft Cloudhub url to the PROXY_URI field.
Configure your Okta Account (Part 2)
Now that we have our authentication client_id and secret, we can set up our policies and rules in the Okta tenant. To do so, run the following bootstrap script:
node okta_bootstrap.js --mulesoft_policy
Two steps need to be done manually in your Okta tenant before launching your app.
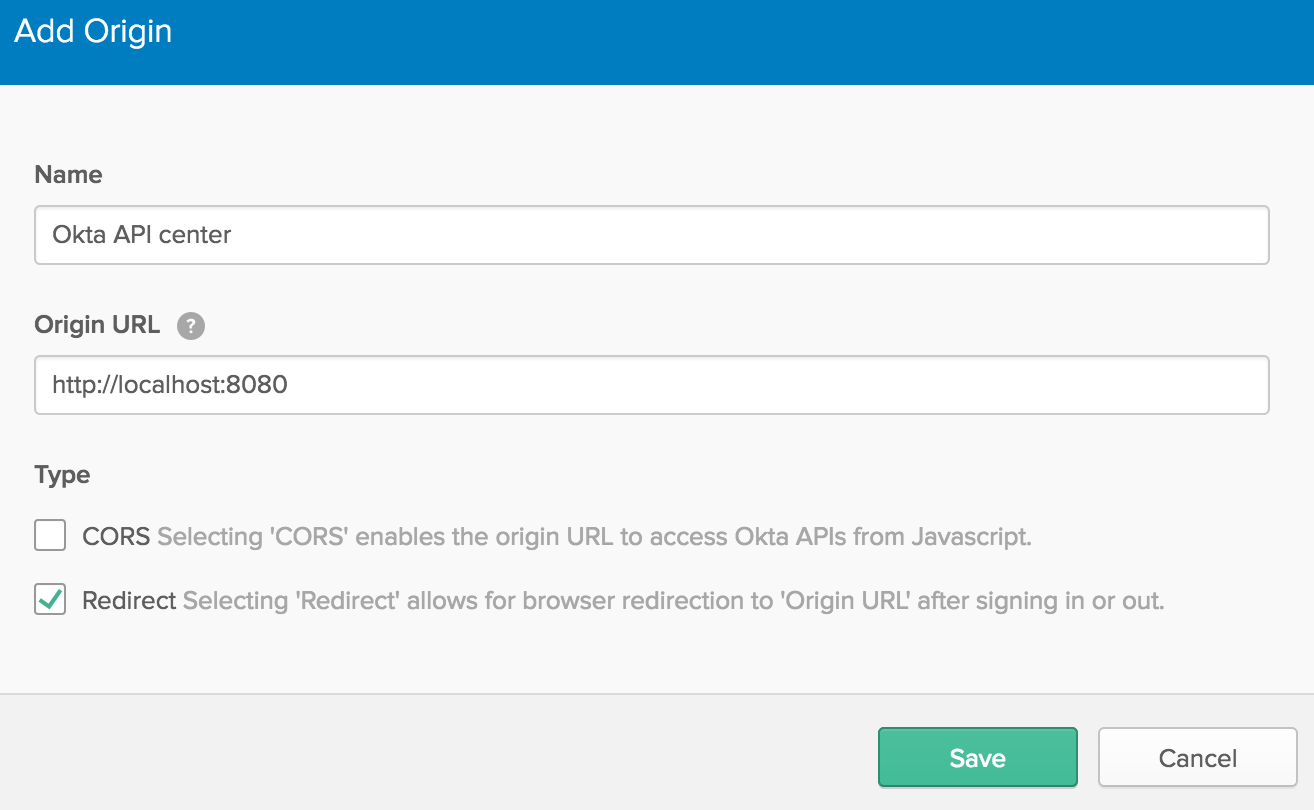
1) Add your REDIRECT_URI as a Trusted Origin in your Okta tenant:
Go to API->Trusted Origins->Add Origin (if you are using the classic UI, go to Security->API->Trusted Origins->Add Origin).
2) Assign the Okta client (AUTHN_CLIENT_ID) that you created via the Mulesoft UI to Okta users/groups
For the purposes of this demo, we’re going to assign this client to the Everyone group, but in a production environment, you would assign it only to the groups that need to use it.
In your Okta tenant, go to Applications, find your Solar System Auth app, and click the Assignments tab.
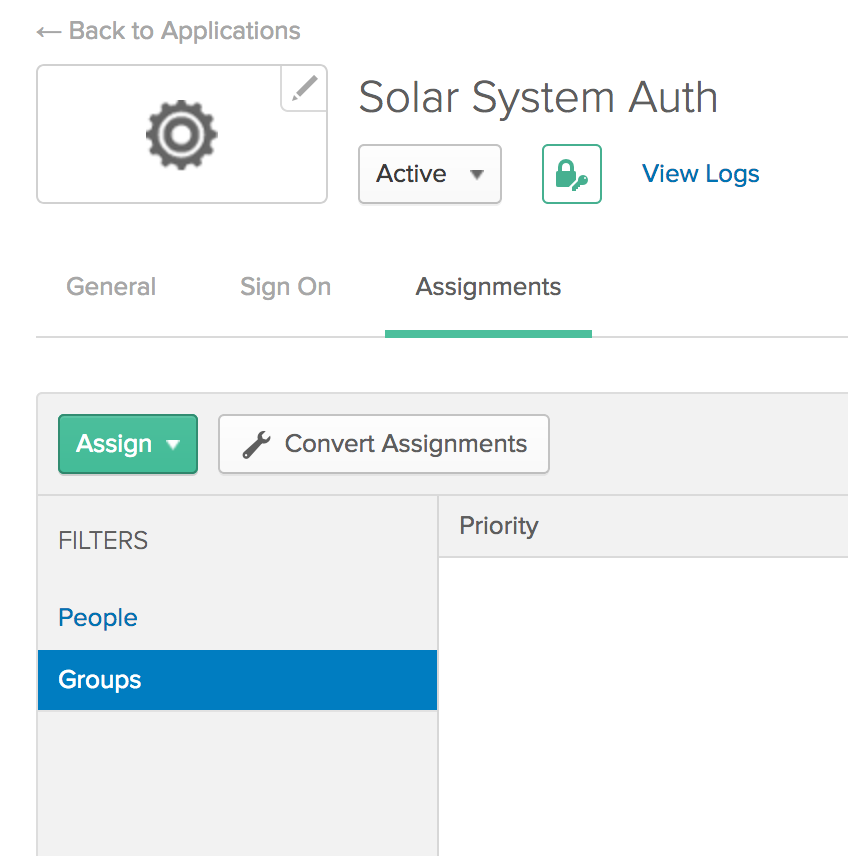
Click the “Assign” button and then select “Assign to Groups”.
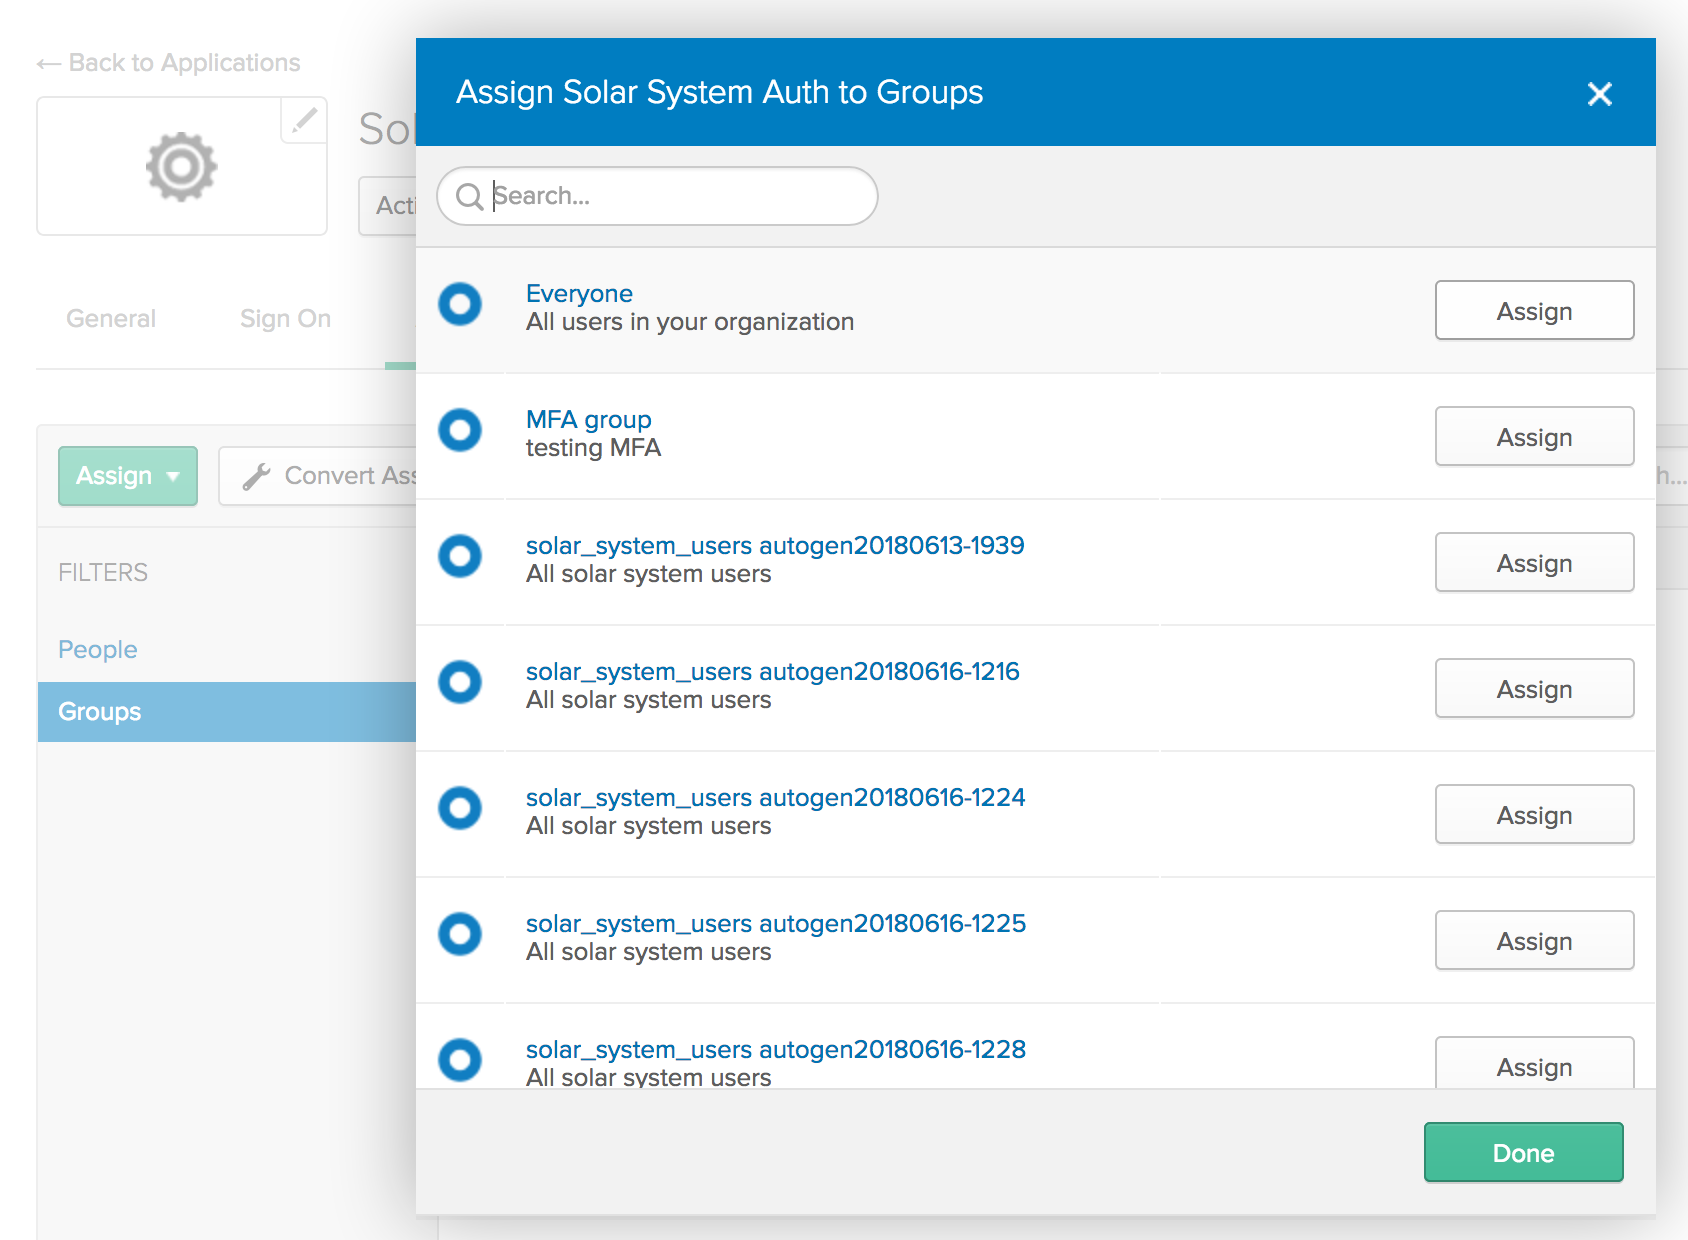
Click the Assign button next to the Everyone group, then click Done.
Launch the Node Application
If you’ve been using the Okta bootstrap tool, run a script to gather the settings that the app will need:
node get_settings.js --mulesoft
Use these settings to update your .env file.
You can now launch your app:
node app.js
When you load the web app, first try clicking on the “show me the planets” and/or the “show me the moons” buttons. You’ll get an error notifying you that you need an access token.
Next, try authenticating as one of the users. You’ll get an id token and an access token displayed in the browser (you would not do this in prod). The raw tokens are also available in the console if you want to check them out.
Now that the user has a token (actually the token is sitting on the server), you can click on one of the “show me” buttons again to see if you get the requested resource.
Wrapping Up
Hopefully you’ve found this walk-through helpful. As I mentioned at the start, the OAuth dance among the application, IDP, and API gateway can be tricky. Now that you have a basic working flow, you can experiment with other scopes, clients, groups, etc. to fit your own use-cases.
Enjoy the planets!
Further Reading
If you want to learn more about OAuth or using Okta with Node.js, you may find these articles interesting:
- What is the OAuth 2.0 Authorization Code Grant Type?
- Build Secure Node Authentication with Passport.js and OpenID Connect
- What the Heck is OAuth?
- Tutorial: Build a Basic CRUD app with Node.js
Head over to Okta’s OIDC/OAuth 2.0 API documentation for more detailed information on how we support OAuth.
As always, you can follow us on Twitter @oktadev for more content or drop a question in the comments below!
Instructions for those not using the bootstrap tool:
These instructions assume that you are using the Developer Edition of Okta. If you are using the Enterprise version, some of the screen captures and menus may look a little different.
Also, we’re going to use the default authorization server that is built in to the developer edition. If you are using an Enterprise edition of Okta, you will need to set up an authorization server.
-
Set up an introspection client: Mulesoft uses a dedicated client to introspect all tokens.
Click “Applications” and then “Add application”.
Choose “Service”, then Next.
Name: Token Introspection Client
Click Done.
You’ll get a client id and client secret. Set these aside for Token Introspection.
-
Get your OpenID Connect Authorization URLs
Click API->Authorization Servers
Click default
Click on the Metadata URI
Leave this page open
-
Follow the steps outlined in “Mulesoft tenant: set up Okta as an External Identity Provider”
Client Registration URL = Metadata->registration_endpoint
Authorization Header = SSWS OKTA_API_TOKEN
Client ID = token introspection client
Client Secret = token introspection secret
Authorize URL = Metadata->authorization_endpoint
Token URL = Metadata->token_endpoint
Token Inspection URL = Metadata->introspection_endpoint -
Finish the Mulesoft set-up: Mulesoft tenant: set up and deploy your API Mulesoft tenant: set access policies on your API Mulesoft tenant: set up an authentication client
At the end of the “set up an authentication client” step, you’ll have a client_id and client_secret to use as your authentication client id and secret.
-
Setting up your Okta tenant
- Set up a group: Users->Groups->Add Group
- Name the group “silver subscribers”; you can use the same for the description
- Click Add Group
- Add a user: Users->People->Add Person
- In the Groups field, add “silver subscribers”
- Use whatever values you wish for the remaining fields
- Click Save
- Add a scope: API->Authorization Servers->default
- Click the Scopes tab
- Click Add Scope
- Name: http://myapp.com/scp/silver
- Description: Silver scope
- Click Create
- Add a policy
- Click the Access Policies tab
- Click Add New Access Policy
- Name: Solar system API access
- Description: Solar system API access
- It’s OK to leave it assigned to All clients
- Click Create
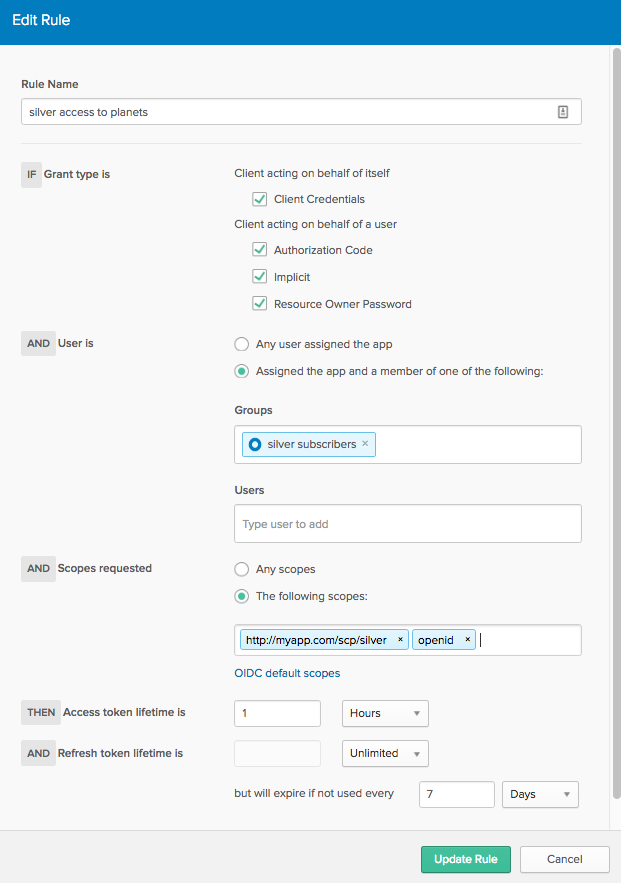
- Add a rule
- Click the Add rule button
- Rule Name: silver access to planets
- Change the User clause to “Assigned the app and a member of the following:”
- Add the silver subscribers group
- Change the Scopes clause to “The following scopes:”
- Add these scopes:
- http://myapp.com/scp/silver
- openid
- Add these scopes:
- Click “Create Rule”
- Click the Add rule button
Your authorization server is now set up so that users in the silver subscribers group who request the
http://myapp.com/scp/silverscope upon authentication will be granted that scope in their access token. In the API gateway, this scope will give them access to the /planets resource.The API Center application renders two user authentication/authorization flows: one for a “silver” user (which you’ve just set up) and one for a “gold” user. If you would like to see the flow for a “gold” user (access to /moons) then go through the steps above (starting with the creation of another new group) using “gold” as the keyword in the place of “silver”.
- Set up a group: Users->Groups->Add Group
- Follow the steps above to add your REDIRECT_URI as a Trusted Origin in your Okta tenant
- Follow the steps above to assign the authentication client (created via Mulesoft UI) to Everyone.
- Copy the ‘.env_example’ file to
.env. Update the values in.envand save. - Launch the web app!
node app.js
Okta Developer Blog Comment Policy
We welcome relevant and respectful comments. Off-topic comments may be removed.