Add Authentication to your PHP App in 5 Minutes
Have you ever found yourself building an app and needing to add authentication, dreading the thought of setting up yet another username and password database? In this post, I’ll show you how easy it is to use Okta to add authentication to a simple PHP app in 5 minutes. By leveraging Okta’s simple OAuth API, we can breeze past most of the challenges involved in authenticating users by letting Okta take care of the hard parts.
To follow this tutorial, you’ll first need an Okta Developer account. If you don’t yet have an account, sign up for free and come back here when you’re done. We won’t use any external PHP libraries or dependencies in this example just to keep things simple.
We’ll start with a single PHP file to demonstrate the logged in/logged out state of our application. Then we’ll integrate the Okta API to authenticate users and find their username after they’re logged in. You can use this guide as the basis of adding authentication to your own real application.
Note: In May 2025, the Okta Integrator Free Plan replaced Okta Developer Edition Accounts, and the Okta CLI was deprecated.
We preserved this post for reference, but the instructions no longer work exactly as written. Replace the Okta CLI commands by manually configuring Okta following the instructions in our Developer Documentation.
Set Up the Sample PHP App
If you want to skip to the finished project, check out the source code on GitHub. This post builds up the code in the finished project and explains it step by step.
Create a new file, index.php, with the following contents. This will set up two different “views” of our application based on whether the user is logged in (whether there is a username in the PHP session).
<?php
// Begin the PHP session so we have a place to store the username
session_start();

// If there is a username, they are logged in, and we'll show the logged-in view
if(isset($_SESSION['username'])) {
  echo '<p>Logged in as</p>';
  echo '<p>' . $_SESSION['username'] . '</p>';
  echo '<p><a href="/?logout">Log Out</a></p>';
  die();
}

// If there is no username, they are logged out, so show them the login link
if(!isset($_SESSION['username'])) {
  $authorize_url = 'TODO';
  echo '<p>Not logged in</p>';
  echo '<p><a href="'.$authorize_url.'">Log In</a></p>';
}
With that simple skeleton created, we have a place to start working on adding authentication. This app now looks for a “username” in the session variable and considers the user logged in when it’s set.
Next, let’s add a simple function that we’ll use when making API calls to Okta. This function will make an HTTP request and return the JSON-decoded response. It takes a URL and optionally an array of parameters. If there are parameters, it will make a POST request with the parameters as the HTTP body. Otherwise it makes a GET request to the given URL. Since all the API calls we’re doing will result in a JSON response body, this function decodes the JSON response and returns the resulting object.
function http($url, $params=false) {
  $ch = curl_init($url);
  curl_setopt($ch, CURLOPT_RETURNTRANSFER, true);
  if($params)
    curl_setopt($ch, CURLOPT_POSTFIELDS, http_build_query($params));
  return json_decode(curl_exec($ch));
}
Create an OAuth Application in Okta
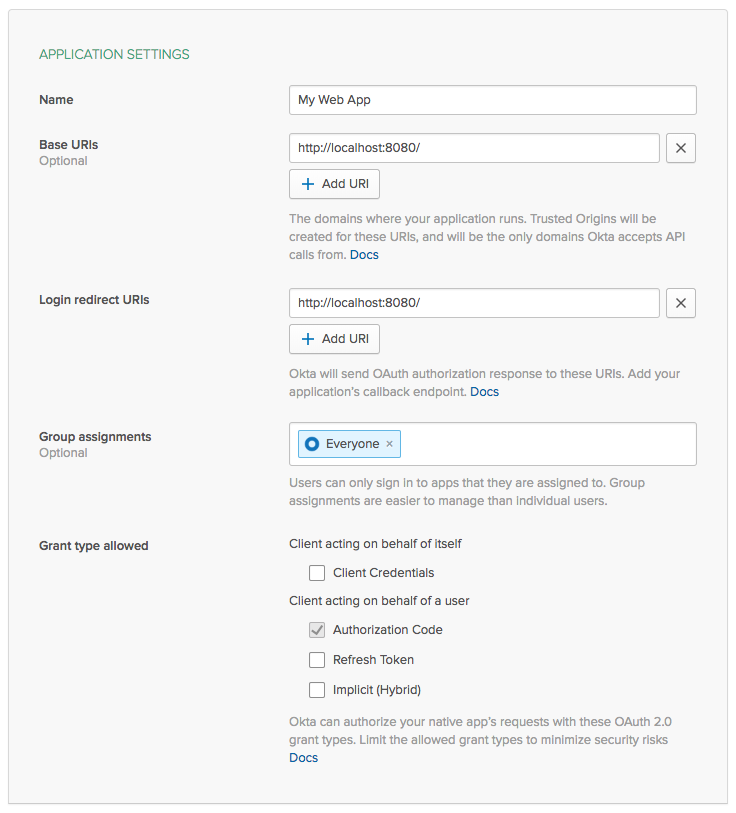
Before we can get much further, we need to configure our Okta Developer account to get a client ID and secret to use to talk to the API. In the Applications section of your Okta Developer account, click Add Application, and choose Web. The only change we need to make to the default application settings is changing the callback URL to http://localhost:8080/, since we’re writing the entire flow in this one PHP file.
Click Done and you’ll be taken to the next screen where you can get your new client ID and secret. Copy those two values into the variables below, and add this chunk to the top of your PHP file, right after session_start():
$client_id = '';
$client_secret = '';
$redirect_uri = 'http://localhost:8080/';
We also need to find the authorization server metadata URL. From the top menu, choose API -> Authorization Servers. You should see one authorization server in the list, default. Click that and copy the Metadata URI below the client and redirect lines:
$metadata_url = 'https://{yourOktaOrg}/oauth2/default/.well-known/oauth-authorization-server';
// Fetch the authorization server metadata which contains a few URLs
// that we need later, such as the authorization and token endpoints
$metadata = http($metadata_url);
Build the Login URL
Now we’re ready to start building the login URL where we can send the user to authenticate. Replace the line $authorize_url = 'TODO'; with the following code.
  // Generate a random state parameter for CSRF security
  $_SESSION['state'] = bin2hex(random_bytes(5));

  // Build the authorization URL by starting with the authorization endpoint
  // and adding a few query string parameters identifying this application
  $authorize_url = $metadata->authorization_endpoint.'?'.http_build_query([
    'response_type' => 'code',
    'client_id' => $client_id,
    'redirect_uri' => $redirect_uri,
    'state' => $_SESSION['state'],
    'scope' => 'openid',
  ]);
This bit of code sets up the beginning of the OAuth Authorization Code flow. If you want more details about these parameters, I wrote about the Authorization Code flow previously on this blog: What is the OAuth 2.0 Authorization Code Grant Type?
We’ve got enough built now to try this out. From the command line, navigate to the folder with your index.php file and start a PHP server:
php -S 127.0.0.1:8080
Now you can visit this page in a browser http://127.0.0.1:8080/ and you’ll see your login prompt.

Don’t click the link just yet, since we still need to set up handling the callback and getting an access token.
Handle the OAuth Redirect
When the user clicks the login URL, they’re sent to the Okta authorization server. The authorization server will ask them to log in (if they aren’t already logged in), and will then generate a temporary authorization code and redirect the user back to this application. To verify that the user did in fact log in, the application needs to check that this temporary authorization code is valid by exchanging it for an access token at Okta’s authorization server.
Between your client ID configuration lines and the section that renders the logged-out view, we’re going to add a new section that handles exchanging the authorization code for an access token.
Let’s start by adding a check for the authorization code in the query string. Your code should look something like this now.
// ...
$metadata = http($metadata_url);

if(isset($_GET['code'])) {

  // TODO: we'll work on filling out this section next

}

if(!isset($_SESSION['username'])) {
// ...
Inside this new section, in place of the “TODO” comment we just added, let’s first add a few bits of error checking. We’ll start by checking that the authorization server returned the same state parameter we set when the user started logging in.
  if($_SESSION['state'] != $_GET['state']) {
    die('Authorization server returned an invalid state parameter');
  }

  if(isset($_GET['error'])) {
    die('Authorization server returned an error: '.htmlspecialchars($_GET['error']));
  }
It’s also possible that the authorization server returns an error here, so we’ll display the error if that happens.
Next we need to take the authorization code from the URL and exchange it for an access token at the token endpoint. To do this, we use the token endpoint from the metadata response, and include our client ID and secret in the API call:
  $response = http($metadata->token_endpoint, [
    'grant_type' => 'authorization_code',
    'code' => $_GET['code'],
    'redirect_uri' => $redirect_uri,
    'client_id' => $client_id,
    'client_secret' => $client_secret,
  ]);

  if(!isset($response->access_token)) {
    die('Error fetching access token');
  }
If all goes well, we’ll end up with an access token in the $response object. We don’t actually need the access token for anything except finding out who logged in, so we won’t be storing it anywhere. Instead, we’ll use it to make a request to the token introspection endpoint.
  $token = http($metadata->introspection_endpoint, [
    'token' => $response->access_token,
    'client_id' => $client_id,
    'client_secret' => $client_secret,
  ]);

  if($token->active == 1) {
    $_SESSION['username'] = $token->username;
    header('Location: /');
    die();
  }
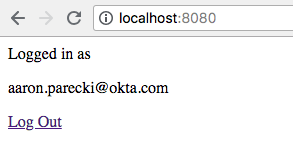
This code takes the access token and sends it, along with the client credentials, to the token introspection endpoint. The introspection endpoint tells us the username of the person who logged in. If the token is active, we set the username in the session, then redirect back to the home page. Now that the username is in the session, our “app” considers the user logged in and we see the logged-in page with the user’s email address!
Hopefully this has been a helpful illustration of how easy it is to add authentication to a simple PHP app! Obviously this is a minimalist example, and in reality your application is much more featureful and probably better organized into more than one file. But you should be able to take what you’ve learned here and adapt it to other frameworks or use cases that you’re working with!
You can see the full source code for this application on GitHub at https://github.com/aaronpk/quick-php-authentication.
Further Reading
For more information and tutorials about OAuth, check out some of our other blog posts!
- What is the OAuth 2.0 Authorization Code Grant Type?
- What is the OAuth 2.0 Implicit Grant Type?
- Build a Basic CRUD App with Symfony 4 and Vue
- Get Started with Spring Boot, OAuth 2.0, and Okta
As always, we’d love to hear from you about this post, or really anything else! Hit us up in the comments, or on Twitter @oktadev!
Aaron Parecki is a Senior Security Architect at Okta. He is the author of OAuth 2.0 Simplified, and maintains oauth.net. He regularly writes and gives talks about OAuth and online security. He is an editor of several internet specs, and is the co-founder of IndieWebCamp, a conference focusing on data ownership and online identity. Aaron has spoken at conferences around the world about OAuth, data ownership, quantified self, and home automation, and his work has been featured in Wired, Fast Company and more.
Okta Developer Blog Comment Policy
We welcome relevant and respectful comments. Off-topic comments may be removed.