Build a Next.js Application with TypeScript

Next.js is a React framework that aims to provide the best development experience. It is feature rich, including hybrid static and server rendering, TypeScript support, built-in CSS support, API routers, and much more.
TypeScript is an open-source language that is built on JavaScript that allows developers to use types. In this tutorial, you will learn how to use TypeScript with Next.js.
Finally, you will secure your application with Okta Single Sign-On and the built-in functionality of Next.js, as well as the support of the next-auth package.
Table of Contents
- Create a Next.js Application with TypeScript
- Convert Your Next.js Application to TypeScript
- Create an OIDC Application
- Configure Authentication for Next.js
- Write Your Next.js Components and Pages
- Test and Make Sure Everything Works
- Learn More About React and TypeScript
Note: In May 2025, the Okta Integrator Free Plan replaced Okta Developer Edition Accounts, and the Okta CLI was deprecated.
We preserved this post for reference, but the instructions no longer work exactly as written. Replace the Okta CLI commands by manually configuring Okta following the instructions in our Developer Documentation.
Create a Next.js Application with TypeScript
Open your favorite IDE. For this tutorial, I used Visual Studio Code. Navigate to the folder where you wish to keep your application. Next, use the create-next-app task runner by using the command npx create-next-app and follow the instructions. When prompted, name your application movies. After the runner is complete, open the folder it created for you.
Since you are using TypeScript in this tutorial you will need to set up TypeScript support. Create a new file in the root of your application called tsconfig.json. Next.js will automatically populate this file with its default values but you can edit them if you wish. Next, run npm run dev in your console and you will see instructions about installing your dependencies for TypeScript.
To do this, open the console and run the following commands.
npm i typescript@4.4.4 @types/node@16.11.2 @types/react@17.0.31
This will complete your TypeScript setup. But there are more dependencies you should add at this point. You can add next-auth at this point. Next-auth makes setting up any type of authentication in Next.js simple. Of course, for this application, you are only setting up Okta as an external provider. Install next-auth with the command below and you will see how to implement it later.
npm i next-auth@3.29.0
Finally, for this tutorial, you will use Bootstrap for your CSS framework.
npm i bootstrap@5.1.3
Convert Your Next.js Application to TypeScript
The task running for creating a Next.js application does not include an option for using TypeScript. Therefore you will need to manually convert your application from JavaScript to TypeScript. The process is simple and should only take a moment.
You have already completed the first two steps by setting up your tsconfig.json file and installing your dependencies. Now you will need to convert files with the .js extension to .tsx. You will need to do this for each file in your pages directory and any subdirectories. Any subsequent components you add will also need to have the .tsx file extension.
mv pages/index.js pages/index.tsx
mv pages/_app.js pages/_app.tsx
mv pages/api/hello.js pages/api/hello.tsx
Create an OIDC Application
Before you begin, you’ll need a free Okta developer account. Install the Okta CLI and run okta register to sign up for a new account. If you already have an account, run okta login.
Then, run okta apps create. Select the default app name, or change it as you see fit.
Choose Web and press Enter.
Select Other.
Then, change the Redirect URI to http://localhost:3000/api/auth/callback/okta and use http://localhost:3000 for the Logout Redirect URI.
What does the Okta CLI do?
The Okta CLI will create an OIDC Web App in your Okta Org. It will add the redirect URIs you specified and grant access to the Everyone group. You will see output like the following when it’s finished:
Okta application configuration has been written to: /path/to/app/.okta.env
Run cat .okta.env (or type .okta.env on Windows) to see the issuer and credentials for your app.
export OKTA_OAUTH2_ISSUER="https://dev-133337.okta.com/oauth2/default"
export OKTA_OAUTH2_CLIENT_ID="0oab8eb55Kb9jdMIr5d6"
export OKTA_OAUTH2_CLIENT_SECRET="NEVER-SHOW-SECRETS"
Your Okta domain is the first part of your issuer, before /oauth2/default.
NOTE: You can also use the Okta Admin Console to create your app. See Create a Web App for more information.
Your issuer, client ID, and client secret will be stored in an .okta.env file in your current directory.
Configure Authentication for Next.js
Next, you’ll need to set up the authentication for external providers.
Before you can implement authentication, you will need to ensure that your .env.local file is set up correctly. Add this file to the root of your project if one doesn’t exist yet. Copy the values from .okta.env into it.
OKTA_CLIENTID={yourClientId}
OKTA_CLIENTSECRET={yourClientSecret}
OKTA_DOMAIN={yourOktaIssuer}
NEXTAUTH_URL=http://localhost:3000
NOTE: The {yourOktaIssuer} value should not have an https:// prefix. For example, dev-133337.okta.com/oauth2/default.
Now, under your pages/api folder create a new folder called auth if one doesn’t exist yet. Add a file called [...nextauth].ts. Add the following code to it.
import NextAuth from 'next-auth'
import Providers from 'next-auth/providers'

const options = {
  // Configure one or more authentication providers
  providers: [
    Providers.Okta({
      clientId: process.env.OKTA_CLIENTID,
      clientSecret: process.env.OKTA_CLIENTSECRET,
      domain: process.env.OKTA_DOMAIN
    }),
    // ...add more providers here
  ]
}

export default (req, res) => NextAuth(req, res, options)
Finally, open pages/_app.tsx and replace the existing code with the following.
import '../styles/globals.css'
import 'bootstrap/dist/css/bootstrap.min.css'

import { Provider } from 'next-auth/client'

function MyApp({ Component, pageProps }) {
  return (
    <Provider session={pageProps.session}>
      <Component {...pageProps} />
    </Provider>
  )
}

export default MyApp
This code is the default Next.js code wrapped in a Provider class from next-auth. The provider class makes sharing the session between pages easier. You added the Bootstrap CSS in this file as well. This will enable you to use Bootstrap on your pages.
Write Your Next.js Components and Pages
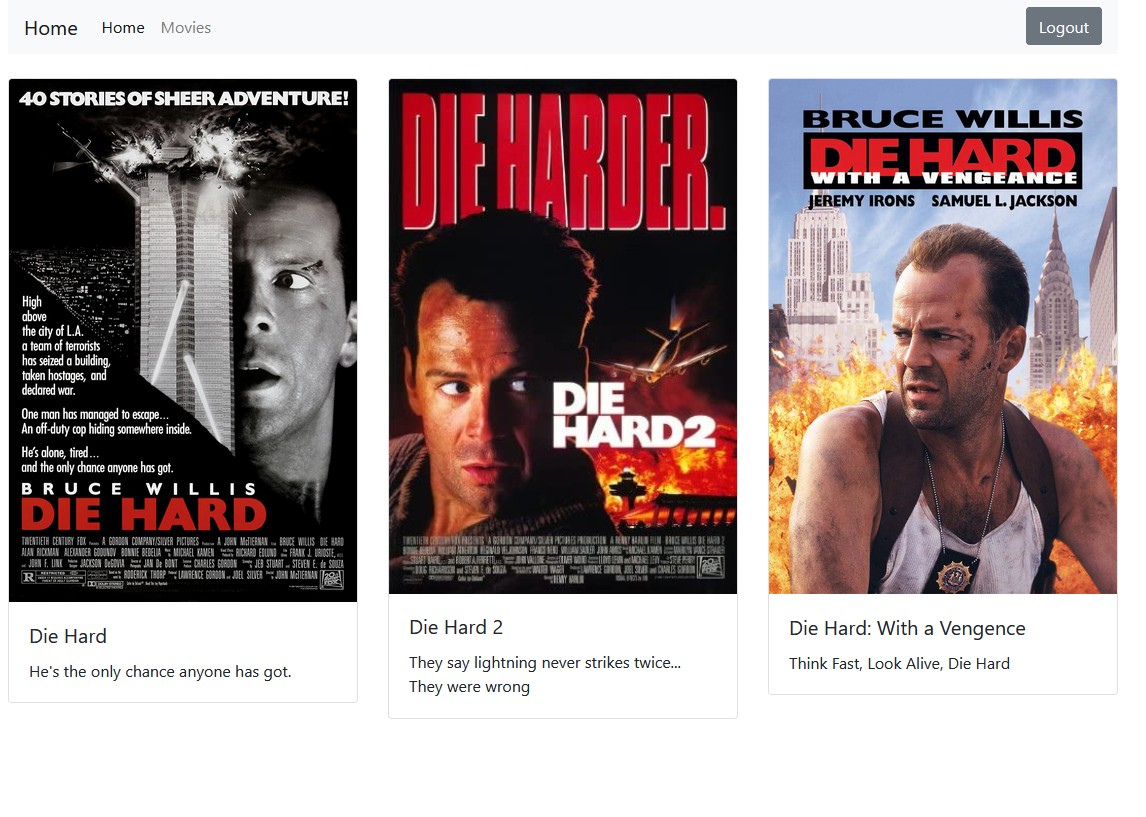
Your application is set up and ready to develop. Start by adding a new folder called components to the root of your project. This will be a folder for your shared components. Add a new file called Movies.tsx and add the following code.
export default function Movies() {

  return (
    <div className="row">
      <div className="col-lg-4">
        <div className="card">
          <img className="card-img-top" src="https://images-na.ssl-images-amazon.com/images/I/91gDYZG%2BzDL._AC_SL1500_.jpg" alt="Card image cap"></img>
          <div className="card-body">
            <h5 className="card-title">Die Hard</h5>
            <p className="card-text">He's the only chance anyone has got.</p>
          </div>
        </div>
      </div>

      <div className="col-lg-4">
        <div className="card">
          <img className="card-img-top" src="https://m.media-amazon.com/images/M/MV5BZjRlNDUxZjAtOGQ4OC00OTNlLTgxNmQtYTBmMDgwZmNmNjkxXkEyXkFqcGdeQXVyNzkwMjQ5NzM@._V1_.jpg" alt="Card image cap"></img>
          <div className="card-body">
            <h5 className="card-title">Die Hard 2</h5>
            <p className="card-text">They say lightning never strikes twice... They were wrong</p>
          </div>
        </div>
      </div>

      <div className="col-lg-4">
        <div className="card">
          <img className="card-img-top" src="https://belgianfilmfreak.files.wordpress.com/2017/01/d0.jpg" alt="Card image cap"></img>
          <div className="card-body">
            <h5 className="card-title">Die Hard: With a Vengence</h5>
            <p className="card-text">Think Fast, Look Alive, Die Hard</p>
          </div>
        </div>
      </div>
    </div>
  )
}
This component will be displayed on the Dashboard page for logged-in users. It displays some of the most important movies in history to the user.
Next, you can add a file called Unauthorized.tsx.
import { signIn } from 'next-auth/client'

export default function Unauthorized() {

  return (
    <div className="row">
      <div className="col-lg-10 col-offset-1">
        <p>Hey There, looks like you reached an area you don't have access to.</p>

        <p>Please sign in here.</p>

        <p><button className="btn btn-secondary" onClick={signIn}>Sign in</button></p>
      </div>
    </div>
  )
}
This is the first time on the client that you are using the next-auth package. You are importing the signIn feature from the next-auth/client component. This function will navigate the user to a list of providers that you implemented previously. The user will then be able to click on that provider and be taken to their login screen. The Unauthorized component simply presents the user with a message that they reached a protected part of the site without being authenticated and routes them to the appropriate provider.
The last file to add to this folder is the Header.tsx file. This is just a banner that sits on top of each page and has a login or logout button depending on the state of the user.
import { signIn, signOut, useSession } from 'next-auth/client'

export default function Header() {

  const [session, loading] = useSession();

  let button;

  if (session) {
    button = <button className="btn btn-secondary" onClick={signOut}>Logout</button>;
  } else {
    button = <button className="btn btn-primary" onClick={signIn}>Login</button>;
  }

  return (
    <div className="row mb-4">
      <div className="col-lg-12">
        <nav className="navbar navbar-expand-lg navbar-light bg-light">
          <div className="container-fluid">
            <button className="navbar-toggler" type="button" data-bs-toggle="collapse" data-bs-target="#navbarSupportedContent" aria-controls="navbarSupportedContent" aria-expanded="false" aria-label="Toggle navigation">
              <span className="navbar-toggler-icon"></span>
            </button>

            <a className="navbar-brand" href="#">Home</a>

            <div className="collapse navbar-collapse" id="navbarSupportedContent">
              <ul className="navbar-nav me-auto mb-2 mb-lg-0">
                <li className="nav-item">
                  <a className="nav-link active" href="/">Home <span className="sr-only">(current)</span></a>
                </li>
                <li className="nav-item">
                  <a className="nav-link" href="dashboard">Movies</a>
                </li>
              </ul>
              <form className="d-flex">
                {button}
              </form>
            </div>
          </div>
        </nav>
      </div>
    </div>
  )
}
The simplest way to see if a user is logged in is to check if the session exists by calling useSession() from next-auth. If it does, you present the user with the option to log out using the signOut() function. If it does not, you present the user with a login button that ties into the signIn() function you used on the Unauthorized component.
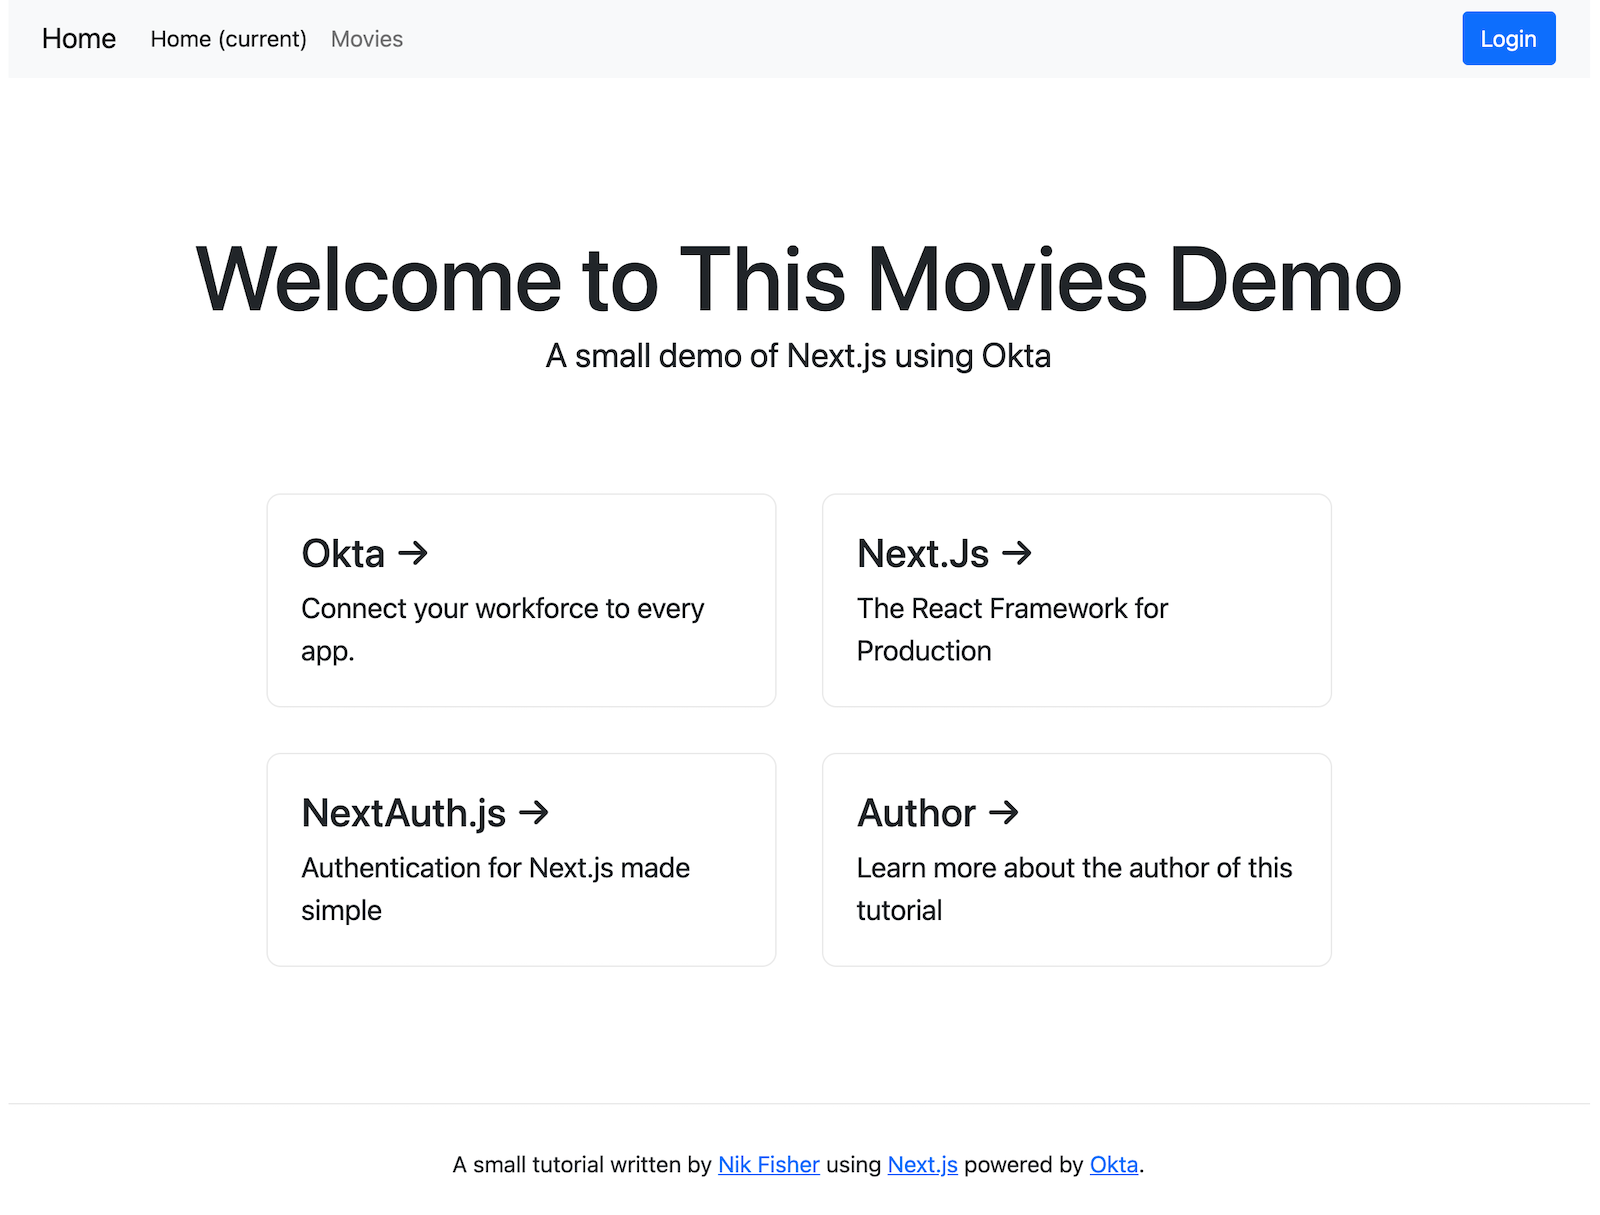
You can tie everything together by creating your pages. By default, Next.js should have added an index.tsx file. (Well, really, it added index.js but you should have changed the extension to .tsx already.) You can replace the code in that file with the code below.
import Head from 'next/head'
import styles from '../styles/Home.module.css'
import Header from '../components/Header'
export default function Home() {
return (
<div className="container">
<Head>
<title>Movies By Nik - Find Your Next Movie</title>
<link rel="icon" href="/favicon.ico" />
</Head>
<div className="row">
<div className="col-lg-12">
<Header></Header>
</div>
</div>
<main className={styles.main}>
<h1 className={styles.title}>
Welcome to This Movies Demo
</h1>
<p className={styles.description}>
A small demo of Next.Js using Okta
</p>
<div className={styles.grid}>
<a href="https://www.okta.com/" className={styles.card}>
<h3>Okta →</h3>
<p>Connect your workforce to every app.</p>
</a>
<a href="https://nextjs.org" className={styles.card}>
<h3>Next.Js →</h3>
<p>The React Framework for Production</p>
</a>
<a
href="https://next-auth.js.org/"
className={styles.card}
>
<h3>NextAuth.js →</h3>
<p>Authentication for Next.js made simple</p>
</a>
<a
href="http://profile.fishbowlllc.com/"
className={styles.card}
>
<h3>Author →</h3>
<p>
Learn more about the author of this tutorial
</p>
</a>
</div>
</main>
<footer className={styles.footer}>
A small tutorial written by <a target="_blank" rel="noreferrer" href="http://profile.fishbowlllc.com/">Nik Fisher</a>
using <a target="_blank" rel="noreferrer" href="https://nextjs.org">Next.js</a>
powered by <a target="_blank" rel="noreferrer" href="https://www.okta.com/">Okta</a>.
</footer>
</div>
)
}
Here you are giving any user a landing page to display what your site is about and using the header to provide a login button if necessary.
Next, modify styles/Home.module.css to adjust the .footer styles and remove the .footer a block:
.footer {
  width: 100%;
  height: 100px;
  border-top: 1px solid #eaeaea;
  text-align: center;
  padding-top: 30px;
}
Finally, you need to create a dashboard page. Start by creating a new file in the pages directory called dashboard.tsx. This page will need to check if the user has access to the page and display the Unauthorized component if not and the Movies component if they are. You can add the following code to it.
import React from 'react'

import Head from 'next/head'
import styles from '../styles/Home.module.css'

import Header from '../components/Header'
import Unauthorized from '../components/Unauthorized'
import Movies from '../components/Movies'

import { useSession } from 'next-auth/client'

export default function Dashboard() {

  const [session, loading] = useSession();

  var content = session ? <Movies></Movies> : <Unauthorized></Unauthorized>

  return (
    <div className="container">
      <Head>
        <title>Movies By Nik - Find Your Next Movie</title>
        <link rel="icon" href="/favicon.ico" />
      </Head>

      <Header></Header>

      {content}

    </div>
  )
}
As you learned already, the easiest way to check if a user is authenticated is to check if the session exists.
Test and Make Sure Everything Works
You should be ready to start your application now. From the command line run npm run dev and navigate to http://localhost:3000. You should be presented with the home screen for the application.
Next click on the Movies link. You should receive a message telling you that you don’t have access to the dashboard. Click Sign in and select Okta then log in with your Okta credentials. You should be redirected to the dashboard page showing you some of the greatest movies in history.
From here you can continue to build on your React components and develop your API to support your frontend knowing that your application is safe and secure with Okta’s authentication.
Learn More About React and TypeScript
I hope you enjoyed this tutorial on using Next.js with TypeScript.
You can find the source code for this example on GitHub, in the @oktadev/okta-nextjs-typescript-example repository.
Here are more React tutorials you might like:
- Build a Simple React Application Using Hooks
- Build a React App with ANT Design Principles
- Build Reusable React Components
Don’t forget to follow us on Twitter and subscribe to our YouTube channel for more great tutorials. If you have any questions, or you want to share what tutorial you’d like to see next, please comment below.
Changelog:
- Oct 21, 2021: Updated to use Okta CLI and React 17. You can see changes to this post in okta-blog#928. Updates to the example can be viewed in okta-nextjs-typescript-example#1.
Okta Developer Blog Comment Policy
We welcome relevant and respectful comments. Off-topic comments may be removed.