Spring Security SAML and Database Authentication
Spring Boot is a ubiquitous and well-supported suite of tools for developing web applications in Java. Database authentication, in which credentials identifying authorized users are stored in a database accessible by the application, is maybe the most common and straightforward method of authenticating users. SAML is a well-supported open standard for handling authentication between identity providers and service providers.
Configuring SAML authentication in Spring Security is a common topic, and examples are easy to come by. It’s also well documented, with straightforward configuration options available, as in this example from the Okta blog.
However, what if you want to combine both database and SAML authentication methods within the same Spring Boot application, so a user can be authenticated using either way? We will discuss and implement a solution in this tutorial!
Prerequisites
Acknowledgment: Much of the groundwork for the implementation of SAML 2.0 authentication used in this project was developed by Vincenzo De Notaris and can be found in this project on GitHub. For this project, some changes have been made to support dual DB + SAML authentication and use Okta as the SAML identity provider rather than SSOCircle.
Table of Contents
- SAML Authentication with Spring Security
- Set Up Your Okta Account with SAML and Run the Application
- How to Combine Database and SAML Authentication in Spring Boot
- Learn More About SAML and Okta
Note: In May 2025, the Okta Integrator Free Plan replaced Okta Developer Edition Accounts, and the Okta CLI was deprecated.
We preserved this post for reference, but the instructions no longer work exactly as written. Replace the Okta CLI commands by manually configuring Okta following the instructions in our Developer Documentation.
SAML Authentication with Spring Security
There are several benefits to using SAML to handle authentication for your application:
- Loose coupling between your application and your authentication mechanism increases independence between the two, allowing for more rapid development and evolution of application logic, with less risk of regression
- Shifts the responsibility of authentication, which involves storing and retrieving sensitive user information, to the identity provider (e.g., Okta), which almost always offers less risk since identity management is their business model
- Allows for an improved user experience via Single Sign-On while navigating between multiple apps
Okta is a very well established identity provider with robust features and a wealth of support. Managing users, accounts, and permissions with Okta is simple and straightforward. Simultaneously, it is still flexible and extensible enough to support your application no matter how much it grows (even as it grows into several applications). And the friendly, growing community is available to answer any questions you may have!
You’ll need to create a forever-free Okta developer account to complete this tutorial. If you already have a developer account, you should complete this tutorial by switching to the Classic UI in the top-left corner.
In case you need to support legacy systems or because you have strange security requirements, you may need to allow users to authenticate using either SAML or database credentials. The process to combine SAML 2.0 with DB auth in Spring Boot is what we’ll tackle here!
Set Up Your Okta Account with SAML and Run the Application
Please complete the following ten steps to see a working example.
Step 1: Clone the okta-spring-security-saml-db-example repository:
git clone https://github.com/oktadeveloper/okta-spring-security-saml-db-example.git
Step 2: Sign up for a free developer account at https://developer.okta.com/signup. This is required to create SAML 2.0 applications in Okta.
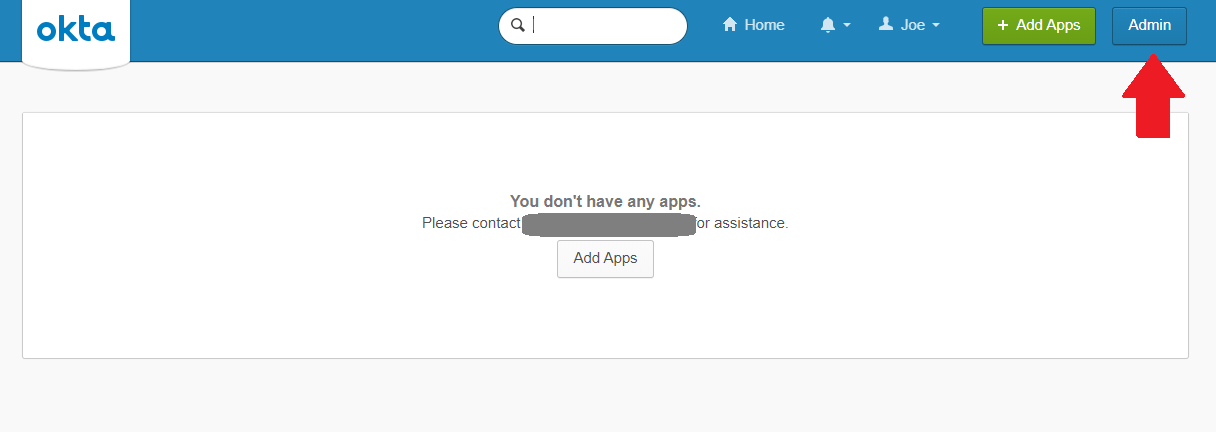
Step 3: Log in to your Okta account at https://your-okta-domain.okta.com. If you see a dashboard like the screenshot below, click on Admin in the top right.
Step 4: Create a new application via Admin > Applications > Add Application > Create New App with the following settings:
- Platform:
Web - Sign On Method:
SAML 2.0
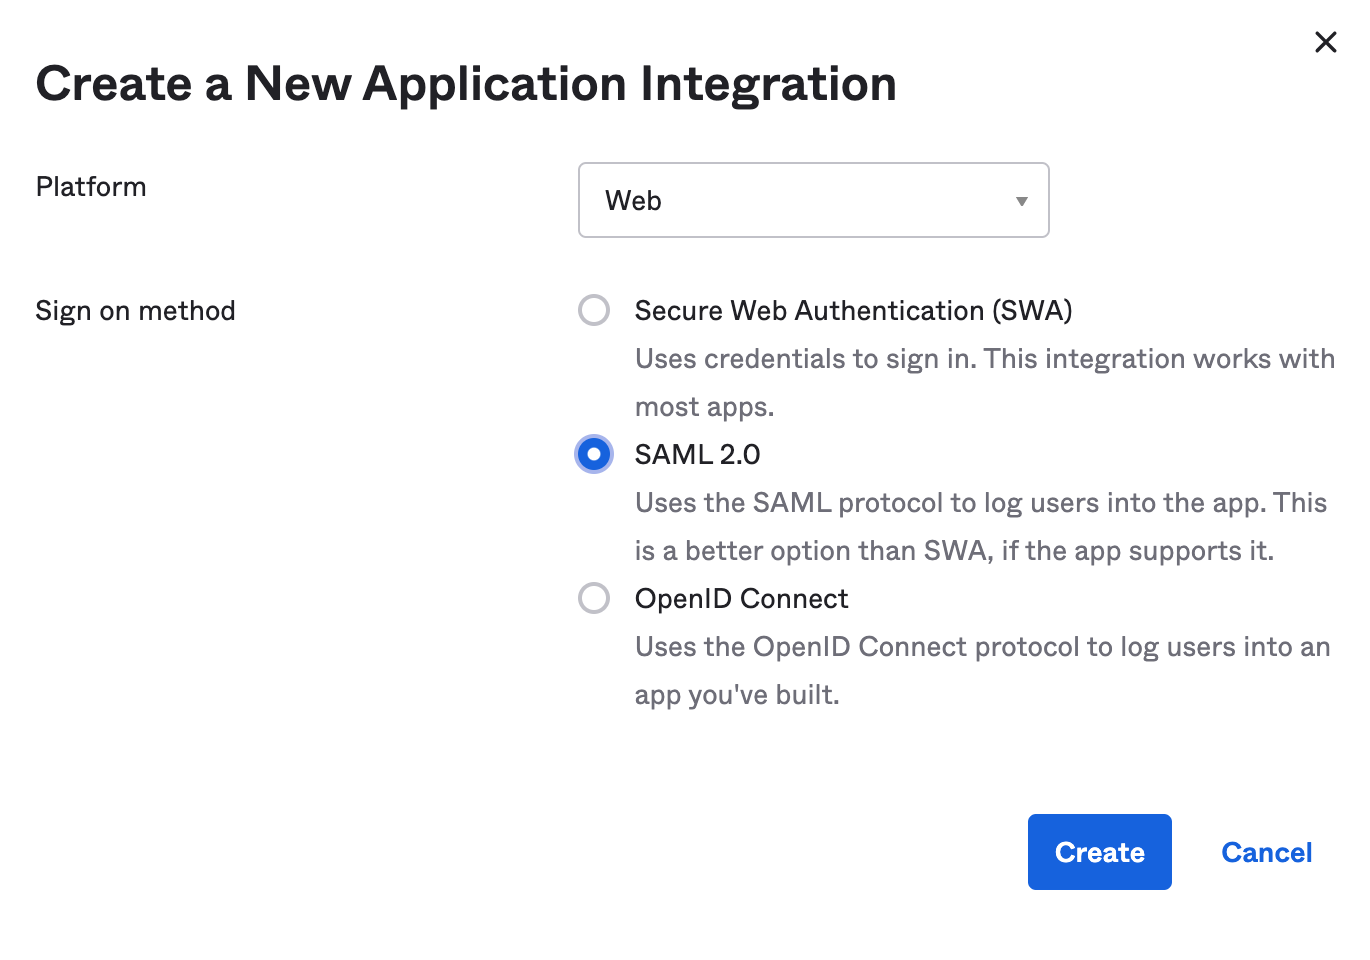
Click Create.
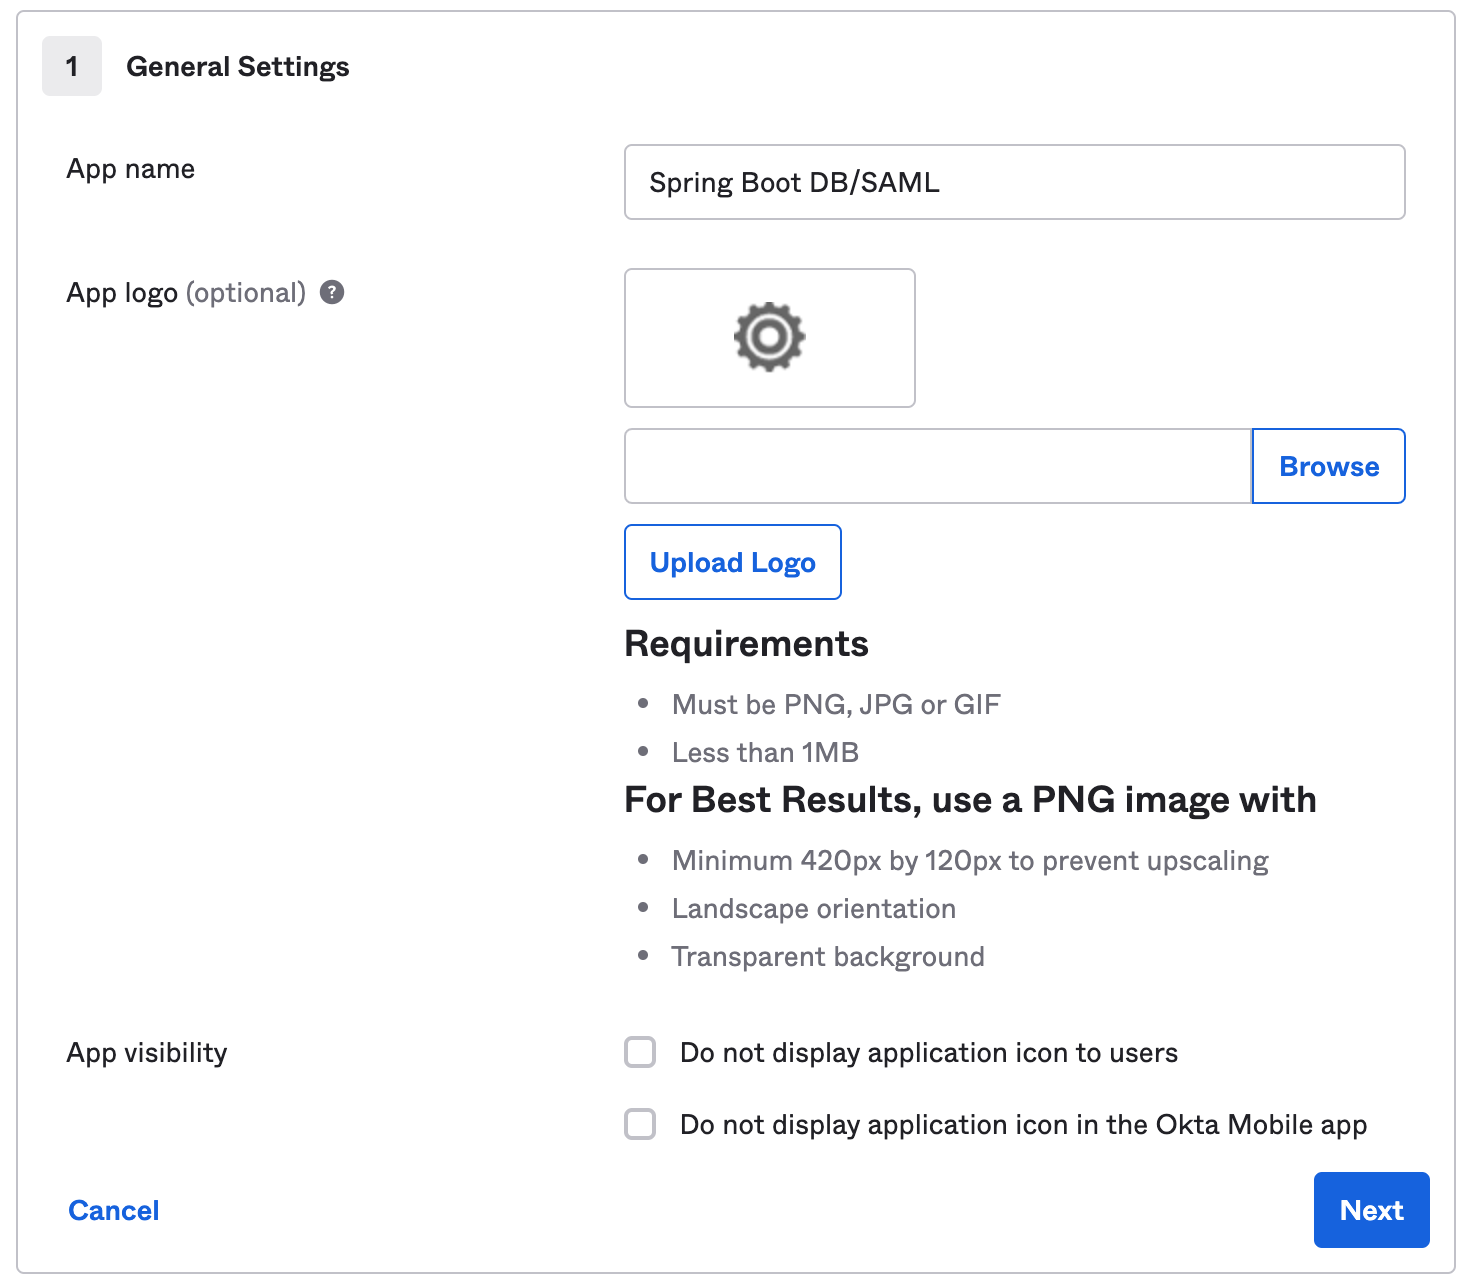
Enter an App name like Spring Boot DB/SAML (or whatever you’d like). Click Next.
Enter the following SAML Settings:
- Single Sign-On URL:
http://localhost:8080/saml/SSO - Use this for Recipient URL and Destination URL:
YES - Audience URI:
http://localhost:8080/saml/metadata
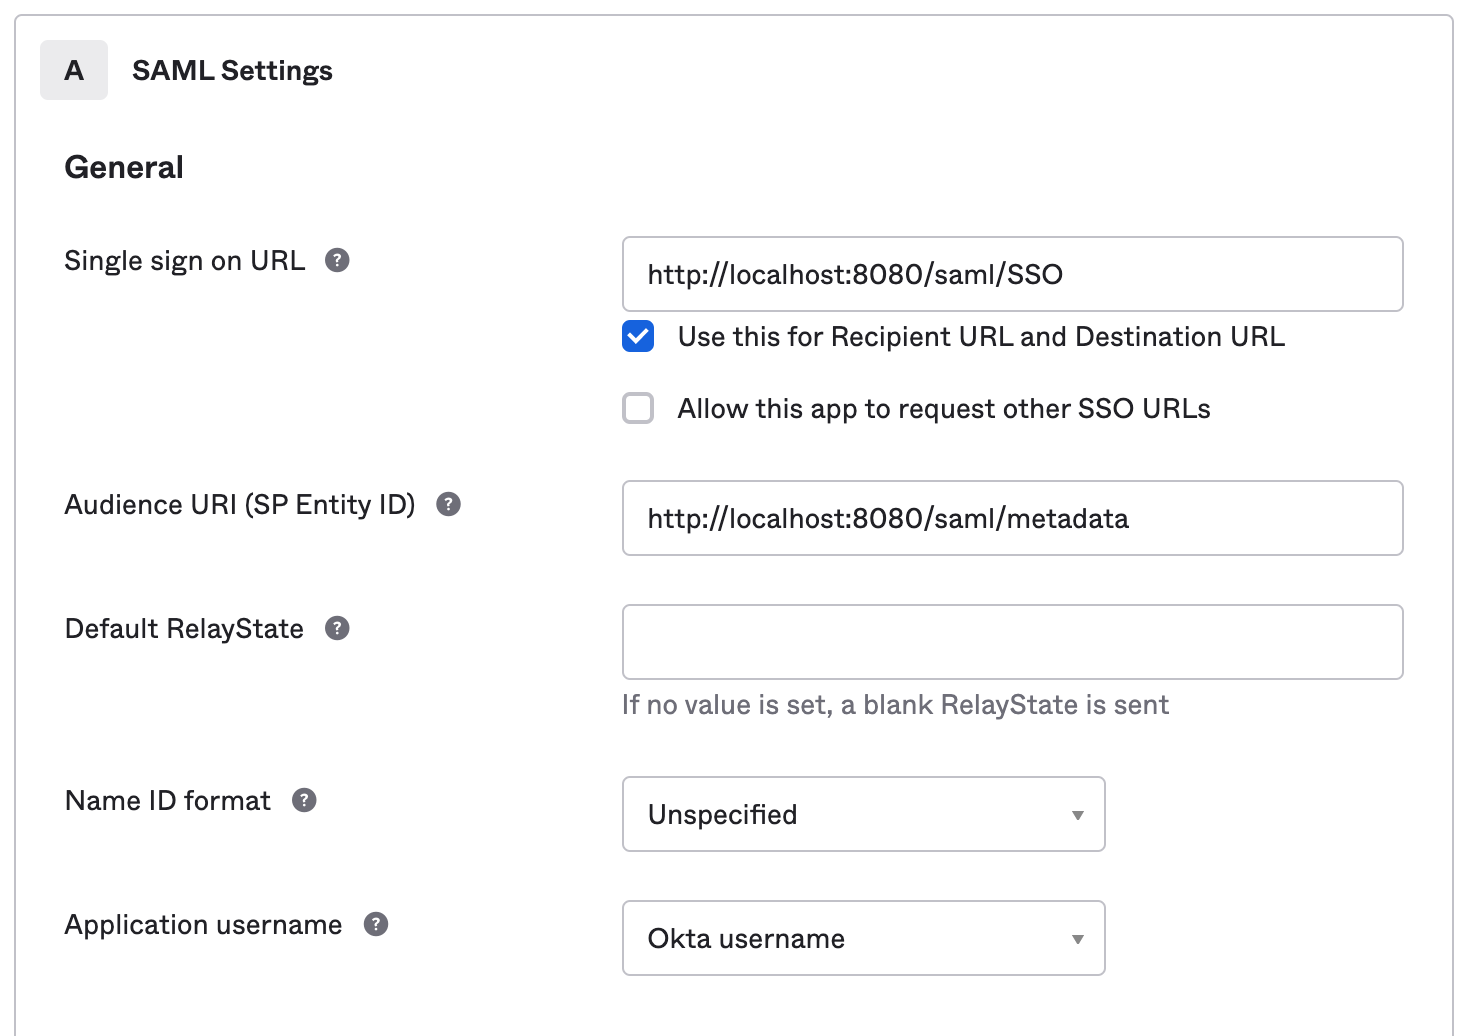
Click Next.
Select the following two options:
- I’m an Okta customer adding an internal app
- This is an internal app that we have created

Then, click Finish.
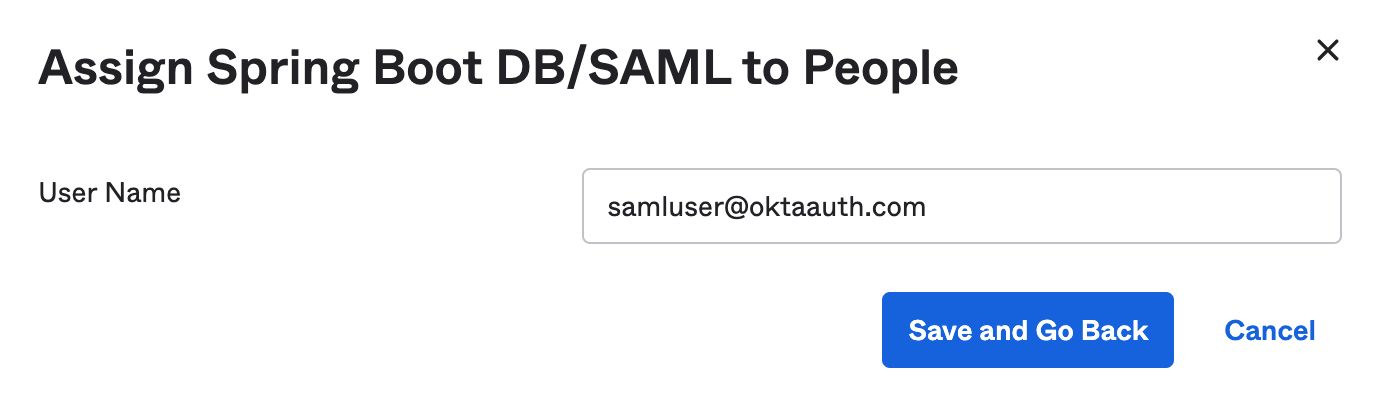
Step 5: Navigate to Assignments > Assign to People.
Step 6: Assign to your account with the custom username samluser@oktaauth.com.
Step 7: Navigate to Sign On and copy the following values to your /src/main/resources/application.properties file:
saml.metadataUrl— Right-click and copy the URL from the Identity Provider metadata link below the View Setup Instructions button.
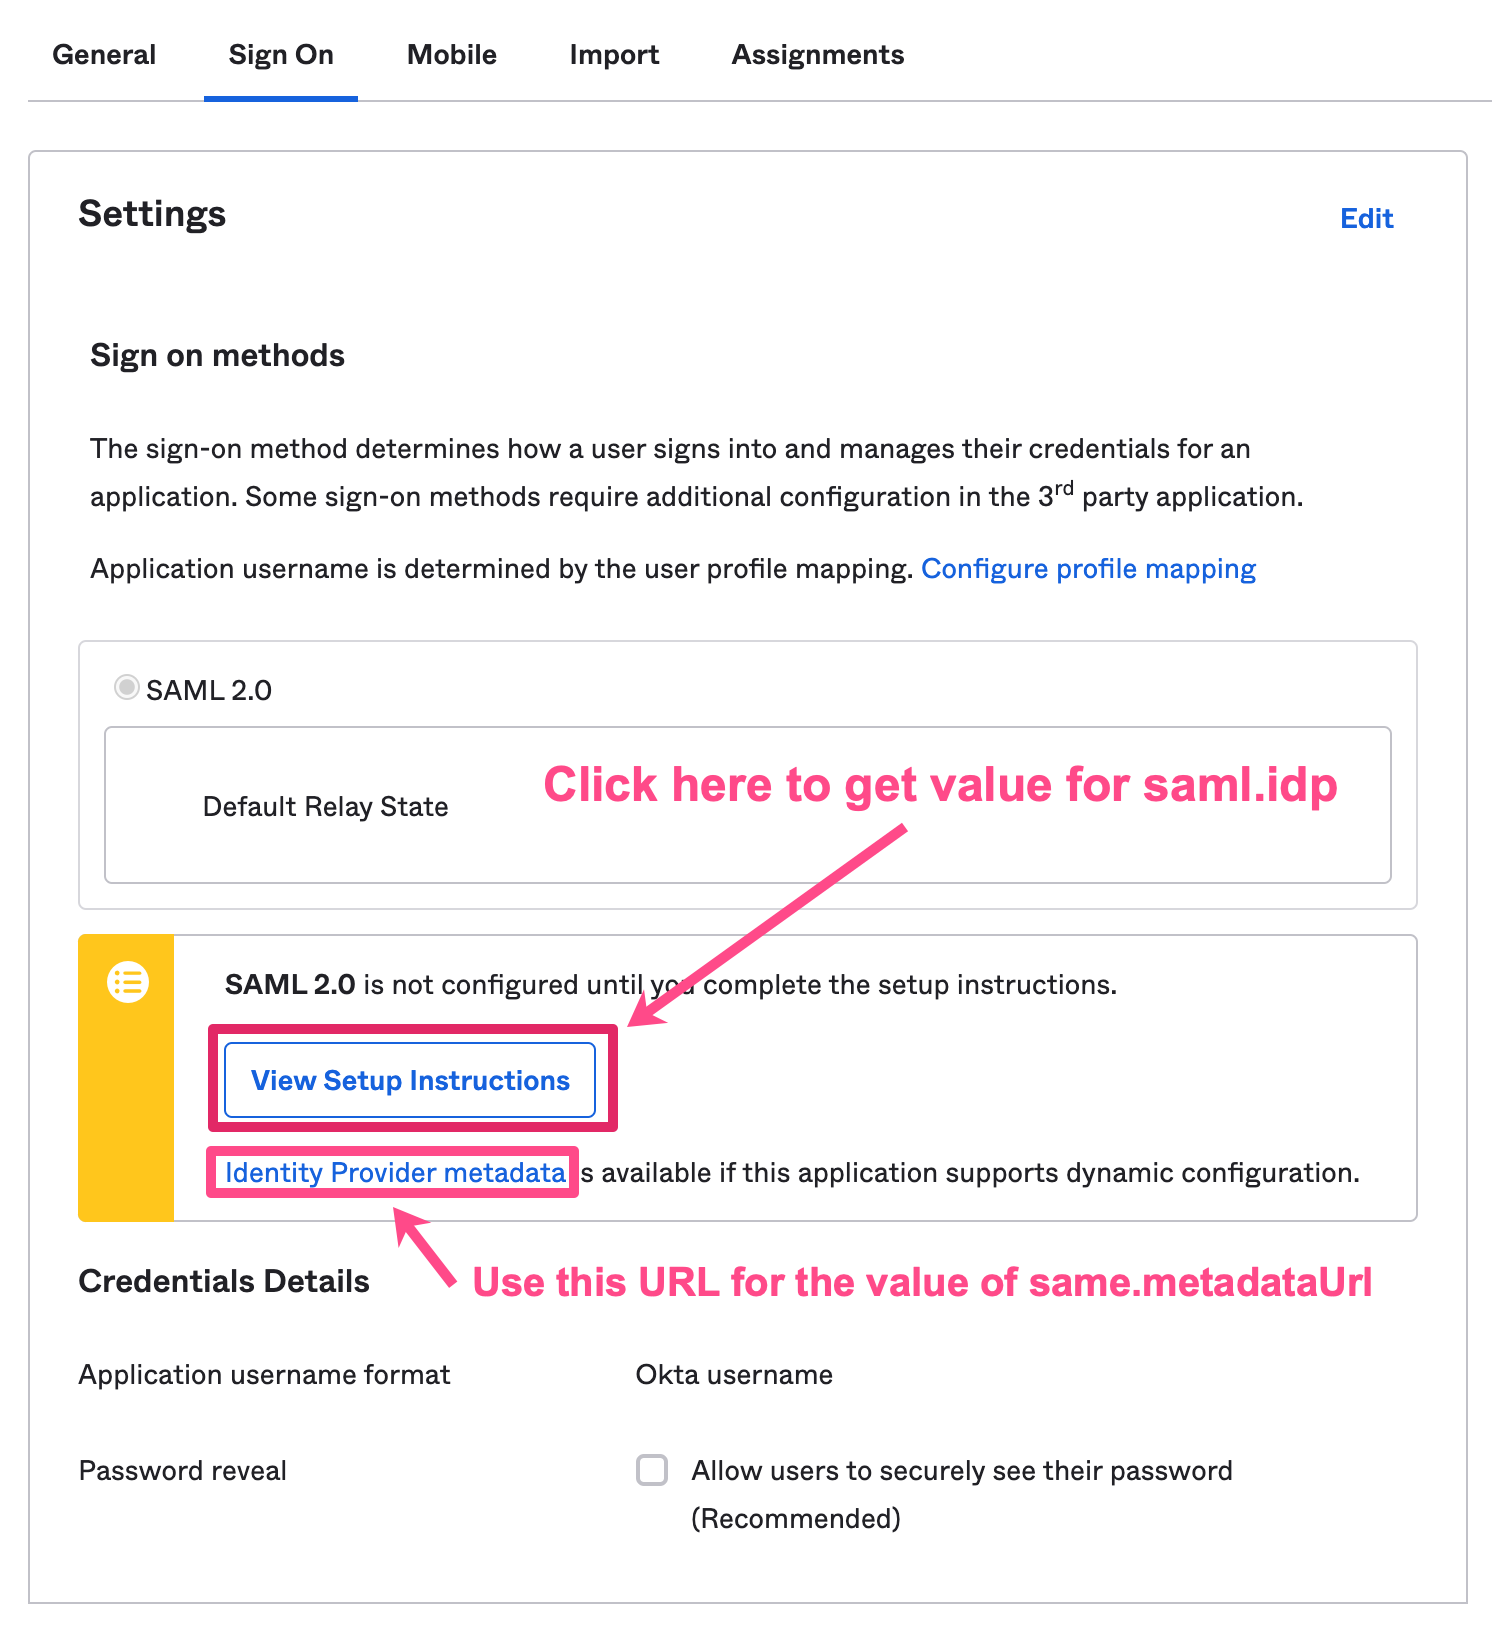
saml.idp— Click the View Setup Instructions button and copy the value in (2) Identity Provider Issuer.
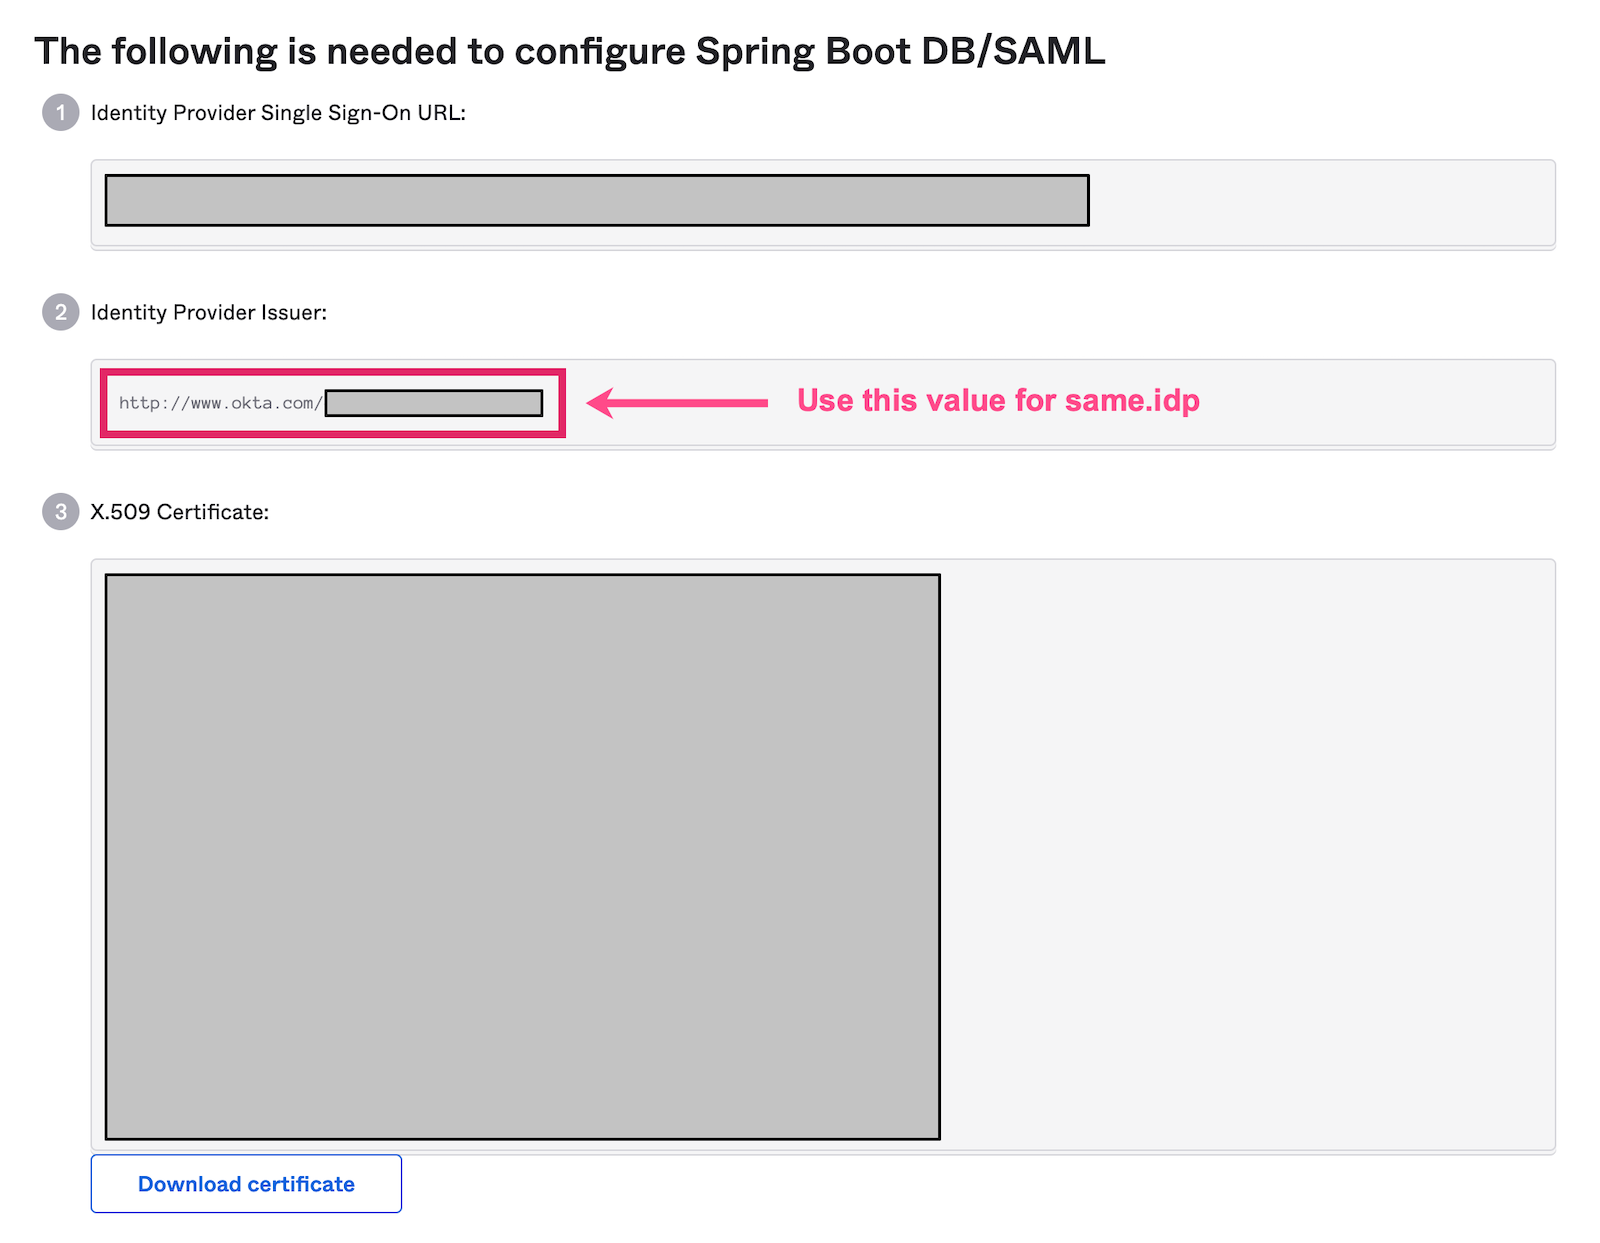
For example, here are the values I used:
saml.metadataUrl=https://dev-763344.okta.com/app/exk74c26UmANQ0ema5d5/sso/saml/metadata
saml.idp=http://www.okta.com/exkrmibtn3VG9S2Pa4x6
Step 8: Run your Spring Boot application in your IDE or via Maven:
mvn spring-boot:run
Step 9: Navigate to your application’s home page at http://localhost:8080.
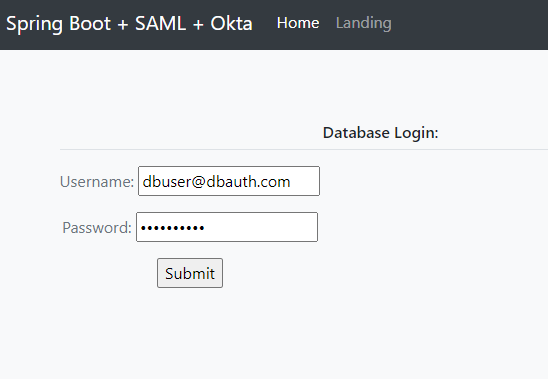
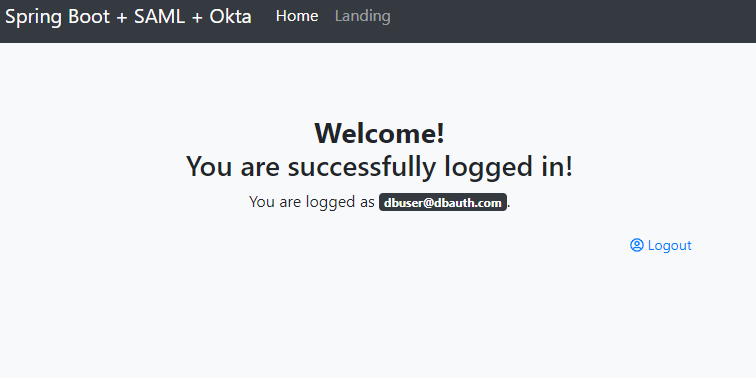
Step 10: For database authentication, log in using dbuser@dbauth.com / oktaiscool.
You should see a success message saying you’re logged in.
For SAML authentication, sign in using samluser@oktaauth.com.

You should be prompted to select your identity provider.
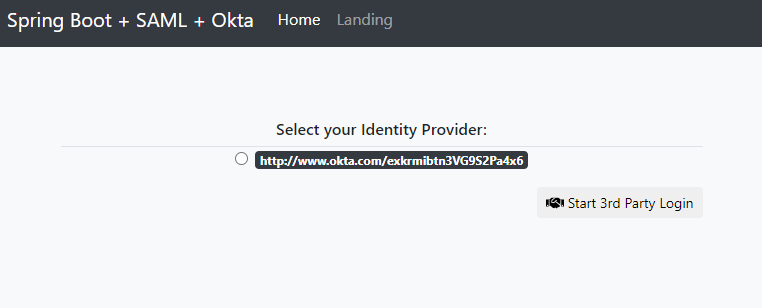
Then, you should be redirected to the SAML Okta auth flow and returned to your application following successful authentication.
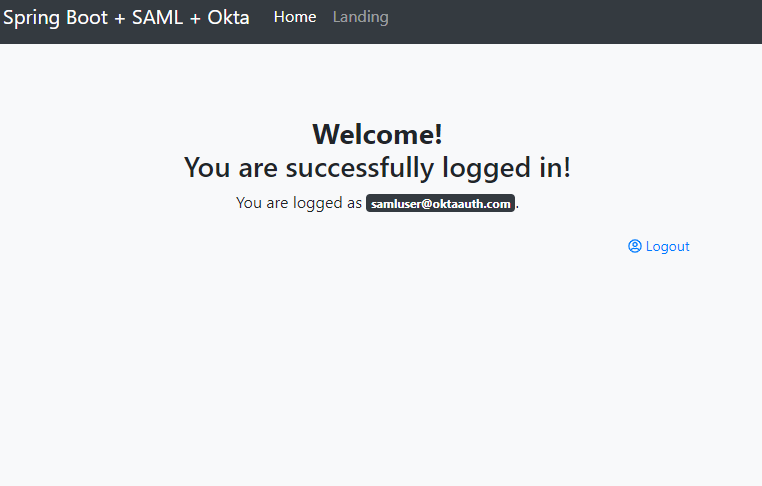
You’re done! You’ve successfully configured your project to support authentication via both the database and SAML 2.0! 🥳
It’s nice to see everything working, but what about the code that makes it happen? Keep reading for a walkthrough of the code and how it works.
How to Combine Database and SAML Authentication in Spring Boot
To get a better understanding of how DB and SAML auth are combined in this example, clone the repository for this tutorial if you have not already:
git clone https://github.com/oktadeveloper/okta-spring-security-saml-db-example.git
Open the project up in your favorite IDE or editor and take a look at the Maven POM file located at /pom.xml.
This application inherits from the spring-boot-starter-parent parent project. This provides you with Spring Boot’s dependency and plugin management:
<parent>
    <groupId>org.springframework.boot</groupId>
    <artifactId>spring-boot-starter-parent</artifactId>
    <version>2.3.4.RELEASE</version>
</parent>
This project uses the following Spring Boot Starter dependencies:
spring-boot-starter-webprovides support for building web applicationsspring-boot-starter-securityprovides support for securing the application (e.g., Basic Auth, Form Login)spring-boot-starter-data-jpaprovides support for the Java Persistence API, which is used to communicate with the database for DB authenticationspring-boot-starter-thymeleafprovides support for the Thymeleaf templating engine, a simple and powerful way to create web pages for Spring Boot applications
The spring-security-saml2-core extension for Spring Boot provides the necessary SAML-related libraries. This extension depends on the opensaml library, which is contained in the Shibboleth repository and is added to the <repositories> block:
<repositories>
    <repository>
        <id>Shibboleth</id>
        <name>Shibboleth</name>
        <url>https://build.shibboleth.net/nexus/content/repositories/releases/</url>
    </repository>
</repositories>

<dependencies>
    ...
    <dependency>
        <groupId>org.springframework.security.extensions</groupId>
        <artifactId>spring-security-saml2-core</artifactId>
        <version>1.0.10.RELEASE</version>
    </dependency>
    ...
</dependencies>
The following dependencies also make life easier:
com.h2database:h2to provide a simple in-memory databaseorg.projectlombok:lombokto reduce boilerplate code (e.g. getters, setters,toString())nz.net.ultraq.thymeleaf:thymeleaf-layout-dialect, a useful add-on for formatting Thymeleaf templates
NOTE: Some IDEs have trouble digesting Lombok-ified code due to version and plugin incompatibilities. If you have difficulty compiling this project, consider removing this dependency and adding the missing boilerplate code, or just use Maven to build and run.
The SAML and Database Auth “Pre-Login” Page
You want to have an initial page in which a user enters their username for login. Depending on the username pattern, you either direct the user to a standard username-and-password page for authenticating against the database, or direct them to the SAML auth flow.
/src/main/resources/templates/index.html
<!doctype html>
<html
        lang="en"
        xmlns:th="http://www.thymeleaf.org"
        xmlns:layout="http://www.ultraq.net.nz/thymeleaf/layout"
        layout:decorate="~{layout}"
>
<body>
<section layout:fragment="content">
    <h6 class="border-bottom border-gray pb-2 mb-0">Please Log In:</h6>
    <div class="media text-muted pt-3">
        <form action="#" th:action="@{/pre-auth}" th:object="${username}" method="post">
            <p>Username: <input type="text" th:field="*{username}" /></p>
            <p><input type="submit" value="Submit" /></p>
        </form>
        <br/>
        <p th:text="${error}" style="color: red"></p>
    </div>
</section>
<body>
</html>
IndexController is the backend @Controller defined to serve this page and handle requests:
/src/main/java/com/okta/developer/controller/IndexController.java
package com.okta.developer.controller;

@Controller
public class IndexController {

    @GetMapping
    public String index(Model model) {
        model.addAttribute("username", new PreAuthUsername());
        return "index";
    }

    @PostMapping("/pre-auth")
    public String preAuth(@ModelAttribute PreAuthUsername username,
                          Model model,
                          RedirectAttributes redirectAttributes) {
        if (StringUtils.endsWithIgnoreCase(username.getUsername(), Constants.OKTA_USERNAME_SUFFIX)) {
            // redirect to SAML
            return "redirect:/doSaml";
        } else if (StringUtils.endsWithIgnoreCase(username.getUsername(), Constants.DB_USERNAME_SUFFIX)) {
            // redirect to DB/form login
            return "redirect:/form-login?username="+username.getUsername();
        } else {
            redirectAttributes.addFlashAttribute("error", "Invalid Username");
            return "redirect:/";
        }
    }
}
Within IndexController, you are checking whether the username matches a particular pattern and redirecting accordingly.
Authenticate with SAML and Spring Security
The WebSecurityConfig class, which extends the WebSecurityConfigurerAdapter parent, defines much of the security settings, including:
- The filter chains to handle SAML requests and responses
- How and when to authenticate a user with either the database or SAML and Okta
- Required permissions for URLs within the application
- Logging out
When redirected to the /doSaml endpoint, the SAML flow is initiated by a custom authentication entry point defined in WebSecurityConfig.configure(HttpSecurity):
/src/main/java/com/okta/developer/config/WebSecurityConfig.java
package com.okta.developer.config;

@Configuration
@EnableWebSecurity
@EnableGlobalMethodSecurity(securedEnabled = true)
public class WebSecurityConfig extends WebSecurityConfigurerAdapter implements DisposableBean {
    ...

    @Autowired
    private SAMLEntryPoint samlEntryPoint;

    ...

    @Override
    protected void configure(HttpSecurity http) throws Exception {
        ...
        http
            .httpBasic()
            .authenticationEntryPoint((request, response, authException) -> {
                if (request.getRequestURI().endsWith("doSaml")) {
                    samlEntryPoint.commence(request, response, authException);
                } else {
                    response.sendRedirect("/");
                }
            });
        ...
    }
}
Here you can see if the requested URL ends with doSaml, the request is handled by the SamlEntryPoint defined in your configuration. This redirects the user to authenticate via Okta, and returns the user to /doSaml upon completion. To handle this redirect, a Controller is defined to redirect the user following a successful SAML auth:
/src/main/java/com/okta/developer/controller/SamlResponseController.java
package com.okta.developer.controller;

@Controller
public class SamlResponseController {
    @GetMapping(value = "/doSaml")
    public String handleSamlAuth() {
        Authentication auth = SecurityContextHolder.getContext().getAuthentication();
        LOGGER.info("doSaml auth result: {}", auth);
        if (auth != null) {
            return "redirect:/landing";
        } else {
            return "/";
        }
    }
}
At this point, the user should be successfully authenticated with the app!
Authenticate with a Database and Spring Security
If the username matches another pattern, the user is redirected to a standard-looking form login page:
/src/main/resources/templates/form-login.html
<!doctype html>
<html
        lang="en"
        xmlns:th="http://www.thymeleaf.org"
        xmlns:layout="http://www.ultraq.net.nz/thymeleaf/layout"
        layout:decorate="~{layout}"
>
<body>
<section layout:fragment="content">
    <h6 class="border-bottom border-gray pb-2 mb-0">Database Login:</h6>
    <div class="media text-muted pt-3">
        <form action="#" th:action="@{/form-login}" th:object="${credentials}" method="post">
            <p>Username: <input type="text" th:field="*{username}" /></p>
            <p>Password: <input type="password" th:field="*{password}" /></p>
            <p><input type="submit" value="Submit" /></p>
        </form>
        <br/>
        <p th:text="${error}" style="color: red"></p>
    </div>
</section>
<body>
</html>
The login submission is handled by a @Controller which calls on the AuthenticationManager built in WebSecurityConfig:
/src/main/java/com/okta/developer/config/WebSecurityConfig.java
package com.okta.developer.config;

@Configuration
@EnableWebSecurity
@EnableGlobalMethodSecurity(securedEnabled = true)
public class WebSecurityConfig extends WebSecurityConfigurerAdapter implements DisposableBean {
    ...

    @Override
    protected void configure(AuthenticationManagerBuilder auth) throws Exception {
        auth.authenticationProvider(dbAuthProvider);
        auth.authenticationProvider(samlAuthenticationProvider);
    }
}
DbAuthProvider is a custom component which performs standard DB authentication by checking the supplied password versus a hashed copy in the database:
/src/main/java/com/okta/developer/auth/DbAuthProvider.java
package com.okta.developer.auth;

@Component
public class DbAuthProvider implements AuthenticationProvider {
    private final CombinedUserDetailsService combinedUserDetailsService;
    private final PasswordEncoder passwordEncoder;

    ...

    @Override
    public Authentication authenticate(Authentication authentication) throws AuthenticationException {
        if (!StringUtils.endsWithIgnoreCase(authentication.getPrincipal().toString(), Constants.DB_USERNAME_SUFFIX)) {
            // this user is not supported by DB authentication
            return null;
        }

        UserDetails user = combinedUserDetailsService.loadUserByUsername(authentication.getPrincipal().toString());
        String rawPw = authentication.getCredentials() == null ? null : authentication.getCredentials().toString();

        if (passwordEncoder.matches(rawPw, user.getPassword())) {
            LOGGER.warn("User successfully logged in: {}", user.getUsername());
            return new UsernamePasswordAuthenticationToken(
                    user.getUsername(),
                    rawPw,
                    Collections.emptyList());
        } else {
            LOGGER.error("User failed to log in: {}", user.getUsername());
            throw new BadCredentialsException("Bad password");
        }
    }

    @Override
    public boolean supports(Class<?> aClass) {
        return aClass.isAssignableFrom(UsernamePasswordAuthenticationToken.class);
    }
}
The above class calls on CombinedUserDetailsService which is another custom component providing an appropriate UserDetails object depending on whether the user is authenticated using the database or SAML, by implementing UserDetailsService and SAMLUserDetailsService respectively:
/src/main/java/com/okta/developer/auth/CombinedUserDetailsService.java
package com.okta.developer.auth;

@Service
public class CombinedUserDetailsService implements UserDetailsService, SAMLUserDetailsService {
    private final UserRepository userRepository;

    ...

    @Override
    public UserDetails loadUserByUsername(String s) throws UsernameNotFoundException {
        StoredUser storedUser = lookupUser(s);
        return new CustomUserDetails(
                AuthMethod.DATABASE,
                storedUser.getUsername(),
                storedUser.getPasswordHash(),
                new LinkedList<>());
    }

    @Override
    public Object loadUserBySAML(SAMLCredential credential) throws UsernameNotFoundException {
        LOGGER.info("Loading UserDetails by SAMLCredentials: {}", credential.getNameID());
        StoredUser storedUser = lookupUser(credential.getNameID().getValue());
        return new CustomUserDetails(
                AuthMethod.SAML,
                storedUser.getUsername(),
                storedUser.getPasswordHash(),
                new LinkedList<>());
    }

    private StoredUser lookupUser(String username) {
        LOGGER.info("Loading UserDetails by username: {}", username);

        Optional<StoredUser> user = userRepository.findByUsernameIgnoreCase(username);

        if (!user.isPresent()) {
            LOGGER.error("User not found in database: {}", user);
            throw new UsernameNotFoundException(username);
        }

        return user.get();
    }
}
The resulting @Controller to handle DB authentication looks like this:
/src/main/java/com/okta/developer/controller/DbLoginController.java
package com.okta.developer.controller;

@Controller
public class DbLoginController {

    private final AuthenticationManager authenticationManager;

    ...

    @GetMapping("/form-login")
    public String formLogin(@RequestParam(required = false) String username, Model model) {
        ...
    }

    @PostMapping("/form-login")
    public String doLogin(@ModelAttribute DbAuthCredentials credentials,
                          RedirectAttributes redirectAttributes) {
        try {
            Authentication authentication = authenticationManager.authenticate(new UsernamePasswordAuthenticationToken(
                    credentials.getUsername(), credentials.getPassword()));

            if (authentication.isAuthenticated()) {
                SecurityContextHolder.getContext().setAuthentication(authentication);
            } else {
                throw new Exception("Unauthenticated");
            }

            return "redirect:/landing";
        } catch (Exception e) {
            redirectAttributes.addFlashAttribute("error", "Login Failed");
            return "redirect:/form-login?username="+credentials.getUsername();
        }
    }
}
When doLogin() is called via POST, the AuthenticationManager handles the username and password authentication and redirects the user if successful.
For ease of use, two users are defined in the database: one for DB auth and one for SAML. Both users are defined in our database, but only one of them is authenticated against the database:
/src/main/resources/data.sql
INSERT INTO user (ID, USERNAME, PASSWORD_HASH) VALUES
('17e3d83c-6e09-41b8-b4ee-b4b14cb8a797', 'dbuser@dbauth.com', '(bcrypted password)'),   /*DB AUTH*/
('17e3d83c-6e09-41b8-b4ee-b4b14cb8a798', 'samluser@oktaauth.com', 'bcrypted password'); /*SAML AUTH*/
Learn More About SAML and Okta
Much of the complexity of this project comes from the need to combine both database and SAML authentication in one app. Normally you would choose one or the other. If you want to use only SAML for authentication (which is a fine idea, especially using Okta), visit this blog post using the standard Spring SAML DSL extension to integrate with Okta and SAML to secure your application.
The source code used in this example is on GitHub.
See a good primer on how SAML works here: What is SAML and How Does it Work?
Check out some other articles on authentication in Spring Boot:
- Use Spring Boot and MySQL to go Beyond Authentication
- A Quick Guide to Spring Boot Login Options
- Build a Web App with Spring Boot and Spring Security in 15 Minutes
- Easy Single Sign-On with Spring Boot and OAuth 2.0
Please provide comments, questions, and any feedback in the comments section below.
Follow us on social media (Twitter, Facebook, LinkedIn) to know when we’ve posted more articles like this, and please subscribe to our YouTube channel for tutorials and screencasts!
We’re also streaming on Twitch, follow us to be notified when we’re live.
Changelog:
- Apr 13, 2021: Updated to for the new Okta Admin Console. You can see the changes in okta-blog#705.
Okta Developer Blog Comment Policy
We welcome relevant and respectful comments. Off-topic comments may be removed.