OpenID Connect Logout Options with Spring Boot

On the Okta blog, we spend much of our time talking about logging in. That is because once you configure your application to log in, the log out just works. But there are a few things you should consider when you’re thinking about your app’s logout configuration. In this post, I’ll walk through examples of the two logout options you have with Spring Security: the "default" session clearing logout, and relying party initiated logout.
If you are new to OAuth 2.0 or OpenID Connect (OIDC), check out An Illustrated Guide to OAuth and OpenID Connect to learn more!
Prerequisites:
-
Java 8+
-
An Okta Developer Account (free forever)
Spring Security’s Default Logout
By default, when logging out of a Spring application, Spring removes the current session (technically it invalidates it) along with the corresponding session cookie (typically JSESSIONID). Finally, Spring redirects the user to a new page (which by default is /login?logout). Other than removing any ID and access tokens from your application’s session, nothing OAuth 2.0/OIDC specific happens.
The examples below are configured to redirect to the root page /.
|
What is RP-Initiated Logout
RP-Initiated Logout is a bit of a mouthful, but the RP means relying party, which in OAuth 2.0/OIDC terms is just your application. Simplified, this means your application triggers the end of the session with your identity provider (IdP). Some folks refer to this as "SSO Logout" because this would end the session for any applications configured for single sign-on (SSO).
This flow does everything the above "default" logout does, but, instead of redirecting to a page with the application, it redirects to the IdP, where the IdP performs its logout action, and then finally redirects back to your application.
The redirect URI looks like this, where the post_logout_redirect_uri is the page to return to in your application.
https://dev-123456.okta.com/oauth2/default/v1/logout?id_token_hint=<id-token>&post_logout_redirect_uri=http://localhost:8080/After hearing this explanation, you might be thinking, isn’t that what I want? Why is that not the default? My answer is usually, "it depends, but probably not."
Which Logout Option is Right for Me?
Nobody likes the answer "it depends," so I’ll give you a couple of common examples.
I think social authentication is one of the easiest ways to see the difference between the use cases. With social authentication, your application isn’t controlling the user’s session with the IdP, only the session within your application. A more concrete way to look at it is Google wouldn’t allow your application’s logout to also log you out of your Gmail. Most corporate SSOs and portals work this way too. In that case, you might want to go with the default logout option.
On the flip side, if you only have a single application, then from a user’s perspective, that is the only way they interact with the IdP so that RP-Initiated logout could be the right choice.
Enough Already—Show Me Some Code
I’ve built a simple Spring Boot app that has two pages, a landing page at / that anyone can access, and a /profile page that requires authentication to view. This application also uses Thymeleaf, but that is an implementation detail; we are only going to be looking at the security configuration.
Grab the project from GitHub:
git clone https://github.com/oktadeveloper/okta-spring-logout-example.git
cd okta-spring-logout-example
Create an Okta OIDC Application
Log in to your Okta dashboard, (if you just signed up, Okta will email login instructions to you) then:
-
Go to Applications > Add Application
-
Select Web and click Next
-
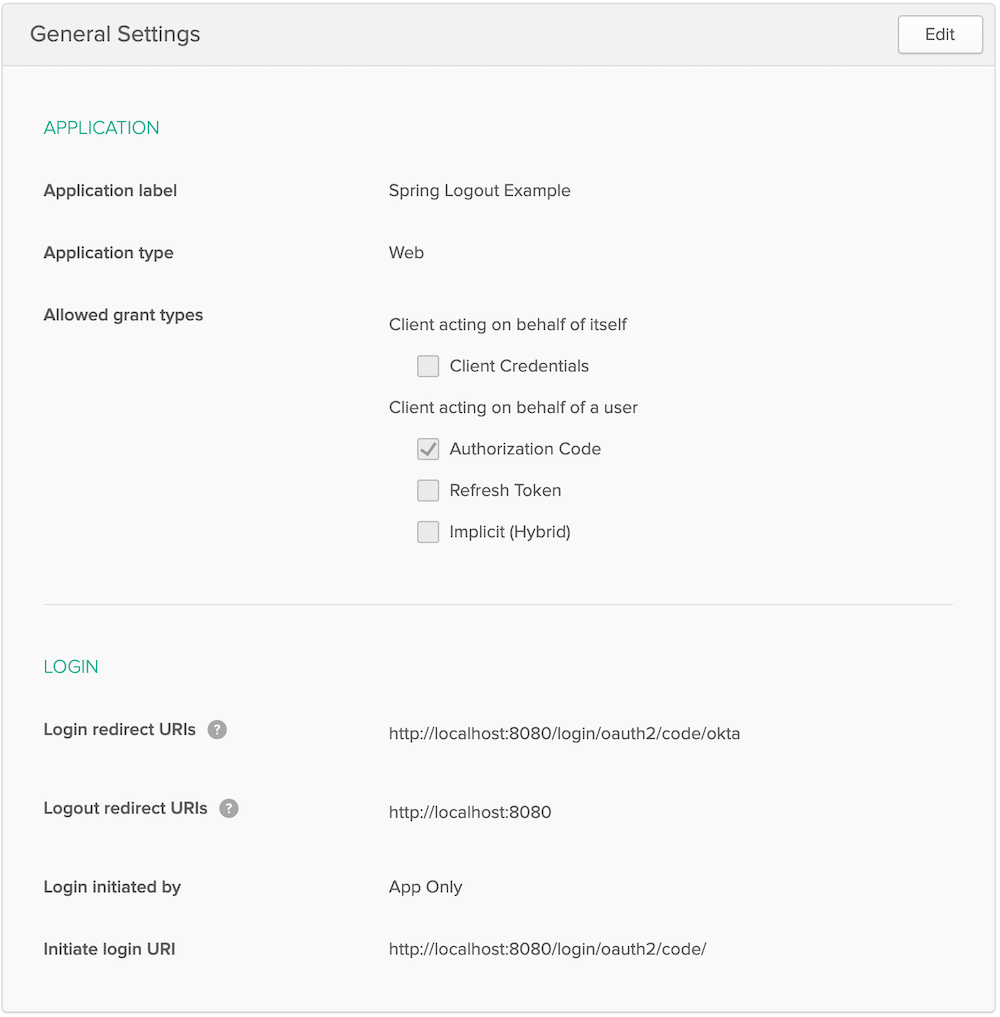
Give it a name like
Spring Logout Exampleand change the Login redirect URI tohttp://localhost:8080/login/oauth2/code/okta -
Make sure Logout redirect URIs is set to
http://localhost:8080 -
Click Done
Your app’s settings should look as follows.
You will find your Client ID and Client secret on this page. Copy them into src/main/resources/application.properties:
spring.security.oauth2.client.provider.okta.issuer-uri={yourOktaDomain}/oauth2/default
spring.security.oauth2.client.registration.okta.client-id={client-id-from-above}
spring.security.oauth2.client.registration.okta.client-secret={client-secret-from-above}| Never store secrets in source control! Spring Boot supports many different options to load configuration. |
For example the same configuration with environment variables would be:
SPRING_SECURITY_OAUTH2_CLIENT_PROVIDER_OKTA_ISSUER_URI={yourOktaDomain}/oauth2/default
SPRING_SECURITY_OAUTH2_CLIENT_REGISTRATION_OKTA_CLIENT_ID={client-id-from-above}
SPRING_SECURITY_OAUTH2_CLIENT_REGISTRATION_OKTA_CLIENT_SECRET={client-secret-from-above}
Start the application with ./mvnw spring-boot:run and browse to http://localhost:8080/ in a private/incognito window.
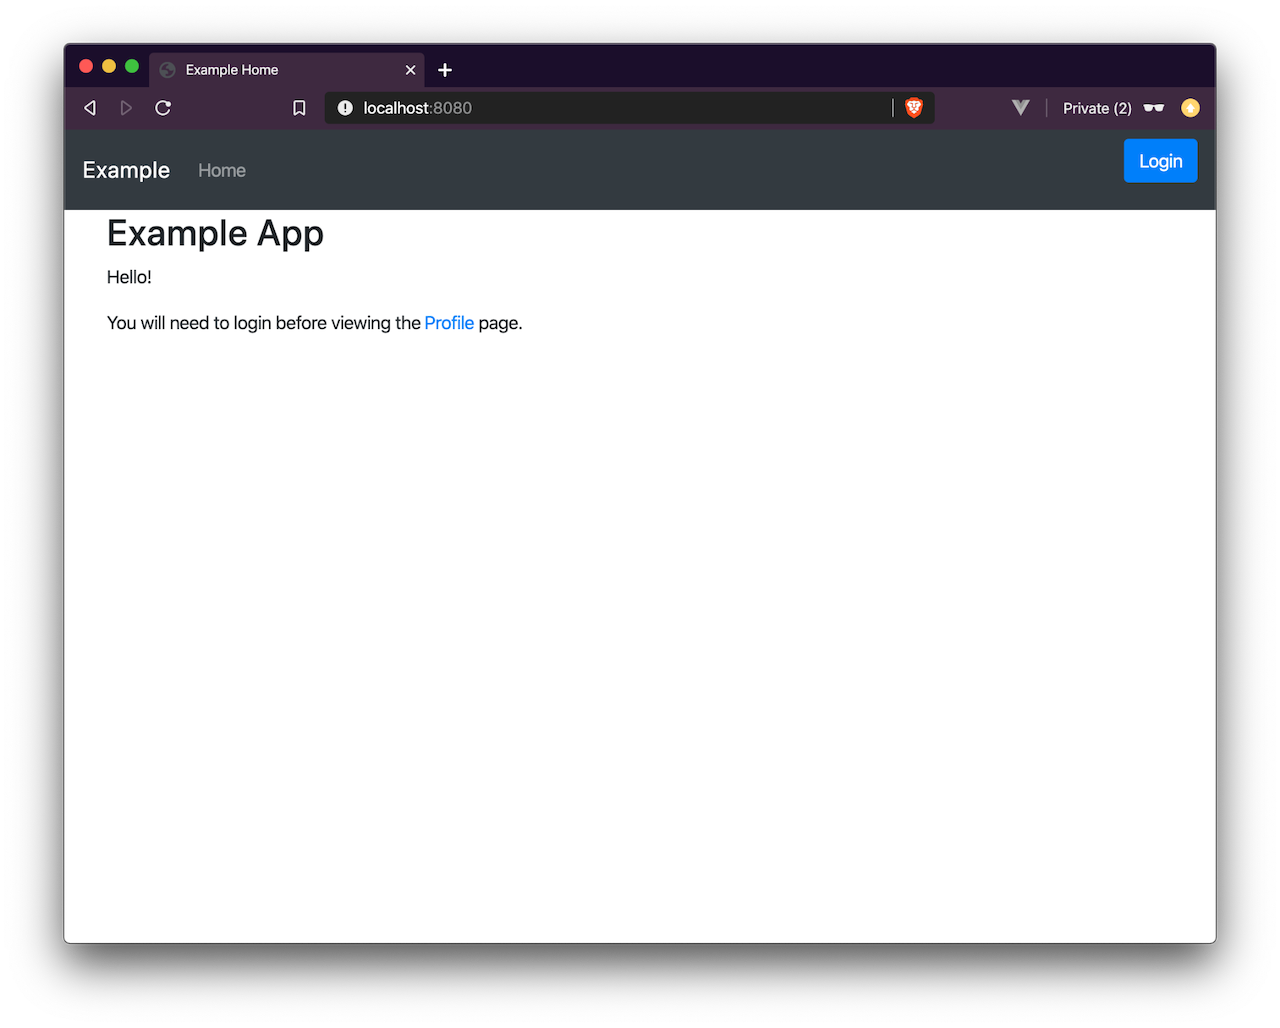
Click the Login button.
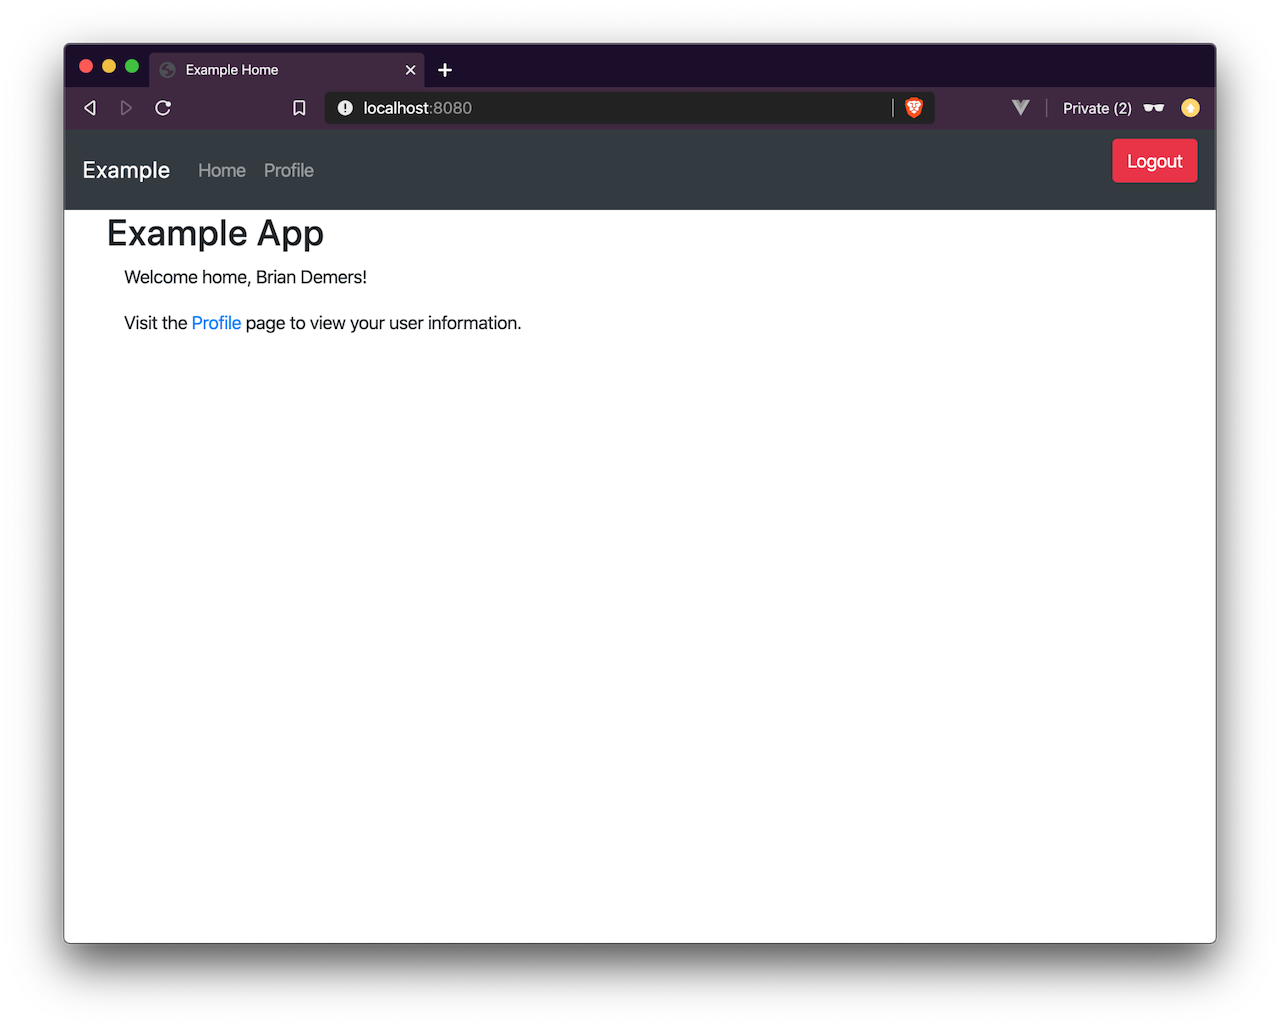
Now the fun part. Click the Logout button. The app has logged you out and sent you back to /. However, if you press the Login button again, you will be automatically logged in; this is because only your application’s session was deleted, not the session with Okta.
| If you inspect the network traffic in your browser, you will see you redirected back to your Okta Organization and then back again. |
Configure RP-Initiated Logout with Spring Security
If you open src/main/java/com/okta/example/LogoutExampleApplication.java, you will see the following WebSecurityConfigurerAdapter class:
@Configuration
static class SecurityConfig extends WebSecurityConfigurerAdapter {

    @Override
    protected void configure(HttpSecurity http) throws Exception {
        http.authorizeRequests()

                // allow anonymous access to the root page
                .antMatchers("/").permitAll()

                // all other requests
                .anyRequest().authenticated()

                // After we logout, redirect to root page,
                // by default Spring will send you to /login?logout
                .and().logout().logoutSuccessUrl("/")

                // enable OAuth2/OIDC
                .and().oauth2Login();
    }
}
Change this class to:
@Configuration
static class SecurityConfig extends WebSecurityConfigurerAdapter {

    @Autowired
    ClientRegistrationRepository clientRegistrationRepository; (1)

    OidcClientInitiatedLogoutSuccessHandler oidcLogoutSuccessHandler() { (2)
        OidcClientInitiatedLogoutSuccessHandler successHandler = new OidcClientInitiatedLogoutSuccessHandler(clientRegistrationRepository);
        successHandler.setPostLogoutRedirectUri(URI.create("http://localhost:8080/"));
        return successHandler;
    }

    @Override
    protected void configure(HttpSecurity http) throws Exception {
        http.authorizeRequests()

                // allow anonymous access to the root page
                .antMatchers("/").permitAll()

                // all other requests
                .anyRequest().authenticated()

                // RP-initiated logout
                .and().logout().logoutSuccessHandler(oidcLogoutSuccessHandler()) (3)

                // enable OAuth2/OIDC
                .and().oauth2Login();
    }
}| 1 | Inject the ClientRegistrationRepository |
| 2 | Create a OidcClientInitiatedLogoutSuccessHandler |
| 3 | Replace logoutSuccessUrl("/") with logoutSuccessHandler(oidcLogoutSuccessHandler()) |
Restart the application and log in and out a few times. You will be prompted to log in every time you press the Login button.
Bonus: Use the Okta Spring Boot Starter
If you are using the Okta Spring Boot Starter, you can configure an RP-Initated Logout by setting the okta.oauth2.postLogoutRedirectUri property such as:
okta.oauth2.postLogoutRedirectUri=http://localhost:8080/Learn More about Okta and Spring Security
In this post, I’ve explained the two types of logout options you have with Spring Security. Which option you pick is up to you and how you want your application to behave.
If you like this blog post and want to see more like it, follow @oktadev on Twitter, subscribe to our YouTube channel, or follow us on LinkedIn. As always, please leave a comment below if you have any questions.
Brian Demers is a Developer Advocate at Okta and a PMC member for the Apache Shiro project. He spends much of his day contributing to OSS projects in the form of writing code, tutorials, blogs, and answering questions. Along with typical software development, Brian also has a passion for fast builds and automation. Away from the keyboard, Brian is a beekeeper and can likely be found playing board games. You can find him on Twitter at @briandemers.
Okta Developer Blog Comment Policy
We welcome relevant and respectful comments. Off-topic comments may be removed.