Build Beautiful Angular Apps with Bootstrap
Heads up... this blog post is old!
For an updated version of this blog post, see The Angular Mini-Book. Its "Beautiful Angular Apps with Bootstrap" chapter was inspired by this blog post.

I’ve been a longtime fan of CSS frameworks since 2005. I led an open-source project called AppFuse at the time and wanted a way to provide themes for our users. We used Mike Stenhouse’s CSS Framework and held a design content to gather some themes we liked for our users. A couple of other CSS frameworks came along in the next few years, namely Blueprint in 2007 and Compass in 2008.
However, no CSS frameworks took the world by storm like Bootstrap. Back then, it was called Twitter Bootstrap. Mark Otto and Jacob Thornton invented it in mid-2010 while they worked at Twitter. As they wrote in "Building Twitter Bootstrap" in Issue 324 of A List Apart:
Our goal is to provide a refined, well-documented, and extensive library of flexible design components built with HTML, CSS, and JavaScript for others to build and innovate on.
They released Bootstrap on August 19, 2011, and it quickly became the most popular project on GitHub. Developers like myself all over the world started using it.
Another web framework took the world by storm the following year: AngularJS. AngularJS (v0.9) first appeared on GitHub in October 2010. The creators released version 1.0 on June 14, 2012.
Together, these frameworks have had quite a run. It’s hard to believe that they’ve lasted so long, especially considering both projects have had major rewrites!
Note: In May 2025, the Okta Integrator Free Plan replaced Okta Developer Edition Accounts, and the Okta CLI was deprecated.
We preserved this post for reference, but the instructions no longer work exactly as written. Replace the Okta CLI commands by manually configuring Okta following the instructions in our Developer Documentation.
- Isn’t Angular Dead?
- Angular Still Loves Bootstrap
- Integrate Bootstrap with Angular 9
- Secure Angular and Spring Boot with OpenID Connect
- Use Sass to Customize Bootstrap
- Make Your Angular App Beautiful with Bootstrap
- Add a Searchable, Sortable, and Pageable Data Table with Angular and Spring Data JPA
- Angular with Bootstrap + Spring Boot is Powerful
- Learn More About Angular and Spring Boot
Isn’t Angular Dead?
I’ve heard many developers say that Angular is dead. As a veteran Java developer, I’ve heard this said about Java many times over the years as well. Yet it continues to thrive. Angular is similar in that it’s become somewhat boring. Some people call boring frameworks "legacy." Others call them "revenue-generating."
Whatever you want to call it, Angular is far from dead. At least according to the popularity of two recent articles we’ve published! Many of you have flocked to our recent Angular posts—the proof is in the traffic numbers.
Angular Still Loves Bootstrap
You might think that Angular Material is more popular than Bootstrap these days. You might be right, but I believe that who you follow on Twitter shapes your popularity perspective. Most of the fabulous folks that follow me still use Bootstrap.
If you're developing @angular apps, what's your preferred CSS framework? #Angular #CSS
— Matt Raible (@mraible) November 19, 2019
Integrate Bootstrap with Angular 9
Today I’d like to show you how to integrate Bootstrap into an Angular 9 application. I’ll start with the CRUD example from my aforementioned Angular 9 + Spring Boot 2.2 tutorial. I’ll integrate Bootstrap, convert the app to use Sass (because CSS is more fun with Sass), make the app look good, add form validation, and write some code to develop a searchable, sortable, and pageable data table. The last part sounds hard, but it only requires < 10 lines of code on the Spring Boot side of things. Kotlin and Spring Data JPA FTW!
Prerequisites:
Clone the previous application into an okta-angular-bootstrap-example directory.
git clone https://github.com/oktadeveloper/okta-spring-boot-2-angular-9-example.git \
 okta-angular-bootstrap-example
In a terminal, navigate into this new directory and its notes folder. Then install the dependencies for the Angular app.
cd okta-angular-bootstrap-example/notes
npm i
Add Bootstrap and NG Bootstrap:
npm i bootstrap@4.4.1 @ng-bootstrap/ng-bootstrap@6.0.0| You can leave off the version numbers if you like. However, this tutorial is only guaranteed to work with the versions specified. 😉 |
Import NgbModule in app.module.ts:
import { NgbModule } from '@ng-bootstrap/ng-bootstrap';

@NgModule({
  ...
  imports: [
    ...
    NgbModule
  ],
  ...
})
export class AppModule { }
If you run ng serve -o, you’ll get a blank screen. Look in your browser’s developer console, and you’ll see why.
Uncaught Error: It looks like your application or one of its dependencies is using i18n.
Angular 9 introduced a global `$localize()` function that needs to be loaded.
Please run `ng add @angular/localize` from the Angular CLI.
Cancel the process and run ng add @angular/localize to fix this error. Now, if you restart your app, you’ll see it’s pretty simple. And kinda ugly.
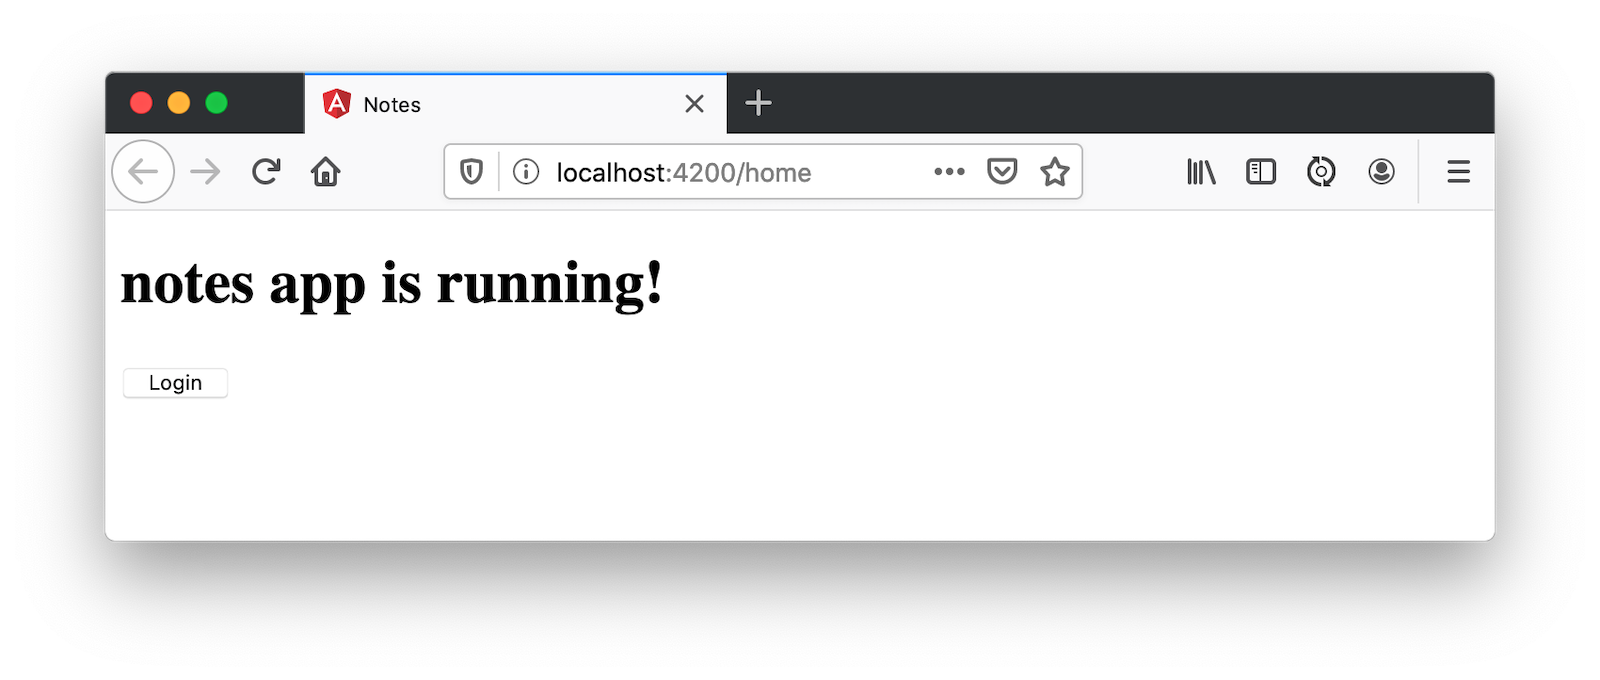
Let’s fix that!
Modify styles.css to add a reference to Bootstrap’s CSS file:
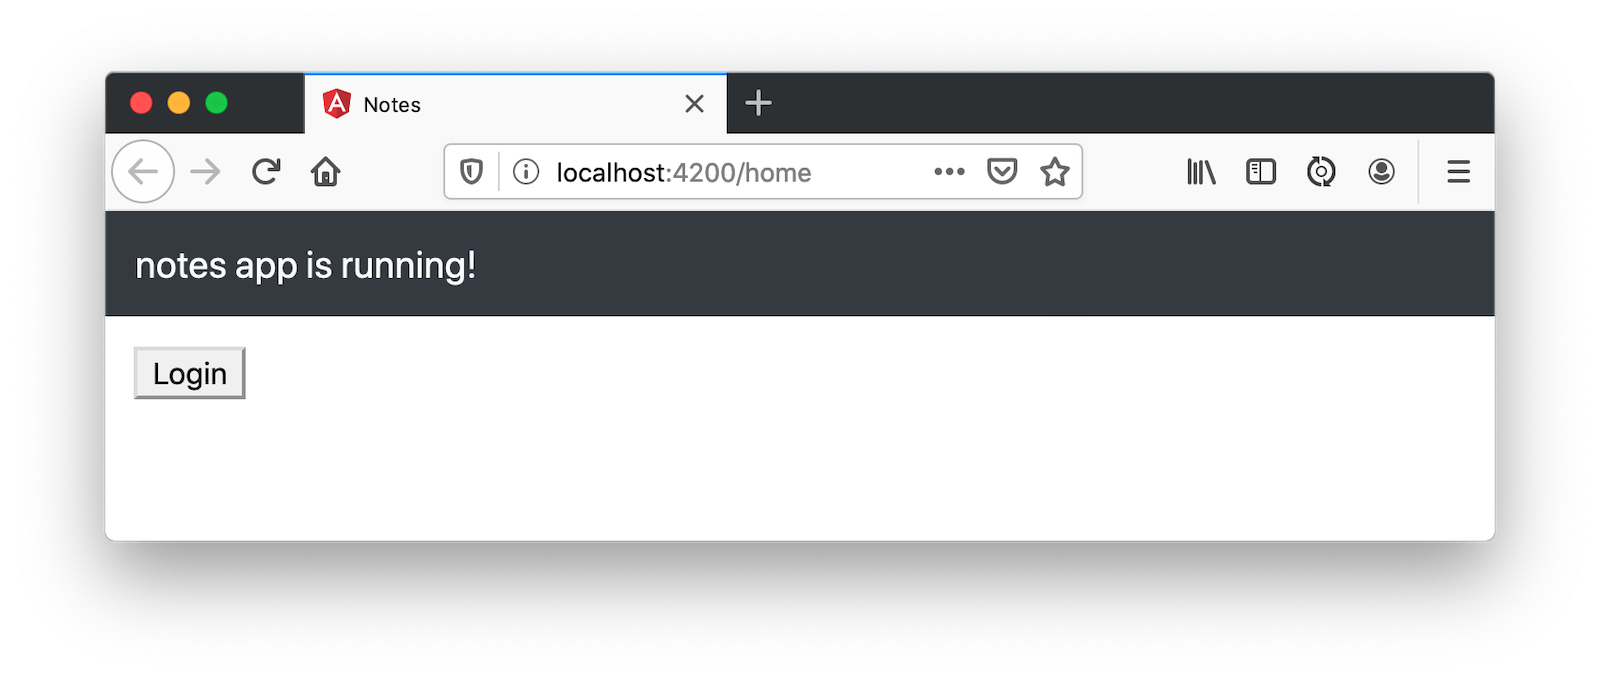
@import "~bootstrap/dist/css/bootstrap.css";And change app.component.html to use Bootstrap classes.
<nav class="navbar navbar-expand-lg navbar-dark bg-dark">
  <a class="navbar-brand text-light" href="#">{{ title }} app is running!</a>
</nav>

<div class="container-fluid pt-3">
  <router-outlet></router-outlet>
</div>
Now we’re getting somewhere!
To make the login button work, you need to configure both apps' security configurations.
Secure Angular and Spring Boot with OpenID Connect
In a terminal window, navigate into the notes-api directory.
Before you begin, you’ll need a free Okta developer account. Install the Okta CLI and run okta register to sign up for a new account. If you already have an account, run okta login.
Then, run okta apps create. Select the default app name, or change it as you see fit.
Choose Web and press Enter.
Select Okta Spring Boot Starter.
Accept the default Redirect URI values provided for you. That is, a Login Redirect of http://localhost:8080/login/oauth2/code/okta and a Logout Redirect of http://localhost:8080.
What does the Okta CLI do?
The Okta CLI will create an OIDC Web App in your Okta Org. It will add the redirect URIs you specified and grant access to the Everyone group. You will see output like the following when it’s finished:
Okta application configuration has been written to:
  /path/to/app/src/main/resources/application.properties
Open src/main/resources/application.properties to see the issuer and credentials for your app.
okta.oauth2.issuer=https://dev-133337.okta.com/oauth2/default
okta.oauth2.client-id=0oab8eb55Kb9jdMIr5d6
okta.oauth2.client-secret=NEVER-SHOW-SECRETS
NOTE: You can also use the Okta Admin Console to create your app. See Create a Spring Boot App for more information.
Delete the Okta properties from application.properties and copy them into a new okta.env file. Remove the \ (if there is one) in your issuer’s URL.
export OKTA_OAUTH2_ISSUER=https://{yourOktaDomain}/oauth2/default
export OKTA_OAUTH2_CLIENT_ID={yourClientId}
export OKTA_OAUTH2_CLIENT_SECRET={yourClientSecret}
Run source okta.env to set your Okta settings as environment variables. If you’re on Windows, edit this file to change export to set. Then rename it to okta.bat and run it from your terminal.
Start your Spring Boot app by running Gradle’s bootRun task.
./gradlew bootRunThen, create a new OIDC app for Angular. Open a new terminal, and cd into the notes directory.
Run okta apps create. Select the default app name, or change it as you see fit.
Choose Single-Page App and press Enter.
Use http://localhost:4200/callback for the Redirect URI and accept the default Logout Redirect URI of http://localhost:4200.
What does the Okta CLI do?
The Okta CLI will create an OIDC Single-Page App in your Okta Org. It will add the redirect URIs you specified and grant access to the Everyone group. It will also add a trusted origin for http://localhost:4200. You will see output like the following when it’s finished:
Okta application configuration:
Issuer:    https://dev-133337.okta.com/oauth2/default
Client ID: 0oab8eb55Kb9jdMIr5d6
NOTE: You can also use the Okta Admin Console to create your app. See Create an Angular App for more information.
Modify auth-routing.module.ts to use your Okta issuer and client ID.
const oktaConfig = {
  issuer: 'https://{yourOktaDomain}/oauth2/default',
  redirectUri: window.location.origin + '/callback',
  clientId: '{yourClientId}',
  pkce: true
};
Now you should be able to log in with your Okta credentials and create notes to your heart’s content!
You’ll notice there’s some styling, but things aren’t quite beautiful. Yet…
Commit your progress to Git from the okta-angular-bootstrap-example directory.
git commit -am "Add Bootstrap and configure OIDC"Use Sass to Customize Bootstrap
Before you make things awesome, I’d like to show you how to convert from using CSS with Angular to using Sass. Why? Because Sass is completely compatible with CSS, and it makes CSS more like programming. It also allows you to customize Bootstrap by overriding its variables.
| If you’re not into Sass, you can skip this section. Everything will still work without it. |
First, run the following command in the notes directory to convert the Angular project to use Sass.
ng config schematics.@schematics/angular:component.styleext scssIf you run the following find command:
find . -name "*.css" -not -path "./node_modules/*"You’ll see three files have a .css extension.
./src/app/home/home.component.css
./src/app/app.component.css
./src/styles.css
You can manually rename these to have a .scss extension, or do it programmatically.
find . -name "*.css" -not -path "./node_modules/*" | rename -v "s/css/scss/g"
I had to brew install rename on my Mac for this command to work.
|
Then, replace all references to .css files.
find ./src/app -type f -exec sed -i '' -e 's/.css/.scss/g' {} \;Modify angular.json to reference src/styles.scss (in the build and test sections).
"styles": [
  "src/styles.scss"
],
And change styles.scss to import Bootstrap’s Sass.
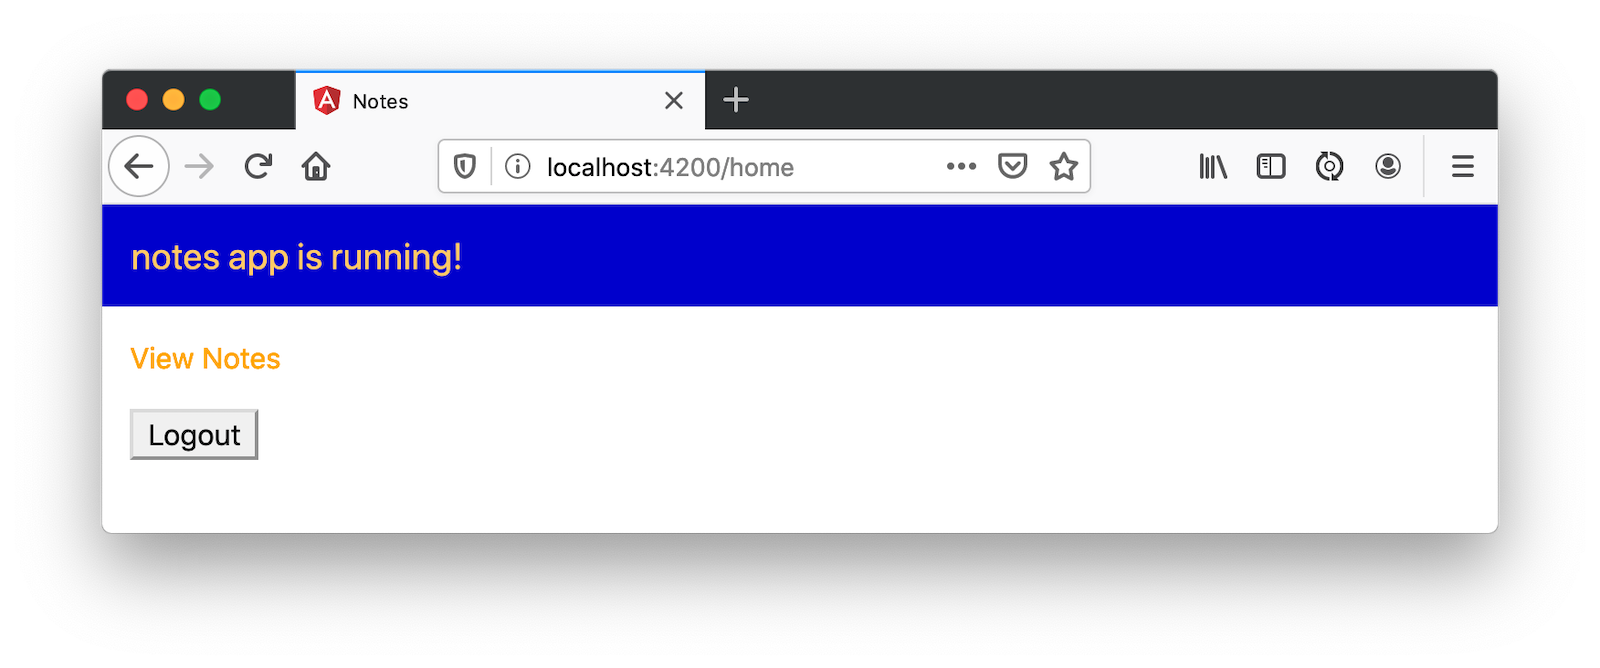
@import "~bootstrap/scss/bootstrap.scss";To demonstrate how you can override Bootstrap’s variables, create a src/_variables.scss and override the colors. You can see the default variables in Bootstrap’s GitHub repo.
$primary: orange;
$secondary: blue;
$light: lighten($primary, 20%);
$dark: darken($secondary, 10%);
Then import this file at the top of src/styles.scss:
@import "variables";
@import "~bootstrap/scss/bootstrap.scss";
You’ll see the colors change after these updates.
Comment out (or remove) the variables in _variables.scss to revert to Bootstrap’s default colors.
Make Your Angular App Beautiful with Bootstrap
You can see from the screenshots above that angular-crud generates screens with some styling, but it’s not quite right. Let’s start by adding a Navbar in app.component.html. Change its HTML to have a collapsible navbar (for mobile devices), add links to useful sites, and add login/logout buttons. While you’re at it, display a message to the user when they aren’t authenticated.
<nav class="navbar navbar-expand-lg navbar-dark bg-dark">
<a class="navbar-brand" href="#">
<img src="/assets/images/angular.svg" width="30" height="30" class="d-inline-block align-top" alt="Angular">
{{ title }}
</a>
<button class="navbar-toggler" type="button" data-toggle="collapse" data-target="#navbarSupportedContent" aria-controls="navbarSupportedContent" aria-expanded="false" aria-label="Toggle navigation">
<span class="navbar-toggler-icon"></span>
</button>
<div class="collapse navbar-collapse" id="navbarSupportedContent">
<ul class="navbar-nav ml-auto">
<li class="nav-item">
<a class="nav-link" href="#">Home</a>
</li>
<li class="nav-item">
<a class="nav-link" href="https://twitter.com/oktadev">@oktadev</a>
</li>
<li class="nav-item">
<a class="nav-link" href="https://github.com/oktadeveloper/okta-angular-bootstrap-example">GitHub</a>
</li>
<li class="nav-item pl-lg-3">
<button *ngIf="!isAuthenticated" (click)="oktaAuth.loginRedirect()" class="btn btn-outline-primary">Login</button>
<button *ngIf="isAuthenticated" (click)="oktaAuth.logout()" class="btn btn-outline-secondary">Logout</button>
</li>
</ul>
</div>
</nav>
<div class="container-fluid pt-3">
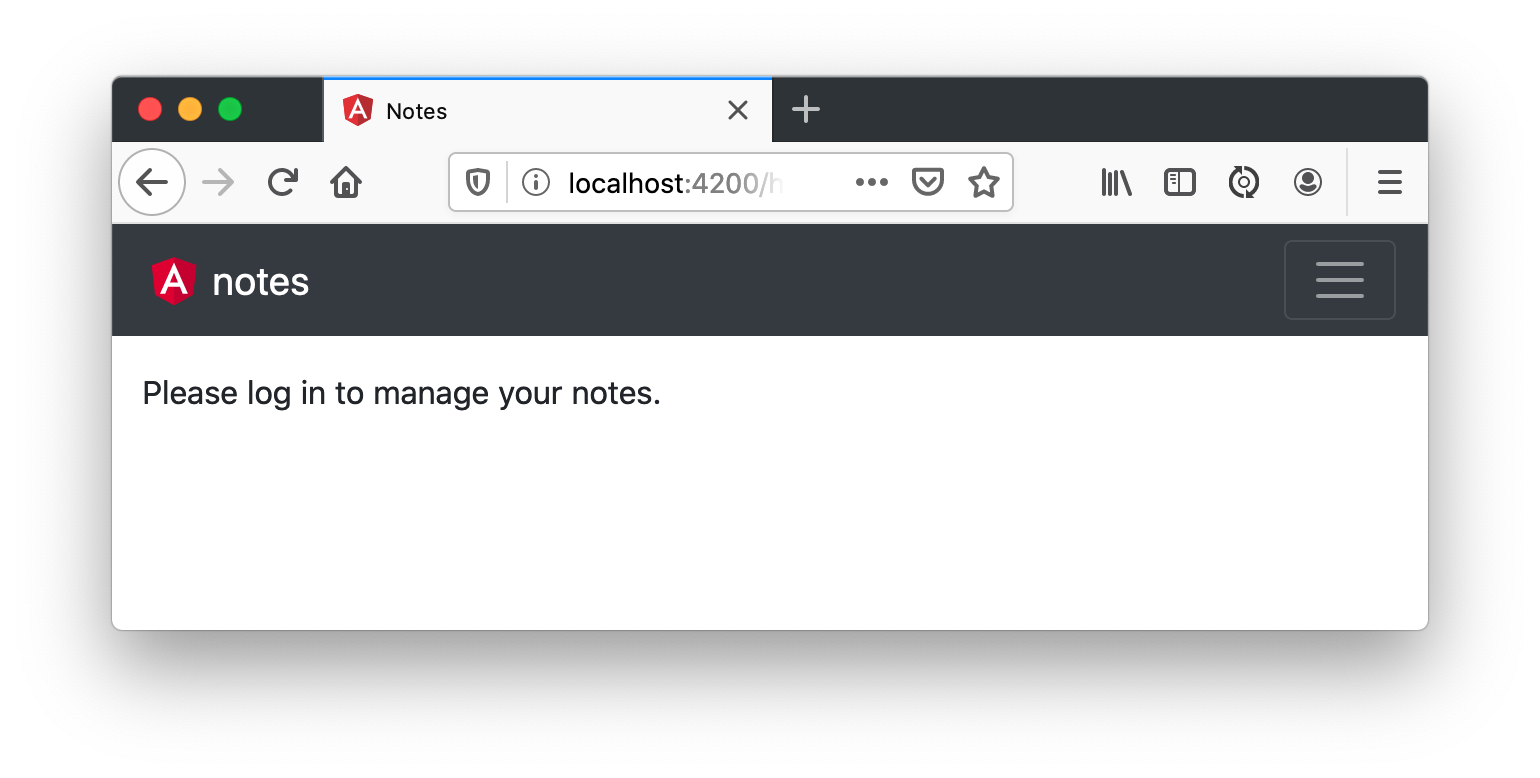
<a *ngIf="!isAuthenticated">Please log in to manage your notes.</a>
<router-outlet></router-outlet>
</div>Remove the login and logout buttons from home.component.html.
<p><a routerLink="/notes" *ngIf="isAuthenticated">View Notes</a></p>Run ng serve and you’ll be able to see your stylish app at http://localhost:4200.

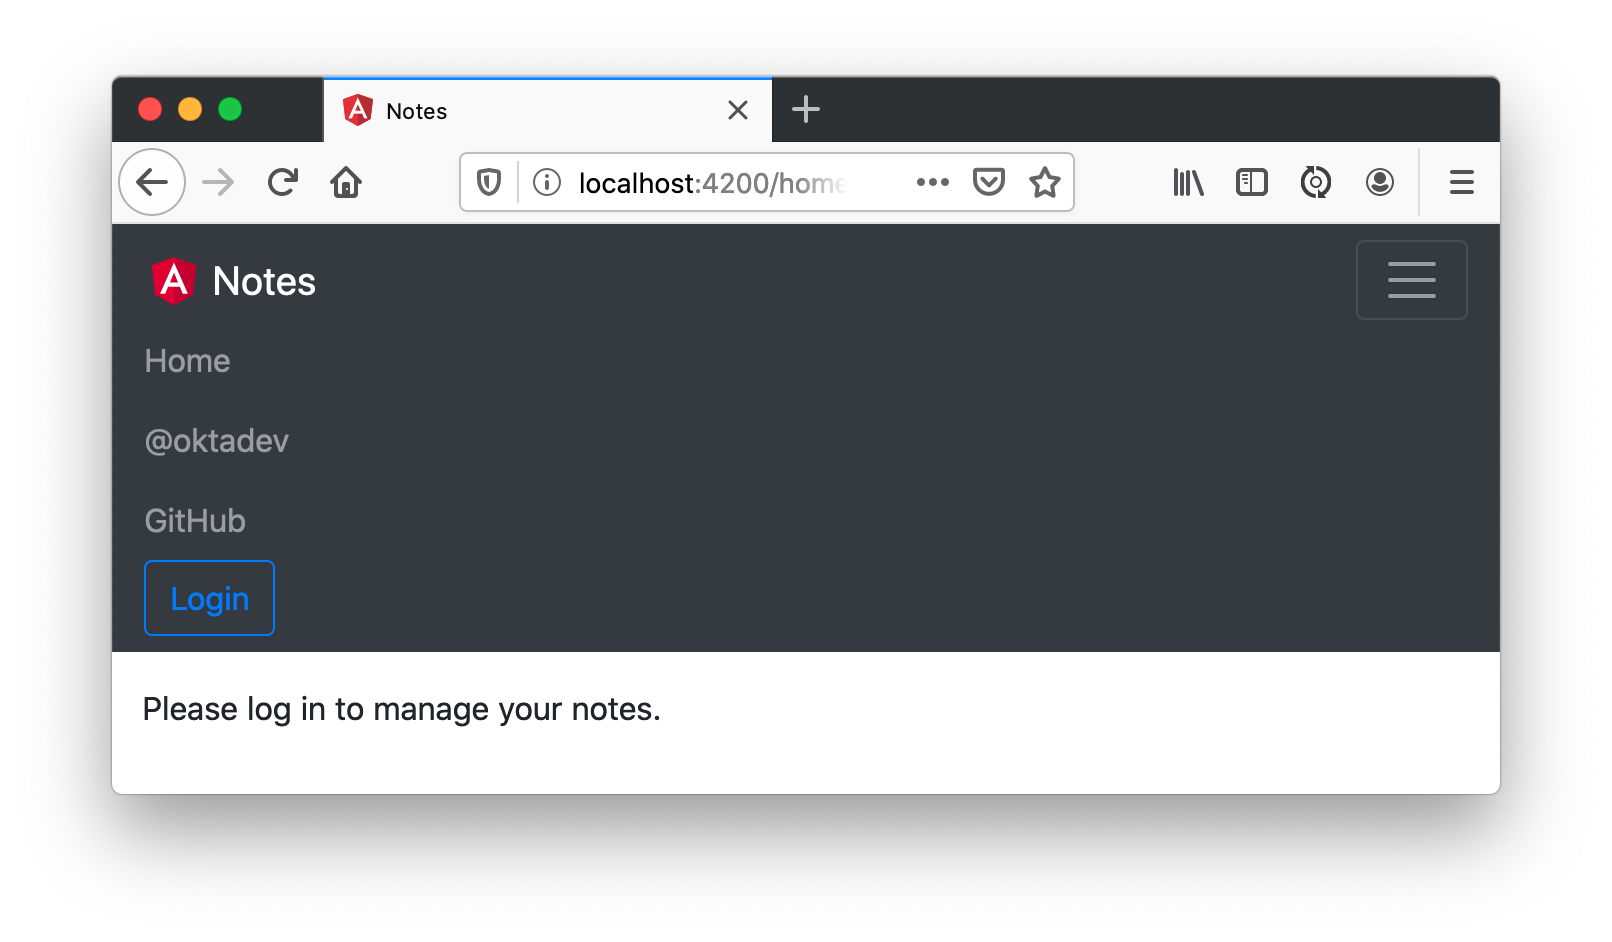
Fix Bootstrap’s Responsive Menu
If you reduce the width of your browser window, you’ll see the menu collapses to take up less real estate.
However, if you click on it, the menu doesn’t expand. To fix that, you need to use the ngbCollapse directive from NG Bootstrap. Modify app.component.html to have a click handler on the navbar toggle and add ngbCollapse to the menu.
<button (click)="isCollapsed = !isCollapsed" class="navbar-toggler" ...>
  ...
</button>

<div [ngbCollapse]="isCollapsed" class="collapse navbar-collapse" ...>
  ...
</div>
Then add isCollapsed in app.component.ts and change the title to be capitalized.
export class AppComponent implements OnInit {
  title = 'Notes';
  isAuthenticated: boolean;
  isCollapsed = true;

  ...

}
Now, you’ll be able to toggle the menu!
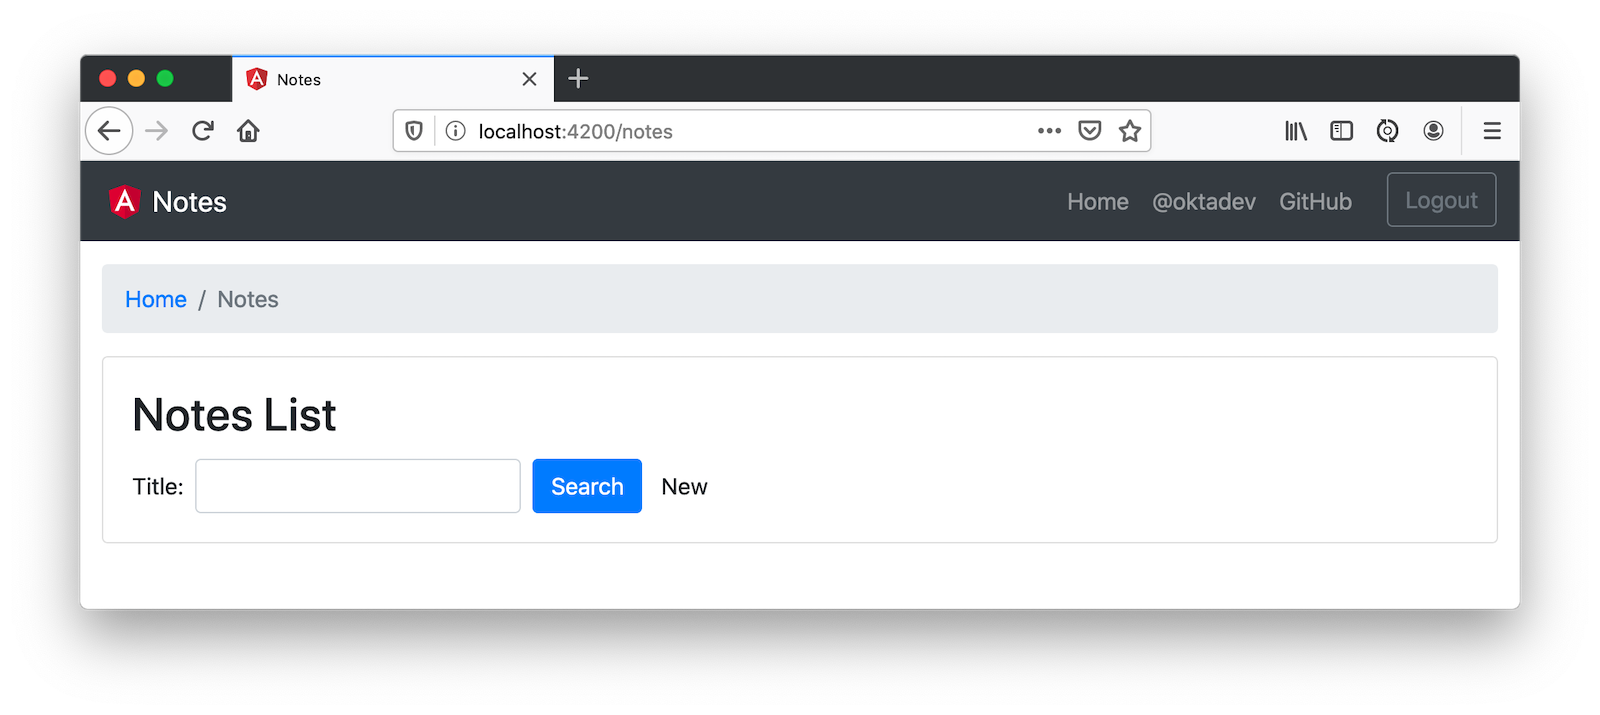
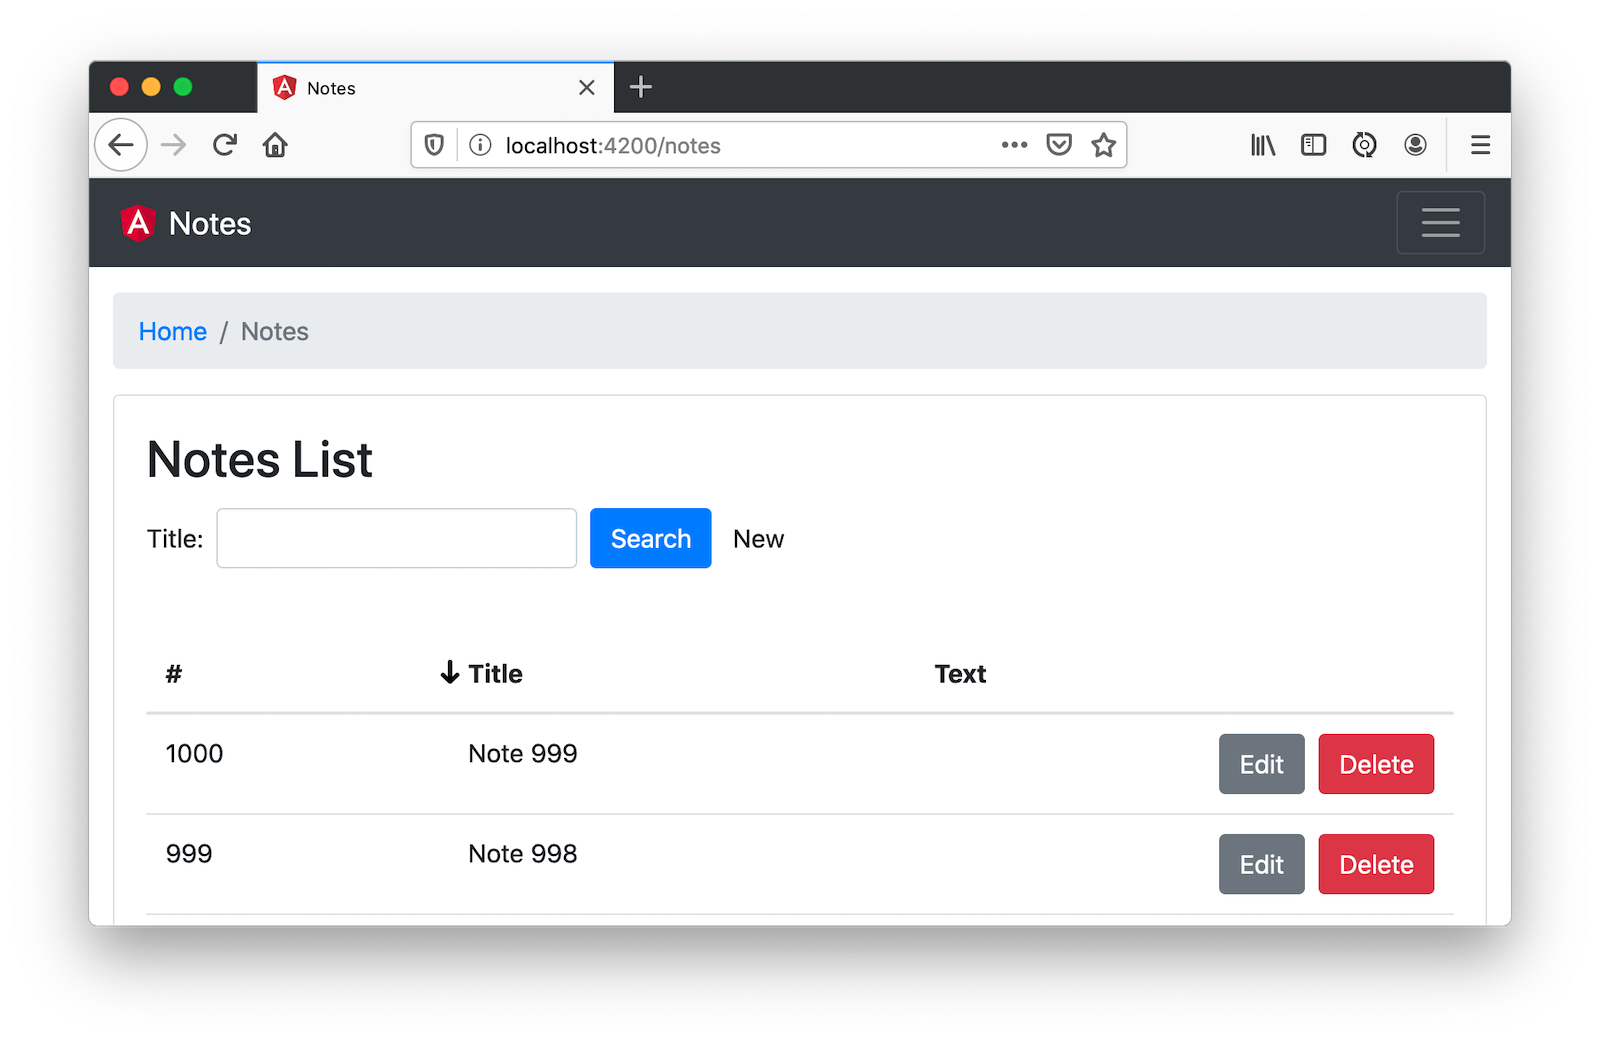
Update the Note List Angular Template
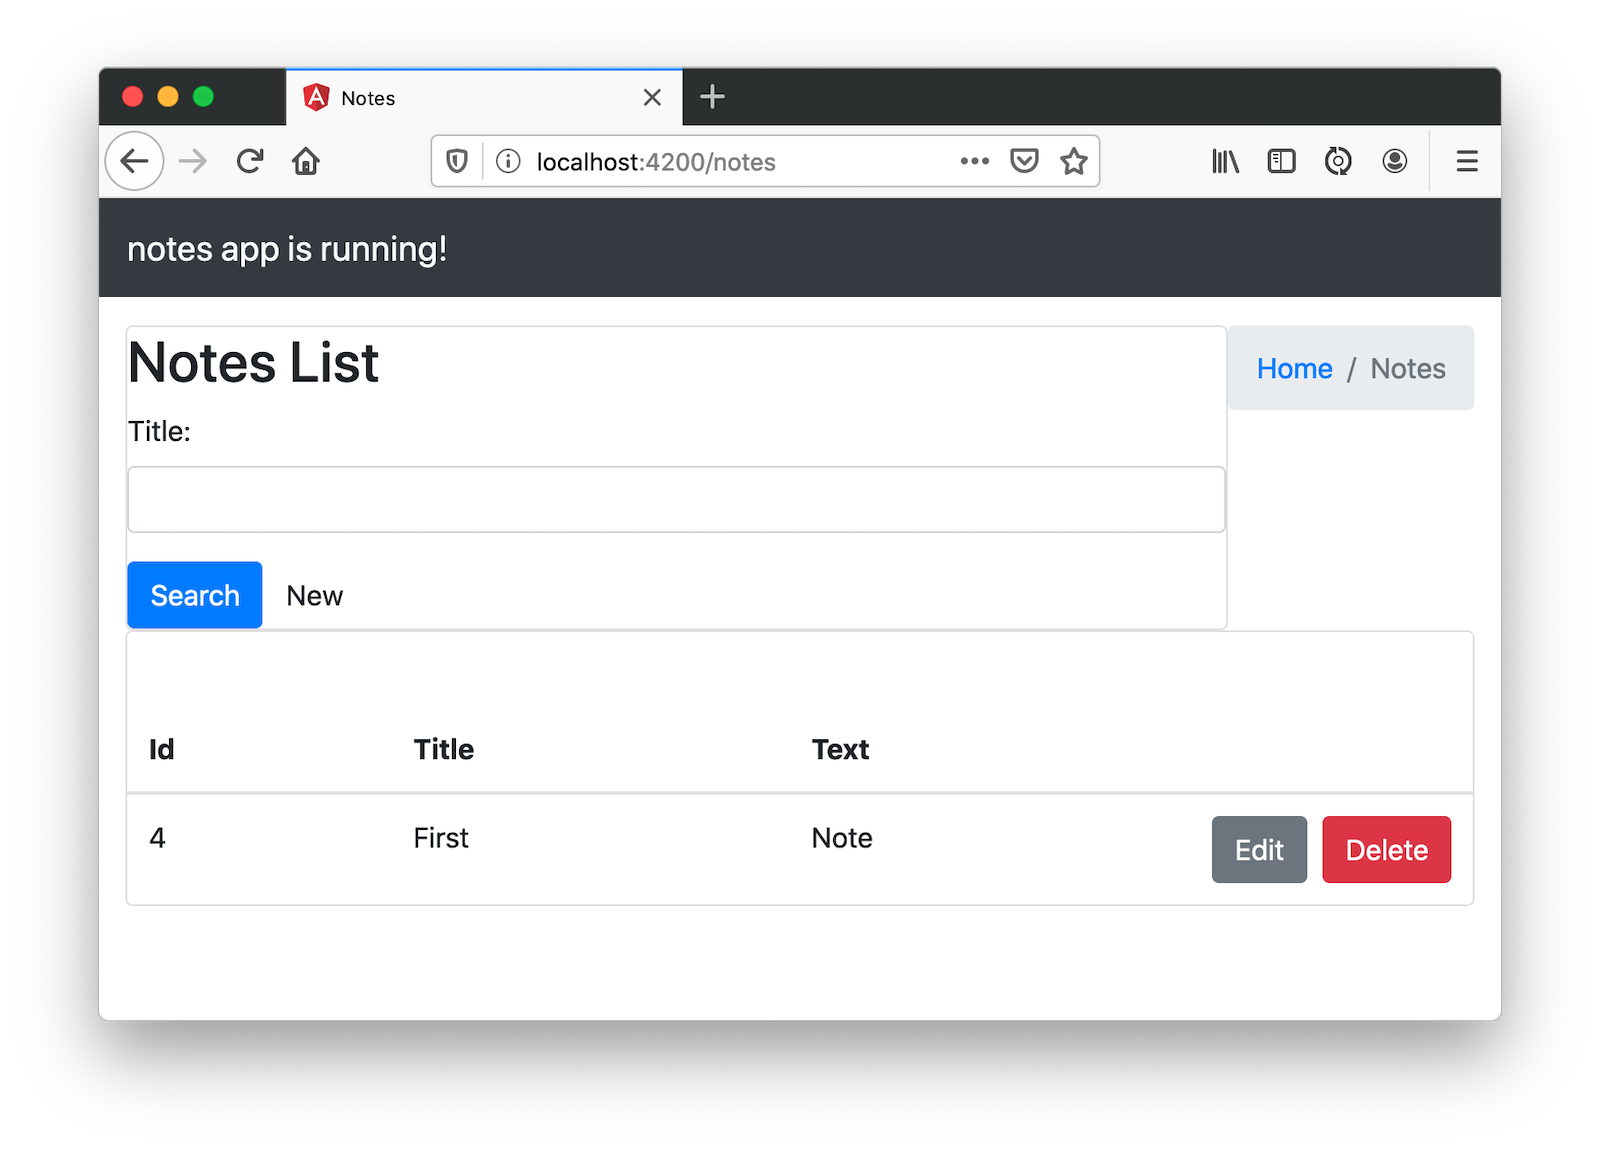
Modify the note-list.component.html so the breadcrumb doesn’t float right and all the content is in the same card.
<ol class="breadcrumb">
<li class="breadcrumb-item"><a routerLink="/">Home</a></li>
<li class="breadcrumb-item active">Notes</li>
</ol>
<div class="card">
<div class="card-body">
<h2 class="card-title">Notes List</h2>
<div class="card-text">
<form #f="ngForm" class="form-inline">
<div class="form-group">
<label for="title">Title:</label>
<input [(ngModel)]="filter.title" id="title" name="title" class="form-control ml-2 mr-2">
</div>
<button (click)="search()" [disabled]="!f?.valid" class="btn btn-primary">Search</button>
<a [routerLink]="['../notes', 'new' ]" class="btn btn-default">New</a>
</form>
</div>
<div *ngIf="noteList.length > 0">
<div *ngIf="feedback.message" class="alert alert-{{feedback.type}} m-2">{{ feedback.message }}</div>
<div class="table-responsive">
<table class="table table-centered table-hover mb-0" id="datatable">
<thead>
<tr>
<th class="border-top-0" scope="col">Id</th>
<th class="border-top-0" scope="col">Title</th>
<th class="border-top-0" scope="col">Text</th>
<th class="border-top-0" scope="col" style="width:120px"></th>
</tr>
</thead>
<tbody>
<tr *ngFor="let item of noteList" [class.active]="item === selectedNote">
<td>{{item.id}}</td>
<td>{{item.title}}</td>
<td>{{item.text}}</td>
<td style="white-space: nowrap">
<a [routerLink]="['../notes', item.id ]" class="btn btn-secondary">Edit</a>
<button (click)="delete(item)" class="btn btn-danger">Delete</button>
</td>
</tr>
</tbody>
</table>
</div>
</div>
</div>That looks better!
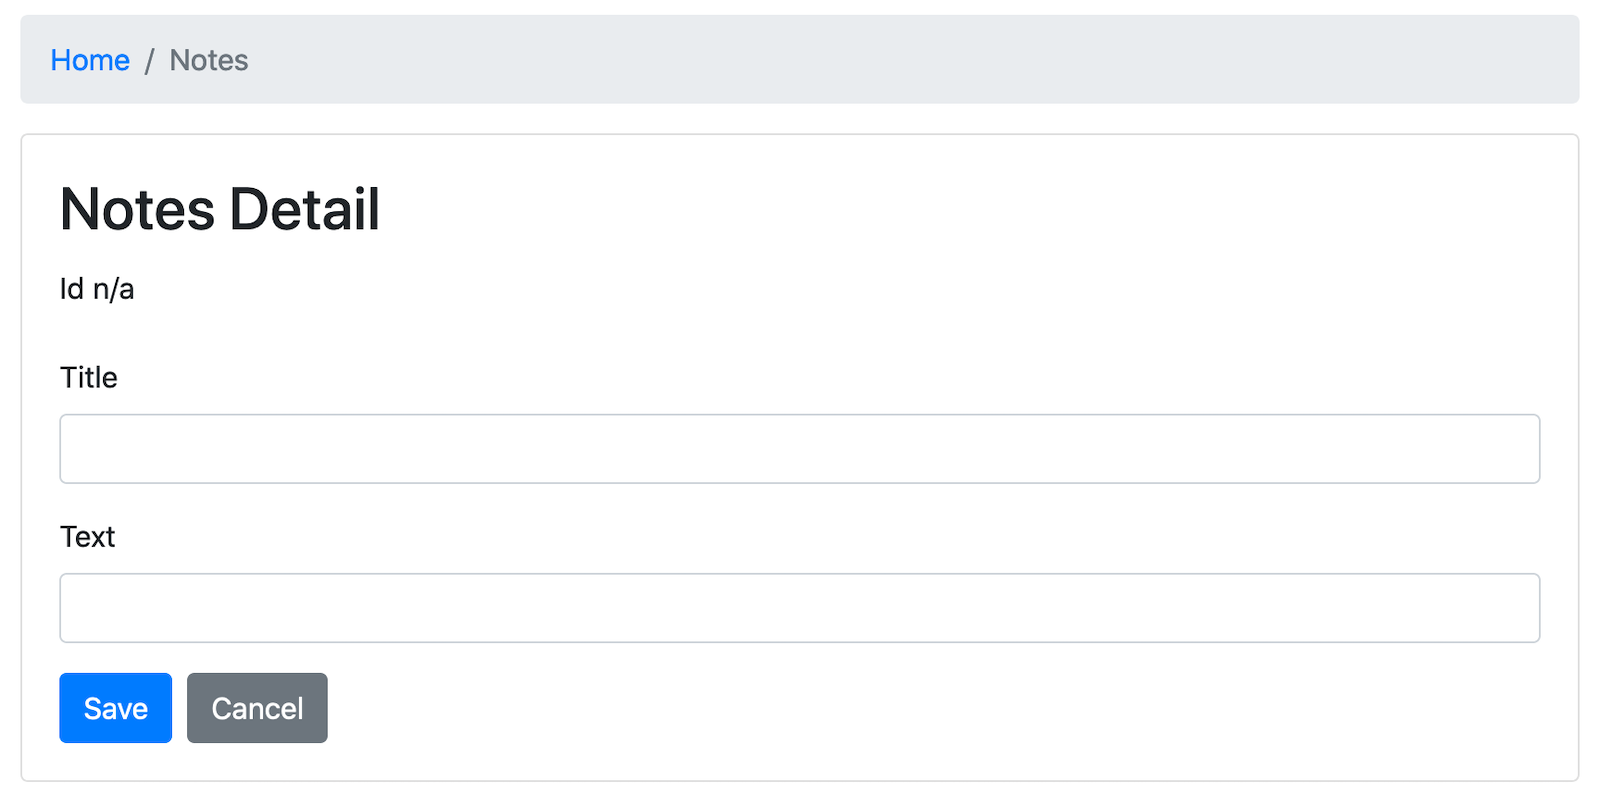
Add Validation and Bootstrap to the Note Edit Template
If you click the New button, you’ll see the form needs some work too. Bootstrap has excellent support for stylish forms using its form-group and form-control classes. note-edit.component.html already uses these classes; you just need to rearrange some things to use the proper card-* classes.
<ol class="breadcrumb">
  <li class="breadcrumb-item"><a routerLink="/">Home</a></li>
  <li class="breadcrumb-item active">Notes</li>
</ol>
<div class="card">
  <div class="card-body">
    <h2 class="card-title">Notes Detail</h2>
    <div class="card-text">
      <div *ngIf="feedback.message" class="alert alert-{{feedback.type}}">{{ feedback.message }}</div>
      <form *ngIf="note" #editForm="ngForm" (ngSubmit)="save()">
        <div class="form-group">
          <label>Id</label>
          {{note.id || 'n/a'}}
        </div>

        <div class="form-group">
          <label for="title">Title</label>
          <input [(ngModel)]="note.title" id="title" name="title" class="form-control">
        </div>

        <div class="form-group">
          <label for="text">Text</label>
          <input [(ngModel)]="note.text" id="text" name="text" class="form-control">
        </div>

        <button type="submit" class="btn btn-primary" [disabled]="!editForm.form.valid">Save</button>
        <button type="button" class="btn btn-secondary ml-2" (click)="cancel()">Cancel</button>
      </form>
    </div>
  </div>
</div>
That’s an improvement!
To make the title field required, add a required attribute to its <input> tag, along with a name so it can be referenced in an error message.
<div class="form-group">
  <label for="title">Title</label>
  <input [(ngModel)]="note.title" id="title" name="title" class="form-control" required
         #name="ngModel" [ngClass]="{'is-invalid': name.touched && name.invalid,  'is-valid': name.touched && name.valid}">
  <div [hidden]="name.valid" style="display: block" class="invalid-feedback">
    Title is required
  </div>
</div>
Now when you add a new note, it’ll let you know that it requires a title.

If you give it focus and leave, it’ll add a red border around the field.

Add a Searchable, Sortable, and Pageable Data Table with Angular and Spring Data JPA
At the beginning of this tutorial, I said I’d show you how to develop a searchable, sortable, and pageable data table. NG Bootstrap has a complete example I used to build the section below. The major difference is you’ll be using a real server, not a simulated one. Spring Data JPA has some slick features that make this possible, namely its query methods and paging/sorting.
Add Search by Title with Spring Data JPA
Adding search functionality requires the fewest code modifications. Change the UserController#notes() method in your Spring Boot app to accept a title parameter and return notes with the parameter’s value in their title.
@GetMapping("/user/notes")
fun notes(principal: Principal, title: String?): List<Note> {
    println("Fetching notes for user: ${principal.name}")
    return if (title.isNullOrEmpty()) {
        repository.findAllByUser(principal.name)
    } else {
        println("Searching for title: ${title}")
        repository.findAllByUserAndTitleContainingIgnoringCase(principal.name, title)
    }
}
Add the new repository method to the NotesRepository in DemoApplication.kt.
@RepositoryRestResource
interface NotesRepository : JpaRepository<Note, Long> {
    fun findAllByUser(name: String): List<Note>
    fun findAllByUserAndTitleContainingIgnoreCase(name: String, term: String): List<Note>
}
Restart your server and add a few notes, and you should be able to search for them by title in your Angular app. I love how Spring Data JPA makes this so easy!
Add Sort Functionality with Angular and Bootstrap
To begin, create a sortable.directive.ts.
import { Directive, EventEmitter, Input, Output } from '@angular/core';

export type SortDirection = 'asc' | 'desc' | '';
const rotate: { [key: string]: SortDirection } = {asc: 'desc', desc: '', '': 'asc'};

export interface SortEvent {
  column: string;
  direction: SortDirection;
}

@Directive({
  selector: 'th[sortable]',
  host: {
    '[class.asc]': 'direction === "asc"',
    '[class.desc]': 'direction === "desc"',
    '(click)': 'rotate()'
  }
})
export class SortableHeaderDirective {

  @Input() sortable: string;
  @Input() direction: SortDirection = '';
  @Output() sort = new EventEmitter<SortEvent>();

  rotate() {
    this.direction = rotate[this.direction];
    this.sort.emit({column: this.sortable, direction: this.direction});
  }
}
Add it as a declaration in note.module.ts.
import { SortableHeaderDirective } from './note-list/sortable.directive';

@NgModule({
  ...
  declarations: [
    ...
    SortableHeaderDirective
  ],
  ...
}
Add a headers variable to note-list.component.ts and an onSort() method.
import { Component, OnInit, QueryList, ViewChildren } from '@angular/core';
import { SortableHeaderDirective, SortEvent} from './sortable.directive';

export class NoteListComponent implements OnInit {
  @ViewChildren(SortableHeaderDirective) headers: QueryList<SortableHeaderDirective>;

  ...

  onSort({column, direction}: SortEvent) {
    // reset other headers
    this.headers.forEach(header => {
      if (header.sortable !== column) {
        header.direction = '';
      }
    });

    this.filter.column = column;
    this.filter.direction = direction;
    this.search();
  }

  ...
}
Update the note-filter.ts to have column and direction properties.
export class NoteFilter {
  title = '';
  column: string;
  direction: string;
}
Modify the find() method in NoteService to pass a sort parameter when appropriate.
import { map } from 'rxjs/operators';

...

find(filter: NoteFilter): Observable<Note[]> {
  const params: any = {
    title: filter.title,
    sort: `${filter.column},${filter.direction}`,
  };
  if (!filter.direction) { delete params.sort; }

  const userNotes = 'http://localhost:8080/user/notes';
  return this.http.get(userNotes, {params, headers}).pipe(
    map((response: any) => {
      return response.content;
    })
  );
}
Update note-list.component.html so it uses the sortable directive and calls onSort() when a user clicks it.
<thead>
  <tr>
    <th class="border-top-0" scope="col">#</th>
    <th class="border-top-0" scope="col" sortable="title" (sort)="onSort($event)">Title</th>
    <th class="border-top-0" scope="col" sortable="text" (sort)="onSort($event)">Text</th>
    <th class="border-top-0" scope="col" style="width:120px"></th>
  </tr>
</thead>
Add CSS in styles.scss to show a sort indicator when a user sorts a column.
th[sortable] {
  cursor: pointer;
  user-select: none;
  -webkit-user-select: none;
}

th[sortable].desc:before, th[sortable].asc:before {
  content: '';
  display: block;
  background: url('data:image/png;base64,iVBORw0KGgoAAAANSUhEUgAAAEAAAABACAYAAACqaXHeAAAAAXNSR0IArs4c6QAAAmxJREFUeAHtmksrRVEUx72fH8CIGQNJkpGUUmakDEiZSJRIZsRQmCkTJRmZmJgQE0kpX0D5DJKJgff7v+ru2u3O3vvc67TOvsdatdrnnP1Y///v7HvvubdbUiIhBISAEBACQkAICAEhIAQ4CXSh2DnyDfmCPEG2Iv9F9MPlM/LHyAecdyMzHYNwR3fdNK/OH9HXl1UCozD24TCvILxizEDWIEzA0FcM8woCgRrJCoS5PIwrANQSMAJX1LEI9bqpQo4JYNFFKRSvIgsxHDVnqZgIkPnNBM0rIGtYk9YOOsqgbgepRCfdbmFtqhFkVEDVPjJp0+Z6e6hRHhqBKgg6ZDCvYBygVmUoEGoh5JTRvIJwhJo1aUOoh4CLPMyvxxi7EWOMgnCGsXXI1GIXlZUYX7ucU+kbR8NW8lh3O7cue0Pk32MKndfUxQFAwxdirk3fHappAnc0oqDPzDfGTBrCfHP04dM4oTV8cxr0SVzH9FF07xD3ib6xCDE+M+aUcVygtWzzbtGX2rPBrEUYfecfQkaFzYi6HjVnGBdtL7epqAlc1+jRdAap74RrnPc4BCijttY2tRcdN0g17w7HqZrXhdJTYAuS3hd8z+vKgK3V1zWPae0mZDMykadBn1hTQBLnZNwVrJpSe/NwEeDsEwCctEOsJTsgxLvCqUl2ACftEGvJDgjxrnBqkh3ASTvEWrIDQrwrnJpkB3DSDrGW7IAQ7wqnJtkBnLRztejXXVu4+mxz/nQ9jR1w5VB86ejLTFcnnDwhzV+F6T+CHZlx6THSjn76eyyBIOPHyDakhBAQAkJACAgBISAEhIAQYCLwC8JxpAmsEGt6AAAAAElFTkSuQmCC') no-repeat;
  background-size: 22px;
  width: 22px;
  height: 22px;
  float: left;
  margin-left: -22px;
}

th[sortable].desc:before {
  transform: rotate(180deg);
  -ms-transform: rotate(180deg);
}
Add Sorting and Paging in Spring Boot with Spring Data JPA
On the server, you can use Spring Data’s support for paging and sorting. Add a Pageable argument to UserController#notes() and return a Page instead of a List.
package com.okta.developer.notes

import org.springframework.data.domain.Page
import org.springframework.data.domain.Pageable
import org.springframework.security.core.annotation.AuthenticationPrincipal
import org.springframework.security.oauth2.core.oidc.user.OidcUser
import org.springframework.web.bind.annotation.GetMapping
import org.springframework.web.bind.annotation.RestController
import java.security.Principal

@RestController
class UserController(val repository: NotesRepository) {

    @GetMapping("/user/notes")
    fun notes(principal: Principal, title: String?, pageable: Pageable): Page<Note> {
        println("Fetching notes for user: ${principal.name}")
        return if (title.isNullOrEmpty()) {
            repository.findAllByUser(principal.name, pageable)
        } else {
            println("Searching for title: ${title}")
            repository.findAllByUserAndTitleContainingIgnoreCase(principal.name, title, pageable)
        }
    }

    @GetMapping("/user")
    fun user(@AuthenticationPrincipal user: OidcUser): OidcUser {
        return user;
    }
}
Modify NotesRepository to add a Pageable argument to its methods and return a Page.
import org.springframework.data.domain.Page
import org.springframework.data.domain.Pageable

...

@RepositoryRestResource
interface NotesRepository : JpaRepository<Note, Long> {
    fun findAllByUser(name: String, pageable: Pageable): Page<Note>
    fun findAllByUserAndTitleContainingIgnoreCase(name: String, term: String, pageable: Pageable): Page<Note>
}
While you’re updating the Spring Boot side of things, modify DataInitializer to create a thousand notes for your user. Make sure to replace <your username> with the email address you use to log in to Okta.
@Component
class DataInitializer(val repository: NotesRepository) : ApplicationRunner {

    @Throws(Exception::class)
    override fun run(args: ApplicationArguments) {
        for (x in 0..1000) {
            repository.save(Note(title = "Note ${x}", user = "<your username>"))
        }
        repository.findAll().forEach { println(it) }
    }
}
Restart your Spring Boot app to make the data available for searching. Click on the Title column to see sorting in action!
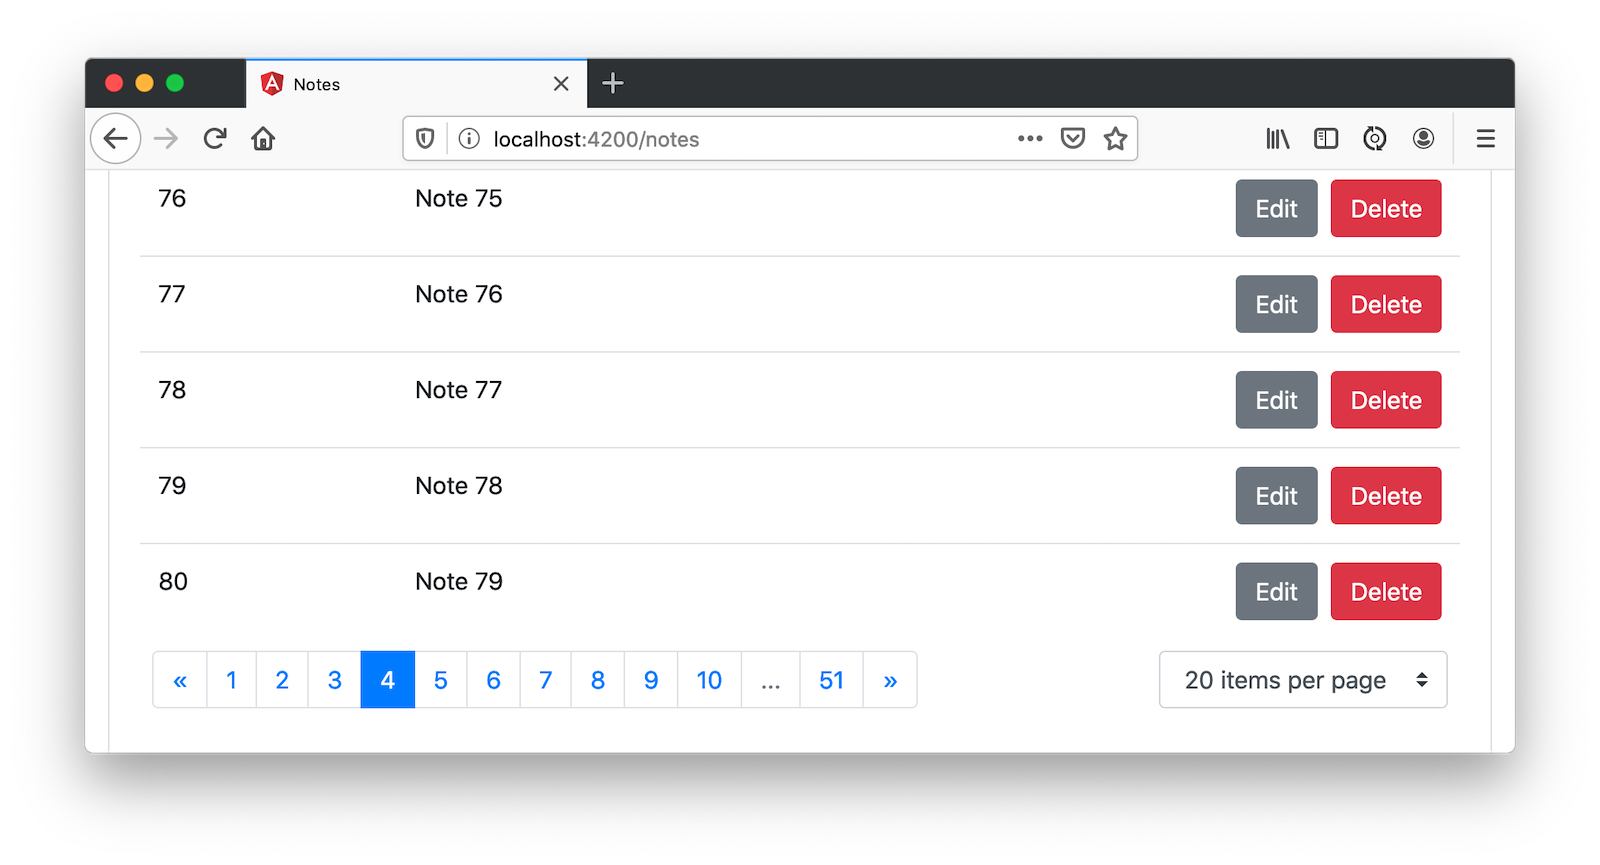
Add Pagination with Angular and Bootstrap
The last feature to add is pagination with NG Bootstrap’s <ngb-pagination> component. Begin by adding page and size variables (with default values) to note-filter.ts.
export class NoteFilter {
  title = '';
  column: string;
  direction: string;
  page = 0;
  size = 20;
}
At the bottom of note-list.component.html (just after </table>), add the pagination component, along with a page-size selector.
<div class="d-flex justify-content-between p-2">
  <ngb-pagination [maxSize]="10"
    [collectionSize]="total$ | async" [(page)]="filter.page" [pageSize]="filter.size" (pageChange)="onPageChange(filter.page)">
  </ngb-pagination>

  <select class="custom-select" style="width: auto" name="pageSize" [(ngModel)]="filter.size" (ngModelChange)="onChange(filter.size)">
    <option [ngValue]="10">10 items per page</option>
    <option [ngValue]="20">20 items per page</option>
    <option [ngValue]="100">100 items per page</option>
  </select>
</div>
Add NgbModule as an import to note.module.ts.
import { NgbModule } from '@ng-bootstrap/ng-bootstrap';

@NgModule({
  imports: [
    ...
    NgbModule
  ],
  ...
}
In note-list.component.ts, add a total$ observable and set it from the search() method. Then add an onPageChange() method and an onChange() method, and modify onSort() to set the page to 0.
import { Observable } from 'rxjs';

export class NoteListComponent implements OnInit {
  total$: Observable<number>;

  ...

  search(): void {
    this.noteService.load(this.filter);
    this.total$ = this.noteService.size$;
  }

  onChange(pageSize: number) {
    this.filter.size = pageSize;
    this.filter.page = 0;
    this.search();
  }

  onPageChange(page: number) {
    this.filter.page = page - 1;
    this.search();
    this.filter.page = page;
  }

  onSort({column, direction}: SortEvent) {
    // reset other headers
    this.headers.forEach(header => {
      if (header.sortable !== column) {
        header.direction = '';
      }
    });

    this.filter.column = column;
    this.filter.direction = direction;
    this.filter.page = 0;
    this.search();
  }
}
Then update notes.service.ts to add a size$ observable and parameters for the page size and page number.
import { BehaviorSubject, Observable } from 'rxjs';

...

export class NoteService {
  ...
  size$ = new BehaviorSubject<number>(0);

  ...

  find(filter: NoteFilter): Observable<Note[]> {
    const params: any = {
      title: filter.title,
      sort: `${filter.column},${filter.direction}`,
      size: filter.size,
      page: filter.page
    };
    if (!filter.direction) { delete params.sort; }

    const userNotes = 'http://localhost:8080/user/notes';
    return this.http.get(userNotes, {params, headers}).pipe(
      map((response: any) => {
        this.size$.next(response.totalElements);
        return response.content;
      })
    );
  }

  ...
}
Now your note list should have a working pagination feature at the bottom. Pretty slick, eh?
Angular with Bootstrap + Spring Boot is Powerful
Phew! That was a lot of code. I hope this tutorial has helped you see how powerful Angular and Spring Boot with Bootstrap can be! You can find all of the source code for this example on GitHub.
| I fixed the Angular tests so they work with Bootstrap in this commit. |
I also wanted to let you know you can get a lot of this functionality for free with JHipster. It even has Kotlin support. You can generate a Notes CRUD app that uses Angular, Bootstrap, Spring Boot, and Kotlin in just three steps.
-
Install JHipster and KHipster
npm install -g generator-jhipster@6.6.0 generator-jhipster-kotlin@1.4.0
-
Create an
easy-notesdirectory and anotes.jdlfile in itapplication { config { baseName notes authenticationType oauth2 buildTool gradle searchEngine elasticsearch testFrameworks [protractor] } entities * } entity Note { title String required text TextBlob } relationship ManyToOne { Note{user(login)} to User } paginate Note with pagination -
In a terminal, navigate to the
easy-notesdirectory and runkhipster import-jdl notes.jdl
That’s it! 🎉
Of course, you probably want to see it running. Run the following commands to start Keycloak (as a local OAuth 2.0 server) and Elasticsearch, and launch the app.
docker-compose -f src/main/docker/keycloak.yml up -d
docker-compose -f src/main/docker/elasticsearch.yml up -d
./gradlew
Then, run npm run e2e in another terminal window to verify everything works. Here’s a screenshot of the app’s Notes form with validation.
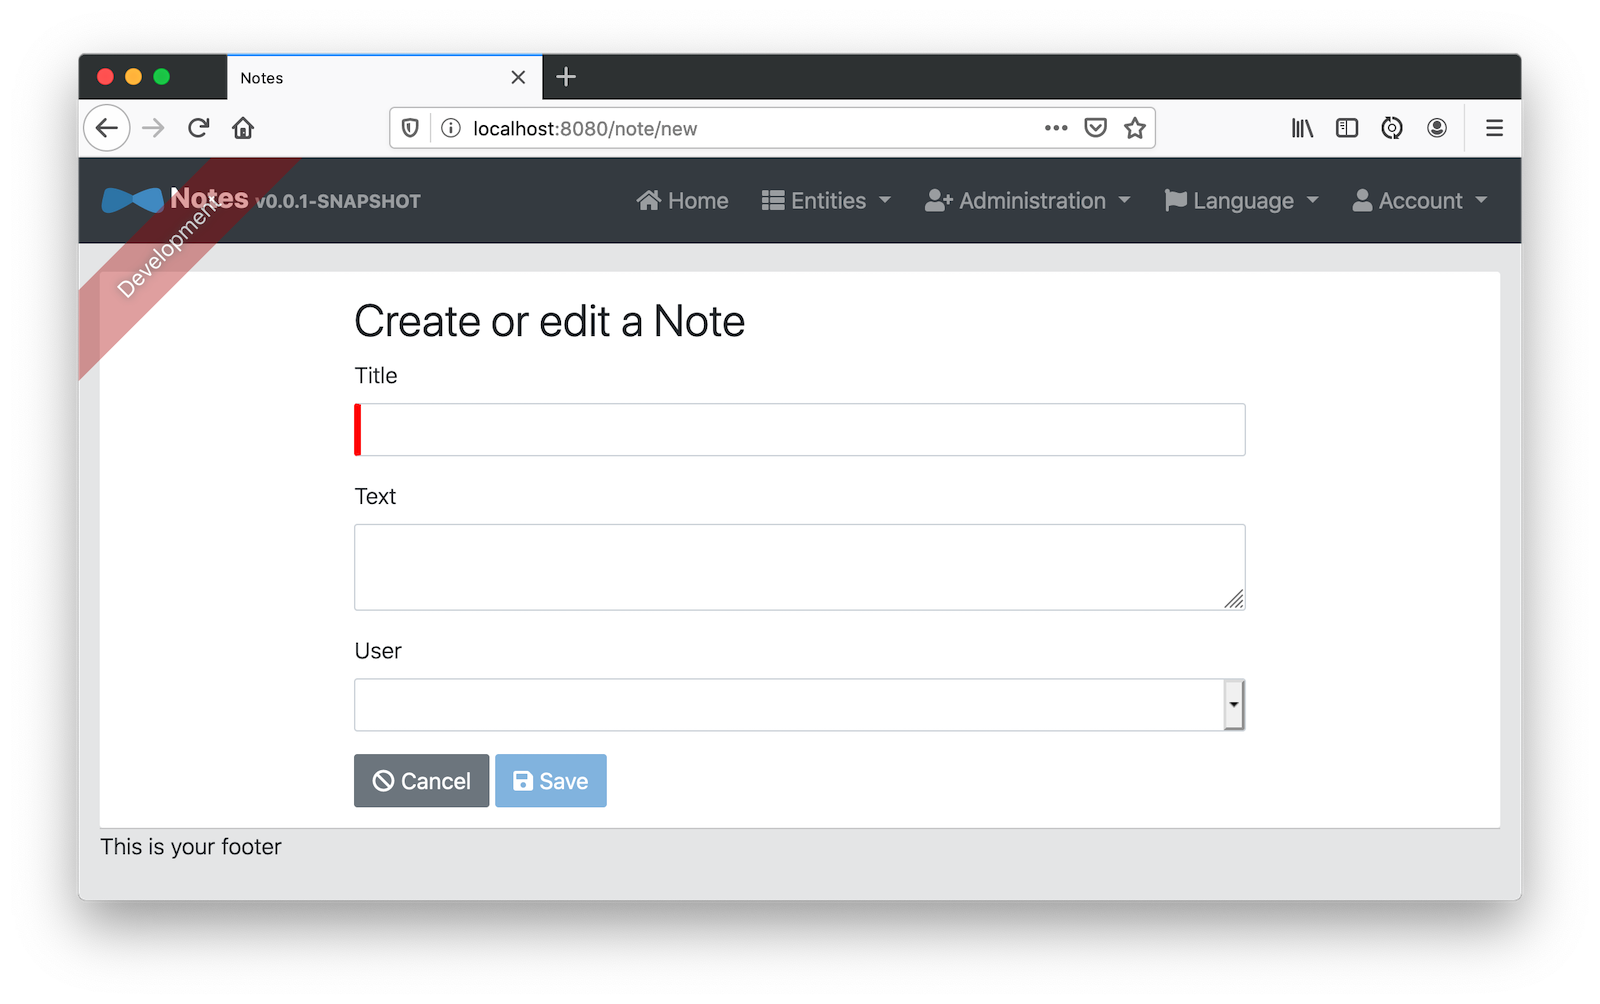
Want to make it work with Okta? See JHipster’s security documentation.
Learn More About Angular and Spring Boot
I used the following resources to gather historical information about Angular and Bootstrap.
If you want to learn more about Angular or Spring Boot, I recommend these blog posts:
If you have questions, please leave a comment below. If you liked this tutorial, follow @oktadev on Twitter and subscribe to our YouTube channel.
Changelog:
- Nov 21, 2021: Added announcement about The Angular Mini-Book. Its "Beautiful Angular Apps with Bootstrap" chapter was inspired by this blog post.
- Apr 7, 2021: Changed Okta OIDC app creation instructions to use the Okta CLI. See changes in okta-blog#670.
- May 18, 2020:
Updated to remove
/implicitfrom Login redirect URI. See the code changes in the example app on GitHub. Changes to this article can be viewed in oktadeveloper/okta-blog#298.
Matt Raible is a well-known figure in the Java community and has been building web applications for most of his adult life. For over 20 years, he has helped developers learn and adopt open source frameworks and use them effectively. He's a web developer, Java Champion, and Developer Advocate at Okta. Matt has been a speaker at many conferences worldwide, including Devnexus, Devoxx Belgium, Devoxx France, Jfokus, and JavaOne. He is the author of The Angular Mini-Book, The JHipster Mini-Book, Spring Live, and contributed to Pro JSP. He is a frequent contributor to open source and a member of the JHipster development team. You can find him online @mraible and raibledesigns.com.
Okta Developer Blog Comment Policy
We welcome relevant and respectful comments. Off-topic comments may be removed.