Build a CRUD App with Python, Flask, and Angular

Developers all have their favorite GitHub repositories. They have software projects that they love and watch closely for the latest changes. In this tutorial, you’ll create a simple CRUD application to save and to display your favorite GitHub open source projects. You will use Angular to implement the user interface features and Python for the backend.
These days it is not uncommon to have an API that is responsible not only for persisting data to the database, but also dealing with business requirements like permissions, data flow, data visibility, and so on. Python is a natural choice for the API because of its simplicity and power. For the same reasons, Angular is a great choice on the client side. Angular’s use of TypeScript makes it easy to get started with and still powerful enough to handle your most advanced scenarios.
Let’s dig in!
To complete this tutorial, there are a few things you will need:
- Python 3 installed
- MongoDB up and running
- A free-forever Okta account
You will start by creating the backend in Python.
Table of Contents
- Set Up Your Python + Angular Environment
- Bootstrap Your Angular App’s Python API
- Create Your Angular Client’s API in Python
- Persist Your Python REST API with MongoDB
- Install MongoDB
- Define Your Python API Middleware
- Define Your Python API Endpoints
- Create Your Angular App
- Add Authentication to Your Angular App
- Create Your Routes in Angular
- Add the Login Angular Component
- Add Your Angular Home Component
- Call the Python API From Angular
- Learn More About Angular, Python, and Flask
Note: In May 2025, the Okta Integrator Free Plan replaced Okta Developer Edition Accounts, and the Okta CLI was deprecated.
We preserved this post for reference, but the instructions no longer work exactly as written. Replace the Okta CLI commands by manually configuring Okta following the instructions in our Developer Documentation.
Set Up Your Python + Angular Environment
For this tutorial, you’re going to use Python 3.6.4. You can check your current Python version by running the following command:
python --version
If needed, use pyenv to install Python 3.6.
If you’re using macOS, install pyenv by running the following command:
brew update && brew install pyenv
On a Linux system use the bash shell:
curl -L https://github.com/pyenv/pyenv-installer/raw/master/bin/pyenv-installer | bash
Once installed, you can run the following commands to install Python 3.
pyenv install 3.6.4
pyenv global 3.6.4
Ensure you are using the correct Python version by adding the pyenv shims path to your $PATH.
export PATH="$(pyenv root)/shims:$HOME/local/bin:$PATH"
Even though Python offers a rich standard library making it possible to develop the backend without third-party libraries, we’re going to use well-known Python libraries to help you focus on the features requirements instead of spending time reinventing the wheel.
You will use pipenv to manage the project’s dependencies.
python -m pip install --user pipenv
Your environment is prepared to run Python code, and you are now ready to work on the backend.
Bootstrap Your Angular App’s Python API
Create a directory in which your code will sit, by running the following command:
mkdir favorite_github_projects && cd favorite_github_projects
Pipenv can create a virtual environment for your project this way you can isolate the project’s dependencies. You can create a virtual environment by running the following command:
pipenv --three --python=$(pyenv root)/shims/python
Notice that a file called Pipfile was created and it should look like this:
[[source]]
name = "pypi"
url = "https://pypi.org/simple"
verify_ssl = true

[dev-packages]

[packages]

[requires]
python_version = "3.6"
Pipfile will be used as a manifest of the project’s dependencies.
You’ll use absolute_import and print_function packages introduced in Python 3. To import them run the following commands:
touch __init__.py
touch __main__.py
And copy and paste the following content into the __main__.py file:
from __future__ import absolute_import, print_function
In the next section you will implement the endpoints needed to list, favorite, and unfavorite a GitHub project.
Create Your Angular Client’s API in Python
Your API should be capable of listing all favorited GitHub repositories for a given user. It should also be able to favorite and unfavorite a GitHub repository. You are going to expose the following endpoints:
# For the authenticated user fetches all favorited GitHub projects
GET /kudos

# Favorite a GitHub project for the authenticated user
POST /kudos

# Unfavorite a favorited GitHub project
DELETE /kudos/:id
Favoriting a GitHub project basically means a client makes HTTP POST calls to your Python server, which has some expectation of the calls:
- The request body or payload must be JSON
- The payload should have four properties, the GitHub project
id,full_name,description, andhtml_url. - Only the GitHub project
idis a required property. Which means, for anyPOST /kudoswhere theidis not given the server must reject the call - All requests must be authenticated
Your Python backend will have to represent two data schemas, one being the incoming request payload and the other, the document your server will persist on the database. They will be called GitHubRepoSchema and KudoSchema respectively.
The client will send a payload like the one below when favoriting a GitHub project:
{
  "description": "okta-oidc-js",
  "full_name": "okta/okta-oidc-js",
  "html_url": "https://github.com/okta/okta-oidc-js",
  "id": 97974659
}
Start by creating the necessary files, running the following commands:
mkdir -p app/kudo
touch app/kudo/schema.py
touch app/kudo/service.py
touch app/kudo/__init__.py
The commands you’ve just run created the app directory as well as another directory within it called kudo which now has three files: schema.py, service.py, and __init__.py.
The schema will have two responsibilities: represent the data and serve as reference to validate incoming request payload. There’s a very useful package called marshmallow, which is an ORM/ODM/framework-agnostic library for serializing/deserializing complex data types, such as objects, to and from native Python data types.
Install marshmallow by running the following command:
pipenv install marshmallow==2.16.3
Then, Copy and paste the following classes into the app/kudo/schema.py:
from marshmallow import Schema, fields

class GitHubRepoSchema(Schema):
  id = fields.Int(required=True)
  repo_name = fields.Str()
  full_name = fields.Str()
  description = fields.Str()

class KudoSchema(GitHubRepoSchema):
  user_id = fields.Email(required=True)
Since what your application requires to display the user’s favorited GitHub projects, in other words, what it has to persist in the database is pretty much similar to the incoming request payload, all you had to do for KudoSchema was make it inherits from GitHubRepoSchema and specialized it by adding a new required field user_id which will be used to filter the data in the database by user.
Persist Your Python REST API with MongoDB
With the data representation implemented, your next step is to prepare your application to persist data in MongoDB. To connect and to run queries against the database, you are going to use a library created and maintained by MongoDB itself called pymongo.
The pymongo library can be installed by running the following commands:
pipenv install pymongo==3.7.2
Start by creating the MongoRepository class. It is always a good idea to have a class with just a single responsibility, so the only point in your backend application MongoDB is going to explicitly deal with is in the MongoRepository.
Start by creating a directory where all persistence-related files should sit, a suggestion would be: repository.
mkdir -p app/repository
Then, create the file for MongoRepository class:
touch app/repository/mongo.py
touch app/repository/__init__.py
Now paste the following content into the app/repository/mongo.py file.
import os
from pymongo import MongoClient

COLLECTION_NAME = 'kudos'

class MongoRepository(object):
 def __init__(self):
   mongo_url = os.environ.get('MONGO_URL')
   self.db = MongoClient(mongo_url).kudos

 def find_all(self, selector):
   return self.db.kudos.find(selector)

 def find(self, selector):
   return self.db.kudos.find_one(selector)

 def create(self, kudo):
   return self.db.kudos.insert_one(kudo)

 def update(self, selector, kudo):
   return self.db.kudos.replace_one(selector, kudo).modified_count

 def delete(self, selector):
   return self.db.kudos.delete_one(selector).deleted_count
As you can see, the MongoRepository class is quite simple, it creates a database connection on its initialization then saves it to an instance variable to be used later by the methods: find_all, find, create, update, and delete. Notice that all methods explicitly use the pymongo API.
For the sake of simplicity MongoRepository is reading environment variable MONGO_URL to obtain the MongoDB string connection. Feel free to change it with a hard-coded string or even better you could use python-dotenv to keep all your environment variables in one place.
Since you might want to use other databases in the future, it is a good idea to decouple your application from MongoDB. SOLID principles tell us that is better to rely on abstract classes instead of concrete classes.
Go ahead and create a repository abstraction. Paste the following content into the app/repository/__init__.py file:
class Repository(object):
 def __init__(self, adapter=None):
   if not adapter:
     raise ValueError("Invalid repository implementation")
   self.client = adapter()

 def find_all(self, selector):
   return self.client.find_all(selector)

 def find(self, selector):
   return self.client.find(selector)

 def create(self, kudo):
   return self.client.create(kudo)

 def update(self, selector, kudo):
   return self.client.update(selector, kudo)

 def delete(self, selector):
   return self.client.delete(selector)
Great! You now have an abstract class to represent a generic repository and a concrete class that fulfills the abstract class contract.
You will soon implement the endpoints of your REST API. To keep your endpoints clean and only responsible for dispatching requests and outputting data, you will use the service pattern and create a class to validate the incoming requests, and to deal with the database persisting and fetching data from it.
Paste the content below to the app/kudo/service.py file:
from ..repository import Repository
from ..repository.mongo import MongoRepository
from .schema import KudoSchema

class Service(object):
 def __init__(self, user_id, repo_client=Repository(adapter=MongoRepository)):
   self.repo_client = repo_client
   self.user_id = user_id

   if not user_id:
     raise Exception("user id not provided")

 def find_all_kudos(self):
   kudos  = self.repo_client.find_all({'user_id': self.user_id})
   return [self.dump(kudo) for kudo in kudos]

 def find_kudo(self, repo_id):
   kudo = self.repo_client.find({'user_id': self.user_id, 'repo_id': repo_id})
   return self.dump(kudo)

 def create_kudo_for(self, githubRepo):
   self.repo_client.create(self.prepare_kudo(githubRepo))
   return self.dump(githubRepo.data)

 def update_kudo_with(self, repo_id, githubRepo):
   records_affected = self.repo_client.update({'user_id': self.user_id, 'repo_id': repo_id}, self.prepare_kudo(githubRepo))
   return records_affected > 0

 def delete_kudo_for(self, repo_id):
   records_affected = self.repo_client.delete({'user_id': self.user_id, 'repo_id': repo_id})
   return records_affected > 0

 def dump(self, data):
   return KudoSchema(exclude=['_id']).dump(data).data

 def prepare_kudo(self, githubRepo):
   data = githubRepo.data
   data['user_id'] = self.user_id
   return data
There are two things to notice here, first, all operations causing side effects are using the user_id. This is because you want to make sure that actions like favoriting, unfavoriting, or listing the GitHub projects are done for the correct user. The last is the service object is not interacting directly with the MongoRepository class it is “adapting” the Repository abstract class with the concrete class MongoRepository, which will be used to persist data to MongoDB.
Install MongoDB
Install the MongoDB database from the mongodb.com servers, via Homebrew, or just run it with Docker.
The MongoDB documentation pages provide excellent install instructions specific to your operating system.
You can install and run MongoDB using Homebrew like so:
brew tap mongodb/brew
brew install mongodb-community@4.4
brew services run mongodb-community@4.4
You can also use Docker:
docker run -d -it -p 27017:27017 mongo
Define Your Python API Middleware
The requests made to your REST API use JSON Web Token (JWT) to let the backend know the request is authorized. How does it work?
- On the front-end, the user signs in using her/his Okta’s account
- The client then will be granted with a JSON Web Token
- JSON Web Token should be sent in every request to the server as a value for the HTTP Authorization Header
- The server then will verify whether the JSON Web Token is valid or not halting the request with a 401 HTTP Status when the credentials/JWT are invalid.
The JWT validation will be implemented in a Middleware. You will need to install flask and pyjwt to perform the JWT validation and to store the user in the session.
To install them run the following commands:
pipenv install pyjwt==1.7.1
pipenv install flask==1.0.2
Then, go ahead and create the necessary files:
mkdir -p app/http/api
touch app/http/api/__init__.py
touch app/http/api/endpoints.py
touch app/http/api/middlewares.py
Here’s how your JWT middleware should look:
from functools import wraps
from flask import request, g, abort
from jwt import decode, exceptions
import json

def login_required(f):
   @wraps(f)
   def wrap(*args, **kwargs):
       authorization = request.headers.get("authorization", None)
       if not authorization:
           return json.dumps({'error': 'no authorization token provided'}), 401, {'Content-type': 'application/json'}

       try:
           token = authorization.split(' ')[1]
           resp = decode(token, None, verify=False, algorithms=['HS256'])
           g.user = resp['sub']
       except exceptions.DecodeError as identifier:
           return json.dumps({'error': 'invalid authorization token'}), 401, {'Content-type': 'application/json'}

       return f(*args, **kwargs)

   return wrap
If you’re happy with the code above, paste it into the app/http/api/middlewares.py file.
You are using a module called g provided by Flask, which is a global context shared across the request life cycle. The middleware is checking whether or not the request is valid and if it is valid, the middleware will extract the authenticated user details and persist them in the global context.
Define Your Python API Endpoints
Your end goal is to implement a web application using Angular, which will run on browsers like Chrome and Firefox and will use AJAX to communicate with the REST API. Your first concern in this scenario is to make sure your backend supports browser’s Cross-Origin Resource Sharing (CORS) Preflight requests. It’s not in the scope of this tutorial to go through on how CORS works, so we’ll use a Python library to handle it for you.
pipenv install flask_cors==3.0.7
The HTTP handlers should be easy now since you have already done the important pieces of the backend, it’s just a matter of putting everything together. Go ahead and paste the content below into the app/http/api/endpoints.py file.
from .middlewares import login_required
from flask import Flask, json, g, request
from app.kudo.service import Service as Kudo
from app.kudo.schema import GitHubRepoSchema
from flask_cors import CORS

app = Flask(__name__)
CORS(app)

@app.route("/kudos", methods=["GET"])
@login_required
def index():
 return json_response(Kudo(g.user).find_all_kudos())


@app.route("/kudos", methods=["POST"])
@login_required
def create():
   github_repo = GitHubRepoSchema().load(json.loads(request.data))

   if github_repo.errors:
     return json_response({'error': github_repo.errors}, 422)

   kudo = Kudo(g.user).create_kudo_for(github_repo)
   return json_response(kudo)


@app.route("/kudo/<int:repo_id>", methods=["DELETE"])
@login_required
def delete(repo_id):
 kudo_service = Kudo(g.user)
 if kudo_service.delete_kudo_for(repo_id):
   return json_response({})
 else:
   return json_response({'error': 'kudo not found'}, 404)


def json_response(payload, status=200):
 return (json.dumps(payload), status, {'content-type': 'application/json'})
You have created three endpoints, all of them are being decorated with login_required with makes sure the request is authorized before going any further.
You should be able to run the REST API with the command below:
FLASK_APP=$PWD/app/http/api/endpoints.py FLASK_ENV=development pipenv run python -m flask run --port 4433
Create Your Angular App
To create your Angular Client-Side App, you will use Angular’s awesome CLI tool to bypass all the TypeScript-to-JavaScript build process hassle.
Installing Angular CLI is quite simple. You’ll use npm, make sure you either have it installed or use the dependency manager of your preference.
To install Angular CLI, run the command below.
npm install -g @angular/cli@10
Navigate to the app/http directory and use ng new to create an Angular application:
cd app/http
ng new web-app
Angular CLI will prompt you with two questions before creating all the files you need to start coding your front-end application. The first question is whether you want routing or not, you can type y to let the Angular CLI set up your application with routing enabled. The second question is which CSS flavor you will want, and you’ll pick SCSS.

Once Angular CLI finishes creating the files, you can now navigate to the newly created directory and spin up a web server.
cd web-app
ng serve --open --port 8080
Your goal now is to use Material Design to create a simple and beautiful UI. Thankfully, Angular has a mature library to help you in this journey, Angular Material has translated Material Design concepts into Angular components.
Run the following command to install what you will need:
ng add @angular/material
When prompted, accept the defaults.
Add the Angular Material components you’ll need as imports in src/app/app.module.ts:
import { MatCardModule } from '@angular/material/card';
import { MatButtonModule } from '@angular/material/button';
import { HomeComponent } from './home/home.component';
import { MatToolbarModule } from '@angular/material/toolbar';
import { MatTabsModule } from '@angular/material/tabs';
import { MatGridListModule } from '@angular/material/grid-list';
import { MatIconModule } from '@angular/material/icon';
import { MatInputModule } from '@angular/material/input';

@NgModule({
  ...
  imports: [
    ...
    BrowserAnimationsModule,
    MatCardModule,
    MatButtonModule,
    MatToolbarModule,
    MatTabsModule,
    MatGridListModule,
    MatIconModule,
    MatInputModule
  ],
  ...
})
export class AppModule { }
And the last step, remove all content in the app/http/web-app/src/app/app.component.html and paste the following content in:
<router-outlet></router-outlet>
Now you have components like MatToolbarModule, MatButtonModule, MatIconModule, MatCardModule, MatTabsModule, MatGridListModule and many more ready to be imported and used. You will use them soon. Let’s talk about protected routes.
Add Authentication to Your Angular App
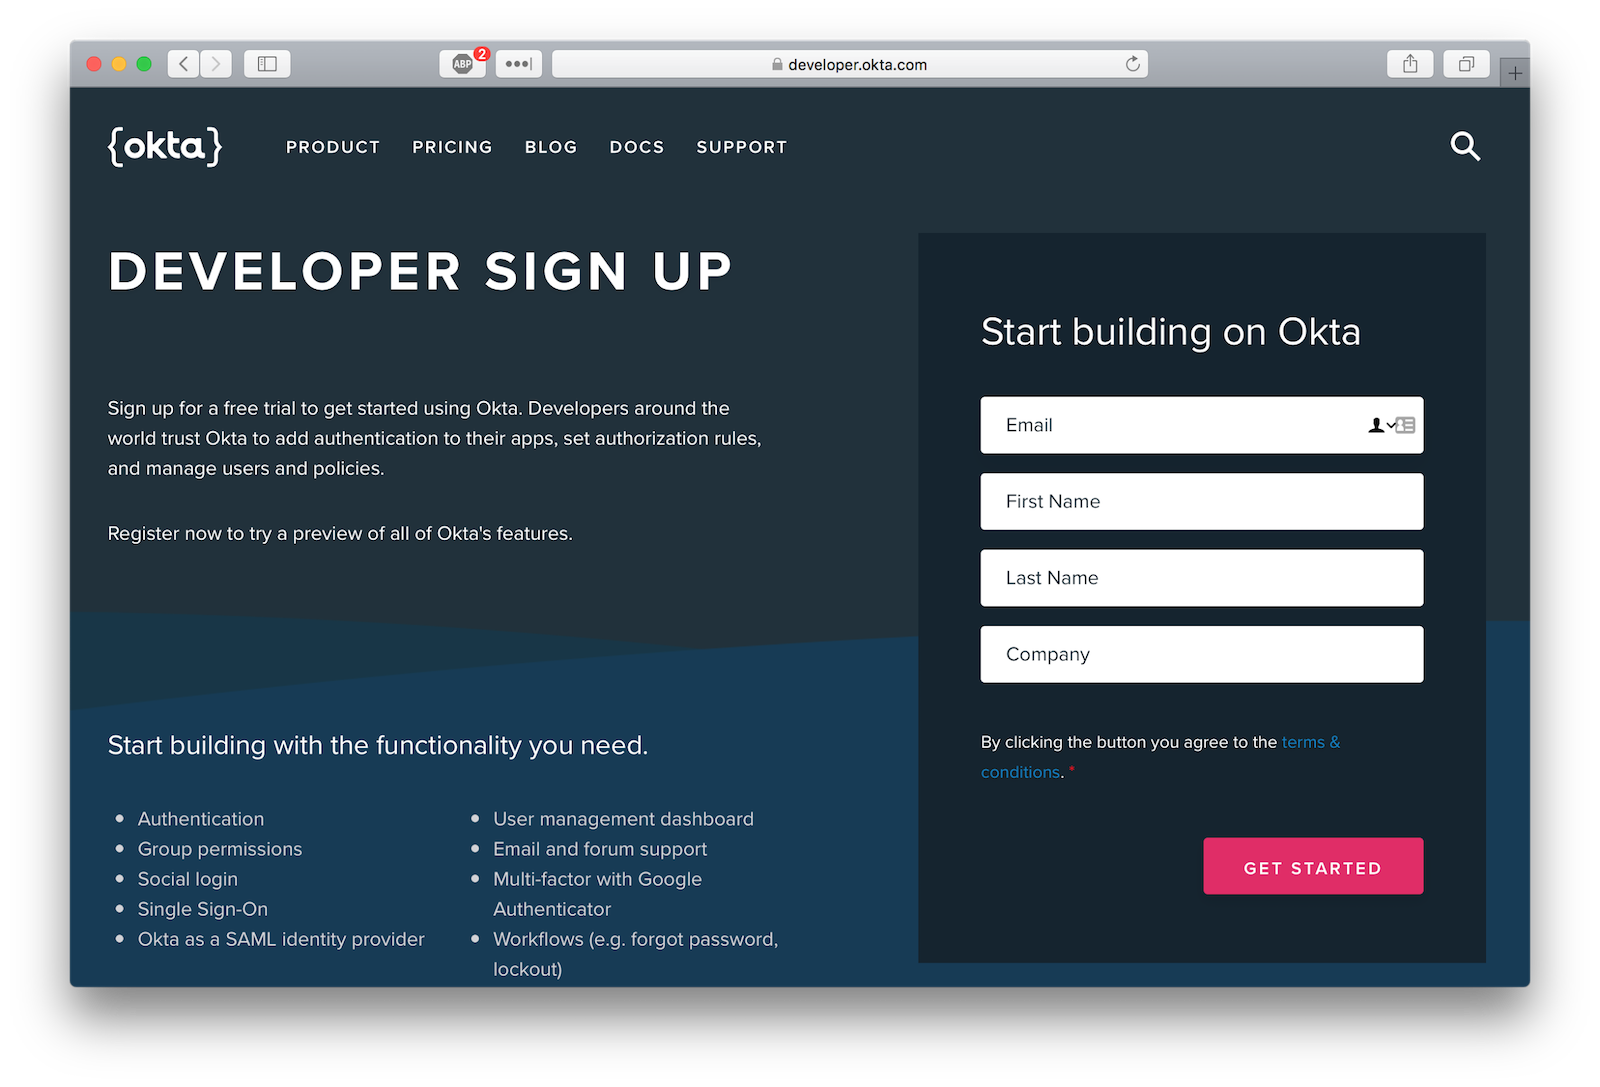
Writing secure user authentication and building login pages is easy to get wrong and can be the downfall of a new project. Okta makes it simple to implement all the user management functionality quickly and securely. Get started by signing up for a free developer account and creating an OpenID Connect application in Okta.
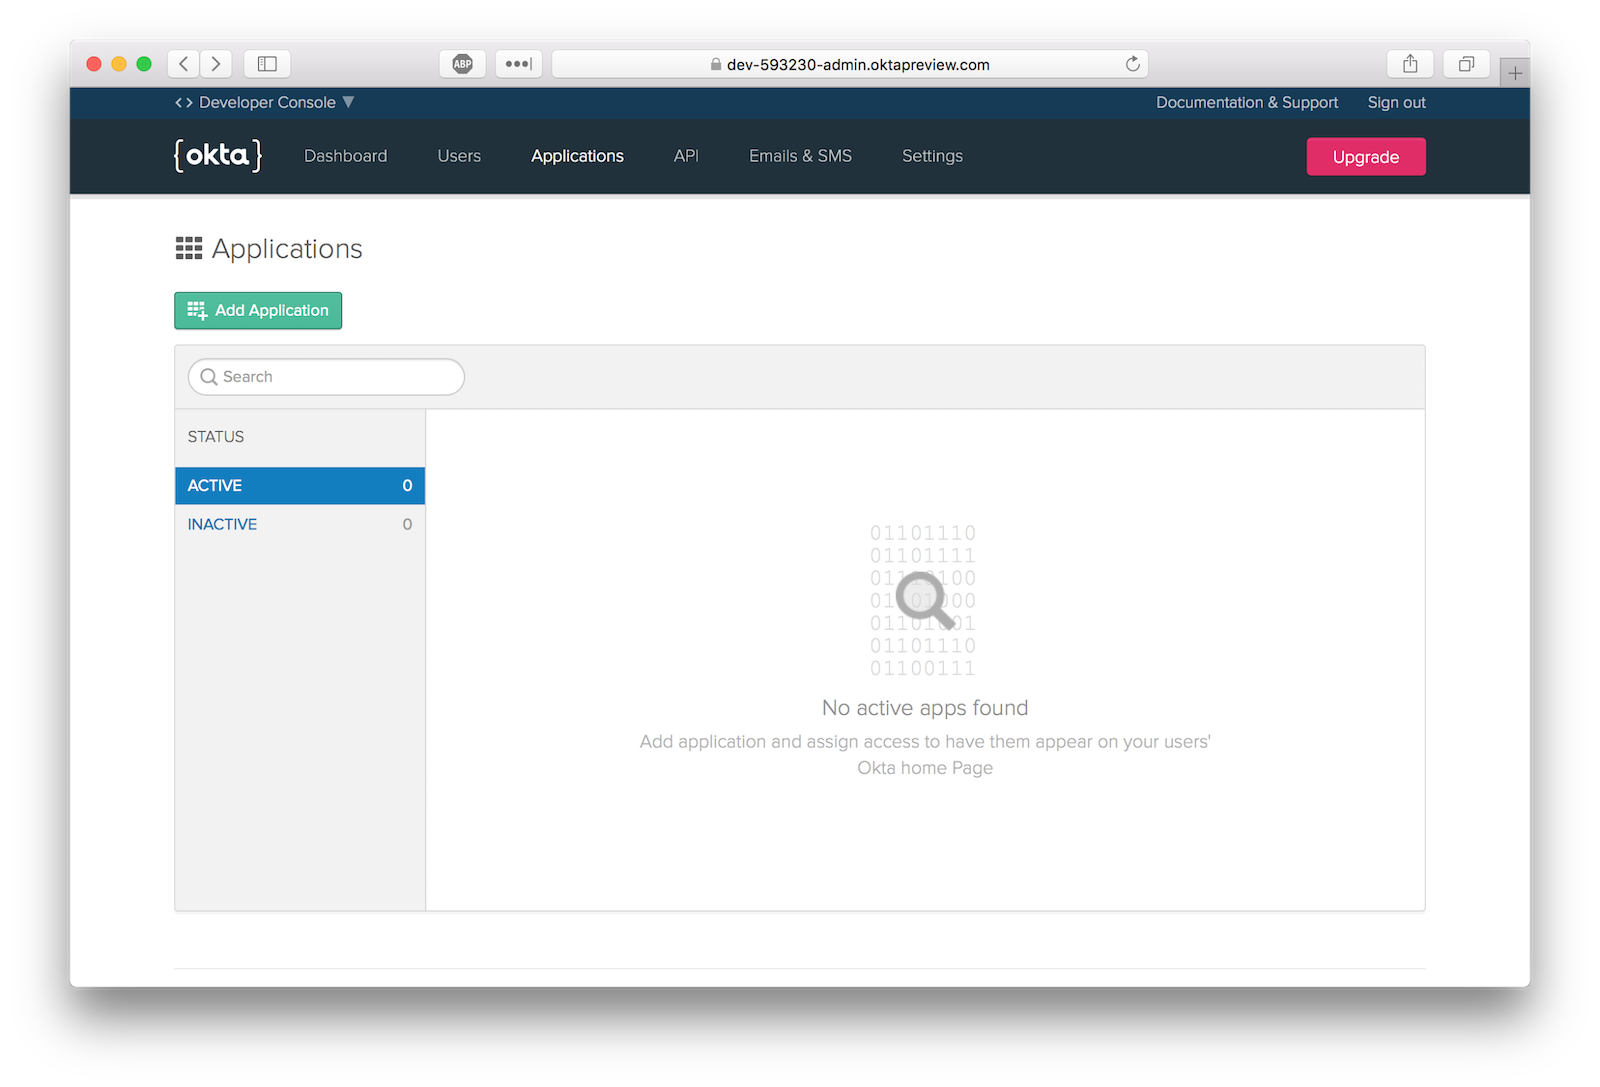
Once logged in, create a new application by clicking Add Application.
Select the Single-Page App platform option.
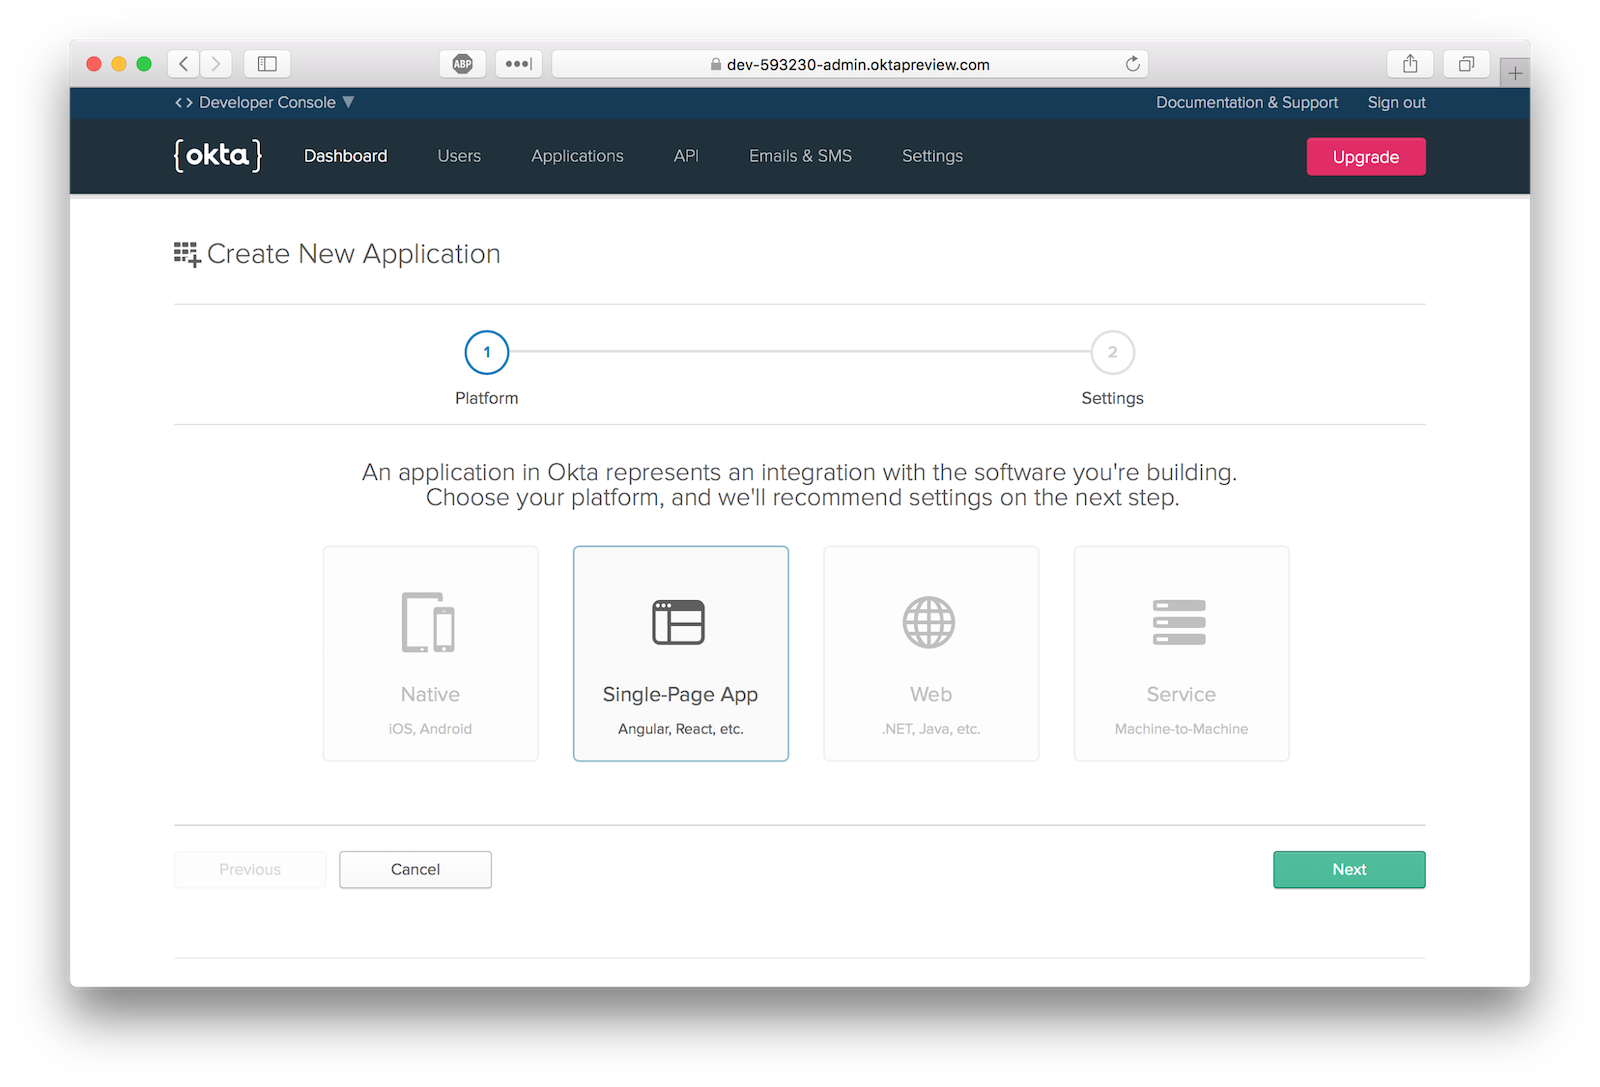
The default application settings should be the same as those pictured.
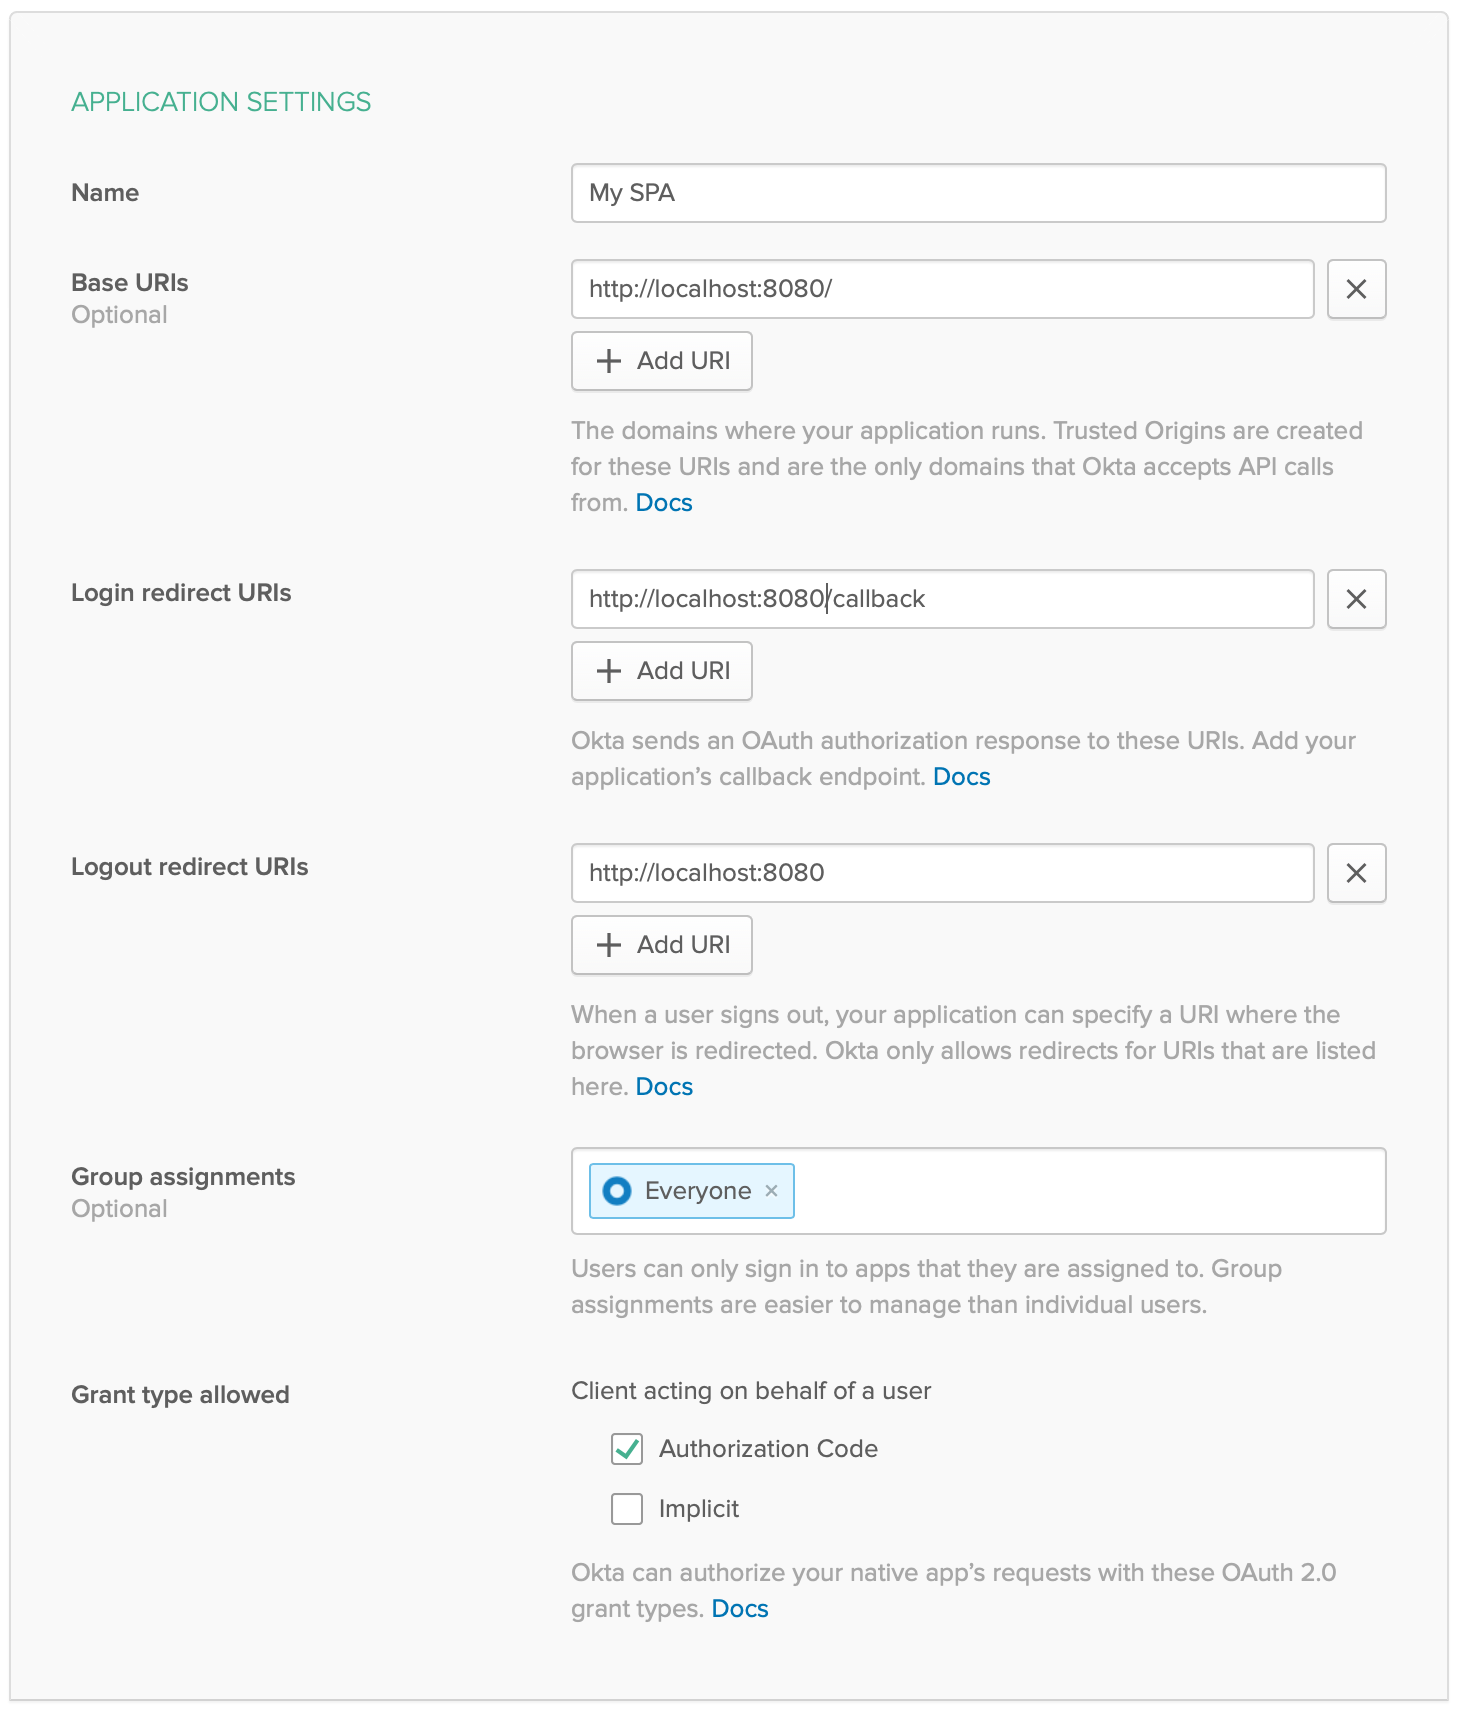
With your token OpenID Connect application in place, you can now move forward and secure the routes that require authentication.
Create Your Routes in Angular
You’ll use @angular/router, a library for routing URLs to Angular components.
Your Angular application will have two routes:
/ The root route does not require the user to be logged in, it actually is the landing page of your application. An user should be able to access this page in order to log in. You will use Okta Angular SDK to integrate your routes with Okta’s OpenID Connect API.
/home The Home route will render most of the components your application will have. It should implement the following user stories.
- An Authenticated User should be able to search through the GitHub API for the open source projects of his/her preferences
- An Authenticated User should be able to favorite an open source project that pleases him/her
- An Authenticated User should be able to see in different tabs his/her previously favorited open source projects and the search results
To install @okta/okta-angular run the command:
npm install @okta/okta-angular@2.2.0
Now go ahead and paste the following content into the src/app/app-routing.module.ts file.
import { NgModule } from '@angular/core';
import { Routes, RouterModule } from '@angular/router';
import { LoginComponent } from './login/login.component';
import { HomeComponent } from './home/home.component';
import { OKTA_CONFIG, OktaAuthModule, OktaCallbackComponent, OktaAuthGuard } from '@okta/okta-angular';
import { HttpClientModule } from '@angular/common/http';

const oktaConfig = {
  issuer: 'https://{yourOktaDomain}/oauth2/default',
  clientId: '{yourClientId}',
  redirectUri: window.location.origin + '/callback',
  scope: 'openid profile email'
}

const routes: Routes = [
 { path: '', component: LoginComponent },
 {
   path: 'home',
   component: HomeComponent,
   canActivate: [OktaAuthGuard],
 },
 { path: 'callback', component: OktaCallbackComponent },
];

@NgModule({
 imports: [
   RouterModule.forRoot(routes),
   HttpClientModule,
   OktaAuthModule
 ],
 providers: [
   { provide: OKTA_CONFIG, useValue: oktaConfig }
 ],
 exports: [RouterModule]
})
export class AppRoutingModule { }
Make sure to replace {yourOktaDomain} and {yourClientId} with the values from the app you created on Okta.
For the moment, don’t worry about the Login and Home components being imported. You will work on them soon. Focus on the OktaAuthModule, OktaCallbackComponent, and OktaAuthGuard components.
To guard a route with authentication anywhere in the application, you need to configure the route with canActivate: [OktaAuthGuard] component provided by Okta.
The OktaCallbackComponent is the route/URI destination to which the user will be redirected after Okta finishes the sign-in process, whereas OktaAuthModule will inject a service which exposes useful methods to access the authenticated user.
Add the Login Angular Component
You are now ready to create the Login component. This component will be accessible to all users (not only authenticated users). The main goal of the Login component is to authenticate the user.
Angular CLI has a useful generator to speed up component creation. Within the directory app/htpp/web-app, run the command below:
ng generate component login
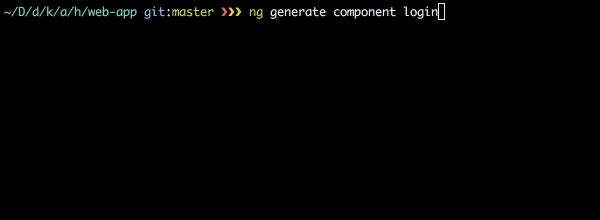
The ng generate component will not just create the component files, it will also configure your Angular application to properly inject the newly created component.
Go ahead and paste the following content into the src/app/login/login.component.ts file:
import { Component, OnInit } from '@angular/core';
import { OktaAuthService } from '@okta/okta-angular';
import { Router } from '@angular/router';

@Component({
  selector: 'app-login',
  templateUrl: './login.component.html',
  styleUrls: ['./login.component.scss']
})
export class LoginComponent implements OnInit {

  constructor(private oktaAuth: OktaAuthService, private router: Router) {
  }

  async ngOnInit() {
    const isAuthenticated = await this.oktaAuth.isAuthenticated();
    if (isAuthenticated) {
      this.router.navigate(['/home'], {replaceUrl: true})
    }
  }

  async login(event) {
    event.preventDefault();
    await this.oktaAuth.loginRedirect('/home');
  }
}
Then paste the following content into the src/app/login/login.component.html file:
<mat-card>
  <mat-card-content>
    <button mat-button (click)="login($event)" color="primary">Login</button>
  </mat-card-content>
</mat-card>
Here’s how the login process will work:
The user navigates to the landing page.
In the Login component you are using the Okta Angular SDK to check whether the user has already signed in or not. If the user has already signed in, they should be redirected to the /home route otherwise, he or she could click Login to then be redirected to Okta, authenticate, and be redirected to the home page.
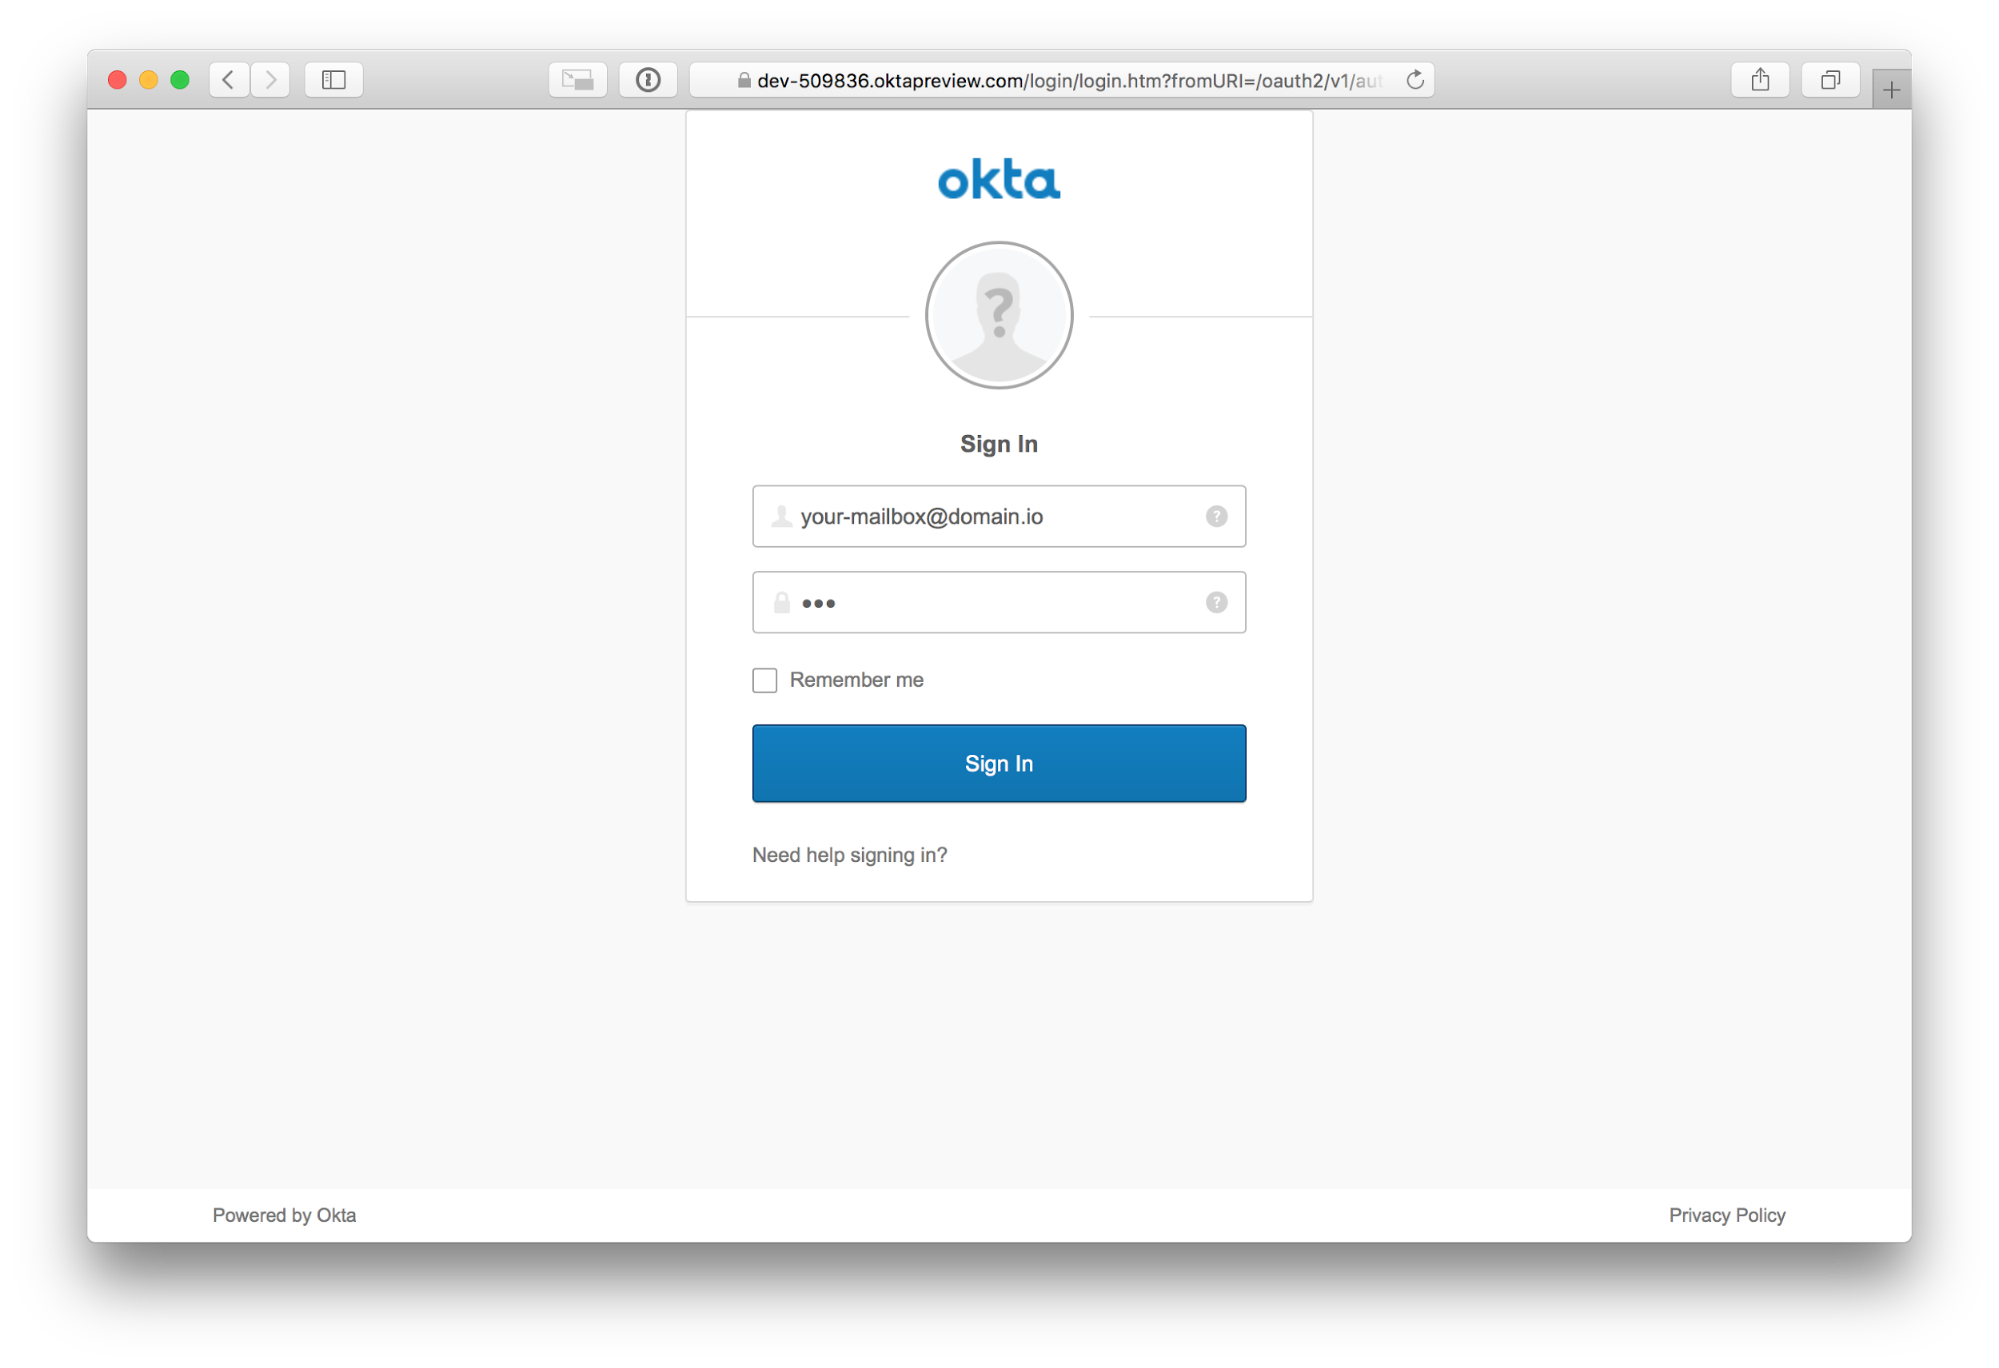
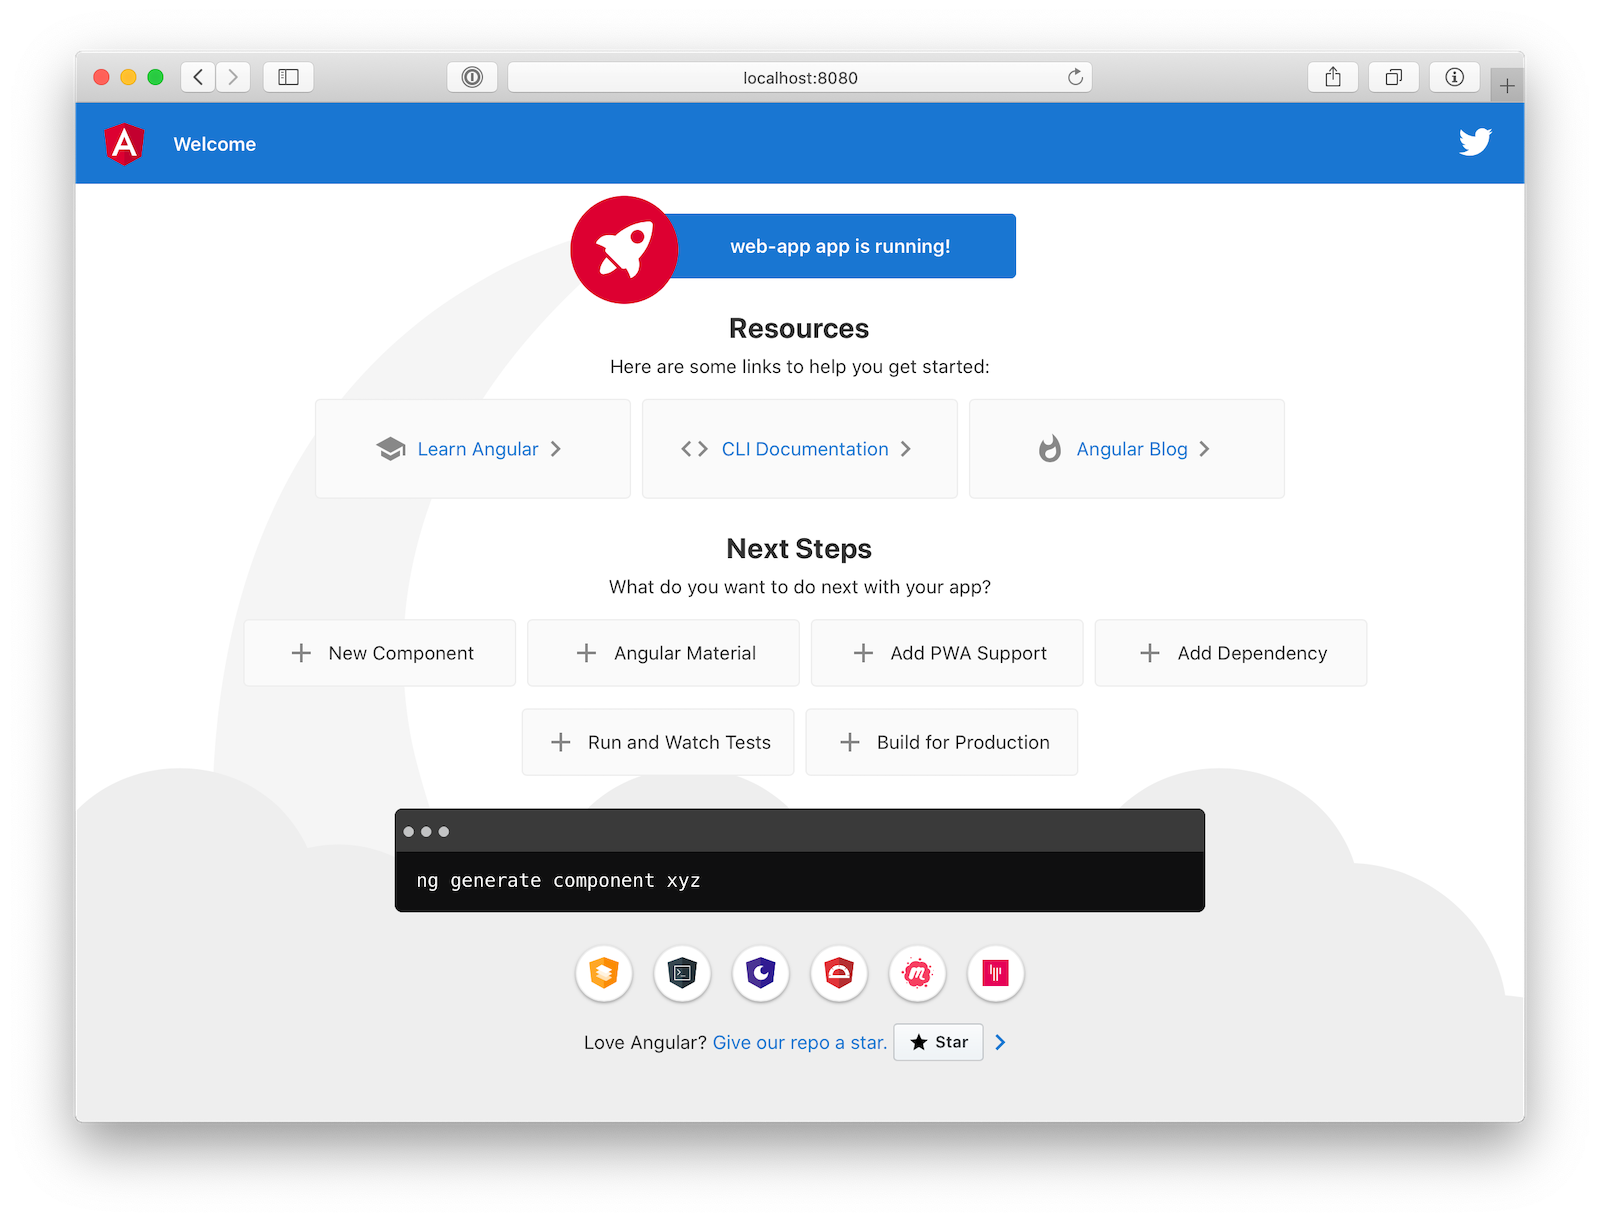
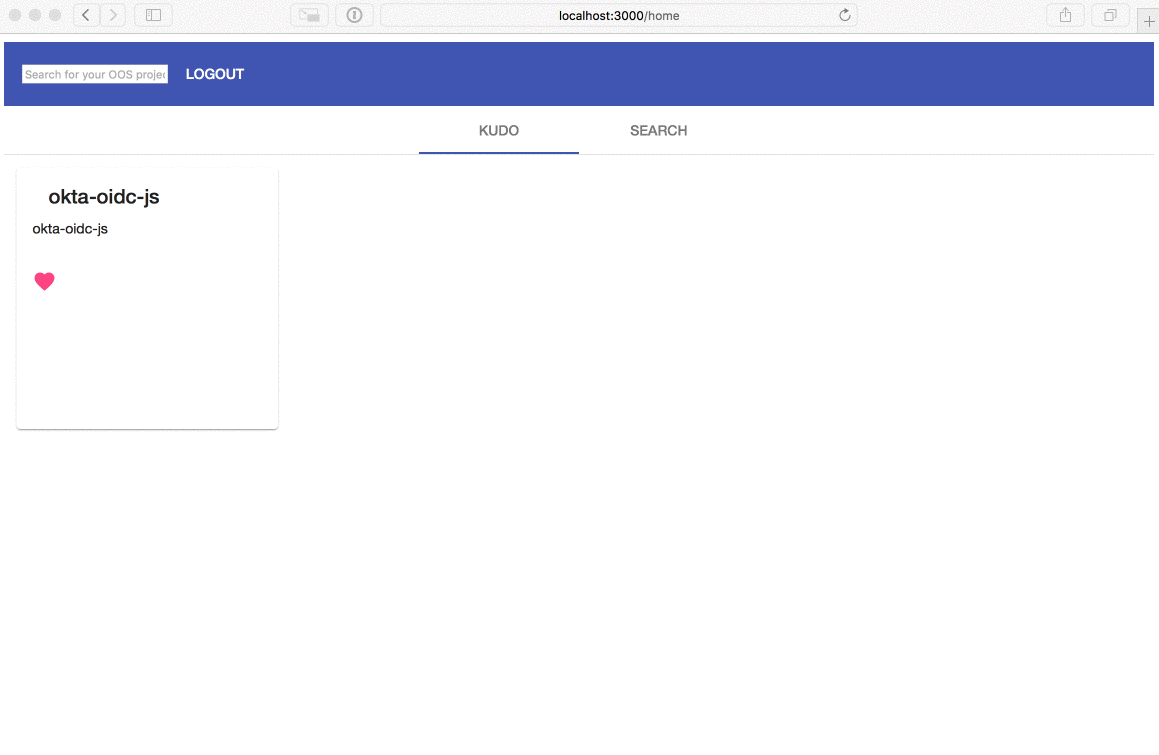
You will work on the Home component soon. After the sign in process finishes you should see:
Add Your Angular Home Component
Home is the main component of your application. It needs to list all favorited open source projects as well as the GitHub search results, which is done using Tabs.
Here’s how it works:
When the Home component is rendered, you should make an HTTP call to your Python REST API to get all the user’s favorite open-source repositories. @angular/core provides a module OnInit that a component can implement in order to have the ngOnInit method fired whenever the component is rendered. You will use ngOnInit to make the HTTP call to your Python REST API.
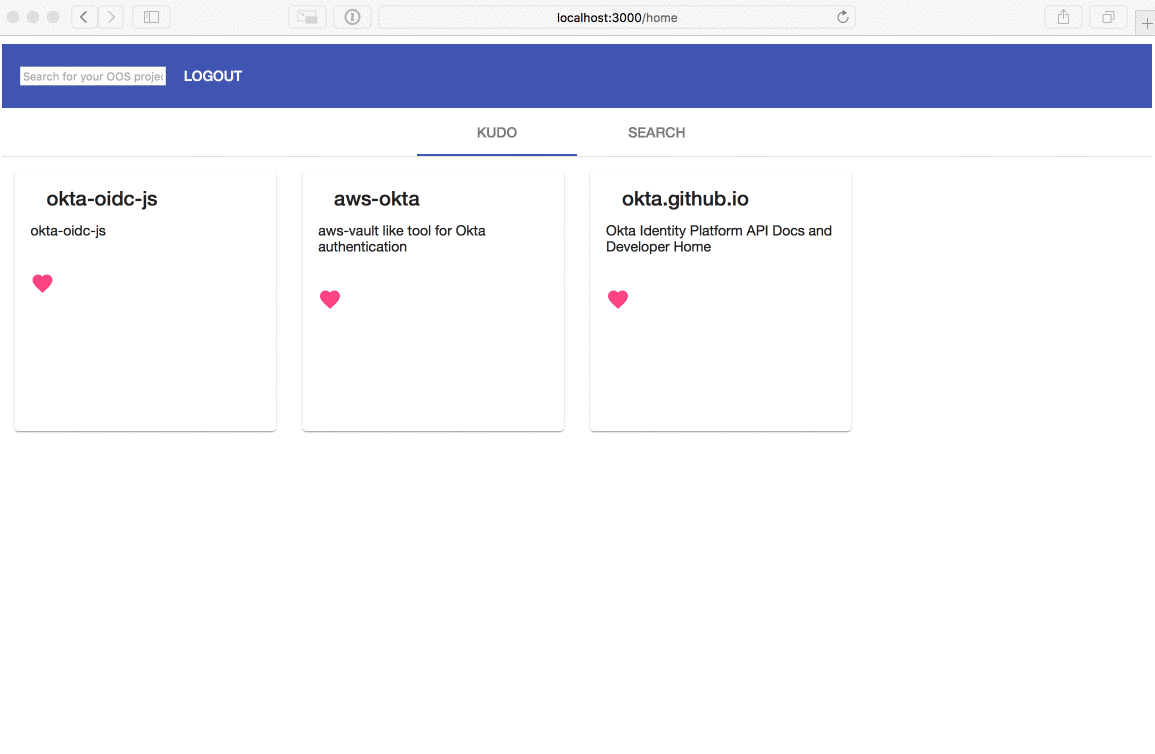
Users can type keywords into the text input on the top of the screen. The method onSearch will be called on the keyPress event of the input. Whenever the user types Return/Enter the method will perform a query against GitHub API.
Once GitHub responds with the list of open-source repositories, you are going to render all the repositories in the “SEARCH” tab. Then the user can favorite any of the repositories. Favoriting a repository will make an HTTP call to your REST API, persisting it to the database.
The Home component also takes care of logging the user out when the user clicks Logout. When this happens, all data related to the session will be wiped out and the user will be redirected to the landing page.
/home is an authenticated route, So if the user tries to access it without authenticating first they should be redirected to Okta’s login page.
ng generate component home
Paste the following content into the src/app/home/home.component.ts.
import { Component, OnInit } from '@angular/core';
import { OktaAuthService } from '@okta/okta-angular';
import { GitHubClientService } from '../gb-client.service';
import { ApiClientService } from '../api-client.service';

@Component({
  selector: 'app-home',
  templateUrl: './home.component.html',
  styleUrls: ['./home.component.scss']
})
export class HomeComponent implements OnInit {

  selectedTab: Number;
  repos: Array<any>;
  kudos: Array<any>;

  constructor(
    private oktaAuth: OktaAuthService,
    private githubClient: GitHubClientService,
    private apiClient: ApiClientService
  ) {
    this.selectedTab = 0;
    this.repos = [];
    this.kudos = [];
  }

  async ngOnInit() {
    this.apiClient.getKudos().then( (kudos) => {
      this.kudos = kudos;
    } )
  }

  async logout(event) {
    event.preventDefault();
    await this.oktaAuth.logout('/');
  }

  onSearch = (event) => {
    const target = event.target;
    if (!target.value || target.length < 3) { return; }
    if (event.which !== 13) { return; }

    this.githubClient
      .getJSONRepos(target.value)
      .then((response) => {
        target.blur();
        this.selectedTab = 1;
        this.repos = response.items;
      })
  }

  onKudo(event, repo) {
    event.preventDefault();
    this.updateBackend(repo);
  }

  updateState(repo) {
    if (this.isKudo(repo)) {
      this.kudos = this.kudos.filter( r => r['id'] !== repo.id );
    } else {
      this.kudos = [repo, ...this.kudos];
    }
  }

  isKudo(repo) {
    return this.kudos.find( r => r['id'] === repo.id );
  }

  updateBackend = (repo) => {
    if (this.isKudo(repo)) {
      this.apiClient.deleteKudo(repo);
    } else {
      this.apiClient.createKudo(repo);
    }
    this.updateState(repo);
  }
}
Then paste the following content into the src/app/home/home.component.html.
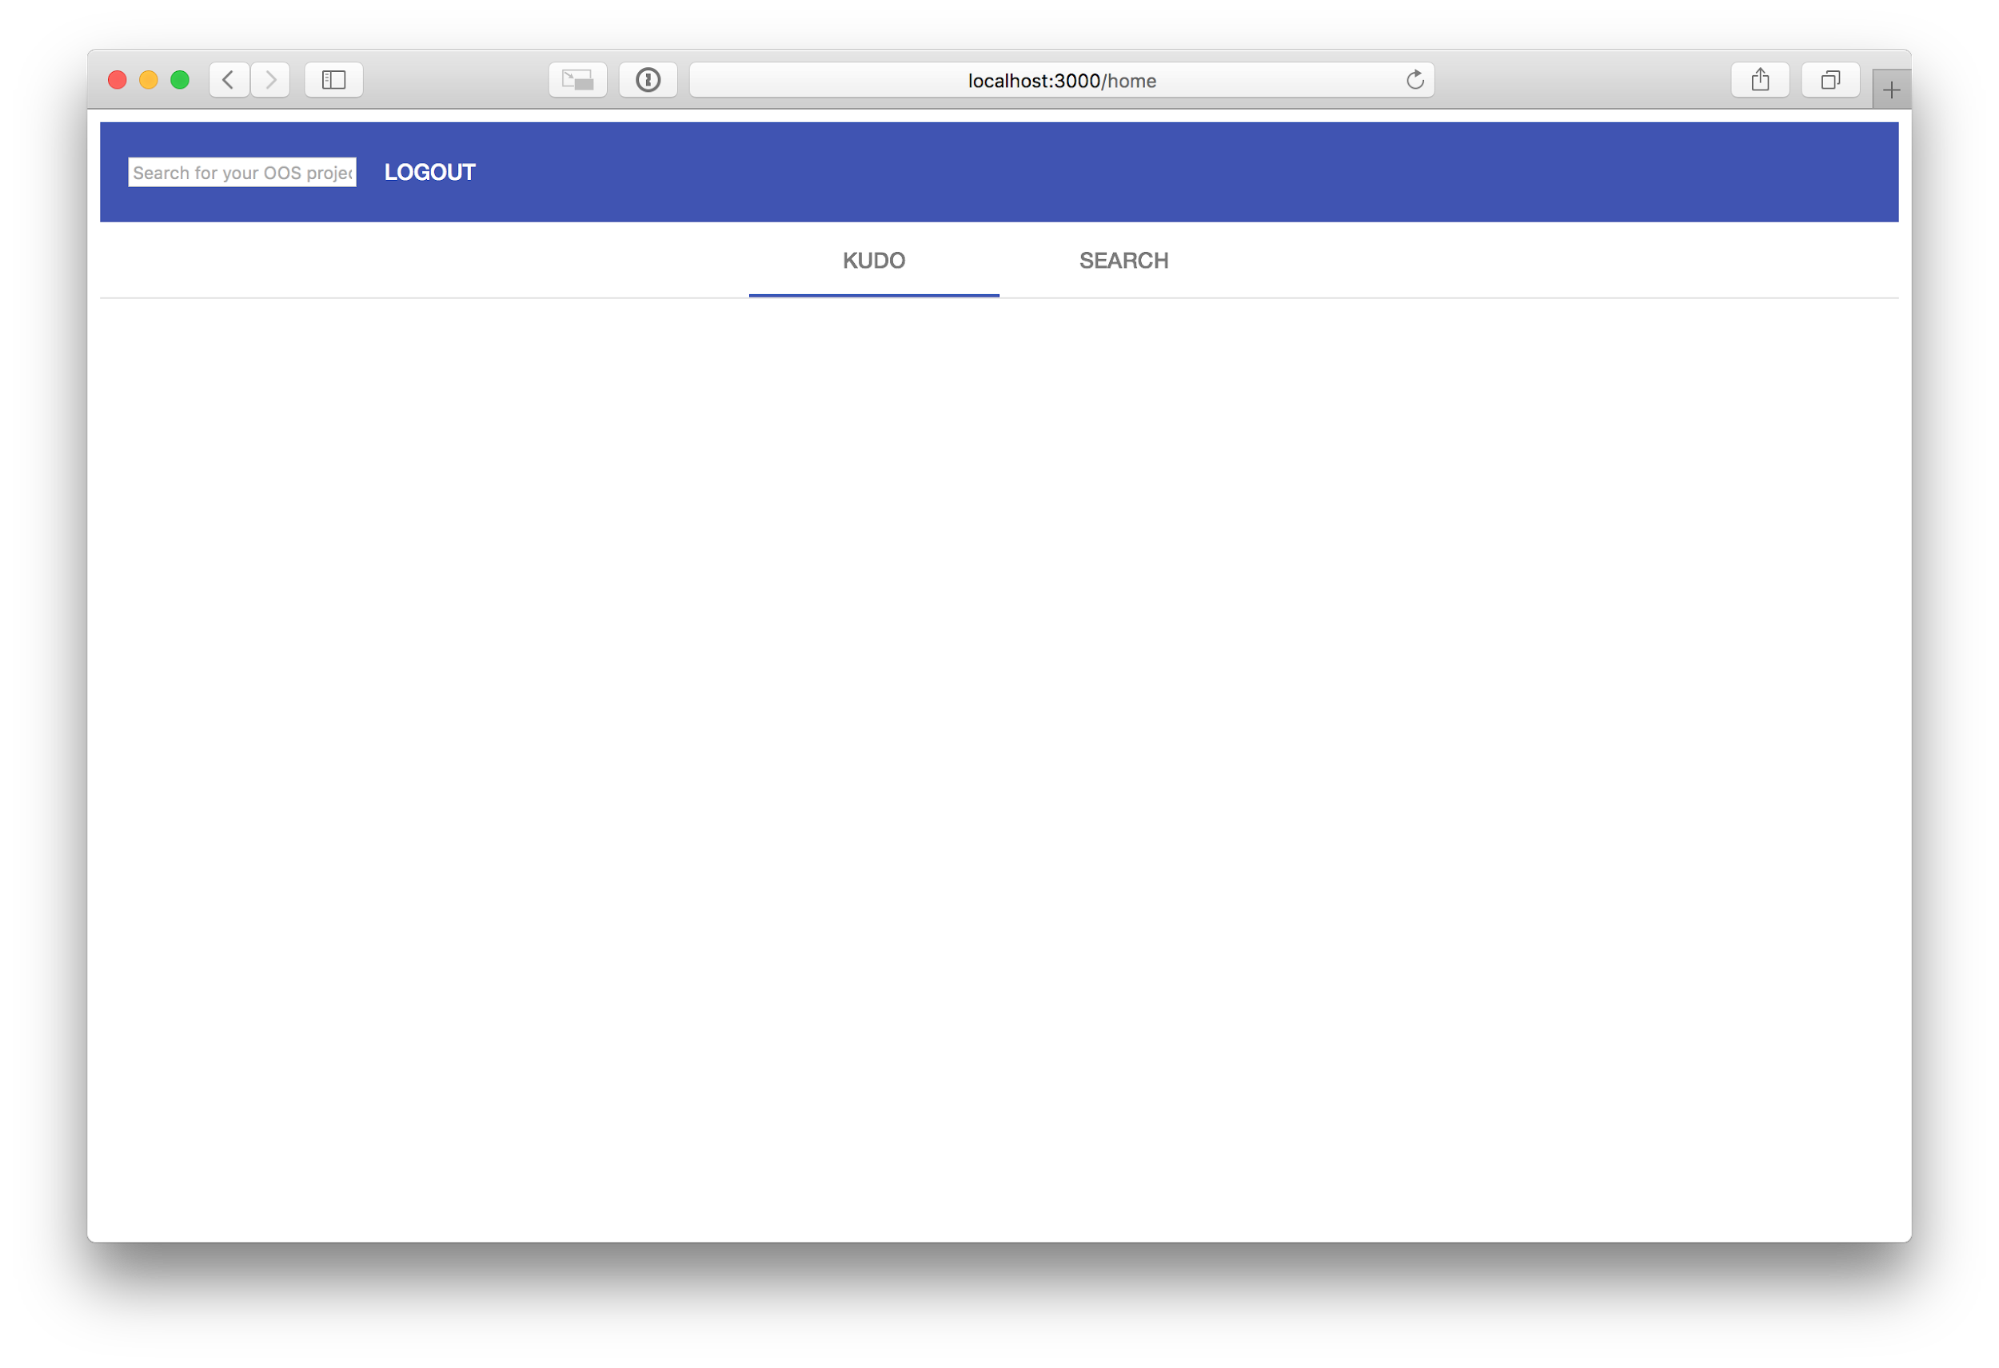
<mat-toolbar color="primary">
  <input matInput (keyup)="onSearch($event)" placeholder="Search for your OOS project on GitHub + Press Enter">
  <button mat-button (click)="logout($event)">LOGOUT</button>
</mat-toolbar>

<mat-tab-group mat-align-tabs="center" [selectedIndex]="selectedTab" dynamicHeight>
  <mat-tab label="KUDO">
    <mat-grid-list cols="4">
      <mat-grid-tile *ngFor="let repo of kudos" rowHeight='200px'>
        <mat-card class="card">
          <mat-card-header class="title">
            <mat-card-title>{{repo.full_name}}</mat-card-title>
          </mat-card-header>
          <mat-card-content>
            {{repo.description}}
          </mat-card-content>
          <mat-card-actions>
            <button mat-icon-button [color]="isKudo(repo) ? 'accent' : 'primary'" (click)="onKudo($event, repo)">
              <mat-icon>favorite</mat-icon>
            </button>
          </mat-card-actions>
        </mat-card>
      </mat-grid-tile>
    </mat-grid-list>
  </mat-tab>
  <mat-tab label="SEARCH">
    <mat-grid-list cols="4">
      <mat-grid-tile *ngFor="let repo of repos" rowHeight='200px'>
        <mat-card class="card">
          <mat-card-header class="title">
            <mat-card-title>{{repo.full_name}}</mat-card-title>
          </mat-card-header>
          <mat-card-content>
            {{repo.description}}
          </mat-card-content>
          <mat-card-actions>
            <button mat-icon-button [color]="isKudo(repo) ? 'accent' : 'primary'" (click)="onKudo($event, repo)">
              <mat-icon>favorite</mat-icon>
            </button>
          </mat-card-actions>
        </mat-card>
      </mat-grid-tile>
    </mat-grid-list>
  </mat-tab>
</mat-tab-group>
Call the Python API From Angular
Great! Now you will need to make HTTP calls to your Python REST API as well as to the GitHub REST API. The GitHub HTTP client will need to have a function to make a request to this URL: https://api.github.com/search/repositories?q=USER-QUERY. You are going to use the q query string to pass the term the user wants to query against GitHub’s repositories.
Angular CLI offers a nice generator for services. To create a GitHub client, run the following command:
ng generate service gbClient
Then, paste the following content into the src/app/gb-client.service.ts file:
import { Injectable } from '@angular/core';

@Injectable({
  providedIn: 'root'
})
export class GitHubClientService {

  constructor() { }

  getJSONRepos(query) {
    return fetch('https://api.github.com/search/repositories?q=' + query).then(response => response.json());
  }

  getJSONRepo(id) {
    return fetch('https://api.github.com/repositories/' + id).then(response => response.json());
  }
}
Now, you need to create an HTTP client to make HTTP calls to the Python REST API you’ve already implemented. Since all the requests made to your Python REST API require the user to be authenticated, you will need to set the Authorization HTTP Header with the acessToken provided by Okta.
ng generate service apiClient
Then, paste the following content into the src/app/api-client.service.ts file.
import { Injectable } from '@angular/core';
import { OktaAuthService } from '@okta/okta-angular';
import { HttpClient, HttpHeaders } from '@angular/common/http';

@Injectable({
  providedIn: 'root'
})
export class ApiClientService {
  constructor(private oktaAuth: OktaAuthService, private http: HttpClient) {
  }

  createKudo(repo) {
    return this.perform('post', '/kudos', repo);
  }

  deleteKudo(repo) {
    return this.perform('delete', `/kudo/${repo.id}`);
  }

  updateKudo(repo) {
    return this.perform('put', `/kudos/${repo.id}`, repo);
  }

  getKudos() {
    return this.perform('get', '/kudos');
  }

  getKudo(repo) {
    return this.perform('get', `/kudo/${repo.id}`);
  }

  async perform(method, resource, data = {}) {
    const accessToken = await this.oktaAuth.getAccessToken();
    const url = `http://localhost:4433${resource}`;

    const httpOptions = {
      headers: new HttpHeaders({
        'Content-Type': 'application/json',
        'Authorization': `Bearer ${accessToken}`
      })
    };

    switch (method) {
      case 'delete':
        return this.http.delete(url, httpOptions).toPromise();
      case 'get':
        return this.http.get(url, httpOptions).toPromise();
      default:
        return this.http[method](url, data, httpOptions).toPromise();
    }
  }
}
Now you can run both the Angular frontend and Python backend together to see the final result.
If you need to start the Python REST API run:
FLASK_APP=$PWD/app/http/api/endpoints.py FLASK_ENV=development pipenv run python -m flask run --port 4433
Then start the Angular application:
cd app/http/web-app && ng serve --open --port 8080
As you might have noticed, your Python REST API is listening to the port 4433 while the Angular application is being served by a process on port 8080.
Learn More About Angular, Python, and Flask
In this tutorial, I have guided you through the development of a single page web application using Angular and Python. Using just a few lines of code you were able to implement user authentication for the client and the server. Angular makes use of TypeScript which is a superset of the JavaScript language and adds type information.
You can find the source code for this example on GitHub in the oktadeveloper/okta-python-angular-crud-example repository.
If you’re ready to learn more about Angular we have some other resources for you to check out:
- Angular 6 - What’s New and Why Upgrade?
- Build a Basic CRUD App with Angular 7 and Spring Boot
- Build a Simple CRUD App with Python, Flask, and React
And as always, we’d love to have you follow us for more cool content and updates from our team. You can find us on Twitter @oktadev, on Facebook, and LinkedIn.
- Sep 1, 2020: Updated to use Angular 10. Changes to this article can be viewed in oktadeveloper/okta-blog#400.
Matt Raible is a well-known figure in the Java community and has been building web applications for most of his adult life. For over 20 years, he has helped developers learn and adopt open source frameworks and use them effectively. He's a web developer, Java Champion, and Developer Advocate at Okta. Matt has been a speaker at many conferences worldwide, including Devnexus, Devoxx Belgium, Devoxx France, Jfokus, and JavaOne. He is the author of The Angular Mini-Book, The JHipster Mini-Book, Spring Live, and contributed to Pro JSP. He is a frequent contributor to open source and a member of the JHipster development team. You can find him online @mraible and raibledesigns.com.
Okta Developer Blog Comment Policy
We welcome relevant and respectful comments. Off-topic comments may be removed.