Build and Test a React Native App with TypeScript and OAuth 2.0

React Native is one of the most popular ways of creating mobile apps. Building on the success of React, it ties together native components for both Android and iOS using a shared JavaScript code-base. However, JavaScript has come under fire recently for not being type safe which can lead to a loss of developer trust. Enter TypeScript, which allows type annotations to be added to existing JavaScript code.
One requirement of many mobile apps is authentication (aka authn - confirming user identity) and authorization (authz - confirming access rights). Implementing this through the OAuth 2.0 standard allows integration with all the major third-party authn / authz services. It’s also imperative to create automated tests to check that core functionality has not been broken.
In this tutorial you’ll create an empty React Native project, add OAuth capabilities with React Native App Auth, port the project over to TypeScript, and finally add testing using the React Test Renderer.
Note: In May 2025, the Okta Integrator Free Plan replaced Okta Developer Edition Accounts, and the Okta CLI was deprecated.
We preserved this post for reference, but the instructions no longer work exactly as written. Replace the Okta CLI commands by manually configuring Okta following the instructions in our Developer Documentation.
Create a React Native Project
The latest version of the official getting started guide recommends using Expo to create initial projects, but I found Expo to be quirky to setup. The old way is using the command-line tool (CLI). Check out the Building Projects with Native Code tab in the aforementioned guide to get details of setting this up.
Once you have installed Node (at least 8.3 - and I recommend using the LTS version) you should be able to install the React Native CLI with npm.
npm install -g react-native-cli@2.0.1
Once done you should have a command react-native available to create a new project.
react-native init ReactNativeTypeScript
This will install the latest version of React Native (currently 0.57.4) into the ReactNativeTypeScript folder. Change into that folder and run react-native run-android.
cd ReactNativeTypeScript
react-native run-android
If you don’t have a phone plugged in or an Android Virtual Device (AVD) running, you’ll see an error:
com.android.builder.testing.api.DeviceException: No connected devices!
To fix this, open Android Studio, and create a new AVD. You can do this by navigating to Tools > Android > AVD Manager. Create a new Virtual Device and click the play button.
This will build and install the skeleton app on either a connected Android device or an emulator if it is connected. Similarly for react-native run-ios. If you get stuck here, check out the getting started guide I mentioned above (specifically the Building Projects with Native Code tab).
Create a Native Application in Okta
To make adding authentication and authorization simple, we’ll use Okta in this tutorial. You can sign-up for a free Okta developer account here. When that’s done, log in and navigate to Applications > Add Application. Select Native and click Next. Choose a name, select Refresh Token and click Done.
Note your Login redirect URI and the Client ID since you’ll be adding them to your app.
Add AppAuth to Your Project
For authentication we’re going to use the react-native-app-auth library, using their example project as a basis. First clone the repository to a local directory.
git clone https://github.com/FormidableLabs/react-native-app-auth
Then inside of your project folder (ReactNativeTypeScript) install the required extra libraries.
npm install react-native-app-auth@4.0.0
react-native link react-native-app-auth
The last command links native code into your project.
npm install styled-components@4.1.1
This library is used in the example code. Now modify your App.js to what is inside of the example code at Example/AndroidExample/App.js, and copy the assets and component folders from the example into your project.
cp ../react-native-app-auth/Example/AndroidExample/App.js .
cp -r ../react-native-app-auth/Example/AndroidExample/assets .
cp -r ../react-native-app-auth/Example/AndroidExample/components .
Now add the following to the defaultConfig section of the android config in android/app/build.gradle, using the base of your Redirect URL, e.g. com.oktapreview.dev-628819.
manifestPlaceholders = [
      appAuthRedirectScheme: '{redirectBase}'
]
Lastly, modify the config section of your App.js to include your Okta app information.
const config = {
  issuer: 'https://{yourOktaDomain}'/oauth2/default,
  clientId: '{clientId}',
  redirectUrl: '{redirectUrl}',
  additionalParameters: {prompt: 'login'},
  scopes: ['openid', 'profile', 'email', 'offline_access']
};
If you see {yourOktaDomain} as the issuer above, you can find this value on the Okta dashboard. If you don’t see this variable, it’s because this site is smart enough to fill it in for you. The values for clientId and redirectUrl you can get from your Okta app.
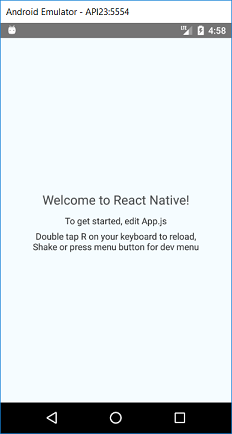
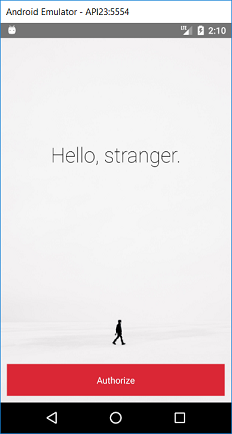
After running react-native run-android you should get the following.
Note: I got several errors about unable to delete on the console which I fixed by cleaning the android project:
cd android
gradlew clean
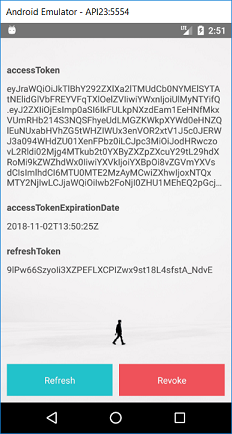
When you click on Authorize you should see a page detailing about the tokens being used for authentication.
TIP: You can reload your app’s code in the Android Emulator using CTRL + M (Command + M on Mac)..
Port Your React Native App to TypeScript
One common way of using TypeScript in React Native is by using a tool like react-native-typescript-transformer
But in September of this year, Facebook released React Native 0.57 which includes Babel 7 that has TypeScript support, so you can use it out of the box. All you have to do is rename your App.js to App.tsx and React Native will pick up the changes.
mv App.js App.tsx
You also need to modify App.tsx and change the State variable to the following:
type State = {
  hasLoggedInOnce: boolean,
  accessToken?: string,
  accessTokenExpirationDate?: string,
  refreshToken?: string
};
The question marks were moved back to before the colon. This is how TypeScript identifies optional parameters (as opposed to Flow, which is what the react-native init command uses to set up a skeleton project).
Running the project again should start and operate as before.
react-native run-android
NOTE: If you get an error like Module not registered in graph, close down the packager window before re-running run-android.
Test your React Native Application
The standard way of testing React Native is using Jest and the React Test Renderer, both of which come included in projects created with react-native init. However, you need to set things up to work with TypeScript.
First, move the contents of .babelrc into babel.config.js and then delete .babelrc.
module.exports = {
  "presets": ["module:metro-react-native-babel-preset"]
};
Next, put the following into jest.config.js:
const { defaults: tsjPreset } = require('ts-jest/presets');

module.exports = {
  ...tsjPreset,
  preset: 'react-native',
  transform: {
    ...tsjPreset.transform,
    '\\.js$': '<rootDir>/node_modules/react-native/jest/preprocessor.js',
  },
  globals: {
    'ts-jest': {
      babelConfig: true,
    }
  },
  // This is the only part which you can keep
  // from the above linked tutorial's config:
  cacheDirectory: '.jest/cache',
};
Next, create a folder called __tests__ and inside create a file called Component-tests.js:
import Page from '../components/Page';
import Form from '../components/Form';
import Heading from '../components/Heading';

import React from 'react';
import renderer from 'react-test-renderer';

test('Page renders correctly', () => {
  const tree = renderer.create(<Page />).toJSON();
  expect(tree).toMatchSnapshot();
});

test('Form renders correctly', () => {
  const tree = renderer.create(<Form />).toJSON();
  expect(tree).toMatchSnapshot();
});

test('Heading renders correctly', () => {
  const tree = renderer.create(<Heading />).toJSON();
  expect(tree).toMatchSnapshot();
});
Here you are pulling in various components and checking that they render correctly. Now install ts-jest and typescript:
npm install -D ts-jest typescript
Create a folder called src and move App.tsx into it, modifying the components import so that it finds it correctly
import { Page, Button, ButtonContainer, Form, Heading } from '../components';
Also, change index.js in the root folder to import ./src/App:
/** @format */

import {AppRegistry} from 'react-native';
import App from './src/App';
import {name as appName} from './app.json';

AppRegistry.registerComponent(appName, () => App);
Now running npm test should check that the Page, Form and Heading components render correctly.
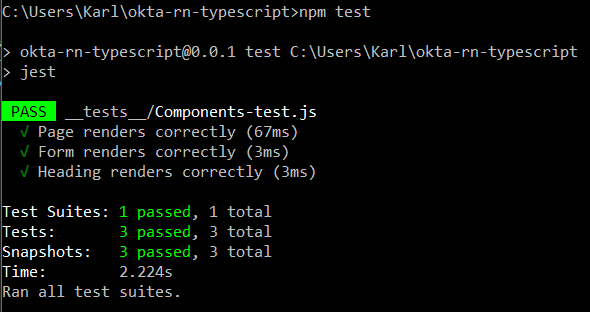
In these tests, you are just checking whether certain components render correctly. Ideally, you’d want to check that authentication works using something like the Detox end-to-end testing framework. However, there is currently an issue with the latest Android. Hopefully, this will be fixed soon.
React Native + TypeScript = Win!
Congrats! You’ve created a React Native app with TypeScript from scratch, with authentication and authorization (through Okta), and automated tests!
You can find the source code for this tutorial at https://github.com/oktadeveloper/okta-react-native-typescript-example.
If you’re interested to know more about TypeScript, React Native or secure user management with Okta, check out the following resources:
- Use TypeScript to Build a Node API with Express
- Build a Secure Notes App with Kotlin, Typescript, and Okta
- Build a React Native App and Authentication with OAuth 2.0
Like what you learned today? Follow us on Twitter, like us on Facebook, check us out on LinkedIn, and subscribe to our YouTube channel.
Okta Developer Blog Comment Policy
We welcome relevant and respectful comments. Off-topic comments may be removed.