Build Your First Router in Node with Express

If you’ve done any web development with Node in the last few years, you’ve probably used Express. Even if you haven’t used it directly, many frameworks meant to make web development even simpler are still built on Express.
One of the key features in Express is the ability to create routes. An infinite combination of URLs can hit the same Express server, and routes are how you can determine which URLs run what piece of code. You can have parameters and wildcards so that you don’t have to explicitly state each endpoint.
In this tutorial, I’ll walk you through creating a server and teach you all you need to know about routes in Express.
Note: In May 2025, the Okta Integrator Free Plan replaced Okta Developer Edition Accounts, and the Okta CLI was deprecated.
We preserved this post for reference, but the instructions no longer work exactly as written. Replace the Okta CLI commands by manually configuring Okta following the instructions in our Developer Documentation.
What is a Route in Express?
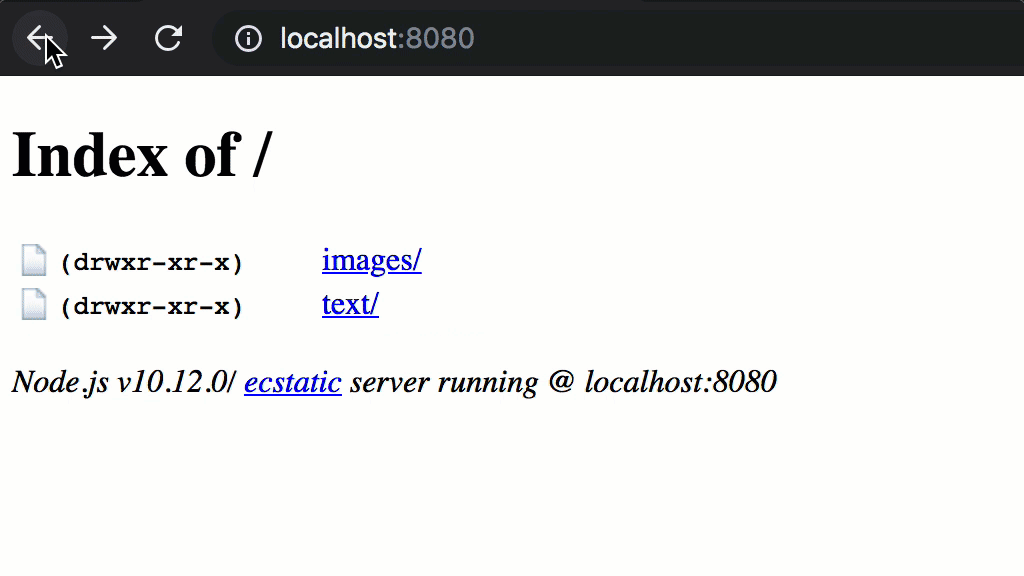
Routes determine what data should be delivered given any URL. Let’s take the most basic file server as an example. Say you have a file structure of:
files/
├── images/
│   ├── cat.png
│   ├── dog.jpg
│   └── pig.bmp
└── text/
    ├── README.md
    └── todo.txt
You could then run a simple HTTP server that will automatically serve those files and create an index for the directories. There’s no files/index.html, but the server is still generating a web page and serving up content based on the files in that folder. If you go to /images/cow.gif you’ll get a 404 error - even though there’s no file there, it’s still serving up something.
npm install -g http-server
cd files
http-server
In Express, a route consists of a method, a path, and a handler.
Methods, Paths, and Handlers, Oh My!
The method could be any HTTP verb, such as GET (for fetching content - this is what most web pages use), or POST (for sending content to the server - this is common with HTML forms). You can also specify that you want Express to handle the same path for all methods if you choose.
The path is a string or a regular expression that describes the relative URL. If you’re working with the root of your app, this describes the absolute URL. A path can be defined in a few ways.
- Simple Strings: A string of
'/'specifies that you want to use this route at the root of your router. A string of'/asdf'would cover the path/asdf - Wildcards: The string can also contain a few wildcards, which work similar to a regular expression, but are a bit limited:
?: A?says that the previous character is optional. The path'/Joh?n'would cover both/Jonand/John+: A+says that the previous character can be repeated as many times as you like, but has to be at least once. A path of'/ni+ce'would cover/niceas well as/niiiiiiiiiiiiiiiiice*: A*says that the previous character is optional and can be repeated as often as you like. A path of'/wow!*'would match/wow,/wow!, or even/wow!!!!!!!!!!!!(): You can also apply wildcards to a group of characters.'/(ha)+'would match/ha,/haha, and/hahahahaha, but not/hah
- Regular Expressions: If you want to go beyond basic wildcards, you can go nuts with a regular expression. With
/^\/(pen-)?((pine)?apple-)+pen$/you could match/apple-pen,/pineapple-pen, or/pen-pineapple-apple-pen. - Parameters: Another very useful feature, is you can have parameters in your route. This lets you easily provide RESTful URLs with dynamic portions. A path of
'/posts/:postId'will not only match/posts/42, but the request will contain aparams.postIdvariable with a value of'42'.
The method and path are essential to know when to do something, but the handler is the callback function that actually gets called in those cases. A handler is passed a request, a response, and a next callback, and those arguments are typically written as (req, res, next)..
- Request (
req): The request contains all kinds of information about what’s been asked by the user. From here you can access the path, parameters, headers, and a myriad of other things. For everything on a request, you can consult the API reference - Response (
res): The response is how you send information back to the user. The simplest way to send back data is with the.sendmethod (e.g.res.send('Hello, world!')), but there are many other methods. Again, you can find all the methods in the API reference - Next Callback (
next): Thenextfunction allows you to use multiple handlers for the same route. You can use one handler to process information, and when it’s done it can callnext()to signal it’s OK to move on to the next handler. If you pass in a string, it will instead throw an error, which you can catch elsewhere, or display to the user (e.g.next('You must be authenticated to access this route')).
What is a Router in Express?
Now that you’re a little more familiar with routes, how is that different from a router? You can think of a router as a collection of routes. This can be a useful way to organize different sections of your app.
When using a router, you can think in terms of a root path, even if you’re going to be using that router from some subpath. For example, say you have an API to manage messages. You could have a router with a path '/' to GET all messages or POST a new message. You could have another path '/:id' to GET or PUT (edit) a specific message.
Your app could then take that router and host it at /messages, with app.use('/messages', messageRouter). The router itself doesn’t have to care what its global path is going to be, and can even be used in multiple routes (e.g. /messages, /texts, and /email).
Create a Simple App with a Router in Node with Express
Enough talk already… let’s get to some real code. To get started, create a folder that will house all your code. Then set up a package.json folder to help manage dependencies. You can use npm init to do this. You’ll also need to install Express.
mkdir my-first-router
cd my-first-router
npm init -y
npm install express@4.16.4 hbs@4.0.1
Create an index.js file with the following code:
index.js
const express = require('express')
const path = require('path')
const app = express()
app.set('views', path.join(__dirname, 'views'))
app.set('view engine', 'hbs')
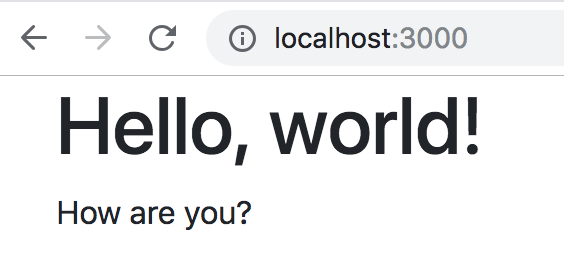
app.get('/', (req, res) => {
res.render('index', {
title: 'Hello, world!',
content: 'How are you?'
})
})
const port = process.env.PORT || 3000
app.listen(port, () => console.log(`App listening on port ${port}`))
This tells Express to use Handlebars (hbs) as a view engine. It uses Node’s built-in path to tell it the directory containing the views. The / path is told to render the page using index.hbs, which will put the content in a paragraph (p) tag.
To make sure Express has templates to render, create a new folder called views, then create a new file in there called layout.hbs. When you tell Express to render a view, it will first render layout.hbs and put the content of the view inside the {{{body}}} tag. This lets you set up a skeleton for the app. Here’s some basic HTML using Bootstrap that will give you some nice styling without needing to write any CSS. This will also render the title passed into the context in your / route.
views/layout.hbs
<!doctype html>
<html lang="en">
  <head>
    <!-- Required meta tags -->
    <meta charset="utf-8">
    <meta name="viewport" content="width=device-width, initial-scale=1, shrink-to-fit=no">

    <!-- Bootstrap CSS -->
    <link rel="stylesheet" href="https://stackpath.bootstrapcdn.com/bootstrap/4.1.3/css/bootstrap.min.css" integrity="sha384-MCw98/SFnGE8fJT3GXwEOngsV7Zt27NXFoaoApmYm81iuXoPkFOJwJ8ERdknLPMO" crossorigin="anonymous">

    <title>{{title}}</title>
  </head>
  <body>
    <h1>{{title}}</h1>
    <main>
      {{{body}}}
    </main>
  </body>
</html>
You’ll also need to create a index.hbs view that will just be really basic for now:
views/index.hbs
<p>{{content}}</p>
To make development a little easier, you can install nodemon with:
npm install --save-dev nodemon@1.18.4
Then modify your package.json file so that the "scripts" entry includes a start script with nodemon .. This will make it so that you can simply run npm start and your server will automatically restart whenever you make changes:
"scripts": {
  "start": "nodemon ."
}
Now in your terminal, if you type npm start you’ll start the server. You can then go to http://localhost:3000 to see the app running.
Create a Router in Express
Well, that’s kind of boring. How about making it do something useful? Let’s create a simple to-do list. Start by creating a router to manage a list of items. Make a new file called todo.js:
todo.js
const express = require('express')

const router = express.Router()

let todo = []

router.post('/', (req, res, next) => {
  todo = [...req.body.todo || []]
  if (req.body.remove) todo.splice(req.body.remove, 1)
  if (req.body.new) todo.push({})

  next()
})

router.use('/', (req, res) => {
  res.render('todo', { title: 'To-do list', todo })
})

module.exports = router
Here you have two route handlers. The first one listens for POST requests (signified by router.post). It will replace the to-do list with a copy of whatever it receives from the form. If the form contains the remove property (containing an index), it will use splice to remove the element at that index. If the form contains the new property, a new item will be pushed on to the array. After it’s done modifying the to-do list, it calls next() to move on to the next route handler.
The second route handler is always used (signified by router.use). Its sole purpose is to render the to-do list. By separating the routes like this, you can easily do one thing always, and another thing only in certain circumstances (in this case on a POST request).
To tell the app to use this router, you’ll have to add a few lines to index.js:
index.js
@@ -1,11 +1,15 @@
 const express = require('express')
 const path = require('path')
+const todoRouter = require('./todo')

 const app = express()

 app.set('views', path.join(__dirname, 'views'))
 app.set('view engine', 'hbs')

+app.use(express.urlencoded({ extended: true }))
+app.use('/todo', todoRouter)
+
 app.get('/', (req, res) => {
   res.render('index', {
     title: 'Hello, world!',
Now for the todo template. It’s a little larger, so I saved it for last. If you’re familiar with HTML it shouldn’t be too bad to follow. Handlebars adds a few features that let you access variables. In this case, you’re using an {{#if}} block to render something special if there aren’t any items, as well as an {{#each}} block to render each of the list items with minimal markup.
The only JavaScript used here is for automatically submitting the form when you change something. If JavaScript were disabled, this would still work when pressing the “Enter” key on your keyboard, thanks to the hidden button labeled “Autosave”.
views/todo.hbs
<form method="post">
<div class="row">
<div class="col">
<button hidden>Autosave</button>
<button class="btn btn-success" name="new" value="true">New</button>
</div>
</div>
<div class="row mt-3">
<div class="col">
{{#if todo.length}}
<ul class="list-group">
{{#each todo}}
<li class="list-group-item d-flex align-items-center">
<input
type="checkbox"
onchange="this.form.submit()"
name="todo[{{@index}}][checked]"
{{#if this.checked}}checked{{/if}}
/>
<input
name="todo[{{@index}}][text]"
onchange="this.form.submit()"
class="form-control mx-2"
value="{{this.text}}"
/>
<button class="btn btn-danger" name="remove" value="{{@index}}">Remove</button>
</li>
{{/each}}
</ul>
{{else}}
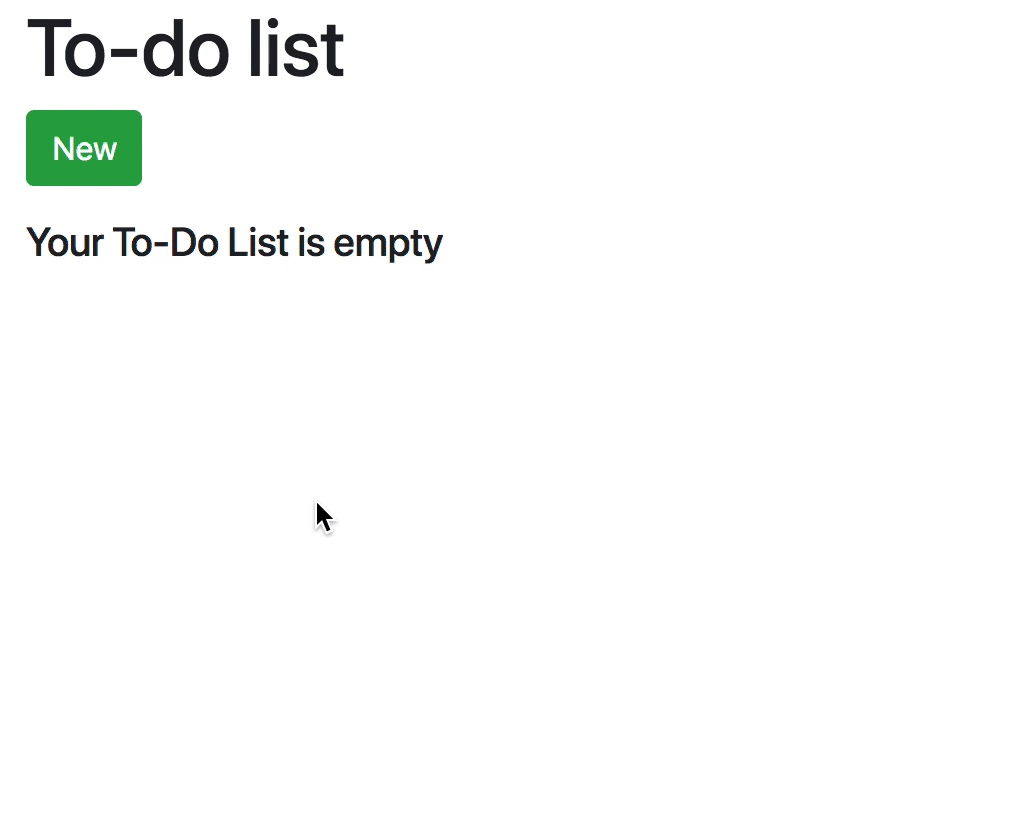
<h5>Your To-Do List is empty</h5>
{{/if}}
</div>
</div>
<style>
input[type=checkbox]:checked + input {
text-decoration: line-through;
opacity: 0.75;
}
</style>
</form>
Now go to http://localhost:3000/todo and enter some items into your todo list.
Add User Authentication in Node
Now you have a functional to-do list. You may have noticed though, this would only work if you want everyone using it to share the same list. If you add in authentication, you can have a separate to-do list for each user.
Adding users doesn’t have to be a pain. In fact, it can be done really simply with Okta. What is Okta?, you might ask. Okta is a cloud service that allows developers to create, edit, and securely store user accounts and user account data, and connect them with one or multiple applications.
If you don’t already have one, sign up for a forever-free developer account.
You’re going to need to save some information to use in the app. Create a new file named .env. In it, enter your organization URL.
HOST_URL=http://localhost:3000
OKTA_ORG_URL=https://{yourOktaOrgUrl}
You will also need a random string to use as an App Secret for sessions. You can generate this with the following commands:
echo -e "\nAPP_SECRET=`npx -q uuid`" >> .env
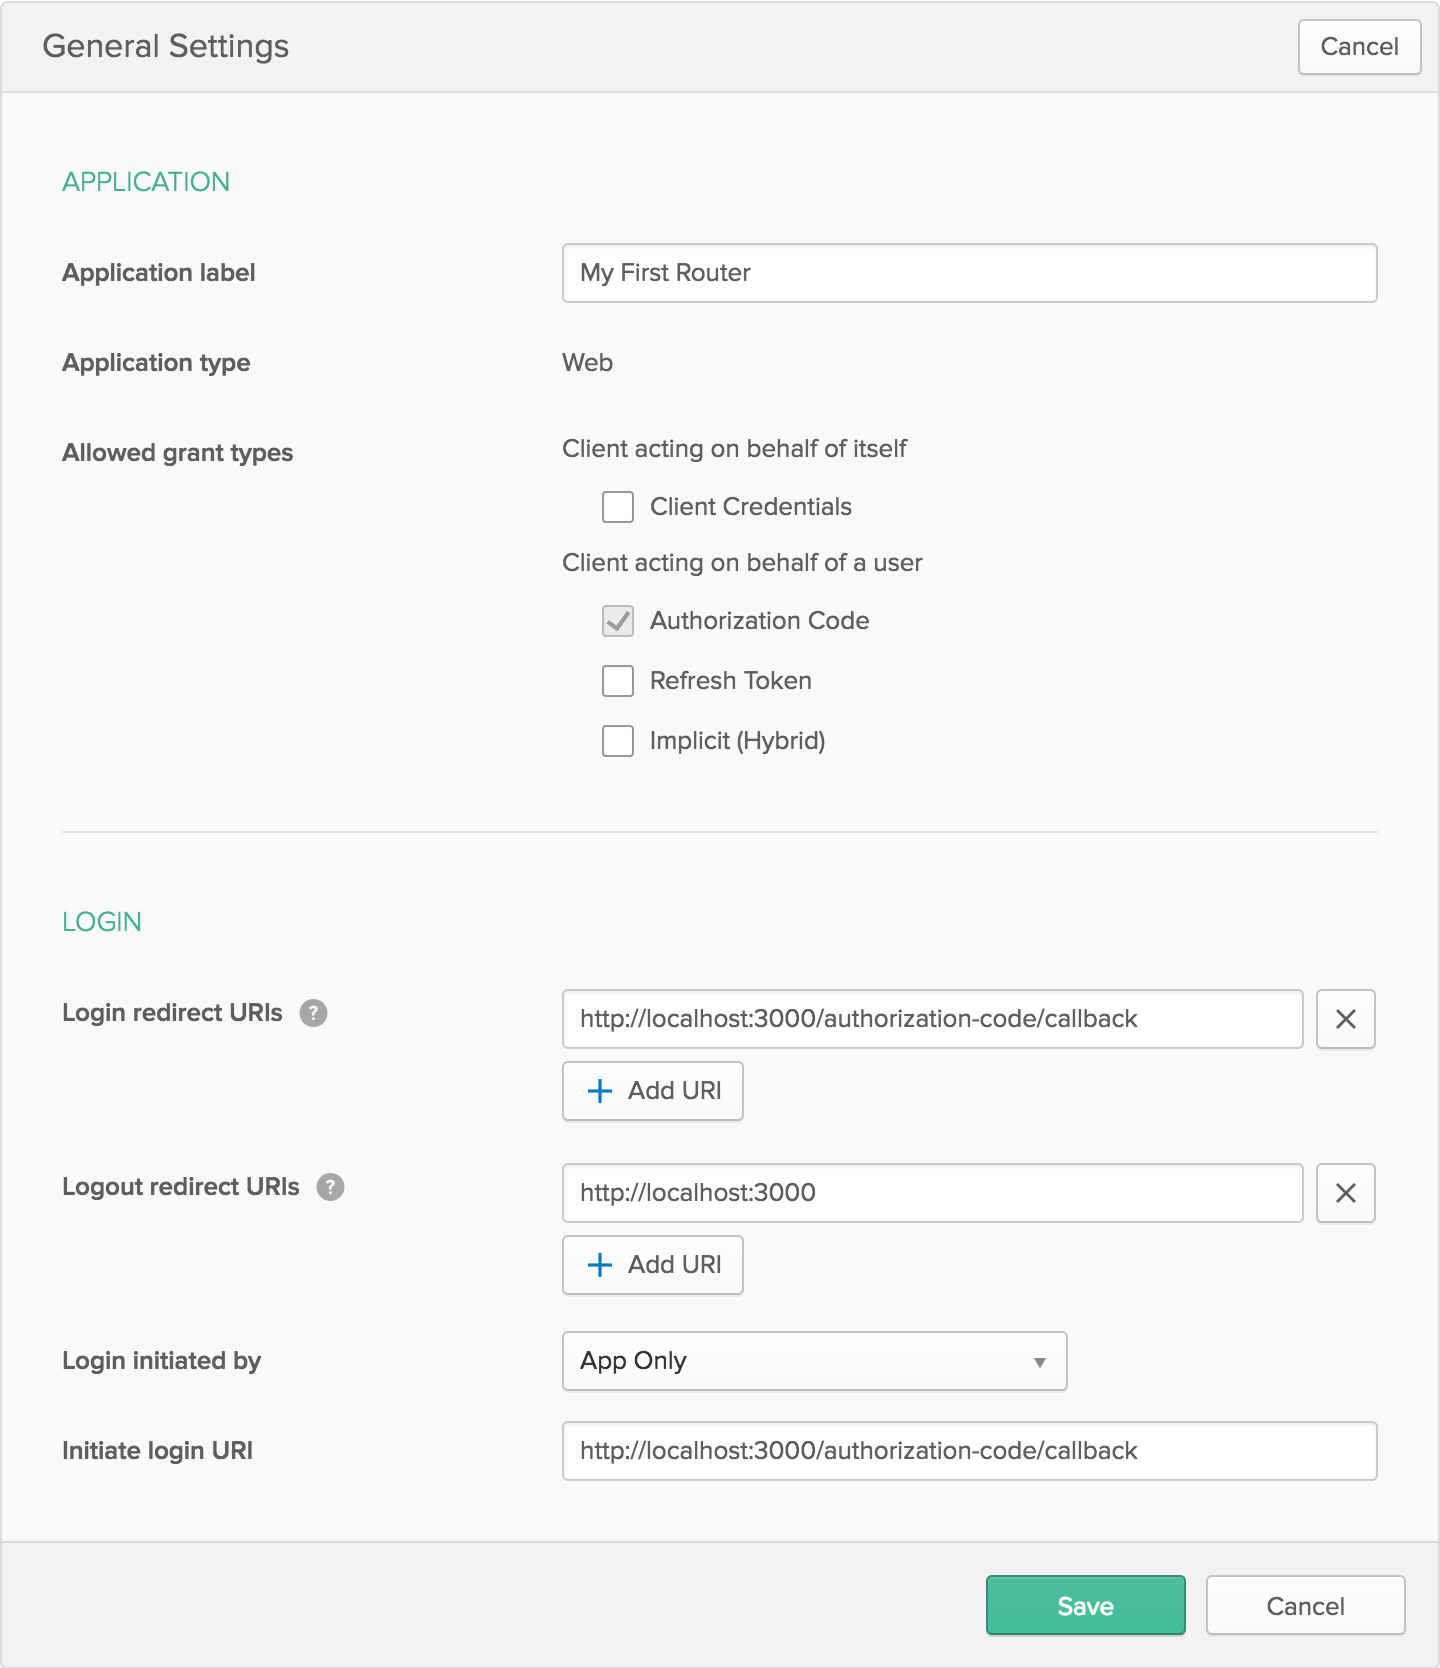
Next, log in to your developer console, navigate to Applications, then click Add Application. Select Web, then click Next. Give your application a name, like “My First Router”. Change the Base URI to http://localhost:3000/ and the Login redirect URI to http://localhost:3000/authorization-code/callback, then click Done
Click Edit and add a Logout redirect URI of http://localhost:3000/, then click Save.
The page you come to after creating an application has some more information you need to save to your .env file. Copy in the client ID and client secret.
OKTA_CLIENT_ID={yourClientId}
OKTA_CLIENT_SECRET={yourClientSecret}
Now back to the code. You’ll need to add Okta’s OIDC middleware to control authentication. It also relies on using sessions. You’ll need to use dotenv to read in variables from the .env file. To install the dependencies you’ll need, run this command:
npm install @okta/oidc-middleware@1.0.1 dotenv@6.1.0 express-session@1.15.6
Now modify your index.js file. Here you’ll be adding the session and OIDC middlewares, and a logout route so users can log out of the app. You’re also adding a middleware specifically to the todoRouter (app.use('/todo', oidc.ensureAuthenticated(), todoRouter)). By adding oidc.ensureAuthenticated(), you’re letting Okta make sure that route can’t be reached unless a user is logged in. If the user isn’t logged in and tries to reach that route, they’ll be taken to a secure site to log in, and redirected back to your site afterward.
index.js
@@ -1,14 +1,46 @@
+require('dotenv').config()
+
 const express = require('express')
 const path = require('path')
+const session = require('express-session')
+const { ExpressOIDC } = require('@okta/oidc-middleware')
+
 const todoRouter = require('./todo')

+const oidc = new ExpressOIDC({
+  issuer: `${process.env.OKTA_ORG_URL}/oauth2/default`,
+  client_id: process.env.OKTA_CLIENT_ID,
+  client_secret: process.env.OKTA_CLIENT_SECRET,
+  redirect_uri: `${process.env.HOST_URL}/authorization-code/callback`,
+  scope: 'openid profile'
+})
+
 const app = express()

+app.use(session({
+  secret: process.env.APP_SECRET,
+  resave: true,
+  saveUninitialized: false
+}))
+app.use(oidc.router)
+
 app.set('views', path.join(__dirname, 'views'))
 app.set('view engine', 'hbs')

 app.use(express.urlencoded({ extended: true }))
-app.use('/todo', todoRouter)
+app.use('/todo', oidc.ensureAuthenticated(), todoRouter)
+
+app.get('/logout', (req, res) => {
+  if (req.userContext) {
+    const idToken = req.userContext.tokens.id_token
+    const to = encodeURI(process.env.HOST_URL)
+    const params = `id_token_hint=${idToken}&post_logout_redirect_uri=${to}`
+    req.logout()
+    res.redirect(`${process.env.OKTA_ORG_URL}/oauth2/default/v1/logout?${params}`)
+  } else {
+    res.redirect('/')
+  }
+})

 app.get('/', (req, res) => {
   res.render('index', {
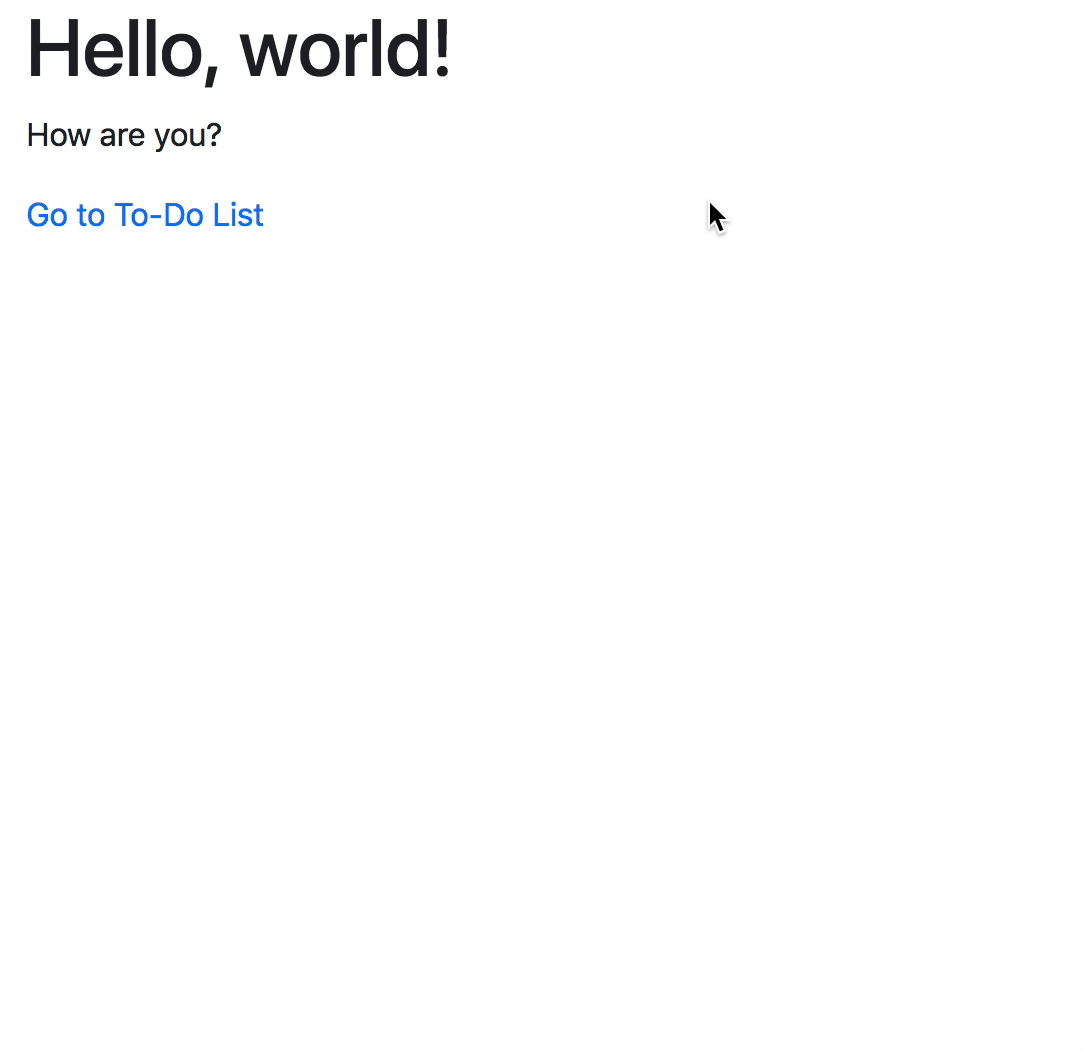
To make things a little easier when a user logs out, add a link to the to-do list from the home page.
views/index.hbs
<p>{{content}}</p>
<a href="/todo">Go to To-Do List</a>
You can also add a welcome message and a log out button to your layout.hbs.
views/layout.hbs
@@ -12,6 +12,12 @@
   </head>
   <body class="container">
     <h1>{{title}}</h1>
+    {{#if userinfo}}
+      <h4>
+        Welcome back, {{userinfo.given_name}}!
+        <small><a href="/logout">Click here to log out</a></small>
+      </h4>
+    {{/if}}
     <main>
       {{{body}}}
     </main>
For that to work, you’ll need to add userinfo to the context when rendering views.
todo.js
--- a/todo.js
+++ b/todo.js
@@ -13,7 +13,7 @@ router.post('/', (req, res, next) => {
 })

 router.use('/', (req, res) => {
-  res.render('todo', { title: 'To-do list', todo })
+  res.render('todo', { title: 'To-do list', todo, userinfo: req.userContext.userinfo })
 })

 module.exports = router
index.js
@@ -43,7 +43,10 @@ app.get('/logout', (req, res) => {
 })

 app.get('/', (req, res) => {
+  const { userinfo } = req.userContext || {}
+
   res.render('index', {
+    userinfo,
     title: 'Hello, world!',
     content: 'How are you?'
   })
OK, so now you’re requiring users to log in before they can edit the to-do list, but it’s still a single, shared list. In order to split it up into a separate list for each user, make another small change to todo.js.
todo.js
@@ -2,17 +2,21 @@ const express = require('express')

 const router = express.Router()

-let todo = []
+const todosByUser = {}

 router.post('/', (req, res, next) => {
-  todo = [...req.body.todo || []]
+  const todo = [...req.body.todo || []]
   if (req.body.remove) todo.splice(req.body.remove, 1)
   if (req.body.new) todo.push({})

+  todosByUser[req.userContext.userinfo.sub] = todo
+
   next()
 })

 router.use('/', (req, res) => {
+  const todo = todosByUser[req.userContext.userinfo.sub] || []
+
   res.render('todo', { title: 'To-do list', todo, userinfo: req.userContext.userinfo })
 })
Learn more about Node, Express, and Secure Web Development
Now that you have a fully functional to-do list, I encourage you to expand on it. Try storing the data in a database, or even let Okta store it for you! See if you can create some more routers to add to the web server.
If you want to see the final code sample, you can find it on GitHub.
If you’d like to learn more about Node and Express check out some of these other articles on the Okta developer blog:
- Build and Understand Express Middleware through Examples
- Build and Understand a Simple Node.js Website with User Authentication
- Build a Simple REST API with Node and OAuth 2.0
- Build Secure Node Authentication with Passport.js and OpenID Connect
- Secure a Node API with OAuth 2.0 Client Credentials
If you have any questions about this post, please add a comment below. For more awesome content, follow @oktadev on Twitter, like us on Facebook, or subscribe to our YouTube channel.
Okta Developer Blog Comment Policy
We welcome relevant and respectful comments. Off-topic comments may be removed.