We're Living in a Passwordless World
Passwords? Bah! Who wants to remember all those letter, number, and special character combinations? Password managers and password manager browser extensions can help us, but what if we stopped using passwords entirely? What if we stopped using authentication factors, such as SMS one-time passwords (OTP), that pose risks where malicious actors can access sensitive authentication information (phishing)? What if authentication was so seamless that we could use built-in device hardware capabilities instead?
Seamless, easy-to-use authentication is the future many dream of, including a group called the Fast Identity Online (FIDO) Alliance. The FIDO Alliance is a group of organizations that focuses on providing open and free authentication standards utilizing more secure technologies. We’ve also heard the World Wide Web Consortium (W3C) is a group that builds web standards. How do these two groups intersect when it comes to authentication security? Let’s better understand the collaboration and what it means for us.
Table of Contents
- Authentication factors
- Phishing-resistant authentication
- Evolving from passwords to passkeys
- FIDO2 authentication with WebAuthn and CTAP
- Passkeys everywhere
- Web Authentication API
- Using passkeys with Identity Providers
- Learn more about WebAuthn, Client to Authenticator Protocol (CTAP), passwordless authentication, and passkeys
Authentication factors
Passwords were the default authentication mechanism for years, but passwords are notoriously insecure and cause most data breaches. Research shows that >80% of breaches stem from stolen or weak passwords. So it’s time for something more secure.
Passwords are just one way to authenticate, but there are other options. Authentication factors break down into the following categories:
 |
Something you know Knowledge factors include passwords and PINs |
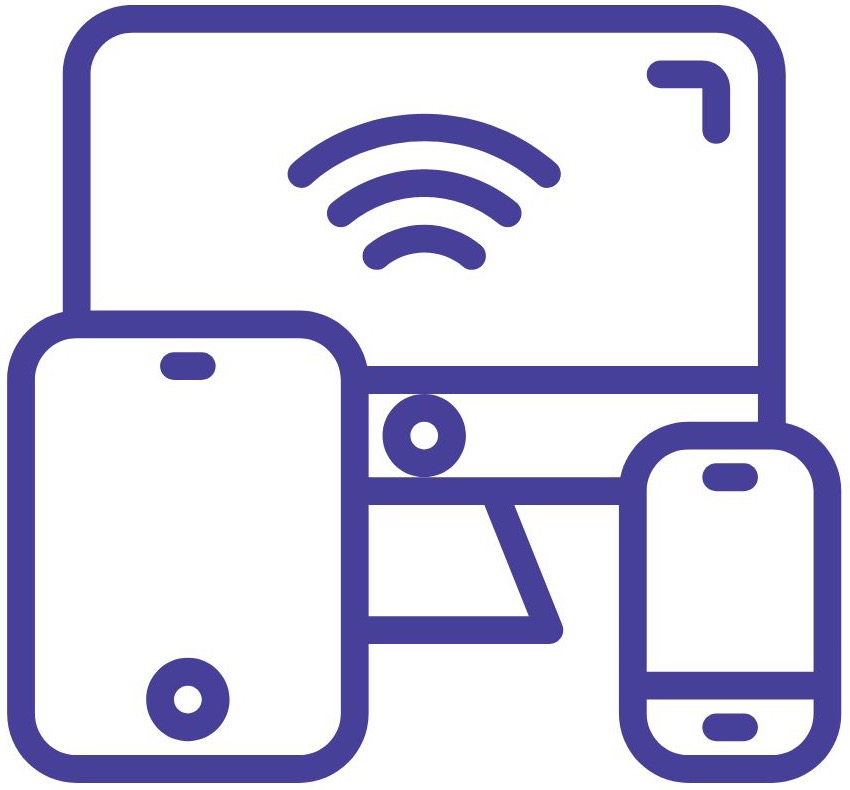 |
Something you have Possession factors include devices such as smart cards, security keys, phones, and tablets |
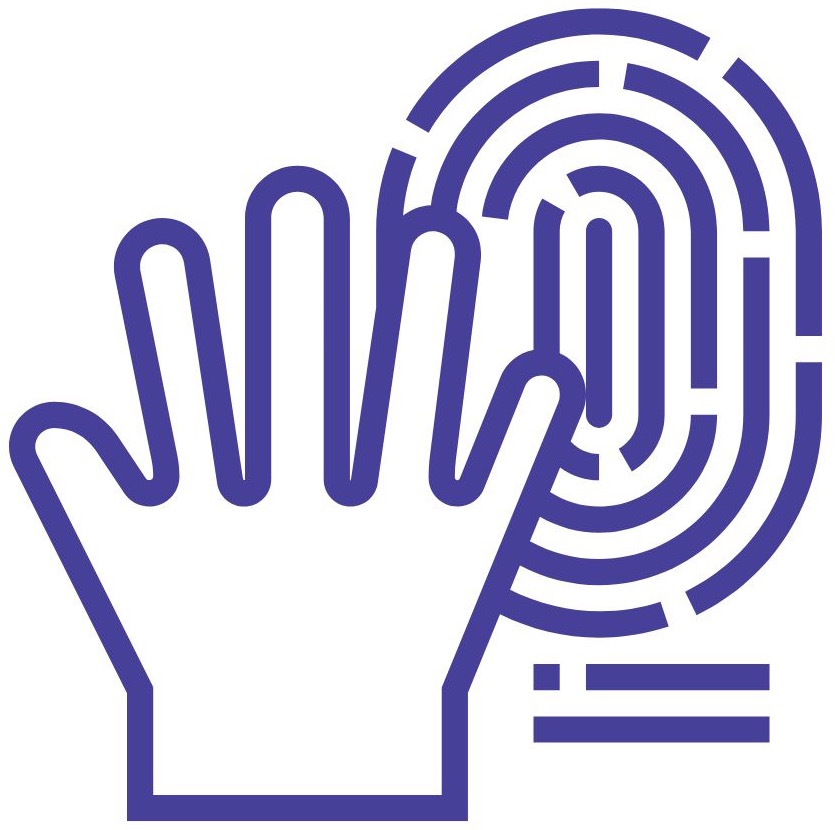 |
Something you are Inference factors include biometrics such as fingerprints and facial recognition |
Because of the security risks associated with passwords, the security community recommended adding additional authentication factors to mitigate the concerns about using passwords alone. Unfortunately, there were still security risks and barriers associated with past recommendations. So that we understand how we get to yet a new recommended method for authentication, let’s recap a few of the previous advice and why they weren’t the perfect solutions:
 |
Any two-factor authentication (2FA) and multi-factor authentication (MFA) Both 2FA and MFA can still be insecure. For example, legacy knowledge-based authentication factors such as security questions are weak, insecure, and prone to social engineering. SMS OTP, a possession-based factor, is vulnerable to SIM swapping hacks and is phishable. |
|
Time-based one-time passwords (TOTP) TOTP are the codes you get through software authenticators, such as Okta Verify or Google Authenticator, valid for a short time. While TOTP improves SMS OTP, any SMS factor is still vulnerable to meddler-in-the-middle (MITM) attacks, displays the code in plaintext and expects the user to transcribe the value accurately and quickly to authenticate. |
 |
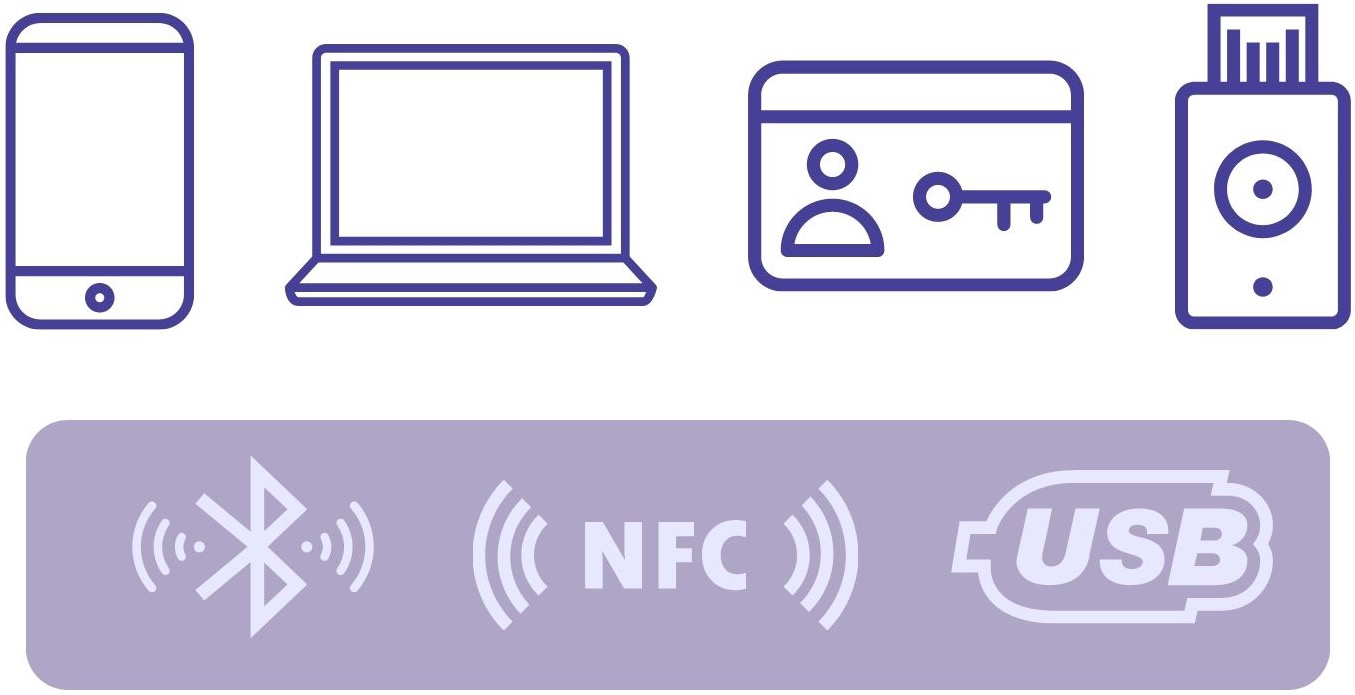
Smart cards conforming to FIDO’s Universal 2nd Factor (U2F) standard, such as security keys Smart cards are a very secure and less human error-prone option because they use a locally stored cryptographically secure key and utilize Bluetooth, USB, or Near Field Communication (NFC) instead of the internet or phone line to transmit the authentication code on behalf of the user. While U2F may be an option for work accounts, users found it cumbersome for personal use. |
What we want is a robust, phishing-resistant, easy-to-use authentication mechanism.
Phishing-resistant authentication
Phishing-resistant authentication factors include local biometric factors and secure possession-based factors. Using cryptographically unique credentials for each website and new browser capabilities that streamlines secure authentication is the winning combination!
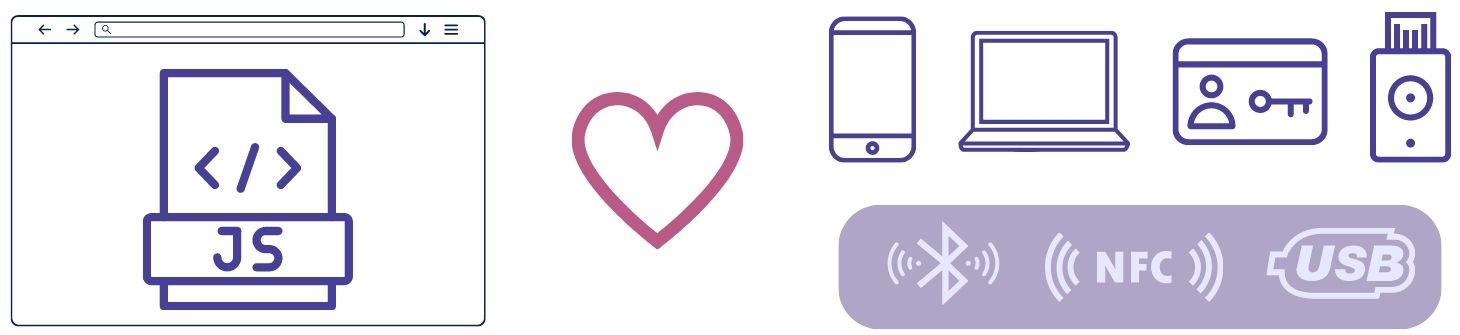
Using FIDO and W3C’s combined forces brings us to a new authentication standard called FIDO2. FIDO2 retained the cryptographically secure authentication key from the previous U2F method. They introduced a new protocol to an existing standard for devices to interoperate with web browsers called Client to Authenticator Protocol (CTAP2). Devices supporting CTAP2 include those with built-in biometric readers such as phones, and external devices such as smart keys. An example of a device with built-in hardware authenticators includes laptops with fingerprint sensors or cameras for facial recognition. External devices include security keys, phones, and watches with Bluetooth, USB, or NFC communication capability.
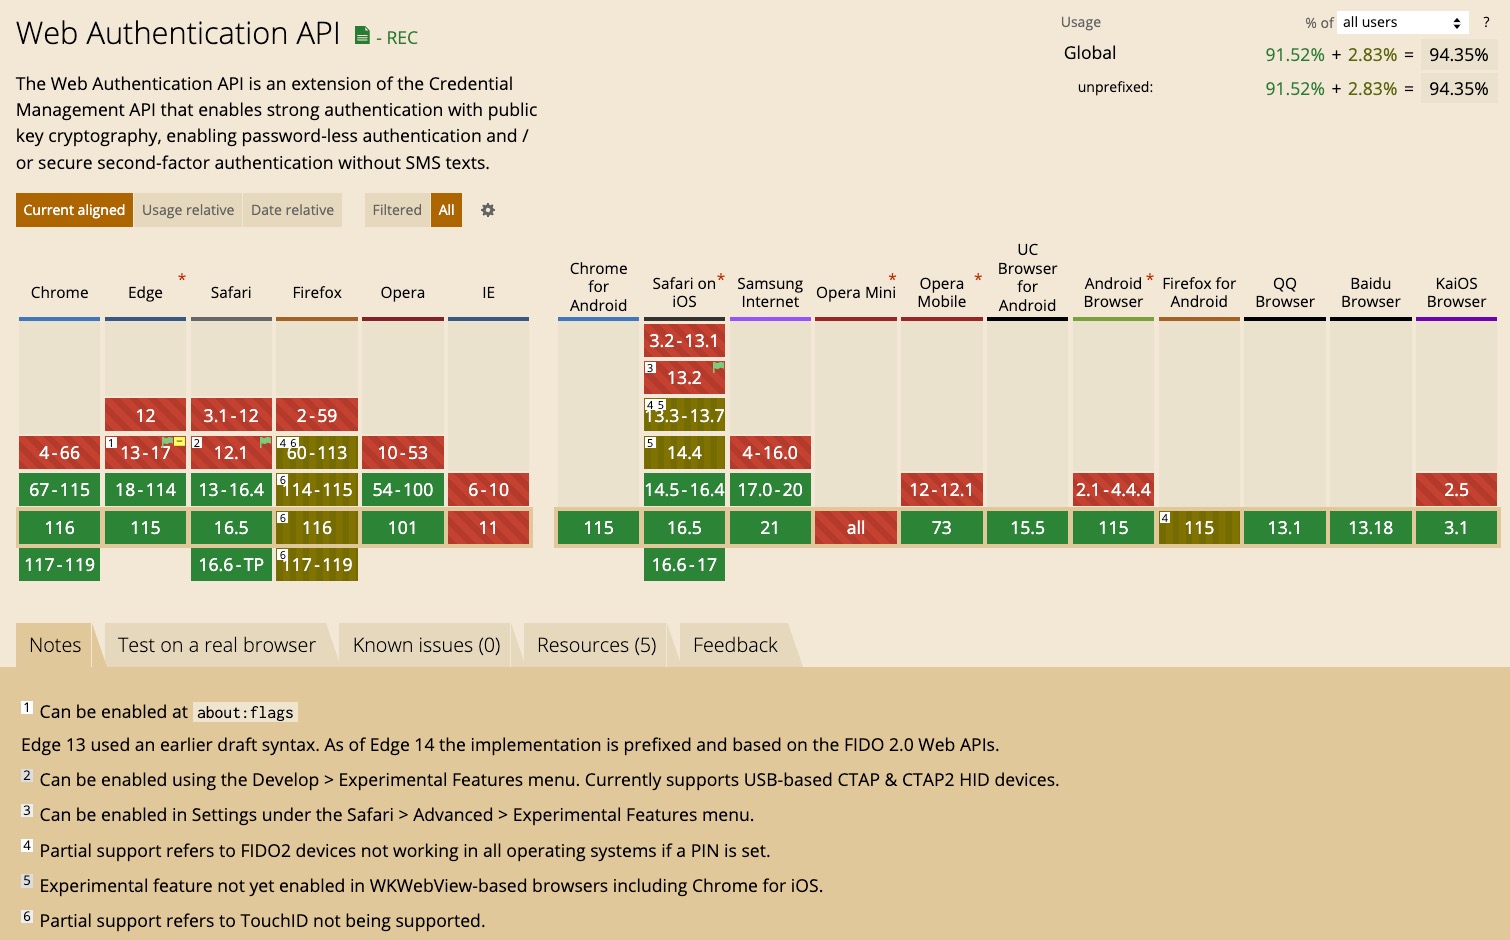
The W3C then introduced a new web standard for web authentication on the web, called WebAuthn. It added a new browser-based API, the Web Authentication API, which extends from the existing Credential Management API. Instead of using passwords, the Web Authentication API uses secure authentication credentials using asymmetric encryption (where you have a public and private key). All modern browsers now have full or partial support for WebAuthn. You can check which browsers and versions support WebAuthn on caniuse.com. The screen capture shows browser support at the time of publishing.
FIDO’s Client to Authenticator Protocol complements WebAuthn to create a seamless, easy-to-use, secure authentication experience.
A new term for this authentication mechanism without passwords is often called “passwordless.” And the combination of WebAuthn and CTAP2 hardware devices to enable passwordless authentication is called a “passkey.” What a great name!
Evolving from passwords to passkeys
Passwordless authentication with CTAP2 and WebAuthn aren’t new secure authentication mechanism since both have been around for a few years now. While CTAP2 and WebAuthn are an awesome progression to elevating security, a cool thing happened. Tech giants Apple, Google, and Microsoft joined forces to standardize on making secure passwordless authentication seamless within and across their ecosystems with passkeys. Passkeys is another evolution on top of WebAuthn. Secure, phishing-resistant authentication keeps getting better!
FIDO2 authentication with WebAuthn and CTAP
So how does this work? At a high level, your FIDO2 authentication flow utilizes each of the three factors:
- Something you know, a PIN to unlock the device
- Something you have, the authenticator device, which may be a security key or a capable phone
- Something you are, biometric data such as fingerprint or facial recognition
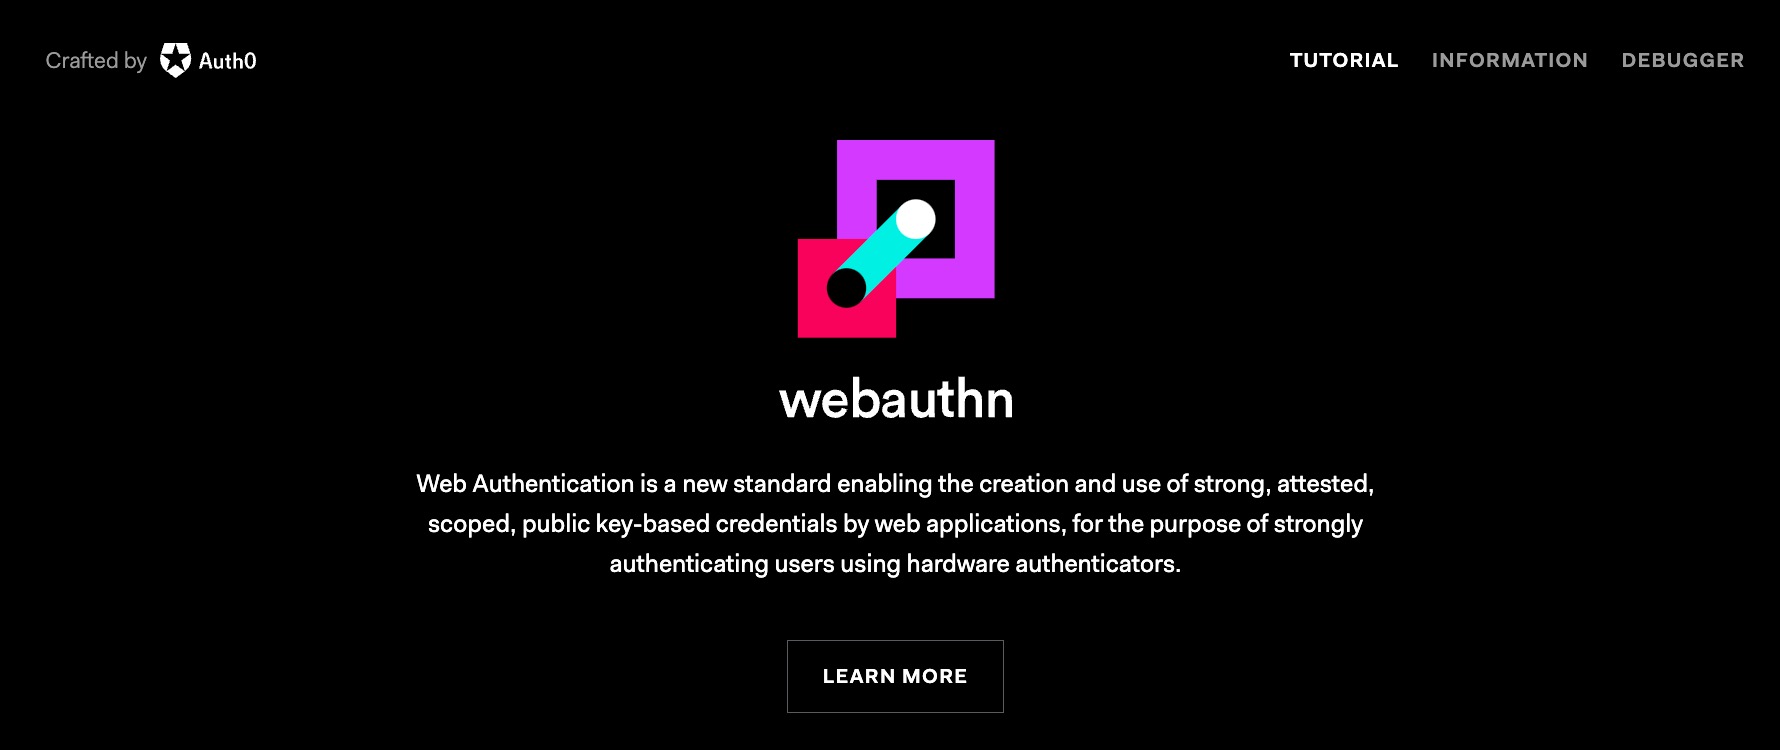
Before we authenticate, we need an account with compliant credentials, so let’s start with the registration process. We’ll use a public demo site demonstrating how passkeys work as we step through what’s going on in the registration and authentication process. Follow along at Auth0’s webauthn.me.
There are a couple of components at play. From the user’s perspective, they interact with a website and a device like their phone. From a technology perspective, there’s WebAuthn and CTAP2. I’ll show screenshots of each step, discuss the interaction between the web app and server of the relying party, and describe the hand-off between WebAuthn and CTAP2.
Registering a user for passkeys
The user opens their favorite site in the browser. In the FIDO2 world, the site that makes the WebAuthn calls is the Relying Party, and the browser is the Client. If your site uses a single-page application frontend, the relying party includes both the frontend and backend server.
The web app for the site displays a form to gather user information, an email address or a user name. The user enters the required information and presses Register. The web app recognizes the browser as FIDO2 capable and asks if the user wants to sign in using a passkey instead of a password. Of course, the user says, “Yes!”
Behinds the scenes the web app calls the server with credential request options, such as the username and registration-related data. The server responds with information about the relying party, a user ID, and a cryptographically random value for the registration process called a “challenge.” The web app uses WebAuthn to generate a new credential, sending the response information from the server, including the challenge. The credential call from the browser to the authenticator is possible via CTAP2.
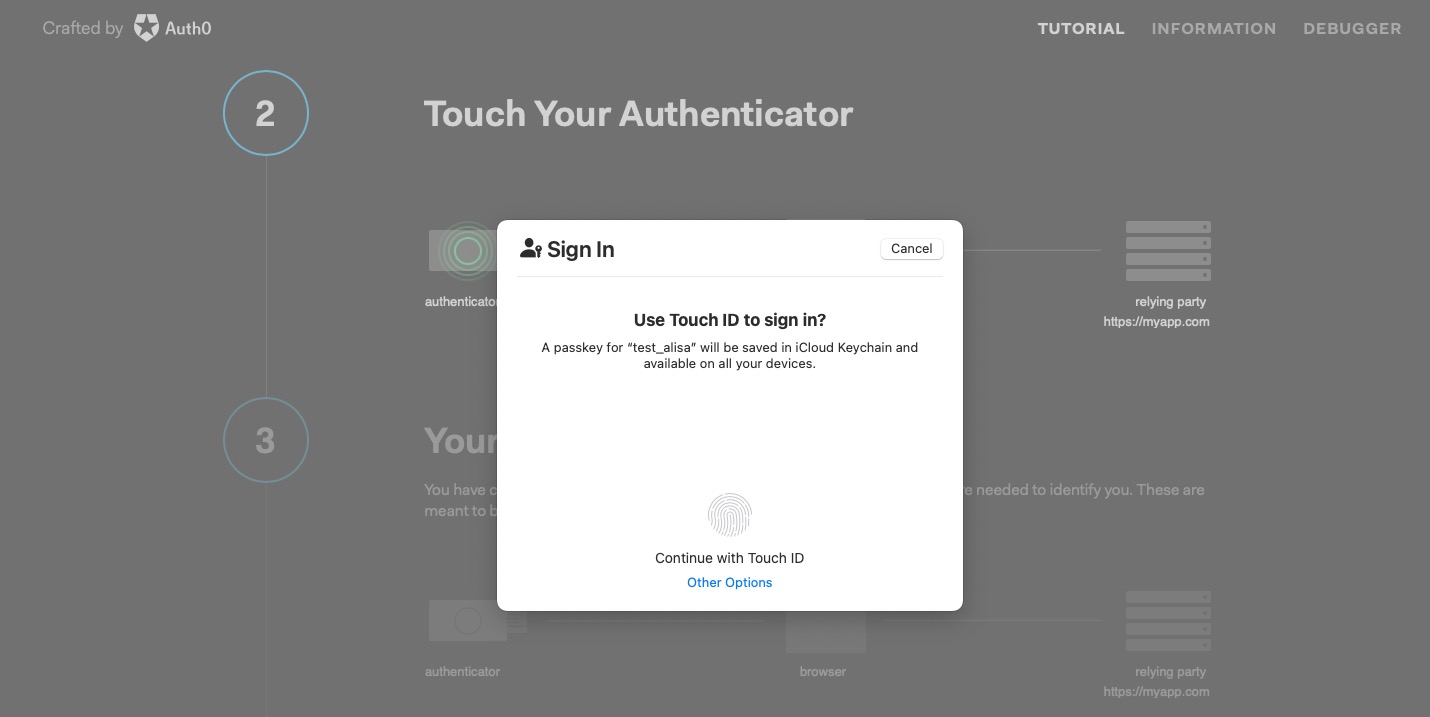
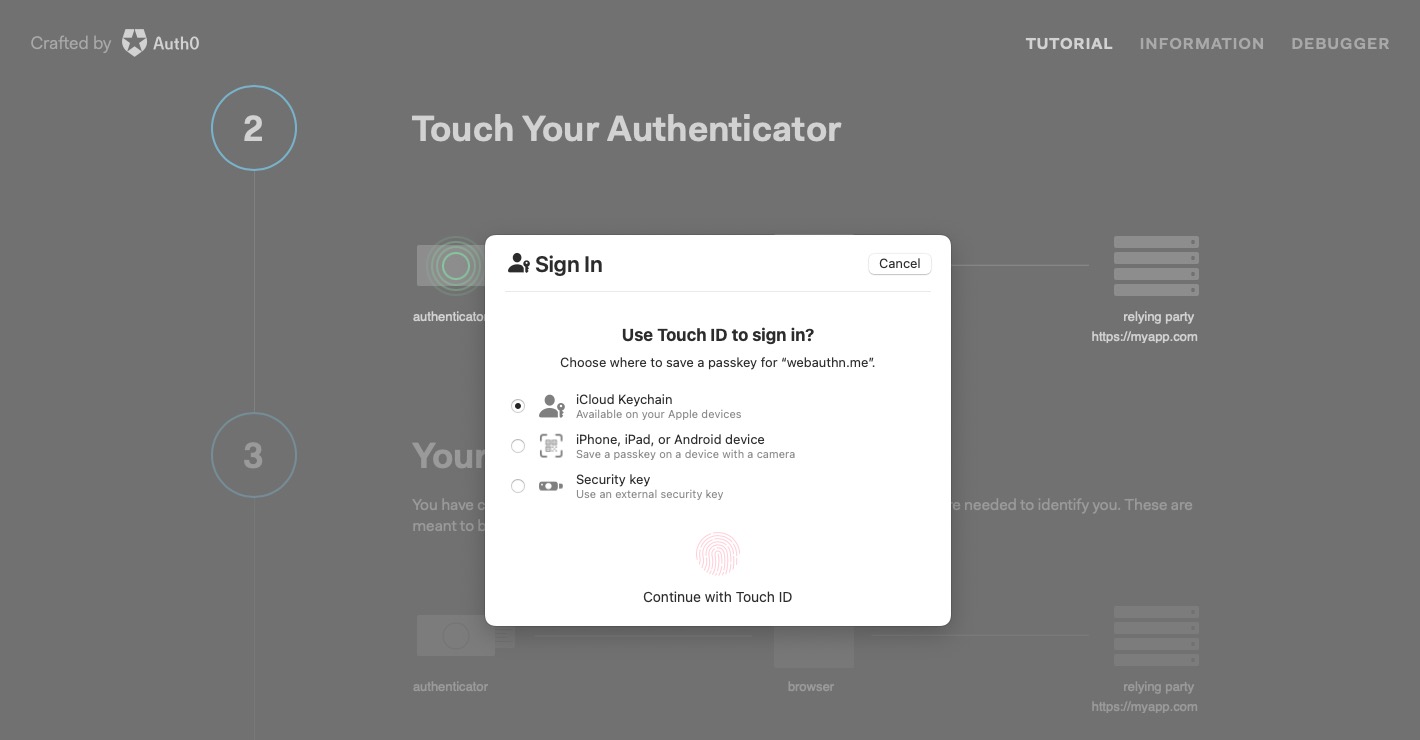
The authenticator takes over, prompting the user for consent and biometric information. The authenticator generates a public/private key pair for the website. The authenticator signs the public key with an attestation certificate for the device hardware. Signing the key with the attestation certificate proves the keyset is from a specific device. The authenticator returns the public key in the WebAuthn credential response.
The web app calls the server with the public key and the user ID to store the user’s credentials. The server verifies the key for completeness and integrity, such as ensuring the certificate’s validity, the website origin is accurate, and that the challenge value matches the original response. Once verified, the server persists this info, matching your username with the public key so it has the information needed to authenticate you for the passkey later.
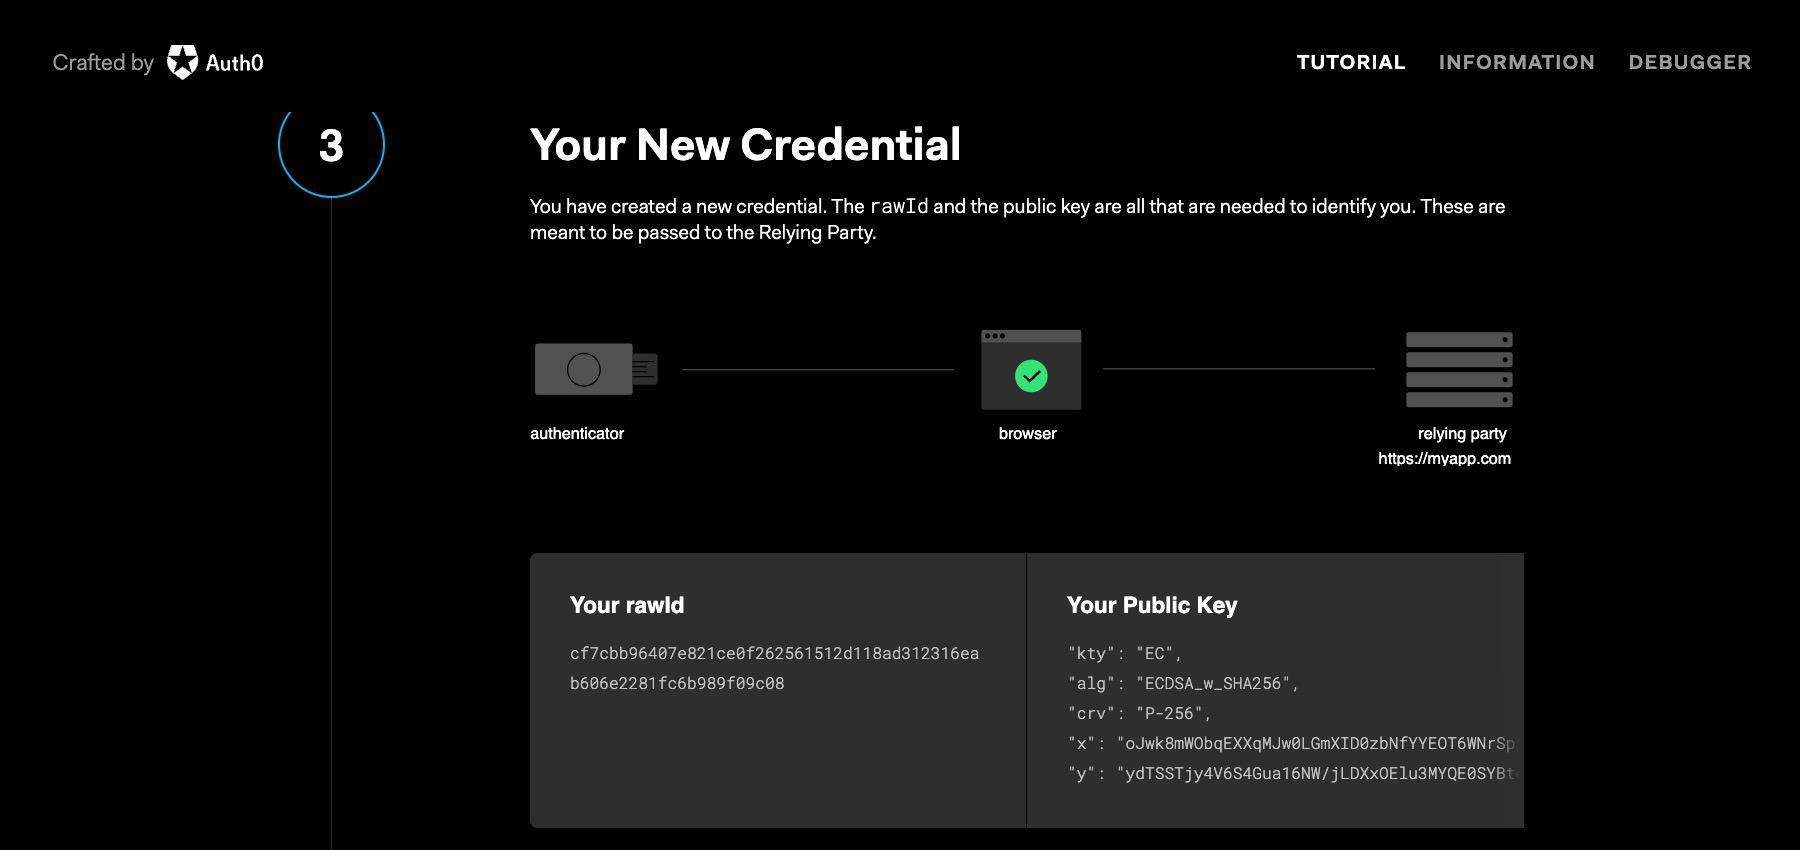
The user is now registered to use FIDO2 authentication mechanisms in the future. Before diving into user authentication, let’s relook at registration. The above scenario demonstrates a user registration process for a new user account. But you can extend the method to pre-existing accounts on your favorite site. Let’s say you already have an existing account on your favorite e-commerce site. You open the site and log in with your username and password. After authenticating, the web app recognizes the browser as FIDO2 capable and asks if you want to convert your authentication experience away from passwords. Of course, you’ll want to say, “Yes, passkeys, please!” The rest of the steps are the same.
Authenticating a user with passkeys
We can see what user authentication looks like with an account for the site set up and the initial passkey created.
The user opens their favorite website (the Relying Party) in their browser (the Client) and initiates signing in by entering their username. In the webauthn.me site we’re using, the user authenticates immediately after registering as the next step demonstrating the process.
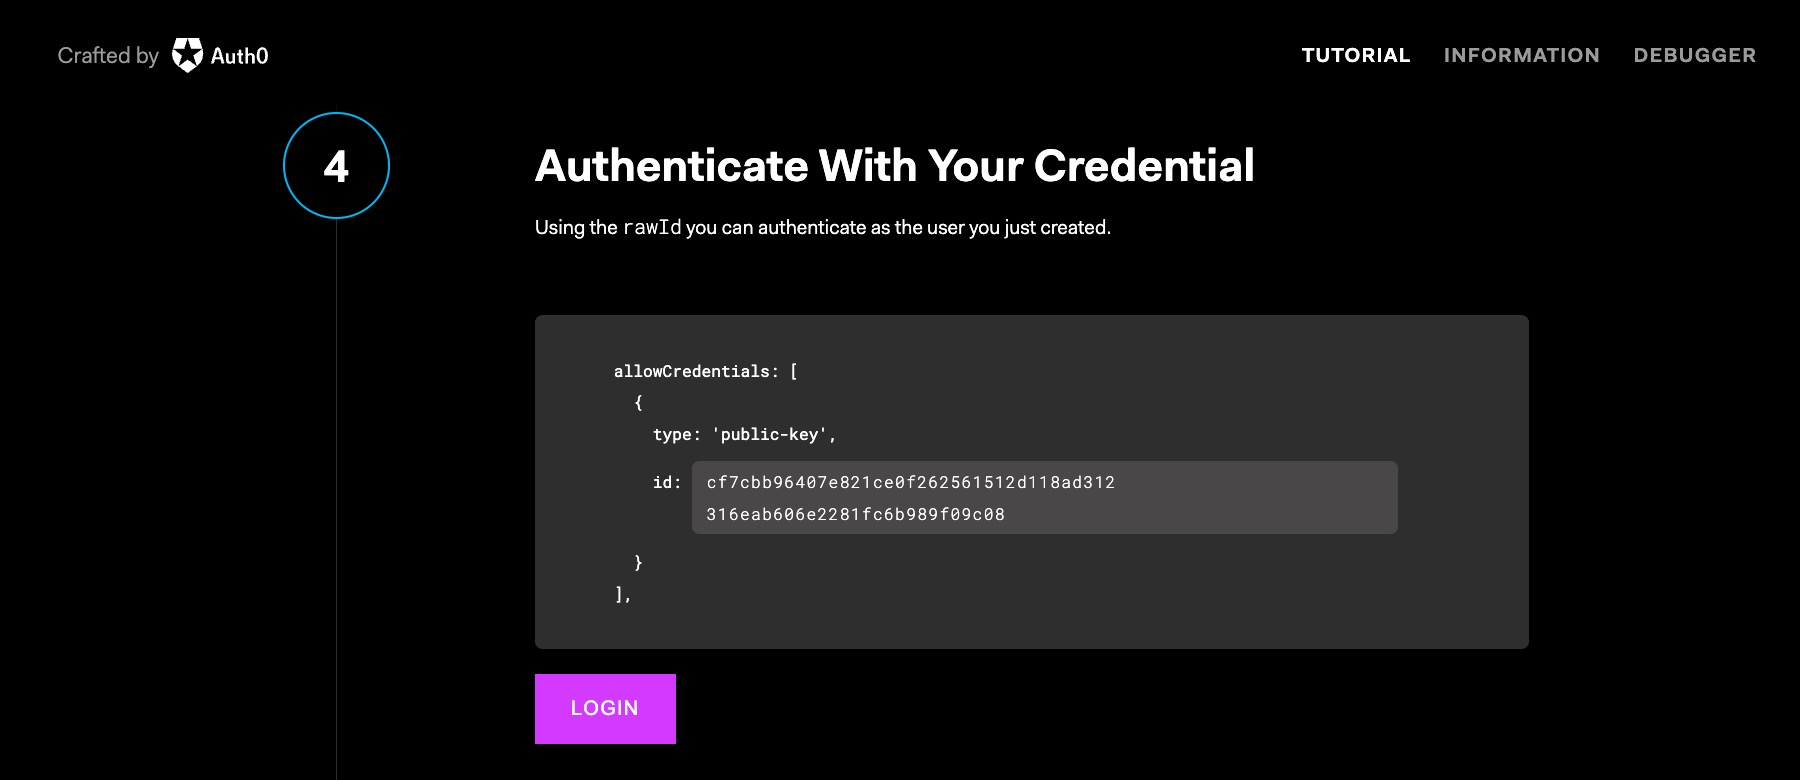
When the user tries to sign-in, the web app calls the server with the username entered. The server remembers you’re using passkeys! 🎉 The server responds with a challenge and additional information required for authentication, such as Relying Party and user credentials or authenticator information.
The website uses WebAuthn to get credentials, which causes the browser to pass the challenge to the authenticator. The authenticator verifies it has credentials for the site and can sign the challenge using the keyset registered, a process called “assertion.” The authenticator requests user consent via biometric verification or a PIN and returns the signed assertion. The browser presents the user with an authentication challenge through the browser, which we see in the screenshots above of the authentication flow. The user grants consent using the passkey.
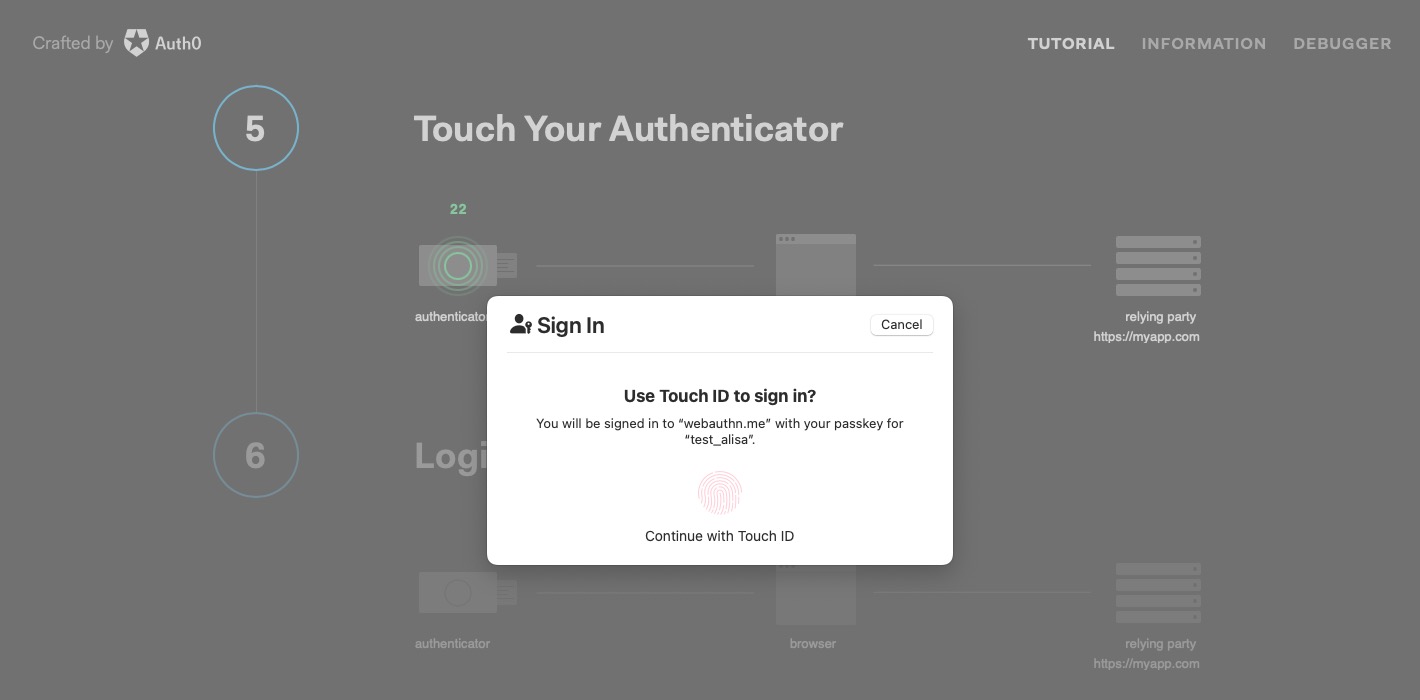
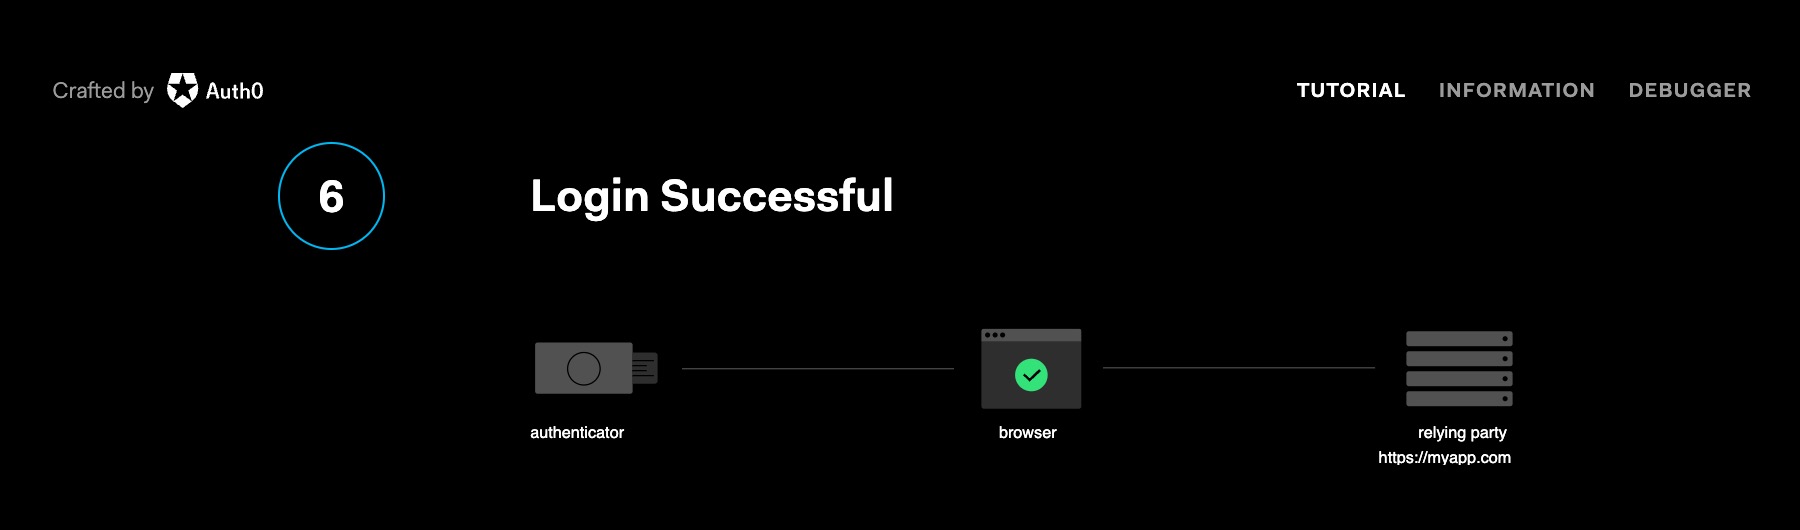
The web app sends the signed assertion to the server for validation. The server validates the public key used matches what it has on hand for the user, the challenge matches the one from the initiate request, and the Relying Party information is correct. Authentication success!
Passkeys everywhere
A great thing about this mechanism is that it works across all compatible browsers and devices, making authentication a truly seamless experience. Let’s say you first created a passkey for your favorite site on your phone and your phone’s fingerprint scanner. Later, when you open the site on your laptop using another compatible browser, you’ll see a prompt to create a new passkey for the laptop using biometric hardware built into your laptop automatically. Suppose you utilize devices within a vendor’s ecosystem. In that case, your passkeys can migrate between devices, allowing you to authenticate with the device hardware without creating a separate passkey for each device, making authentication even more seamless. Apple showcased passkeys migrating within iCloud so you don’t need to create a separate passkey for each Apple device at a recent developer event. Very slick! Who’s ready for Google and Microsoft to follow suit? 🙋♀️
Web Authentication API
But let’s be honest. There are a lot of steps documented in this post and many screenshots for the registration and authentication process. So you may be thinking, “Whoa, there are a lot of steps! It has to be complicated to use, right”? Quite the opposite! The user experience is seamless, although there’s communication between the different parties behind the scenes. From the user’s perspective, as you can see in the screenshots, it looks like a touch of a fingerprint on a device or a scan of a face… and that’s it! No passwords are required! But we’re developers, so what does it look like for us?
From a developer perspective, you can use the Web Authentication API directly. There are two methods you use:
navigator.credentials.create({options});

navigator.credentials.get({options});
You’ll need to pass in options for each call, including the Relying Party info, challenge, etc. If you want to use something other than Web Authentication APIs directly, you can find a library for your favorite tech stack on awesome-webauthn GitHub repo, or your tech stack’s package manager.
Using passkeys with Identity Providers
We’re entering a whole new world of authentication. Authentication security is critical. You don’t want to dedicate development time and resources to add new, excellent security-minded features like passkeys, and you certainly don’t want to spend time maintaining and monitoring. And you’ll still need to handle user identity and access management. So, while the landscape may look different, you still want to use a reputable Identity Provider that supports FIDO2.
Okta has passkey support, including in your Developer Edition org. The great news is many reputable Identity Providers support this. So, if you redirect to Okta for sign-in, your application can take advantage of secure phishing-resistant FIDO2 authentication with only some configuration changes within the Okta Admin Console. You can try out using passkeys as part of the authentication experience yourself on Okta by following the instructions on the Okta Help Center.
Learn more about WebAuthn, Client to Authenticator Protocol (CTAP), passwordless authentication, and passkeys
This post laid out the landscape of the new passwordless world, why there was a need for this new authentication mechanism, and how it works behind the scenes. If you found this post intriguing and want to learn more, you may find these links useful:
- Phishing-Resistant Authenticators with Megha Rastogi: Okta Workforce Identity Developer Podcast
- Building a WebAuthn Application with Java
- Passkeys Playground
- Our Take on Passkeys blogpost by Auth0
- Web Authentication information from Auth0
- Passkeys in Action video by the FIDO Alliance
Don’t forget to follow us on Twitter and subscribe to our YouTube channel for more great content. We’d also love to hear from you! Please comment below if you have questions or want to share your WebAuthn experience. Also, let us know what topics you’d like to see us cover next.
Alisa Duncan is a Senior Developer Advocate at Okta, a full-stack developer, and a community builder who loves the thrill of learning new things. She is a Google Developer Expert in Angular and organizes coding workshops and community events locally and internationally. Her background is primarily working on enterprise software platforms, and she is a fan of all things TypeScript and JavaScript.
Okta Developer Blog Comment Policy
We welcome relevant and respectful comments. Off-topic comments may be removed.