Use the Okta CLI to Build Secure Python Apps
Okta is a customizable, secure solution that lets you add authentication and access management to your applications. Since this can be a complex topic, we recommend setting up your first project with our CLI. In this walkthrough, we will:
- Configure the Okta CLI
- Teach you how to create your first application
- Learn about authentication and authorization credentials
- Set up hosted authentication with Okta and try it out
- Cover troubleshooting issues you might encounter
Prerequisites
This tutorial uses the following technologies but doesn’t require any prior experience:
- Okta Developer account - these instructions assume you already have signed up. If you didn’t, you can sign up for a free account using the CLI!
- Python 3
We will go over how to install the CLI during this tutorial.
Table of Contents
- Overview concepts
- Configure the Okta CLI
- Configure the project
- Create an application (optional)
- Run the project
- Troubleshooting - Help, it’s not working!
- Learn more about Python, authentication, and Okta
Note: In May 2025, the Okta Integrator Free Plan replaced Okta Developer Edition Accounts, and the Okta CLI was deprecated.
We preserved this post for reference, but the instructions no longer work exactly as written. Replace the Okta CLI commands by manually configuring Okta following the instructions in our Developer Documentation.
Overview concepts
This section quickly covers a few key concepts.
Org URL
When you’re starting out with Okta, you’re provided an Org URL. This is what you’ll use to set up all of your applications. Think of it as a reference ID that lets Okta figure out who you are and which projects are yours. If you want to learn more about the complexities of the Org URL (it has many more features than what we’ve just described and it’s possible to have more than one depending on your needs), you can read about it here: Org URL features.
Tokens, client ID, and client secret
You’re also provided some information for authentication. It can get a bit confusing as there are tokens, client IDs, and client secrets. You need to use all three for the Okta application we’re working on today. Let’s quickly go over what each thing does for you.
- Tokens - these are like an API key. You’re going to provide the token so that you can authenticate with the API. You use this for every request and it contains details about what you can and can’t access. Tokens are presented to you only once, and never shown again. However, if you forget your token but you authenticate with the CLI, you can retrieve it. We’ll go over that in a bit.
- Client ID - this is a way to say which application you’re working with.
- Client secret - a password that goes with your client ID and gives you permission to access a particular application.
Not every project needs all three of these things. You will generally need a token, you may not always need the other items. Sometimes you may require additional credentials when integrating with third party applications.
Configure the Okta CLI
Let’s get the Okta CLI installed. Okta has a great resource page about the CLI and it contains installation instructions. We’re going to do ours slightly differently from the instructions, so be sure to follow the steps here.
- Install the CLI with the provided command:
brew install –cask oktadeveloper/tap/okta - Check and see if the CLI is accessible by trying out a command. If everything’s working you’ll see some information about how to use the CLI presented.
okta –help - Next, we need to log in. We already have our Okta developer account, so in the Terminal, type:
okta login -
Now we want to provide the credentials we are asked for. When asked for your organization, this is the URL that appears in your developer account in the upper right corner. Type out the entire URL, if the format is different the CLI will make you enter it again. You’ll also need an API token. In your developer dashboard, from the choices on the left, click Security and choose API.
-
On the API screen you can see your organization URL(s) and a tab called Tokens. Click the Tokens tab.
-
On the Token page, you can manage and see all the tokens you’ve created. You can’t see the token’s value after creating it, so save the token information somewhere secure. Click Create Token.
- Follow the Create Token wizard to make your new token, and save the value to put in the CLI when prompted for credentials.
After you’ve done this, you will have a developer account associated with the CLI. If you want to change it you can wipe the file and log in with a different Org URL and credentials. For now, let’s leave it set up.
Configure the project
If you download the CLI, you can type okta start flask and follow the provided instructions to get the project set up. The GitHub repository will be downloaded for you and the environment variables will be configured in the .okta.env file.
NOTE: You need to enter the URIs you want to use to redirect. In the CLI these are referred to as Redirect URIs. In your developer dashboard, they’re called Sign-in redirect URIs. For this walkthrough, we’ll use: http://localhost:3000/authorization-code/callback. You can use other localhost ports, just be sure to write out the link with the /authorization-code/callback added at the end. You also need to add your Post Logout Redirect URIs. In the developer dashboard, these are called Sign-out redirect URIs. Since we used localhost:3000, the URI will be: http://localhost:3000/.
Create an application (optional)
This section goes over how you can create an Okta application yourself instead of having it automatically configured for you. You might want to learn this process for other projects, or if something goes wrong when you configure the CLI and set up the project. There’s a variety of ways to do this, since we’re using the CLI let’s create an application there.
NOTE: The CLI doesn’t allow you to make all kinds of applications, only some, so it is important to learn to create apps in the developer dashboard too.
- In the terminal type:
okta apps create -
You’re prompted to name your new application. Name it.
-
Next you’re asked what kind of application you want to make. We are making a web application, so choose 1.
-
For framework, choose 1.
-
You need to enter the URIs you want to use to redirect. In the CLI these are referred to as Redirect URIs. In your developer dashboard, they’re called Sign-in redirect URIs. For this walkthrough, we’ll use:
http://localhost:3000/authorization-code/callback. You can use other localhost ports, just be sure to write out the link with the/authorization-code/callbackadded at the end. - You also need to add your Post Logout Redirect URIs. In the developer dashboard, these are called Sign-out redirect URIs. Since we used localhost:3000, the URI will be:
http://localhost:3000/.
Run the project
You can run the project now. Type:
python3 -m flask run --port=3000
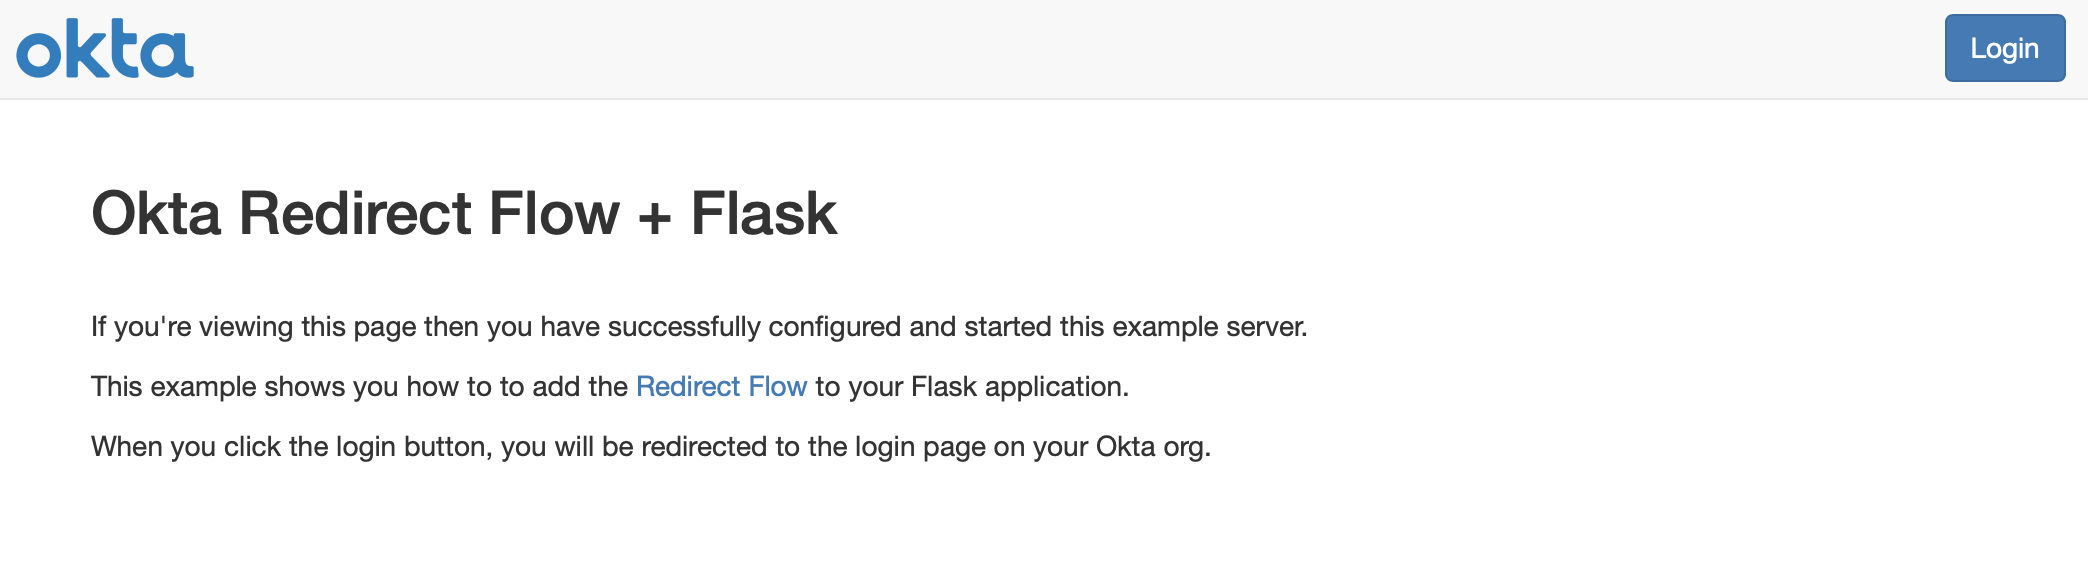
And try walking through hosted authentication with Okta! If all goes well, you’ll see this screen to start with:
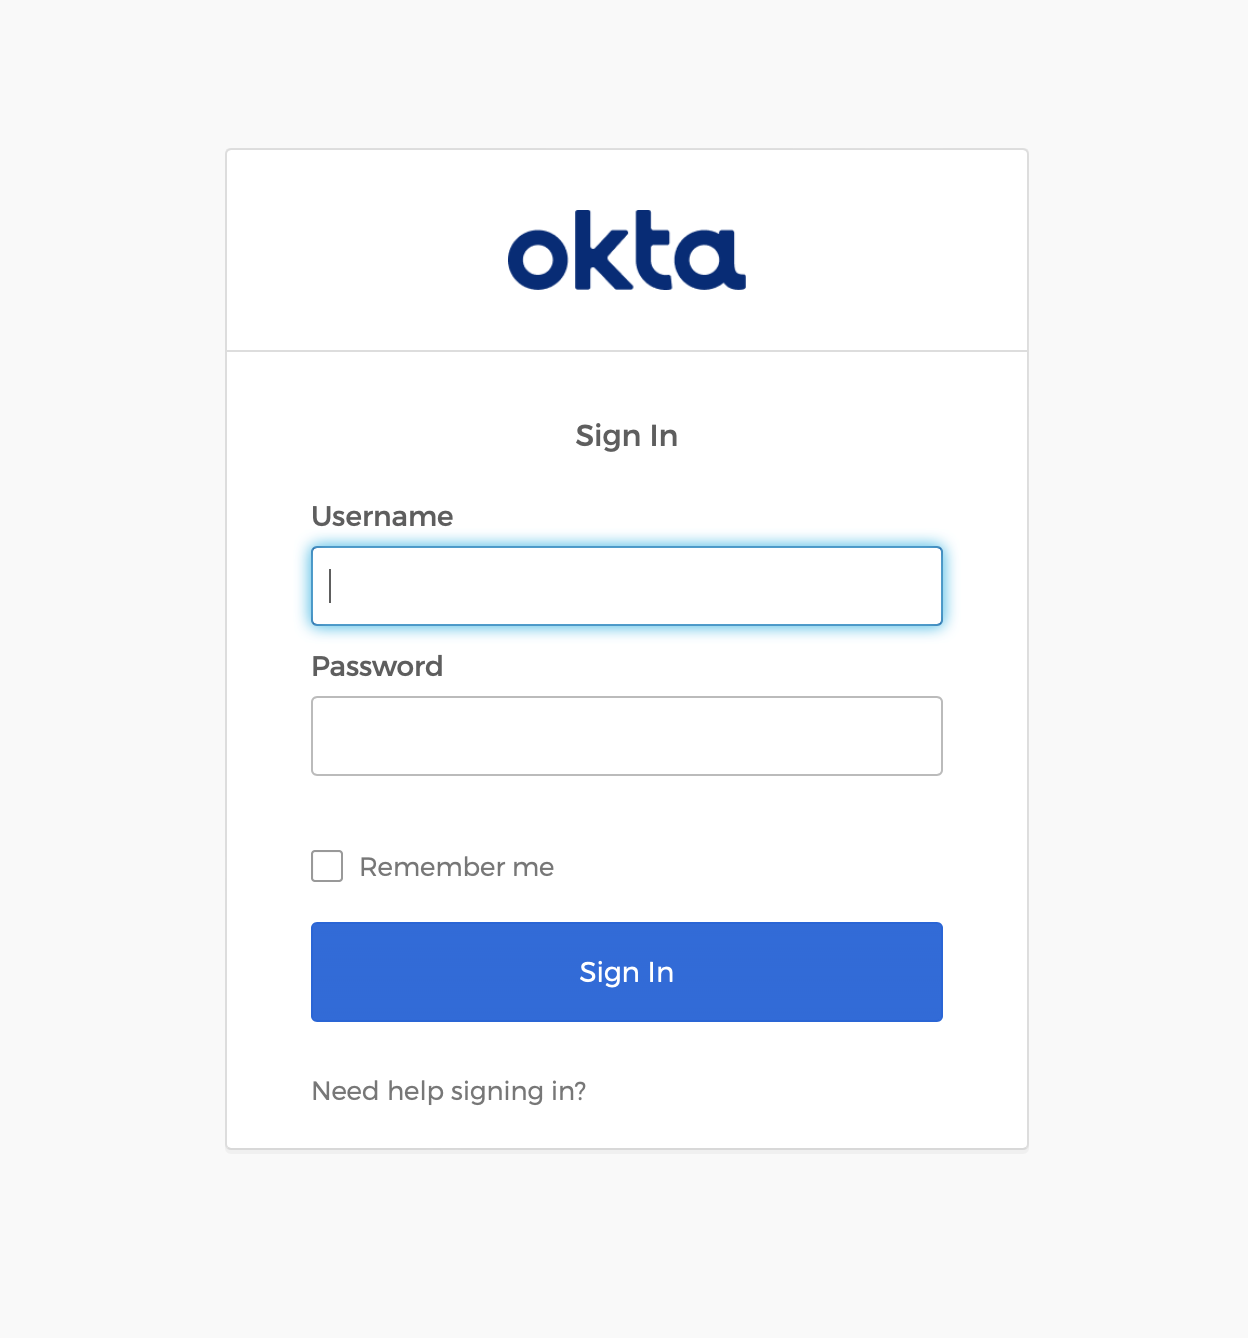
When you click the Login button, you’re then taken to a form where you can enter your email and password:
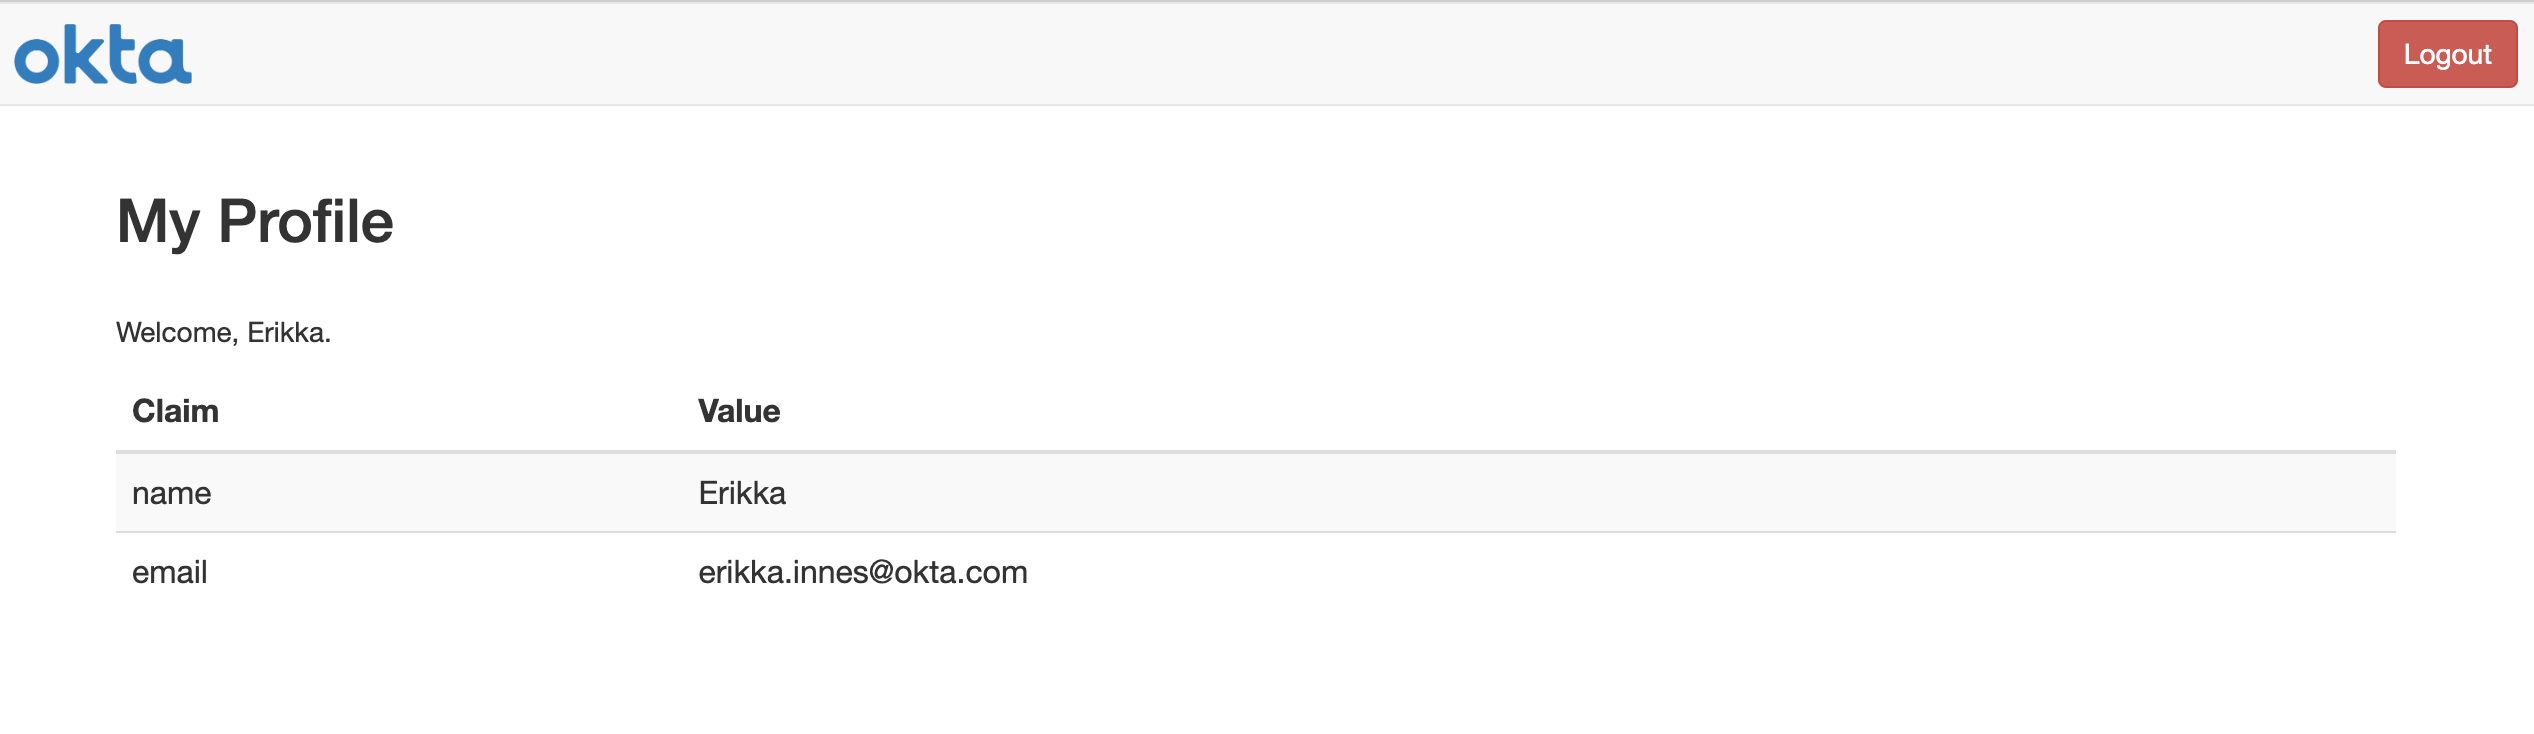
You will know you’ve successfully logged in when you see a screen displaying some information about your profile:
Troubleshooting - Help, it’s not working!
Never fear, the troubleshooting section is here to help you figure out what’s going wrong with your application. Look for the item that matches your problem and read on to learn how to fix it.
It says I’m not authorized to view localhost:5000
If your Mac runs Monterey or later, it uses port 5000 for the AirPlay Receiver. If you have access to the Sharing folder on your computer, you may be able to shut it off and run the application at that point. If you want to try that, follow these instructions to turn off the AirPlay Receiver.
You should then be able to use localhost:5000 again.
I tried everything and I still can’t view localhost:5000
If you cannot access the Sharing folder on your Mac due to permissions, or you tried shutting off AirPlay Receiver and it still isn’t letting you see localhost:5000, then change the project to use localhost:3000. You’ll need to do these things for that to work:
- In your copy of the project, navigate to app.py. Change:
app.run(host="localhost", port=5000, debug=True)To:
app.run(host="localhost", port=3000, debug=True) -
In app.py, go to where it says # get request params and in the json for query_params change the redirect_uri from
http://localhost:5000/authorization-code/callbacktohttp://localhost:3000/authorization-code/callback. -
Log in as an administrator to your Okta developer account. Your login URL for this will be your Organization URL, with a tweak to show you’re logging in as the administrator. The URL takes the form of
https://dev-assignednumber-admin.okta.com. -
From the left panel, choose Applications.
-
Click on the application you are using for the sample.
- At the top of the General Settings section, click Edit. Then scroll down to the Login section. For Sign-in redirect URIs make sure it says
http://localhost:3000/authorization-code/callback. For Sign-out redirect URIs make sure it sayshttp://localhost:3000/.
That should solve the issue.
My application says I can’t authenticate
Sometimes, the .okta.env file does not populate with the information you need. If this is the case, you will need to navigate to your developer dashboard and grab the information manually from your application. To do that, take the following steps:
-
Log in to your dashboard.
-
From the left panel, click Applications.
-
Choose your application. If you used the CLI to create the app as instructed, it should be called okta-flask-sample.
-
Get the Client ID and the Client Secret. These map respectively to CLIENT_ID and CLIENT_SECRET in your
.okta.envfile. -
If you need your Organization URL, that’s up in the right corner of your dashboard under your email address. Grab that URL and put it in the
.okta.envfile for ORG_URL.
I have the wrong credentials in the Okta CLI
If there’s something wrong with your credentials in the Okta CLI, you can try changing them in the Okta CLI. If that doesn’t work, you might need to delete your okta.yaml file. It’s in a hidden directory. This file is added by the CLI, and it’s usually at Users/yourname/.okta/okta.yaml. Delete the entire folder and try what you were doing again with the CLI.
I forgot my API token, do I HAVE to make a new one?
If you configured your CLI correctly, you can actually retrieve your API token! The CLI stores this in a yaml file that’s hidden in the .okta folder. Navigate to Users/yourname/.okta/okta.yaml. Copy the token from there.
Learn more about Python, authentication, and Okta
Can’t get enough of Python? Check out our quickstarts for Python and other excellent posts from the Okta Developer blog:
- Flask Tutorial: Simple User Registration and Login
- Build a Simple CRUD App with Flask and Python
- How to Write a Secure Python Serverless App on AWS Lambda
Make sure you follow us on Twitter and subscribe to our YouTube channel. Please comment below if you have any questions or want to share what tutorial you’d like to see next.
Freelance Developer and Writer
Okta Developer Blog Comment Policy
We welcome relevant and respectful comments. Off-topic comments may be removed.