Build and Secure an API in Python with FastAPI
As Python grows in popularity, the variety of high-quality frameworks available to developers has blossomed. In addition to steadfast options like Django and Flask, there are many new options including FastAPI.
First released in late 2018, FastAPI differentiates itself from other Python frameworks by offering a modern, fast, and succinct developer experience for building reliable REST APIs. While one of the newer open-source Python frameworks available, FastAPI has quickly gained a following with over 22,000 stars on GitHub and an active community of maintainers working on the project.
In this post, you’ll learn more about FastAPI, and why it might be the right choice for your next project. You’ll see how to set up a new FastAPI project and use Okta to secure the API.
Note: In May 2025, the Okta Integrator Free Plan replaced Okta Developer Edition Accounts, and the Okta CLI was deprecated.
We preserved this post for reference, but the instructions no longer work exactly as written. Replace the Okta CLI commands by manually configuring Okta following the instructions in our Developer Documentation.
What Sets FastAPI Apart?
Unlike many web frameworks, FastAPI is built to support REST APIs first. As single-page applications become increasingly common, separate backends like those created with FastAPI are an essential part of web application architecture. With this in mind, FastAPI incorporates several features meant to support HTTP API-driven application development.
First, documentation is created for your application automatically. Using OpenAPI, FastAPI generates clean, interactive documentation for your application. Later in this tutorial, you’ll see how you can use this documentation to test your API’s authorization functionality.
Next, FastAPI is, as its name suggests, fast. Python has historically tended to be slower than Node or Go because of the blocking, synchronous nature of the language; in Python 3, the option to declare functions async changed that. Some older frameworks aren’t built to support asynchronous Python, but FastAPI does. It’s built on Starlette, a lightweight asynchronous Python server, and it takes advantage of modern features like typing to improve developer experience.
Another feature implemented by FastAPI, but not necessarily common in the Python ecosystem, is dependency injection. The FastAPI framework uses type hints in your function signatures to find and inject the required dependencies. This allows you to write decoupled, reusable code, making unit testing much easier as dependencies can be swapped out at runtime.
Finally, while FastAPI comes with many of the features you would expect in a REST API framework (like data validation and authentication), it lets you choose your ORM and database of choice. This means that FastAPI can work with your existing data models if you’re migrating from an existing Python application.
While FastAPI is an excellent option for building REST APIs in Python, it’s not perfect for every situation. If the system you’re building relies on Python 3.5 or any earlier Python framework, you won’t be able to use FastAPI. FastAPI also isn’t a great choice if you’re building a server-side web application that needs to display HTML, as it doesn’t include all the view helper functions that full-stack frameworks like Django do.
Now that you’re familiar with FastAPI at a high level, you’re ready to start building your first application. In the rest of this tutorial, you’ll see how to get started and secure your endpoints using Okta as your OAuth authorization server.
Building a New FastAPI Project
In this section, you’ll create a new FastAPI project and add a single, unprotected endpoint to your API.
Before you get started, make sure your computer has Python 3.6+ installed. FastAPI uses the typing and asynchronous features in Python, so earlier versions of the language won’t run it.
Install FastAPI
Start by creating a new Python project and using pip to install FastAPI and Uvicorn as your asynchronous server:
pip install fastapi uvicorn
pip freeze > requirements.txt
The dependencies will be added to your requirements.txt file.
Create a New Endpoint
For this tutorial, you’ll use a single main.py file that contains all your routes. You can break this file up as your application grows, but since you’ll just be adding a couple of endpoints, you don’t need to worry about that now.
Create the main.py file in your project’s root directory and add the following:
from fastapi import FastAPI


app = FastAPI()


# Hello World route
@app.get("/")
def read_root():
    return {"Hello": "World"}
Accessing Your API
When using FastAPI, there are two ways you can access your API. You can use an API explorer like Postman, or you can use FastAPI’s interactive documentation in your browser. This tutorial will focus on the latter.
To start your application, run the Uvicorn server:
uvicorn main:app --reload
Then, open http://127.0.0.1:8000 in your browser to see your “Hello, world” endpoint in action:

FastAPI’s interactive documentation is available at http://127.0.0.1:8000/docs. Once you’re there, you’ll see details about each endpoint automatically. FastAPI uses type hints and context in your application to produce these docs on its own.

Now that you’ve seen how easy it is to get started, you’re ready to build a more useful application. In the remainder of this tutorial, you’ll see how to create protected endpoints in FastAPI that use Okta as an authorization server.
Securing FastAPI with Okta
To demonstrate some of the more advanced features of the FastAPI framework, I’ll show you how to build a protected endpoint that uses the client credentials flow to authorize access. By the end of this tutorial, you will be able to enter your Okta client ID and secret into FastAPI’s interactive docs to get an access token. You’ll see how to validate this JWT access token remotely using Okta’s introspect endpoint and locally using the Okta JWT Python library.
If you’d like to run the final application, the code is available on GitHub, or you can follow along for step-by-step instructions.
To continue, please create a free Okta developer account and log into your new account. Okta is an API service that allows you to store user accounts, handle user authentication & authorization, etc. We’ll be using Okta through this guide to handle the security layer of the API service.
Setting Up a New Application in Okta
Before you create any endpoints in your FastAPI application, you’ll need to create a new application in Okta and get your Authorization Server’s issuer URL and audience. As you go through these steps, add the Okta environment variables to a new file in your application called .env. You’ll see how to use these variables later in the tutorial.
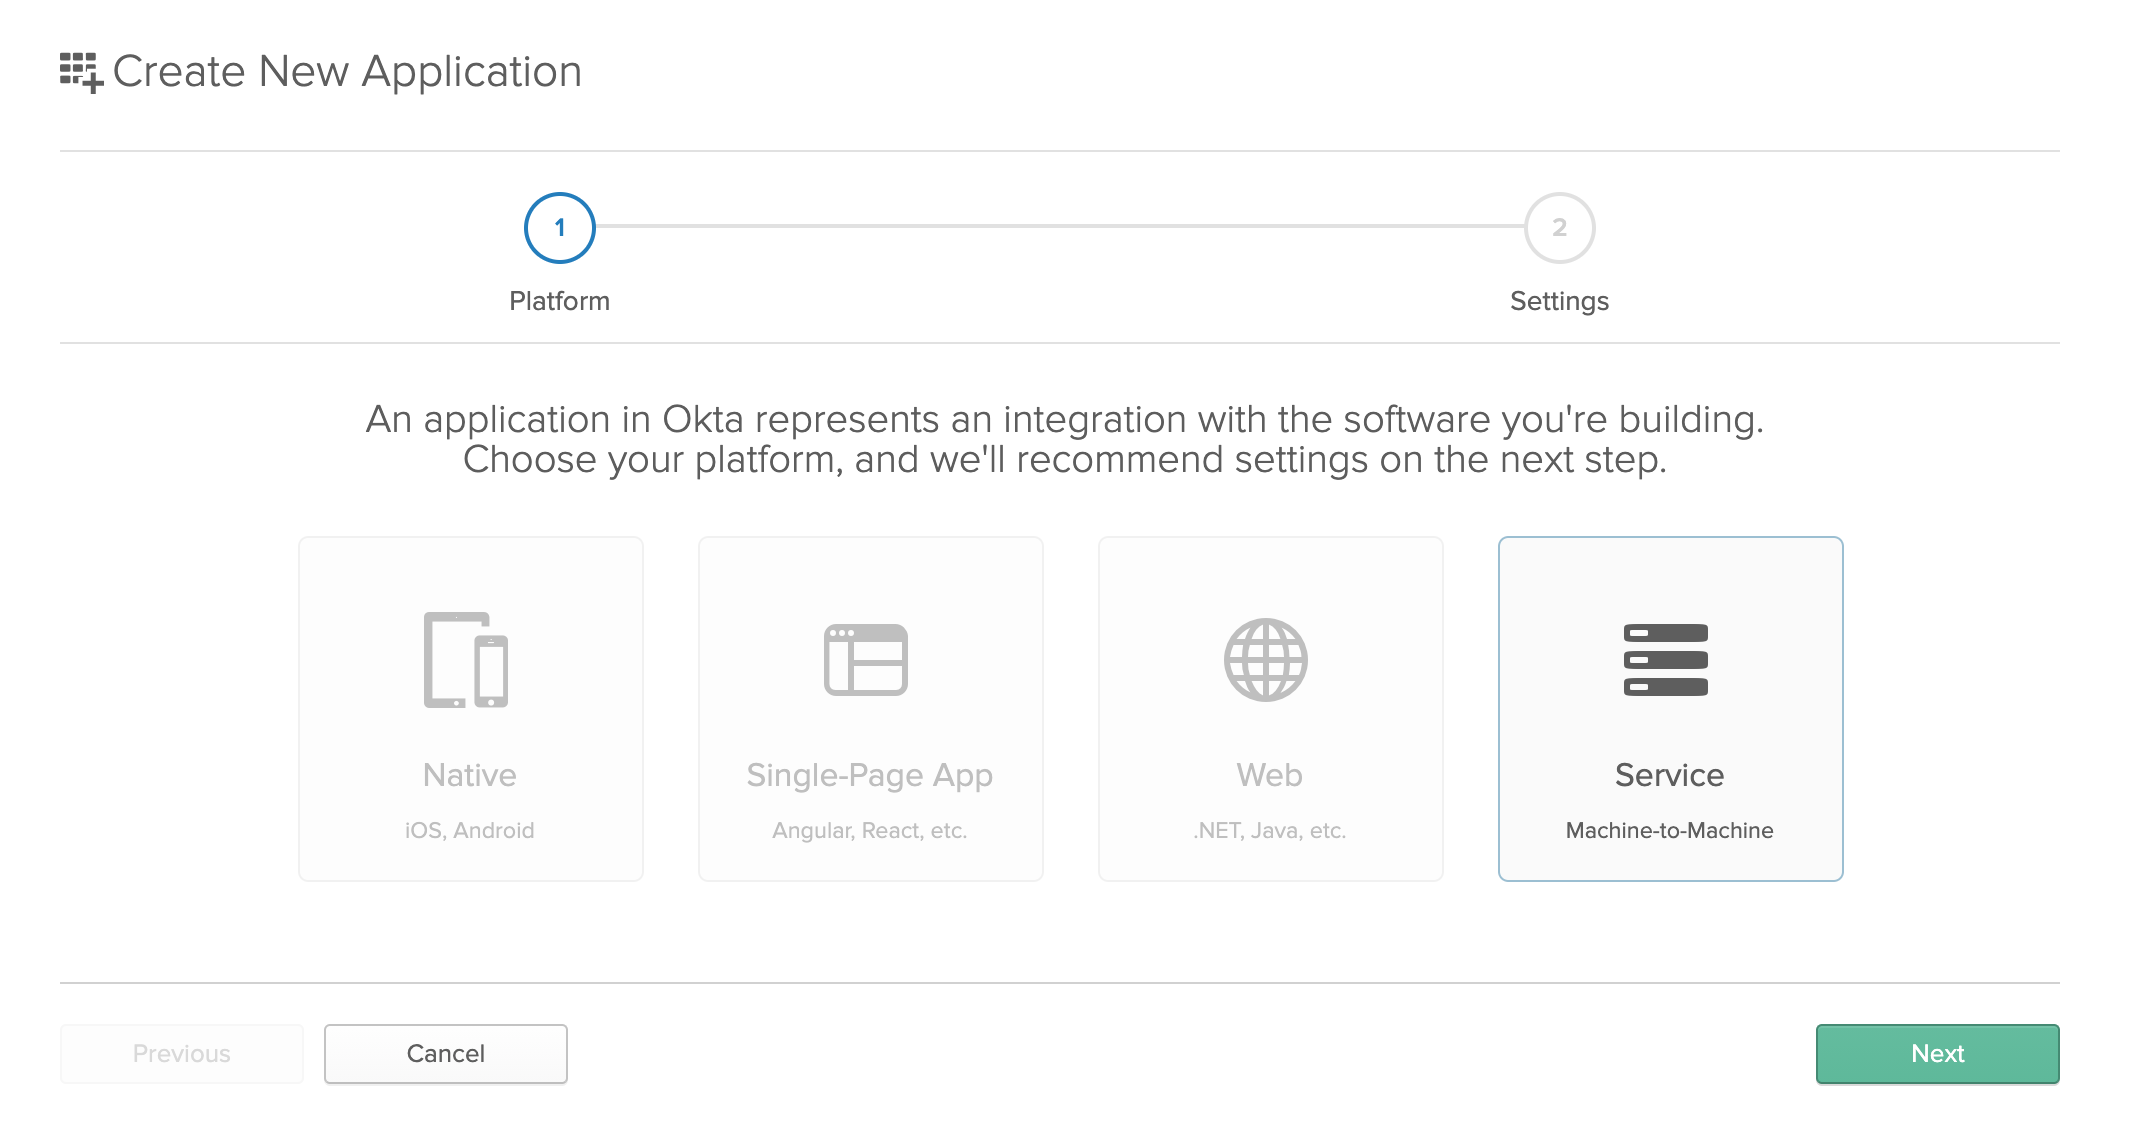
To create a new server application, log in to your Okta account and go to Applications and click the Add Application button in the top left. Select Service, Machine-to-Machine, then click Next.
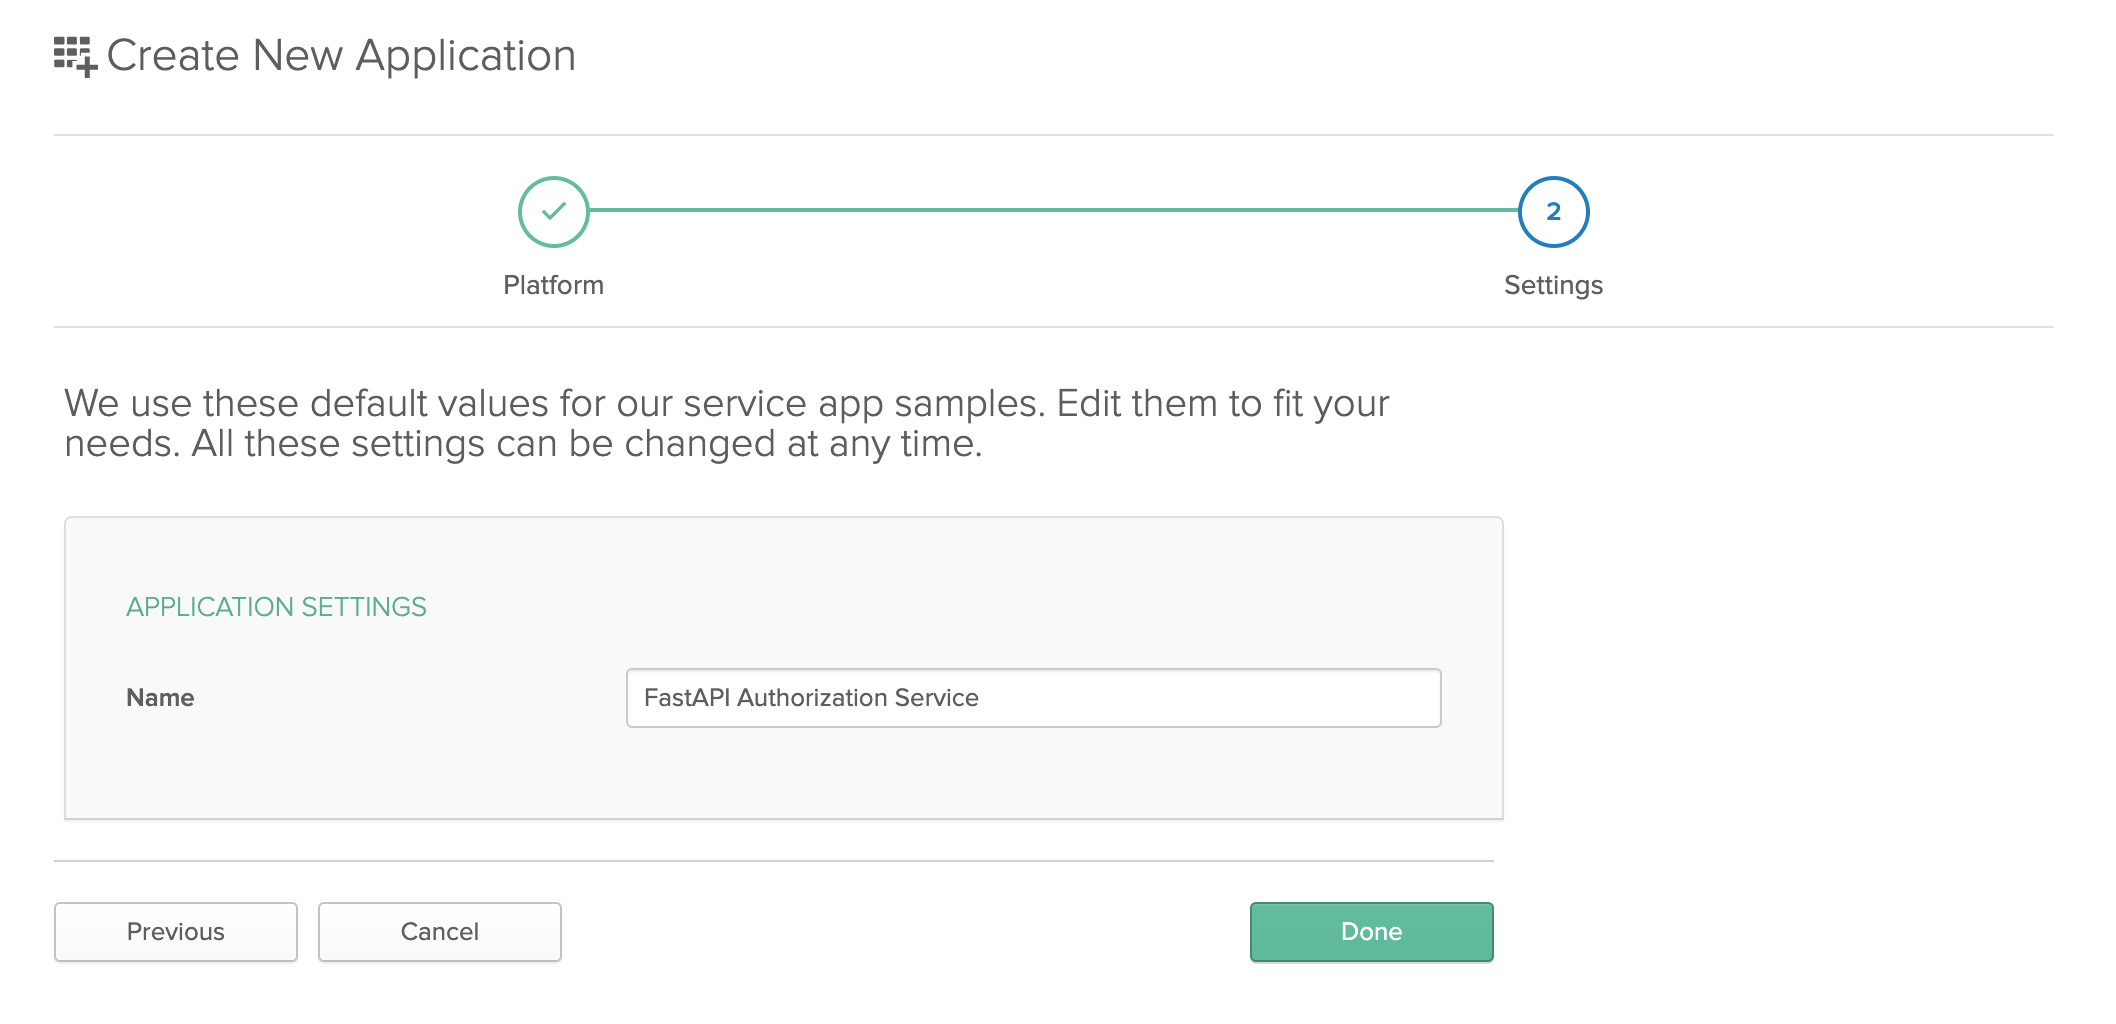
Enter a name for your application and click Next again.
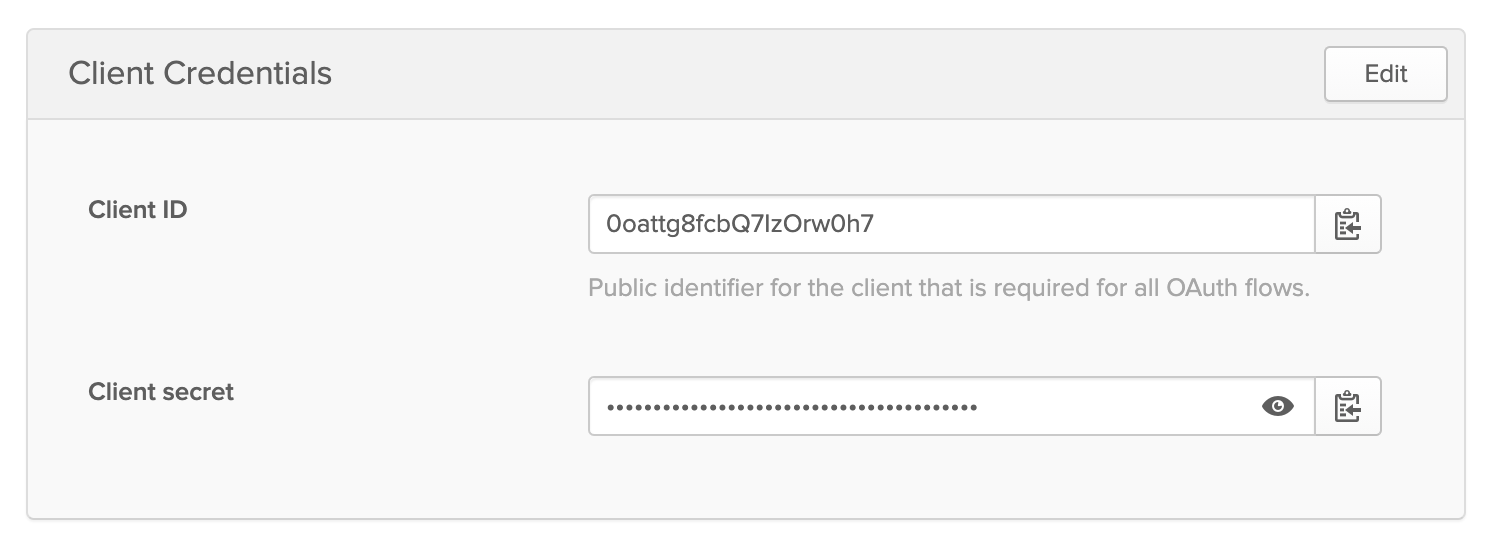
Copy the Client ID and Client Secret from this page and add them to your FastAPI application’s .env file as OKTA_CLIENT_ID and OKTA_CLIENT_SECRET respectively.
Your .env file should look like the example below, with your OKTA_CLIENT_ID and OKTA_CLIENT_SECRET values filled out:
OKTA_CLIENT_ID=
OKTA_CLIENT_SECRET=
Next, go to API > Authorization Servers. Copy the Issuer URI and Audience, and add them as the OKTA_ISSUER and OKTA_AUDIENCE environment variables in your .env file.
Your .env file should now look something like this:
OKTA_CLIENT_ID=
OKTA_CLIENT_SECRET=
OKTA_ISSUER="https://SOMETHING_HERE.oktapreview.com/oauth2/default"
OKTA_AUDIENCE="api://default"

Now that you have your environment variables, you need to create a custom scope for your authorization server. Your FastAPI application will request a token with this scope. Click the pencil icon to edit the authorization server.

Click the Scopes tab and then the Add Scopes button.

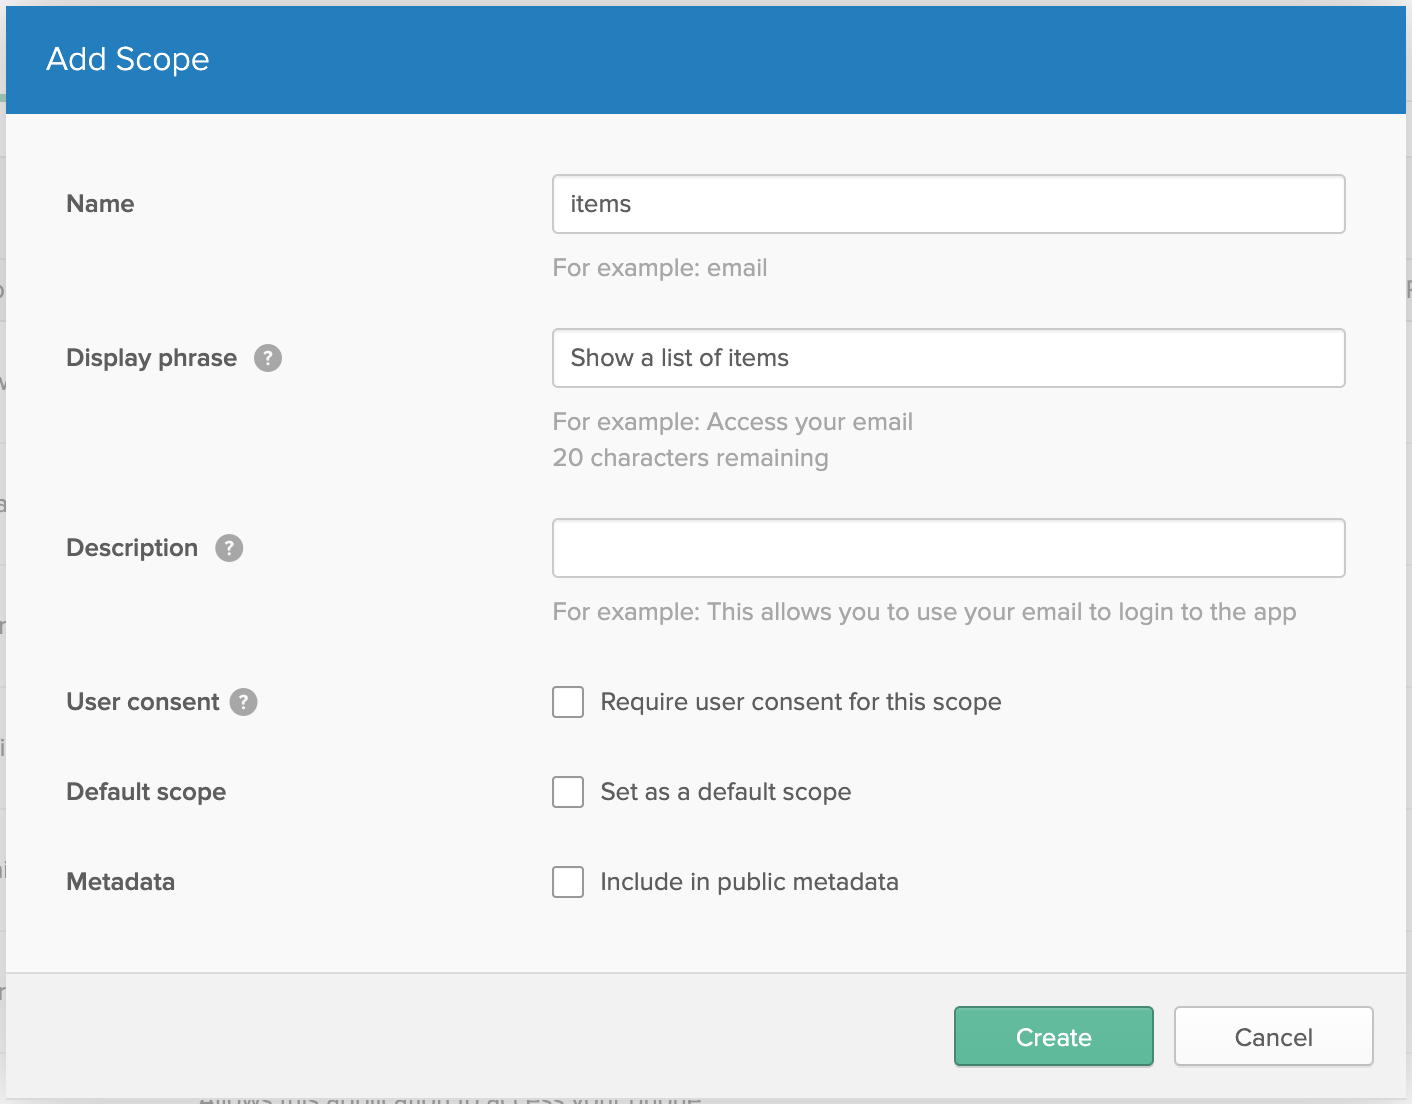
Give your scope a Name and Display phrase so you can identify it. I used items for the scope name since the example here is pretty generic, but it’s a good idea to be specific about the resources users will gain access to when requesting a scope.
Click Create when you’re finished.
Now that you’ve created a new application, set up a custom scope, and set your environment variables, you’re ready to call the Okta authorization server from your FastAPI application.
Retrieving an Access Token in FastAPI
The client credentials authorization flow requires users to enter a client ID and secret. The authorization server will then return an access token that allows the user to access the API. When using Okta, you’ll call the /token endpoint, passing your client ID and secret in as the authorization header.
You can set FastAPI to call an external authentication endpoint like Okta’s, but it requires a bit more custom code. Because the documentation’s API call originates from the browser, you also introduce further security considerations.
The easiest way to request an access token is to use the Python HTTPX library to call the Okta /token endpoint from your API.
First, install HTTPX:
pip install httpx
pip freeze > requirements.txt
Next, open your main.py file and add the following:
from fastapi import Depends, FastAPI, HTTPException, Request
from fastapi.security import OAuth2PasswordBearer
import httpx
from starlette.config import Config


# Load environment variables
config = Config('.env')

app = FastAPI()

# Define the auth scheme and access token URL
oauth2_scheme = OAuth2PasswordBearer(tokenUrl='token')


# Call the Okta API to get an access token
def retrieve_token(authorization, issuer, scope='items'):
    headers = {
        'accept': 'application/json',
        'authorization': authorization,
        'cache-control': 'no-cache',
        'content-type': 'application/x-www-form-urlencoded'
    }
    data = {
        'grant_type': 'client_credentials',
        'scope': scope,
    }
    url = issuer + '/v1/token'

    response = httpx.post(url, headers=headers, data=data)

    if response.status_code == httpx.codes.OK:
        return response.json()
    else:
        raise HTTPException(status_code=400, detail=response.text)


# Get auth token endpoint
@app.post('/token')
def login(request: Request):
    return retrieve_token(
        request.headers['authorization'],
        config('OKTA_ISSUER'),
        'items'
    )
This creates a new endpoint (/token) in your FastAPI application that passes the request’s Authorization header on to your Okta authorization server. It also includes your custom scope ('items').
Creating a Protected Endpoint
Now that you have an endpoint that generates a token, you are ready to create a new endpoint that checks the token before granting access.
Before you worry about token validation, create the new endpoint and validate function. You’ll add the logic to this function in the next step, but for testing purposes, you can simply return True.
...
# Add these to your imports
from typing import List
from pydantic import BaseModel

...

# Validate the token
def validate(token: str = Depends(oauth2_scheme)):
    # TODO: Add token validation logic
    return True


# Data model
class Item(BaseModel):
    id: int
    name: str


# Protected, get items route
@app.get('/items', response_model=List[Item])
def read_items(valid: bool = Depends(validate)):
    return [
        Item.parse_obj({'id': 1, 'name': 'red ball'}),
        Item.parse_obj({'id': 2, 'name': 'blue square'}),
        Item.parse_obj({'id': 3, 'name': 'purple ellipse'}),
    ]
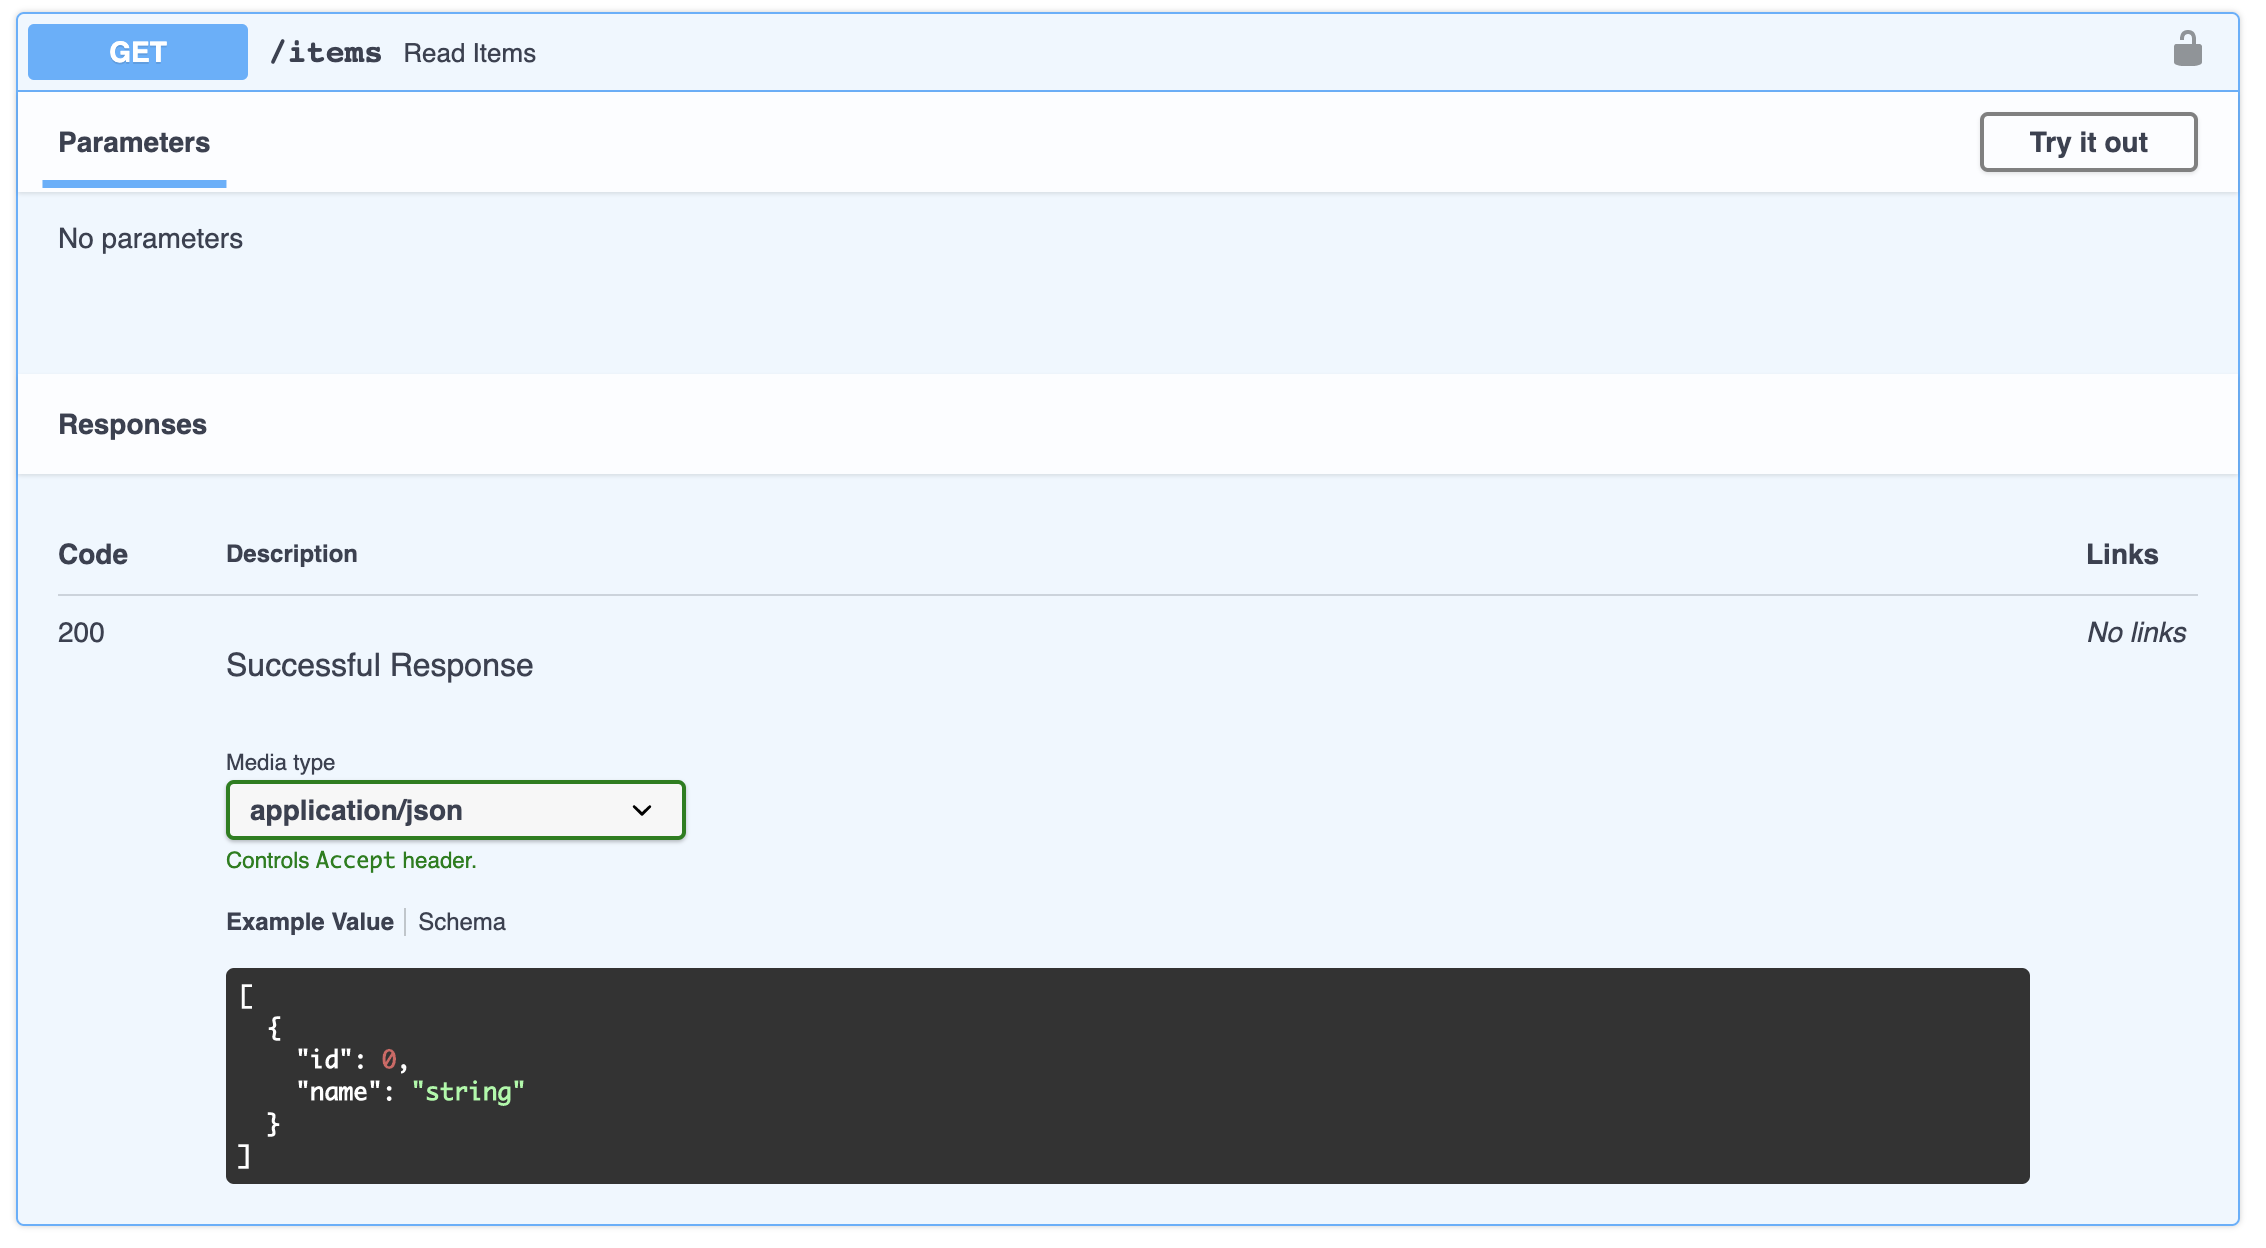
The new /items endpoint includes a response_model definition. This allows FastAPI to generate documentation for your endpoint with a sample response. It uses FastAPI’s dependency injection pattern to call the validate function. In turn, that function injects the oauth2_scheme, which extracts the access token for you.
To view the interactive documentation, start the Uvicorn server (if you stopped it earlier), and go to http://127.0.0.1:8000/docs.
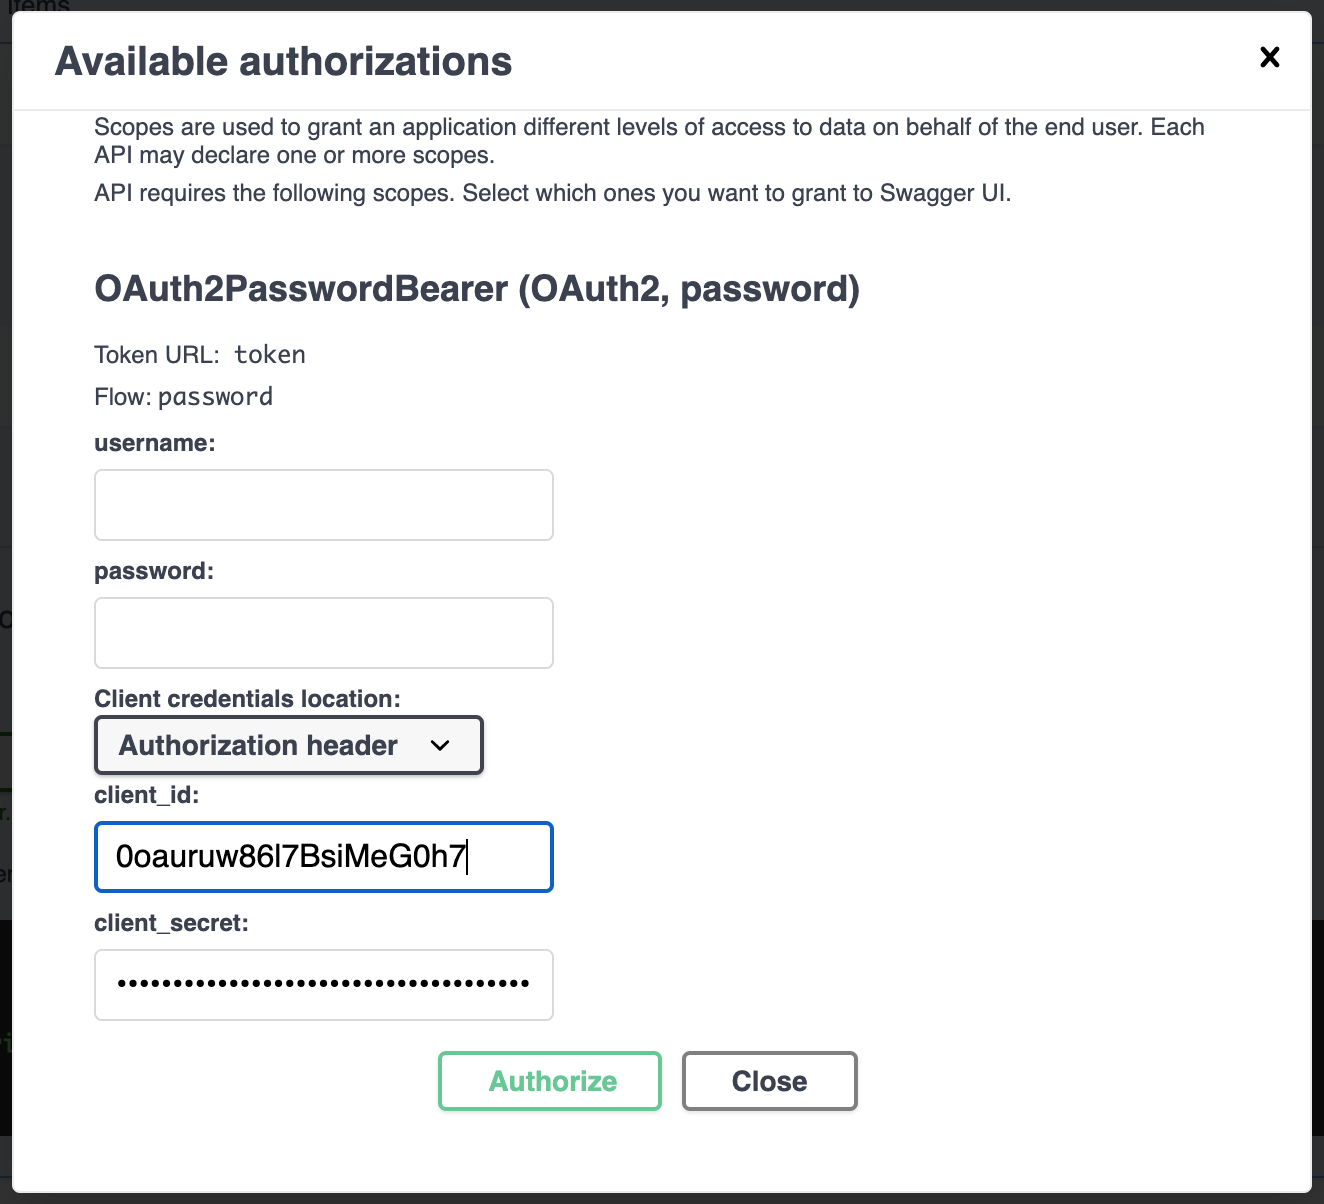
To test the authorization flow, click the grey lock in the top right corner of the endpoint. Enter your Okta client ID and secret (you can ignore the username and password fields) and click Authorize.
Now, click Try it out then Execute to call the endpoint. FastAPI’s documentation automatically stores and injects your access token. Because the validate function you created above never throws an exception, the API will show you the equivalent curl request and respond with the list of items.
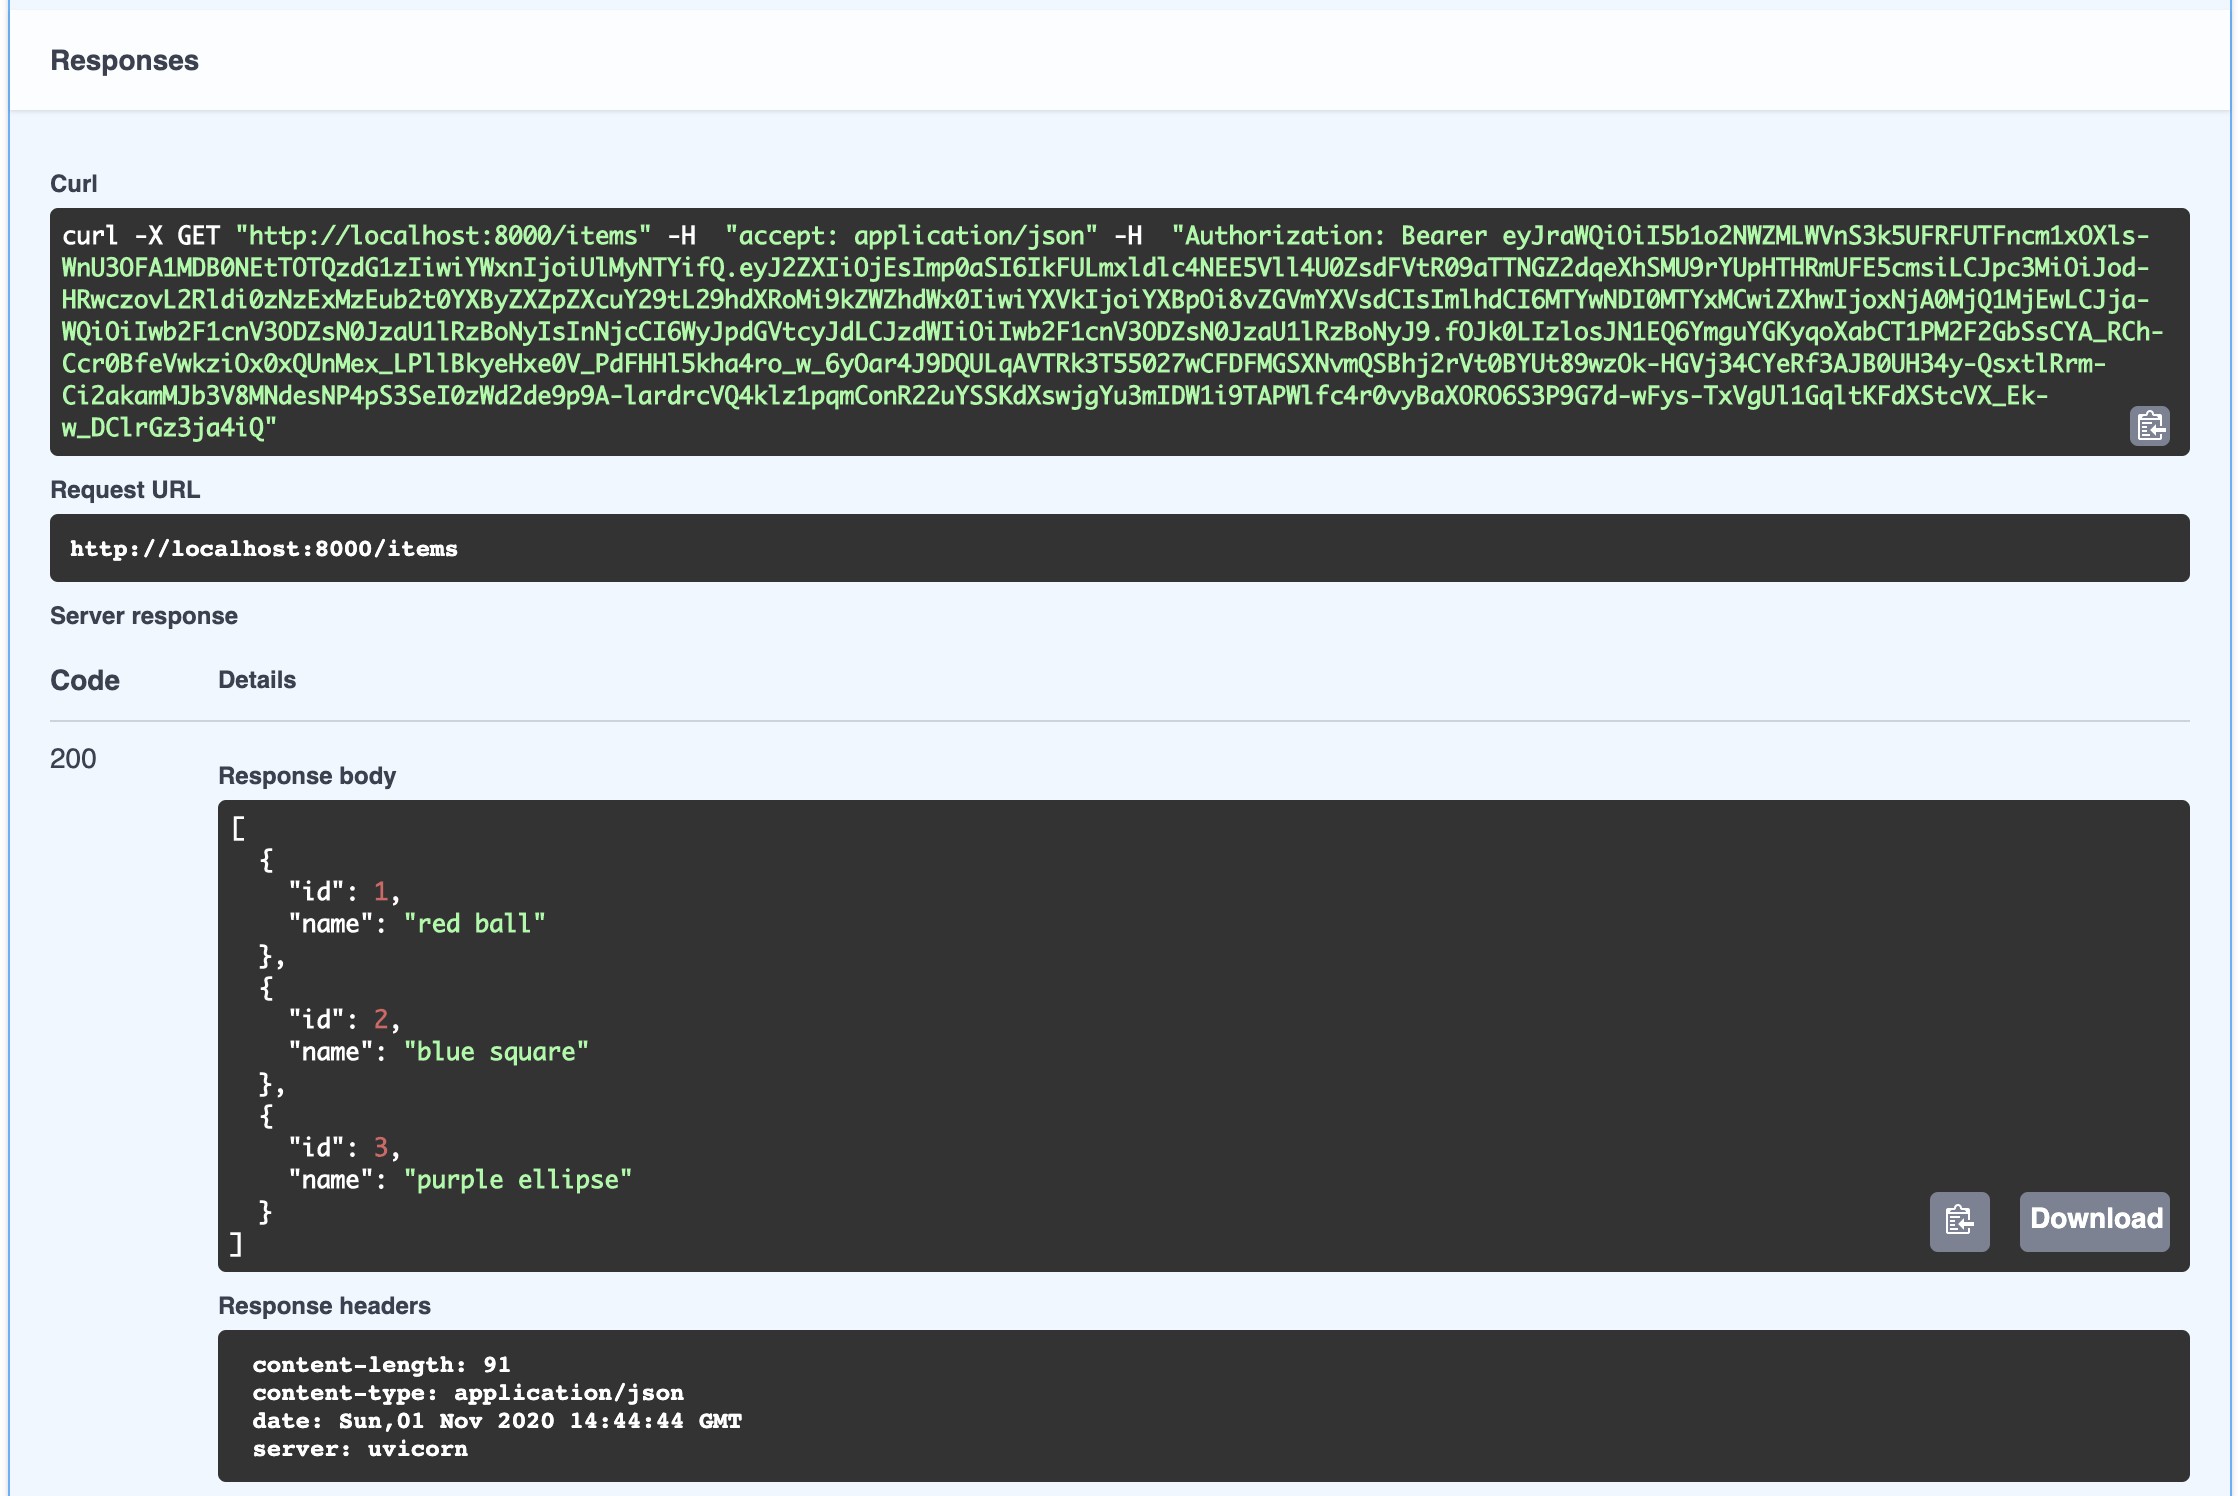
Now that you see how the interactive documentation is generated and how access tokens can be used, you are ready to implement token validation.
Validating Access Tokens Remotely
There are two ways to validate JWT access tokens generated by Okta. The first method you’ll see uses the Okta authorization server’s /inspect endpoint to check the token. The advantage of this method is that you will know if the token has been revoked; the downside is that it’s slower than validating the JWT locally.
To validate access tokens remotely, update your validate function, and add the following validate_remotely function:
def validate_remotely(token, issuer, clientId, clientSecret):
    headers = {
        'accept': 'application/json',
        'cache-control': 'no-cache',
        'content-type': 'application/x-www-form-urlencoded',
    }
    data = {
        'client_id': clientId,
        'client_secret': clientSecret,
        'token': token,
    }
    url = issuer + '/v1/introspect'

    response = httpx.post(url, headers=headers, data=data)

    return response.status_code == httpx.codes.OK and response.json()['active']


def validate(token: str = Depends(oauth2_scheme)):
    res = validate_remotely(
        token,
        config('OKTA_ISSUER'),
        config('OKTA_CLIENT_ID'),
        config('OKTA_CLIENT_SECRET')
    )

    if res:
        return True
    else:
        raise HTTPException(status_code=400)
Now, refresh the docs, generate an access token by entering your Okta client ID and secret again, and call the /items endpoint. You should see a 200 Success response again with the items. This endpoint is now calling the Okta authorization server on every request.
Validating Access Tokens Locally
Because access tokens are generally short-lived (an hour by default), you might prefer to validate the tokens locally. This method is slightly less secure because you can’t be sure that the access token hasn’t been revoked remotely, but on the other hand, you don’t have to use your Okta client secret to validate the token locally. Finally, local validation is significantly faster because you don’t have to make a request to the Okta authorization server with every API call. You’ll have to decide which method is most appropriate for your application.
To validate the access token locally, install the Okta JWT Python package:
pip install okta_jwt
pip freeze > requirements.txt
Next, import the package’s validate_token function and update the validate function in your main.py file:
...
from okta_jwt.jwt import validate_token as validate_locally

...

def validate(token: str = Depends(oauth2_scheme)):
    try:
        res = validate_locally(
            token,
            config('OKTA_ISSUER'),
            config('OKTA_AUDIENCE'),
            config('OKTA_CLIENT_ID')
        )
        return bool(res)
    except Exception:
        raise HTTPException(status_code=403)
...
When you call the /items endpoint, the API will decode the JWT and validate it locally. The decoded JWTs are cached, so subsequent requests will be faster than the first one.
Learn More About Python and REST APIs
In this post, you’ve seen how to use FastAPI to build a REST API endpoint that uses an external authorization server to generate and validate access tokens. You’ve seen some of the key features of FastAPI in action, including dependency injection, the OpenAPI documentation, type hinting, and OAuth implementation.
FastAPI is a great option for building secure and performant backend systems. While there’s much more to building a robust production API, including testing, handling POST and PUT endpoints, and connecting to a database for persistence, I hope this tutorial helps you get started.
If you want to learn more about FastAPI, I suggest the following resources:
To learn more about building an app that can communicate with FastAPI, I suggest using one of these tutorials:
- Data Visualization in Angular Using D3.js
- Building Micro Frontends
- Building a Response Timer to Benchmark API Performance
If you like this topic, be sure to follow OktaDev on Twitter, subscribe to the OktaDev YouTube Channel, and follow OktaDev on Twitch.
Okta Developer Blog Comment Policy
We welcome relevant and respectful comments. Off-topic comments may be removed.