Build Secure Microservices in PHP

The history of software is a history of improving architectures - from the underlying hardware, OS and virtualization platforms, programming languages and frameworks, to the architecture of the applications we build. The microservice architecture in PHP is a relatively new improvement that’s emerged from the desire of fast-paced companies like Netflix and Amazon to improve their software continually, experiment with different ideas, ship early and ship often. This is difficult to achieve in a traditional web application built as a monolith - one single, huge code base, running in the same process. PHP applications (especially successful ones) tend to grow over time, which makes them harder to maintain, and with a monolith rather than microservices, you have to re-deploy the entire application for every single change.
Note: In May 2025, the Okta Integrator Free Plan replaced Okta Developer Edition Accounts, and the Okta CLI was deprecated.
We preserved this post for reference, but the instructions no longer work exactly as written. Replace the Okta CLI commands by manually configuring Okta following the instructions in our Developer Documentation.
Microservices for Your PHP App
The emergence of the DevOps discipline and the ability to automatically build, integrate, deploy and scale software led to the birth of Service-Oriented Architecture (SOA). It predates microservices, but it’s based on the same core principle - organize the application into separate units that can be accessed remotely through a well-defined interface and can be updated independently, without affecting the rest of the system. However, SOA remains vague about how you organize and deploy your application, how separated the different units are (they might even be using the same database) and how the various units interact with each other - you might be using remote procedure calls, or some sort of inter-process communication on the same host, or indirectly (through message queues), or over HTTP.
Of course, there is no formal, industry-accepted definition or specification of microservices either, but they introduce some key concepts that lack or differ in SOA:
- service granularity - microservices are small, fine-grained services, while SOA can include large-scale services that encompass a whole system or product.
- bounded context - microservices are built on the ‘share as little as possible’ architecture style. Each microservice owns its own data and communicates with clients/other services only through a well-defined, strictly enforced interface. Microservices are independently scaled and resilient to failure.
- communication protocols - microservices tend to rely on REST/gRPC for synchronous calls and message queues for asynchronous calls, while SOA has no prescribed limits.
What You Will Build: Design Your PHP Microservices Application
I will repeat: the prudent way to start your application is to build a monolith and let it evolve naturally into a different architecture when needed. However, in this article, you will implement a microservice architecture from the start for purely educational purposes.
Using REST APIs with JSON payloads for intra-service communication is a simple and popular solution, but it’s not ideal for all use cases since it’s most often synchronous. You should always consider the alternatives when building a distributed system - many situations call for asynchronous communication via work queues or event-driven processing.
The application you’ll build is a simulation of an audio transcription service. It consists of the following microservices:
- Transcription Gateway - a service that exposes an API which allows it to accept a request from another machine to transcribe an audio file. Each new request is put on a queue (the ‘transcription’ queue) to be handled asynchronously (since audio transcriptions can be slow). Requests must be authorized.
- Transcriber - an auto-scaling service that uses multiple workers (you wish: after building the example you’ll end up with a single service and no scaling but it’s easy to scale it, especially on cloud providers like AWS). Each worker listens to the queue for transcription requests, and when there is a new request, the first available worker takes it off the queue, transcribes the audio and puts the result on another queue (the ‘notification’ queue).
- Notifier - a service that listens to the notification queue and when a transcription has been processed, it notifies the end user of the result via an email (a real system would also use a push notification back to the web app/mobile app that originated the request).
The application doesn’t use a database (or any persistent storage, for that matter) for simplicity. It also doesn’t have any error handling, automated retries on failure, etc. It goes without saying that you would need all of that (and much more) in a production system.
You’ll use Lumen to build the Transcription Gateway, and plain PHP scripts to build the Transcriber and Notifier services (they are not directly accessible because they’re behind the Gateway, and only communicate with the other services via private queues).
Prerequisites: PHP, Composer, an Okta account (used for authentication), an AWS account (you’ll use Amazon SQS for the queues), and some SMTP account you can use for sending emails programmatically (you can sign up at mailtrap.io for an easy solution to test email sending from your app).
Microservices in PHP – Security and Authentication
In monolithic web applications, there is a client (user) and a server. The client would submit credentials via a web form and the server would set a cookie/create a server-side session (or probably use a JWT token) to identify the user in future requests.
In a microservice architecture, you can’t rely on this scheme since you also need to have the different services communicate with each other.
For your application, you’ll use the OAuth 2.0 authorization protocol and Okta as the identity provider. There are different authentication flows in Okta, depending on if the client application is public or private, if there is a user involved, or if the communication is machine-to-machine only. The Client Credentials Flow that you’ll implement is best suited for machine-to-machine communication where the client application is private and can be trusted to hold a secret. You won’t bother to build a user-facing application, but obviously if you had such an application, it should authenticate and authorize its users as well (using one of the other available Okta flows, such as the Authorization Code Flow).
Why Okta for Secure Microservices in PHP?
Okta is an API service that allows you to create, edit, and securely store user accounts and user account data, and connect them with one or more applications. Register for a forever-free developer account, and when you’re done, come back to learn more about building microservices in PHP.
Create an Account for User Management in PHP
In this section, I’ll show you how to create a machine-to-machine application in Okta and how to get JWT access tokens from your Okta authorization server so you can authenticate your requests to the Transcription Gateway service using the Client Credentials Flow.
The Client Credentials Flow is best suited for machine-to-machine communication (where the client can be trusted to hold a secret). Here’s the documentation of the flow: Okta: Client Credentials Flow.
If you still haven’t created your forever-free Okta developer account, do it now and then continue with the tutorial.
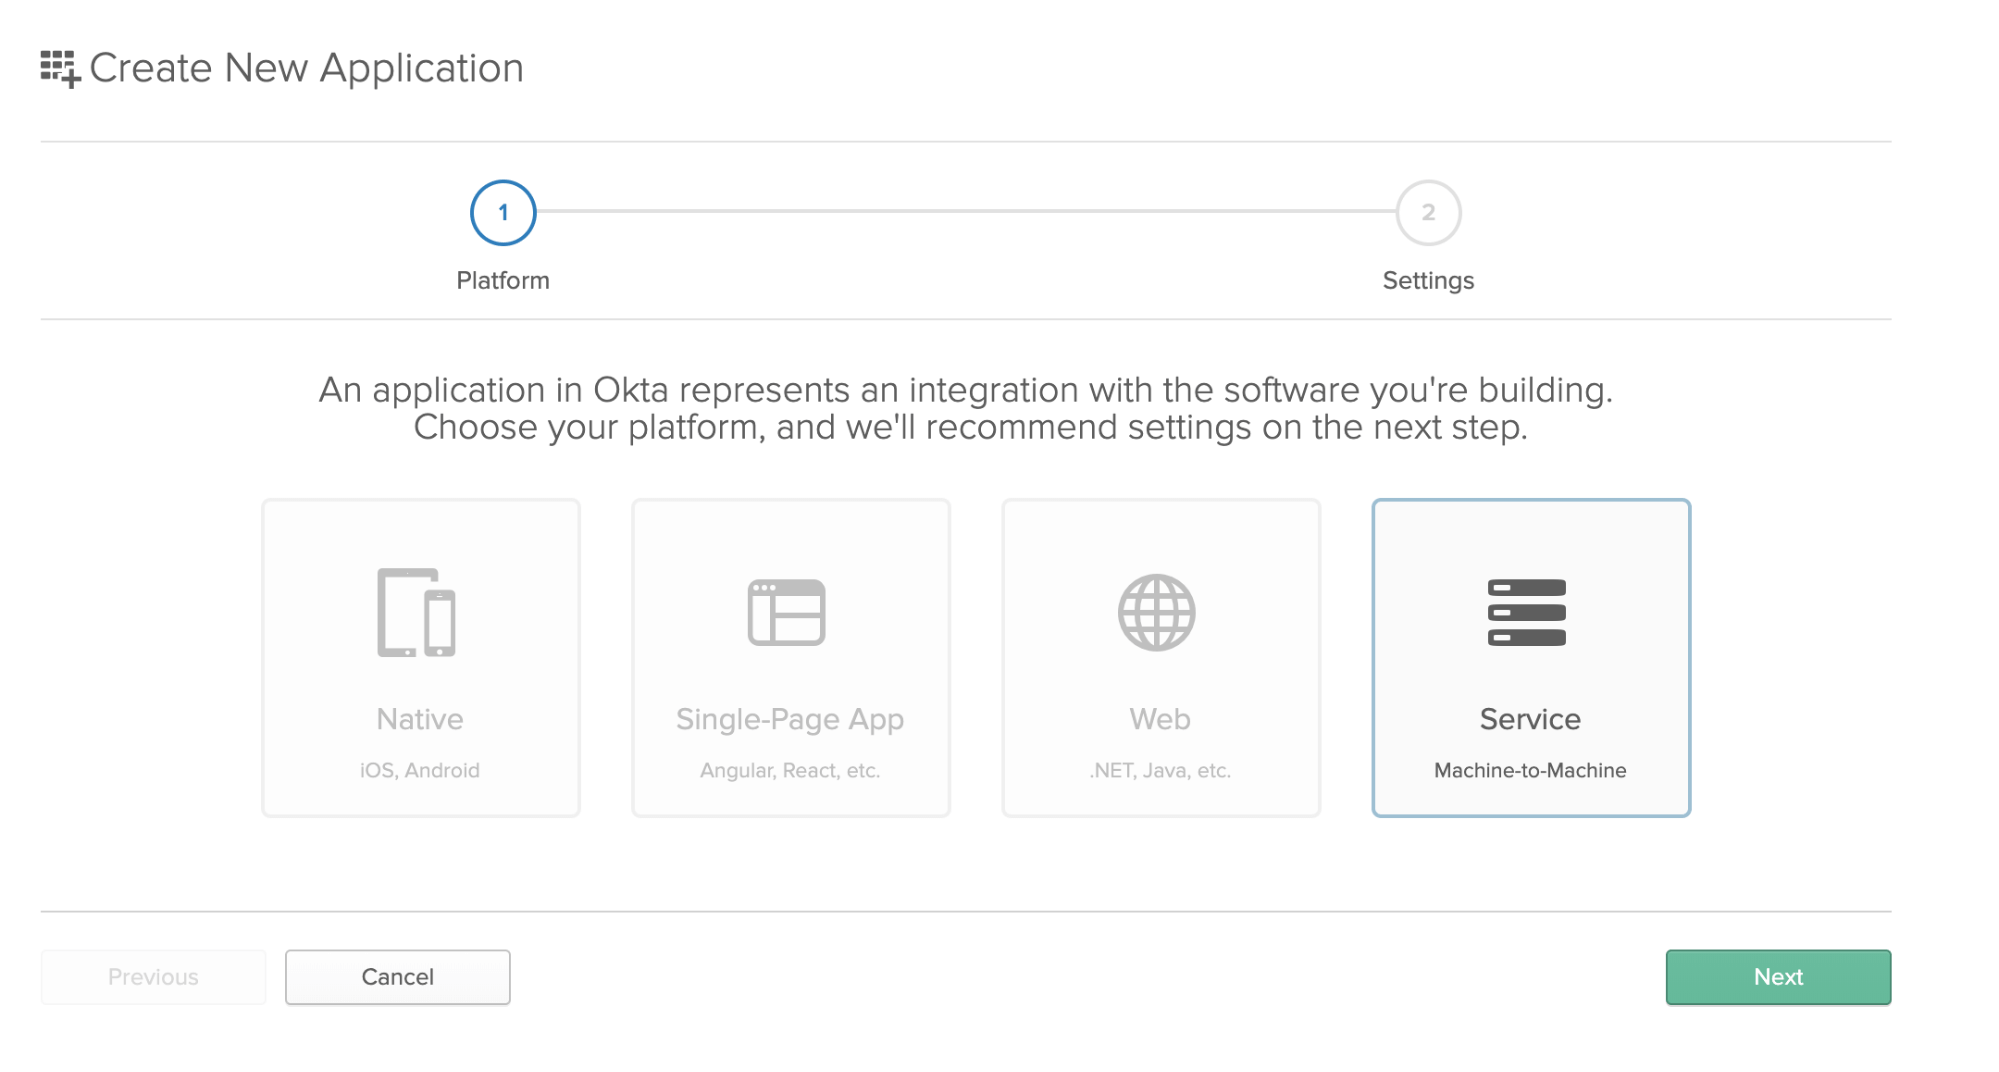
Log in and go to Applications, then click Add Application:

Select Service (Machine-to-Machine) and click Next:
Enter a title for your application and click Done. Take note of the values in the Client ID and Client secret fields that are displayed on the next screen, you’ll need them when building the app.
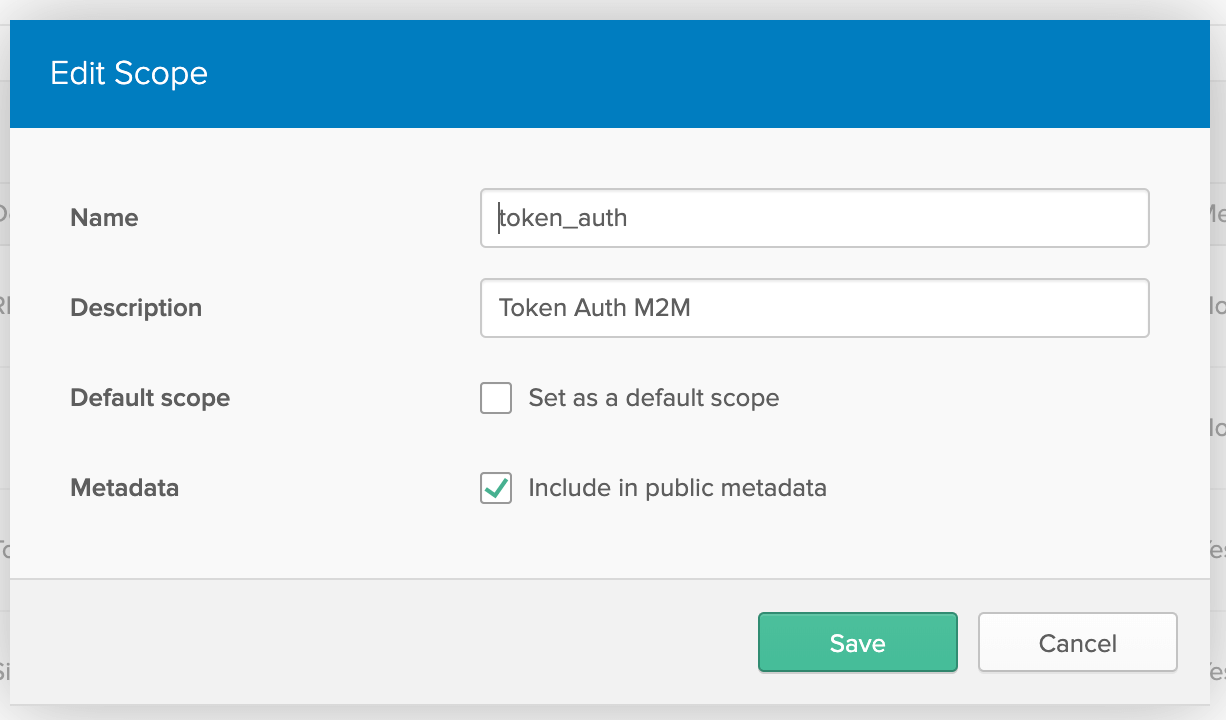
Before creating the application, there’s one more thing to configure in Okta: you need to create a scope for your application.
Go to Api > Authorization Servers, take note of the Issuer URI field (you will need it when configuring the app), and click on the default authorization server. Go to the Scopes tab and click Add Scope. Set up your scope like this:
You should’ve copied 4 values if you did everything correctly: Client ID, Client Secret, Issuer URI, and Scope (‘token_auth’). Keep these handy because we’ll need them later!
Build and Test the Transcription Gateway
In this section, you’ll build the first draft of the Transcription Gateway - a simple service that exposes an API with a single endpoint POST /transcriptions which allows other apps to submit requests for audio file transcriptions.
First, you’ll install the Lumen installer and initialize a new Lumen application:
composer global require "laravel/lumen-installer"
lumen new transcription-gateway
Change directories into the new folder, and run your new Lumen app using the built-in PHP server:
cd transcription-gateway
php -S 127.0.0.1:8080 -t public
Load http://localhost:8080/ and you should see something like:
Lumen (5.8.4) (Laravel Components 5.8.*)
Create a route for the API endpoint:
/routes/web.php
$router->post('transcription', 'TranscriptionController@create');
Create the Controller file and create() method (for now, it will simply validate the request and return either a 422 response with the validation errors or a 202 Accepted response with the input):
/app/Http/Controllers/TranscriptionController.php
<?php
namespace App\Http\Controllers;

use Illuminate\Http\Request;

class TranscriptionController extends Controller
{
    public function create(Request $request)
    {
        $this->validate($request, [
            'email' => 'required|email',
            'audio-file-url' => 'required|url'
        ]);

        $message = [
            'user-email'          => $request->input('email'),
            'user-audio-file-url' => $request->input('audio-file-url')
        ];

        return response()->json($message, 202);
    }
}
Test it (including the validation) with curl or Postman by making various POST requests to http://localhost:8080/transcription
The next thing you’ll do is add authentication to the TranscriptionGateway so it only accepts authenticated requests.
Secure Your Transcription Gateway
Add the following to the .env.example file:
CLIENT_ID=
CLIENT_SECRET=
ISSUER=
SCOPE=
Copy the file to .env, open it and fill in the values from the previous section.
Install the dependencies required for authentication:
composer require nesbot/carbon:"2.17.0 as 1.22" firebase/php-jwt okta/jwt-verifier guzzlehttp/psr7
Create a new file /app/Http/Middleware/AuthenticateWithOkta.php which will hold your Okta authentication middleware:
<?php
namespace App\Http\Middleware;

use Closure;

class AuthenticateWithOkta
{
    /**
     * Handle an incoming request.
     *
     * @param  \Illuminate\Http\Request  $request
     * @param  \Closure  $next
     * @return mixed
     */
    public function handle($request, Closure $next)
    {
        if ($this->isAuthorized($request)) {
            return $next($request);
        } else {
            return response('Unauthorized.', 401);
        }
    }

    public function isAuthorized($request)
    {
        if (!$request->header('Authorization')) {
            return false;
        }

        $authType = null;
        $authData = null;

        // Extract the auth type and the data from the Authorization header.
        @list($authType, $authData) = explode(" ", $request->header('Authorization'), 2);

        // If the Authorization Header is not a bearer type, return a 401.
        if ($authType != 'Bearer') {
            return false;
        }

        // Attempt authorization with the provided token
        try {
            // Setup the JWT Verifier
            $jwtVerifier = (new \Okta\JwtVerifier\JwtVerifierBuilder())
                ->setAudience('api://default')
                ->setClientId(getenv('CLIENT_ID'))
                ->setIssuer(getenv('ISSUER'))
                ->build();


            // Verify the JWT from the Authorization Header.
            $jwt = $jwtVerifier->verify($authData);
        } catch (\Exception $e) {
            // We encountered an error, return a 401.
            return false;
        }

        return true;
    }
}
Register the middleware:
/bootstrap/app.php (add to the file)
$app->routeMiddleware([
    'auth' => App\Http\Middleware\AuthenticateWithOkta::class,
]);
Modify the API route so it requires authentication:
/routes/web.php
$router->post('transcription', [
    'middleware' => 'auth',
    'uses' => 'TranscriptionController@create'
]);
If you attempt a POST to http://localhost:8080/transcription now you should get a 401 Unauthorized response. You need to get a valid Okta token to proceed.
Here’s how you can get a valid token in the easiest way (since you have no user-facing application, and you’re doing machine-to-machine communication only):
source .env
curl $ISSUER/v1/token -d grant_type=client_credentials -d client_id=$CLIENT_ID -d client_secret=$CLIENT_SECRET -d scope=$SCOPE
Copy the value of the access_token property from the JSON response.
Now modify your original curl or Postman request to include the following header:
Authorization: Bearer <put your access token here>
Now you should be able to run successful requests again, at least until your token expires (then you can simply get a new one).
Put the Transcription Request on a Queue
Things are about to get interesting! Your gateway receives requests but doesn’t do anything with them yet. Let’s put the requests on a queue and then you’ll build a separate microservice to get jobs from the queue and perform the actual audio transcription (or pretend to do so).
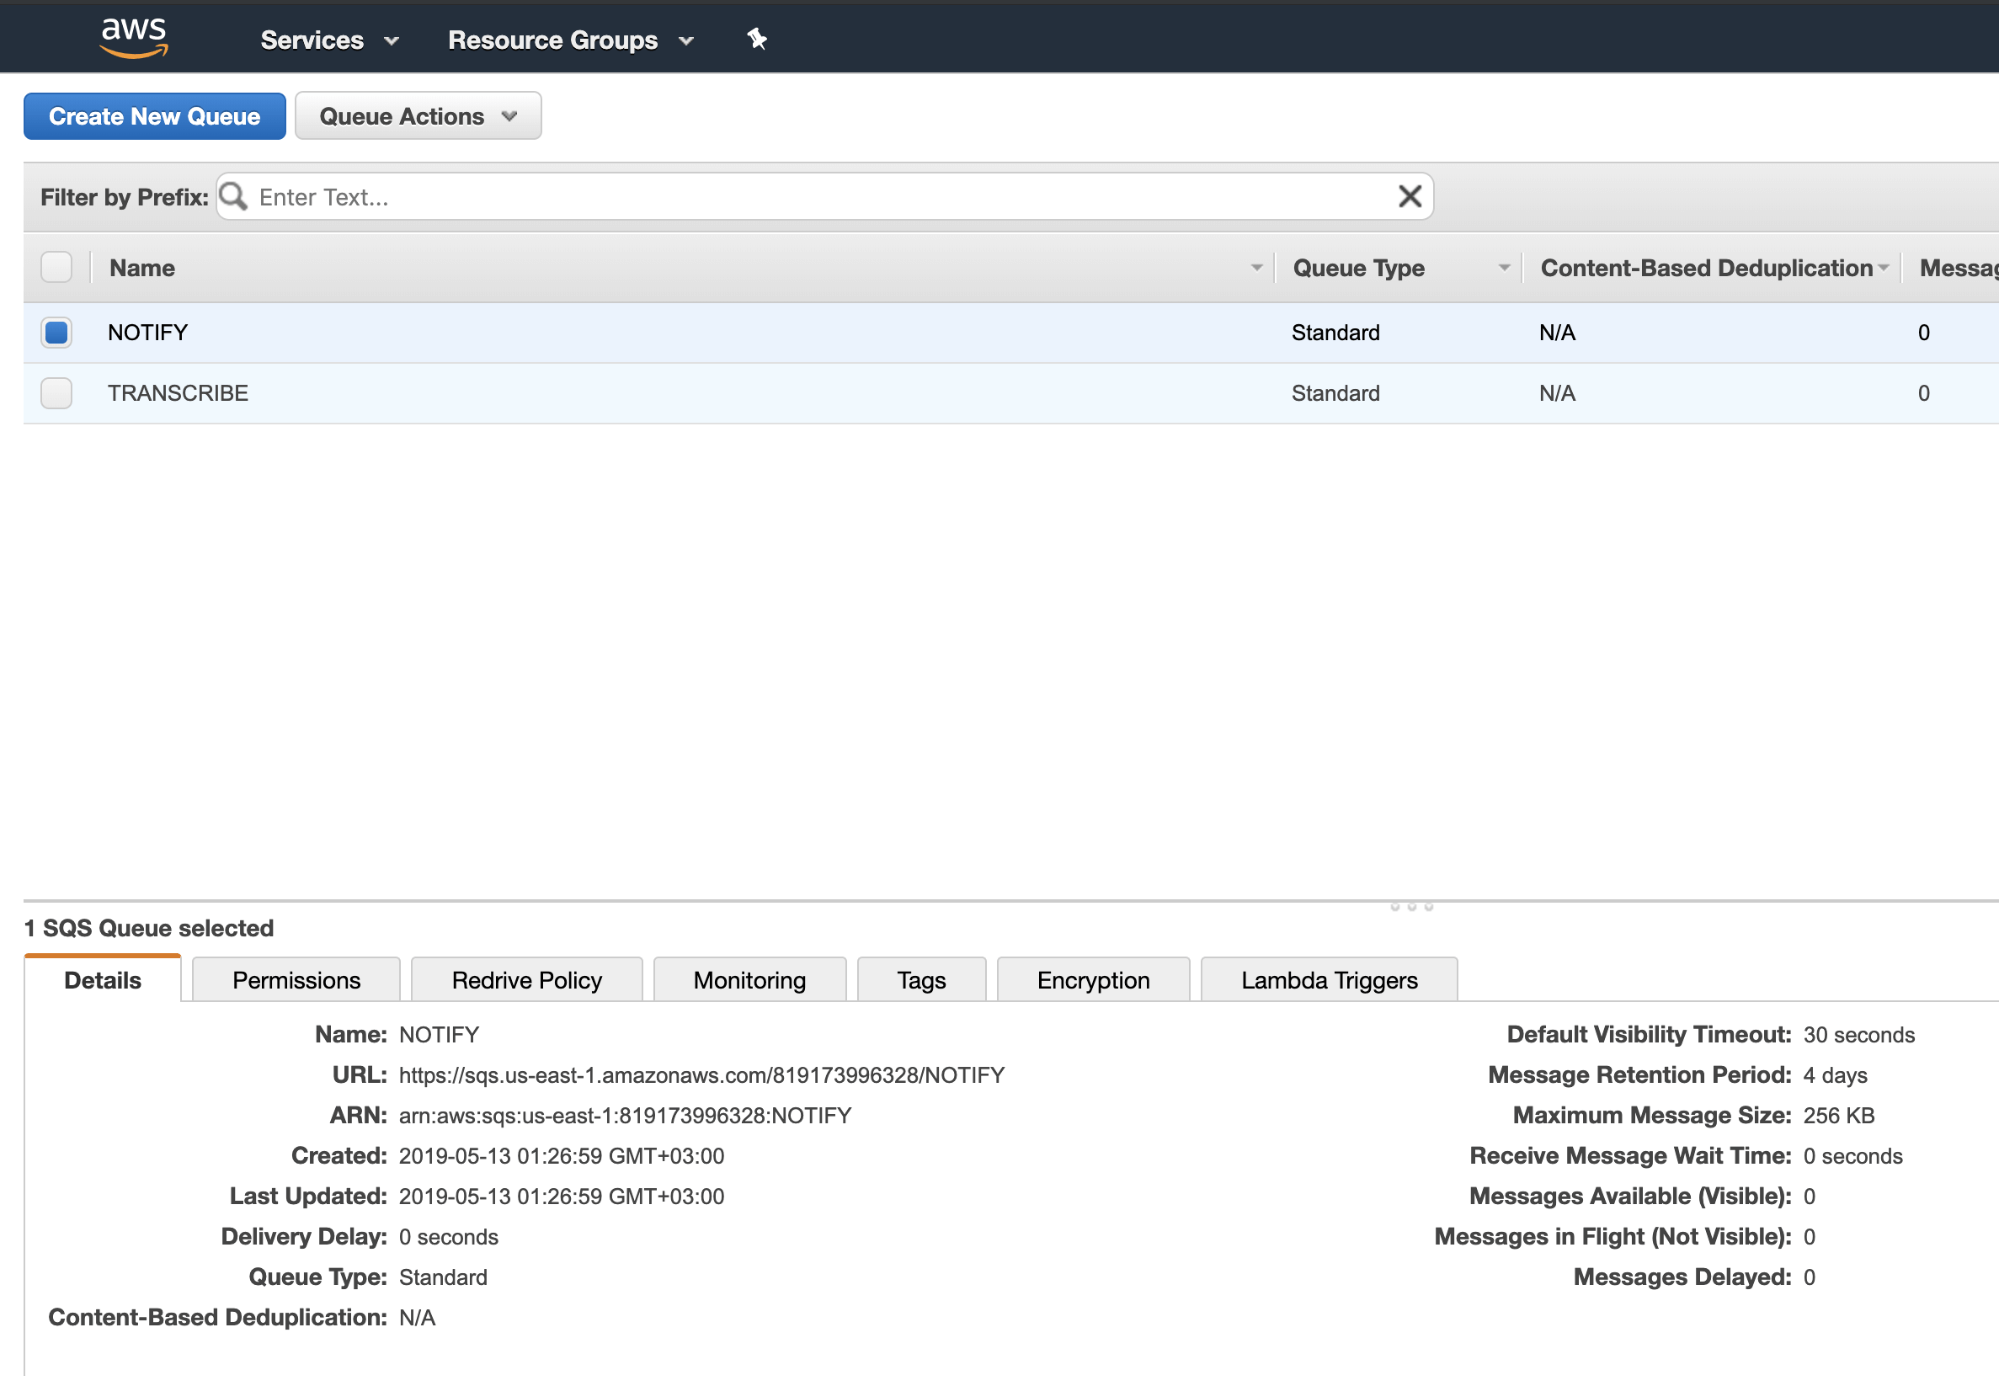
Sign up for a free AWS account, then find SQS in the menu:

Create two SQS queues with names TRANSCRIBE and NOTIFY using Standard queues (not FIFO) and the default settings. Copy the URLs of the queues:
Then find the IAM service and create a user with programmatic access:
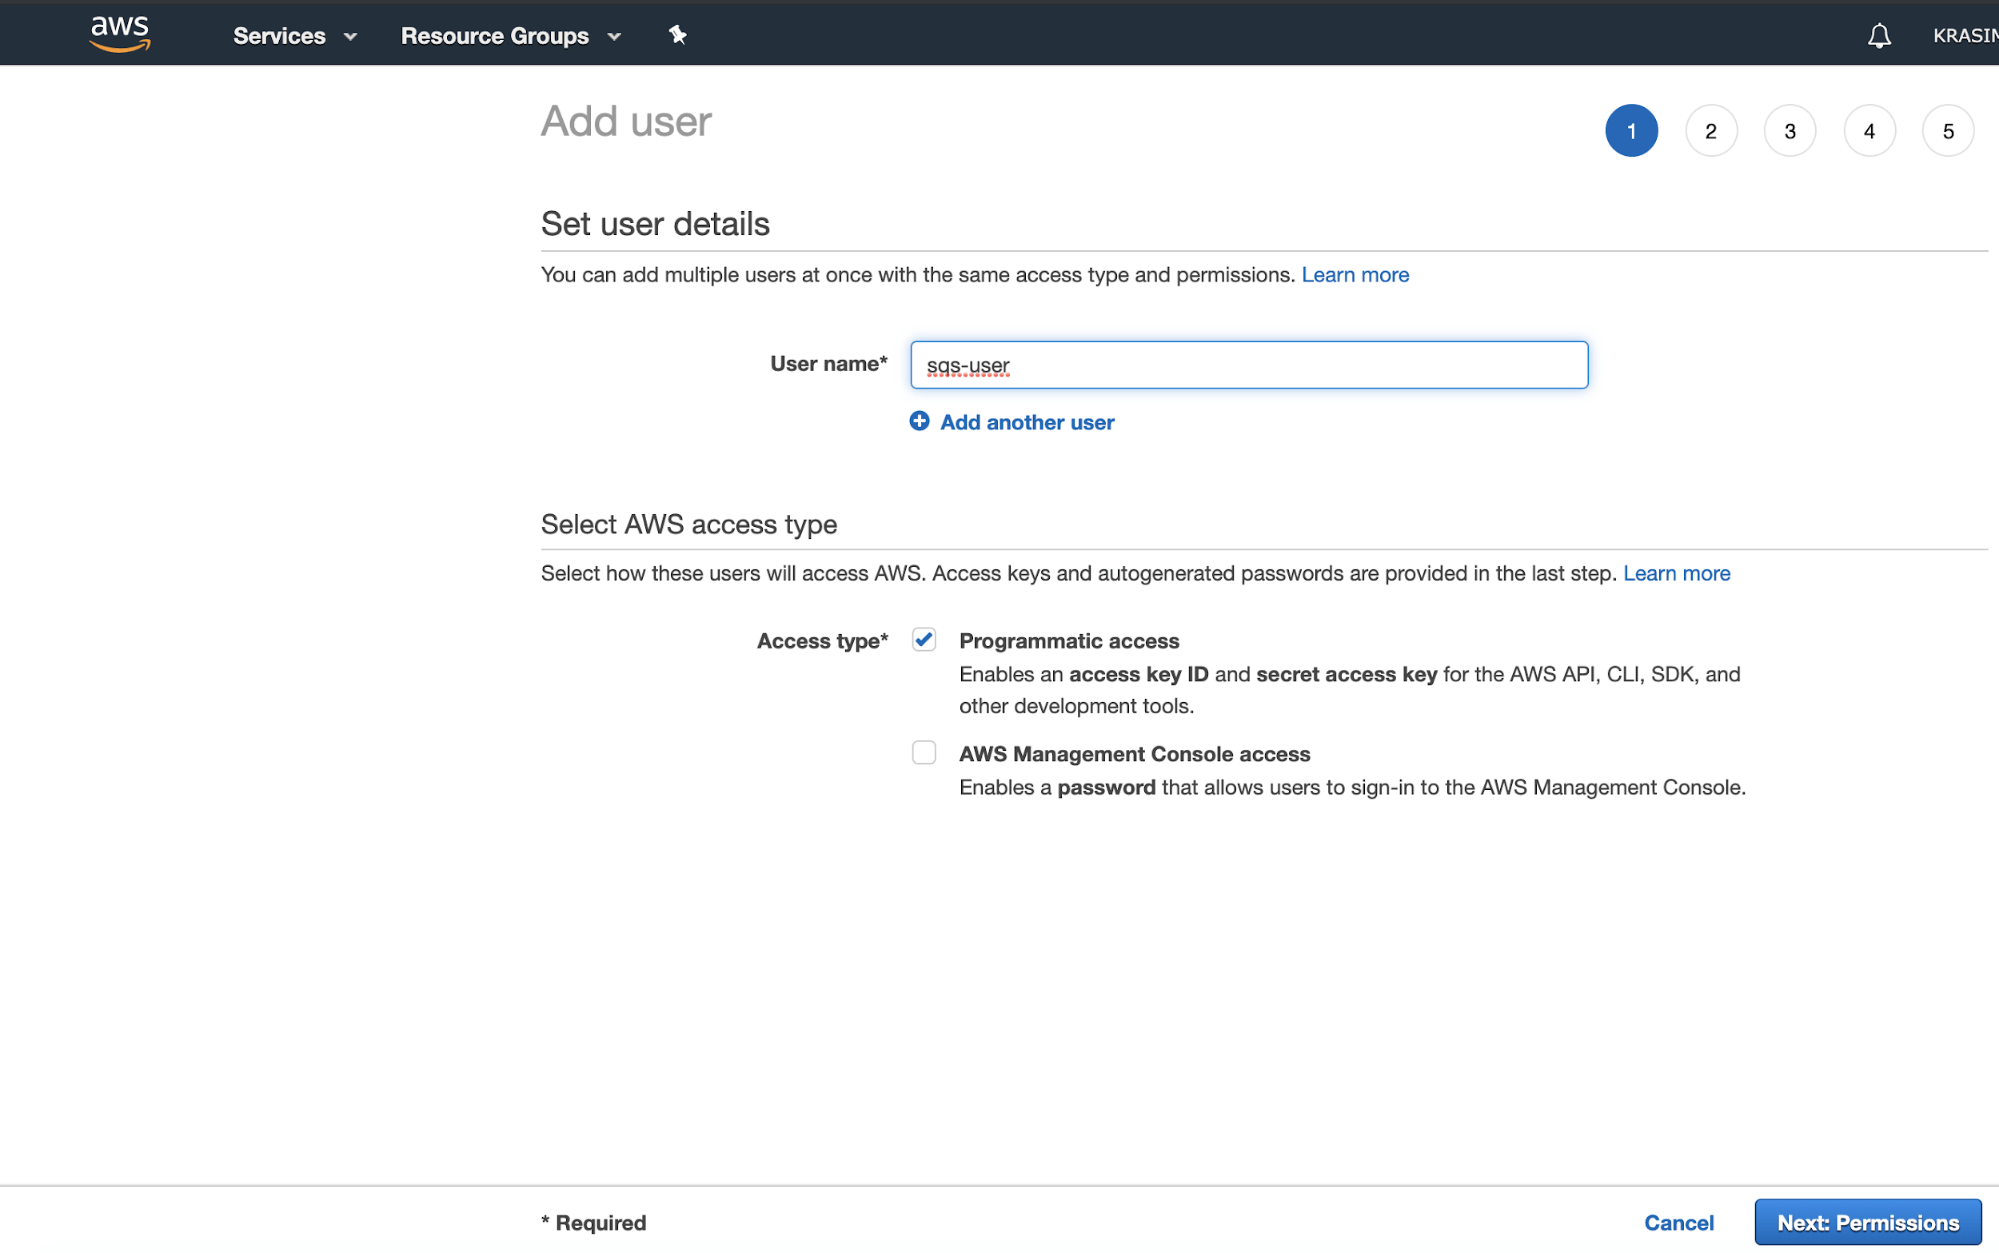
Attach the AmazonSQSFullAccess policy to the user:
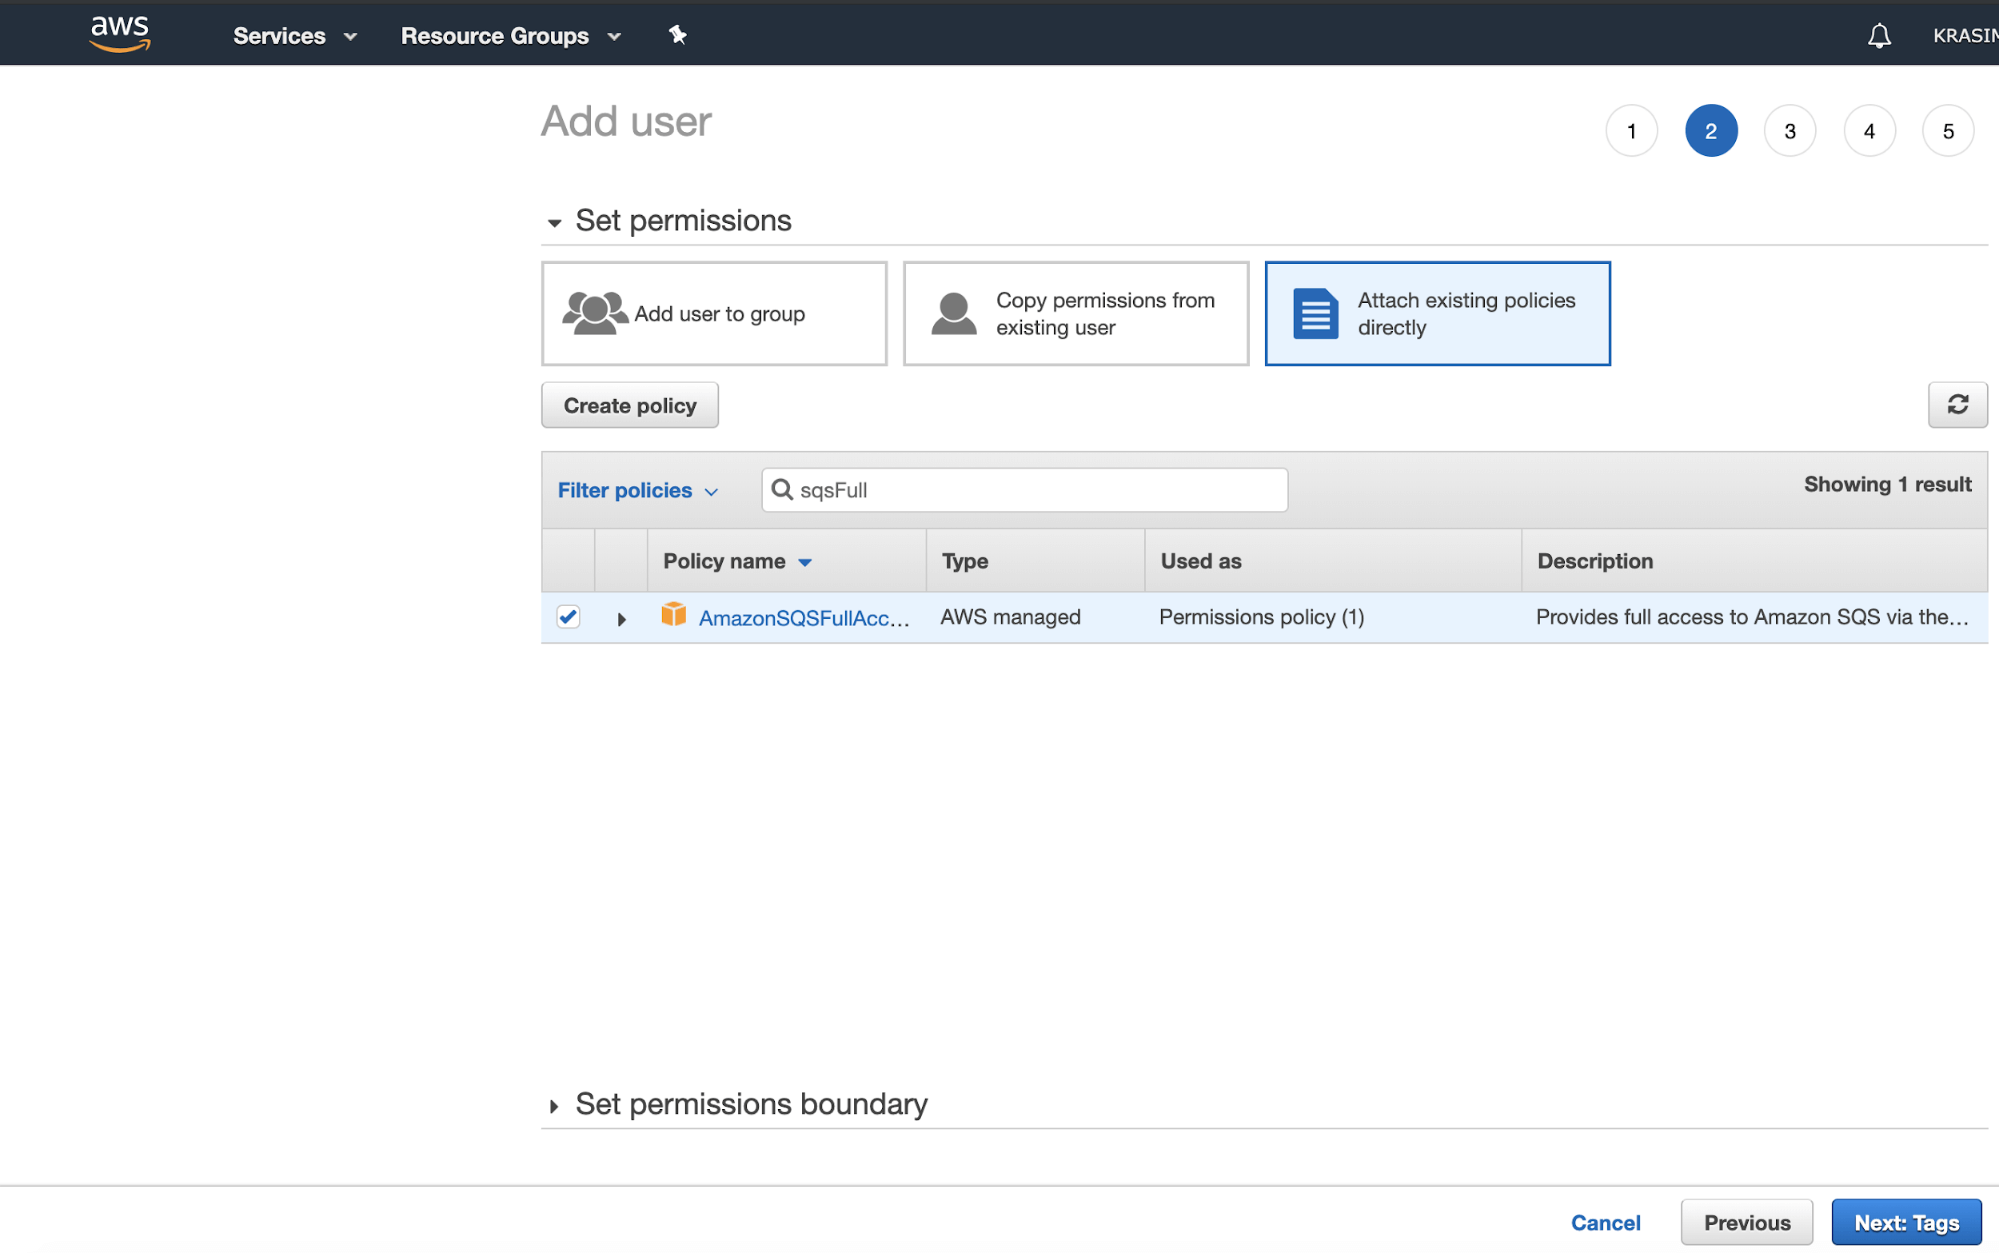
Finally, copy the access key ID and secret access key of the user.
Add the following variables to .env.example:
AWS_ACCESS_KEY_ID=
AWS_SECRET_ACCESS_KEY=
AWS_QUEUE_URL_TRANSCRIBE=
AWS_QUEUE_URL_NOTIFY=
Copy them to .env and fill in your AWS details.
Install the AWS SDK for PHP:
composer require "aws/aws-sdk-php"
Modify the TranscriptionController to put the message on the TRANSCRIBE queue:
/app/Http/Controllers/TranscriptionController.php
<?php

namespace App\Http\Controllers;

use Illuminate\Http\Request;
use Aws\Sqs\SqsClient;

class TranscriptionController extends Controller
{
    public function create(Request $request)
    {
        $this->validate($request, [
            'email' => 'required|email',
            'audio-file-url' => 'required|url'
        ]);

        $message = [
            'user-email'          => $request->input('email'),
            'user-audio-file-url' => $request->input('audio-file-url')
        ];

        // of course, this should be extracted to a service
        // instead of using a private method on the controller:
        $this->putMessageOnQueue($message);

        return response()->json($message, 202);
    }


    private function putMessageOnQueue($message)
    {
        $key = getenv('AWS_ACCESS_KEY_ID');
        $secret = getenv('AWS_SECRET_ACCESS_KEY');

        $client = SqsClient::factory([
            'key' => $key,
            'secret' => $secret,
            'version' => '2012-11-05',
            // modify the region if necessary:
            'region'  => 'us-east-1',
        ]);

        $result = $client->sendMessage(array(
            'QueueUrl'    => getenv('AWS_QUEUE_URL_TRANSCRIBE'),
            'MessageBody' => json_encode($message)
        ));

        return $result;
    }
}
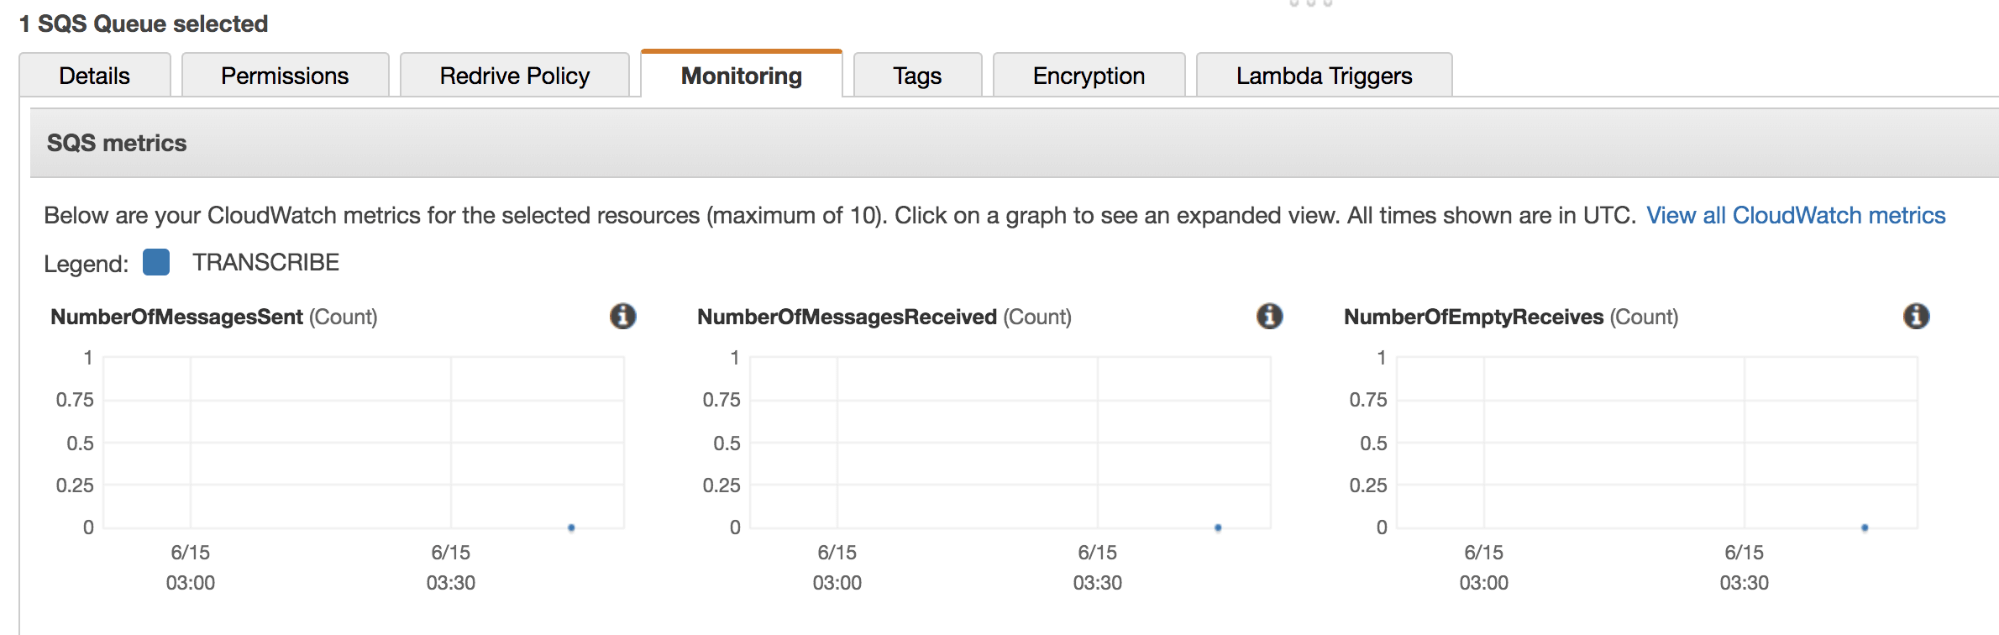
Test the TranscriptionGateway with Postman again and you should see a new message pop up on the TRANSCRIBE queue. You’ll be able to see a dot appear in your AWS console under the Monitoring tab of the SQS queue.
Implement the Transcriber Service for Your PHP Microservices
The message appears on the queue, but you need a service to process it. Create a new directory /transcriber, and inside the new directory, create the following files:
env.example
AWS_ACCESS_KEY_ID=
AWS_SECRET_ACCESS_KEY=
AWS_QUEUE_URL_TRANSCRIBE=
AWS_QUEUE_URL_NOTIFY=
Copy this file to .env and fill in your details (same as in the previous section).
.gitignore
/vendor
.env
composer.json
{
    "require": {
        "aws/aws-sdk-php": "2.*",
        "vlucas/phpdotenv": "^3.3"
    }
}
worker.php
<?php
require 'vendor/autoload.php';

use Aws\Sqs\SqsClient;
use Dotenv\Dotenv;

$dotenv = Dotenv::create(__DIR__);
$dotenv->load();

$key = getenv('AWS_ACCESS_KEY_ID');
$secret = getenv('AWS_SECRET_ACCESS_KEY');
$queueUrl = getenv('AWS_QUEUE_URL_TRANSCRIBE');
$notificationQueueUrl = getenv('AWS_QUEUE_URL_NOTIFY');

$client = SqsClient::factory([
    'key' => $key,
    'secret' => $secret,
    'version' => '2012-11-05',
    // modify the region if necessary:
    'region'  => 'us-east-1',
]);

while (true) {
    // wait for messages with 10 second long-polling
    $result = $client->receiveMessage([
        'QueueUrl'        => $queueUrl,
        'WaitTimeSeconds' => 10,
    ]);

    // if we have a message, get the receipt handle and message body and process it
    if ($result->getPath('Messages')) {
        $receiptHandle = $result->getPath('Messages/*/ReceiptHandle')[0];
        $messageBody = $result->getPath('Messages/*/Body')[0];
        $decodedMessage = json_decode($messageBody, true);

        // simulate processing the message here:
        // wait 2 seconds
        sleep(2);

        // put a message on the notification queue:
        $result = $client->sendMessage(array(
            'QueueUrl'    => $notificationQueueUrl,
            'MessageBody' => $messageBody
        ));

        // delete the transcription message:
        $client->deleteMessage([
            'QueueUrl' => $queueUrl,
            'ReceiptHandle' => $receiptHandle,
        ]);
    }
}
The worker script simply runs an endless loop, waiting for jobs to appear on the queue. When it gets a new job, it waits for 2 seconds (to simulate working on the transcription), and puts the message on the notification queue.
Run composer install inside the directory to load the dependencies. Then run the worker from the command line:
php worker.php
You can test by sending some more jobs to the gateway service. Each of those jobs should appear on the TRANSCRIBE queue, and two seconds later it should be ‘processed’ and moved to the NOTIFY queue.
Implement the Notification Service
The final piece is building the notification service which listens for jobs on the NOTIFY queue and when it gets a job, it notifies the user by email that the audio file has been transcribed. This service is very similar to the transcription service, but it has an additional dependency on SwiftMailer and an SMTP account for sending emails.
Create a new directory /notifier and create the following files inside the new directory:
env.example
AWS_ACCESS_KEY_ID=
AWS_SECRET_ACCESS_KEY=
AWS_QUEUE_URL_TRANSCRIBE=
AWS_QUEUE_URL_NOTIFY=

SMTP_HOST=
SMTP_USERNAME=
SMTP_PASSWORD=
Copy this file to .env and fill in your details (same as in the previous section, plus the new SMTP details).
.gitignore
/vendor
.env
composer.json
{
    "require": {
        "aws/aws-sdk-php": "2.*",
        "vlucas/phpdotenv": "^3.3",
        "swiftmailer/swiftmailer": "^6.0"
    }
}
worker.php
<?php
require 'vendor/autoload.php';

use Aws\Sqs\SqsClient;
use Dotenv\Dotenv;

$dotenv = Dotenv::create(__DIR__);
$dotenv->load();

$key = getenv('AWS_ACCESS_KEY_ID');
$secret = getenv('AWS_SECRET_ACCESS_KEY');
$notificationQueueUrl = getenv('AWS_QUEUE_URL_NOTIFY');

$client = SqsClient::factory([
    'key' => $key,
    'secret' => $secret,
    'version' => '2012-11-05',
    // modify the region if necessary:
    'region'  => 'us-east-1',
]);

while (true) {
    // wait for messages with 10 second long-polling
    $result = $client->receiveMessage([
        'QueueUrl'        => $notificationQueueUrl,
        'WaitTimeSeconds' => 10,
    ]);

    // if we have a message, get the receipt handle and message body and process it
    if ($result->getPath('Messages')) {
        $receiptHandle = $result->getPath('Messages/*/ReceiptHandle')[0];
        $messageBody = $result->getPath('Messages/*/Body')[0];
        $decodedMessage = json_decode($messageBody, true);

        // Create the Transport
        $transport = (new Swift_SmtpTransport(getenv('SMTP_HOST'), 587, 'tls'))
          ->setUsername(getenv('SMTP_USERNAME'))
          ->setPassword(getenv('SMTP_PASSWORD'))
          ->setAuthMode('PLAIN');

        // Create the Mailer using your created Transport
        $mailer = new Swift_Mailer($transport);

        // Create a message
        $message = (new Swift_Message('Your file has been transcribed!'))
          ->setFrom(['notifier@app.com' => 'Audio Transcription Service'])
          ->setTo([$decodedMessage['user-email']])
          ->setBody($decodedMessage['user-audio-file-url']);

        // Send the message
        $result = $mailer->send($message);

        // delete the notification message:
        $client->deleteMessage([
            'QueueUrl' => $notificationQueueUrl,
            'ReceiptHandle' => $receiptHandle,
        ]);
    }
}
This script also runs an endless loop, waiting for jobs to appear on the notification queue. When it gets a new job, it sends an email to the address specified in the user-email field of the message.
Run composer install inside the directory to load the dependencies. Then run the worker from the command line:
php worker.php
If you do a test now, it should go through the whole loop:
Transcription Gateway -> Transcriber -> Notifier -> Your email inbox.
I hope you enjoyed this introduction to building microservices in PHP!
Monoliths vs. Microservices in PHP
Most web applications are born as monoliths, and many thrive or die as monoliths. Here’s the big secret: there’s no shame in starting your application as a monolith, and letting it grow until it reaches its limits. I would even argue that this is the prudent thing to do because monoliths are easy to build and deploy (at least while the application is small). They use a centralized database which simplifies the design and organization of the data.
You should change a monolithic system only when you have no other choice. If you’re sitting there wondering if you should use microservices for your next project idea, here’s your answer: you shouldn’t. When you get to the point where you need microservices, you’ll know. Once your application starts growing, and changes in the code start impacting unrelated features, or different features have different scalability/reliability requirements, the time has come to look at the microservice architecture.
Benefits and Drawbacks of Microservices in PHP
There are clear benefits to using microservices:
- Separation of concerns (microservices follow the single responsibility principle - they do one thing, and do it well).
- Smaller projects - you can easily refactor or even rewrite parts of the system using the appropriate platform, and without affecting the other parts.
- Scaling and deployment are easier and faster.
- Isolation and resilience - if the service that prints invoice PDFs crashes, it won’t take down the rest of your billing system. You also avoid the dreaded ‘dependency hell’ problem - where different parts of your application rely on different versions of the same package.
However, implementing a microservice architecture comes with its own challenges. There are specific anti-patterns you have to avoid, and trade-offs to consider:
- Data migrations and duplication of data - because of bounded contexts and the ‘shared-nothing architecture’, handling data appropriately can become a big issue. However, you absolutely have to make sure to avoid ‘reach-ins’ where a service pulls data directly from the data repository of another service (or, even worse, modifies data that should be owned by a different service).
- Timeouts - you have to define the acceptable standards for service responsiveness and use patterns like Circuit Breaker to avoid poor user experience because of prolonged, repeated service timeouts.
- Code dependencies - you should generally prevent code sharing between services. You can extract the shared code into its own service, or practice service consolidation where you combine the different services that rely on shared code into a single service.
- Transactions - achieving ACID-level database transactions over multiple services is impossible (because of the bounded contexts and communication latency). You have to analyze your needs very carefully and use techniques such as service consolidation (so you can implement transactions within the context of a single service) and event sourcing/CQRS to guarantee eventual data consistency over multiple services.
- Developing without a cause/jumping on the bandwagon - it’s outside the scope of this article to describe all aspects and patterns of the microservice architecture in detail, but I hope you understand the complexity involved and you can use this article as a starting point for further study. Just like any other architecture, the use of microservices should be driven by business needs and should achieve specific business outcomes.
Learn More About Microservices and OAuth 2.0 in PHP
You can find the whole code example on GitHub.
If you would like to dig deeper into the topics covered in this article, the following resources are a great starting point:
- Token Authentication in PHP
- Create and Verify JWTs in PHP with OAuth 2.0
- Add Authentication to your PHP App in 5 Minutes
- Build a Simple REST API in PHP
Like what you learned today? Follow us on Twitter, and subscribe to our YouTube channel for more awesome content!
Okta Developer Blog Comment Policy
We welcome relevant and respectful comments. Off-topic comments may be removed.