Java Microservices with Spring Cloud Config and JHipster
Developing a microservice architecture with Java and Spring Boot is quite popular these days. It’s definitely one of the most popular combinations in the Java ecosystem. If you need any proof, just look at all of the similar frameworks that have cropped up in the last few years: MicroProfile, Micronaut, and Quarkus, just to name a few.
Spring Boot provided a much-needed spark to the Spring ecosystem when it was first released in 2014. Instead of making Java developers configure all aspects of their Spring beans, it provided "starters" that contained pre-configured beans with the default settings. This led to less Java code, and also provided the ability to override the defaults via an application.properties file. Yes, there are many ways to modify the defaults in a Spring Boot application, but I’ll skip over that for now.
In a previous tutorial on Java Microservices with Spring Boot and Spring Cloud, I showed how you can use OAuth 2.0 and OpenID Connect to secure everything. One of the problems with this example is that you have to configure the OIDC properties in each application. This can be a real pain if you have hundreds of microservices. Yes, you could define them as environment variables and this would solve the problem. However, if you have different microservices stacks using different OIDC client IDs, this approach will be difficult.
<div class="integrator-org-warning"> <blockquote> <p> Note: In May 2025, the <a href="/blog/2025/05/13/okta-developer-edition-changes">Okta Integrator Free Plan</a> replaced Okta Developer Edition Accounts, and the Okta CLI was deprecated. <br> We preserved this post for reference, but the instructions no longer work exactly as written. Replace the Okta CLI commands by manually configuring Okta following the instructions in our <a href="/docs/guides/redirect-authentication/">Developer Documentation</a>. </p> </blockquote> </div>
- Java Microservices with Spring Cloud Config
- Use JHipster to Generate a Java Microservices Architecture
- Configure JHipster Microservices to Use Okta for Identity
- Configure Your OpenID Connect Settings with Spring Cloud Config
- Configuring Spring Cloud Config with Git
- What About Kotlin Microservices?
- Learn More about Spring Cloud Config, Java Microservices, and JHipster
Java Microservices with Spring Cloud Config
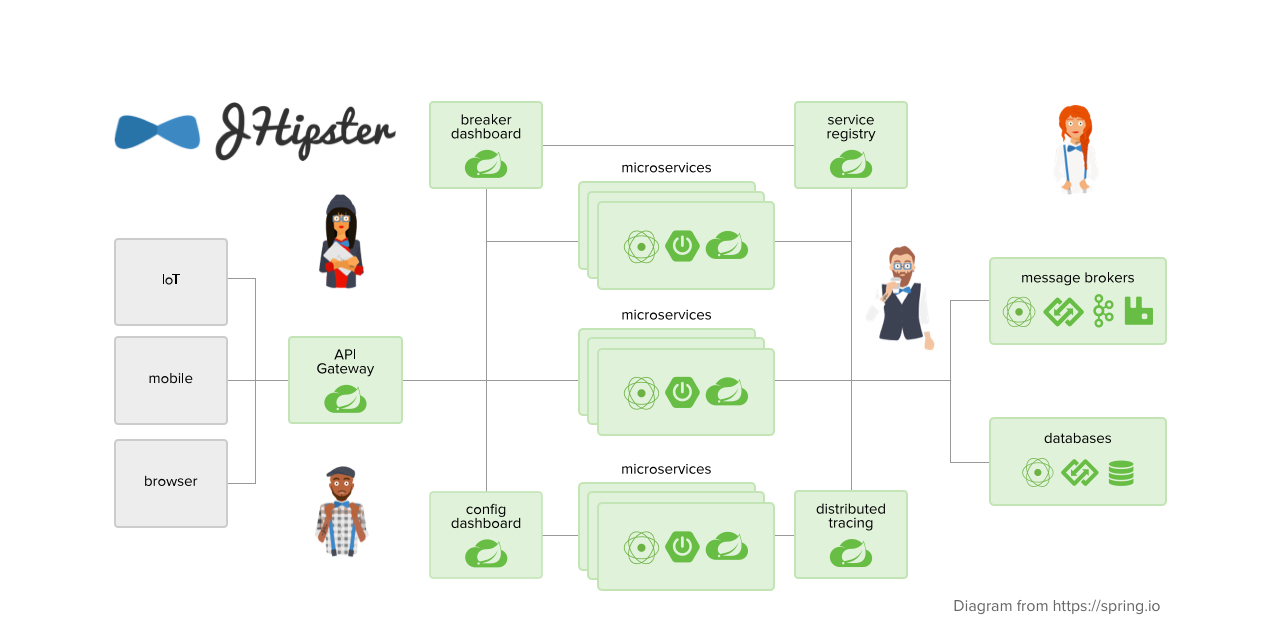
Spring Cloud Config is a project that provides externalized configuration for distributed systems. Spring Cloud Config has server and client components. You can configure the server to read its configuration from the file system or a source code repository, like Git. On the client, you configure things in a bootstrap configuration file to get configuration data from the server. In a microservices environment, this provides an elegant way to configure all your microservices from a central location.
Today I’d like to show you how this works and demo it using one of the hippest microservice solutions I’ve ever worked with.
If you’d rather watch a video, I created a screencast of this blog post.
Use JHipster to Generate a Java Microservices Architecture
JHipster is a development platform to generate, develop, and deploy Spring Boot + { Angular or React or Vue } applications. In addition, it supports creating Spring-based microservice architectures. In fact, if you create microservices projects and choose OAuth 2.0 / OIDC for authentication, you’ll be using code that’s very similar to the aforementioned example.
To use JHipster, you’ll need to have Node.js installed. You can also use start.jhipster.tech, which is similar to start.spring.io.
The most common way to install JHipster is using npm:
npm install -g generator-jhipster@6.0.1| You can run the command above without the version number to get the latest version of JHipster. If it’s 6.x, this tutorial should work, but I can’t guarantee it does. |
In a terminal, create a directory to hold all the projects you’re about to create. For example, jhipster.
Create an apps.jh file in this directory and put the following code into it.
application {
  config {
    baseName gateway,
    packageName com.okta.developer.gateway,
    applicationType gateway,
    authenticationType oauth2,
    prodDatabaseType postgresql,
    serviceDiscoveryType eureka,
    testFrameworks [protractor]
  }
  entities Blog, Post, Tag, Product
}

application {
  config {
    baseName blog,
    packageName com.okta.developer.blog,
    applicationType microservice,
    authenticationType oauth2,
    prodDatabaseType postgresql,
    serverPort 8081,
    serviceDiscoveryType eureka
  }
  entities Blog, Post, Tag
}

application {
  config {
    baseName store,
    packageName com.okta.developer.store,
    applicationType microservice,
    authenticationType oauth2,
    databaseType mongodb,
    devDatabaseType mongodb,
    prodDatabaseType mongodb,
    enableHibernateCache false,
    serverPort 8082,
    serviceDiscoveryType eureka
  }
  entities Product
}

entity Blog {
  name String required minlength(3),
  handle String required minlength(2)
}

entity Post {
  title String required,
  content TextBlob required,
  date Instant required
}

entity Tag {
  name String required minlength(2)
}

entity Product {
  title String required,
  price BigDecimal required min(0),
  image ImageBlob
}

relationship ManyToOne {
  Blog{user(login)} to User,
  Post{blog(name)} to Blog
}

relationship ManyToMany {
  Post{tag(name)} to Tag{post}
}

paginate Post, Tag with infinite-scroll
paginate Product with pagination

microservice Product with store
microservice Blog, Post, Tag with blog

// will be created under 'docker-compose' folder
deployment {
  deploymentType docker-compose
  appsFolders [gateway, blog, store]
  dockerRepositoryName "jmicro"
  consoleOptions [zipkin]
}
You’ll want to change the dockerRepositoryName in the JDL above to use your Docker Hub username if you want to publish your containers. This is not a necessary step to complete this tutorial.
|
This code is JDL (JHipster Domain Language) and you can use it to define your app, its entities, and even deployment settings. You can learn more about JDL in JHipster’s JDL documentation. Below is a screenshot of JDL Studio, which can be used to edit JDL and see how entities related to each other.
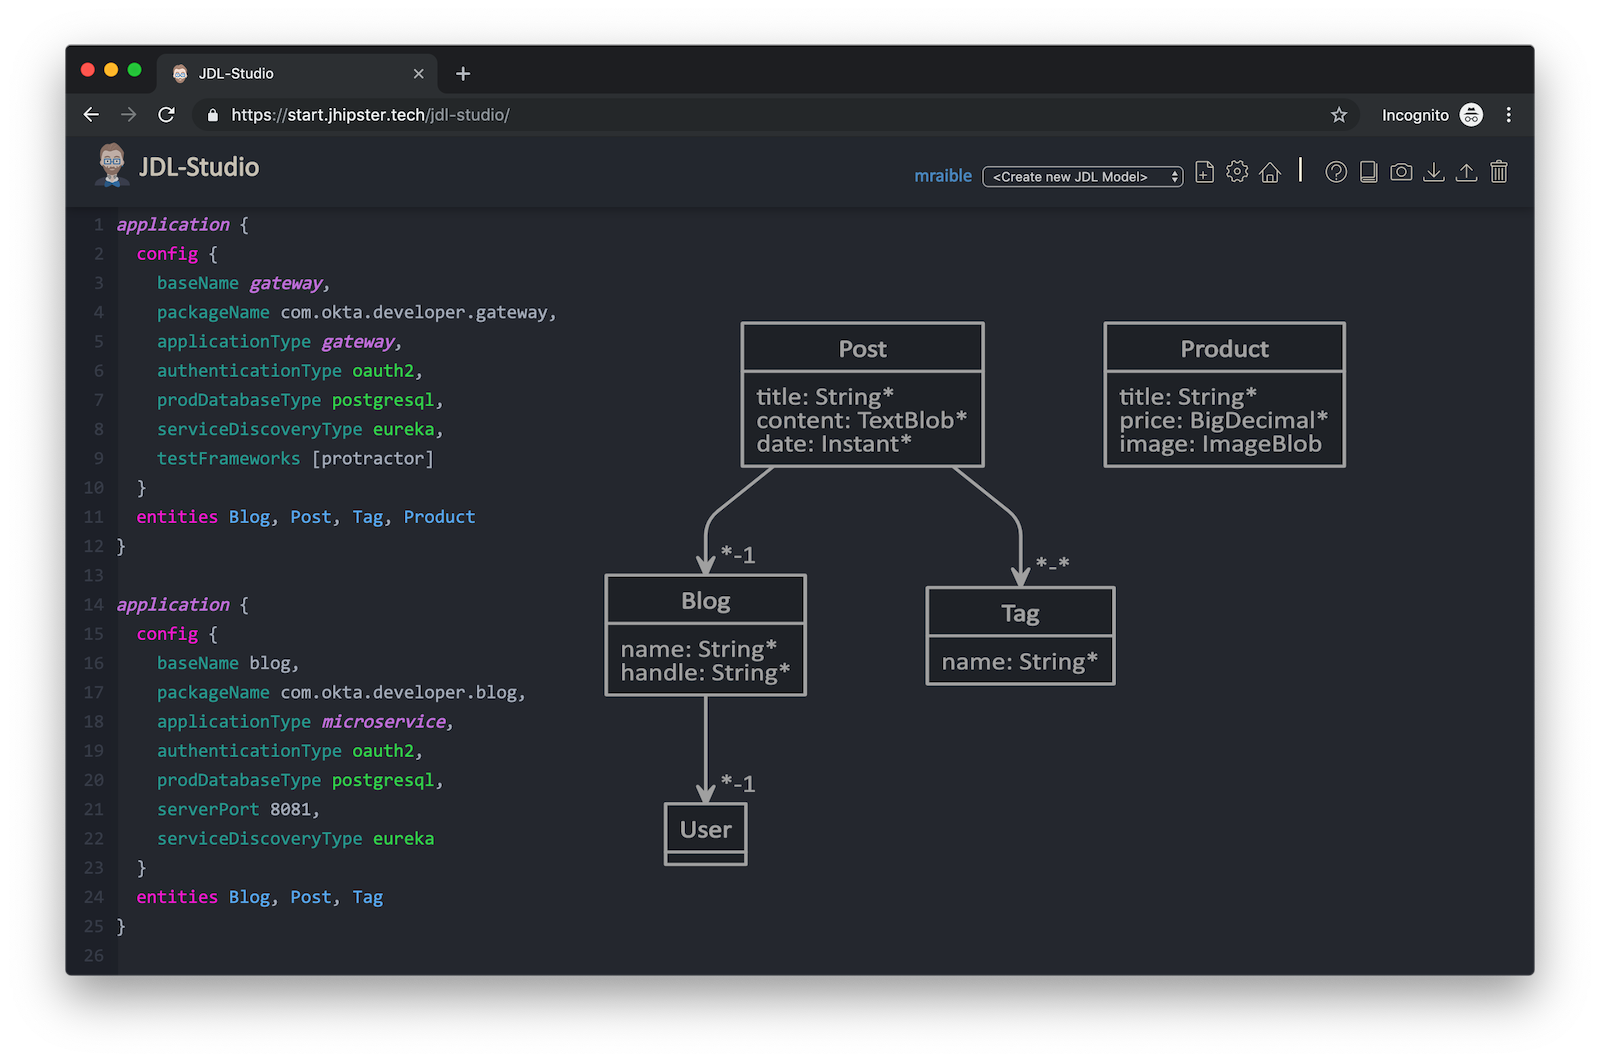
The JDL you just put in apps.jh defines three applications:
-
gateway: a single entry point to your microservices, that will include the UI components.
-
blog: a blog service that talks to PostgreSQL.
-
store: a store service that uses MongoDB.
Run the following command to create these projects in your jhipster folder.
jhipster import-jdl apps.jhThis will create all three projects in parallel. You can watch the console recording below to see how it looks. The time it takes to create everything will depend on how fast your computer and internet are.
Create Docker Images for Microservice Apps
When the configuration is generated for Docker Compose, a warning is spat out to the console.
WARNING! Docker Compose configuration generated, but no Jib cache found
If you forgot to generate the Docker image for this application, please run:
To generate the missing Docker image(s), please run:
  ./mvnw -Pprod verify jib:dockerBuild in /Users/mraible/java-microservices-examples/jhipster/gateway
  ./mvnw -Pprod verify jib:dockerBuild in /Users/mraible/java-microservices-examples/jhipster/blog
  ./mvnw -Pprod verify jib:dockerBuild in /Users/mraible/java-microservices-examples/jhipster/store
To make it easier to create Docker images with one command, create an aggregator pom.xml in the jhipster root directory.
<?xml version="1.0" encoding="UTF-8"?>
<project xmlns="http://maven.apache.org/POM/4.0.0" xmlns:xsi="http://www.w3.org/2001/XMLSchema-instance"
    xsi:schemaLocation="http://maven.apache.org/POM/4.0.0 http://maven.apache.org/xsd/maven-4.0.0.xsd">
    <modelVersion>4.0.0</modelVersion>
    <groupId>com.okta.developer</groupId>
    <artifactId>jhipster-parent</artifactId>
    <version>1.0.0-SNAPSHOT</version>
    <packaging>pom</packaging>
    <name>jhipster-parent</name>
    <modules>
        <module>gateway</module>
        <module>blog</module>
        <module>store</module>
    </modules>
</project>
Then "just jib it" using Jib.
mvn -Pprod verify com.google.cloud.tools:jib-maven-plugin:dockerBuild
If you don’t have Maven installed, use brew install maven on a Mac, or see Maven’s installation docs.
|
[INFO] Skipping containerization because packaging is 'pom'...
[INFO] ------------------------------------------------------------------------
[INFO] Reactor Summary:
[INFO]
[INFO] Gateway 0.0.1-SNAPSHOT ............................. SUCCESS [02:44 min]
[INFO] Blog 0.0.1-SNAPSHOT ................................ SUCCESS [ 34.391 s]
[INFO] Store 0.0.1-SNAPSHOT ............................... SUCCESS [ 28.589 s]
[INFO] jhipster-parent 1.0.0-SNAPSHOT ..................... SUCCESS [  1.096 s]
[INFO] ------------------------------------------------------------------------
[INFO] BUILD SUCCESS
[INFO] ------------------------------------------------------------------------
[INFO] Total time: 03:49 min
[INFO] Finished at: 2019-05-17T07:44:39-06:00
[INFO] ------------------------------------------------------------------------
Execution time: 3 min. 50 s.
Run Your Java Microservices Stack with Docker Compose
Once everything has finished building, cd into the docker-compose directory and start all your containers.
cd docker-compose
docker-compose up -d
Remove the -d if you want to see all the logs in your current terminal window.
|
It will take several minutes to start all eight of your containers. You can use Kitematic to monitor their startup progress if you like.
Creating docker-compose_gateway-app_1                ... done
Creating docker-compose_gateway-postgresql_1         ... done
Creating docker-compose_blog-app_1                   ... done
Creating docker-compose_store-mongodb_1              ... done
Creating docker-compose_keycloak_1                   ... done
Creating docker-compose_blog-postgresql_1            ... done
Creating docker-compose_jhipster-registry_1          ... done
Creating docker-compose_store-app_1                  ... done
JHipster Registry for Service Discovery with Java Microservices
This microservices stack uses Eureka for service discovery, just like the bare-bones Spring Boot + Spring Cloud example. This was determined by the following line for each app in the JDL.
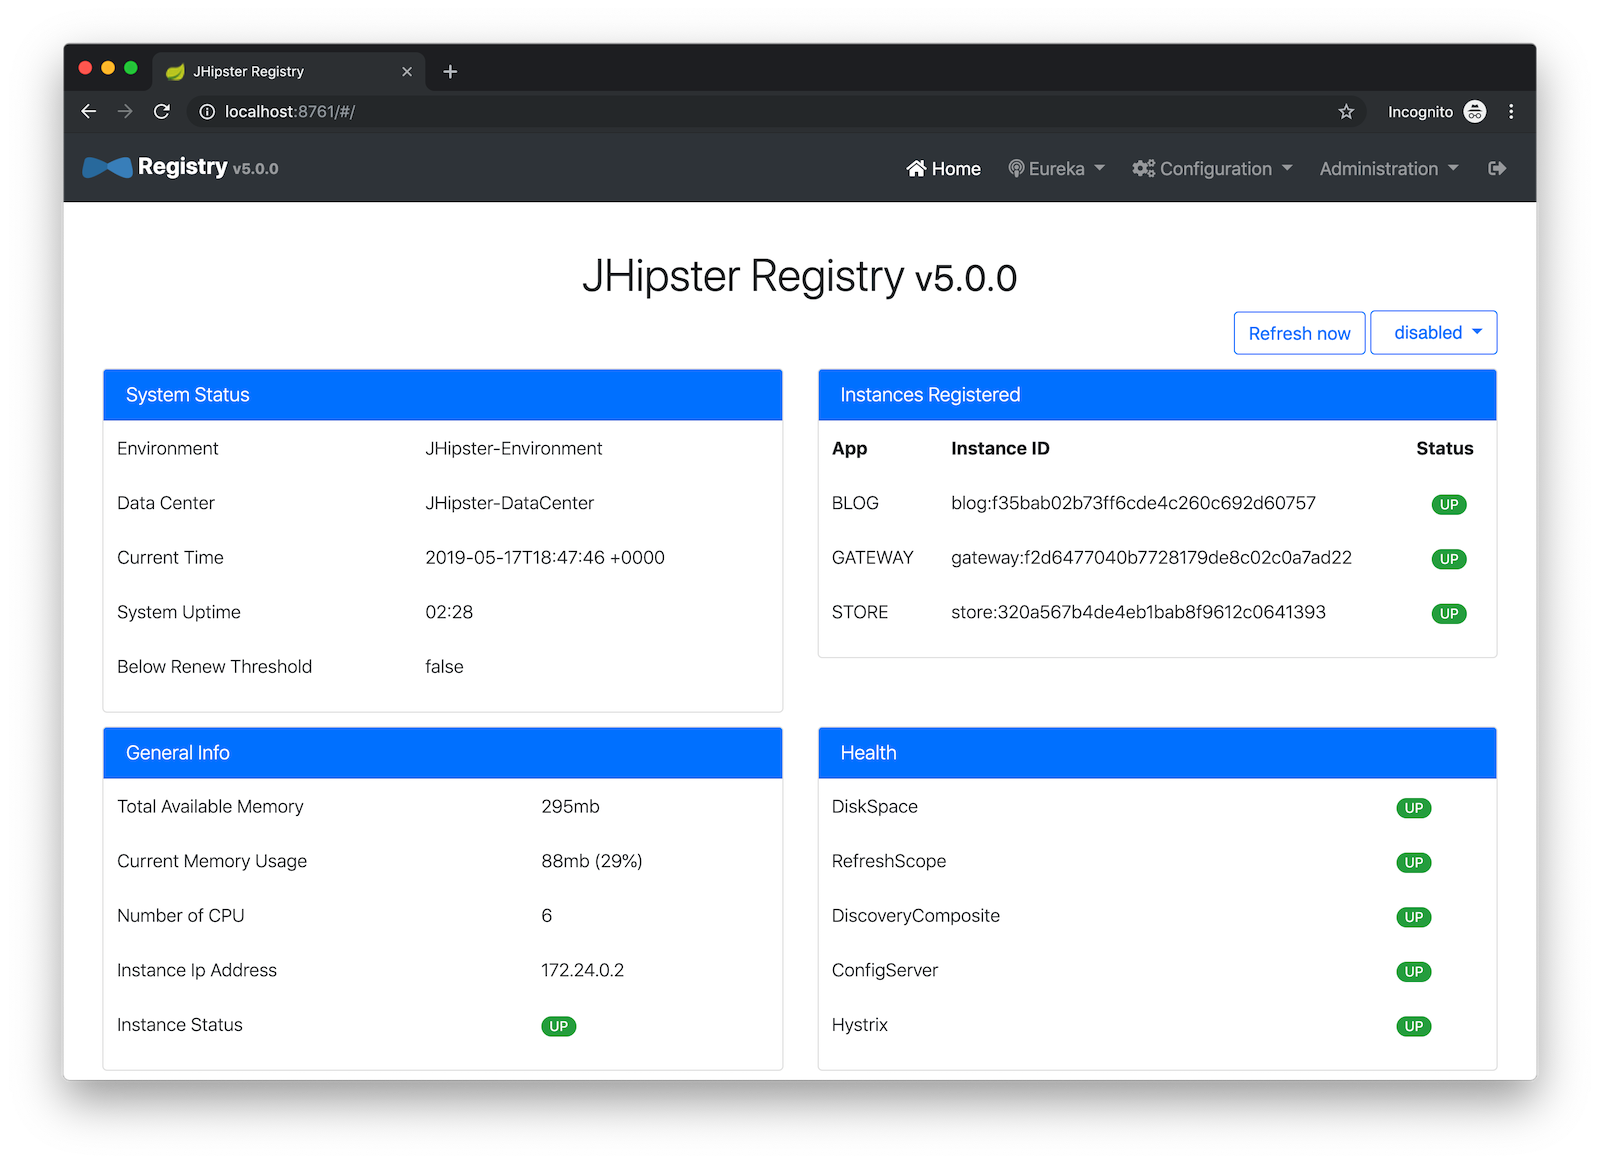
serviceDiscoveryType eurekaWhen you select eureka for service discovery, JHipster Registry is used. This application is very similar to Eureka Server, except it has an Angular UI and includes Spring Cloud Config, among other features.
| JHipster also supports Hashicorp Consul for service discovery. |
Because you chose OAuth 2.0/OIDC for authentication, you’ll need to create an entry in your hosts file (/etc/hosts on Linux/Mac, C:\Windows\System32\Drivers\etc\hosts on Windows) for Keycloak.
127.0.0.1 keycloakThis is because the Docker network recognizes keycloak as a registered hostname, but it also redirects you to keycloak. Your browser is not aware of that hostname without the hosts entry.
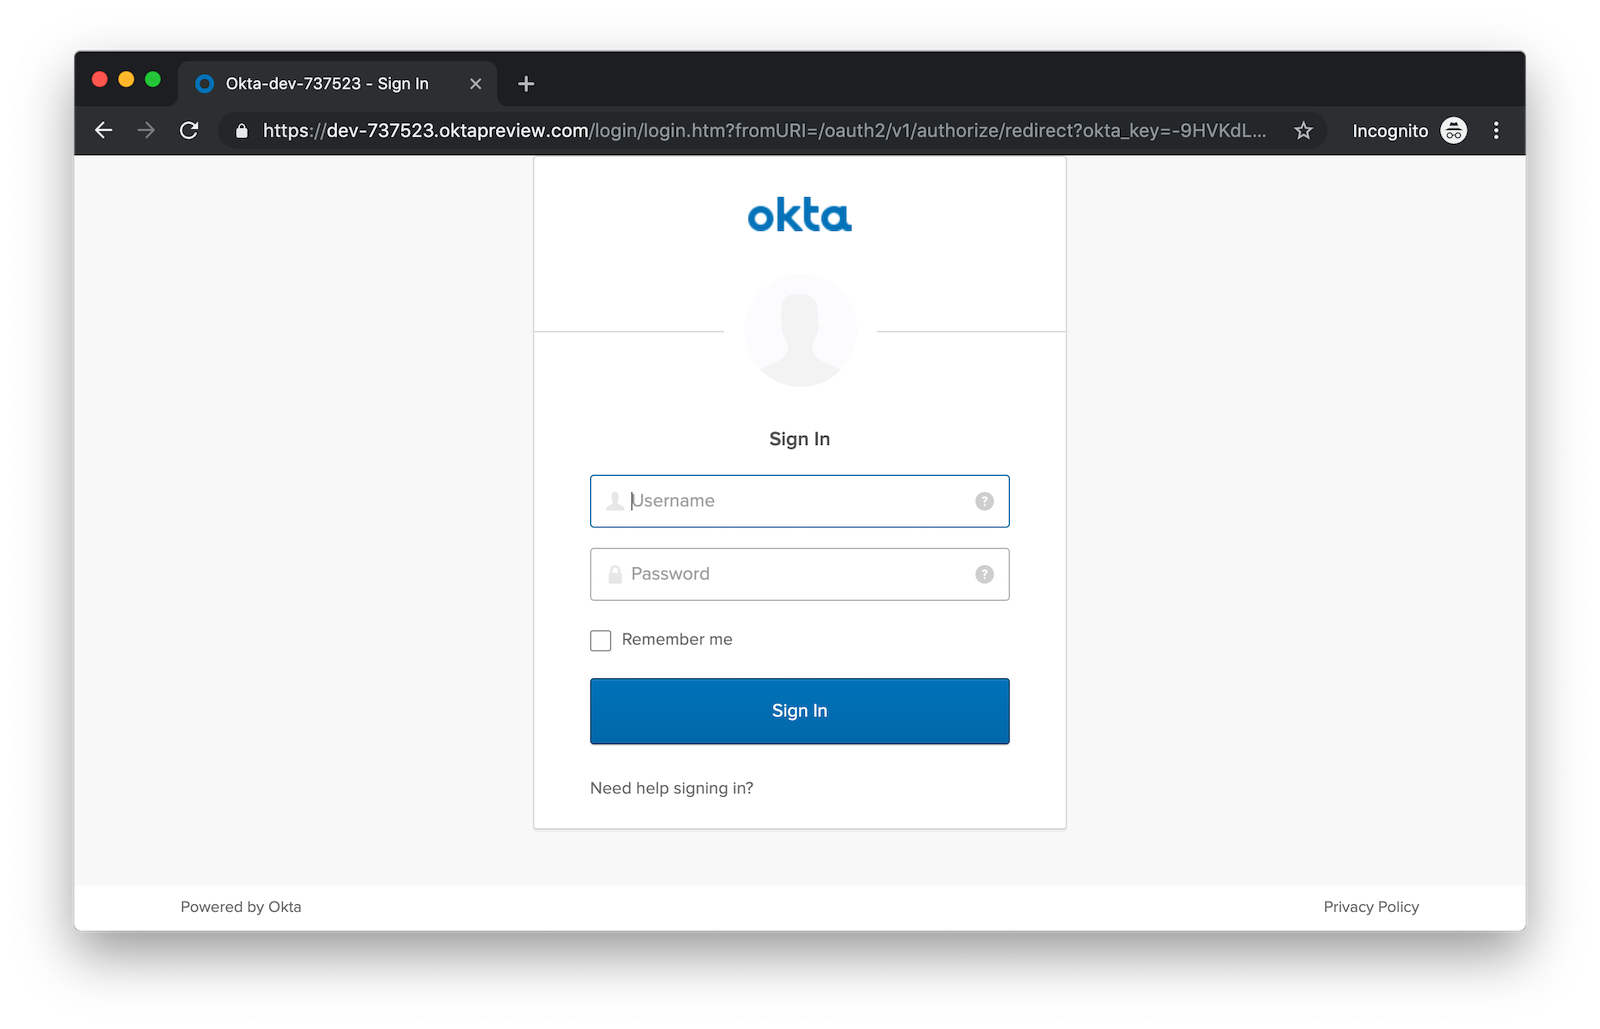
Open your browser and navigate to http://localhost:8761. You’ll be redirected to Keycloak to login. Enter admin/admin for credentials and you’ll be redirected back to JHipster Registry. You’ll see all your microservice instances have been registered.
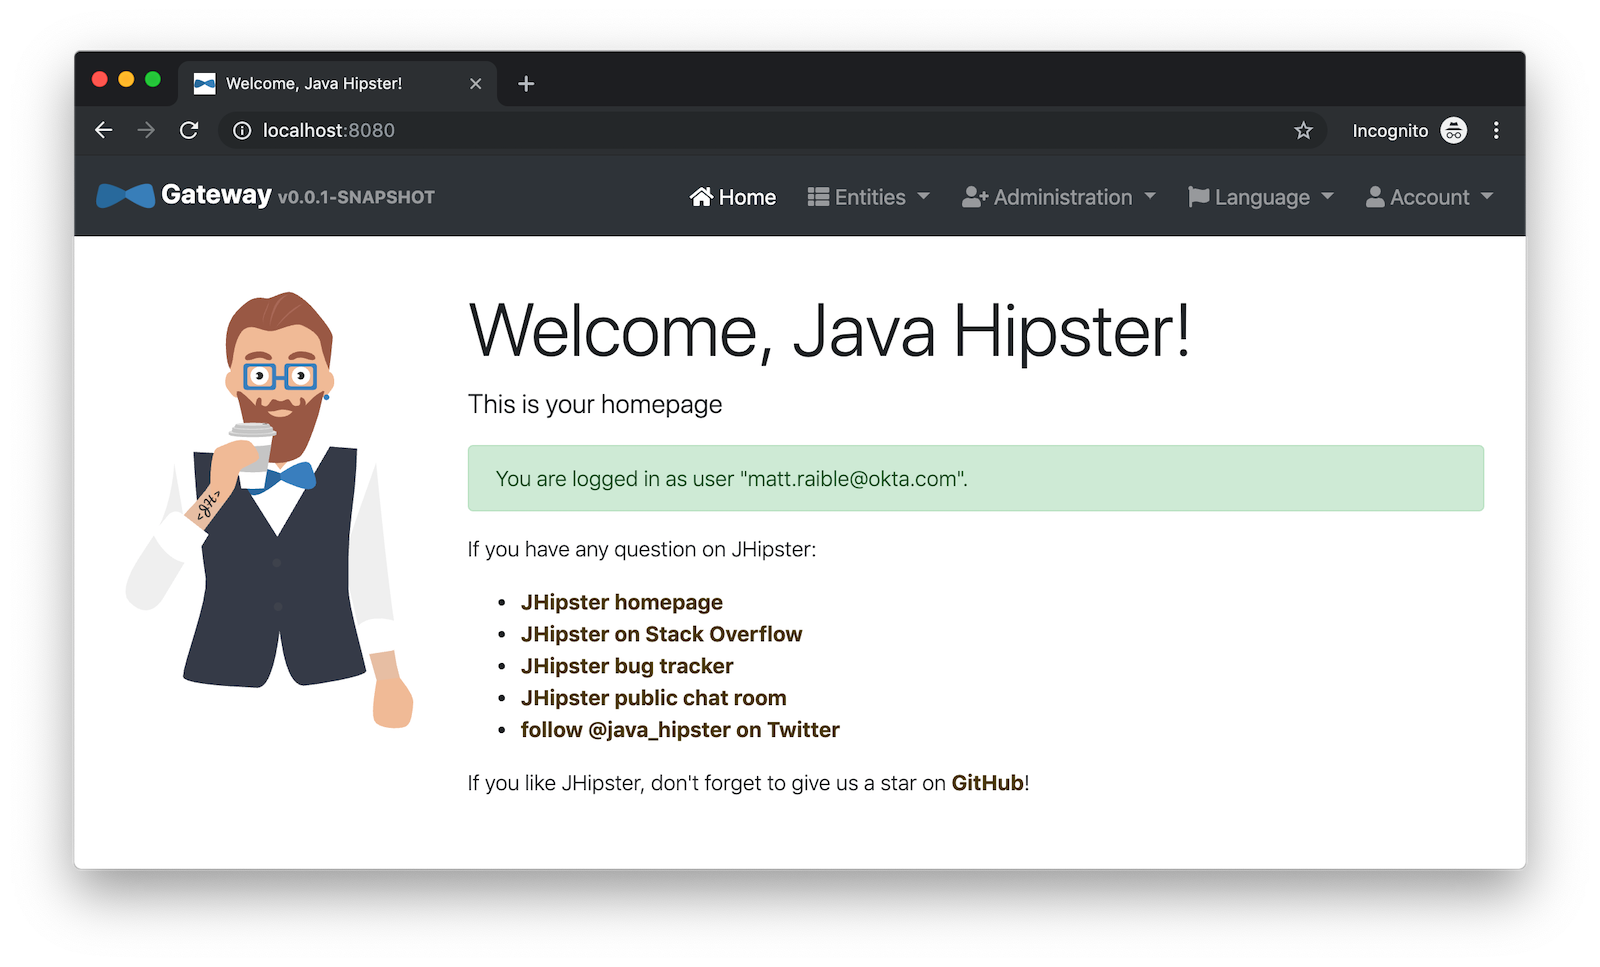
Navigate to http://localhost:8080, click sign in, and you’ll be logged in to the gateway. You can go to Entities > Blog and add a blog.

Go to Entities > Product and you can add a product too.
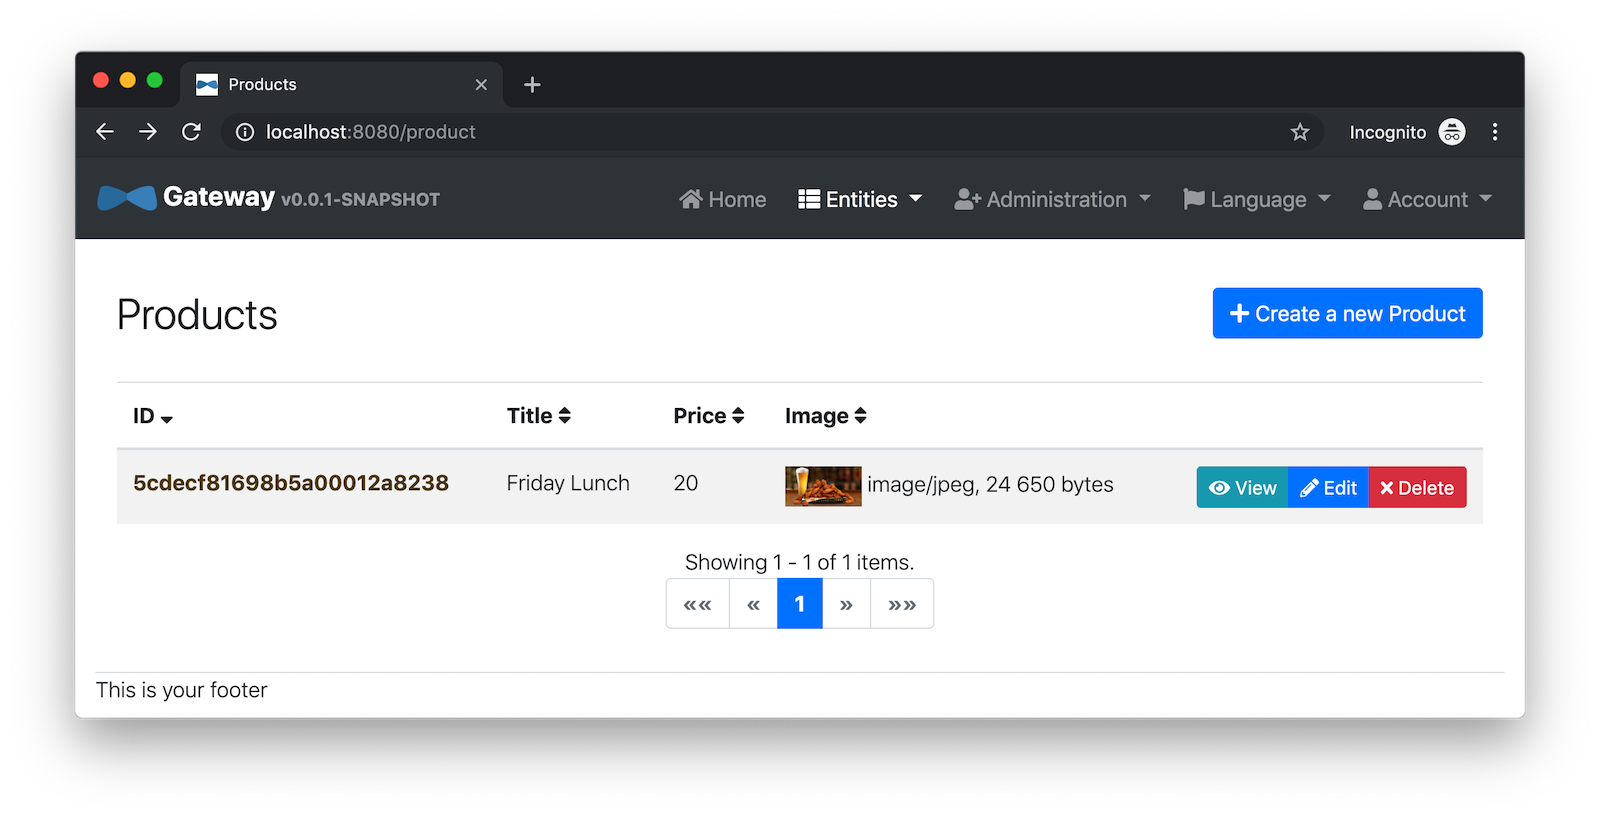
Pretty slick, don’t you think?! 🤓
Configure JHipster Microservices to Use Okta for Identity
One of the problems you saw in the bare-bones Spring Boot + Spring Cloud setup is you have to configure okta.oauth2.* properties in every microservice. JHipster doesn’t use the Okta Spring Boot starter. It uses oauth2-client and oauth2-resource-server Spring Boot starters instead. The configuration for OAuth 2.0 is contained in each app’s src/main/resources/config/application.yml file.
spring:
  ...
  security:
    oauth2:
      client:
        provider:
          oidc:
            issuer-uri: http://localhost:9080/auth/realms/jhipster
        registration:
          oidc:
            client-id: internal
            client-secret: internal
Why Okta?
You might be wondering why you should use Okta instead of Keycloak? Keycloak works great for development and testing, and especially well if you’re on a plane with no wi-fi. However, in production, you want a system that’s always on. That’s where Okta comes in. To begin, you’ll need to create an Okta account and an application with it.
Create a Web Application in Okta
Before you begin, you’ll need a free Okta developer account. Install the Okta CLI and run okta register to sign up for a new account. If you already have an account, run okta login.
Then, run okta apps create jhipster. Select the default app name, or change it as you see fit.
Accept the default Redirect URI values provided for you.
What does the Okta CLI do?
The Okta CLI streamlines configuring a JHipster app and does several things for you:
- Creates an OIDC app with the correct redirect URIs:
- login:
http://localhost:8080/login/oauth2/code/oidcandhttp://localhost:8761/login/oauth2/code/oidc - logout:
http://localhost:8080andhttp://localhost:8761
- login:
- Creates
ROLE_ADMINandROLE_USERgroups that JHipster expects - Adds your current user to the
ROLE_ADMINandROLE_USERgroups - Creates a
groupsclaim in your default authorization server and adds the user’s groups to it
NOTE: The http://localhost:8761* redirect URIs are for the JHipster Registry, which is often used when creating microservices with JHipster. The Okta CLI adds these by default.
You will see output like the following when it’s finished:
Okta application configuration has been written to: /path/to/app/.okta.env
Run cat .okta.env (or type .okta.env on Windows) to see the issuer and credentials for your app. It will look like this (except the placeholder values will be populated):
export SPRING_SECURITY_OAUTH2_CLIENT_PROVIDER_OIDC_ISSUER_URI="https://{yourOktaDomain}/oauth2/default"
export SPRING_SECURITY_OAUTH2_CLIENT_REGISTRATION_OIDC_CLIENT_ID="{clientId}"
export SPRING_SECURITY_OAUTH2_CLIENT_REGISTRATION_OIDC_CLIENT_SECRET="{clientSecret}"
NOTE: You can also use the Okta Admin Console to create your app. See Create a JHipster App on Okta for more information.
Configure Your OpenID Connect Settings with Spring Cloud Config
Rather than modifying each of your apps for Okta, you can use Spring Cloud Config in JHipster Registry to do it. Open docker-compose/central-server-config/application.yml and add your Okta settings. Copy your OIDC settings from the .okta.env file the Okta CLI generated.
spring:
  security:
    oauth2:
      client:
        provider:
          oidc:
            issuer-uri: https://{yourOktaDomain}/oauth2/default
        registration:
          oidc:
            client-id: {yourClientId}
            client-secret: {yourClientSecret}
The registry, gateway, blog, and store applications are all configured to read this configuration on startup.
Restart all your containers for this configuration to take effect.
docker-compose restartNow when you hit http://localhost:8761 or http://localhost:8080, you’ll be prompted to log in with Okta!
It’s pretty nifty how you can configure your service registry and all your microservices in one place with Spring Cloud Config, don’t you think?! 👌
Configuring Spring Cloud Config with Git
JHipster Registry and its Spring Cloud Config server support two kinds of configuration sources: native and git. Which one is used is determined by a spring.cloud.config.server.composite property. If you look in docker-compose/jhipster-registry.yml, you’ll see that native is enabled and git is commented out.
- SPRING_CLOUD_CONFIG_SERVER_COMPOSITE_0_TYPE=native
- SPRING_CLOUD_CONFIG_SERVER_COMPOSITE_0_SEARCH_LOCATIONS=file:./central-config
# - SPRING_CLOUD_CONFIG_SERVER_COMPOSITE_0_TYPE=git
# - SPRING_CLOUD_CONFIG_SERVER_COMPOSITE_0_URI=https://github.com/jhipster/jhipster-registry/
# - SPRING_CLOUD_CONFIG_SERVER_COMPOSITE_0_SEARCH_PATHS=central-config
# For Keycloak to work, you need to add '127.0.0.1 keycloak' to your hosts file
You can see the default configuration for Git at @jhipster/jhipster-registry/central-config/application.yml. You can learn more about application configuration with Spring Cloud Config in JHipster Registry’s documentation. It includes a section on encrypting configuration values.
What About Kotlin Microservices?
In the first post of this series, I told you why I wrote this post in Java:
I wrote this post with Java because it’s the most popular language in the Java ecosystem. However, Kotlin is on the rise, according to RedMonk’s programming language rankings from January 2019.
Spring has excellent support for Kotlin, and you can choose it as a language on start.spring.io. JHipster has support for Kotlin too with its Kotlin Blueprint! A new release was published last week that allows you to create Kotlin-based JHipster apps with khipster.
If you’d like to see us write more posts using Kotlin, please let us know in the comments!
Learn More about Spring Cloud Config, Java Microservices, and JHipster
I hope you enjoyed learning how to build Java microservice architectures with JHipster and configure them with Spring Cloud Config. You learned how to generate everything from a single JDL file, package your apps in Docker containers, run them with Docker Compose, and authenticate with OIDC using Keycloak and Okta.
You can find all the code shown in this tutorial on GitHub in the jhipster directory.
We’re big fans of Spring Boot, Spring Cloud, and JHipster on this blog. Here are a few other posts you might find interesting:
Please follow us on Twitter @oktadev and subscribe to our YouTube channel for more Spring and Spring Security tips.
Matt Raible is a well-known figure in the Java community and has been building web applications for most of his adult life. For over 20 years, he has helped developers learn and adopt open source frameworks and use them effectively. He's a web developer, Java Champion, and Developer Advocate at Okta. Matt has been a speaker at many conferences worldwide, including Devnexus, Devoxx Belgium, Devoxx France, Jfokus, and JavaOne. He is the author of The Angular Mini-Book, The JHipster Mini-Book, Spring Live, and contributed to Pro JSP. He is a frequent contributor to open source and a member of the JHipster development team. You can find him online @mraible and raibledesigns.com.
Okta Developer Blog Comment Policy
We welcome relevant and respectful comments. Off-topic comments may be removed.