Bootiful Development with Spring Boot and Vue
Heads up... this blog post is old!
For an updated version of this blog post, see Build a CRUD App with Vue.js, Spring Boot, and Kotlin.

Vue is a web framework that’s gotten a lot of attention lately because it’s lean and mean. Its baseline framework cost is around 40K and is known as a minimalistic web framework. With all of the recent attention on web performance and mobile-first, mobile-fast, it’s no surprise that Vue has become more and more popular. If you spent the time to learn AngularJS back in the day, chances are you’ll find an old friend in Vue.js.
Spring Boot is one of my favorite frameworks in the Java ecosystem. Yes, I’m biased. I’ve been a fan of the Spring Framework since way back in 2004. It was neat to be able to write Java webapps with Spring MVC, but most people used XML to configure things. Even though Spring supported JavaConfig, it wasn’t until Spring Boot (in 2014) that it really took off. Nowadays, you never see a Spring tutorial that shows you how to configure things with XML. Nice work, Spring Boot team!
I’m writing this tutorial because I’m a big fan of Vue. If you know me, you’ll know I’m a web framework aficionado. That is, I’m a big fan of web frameworks. Much like an NBA fan has a few favorite players, I have a few favorite frameworks. Vue has recently become one of those, and I’d like to show you why.
In this post, I’ll show you how to build a Spring Boot API using Spring Data JPA and Hibernate. Then I’ll show you how to create a Vue PWA and customize it to display the data from your API. Then you’ll add in some animated gifs, a sprinkle of authentication, and have a jolly good time doing it!
Build a REST API with Spring Boot
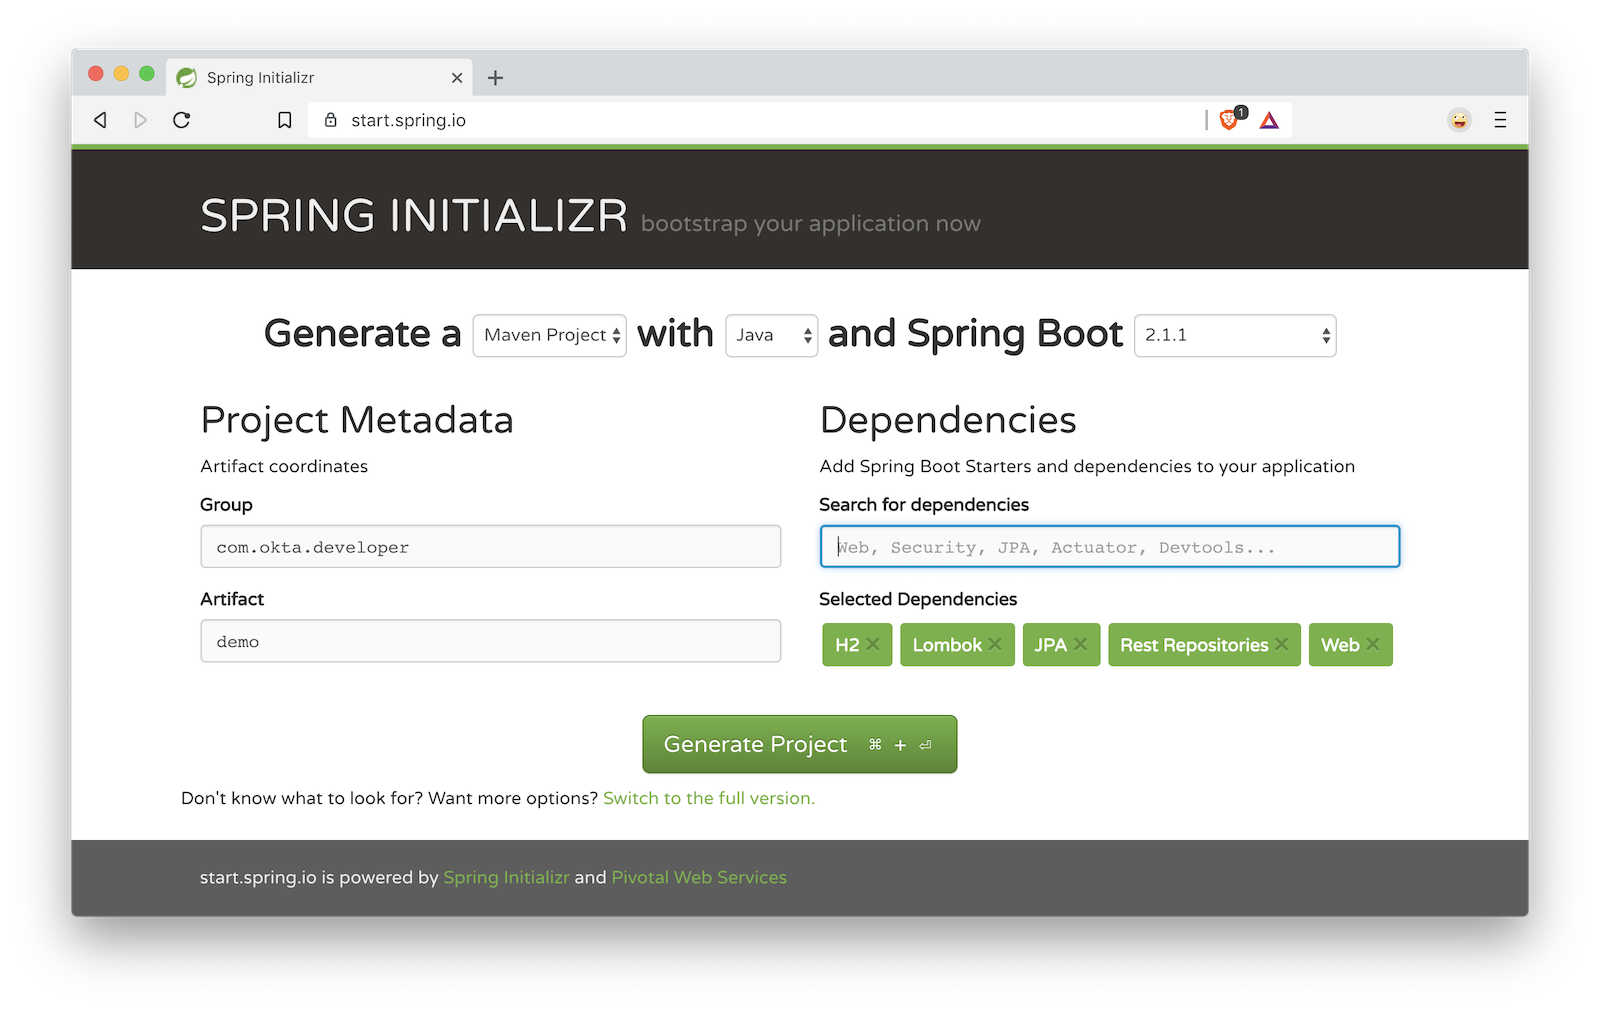
To get started with Spring Boot, navigate to start.spring.io and choose version 2.1.1+. In the "Search for dependencies" field, select the following:
-
H2: An in-memory database
-
Lombok: Because no one likes generating (or even worse, writing!) getters and setters
-
JPA: Standard ORM for Java
-
Rest Repositories: Allows you to expose your JPA repositories as REST endpoints
-
Web: Spring MVC with Jackson (for JSON), Hibernate Validator, and embedded Tomcat
If you like the command-line better, install HTTPie and run the following command to download a demo.zip.
http https://start.spring.io/starter.zip dependencies==h2,lombok,data-jpa,data-rest,web \
  packageName==com.okta.developer.demo bootVersion==2.1.1.RELEASE -d
Create a directory called spring-boot-vue-example. Expand the contents of demo.zip into its server directory.
mkdir spring-boot-vue-example
unzip demo.zip -d spring-boot-vue-example/server
Open the "server" project in your favorite IDE and run DemoApplication or start it from the command line using ./mvnw spring-boot:run.
Create a com.okta.developer.demo.beer package and a Beer.java file in it. This class will be the entity that holds your data.
package com.okta.developer.demo.beer;

import lombok.Data;
import lombok.NoArgsConstructor;
import lombok.NonNull;

import javax.persistence.Entity;
import javax.persistence.GeneratedValue;
import javax.persistence.Id;

@Data
@NoArgsConstructor
@Entity
class Beer {

    public Beer(String name) {
        this.name = name;
    }

    @Id
    @GeneratedValue
    private Long id;

    @NonNull
    private String name;
}
Add a BeerRepository class that leverages Spring Data to do CRUD on this entity.
package com.okta.developer.demo.beer;

import org.springframework.data.jpa.repository.JpaRepository;
import org.springframework.data.rest.core.annotation.RepositoryRestResource;

@RepositoryRestResource
interface BeerRepository extends JpaRepository<Beer, Long> {
}
Adding the @RepositoryRestResource annotation to BeerRepository exposes all its CRUD operations as REST endpoints.
|
Add a BeerCommandLineRunner that uses this repository and creates a default set of data.
package com.okta.developer.demo.beer;
import org.springframework.boot.CommandLineRunner;
import org.springframework.stereotype.Component;
import java.util.stream.Stream;
@Component
public class BeerCommandLineRunner implements CommandLineRunner {
private final BeerRepository repository;
public BeerCommandLineRunner(BeerRepository repository) {
this.repository = repository;
}
@Override
public void run(String... strings) throws Exception {
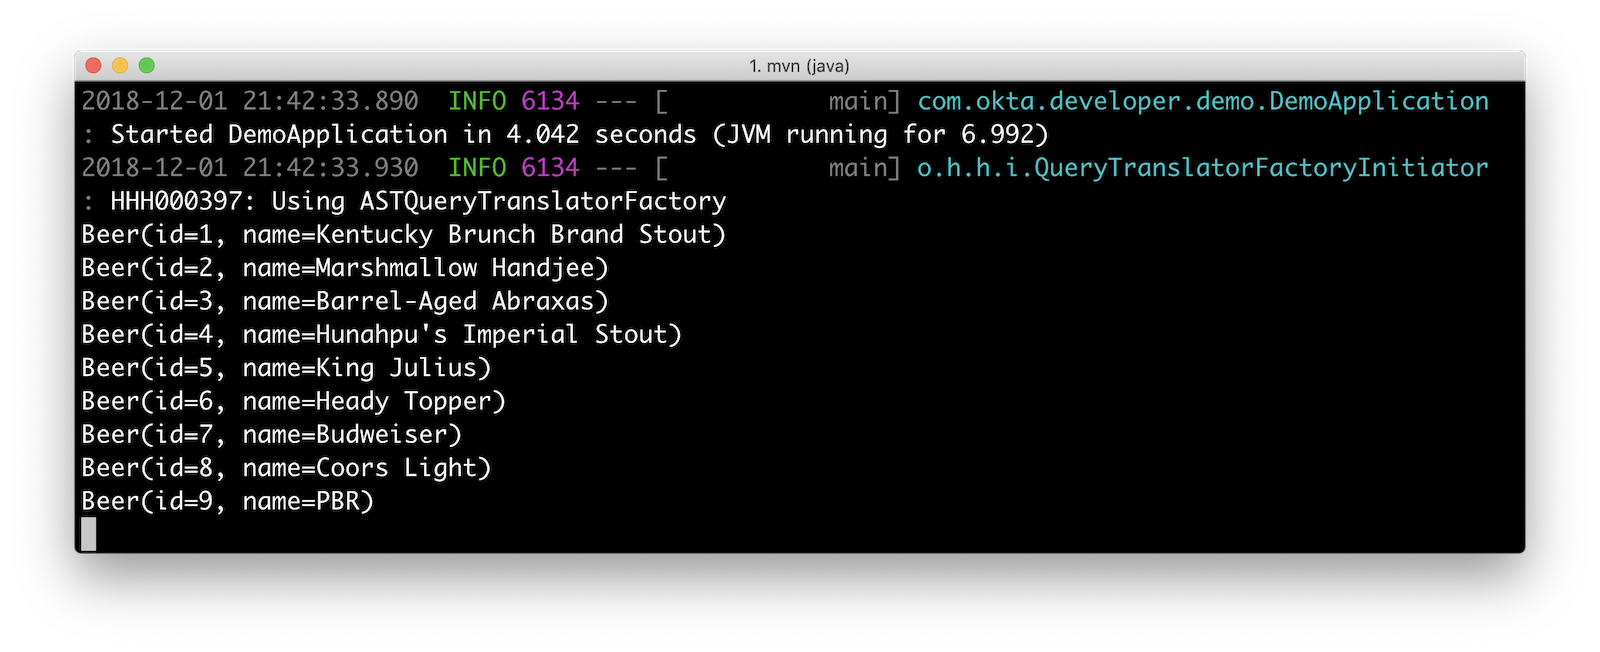
// Top beers from https://www.beeradvocate.com/lists/us, November 2018
Stream.of("Kentucky Brunch Brand Stout", "Marshmallow Handjee", "Barrel-Aged Abraxas",
"Hunahpu's Imperial Stout", "King Julius", "Heady Topper",
"Budweiser", "Coors Light", "PBR").forEach(name ->
repository.save(new Beer(name))
);
repository.findAll().forEach(System.out::println);
}
}Restart your app, and you should see a list of beers printed in your terminal.
Add a BeerController class to create an endpoint that filters out less-than-great beers.
package com.okta.developer.demo.beer;

import org.springframework.web.bind.annotation.GetMapping;
import org.springframework.web.bind.annotation.RestController;

import java.util.Collection;
import java.util.stream.Collectors;

@RestController
public class BeerController {
    private BeerRepository repository;

    public BeerController(BeerRepository repository) {
        this.repository = repository;
    }

    @GetMapping("/good-beers")
    public Collection<Beer> goodBeers() {
        return repository.findAll().stream()
                .filter(this::isGreat)
                .collect(Collectors.toList());
    }

    private boolean isGreat(Beer beer) {
        return !beer.getName().equals("Budweiser") &&
                !beer.getName().equals("Coors Light") &&
                !beer.getName().equals("PBR");
    }
}
Re-build your application and navigate to http://localhost:8080/good-beers. You should see the list of good beers in your browser.
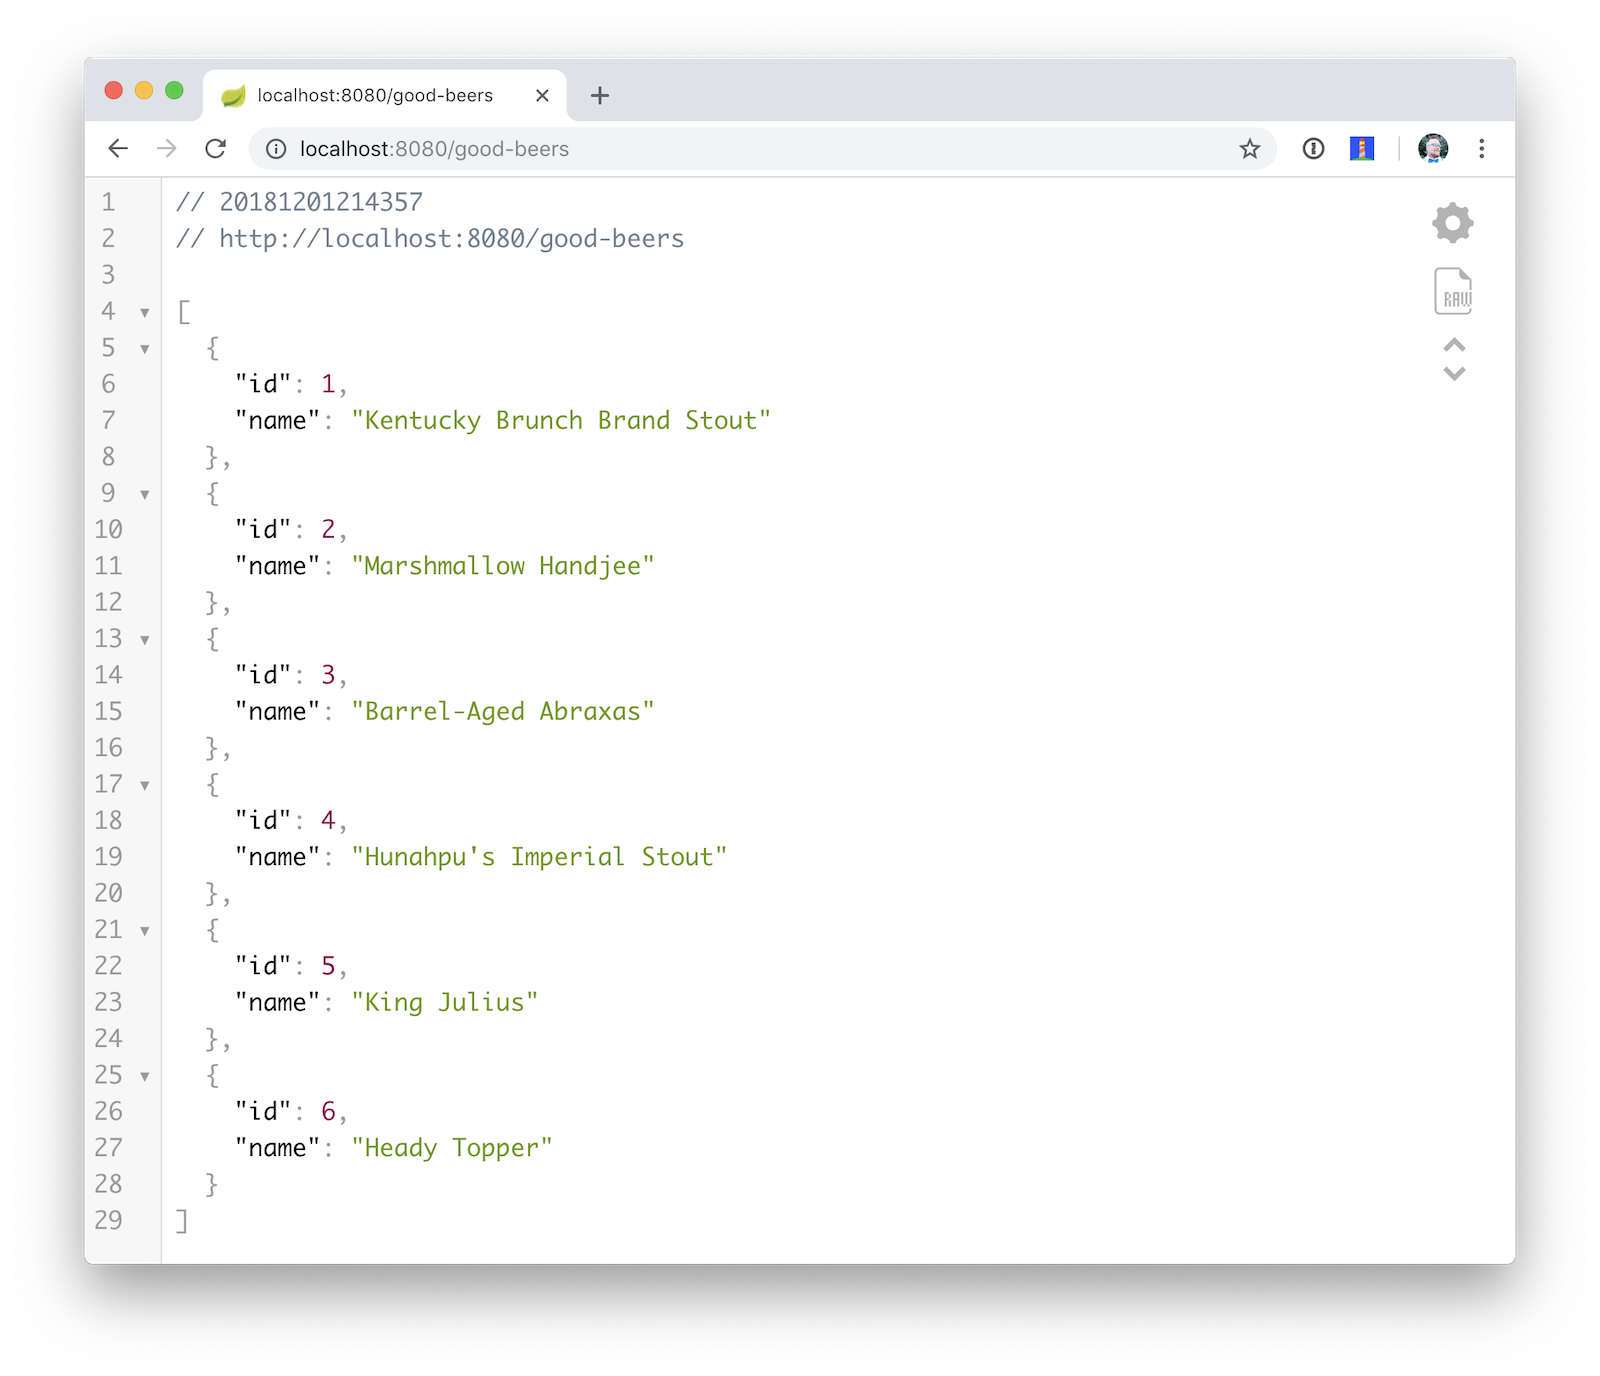
You should also see the same result in your terminal window when using HTTPie.
http :8080/good-beersCreate a Project with Vue CLI
Creating an API seems to be the easy part these days, thanks in large part to Spring Boot. In this section, I hope to show you that creating a UI with Vue is pretty simple too. I’ll also show you how to develop the Vue app with TypeScript. If you follow the steps below, you’ll create a new Vue app, fetch beer names and images from APIs, and create components to display their data.
To create a Vue project, make sure you have Node.js, and Vue CLI 3 installed. I used Node 11.3.0 when I created this tutorial.
npm install -g @vue/cli@3.2.1From a terminal window, cd into the root of the spring-boot-vue-example directory and run the following command. This command will create a new Vue application and prompt you for options.
vue create clientWhen prompted to pick a present, choose Manually select features.
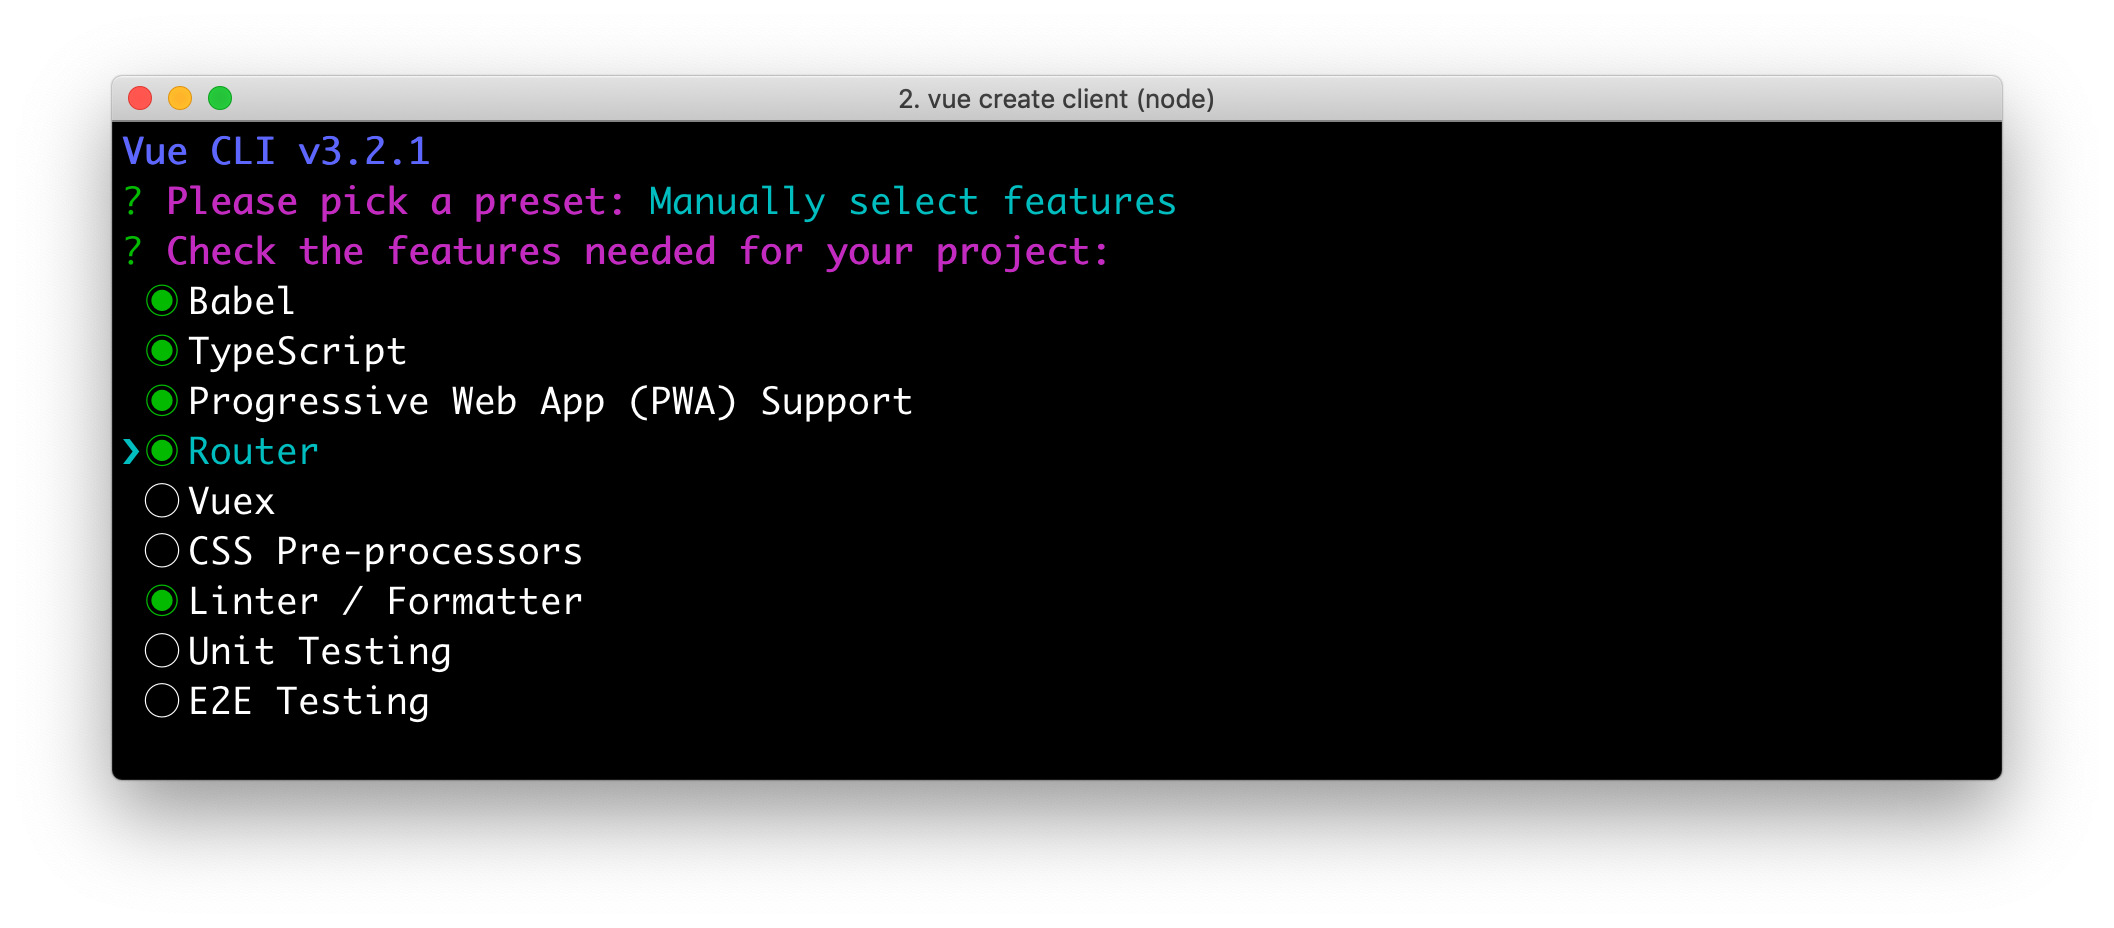
Check the TypeScript, PWA, and Router features. Choose the defaults (by pressing Enter) for the rest of the questions.
In a terminal window, cd into the client directory and open package.json in your favorite editor. Add a start script that’s the same as the serve script.
"scripts": {
  "start": "vue-cli-service serve",
  "serve": "vue-cli-service serve",
  "build": "vue-cli-service build",
  "lint": "vue-cli-service lint"
},
Now you can start your Vue app using npm start. Your Spring Boot app should be still running on port 8080, which will cause your Vue app to use port 8081. I expect you to run your Vue app on 8081 throughout this tutorial. To ensure it always runs on this port, create a client/vue.config.js file and add the following JavaScript to it.
module.exports = {
devServer: {
port: 8081
}
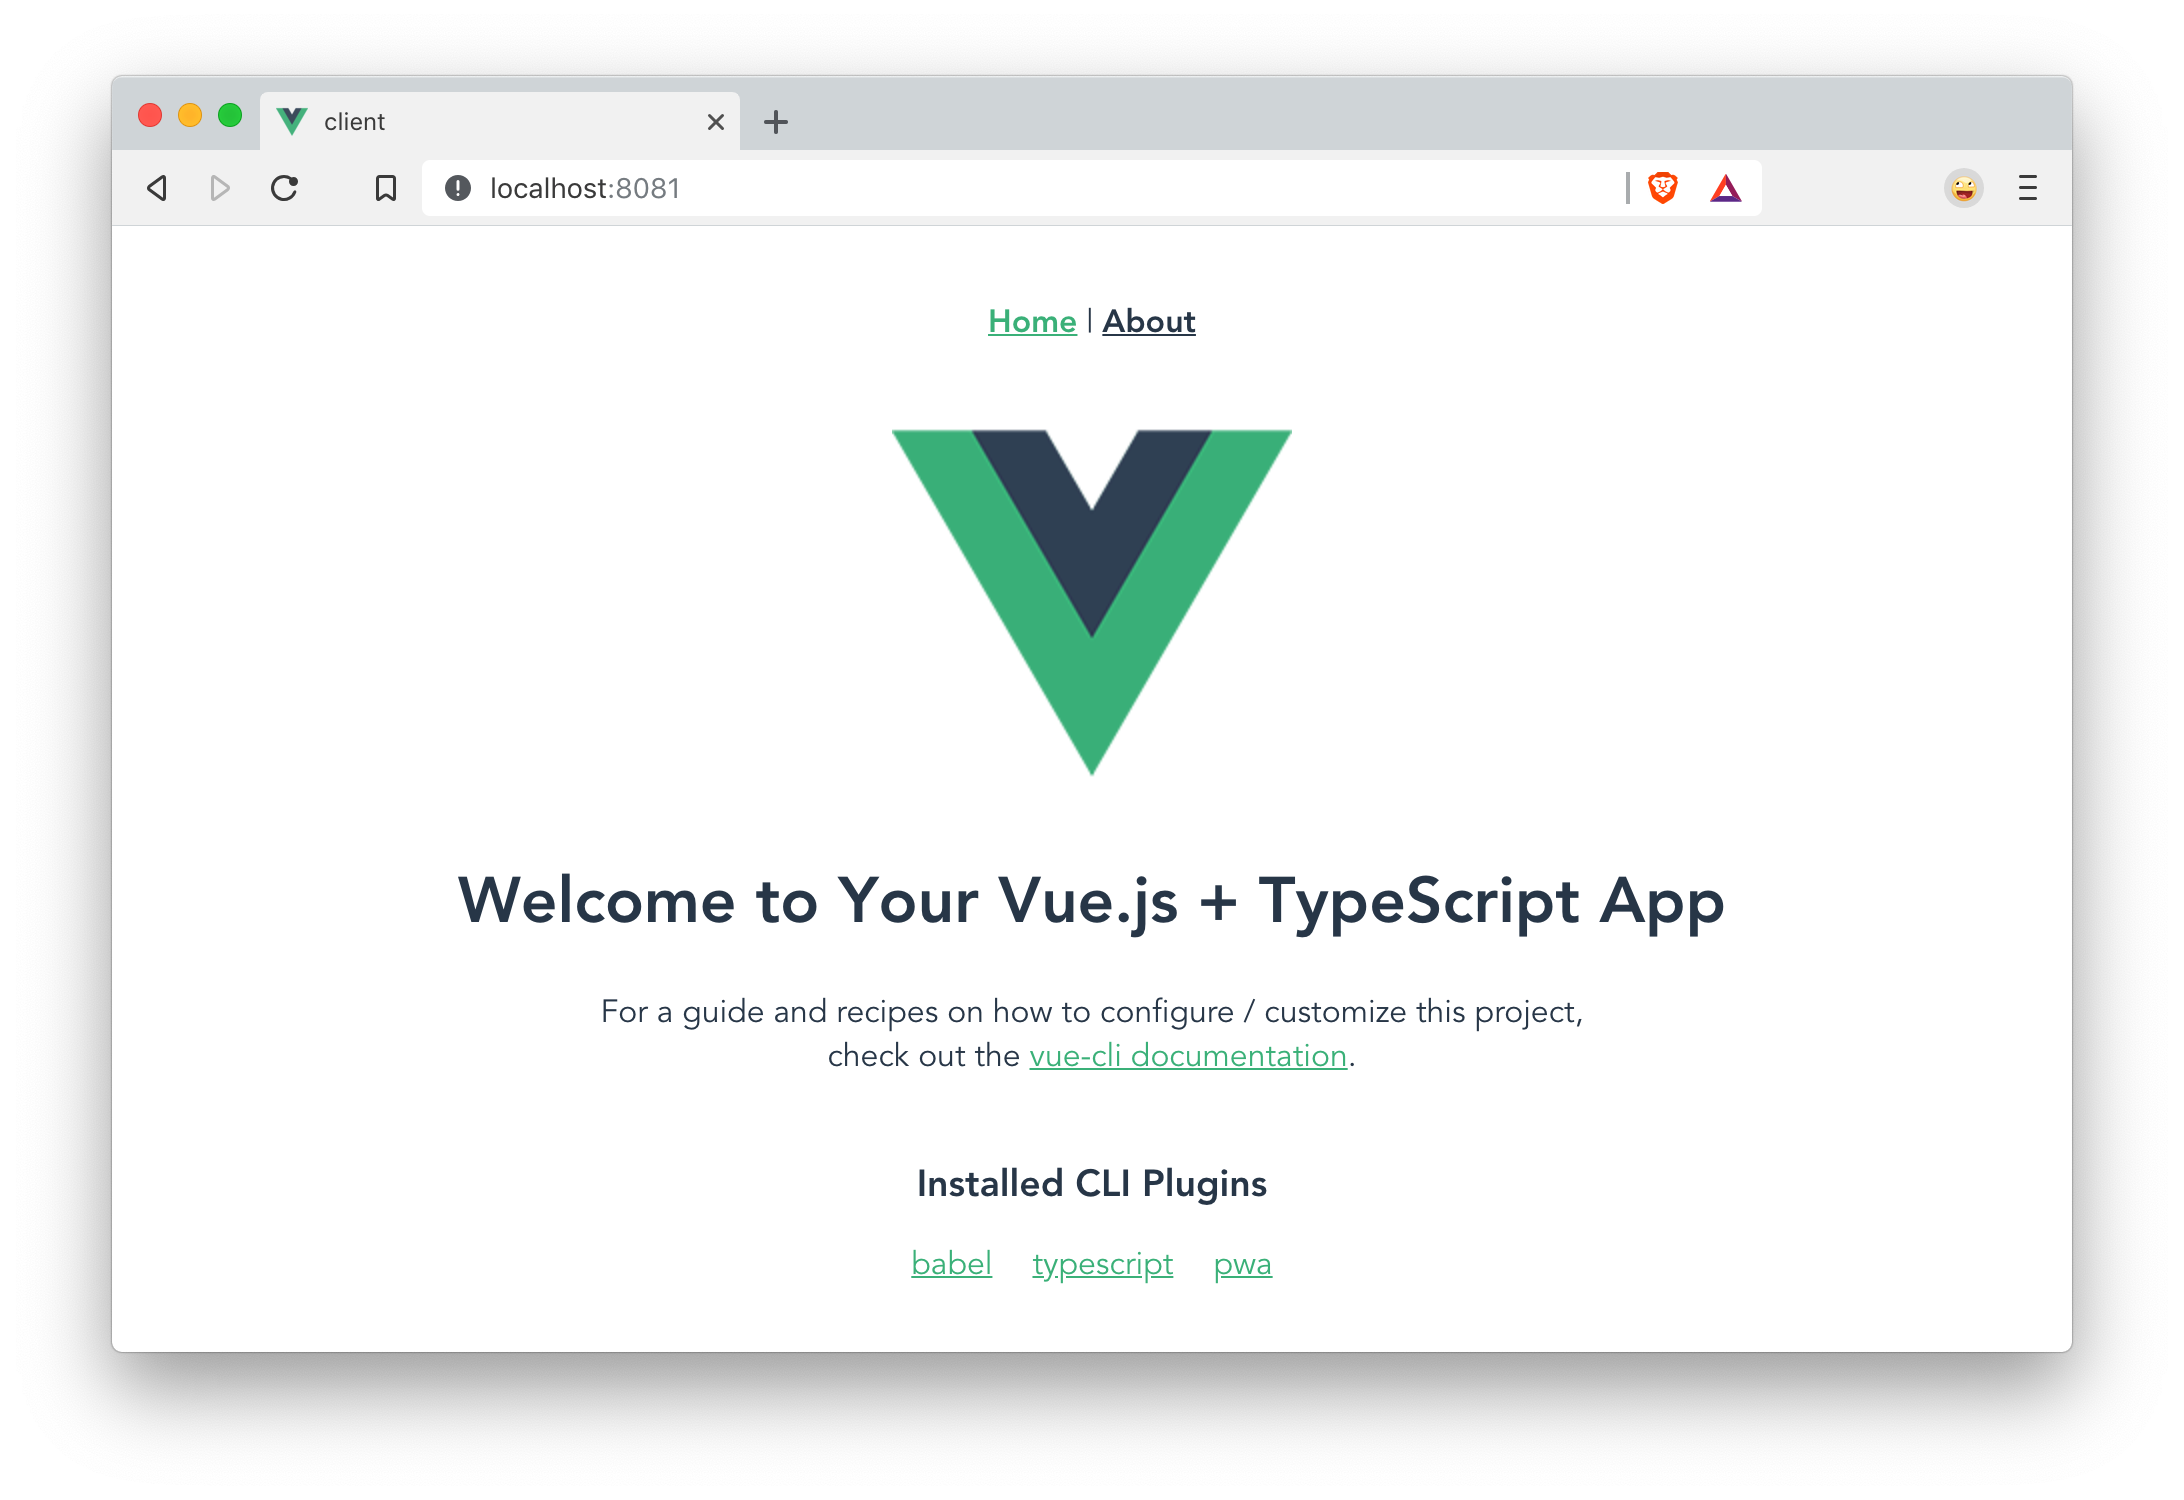
};Open http://localhost:8081 in your browser, and you should see a page like the one below.
Create a Good Beers UI in Vue
So far, you’ve created a good beers API and a Vue client, but you haven’t created the UI to display the list of beers from your API. To do this, open client/src/views/Home.vue and add a created() method.
import axios from 'axios';
...

private async created() {
  const response = await axios.get('/good-beers');
  this.beers = await response.data;
}
Vue’s component lifecycle will call the created() method.
| John Papa’s Vue.js with TypeScript was a big help in figuring out how to use TypeScript with Vue. Vue’s TypeScript docs were also helpful. |
You’ll need to install axios for this code to compile.
npm i axiosYou can see this puts the response data into a local beers variable. To properly define this variable, create a Beer interface and initialize the Home class’s beers variable to be an empty array.
export interface Beer {
  id: number;
  name: string;
  giphyUrl: string;
}

@Component({
  components: {
    HelloWorld,
  },
})
export default class Home extends Vue {
  public beers: Beer[] = [];

  private async created() {
    const response = await axios.get('/good-beers');
    this.beers = await response.data;
  }
}
A keen eye will notice this makes a request to /good-beers on the same port as the Vue application (since it’s a relative URL). For this to work, you’ll need to modify client/vue.config.js to have a proxy that sends this URL to your Spring Boot app.
module.exports = {
  devServer: {
    port: 8081,
    proxy: {
      "/good-beers": {
        target: "http://localhost:8080",
        secure: false
      }
    }
  }
};
Modify the template in client/src/views/Home.vue to display the list of good beers from your API.
<template>
<div class="home">
<img alt="Vue logo" src="../assets/logo.png">
<h1>Beer List</h1>
<div v-for="beer in beers">
{{ beer.name }}
</div>
</div>
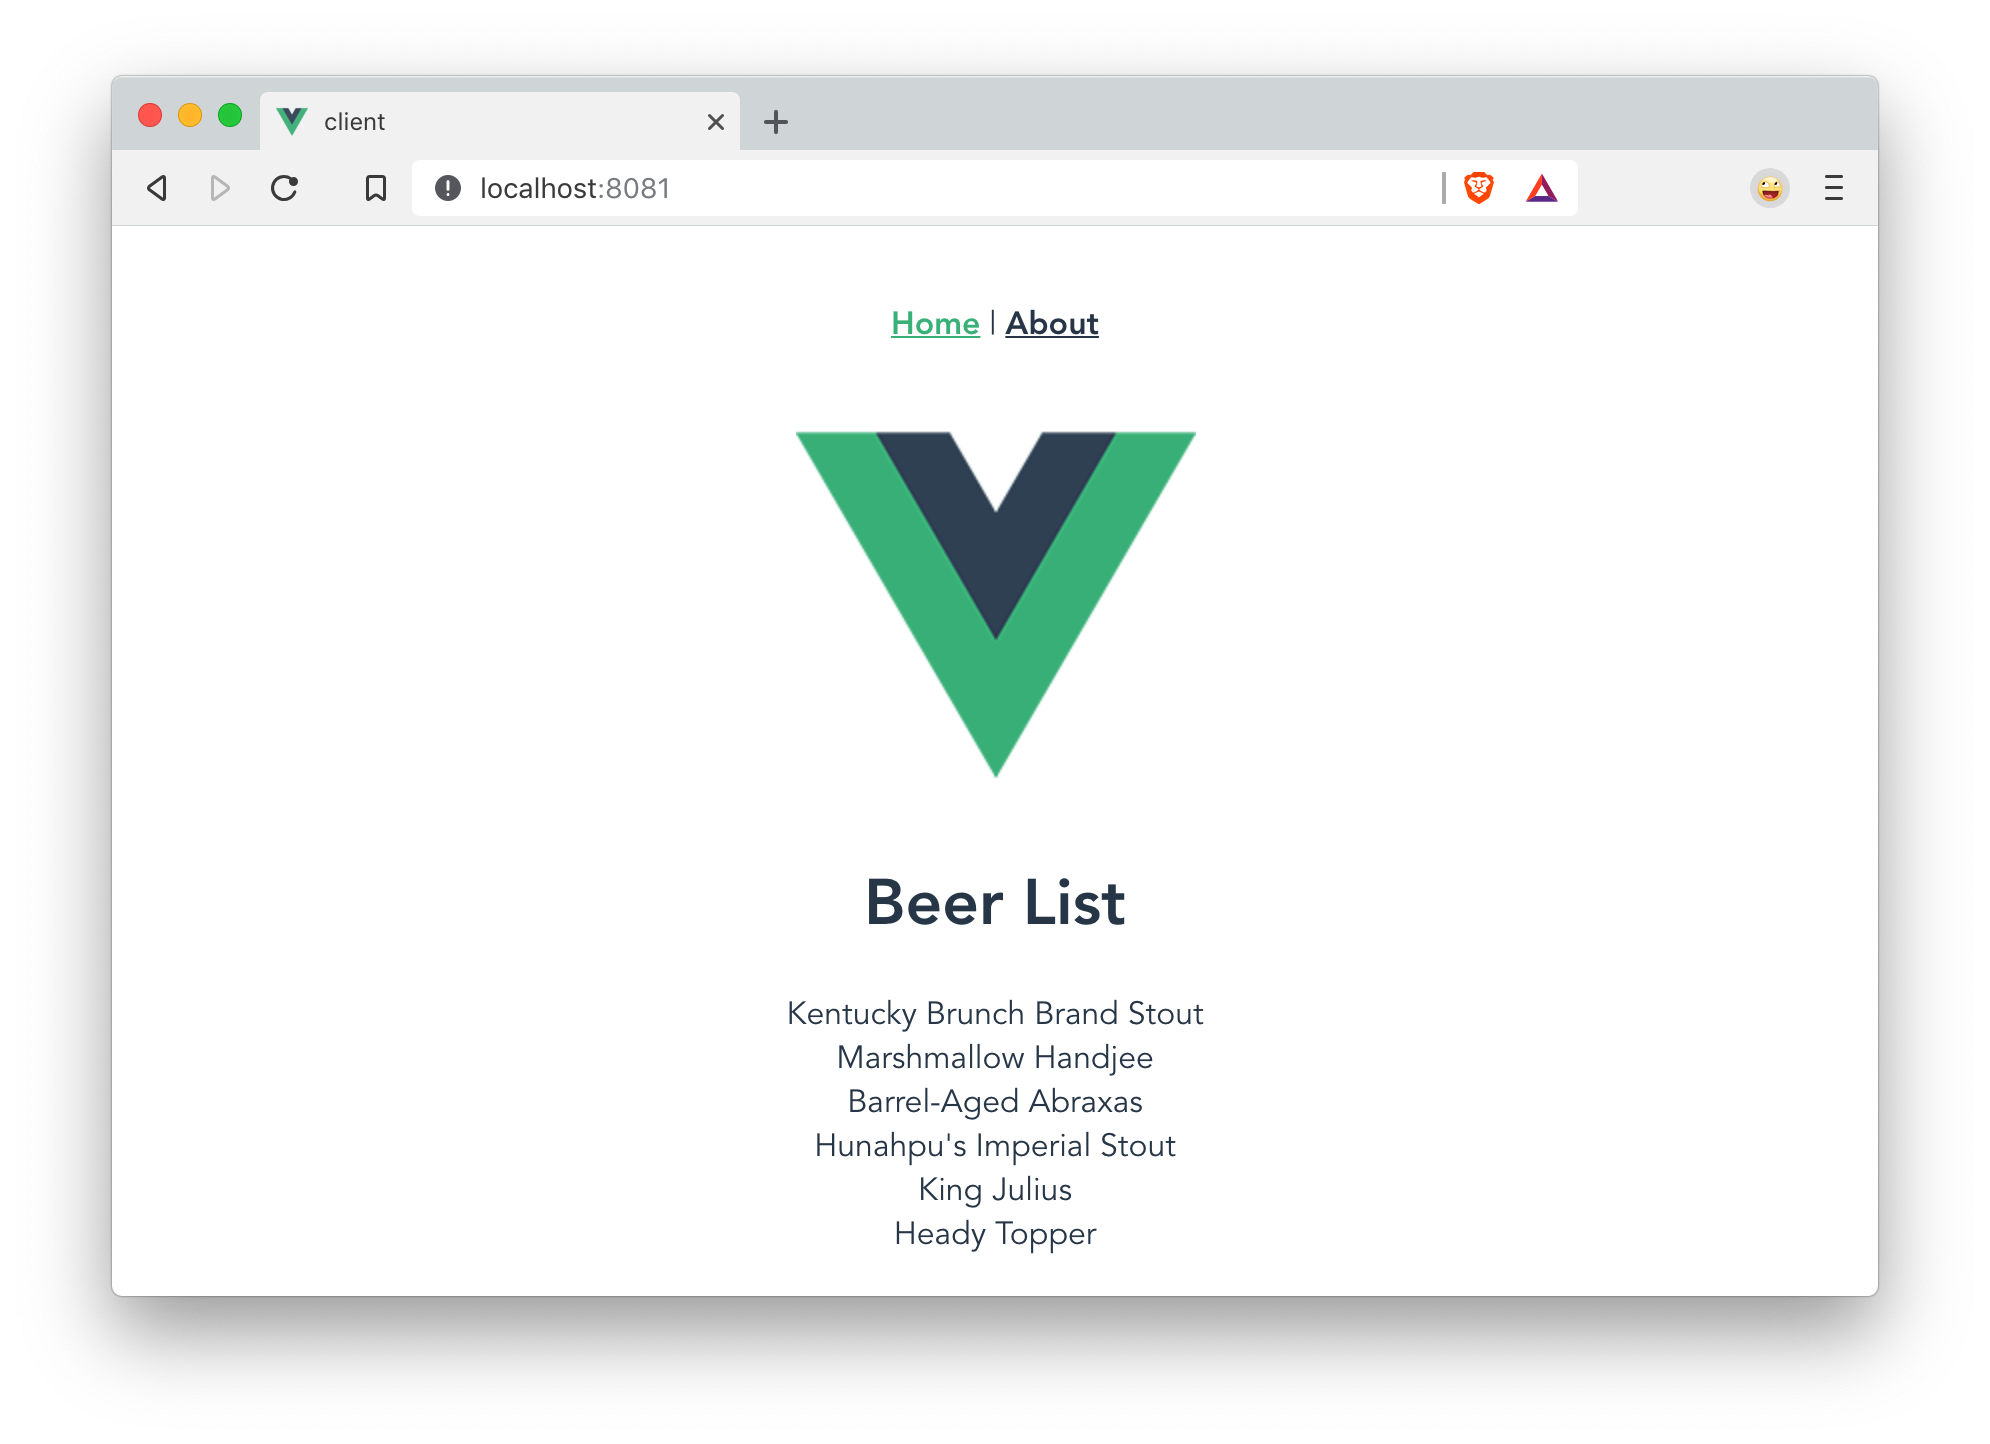
</template>Restart your Vue app using npm start and refresh your app on http://localhost:8081. You should see a list of beers from your Spring Boot API.
Create a BeerList Component
To make this application easier to maintain, move the beer list logic and rendering to its own BeerList component. Create client/src/components/BeerList.vue and populate it with the code from Home.vue. Remove the Vue logo, customize the template’s main class name, and remove the HelloWorld component. It should look as follows when you’re done.
<template>
  <div class="beer-list">
    <h1>Beer List</h1>
    <div v-for="beer in beers">
      {{ beer.name }}
    </div>
  </div>
</template>

<script lang="ts">
import { Component, Vue } from 'vue-property-decorator';
import axios from 'axios';

export interface Beer {
  id: number;
  name: string;
  giphyUrl: string;
}

@Component
export default class BeerList extends Vue {
  public beers: Beer[] = [];

  private async created() {
    const response = await axios.get('/good-beers');
    this.beers = await response.data;
  }
}
</script>
Then change client/src/views/Home.vue so it only contains the logo and a reference to <BeerList/>.
<template>
  <div class="home">
    <img alt="Vue logo" src="../assets/logo.png">
    <BeerList/>
  </div>
</template>

<script lang="ts">
import { Component, Vue } from 'vue-property-decorator';
import BeerList from '@/components/BeerList.vue';

@Component({
  components: {
    BeerList,
  },
})
export default class Home extends Vue {}
</script>
Create a GiphyImage Component
To make things look a little better, add a GIPHY component to fetch images based on the beer’s name. Create client/src/components/GiphyImage.vue and place the following code inside it.
| You will need a Giphy API key to make this work. You can sign up for a Giphy API key on their developer site. Once you’ve created an API key, insert it into the code below. |
<template>
  <img :src=giphyUrl v-bind:alt=name height="200"/>
</template>

<script lang="ts">
import { Component, Prop, Vue } from 'vue-property-decorator';
import axios from 'axios';

@Component
export default class GiphyImage extends Vue {
  @Prop() private name!: string;
  private giphyUrl: string = '';

  private async created() {
    const giphyApi = '//api.giphy.com/v1/gifs/search?api_key=<YOUR_GIPHY_API_KEY_HERE>&limit=1&q=';

    const response = await axios.get(giphyApi + this.name);
    const data = await response.data.data;
    if (data.length) {
      this.giphyUrl = data[0].images.original.url;
    } else {
      this.giphyUrl = '//media.giphy.com/media/YaOxRsmrv9IeA/giphy.gif';
    }
  }
}
</script>

<!-- The "scoped" attribute limits CSS to this component only -->
<style scoped>
img {
  margin: 10px 0 0;
}
</style>
Change BeerList.vue to use the <GiphyImage/> component in its template:
<div v-for="beer in beers">
  {{ beer.name }}<br/>
  <GiphyImage :name="beer.name"/>
</div>
And add it to the components list in the <script> block:
import GiphyImage from '@/components/GiphyImage.vue';

@Component({
  components: {GiphyImage},
})
export default class BeerList extends Vue { ... }
In this same file, add a <style> section at the bottom and use CSS Grid layout to organize the beers in rows.
<style scoped>
.grid {
  display: grid;
  grid-template-columns: repeat(3, 1fr);
  grid-gap: 10px;
  grid-auto-rows: minmax(100px, auto);
}
</style>
You’ll need to wrap a div around the beer list template for this to have any effect.
<div class="grid">
<div v-for="beer in beers">
{{ beer.name }}<br/>
<GiphyImage :name="beer.name"/>
</div>
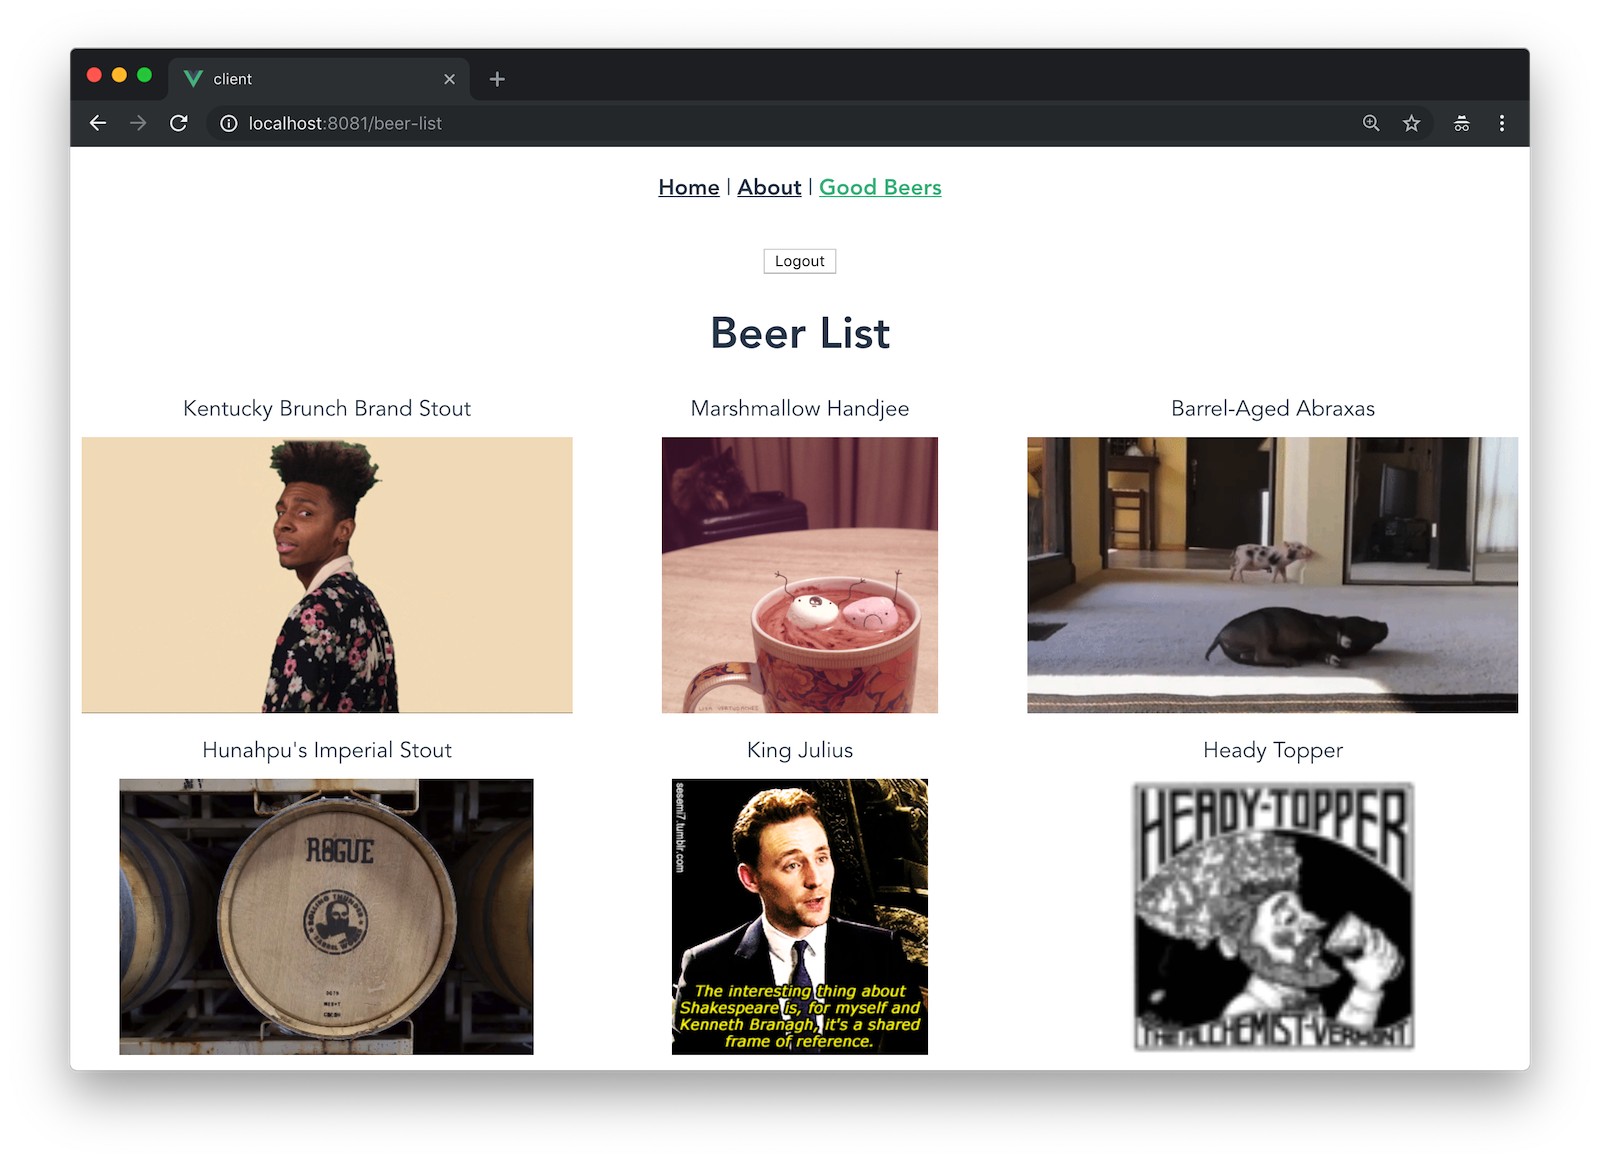
</div>After making these changes, your UI should look something like the following list of beer names and matching images.
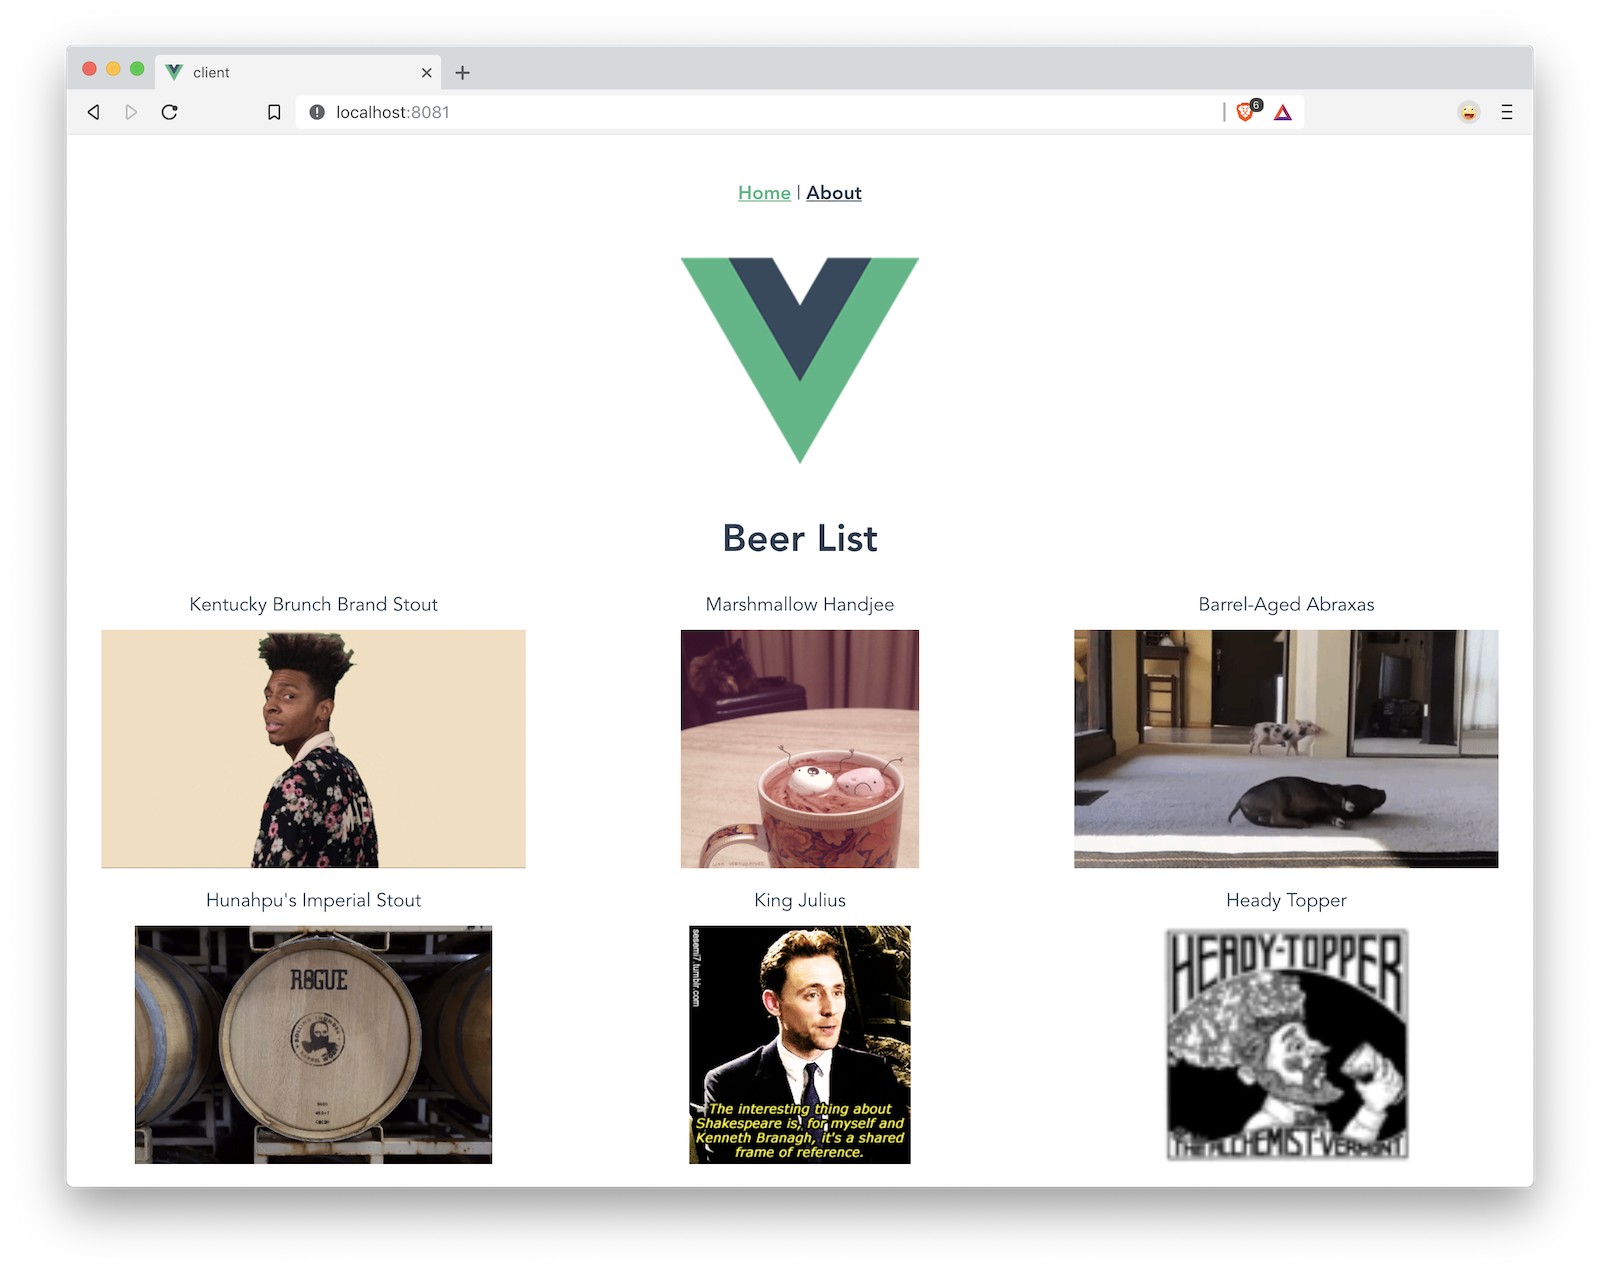
You just created a Vue app that talks to a Spring Boot API. Congratulations! 🎉
Add PWA Support
Vue CLI has support for progressive web applications (PWAs) out-of-the-box. When you created your Vue app, you selected PWA as a feature.
PWA features are only enabled in production, because having assets cached in development can be a real pain. Run npm run build in the client directory to create a build ready for production. Then use serve to create a web server and show your app.
npm i -g serve
serve -s dist -p 8081
You should be able to open your browser and see your app at http://localhost:8081. When I first tried this, I found that loading the page didn’t render any beer names and all the images were the same. This is because the client attempts to make a request to /good-beers and there’s no proxy configured in production mode.
To fix this issue, you’ll need to change the URL in the client and configure Spring Boot to allow cross-domain access from http://localhost:8081.
Modify client/src/components/BeerList.vue to use the full URL to your Spring Boot API.
private async created() {
  const response = await axios.get('http://localhost:8080/good-beers');
  this.beers = await response.data;
}| If you don’t see any changes in your UI after making these changes, it’s because your browser has cached your app. Use an incognito window, or clear your cache (in Chrome: Developer Tools > Application > Clear storage > Clear site data) to fix this issue. |
Configure CORS for Spring Boot
In the server project, open src/main/java/…/demo/beer/BeerController.java and add a @CrossOrigin annotation to enable cross-origin resource sharing (CORS) from the client (http://localhost:8081).
import org.springframework.web.bind.annotation.CrossOrigin;
...
    @GetMapping("/good-beers")
    @CrossOrigin(origins = "http://localhost:8081")
    public Collection<Beer> goodBeers() {
After making these changes, rebuild your Vue app for production, refresh your browser, and everything should render as expected.
Use Lighthouse to See Your PWA Score
I ran a Lighthouse audit in Chrome and found that this app scores a 81/100 at this point. The most prominent complaint from this report was that I wasn’t using HTTPS. To see how the app would score when it used HTTPS, I deployed it to Pivotal Cloud Foundry and Heroku. I was pumped to discover it scored high on both platforms.
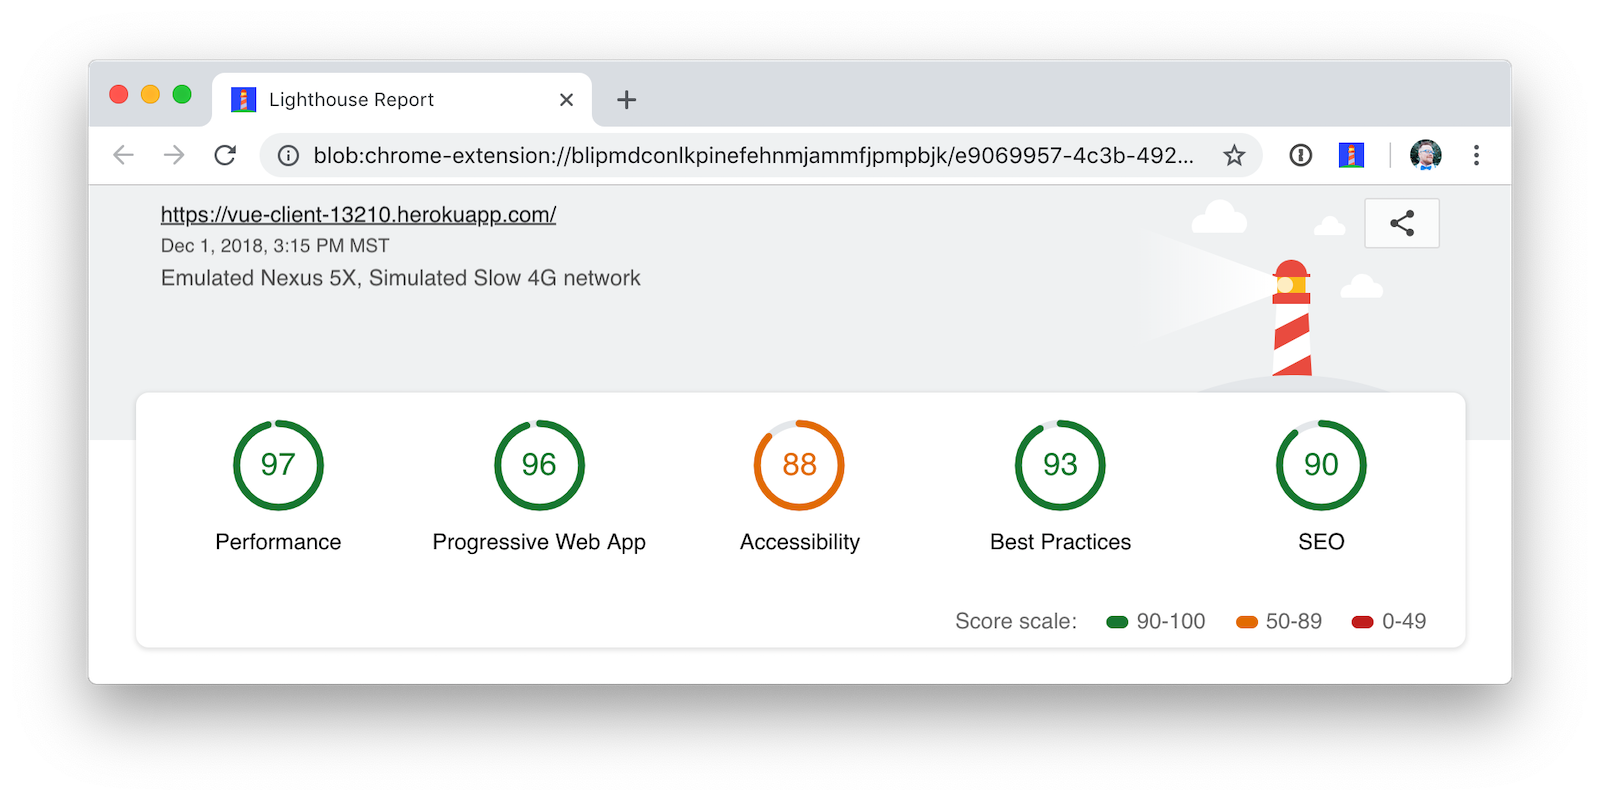
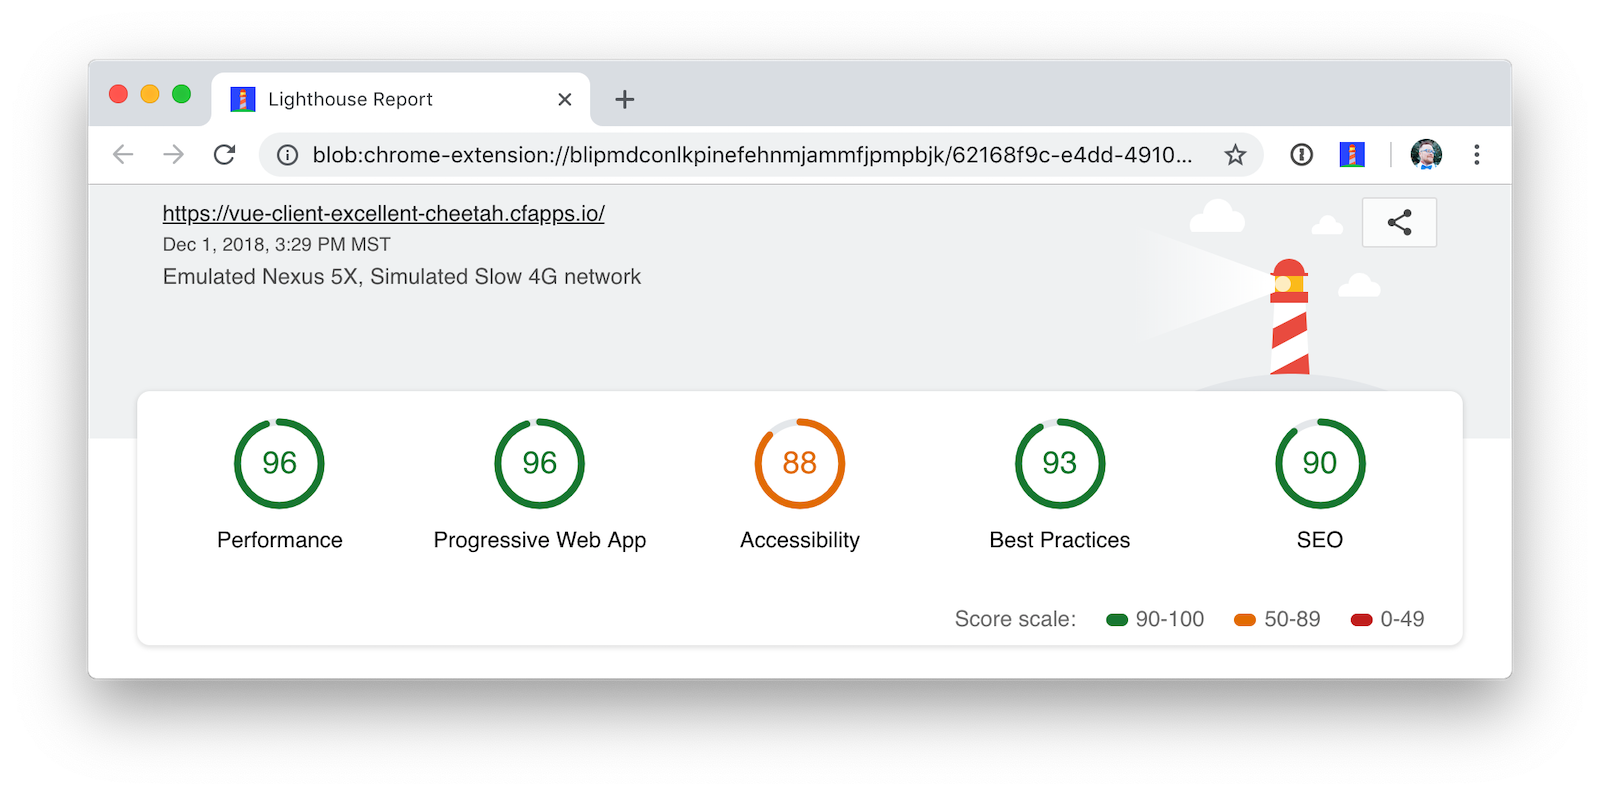
The reason it scores a 96 is because The viewport size is 939px, whereas the window size is 412px. I’m not sure what’s causing this issue, maybe it’s the CSS Grid layout?
To see the scripts I used to deploy everything, see heroku.sh and cloudfoundry.sh in this post’s companion GitHub repository.
You will need to initialize Git before running the deployment scripts. Run rm -rf client/.git, followed by git commit -a "Add project".
|
Add Authentication with Okta
You might be thinking, "this is pretty cool, it’s easy to see why people dig Vue." There’s another tool you might dig after you’ve tried it: Authentication with Okta! Why Okta? Because you can get 1,000 active monthly users for free! It’s worth a try, especially when you see how easy it is to add auth to Spring Boot and Vue with Okta.
Okta Spring Boot Starter
To secure your API, you can use Okta’s Spring Boot Starter. To integrate this starter, add the following dependencies to server/pom.xml:
<dependency>
    <groupId>com.okta.spring</groupId>
    <artifactId>okta-spring-boot-starter</artifactId>
    <version>0.6.1</version>
</dependency>
<dependency>
    <groupId>org.springframework.security.oauth.boot</groupId>
    <artifactId>spring-security-oauth2-autoconfigure</artifactId>
    <version>2.1.1.RELEASE</version>
</dependency>
Now you need to configure the server to use Okta for authentication. You’ll need to create an OIDC app in Okta for that.
Create an OIDC App in Okta
Log in to your Okta Developer account (or sign up if you don’t have an account) and navigate to Applications > Add Application. Click Single-Page App, click Next, and give the app a name you’ll remember. Change all instances of localhost:8080 to localhost:8081 and click Done.
Copy the client ID into your server/src/main/resources/application.properties file. While you’re in there, add a okta.oauth2.issuer property that matches your Okta domain. For example:
okta.oauth2.issuer=https://{yourOktaDomain}/oauth2/default
okta.oauth2.client-id={yourClientId}
Replace {yourOktaDomain} with your org URL, which you can find on the Dashboard of the Developer Console. Make sure you don’t include -admin in the value!
|
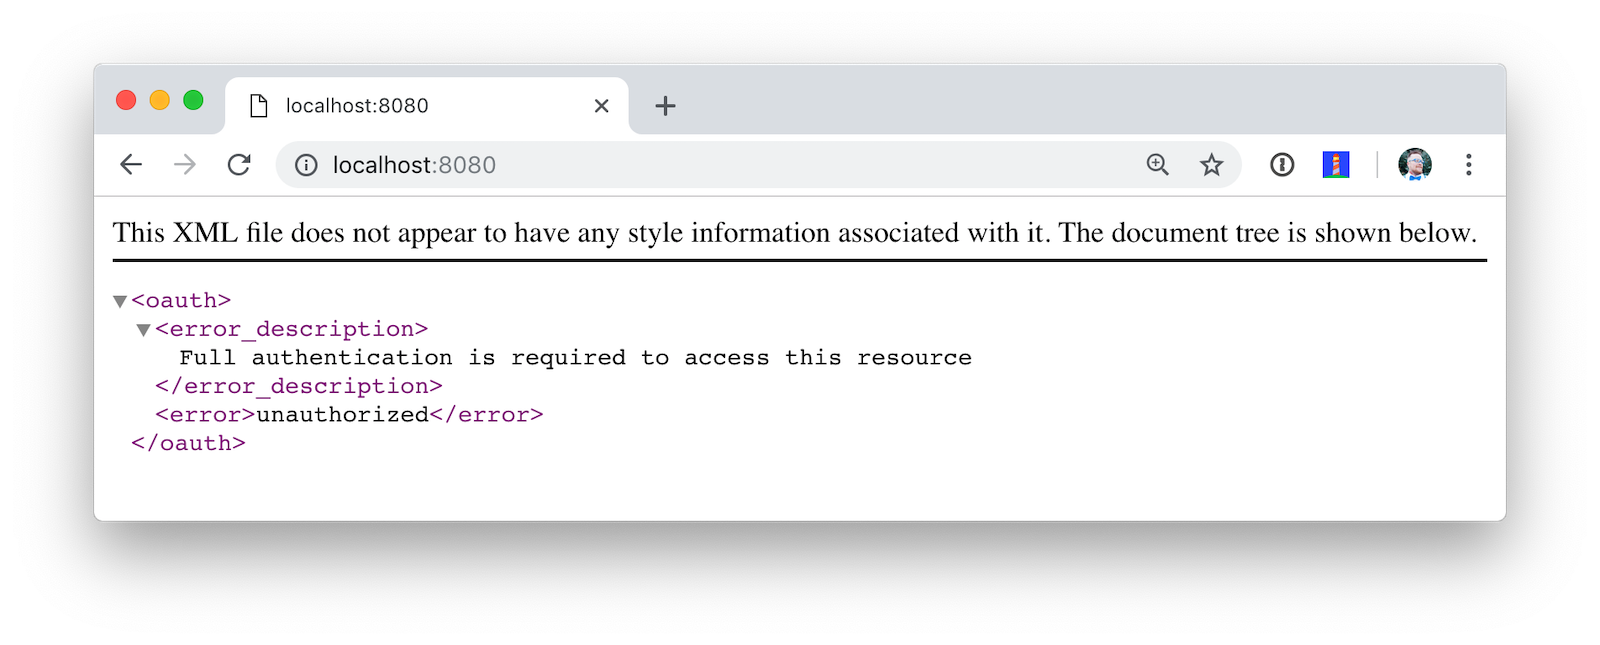
Update server/src/main/java/…/demo/DemoApplication.java to enable it as a resource server.
import org.springframework.security.oauth2.config.annotation.web.configuration.EnableResourceServer;

@EnableResourceServer
@SpringBootApplication
After making these changes, you should be able to restart the server and see access denied when you try to navigate to http://localhost:8080.
Okta’s Vue Support
Okta’s Vue SDK allows you to integrate OIDC into a Vue application. You can learn more about Okta’s Vue SDK can be found on npmjs.com. To install, run the following commands in the client directory:
npm i @okta/okta-vue@1.0.7
npm i -D @types/okta__okta-vue| The types for Okta’s Vue SDK may be included in a future release. I created a pull request to add them. |
Open client/src/router.ts and add your Okta configuration. The router.ts below also includes a path for the BeerList, a callback that’s required for authentication, and a navigation guard to require authentication for the /beer-list path. Replace yours with this one, then update yourClientDomain and yourClientId to match your settings. Make sure to remove the {} since those are just placeholders.
import Vue from 'vue';
import Router from 'vue-router';
import Home from './views/Home.vue';
import OktaVuePlugin from '@okta/okta-vue';
import BeerList from '@/components/BeerList.vue';

Vue.use(Router);
Vue.use(OktaVuePlugin, {
  issuer: 'https://{yourOktaDomain}/oauth2/default',
  client_id: '{yourClientId}',
  redirect_uri: window.location.origin + '/implicit/callback',
  scope: 'openid profile email',
});

const router = new Router({
  mode: 'history',
  base: process.env.BASE_URL,
  routes: [
    {
      path: '/',
      name: 'home',
      component: Home,
    },
    {
      path: '/about',
      name: 'about',
      // route level code-splitting
      // this generates a separate chunk (about.[hash].js) for this route
      // which is lazy-loaded when the route is visited.
      component: () => import(/* webpackChunkName: "about" */ './views/About.vue'),
    },
    {
      path: '/beer-list',
      name: 'beer-list',
      component: BeerList,
      meta: {
        requiresAuth: true,
      },
    },
    { path: '/implicit/callback', component: OktaVuePlugin.handleCallback() },
  ],
});

router.beforeEach(Vue.prototype.$auth.authRedirectGuard());

export default router;
Since you have a route for BeerList remove it from client/src/views/Home.vue.
<template>
  <div class="home">
    <img alt="Vue logo" src="../assets/logo.png">
  </div>
</template>

<script lang="ts">
import { Component, Vue } from 'vue-property-decorator';

@Component
export default class Home extends Vue {}
</script>
Add a link to the BeerList in client/src/App.vue. You’ll also need to add code that detects if the user is logged in or not. Replace the <template> section and add the <script> below to your App.vue.
<template>
<div id="app">
<div id="nav">
<router-link to="/">Home</router-link> |
<router-link to="/about">About</router-link>
<template v-if="authenticated"> |
<router-link to="/beer-list">Good Beers</router-link>
</template>
</div>
<button v-if="authenticated" v-on:click="logout">Logout</button>
<button v-else v-on:click="$auth.loginRedirect()">Login</button>
<router-view/>
</div>
</template>
<script lang="ts">
import { Component, Vue, Watch } from 'vue-property-decorator';
@Component
export default class App extends Vue {
public authenticated: boolean = false;
private created() {
this.isAuthenticated();
}
@Watch('$route')
private async isAuthenticated() {
this.authenticated = await this.$auth.isAuthenticated();
}
private async logout() {
await this.$auth.logout();
await this.isAuthenticated();
// Navigate back to home
this.$router.push({path: '/'});
}
}
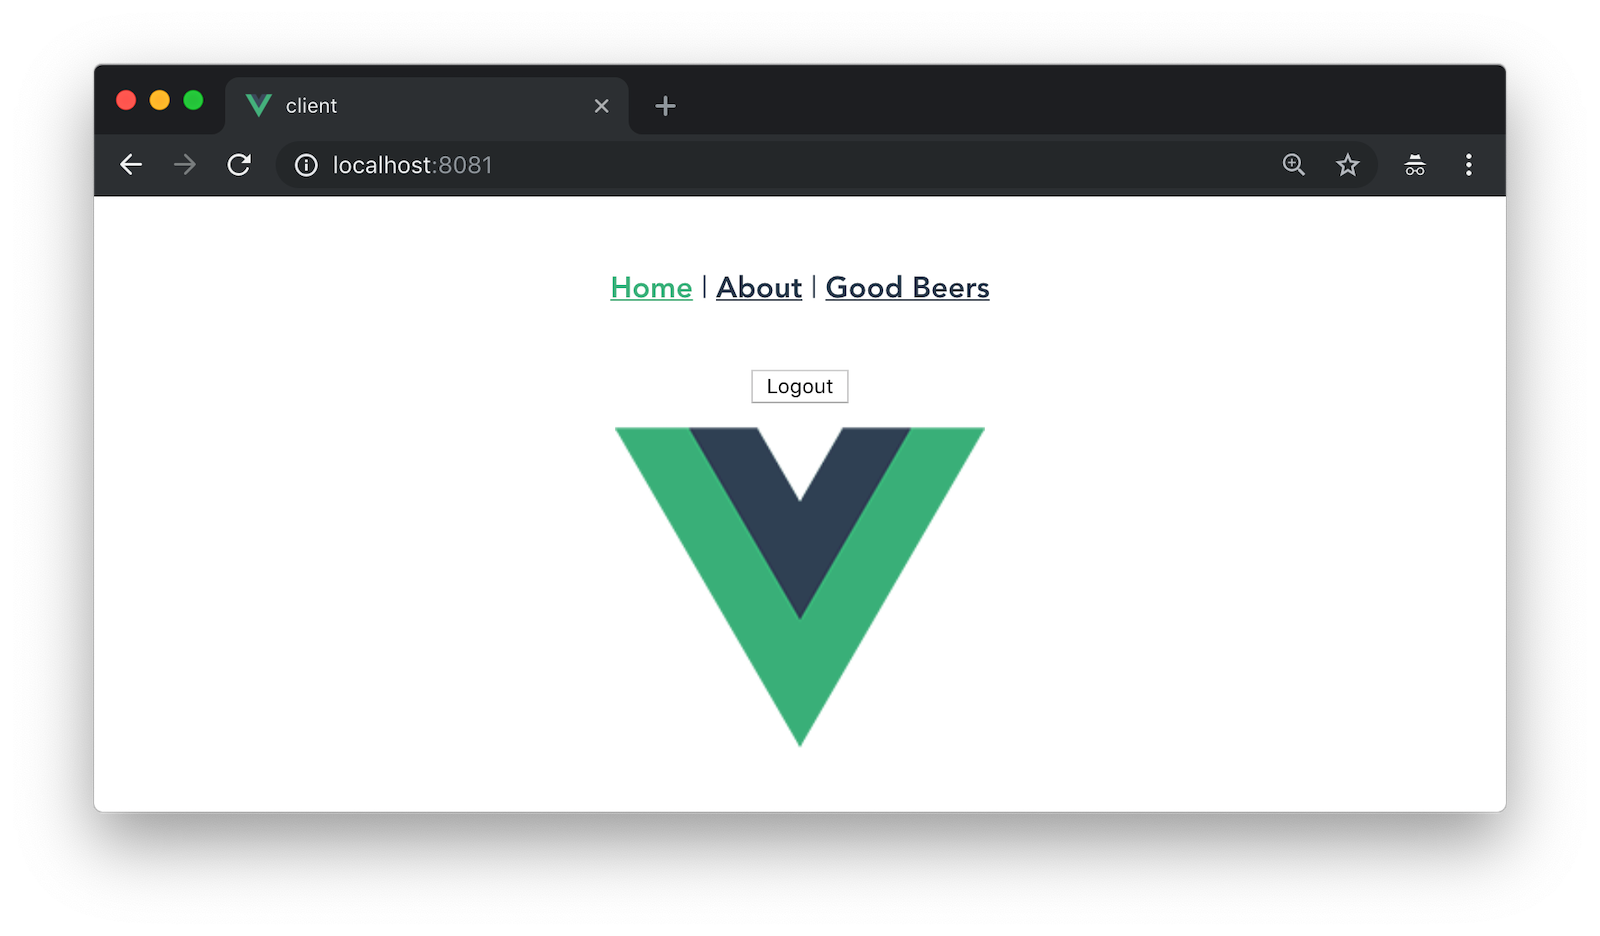
</script>Restart your Vue app and you should see a button to log in.
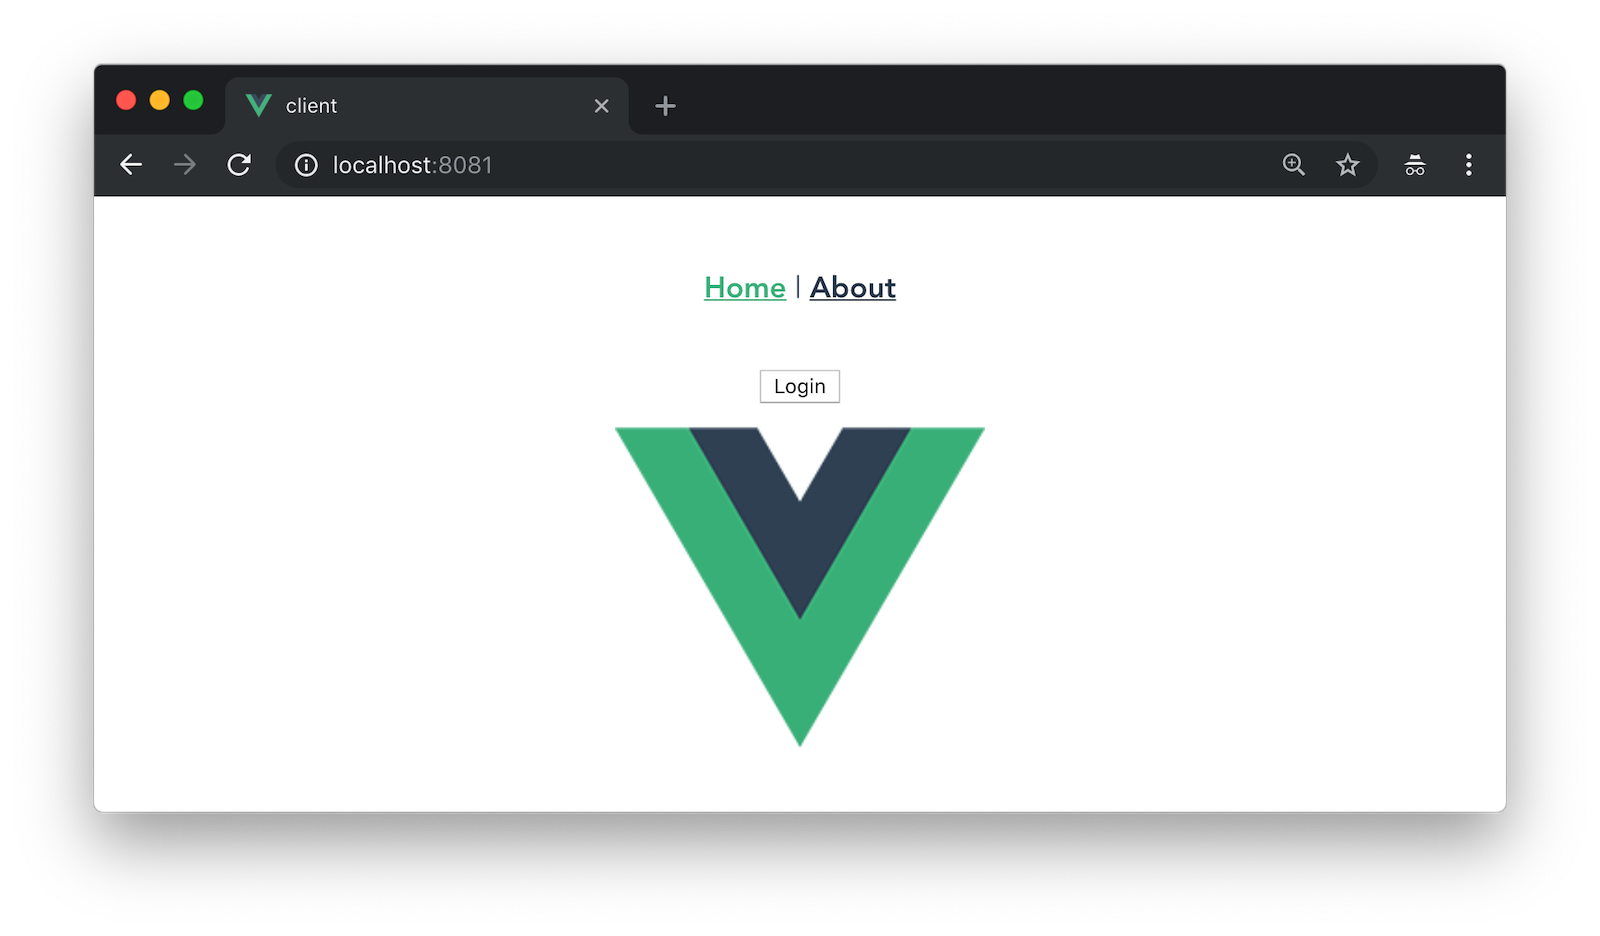
Click on it and you’ll be redirected to Okta. Enter the credentials you used to sign up for Okta and you’ll be redirected back to the app. You should see a Logout button and a link to see some good beers.
If you click to on the Good Beers link, you’ll see the component’s header, but no data. If you look at your JavaScript console, you’ll see there’s a CORS error.
This error happens because Spring’s @CrossOrigin doesn’t play well with Spring Security. To solve this problem, add a simpleCorsFilter bean to the body of DemoApplication.java.
package com.okta.developer.demo;

import org.springframework.boot.SpringApplication;
import org.springframework.boot.autoconfigure.SpringBootApplication;
import org.springframework.boot.web.servlet.FilterRegistrationBean;
import org.springframework.context.annotation.Bean;
import org.springframework.core.Ordered;
import org.springframework.security.oauth2.config.annotation.web.configuration.EnableResourceServer;
import org.springframework.web.cors.CorsConfiguration;
import org.springframework.web.cors.UrlBasedCorsConfigurationSource;
import org.springframework.web.filter.CorsFilter;

import java.util.Collections;

@EnableResourceServer
@SpringBootApplication
public class DemoApplication {

    public static void main(String[] args) {
        SpringApplication.run(DemoApplication.class, args);
    }

    @Bean
    public FilterRegistrationBean<CorsFilter> simpleCorsFilter() {
        UrlBasedCorsConfigurationSource source = new UrlBasedCorsConfigurationSource();
        CorsConfiguration config = new CorsConfiguration();
        config.setAllowCredentials(true);
        config.setAllowedOrigins(Collections.singletonList("http://localhost:8081"));
        config.setAllowedMethods(Collections.singletonList("*"));
        config.setAllowedHeaders(Collections.singletonList("*"));
        source.registerCorsConfiguration("/**", config);
        FilterRegistrationBean<CorsFilter> bean = new FilterRegistrationBean<>(new CorsFilter(source));
        bean.setOrder(Ordered.HIGHEST_PRECEDENCE);
        return bean;
    }
}
Restart your server after making this change. To make it all work on the client, modify the created() method in client/src/components/BeerList.vue to set an authorization header.
private async created() {
  const response = await axios.get('http://localhost:8080/good-beers',
    {
      headers: {
        Authorization: `Bearer ${await this.$auth.getAccessToken()}`,
      },
    },
  );
  this.beers = await response.data;
}
Now you should be able to see the good beer list as an authenticated user.
If it works, excellent! 👍
Learn More About Spring Boot and Vue
This tutorial showed you how to build an app that uses modern frameworks like Spring Boot and Vue. You learned how to add authentication with OIDC and protect routes using Okta’s Vue SDK. If you’d like to watch a video of this tutorial, I published it as a screencast to YouTube.
If you want to learn more about the Vue phenomenon, I have a couple of recommended articles. First of all, I think it’s awesome it’s not sponsored by a company (like Angular + Google and React + Facebook), and that’s it’s mostly community driven. The Solo JavaScript Developer Challenging Google and Facebook is an article in Wired that explains why this is so amazing.
Regarding JavaScript framework performance, The Baseline Costs of JavaScript Frameworks is an interesting blog post from Anku Sethi. I like his motivation for writing it:
Last week I was curious about how much of a performance impact just including React on a page can have. So I ran some numbers on a cheap Android phone and wrote about it.
To learn more about Vue, Spring Boot, or Okta, check out the following resources:
You can find the source code associated with this article on GitHub. The primary example (without authentication) is in the master branch, while the Okta integration is in the okta branch. To check out the Okta branch on your local machine, run the following command.
git clone -b okta https://github.com/oktadeveloper/spring-boot-vue-example.gitIf you find any issues, please add a comment below, and I’ll do my best to help. If you liked this tutorial, you should follow my team on Twitter. We also have a YouTube channel where we publish screencasts.
Matt Raible is a well-known figure in the Java community and has been building web applications for most of his adult life. For over 20 years, he has helped developers learn and adopt open source frameworks and use them effectively. He's a web developer, Java Champion, and Developer Advocate at Okta. Matt has been a speaker at many conferences worldwide, including Devnexus, Devoxx Belgium, Devoxx France, Jfokus, and JavaOne. He is the author of The Angular Mini-Book, The JHipster Mini-Book, Spring Live, and contributed to Pro JSP. He is a frequent contributor to open source and a member of the JHipster development team. You can find him online @mraible and raibledesigns.com.
Okta Developer Blog Comment Policy
We welcome relevant and respectful comments. Off-topic comments may be removed.