Add Role-Based Access Control to Your App with Spring Security and Thymeleaf
User management functions are required by a wide variety of apps and APIs, and it’s a common use-case to partition access to parts of an application according to roles assigned to a user. This is the basis of role-based access control (RBAC). Okta manages these roles with groups. Users can belong to one or more groups. With the Okta Spring Security integration, these groups are automatically mapped to roles that can be called out in your application to grant or deny access. This is all done using common Spring Security annotations as you’ll see below.
Okta’s Java dev team is working hard on our next generation SDK and integrations. With Okta’s integration for Spring Boot and Spring Security you can wire up your Okta tenant to a Spring Boot application and take advantage of the built in RBAC.
In this post, you’ll walk through a simple example that has some unprotected pages, some pages that can only be accessed by authenticated users and some pages that can only be accessed by users who belong to a particular group.
All the code used in this demo can be found in this GitHub repo.
Note: In May 2025, the Okta Integrator Free Plan replaced Okta Developer Edition Accounts, and the Okta CLI was deprecated.
We preserved this post for reference, but the instructions no longer work exactly as written. Replace the Okta CLI commands by manually configuring Okta following the instructions in our Developer Documentation.
Configure Okta
To get started, let’s get your Okta tenant set up. You’ll then be able to fire up the sample app and see it in action. Head on over to https://developer.okta.com and sign up for a developer account.
Here’s what we are going to do to exercise the code:
- Create an
adminsgroup - Create a
usersgroup - Create a user who belongs to the
usersgroups - Create a second user who belongs to both groups
- Create an OpenID Connect (OIDC) application
- Add our two groups to the application
- Configure the default Authorization Server to include group memberships in access tokens
If that seems like a lot – don’t worry! It’s just a bunch of clicking in a friendly webapp.
Groups
Navigate in your Okta Admin Dashboard to Users -> Groups. Click Add Group and fill in admins for the Name. Click Add Groupto save it.
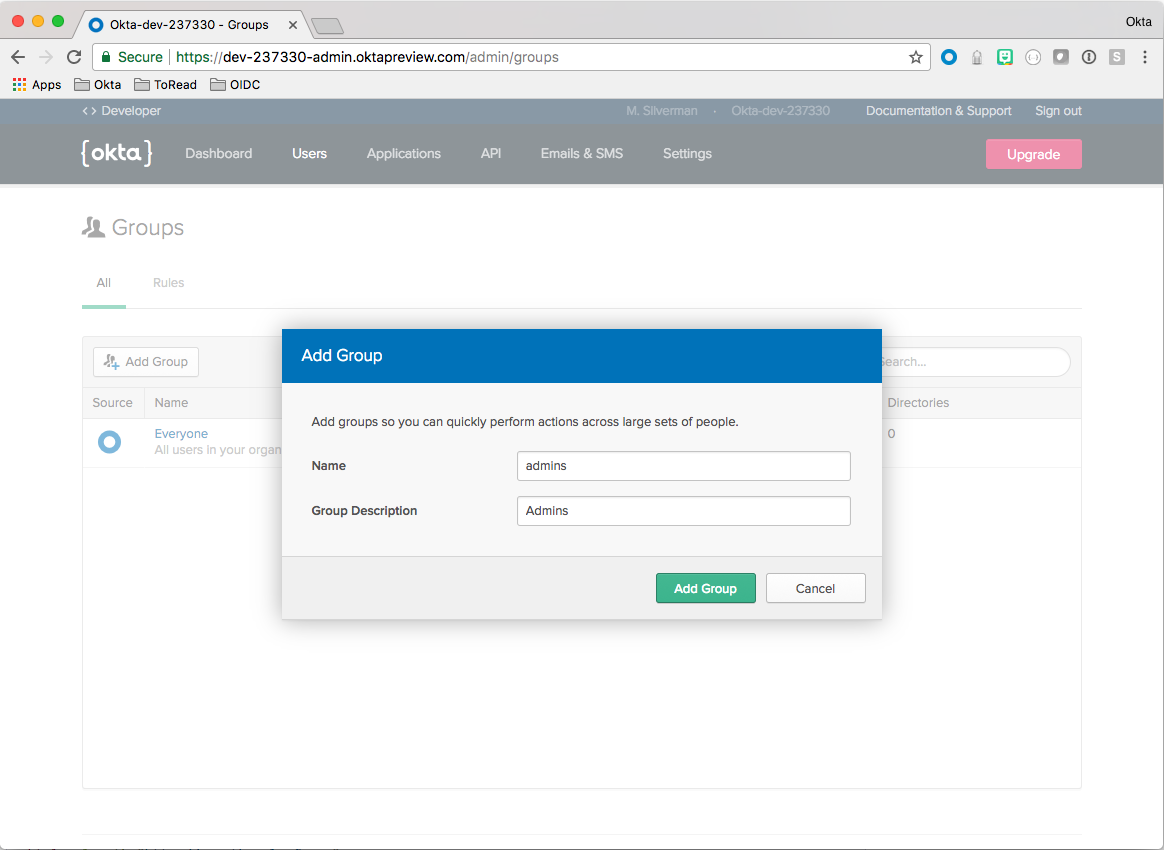
Repeat for the users group.
Users
Navigate in your Okta Admin Dashboard to Users -> People. Click Add User and fill in the form. Add this user to the users group you set up previously. Make sure the checkbox is selected to send an activation email.
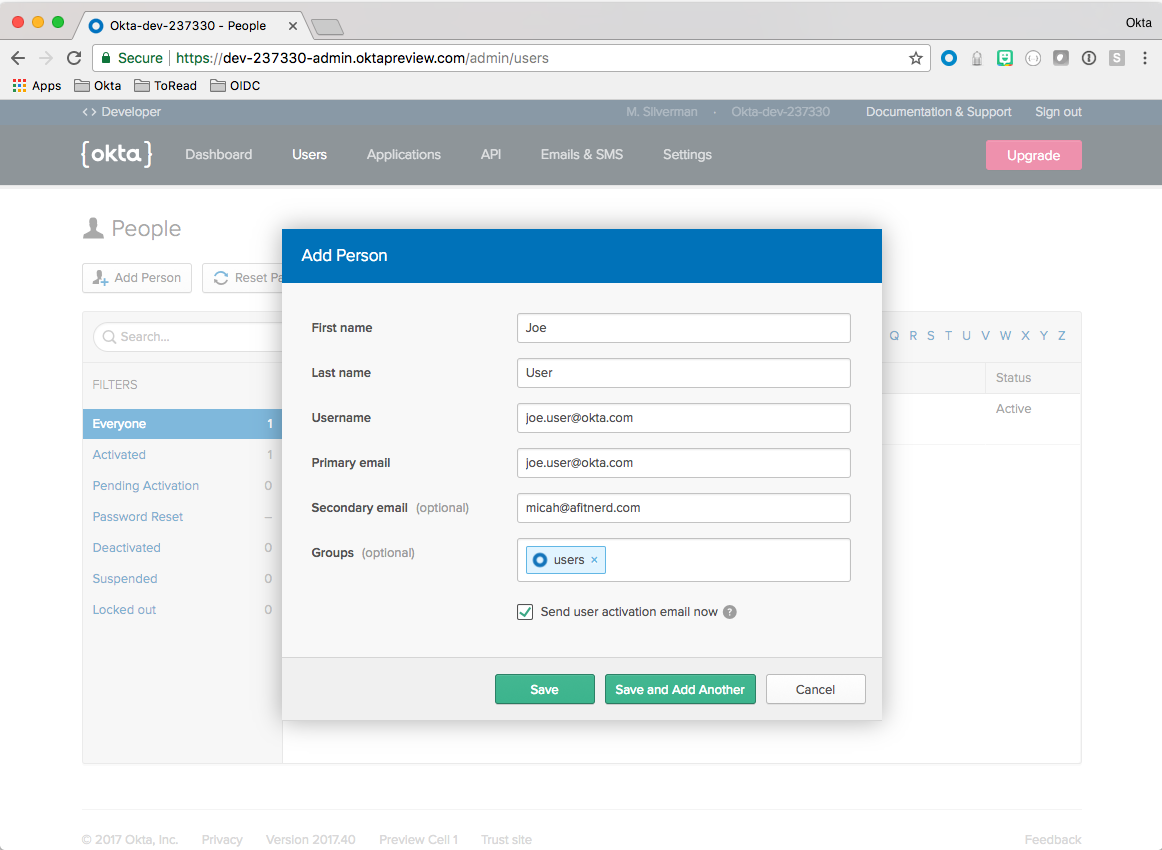
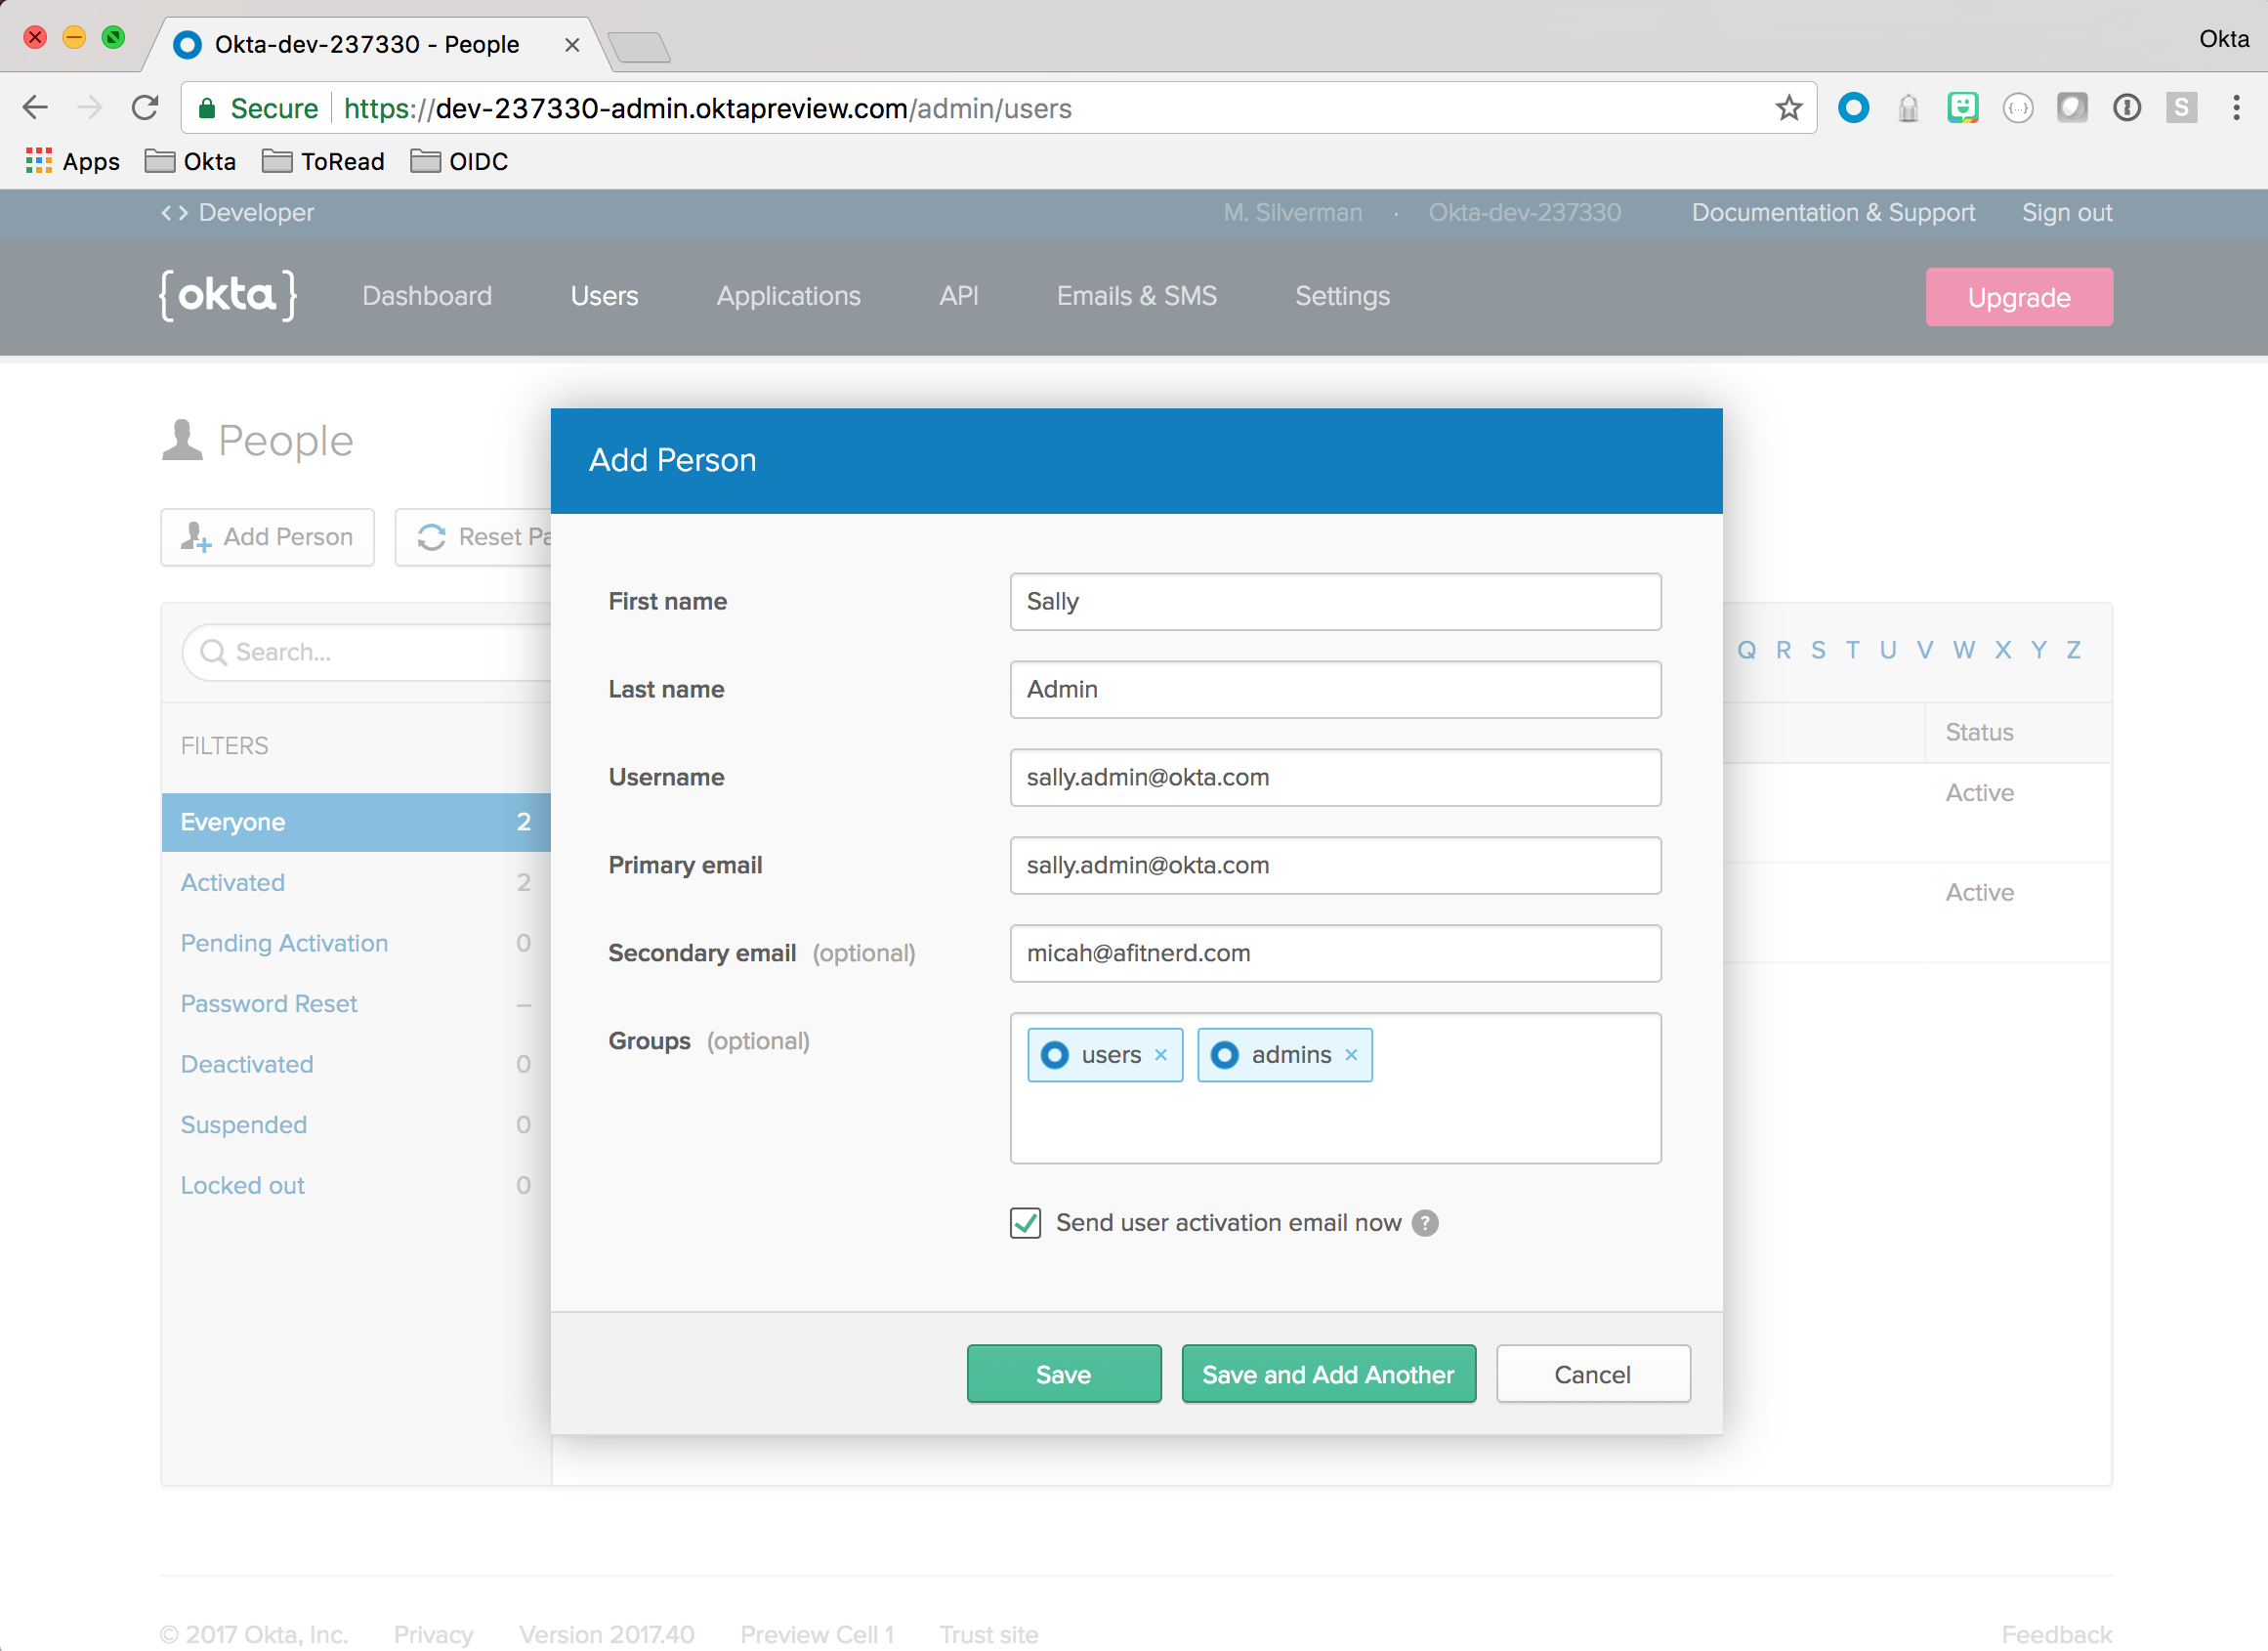
Click Save and Add Another. Repeat the above steps, only for the second user add to both the users and admins groups.
Note: Either the primary or secondary email needs to be a real email address so you can activate the user. Check your email and click the links for both users to activate them.
OIDC Application
Click the Applications menu item in your Okta Admin Dashboard. Click Add Application.
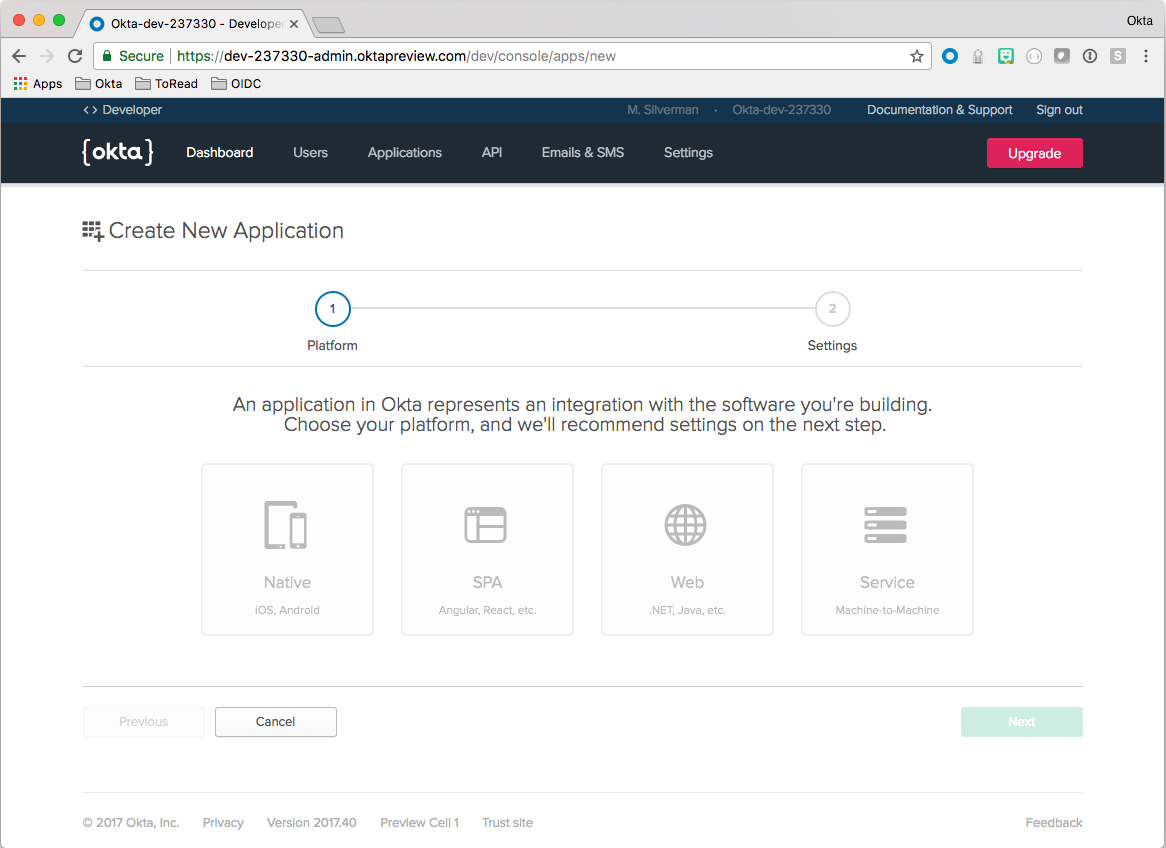
Choose the Web option and click Next.
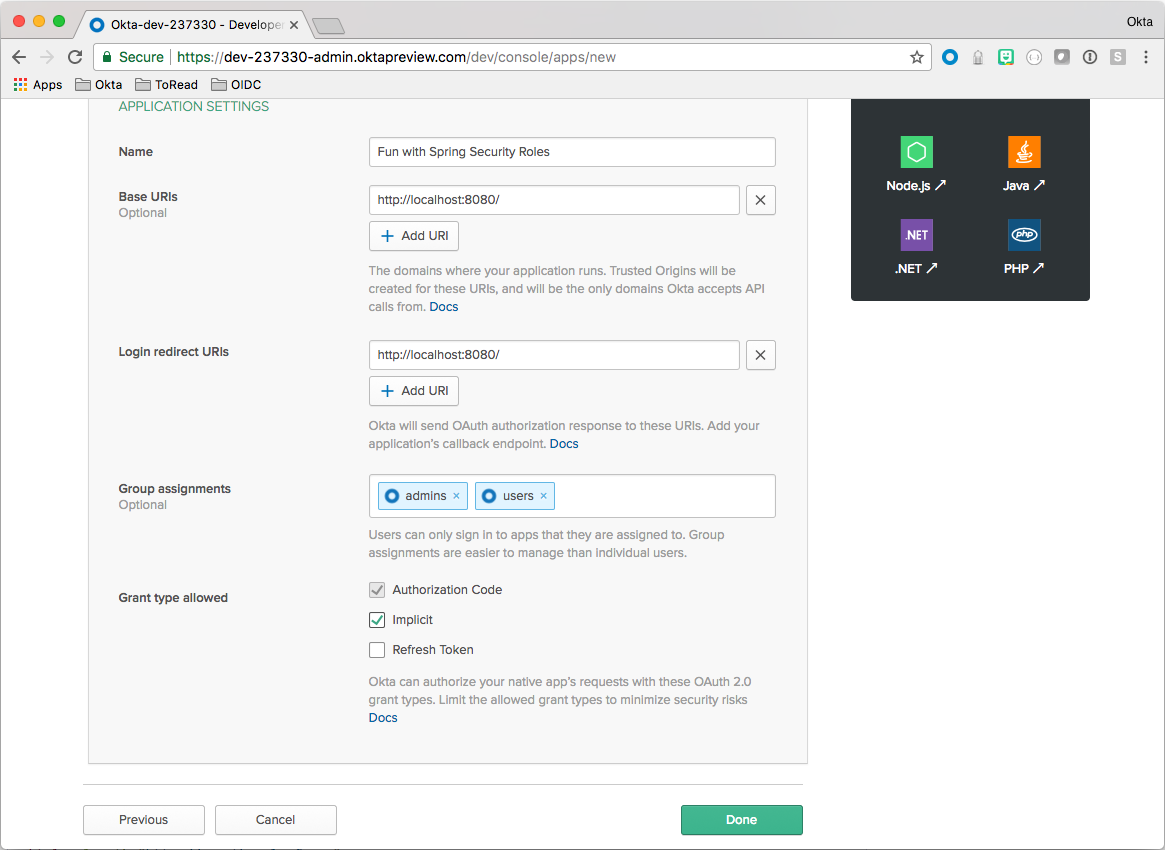
Fill out the form like so:
| Field | Value |
|---|---|
| Name | Fun with Spring Security Roles |
| Base URIs | http://localhost:8080/ |
| Login redirect URIs | http://localhost:8080/ |
| Group assignments | admins and users |
| Grant type allowed | Check: Implicit |
ClickDone!
Note: The URIs specified above are the Spring Boot defaults. These can easily be changed later on.
Scroll down on the resulting page and note the Client ID. You’ll need it later to configure the Spring Boot app.
Authorization Server
Navigate in your Okta Admin Dashboard to API -> Authorization Servers.
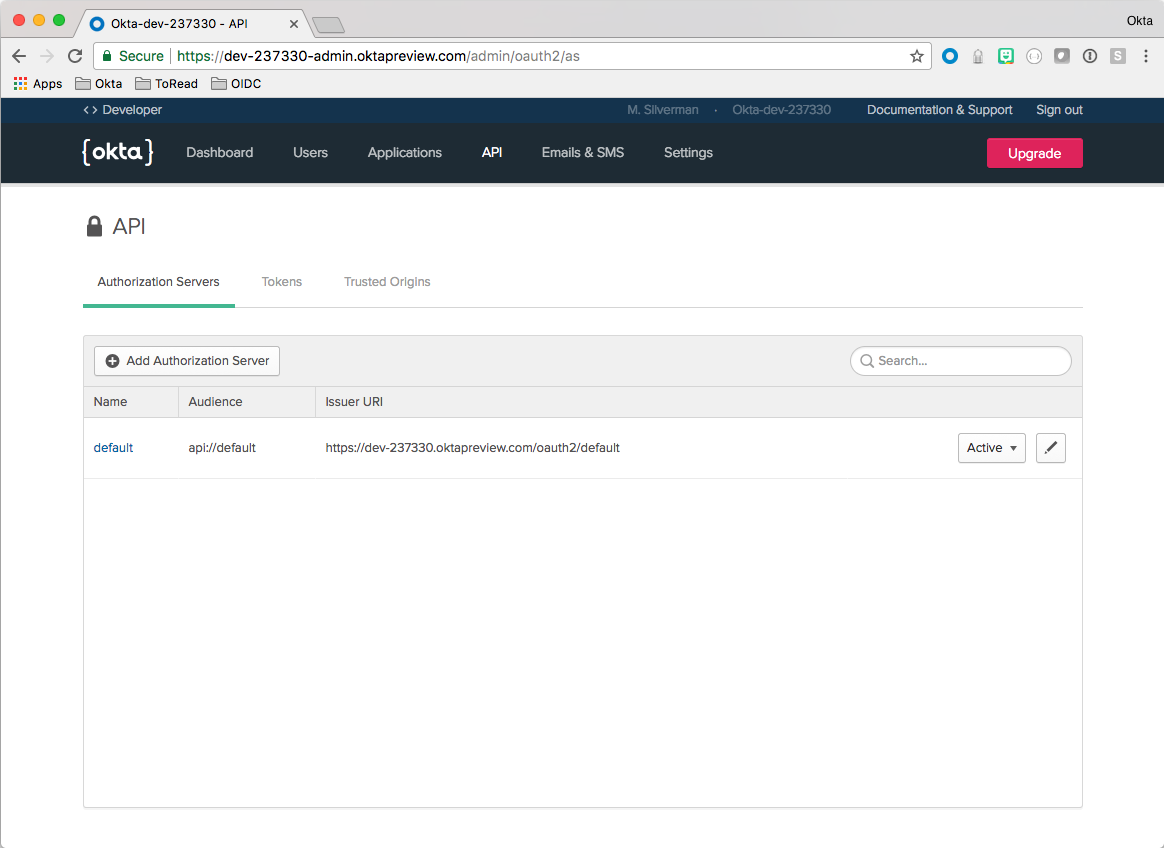
Note the Issuer URI. You’ll need it later to configure the Spring Boot app.
Click the default link and choose the Claims tab. Click Add Claim.
Fill out the form like so:
| Field | Value |
|---|---|
| Name | groups |
| Include in token type | Access Token |
| Value type | Groups |
| Filter | Regex .* |
| Include in | Any scope |
ClickCreate.

This ensures that group membership information is included in the Access Token when a user authenticates. This is key to hooking into Spring Security’s roles and authorities mechanism.
Configure Your Spring Boot App
Clone the GitHub repo.
git clone https://github.com/oktadeveloper/okta-spring-security-roles-example.git
Open up the project in your favorite IDE or editor. The screenshots below are from IntelliJ IDEA.
Make a copy of the application.yml.sample file and name it application.yml
Update the values with the information you saved earlier. For example:
| Name | Value |
|---|---|
| baseUrl | https://{yourOktaDomain} |
| issuer | https://{yourOktaDomain}/oauth2/default |
| audience | api://default |
| clientId | {clientId} |
| rolesClaim | groups |
| redirectUri | http://localhost:8080/ |
Let’s fire up the application and see it in action before we jump into the code.
You can run this from the command line:
mvn spring-boot:run
Exercise the App
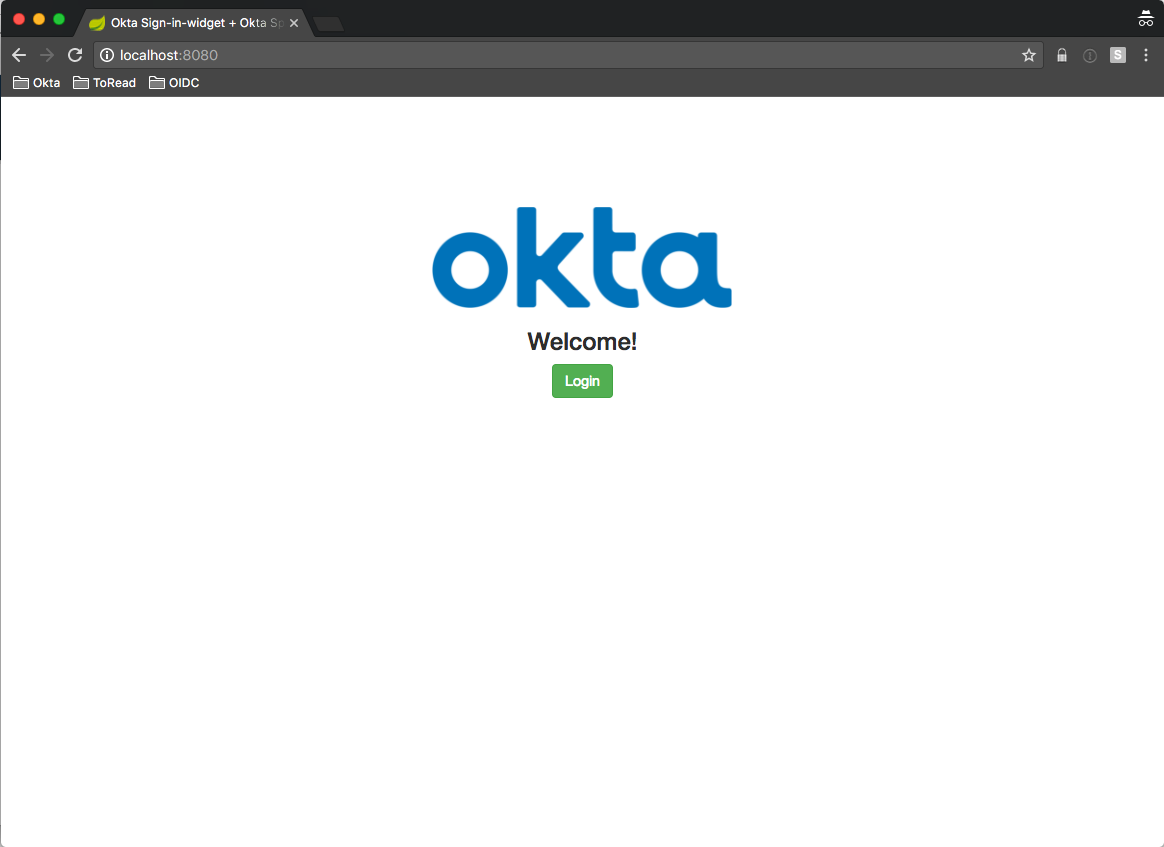
Navigate to the home page and click Login.
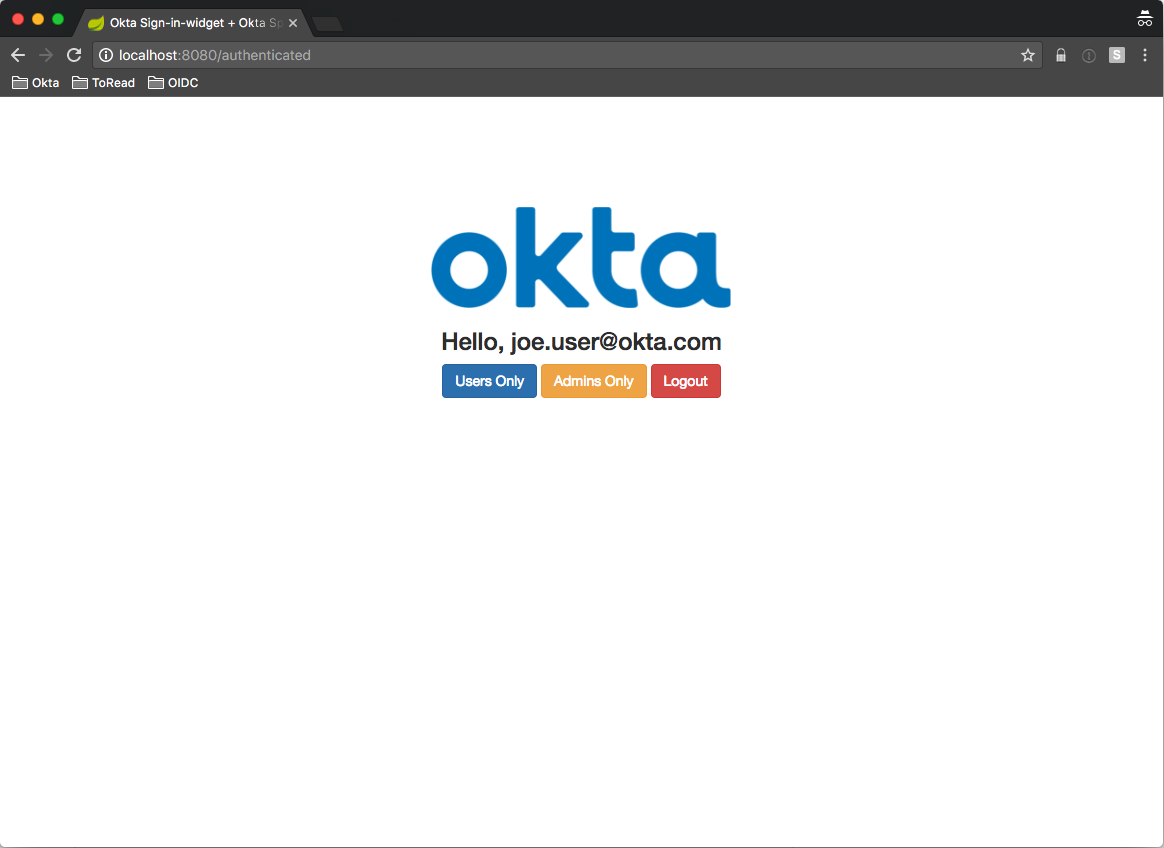
Sign in as the user that belongs to the users group that you created before.
You’ll see that the app knows who you are and there are a row of buttons on the bottom of the page.
These buttons are connected to the app such that only members of the users group will be able to see the page when Users Only is clicked and only members of the admins group will be able to see the page when Admins Only is clicked.
Click Users Only. You’ll see a page that shows that you’re a member of the users group.
Click Back then Admins Only. Notice that you get a 403 Unauthorized because you’re not a member of the admins group.
Click the Logout button. Log in again as the user that belongs to the admins group that you created before.
Click Admins Only.
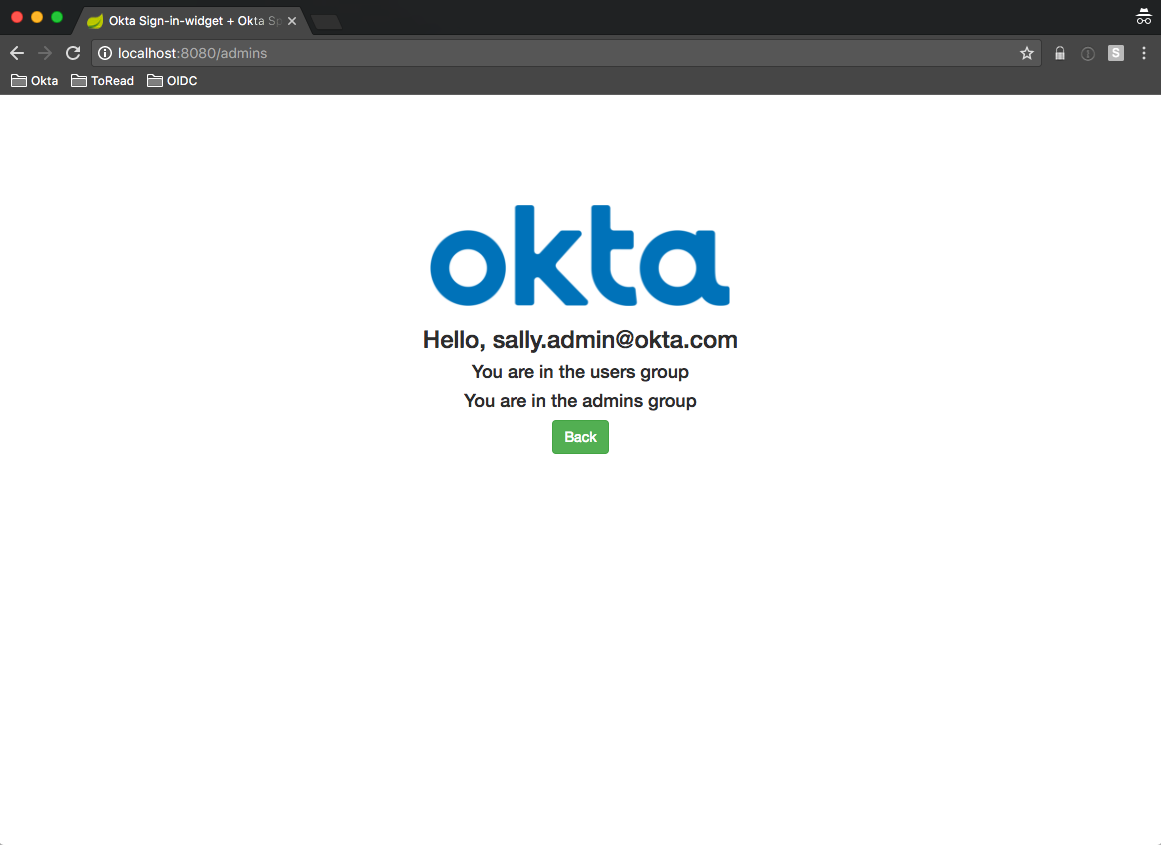
This time, you can see that you are in both the admins group and the users group.
Spring Security Code Review
Now that you’ve seen the app working, let’s jump into the code and see how Okta groups link up to Spring Security roles.
The demo application found on GitHub makes use of:
- Spring Boot
- Spring Security
- Spring Security OAuth2
- Okta Spring Security Starter
- Thymeleaf Templates
- Thymeleaf Extras for Spring Security 4
- Okta Sign-In Widget
The “behind the scenes magic” happens by virtue of the fact that we depend on the okta-spring-security-starter (from pom.xml):
...
<dependency>
    <groupId>com.okta.spring</groupId>
    <artifactId>okta-spring-security-starter</artifactId>
    <version>0.1.0</version>
</dependency>
...
Let’s start at the beginning and take a look at how the Okta Sign-In Widget bridges the gap from the client side to Spring Boot.
The Okta Sign-In Widget
In the login.html Thymeleaf template, we set up the login widget like so:
$( document ).ready(function() {
    var data = {
        baseUrl: [[${appProperties.baseUrl}]],
        clientId: [[${appProperties.clientId}]],
        redirectUri: [[${appProperties.redirectUri}]],
        authParams: {
            issuer: [[${appProperties.issuer}]],
            responseType: ['token']
        }
    };
    window.oktaSignIn = new OktaSignIn(data);

    // Check if we already have an access token
    var token = oktaSignIn.tokenManager.get('token');
    if (token) {
        window.location.href = "/authenticated";
    } else {
        renderWidget();
    }
});
Notice that we’ve embedded all the settings to connect to our Okta tenant as inline Thymeleaf Template variables (lines 3 - 8). These values are passed in from the Spring Boot controller as part of the model. This is powerful because you only have to specify these settings in one place. Both server side and client side make use of them. You’ll see how these settings are managed below. For now, just know that they all come from the application.yml file.
After the Okta Sign-In Widget is configured and instantiated, we check to see if the user has already logged in. If so, we send them to the /authenticated page. If not, we render the widget, which gives the user the opportunity to log in.
Here’s the renderWidget function:
function renderWidget() {
    oktaSignIn.renderEl(
        {el: '#okta-login-container'},
        function (response) {

            // check if success
            if (response.status === 'SUCCESS') {

                // for our example we have the id token and the access token
                oktaSignIn.tokenManager.add('token', response[0]);

                if (!document.location.protocol.startsWith('https')) {
                    console.log(
                        'WARNING: You are about to pass a bearer token in a cookie over an insecure\n' +
                        'connection. This should *NEVER* be done in a production environment per\n' +
                        'https://tools.ietf.org/html/rfc6750'
                    );
                }
                document.cookie = 'access_token=' + oktaSignIn.tokenManager.get('token').accessToken;
                document.location.href = "/authenticated";
            }
        },
        function (err) {
            // handle any errors
            console.log(err);
        }
    );
}
Once the widget is rendered on the page, the internal logic takes over based on your settings when the user logs in. In this case, you are using the implicit flow and will get back only an access token as specified by the responseType parameter of the configuration.
On successful login, you enter the callback function with a response object. The response object has your (or in this case, your user’s) access token.
Line 19 sets a cookie with the access token and line 20 sends the (now authenticated) user to the /authenticated endpoint.
At this point, Spring Security can recognize the authenticated user. Before we look at how the Spring Security roles work, let’s first see how Spring Security deals with the access token.
Spring Security Token Extractor
By default, the Spring Security OAuth 2.0 plugin processes access tokens coming in on an Authorization header as a bearer token. This is fine for applications that are creating RESTful responses for clients, such as an Angular client.
For this example, I wanted to keep the architecture and amount of JavaScript minimal, so I wanted full page transitions. This is a little old-school, but it keeps the example code tight and small.
In order for Spring Security to recognize that a user has authenticated, we need it to be able to handle the token coming in on a cookie.
Fortunately, Spring Security makes it pretty easy to override the default behavior by setting a TokenExtractor. Here’s the code that makes this happen from OktaSpringSecurityRolesExampleApplication:
@Bean
protected ResourceServerConfigurerAdapter resourceServerConfigurerAdapter() {
    return new ResourceServerConfigurerAdapter() {
        ...
        @Override
        public void configure(ResourceServerSecurityConfigurer resources) throws Exception {
            resources.tokenExtractor(new TokenExtractor() {

                @Override
                public Authentication extract(HttpServletRequest request) {
                    String tokenValue = findCookie(ACCESS_TOKEN_COOKIE_NAME, request.getCookies());
                    if (tokenValue == null) { return null; }

                    return new PreAuthenticatedAuthenticationToken(tokenValue, "");
                }
                ...
            });
        }
    };
}
All this is doing is pulling the access token from the list of cookies on the incoming request, if it can. The parsing and validation is handled automatically. Pretty neat, eh?
Role Based Access Controls
In the application setup, you define which paths are open. All other paths require an authenticated session at least.
Here’s another excerpt from OktaSpringSecurityRolesExampleApplication:
@Bean
protected ResourceServerConfigurerAdapter resourceServerConfigurerAdapter() {
    return new ResourceServerConfigurerAdapter() {

        @Override
        public void configure(HttpSecurity http) throws Exception {
            http.authorizeRequests()
                .antMatchers("/", "/login", "/images/**").permitAll()
                .and()
                .exceptionHandling().accessDeniedHandler(customAccessDeniedHandler);
        }
        ...
    };
}
Here, you are telling Spring Security to let any unauthenticated user access the home page (/), the login page (/login), and anything that comes from our static images folder.
You also define a custom access-denied handler. Every other path is automatically locked down by default.
Here’s the SecureController:
@Controller
public class SecureController {

    private AppProperties appProperties;

    public SecureController(AppProperties appProperties) {
        this.appProperties = appProperties;
    }

    @RequestMapping("/authenticated")
    public String authenticated(Model model) {
        model.addAttribute("appProperties", appProperties);
        return "authenticated";
    }

    @RequestMapping("/users")
    @PreAuthorize("hasAuthority('users')")
    public String users() {
        return "roles";
    }

    @RequestMapping("/admins")
    @PreAuthorize("hasAuthority('admins')")
    public String admins() {
        return "roles";
    }

    @RequestMapping("/403")
    public String error403() {
        return "403";
    }
}
There are four paths defined in this controller and all require an authenticated user at a minimum. The real value comes in with the /users and /admins paths.
Notice that they both have the @PreAuthorize annotation. This means that the SpringEL expression that follows must be satisfied before the method will even be entered. The hasAuthority function looks to see if the authenticated user belongs to those roles. In this case, these are automatically mapped to the Okta groups we created earlier. That’s why it was key to ensure that the groups claim was included in the access token from Okta.
While there was a bit of setup to get to this point, you get role-based access control with one line of code!
End to End Configuration
Since the client side is a set of HTML pages in the form of Thymeleaf templates that are served from the application itself, it makes sense to have a single source for configuration values that are needed on both the client and server.
Spring makes this easy with the @Component and @ConfigurationProperties annotations.
Here’s the AppProperties class:
@Component
@ConfigurationProperties("okta.oauth")
public class AppProperties {
    private String issuer;
    private String audience;
    private String clientId;
    private String rolesClaim;
    private String baseUrl;
    private String redirectUri;

    // getters and setters
}
The @ConfigurationProperties tells Spring to pull in all the properties from the application.yml file that belong to the okta.oauth key.
The @Component annotation causes Spring to instantiate this Object and make it available for auto-wiring elsewhere.
Here’s a snippet from the the HomeController:
@Controller
public class HomeController {

    private AppProperties appProperties;

    public HomeController(AppProperties appProperties) {
        this.appProperties = appProperties;
    }
    ...
    @RequestMapping("/login")
    public String login(Model model) {
        model.addAttribute("appProperties", appProperties);
        return "login";
    }
}
Before returning the login view when the /login endpoint is hit, the AppProperties object (autowired in on lines 4 & 5) is added to the model.
This is what makes it available to the Thymeleaf template as you saw before:
<script th:inline="javascript">
    /*<![CDATA[*/
    $( document ).ready(function() {
        var data = {
            baseUrl: [[${appProperties.baseUrl}]],
            clientId: [[${appProperties.clientId}]],
            redirectUri: [[${appProperties.redirectUri}]],
            authParams: {
                issuer: [[${appProperties.issuer}]],
                responseType: ['token']
            }
        };
        window.oktaSignIn = new OktaSignIn(data);
        ...
    });
    ...
    /*]]>*/
</script>
Get Coding!
Hopefully you’ve seen the benefit of Okta’s Groups mechanism in conjunction with Spring Security’s role-based access control.
Try it for yourself and let me know how your experience is with it! You can find me on Twitter @afitnerd.
Keep an eye out for upcoming releases of the new Okta Java Spring Boot Integration, which will have support for other OIDC workflows, including code as well as hosted, configurable login and registration views.
Micah Silverman is a Senior Security H@X0R. With 25 years of Java Experience (yup, that's from the beginning), he's authored numerous articles, co-authored a Java EE book and spoken at many conferences. He's a maker, who's built full size MAME arcade cabinets and repaired old electronic games. He brings his love of all things Java and Developer Advocacy to you!
Okta Developer Blog Comment Policy
We welcome relevant and respectful comments. Off-topic comments may be removed.