Build Your First Progressive Web Application with Angular and Spring Boot
An October 2016 DoubleClick report found 53% of visits are abandoned if a mobile site takes more than 3 seconds to load. That same report said the average mobile sites load in 19 seconds. According to Alex Russell in his recent talk on the state of mobile development, one of the biggest problems in mobile today is that developers use powerful laptops and desktops to develop their mobile applications, rather than using a $200 device on a 3G connection. Using this environment is “ground truth” to the majority of web users in the world. It’s cool to develop native applications, but people with slow phones and internet don’t want to download a 60MB app, they just want to use the web. Progressive web applications, or PWAs, are one of the easiest ways to make web applications faster and easier to use, allowing developers to build a better internet for everyone.
Check out the full video of Alex’s talk to learn more about Adapting to the Mobile Present.
PWAs are becoming increasingly popular in web development. Most of the information about PWAs on the web today comes from Google and its network of Google Developer Experts. This isn’t surprising as Google is often promoting the latest and greatest web technologies. They also develop their own browser, Chrome, which makes it possible to use many of the new standards in HTML5, JavaScript and beyond.
So What is a PWA?
PWAs leverage Transport Layer Security (TLS), webapp manifests, and service workers to make an application installable with offline capabilities. In other words, a PWA is like a native app on your phone, but it’s built with web technologies like HTML5, JavaScript, and CSS3. If built right, a PWA is indistinguishable from a native application.
Use Progressive Web Apps to Build Better Mobile Apps
To combat the problems Alex Russell calls to light, and ultimately build better mobile apps, he recommends five techniques:
- Implement the PRPL pattern
- Get a ~$150-200 unlocked Android (e.g. Moto G4)
- Use chrome://inspect && chrome://inspect?tracing
- Install Lighthouse and use it to analyze your applications
- Use Chrome DevTools Network and CPU Throttling
Google engineer Addy Osmani describes the PRPL pattern in an article on Google’s Web Fundamentals site.
PRPL is a pattern for structuring and serving Progressive Web Apps (PWAs), with an emphasis on the performance of app delivery and launch. It stands for:
- Push critical resources for the initial URL route.
- Render initial route.
- Pre-cache remaining routes.
- Lazy-load and create remaining routes on demand.
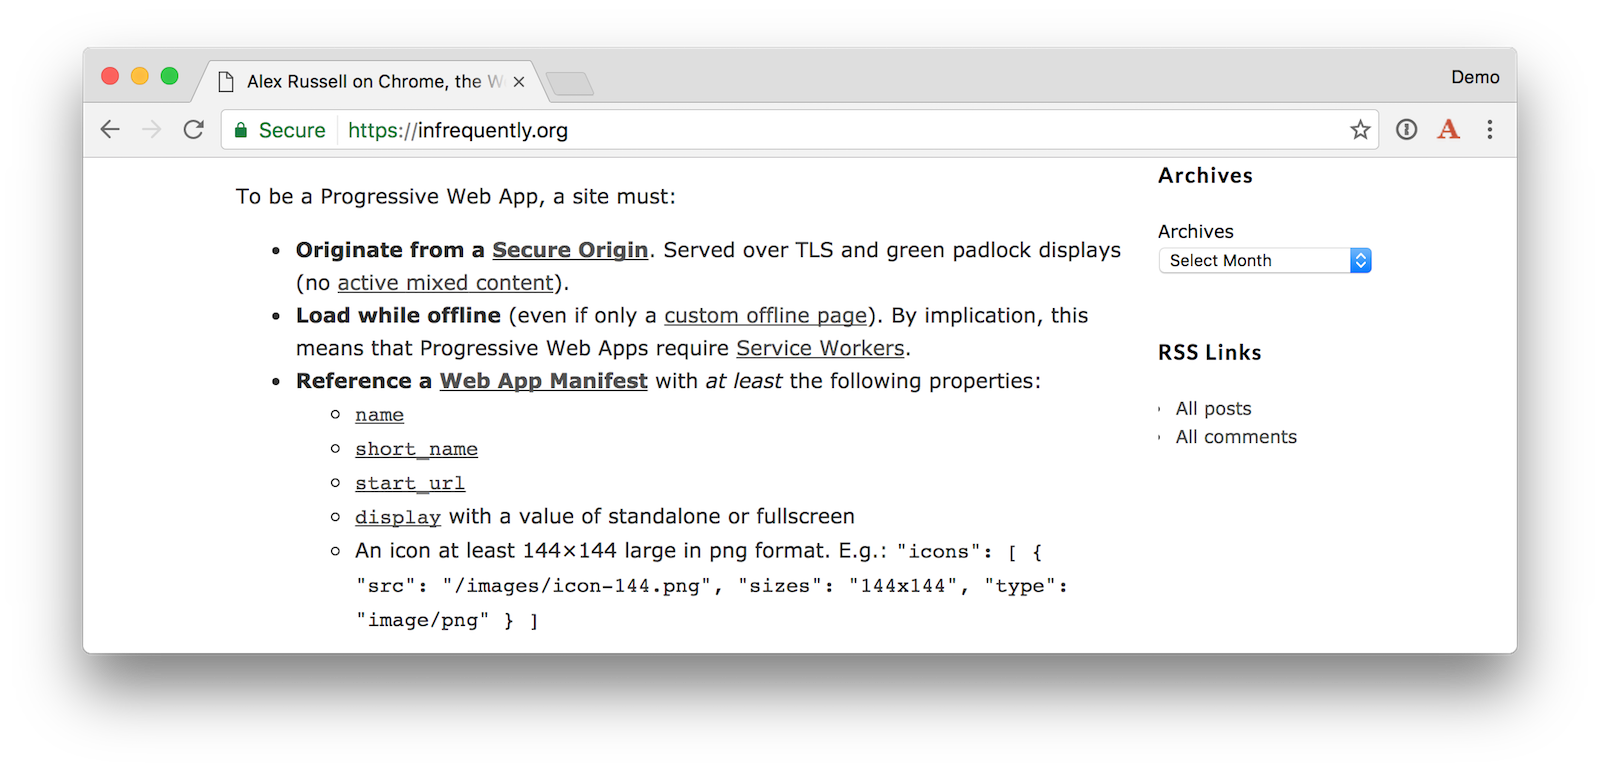
The Progressive Web App Checklist lists all the things you’ll need to make a progressive webapp. However, I like the simple list that Alex Russell lists on What, Exactly, Makes Something A Progressive Web App?
This article will show you how to build a PWA with a Spring Boot backend and an Angular frontend. It’ll work offline and I’ll show how to deploy it to the cloud.
Run a Spring Boot API
In part 1 of this series, I showed you how to create an API with Spring Boot and display its data in an Angular UI. You’ll be using that project as a starting point for this tutorial. You’ll adding offline capabilities by turning it into a PWA.
To begin, clone the project from GitHub.
git clone https://github.com/oktadeveloper/spring-boot-angular-example.git
Open the “server” project in your favorite IDE and run DemoApplication or start it from the command line using ./mvnw spring-boot:run.
Re-build your application and navigate to http://localhost:8080/good-beers. You should see the list of good beers in your browser.
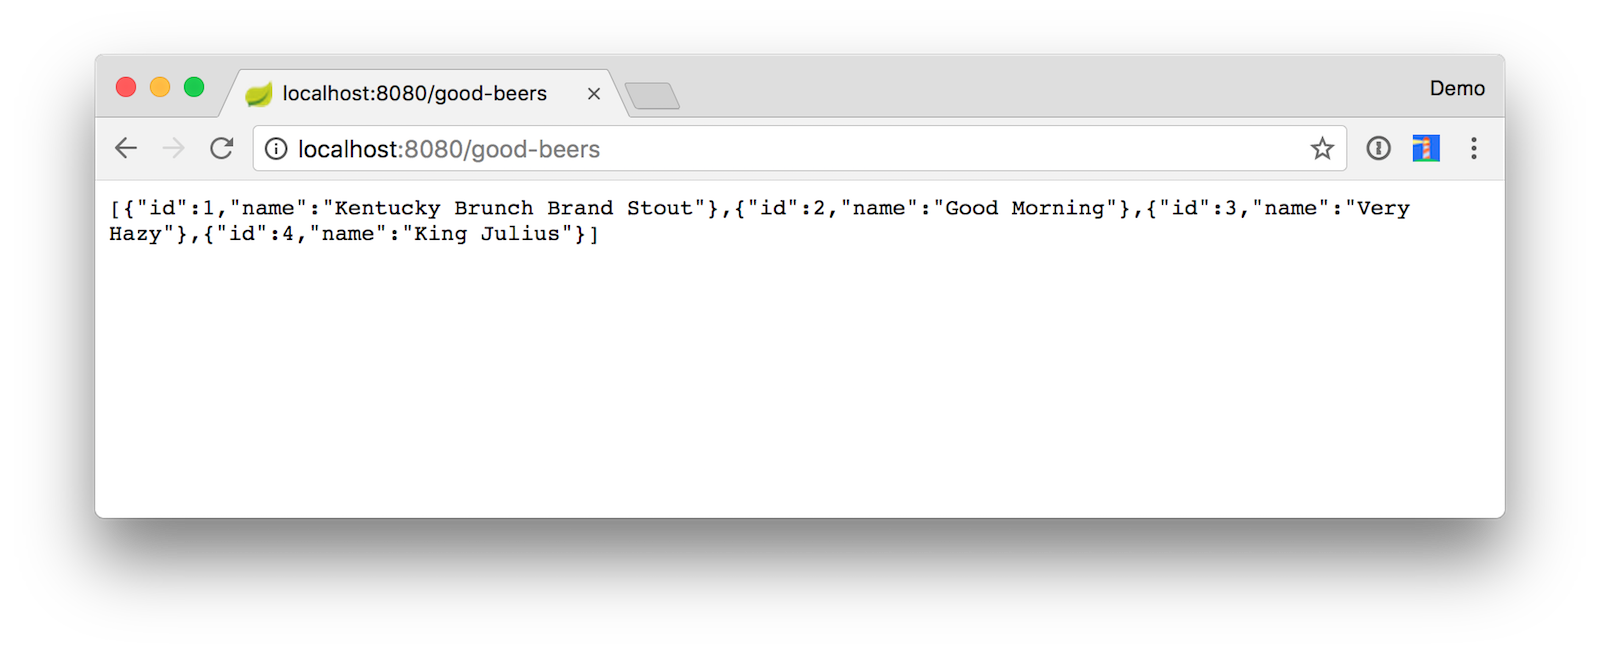
You can also see the result in your terminal window using HTTPie.
http localhost:8080/good-beers
Progressive Web Apps with Angular
I started my PWAs learning journey while sitting in a conference session with Josh Crowther at The Rich Web Experience. His Progressive Web Apps: The Future of the Web presentation taught me everything I needed to know to get started. However, his examples used Polymer and I wanted to create a PWA with Angular.
I used my good friend Google to find a reference to Maxim Salnikov’s PWA demo app. Maxim created this repo as part of a half-day workshop at ngPoland and the project’s README said to contact him for workshop instructions. I emailed Maxim and he politely shared his Angular 2 PWA Workshop instructions and slides.
NOTE: Since then, Maxim as created a new guide called Progressive Web Apps using the Angular Mobile Toolkit.
This tutorial has been built from Maxim’s guides, and uses the latest and greatest Angular versions (Angular CLI 1.6.7 and Angular 5.2.0) from February 2018.
Transform your Angular App to be a PWA
There are a number of steps you need to perform to make the Angular client work offline and be a PWA.
- Add Angular Material
- Create and register a Service Worker
- Add a manifest to make it installable
Add Angular Material
Installing Angular Material is not a necessary step, but it will make the client look much nicer. Make sure you’re in the client directory, then install its dependencies, as well as Angular Material.
npm install
npm install --save-exact @angular/material@5.2.0 @angular/cdk@5.2.0
Add imports for the modules you’ll be using in app.module.ts:
import { MatButtonModule, MatListModule, MatToolbarModule } from '@angular/material';

@NgModule({
  ...
  imports: [
    ...
    MatButtonModule, MatListModule, MatToolbarModule
  ]
  ...
})
Add Material icons and a theme to styles.css:
@import 'https://fonts.googleapis.com/icon?family=Material+Icons';
@import '~@angular/material/prebuilt-themes/deeppurple-amber.css';

body {
  margin: 0;
  font-family: Roboto, sans-serif;
}
Change the HTML templates to use Material components. For app.component.html, you can change the <h1> to be an <mat-toolbar>.
<mat-toolbar color="primary">
  <span>Welcome to {{title}}!</span>
</mat-toolbar>

<app-beer-list></app-beer-list>
In beer-list.component.html, change it to use <mat-list> and its related components.
<h2>Beer List</h2>

<mat-list>
  <mat-list-item *ngFor="let b of beers">
    <img mat-list-avatar src="{{b.giphyUrl}}" alt="{{b.name}}">
    <h3 mat-line>
      {{b.name}}
    </h3>
  </mat-list-item>
</mat-list>
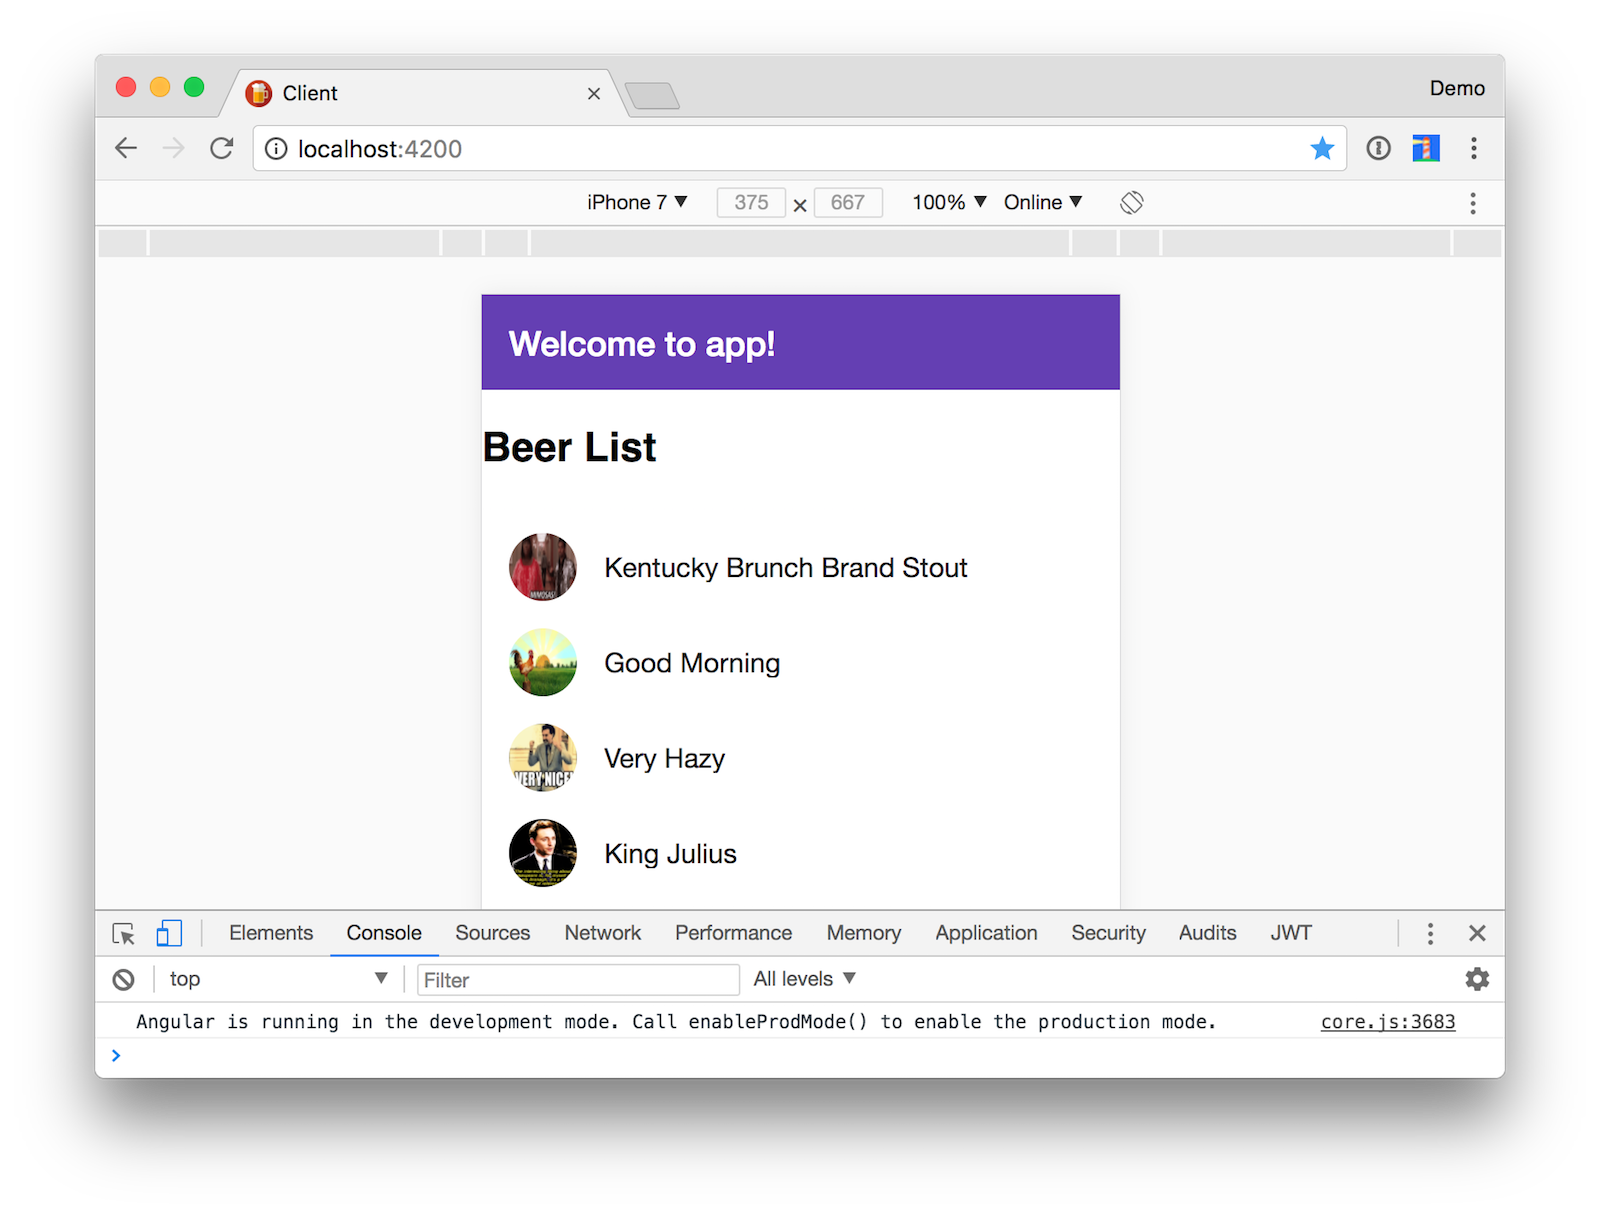
After making these changes, the app should look a little better. Run ng serve and you should see how your UI has changed. Below is a screenshot using Chrome’s device toolbar.
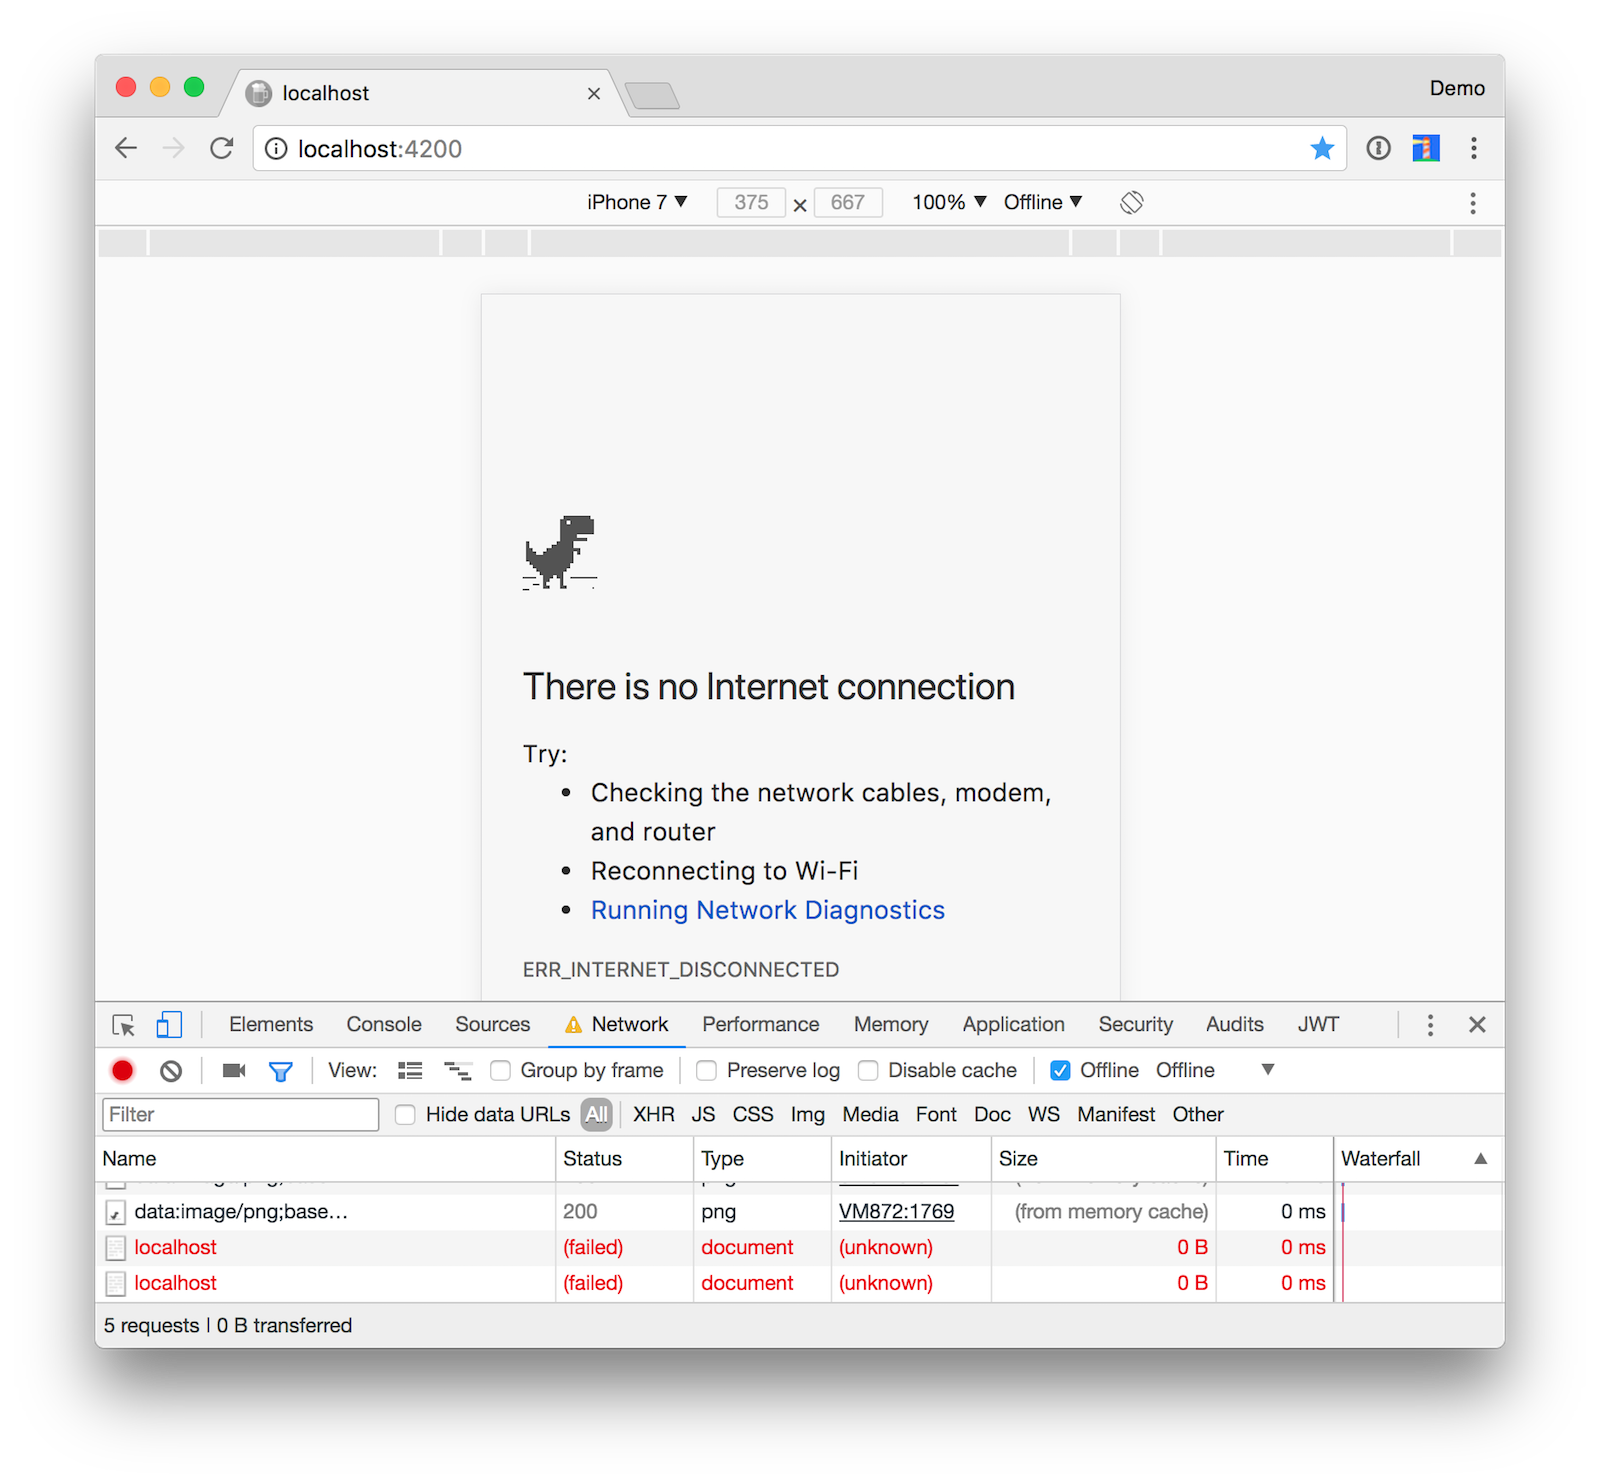
To prove that there’s still work to do, you’ll notice that if you toggle offline mode in the Network tab of Chrome’s developer tools, the app does not work.
Create and Register a Service Worker
Angular has service worker support built-in, you just need to install @angular/service-worker.
npm install @angular/service-worker
To enable service worker support in Angular CLI, run the following command:
ng set apps.0.serviceWorker=true
Import and register the Angular service worker in client/app/app.module.ts:
import { ServiceWorkerModule } from '@angular/service-worker';
import { environment } from '../environments/environment';

@NgModule({
  ...
  imports: [
    ...
    ServiceWorkerModule.register('/ngsw-worker.js', {enabled: environment.production})
  ],
  providers: [],
  bootstrap: [AppComponent]
})
The register() helper takes care of registering the service worker, and disabling it in development mode.
Create a src/ngsw-config.json file and populate it with the following JSON:
{
  "index": "/index.html",
  "assetGroups": [
    {
      "name": "app",
      "installMode": "prefetch",
      "resources": {
        "files": [
          "/favicon.ico",
          "/index.html"
        ],
        "versionedFiles": [
          "/*.bundle.css",
          "/*.bundle.js",
          "/*.chunk.js"
        ]
      }
    },
    {
      "name": "assets",
      "installMode": "lazy",
      "updateMode": "prefetch",
      "resources": {
        "files": [
          "/assets/**"
        ],
        "urls": [
          "https://fonts.googleapis.com/**"
        ]
      }
    }
  ]
}
To build the client with service worker support, run ng build --prod. To see it in action, install serve and run the application from the dist directory:
npm install -g serve
serve -p 4200 -s dist
Open http://localhost:4200 in Chrome and go to DevTools > Application > Service Workers to see that it’s been registered.
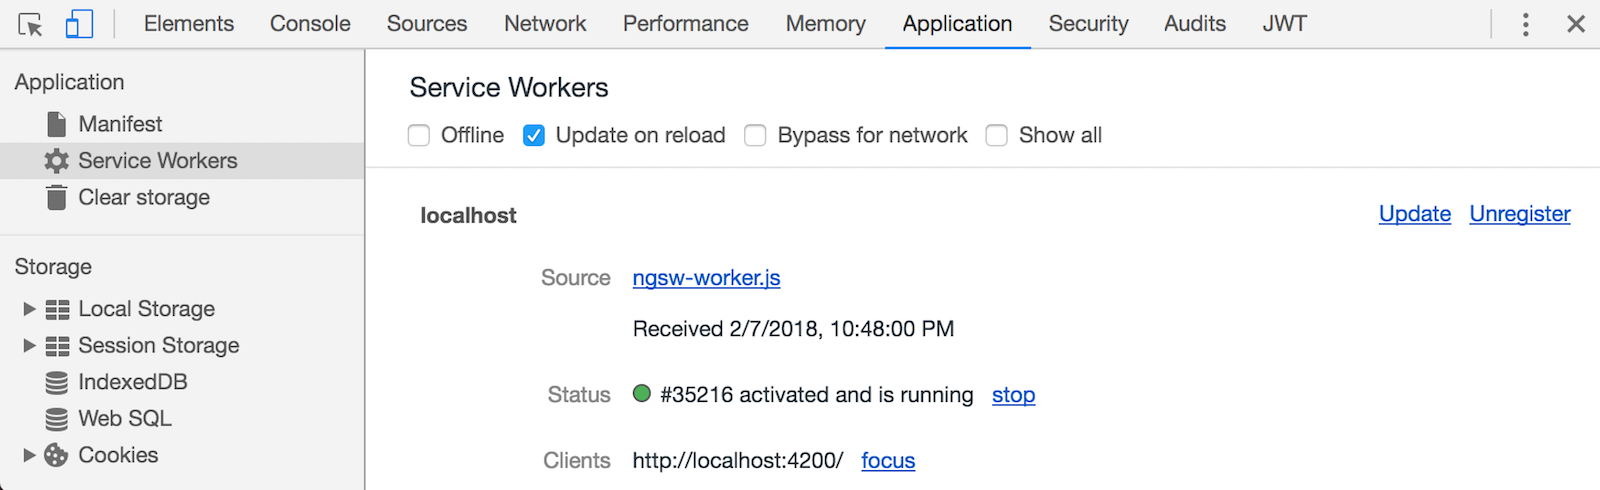
TIP: To ensure the service worker gets updated with each page refresh, check the “Update on reload” checkbox.
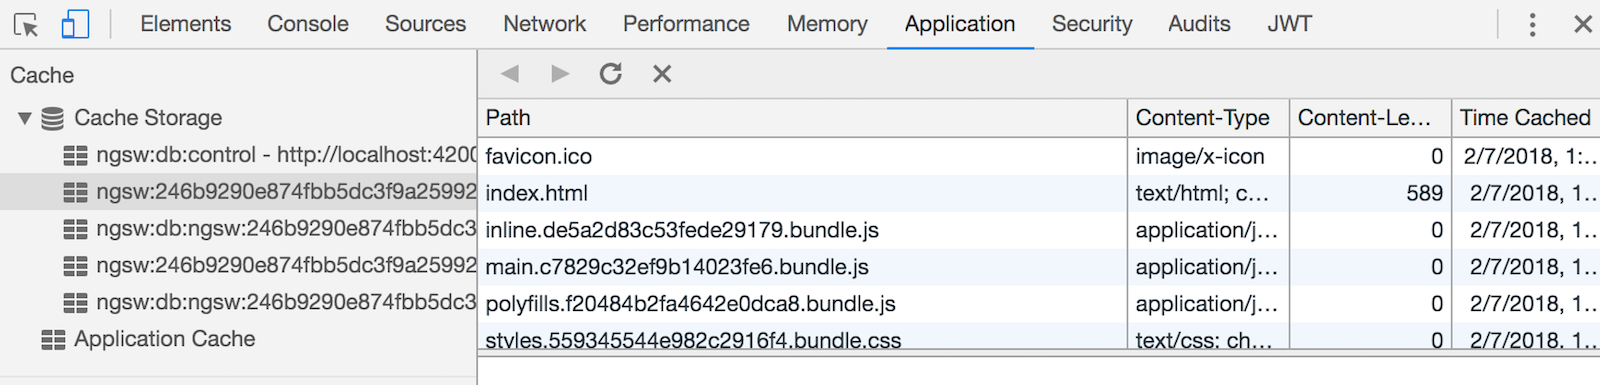
After making this change and refreshing, you’ll notice that caches are created for local assets.
TIP: If you want to change how the service worker caches files and data resources, see Angular’s documentation.
Add a Manifest to Make it Installable
The final step to making your app a PWA is to add a manifest that describes the application. This also enables the ability for people to install your app in Chrome as well as on smart phones.
You can use Favicon Generator to generate graphic assets and a manifest.json file. For an app icon, I searched for “beer icons” and found this one, developed by Freepik. I generated a favicon, changed the generator options to use assets/favicons for the path, and downloaded the favicon package.
Copy the contents of favicons.zip to src/assets/favicons (you will have to create this directory) and add the following HTML to the <head> of index.html.
<link rel="apple-touch-icon" sizes="180x180" href="assets/favicons/apple-touch-icon.png">
<link rel="icon" type="image/png" sizes="32x32" href="assets/favicons/favicon-32x32.png">
<link rel="icon" type="image/png" sizes="16x16" href="assets/favicons/favicon-16x16.png">
<link rel="manifest" href="assets/favicons/site.webmanifest">
<link rel="mask-icon" href="assets/favicons/safari-pinned-tab.svg" color="#5bbad5">
<link rel="shortcut icon" href="assets/favicons/favicon.ico">
<meta name="msapplication-TileColor" content="#da532c">
<meta name="msapplication-config" content="assets/favicons/browserconfig.xml">
<meta name="theme-color" content="#ffffff">
Modify assets/favicons/site.manifest to have a name, short_name, as well as a background_color, and start_url.
{
    "name": "PWA Beers",
    "short_name": "Beers",
    "icons": [
        {
            "src": "android-chrome-192x192.png",
            "sizes": "192x192",
            "type": "image/png"
        },
        {
            "src": "android-chrome-512x512.png",
            "sizes": "512x512",
            "type": "image/png"
        }
    ],
    "theme_color": "#ffffff",
    "background_color": "#ffa500",
    "display": "standalone",
    "start_url": "/index.html"
}
Build your app with ng build --prod, serve it with serve -p 4200 -s dist, and navigate to http://localhost:4200.
If Chrome doesn’t prompt you to install the app, you probably need to turn on a couple of features. Copy and paste the following URLs into Chrome to enable each feature.
- chrome://flags/#enable-app-banners
- chrome://flags/#bypass-app-banner-engagement-checks
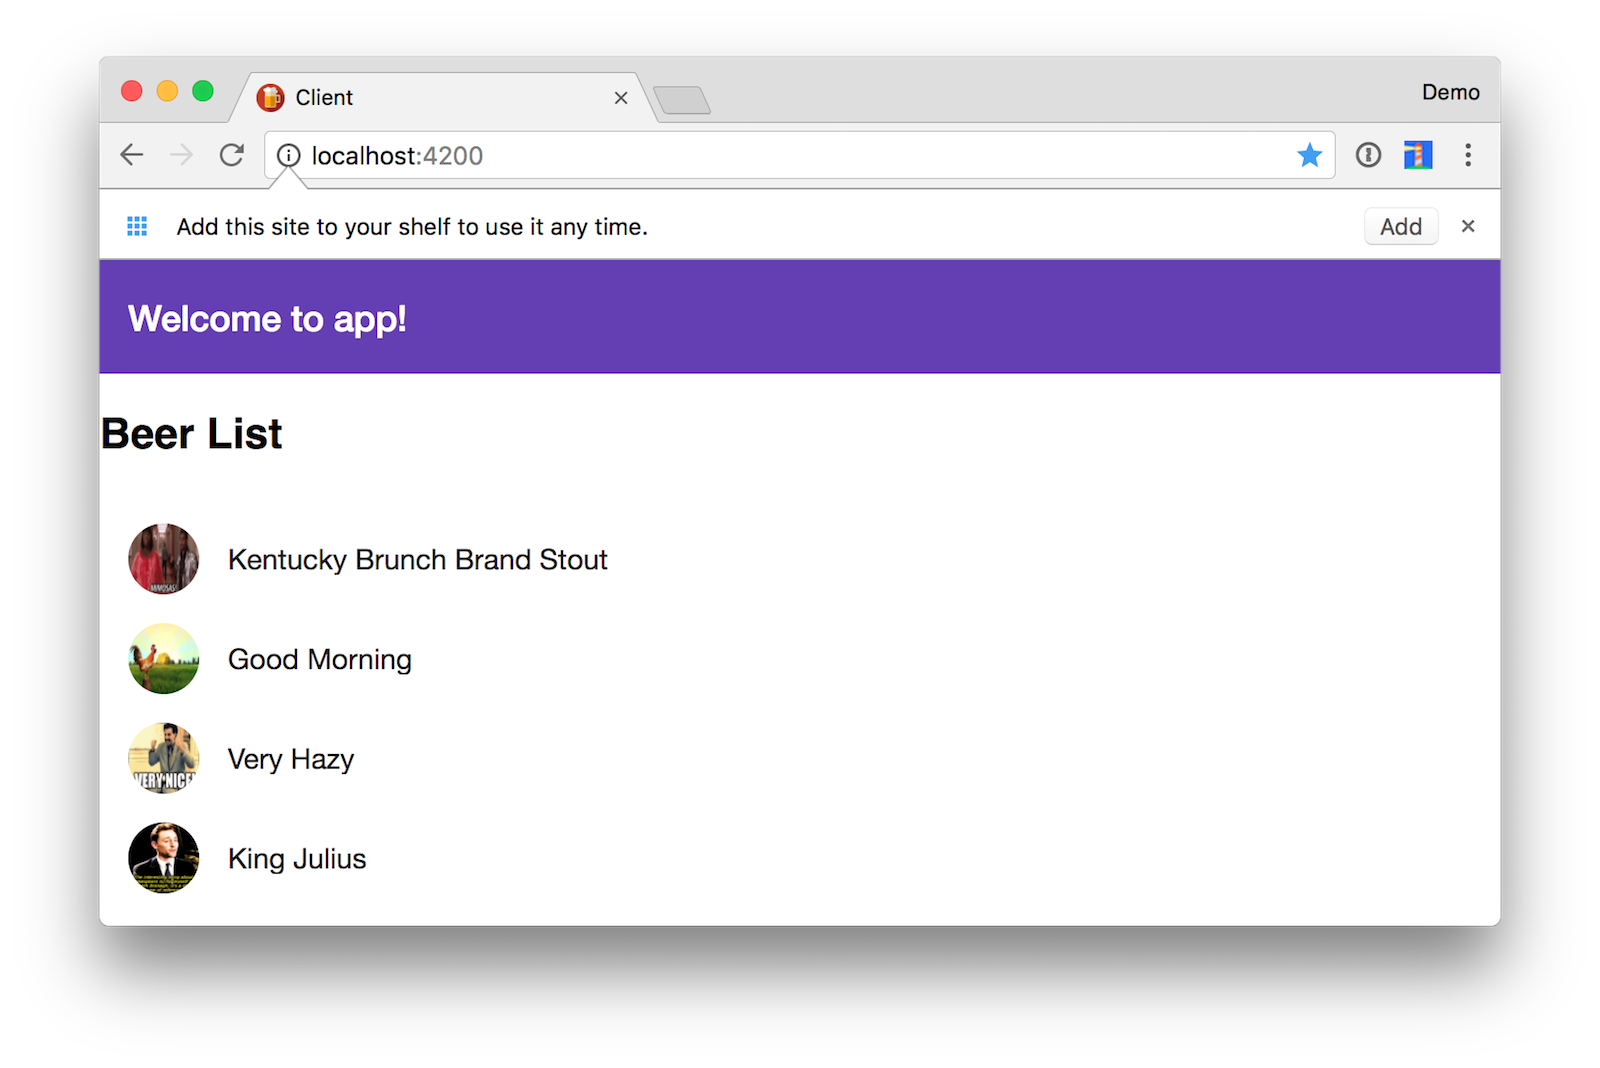
After making these changes, you should see a prompt at the top of the screen to install the app.
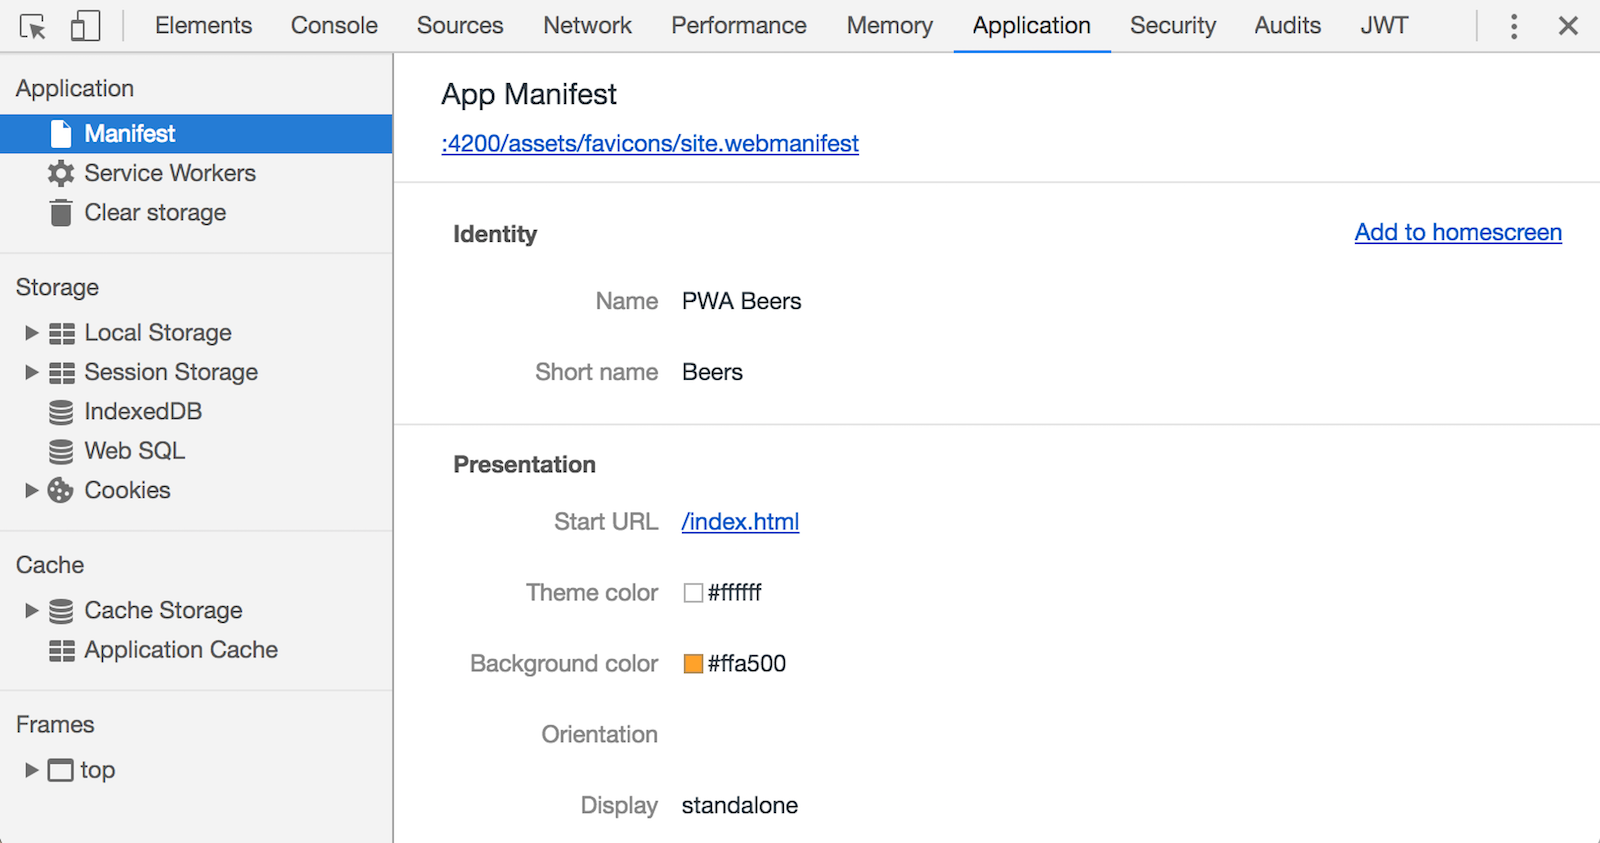
You can verify your manifest loaded correctly by going to DevTools > Application > Manifest.
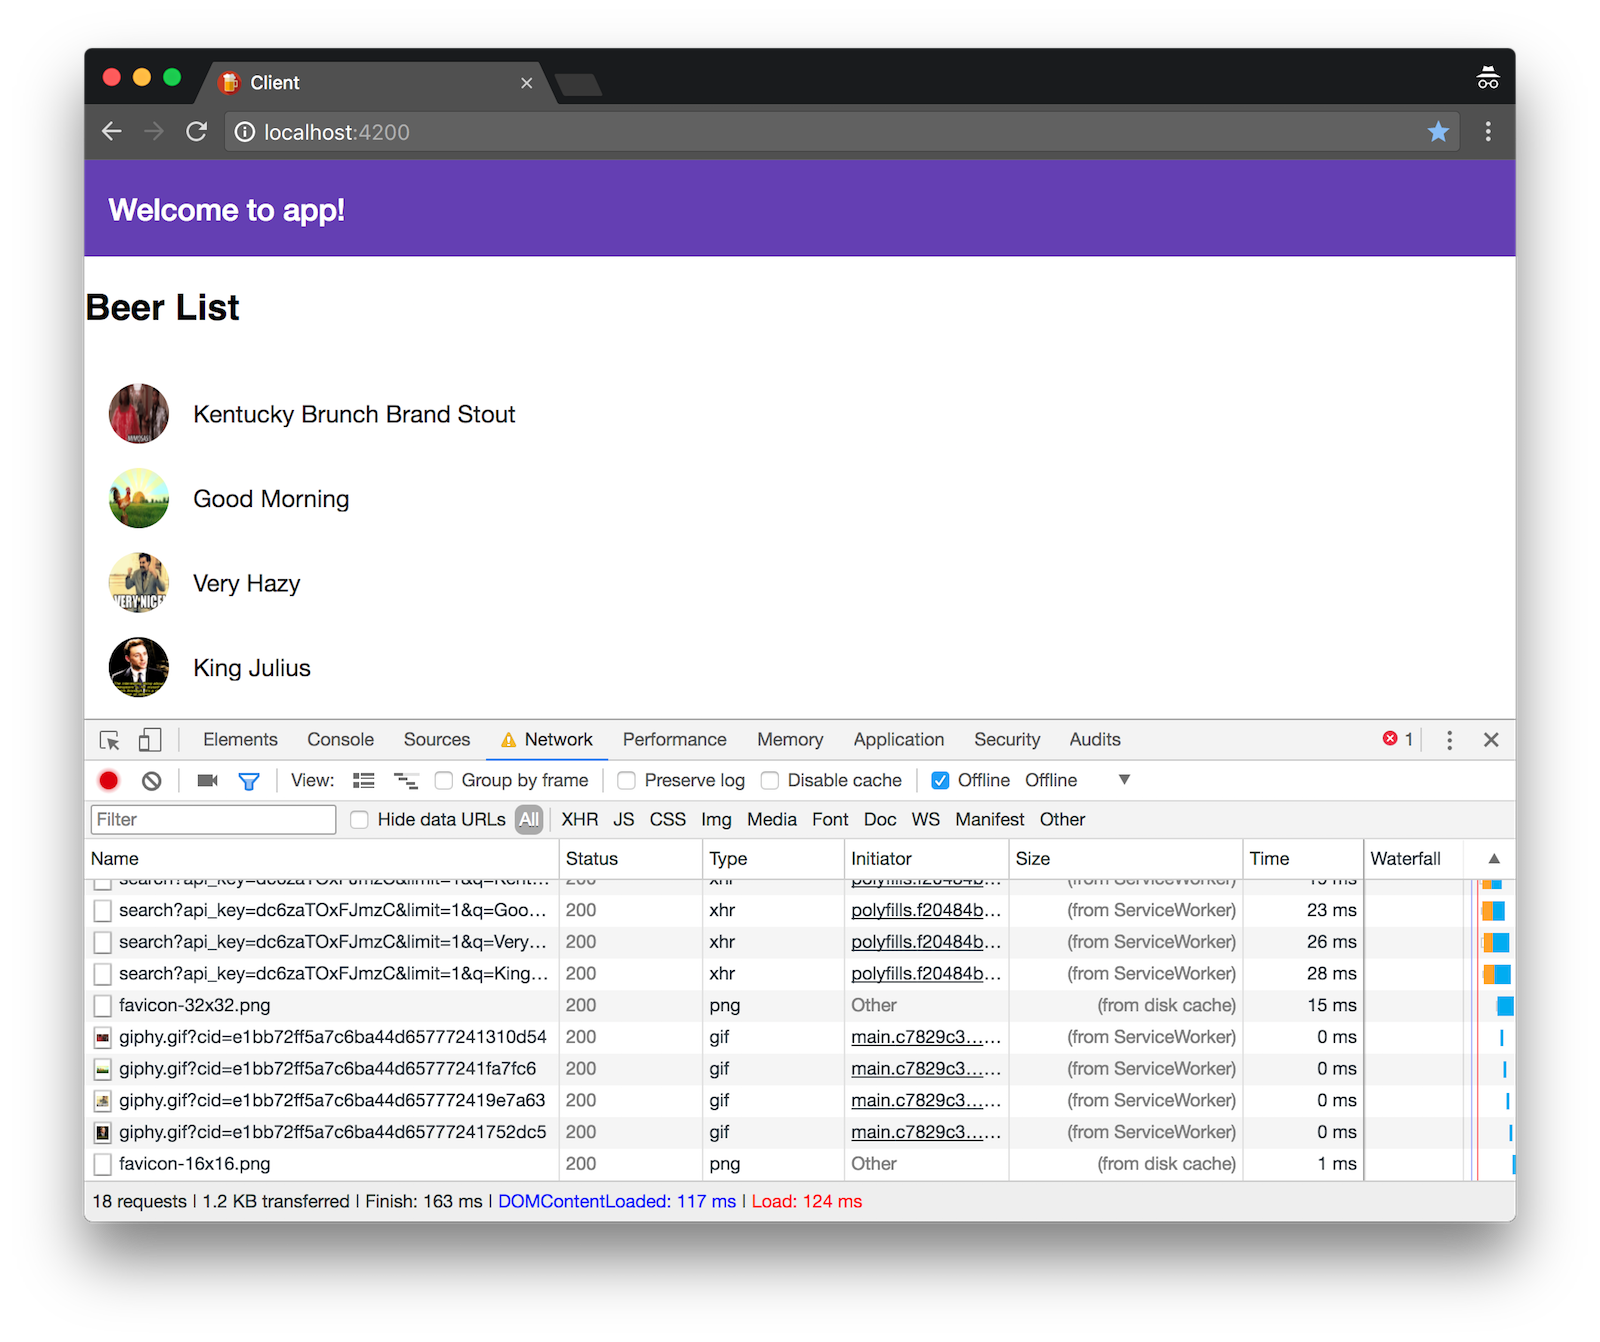
Click on the Network tab and enable offline. You’ll notice the app still loads when the user is offline. However, it does not load the data from its API calls. To make this work, you need to modify src/ngsw-config.json and add a list of dataGroups after assetGroups.
"dataGroups": [
  {
    "name": "local-api",
    "urls": [
      "http://localhost:8080/**"
    ],
    "cacheConfig": {
      "maxSize": 100,
      "maxAge": "1d",
      "strategy": "freshness"
    }
  },
  {
    "name": "giphy-api",
    "urls": [
      "http://api.giphy.com/**"
    ],
    "cacheConfig": {
      "maxSize": 100,
      "maxAge": "1d",
      "strategy": "performance"
    }
  }
]
Rebuild your app and serve it up again. Now you’ll notice it loads images when you’re offline. Yippee!
Test with Lighthouse
Install the Lighthouse extension for Chrome and click its icon to audit your app. You can also use Chrome Developer tools > Audits > Perform an audit….
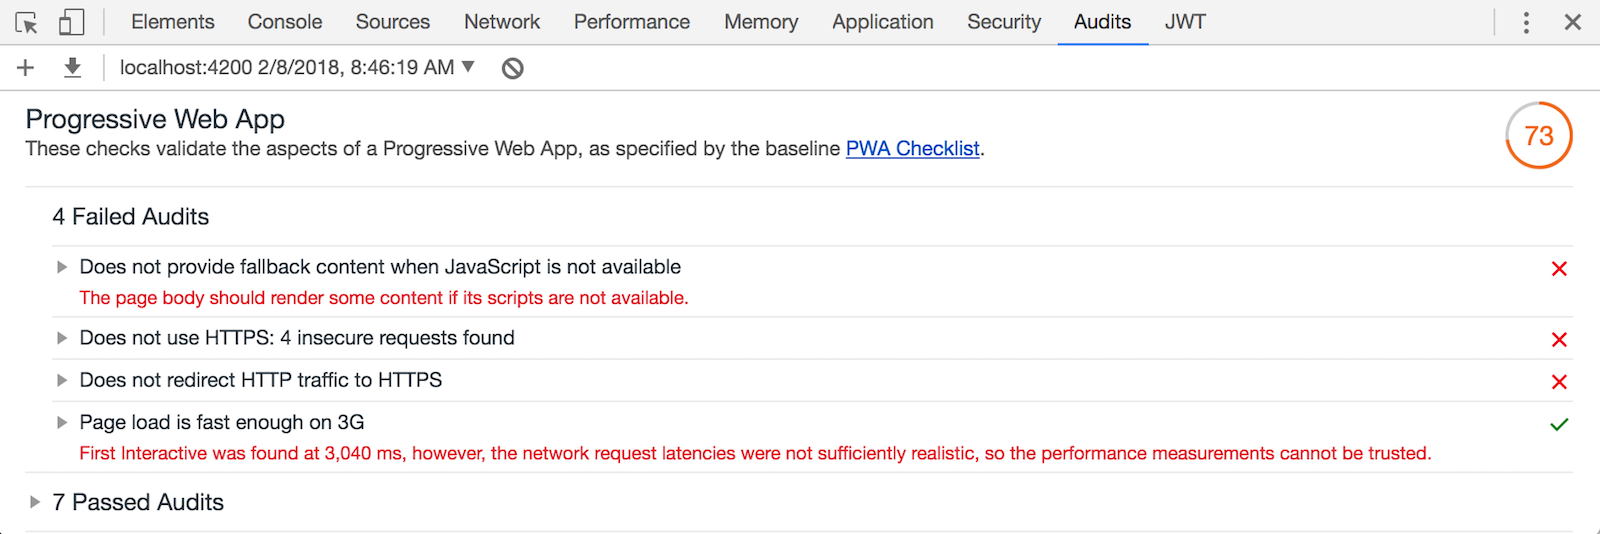
You can see that four audits fails, one of which you can fix.
Add a <noscript> tag to src/index.html that indicates JavaScript is required.
<noscript><h1>You must enable JavaScript to view this page.</h1></noscript>
Rebuild and run Lighthouse again and your score should be much better this time.
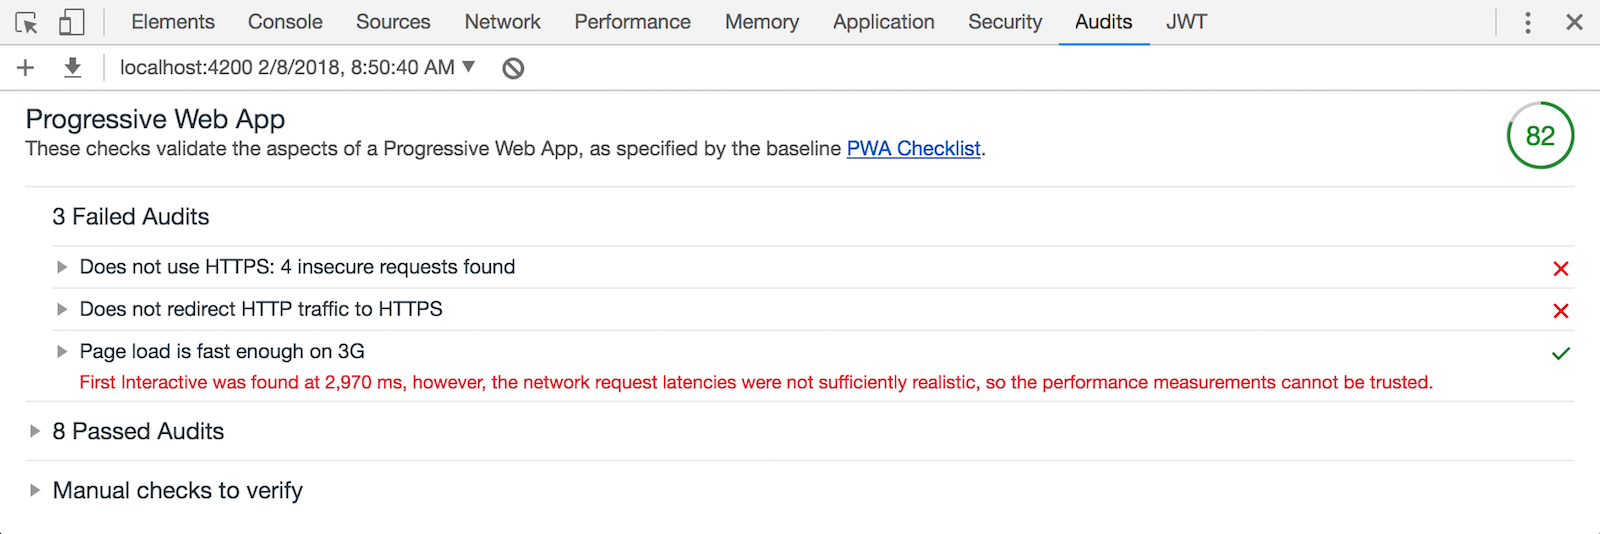
82 is an OK score, but you might notice that the app is not served over HTTPS. Deploying the app to a cloud provider can make this possible.
Deploy to the Cloud!
There are many cloud providers that support Spring Boot. For the Angular client, any web server will do since the app is full of static files after it’s been built. However, there are a couple things you’ll need to do to prepare the application for production.
Modify beer.service.ts to use a different URL for production.
  getAll(): Observable<any> {
    return this.http.get('https://pwa-server.cfapps.io/good-beers');
  }
Update src/ngsw-config.json to have this URL as a URL in the local-api data group.
"name": "local-api",
"urls": [
  "http://localhost:8080/**",
  "https://pwa-server.cfapps.io/**"
],
In the client directory, run the following command to build and optimize for production.
ng build --prod
Cloud Foundry
Now, let’s look at how to deploy it on Cloud Foundry with Pivotal Web Services. The instructions below assume you have an account and have logged in (using cf login).
Deploy the client
To deploy a static application to Cloud Foundry is very easy. In the dist directory, create an empty Staticfile. Enable pushstate routing since that’s what Angular CLI uses by default.
touch Staticfile
echo "pushstate: enabled" >> Staticfile
Run the following commands to push the client, set it to force HTTPs, then start it.
NOTE: You may have to change the name from “pwa-client” to a unique name that’s not being used.
cf push pwa-client --no-start --random-route
cf set-env pwa-client FORCE_HTTPS true
cf start pwa-client
Navigate to the deployed application in your browser (e.g. https://pwa-client-unstaggered-vicomtesse.cfapps.io/) and ensure it loads. If it does, you’ll likely have a 404 in its console for when it tries to access the server.
Deploy the server
To deploy the Spring Boot backend, you first need to add CORS configuration for the new client. In BeerController.java, change origins to the location of the deployed client.
@GetMapping("/good-beers")
@CrossOrigin(origins = "https://pwa-client-unstaggered-vicomtesse.cfapps.io")
public Collection<Map<String, String>> goodBeers() {
Next, build the app and push it to Cloud Foundry. If you run the following commands from the server directory, all of this should happen for you.
mvn clean package
cf push -p target/*jar pwa-server
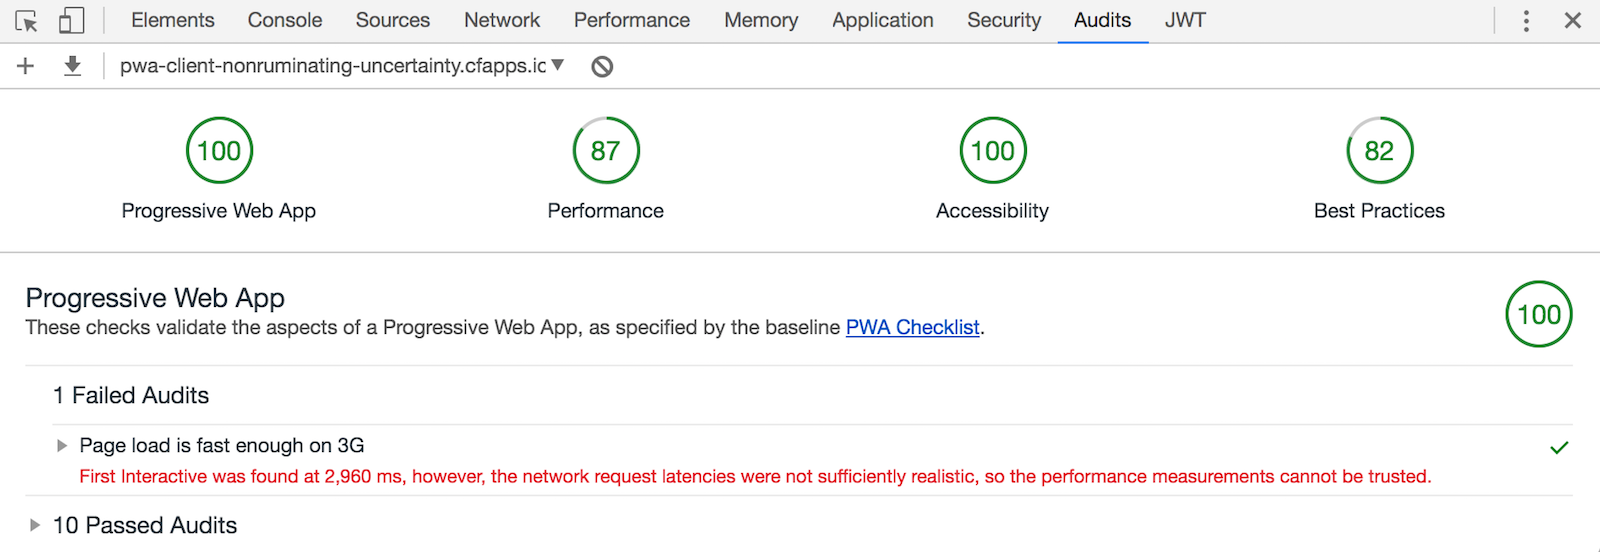
After deploying to Pivotal’s Cloud Foundry, I ran a Lighthouse audit again and found my score to be 100. Wahoo!
Automation
There were quite a few steps involved to deploy this application and update files for production. For that reason, I wrote a deploy.sh script that automates everything and uses random domain names for both servers. Kudos to Josh Long for helping create it.
If you’d like to use these scripts in your project, make sure to revert the changes for production URLs in beer.service.ts and BeerController.java.
You can find the source code associated with this article on GitHub. If you find any bugs, please file an issue, or post a question to Stack Overflow with the “okta” tag. Of course, you can always ping me on Twitter too.
In April 2017, I did a talk on Cloud Native PWAs at Devoxx France with Josh Long. The video below is a recording of that talk and shows me writing similar code to what’s listed in this article.
What’s Next?
This article showed you to convert an existing Angular application into a progressive web application and deploy it to the cloud.
One of the recommendations in the Lighthouse report was to use HTTP/2. In a future post, I’ll write about HTTP/2, what cloud providers support it, and how to deploy to the ones that do.
I’d like to give a big thanks to all the engineers that’ve been developing progressive web apps and documenting how to do it. It’s new and exciting stuff, and may become the best way to write mobile applications in the future.
Learn More About PWAs
To learn more about progressive web applications, check out The Ultimate Guide to Progressive Web Applications. I’d also recommend visiting the following websites:
- Google Developer’s Progressive Web Apps Homepage
- Progressive Web Apps Training from Google
- PWA Directory
- Maxim Salnikov’s Angular Mobile Toolkit Workshop
- Hacker News Readers as Progressive Web Apps
Update: To learn how to add authentication to this application, see Add Authentication to Your Angular PWA. I also wrote a blog post on how to develop the backend using a microservices architecture.
Changelog:
- Nov 3, 2017: Updated to use Spring Boot 1.5.8, Angular 5.0.0, and Angular CLI 1.5.0. You can see what changed in this article via this pull request on GitHub. For code changes, see oktadeveloper/spring-boot-angular-pwa-example#2.
- Feb 8, 2017: Updated to use Spring Boot 1.5.10, Angular 5.2.0, and Angular CLI 1.6.7. You can see what changed in this article via this pull request on GitHub. For code changes, see oktadeveloper/spring-boot-angular-pwa-example#3.
Matt Raible is a well-known figure in the Java community and has been building web applications for most of his adult life. For over 20 years, he has helped developers learn and adopt open source frameworks and use them effectively. He's a web developer, Java Champion, and Developer Advocate at Okta. Matt has been a speaker at many conferences worldwide, including Devnexus, Devoxx Belgium, Devoxx France, Jfokus, and JavaOne. He is the author of The Angular Mini-Book, The JHipster Mini-Book, Spring Live, and contributed to Pro JSP. He is a frequent contributor to open source and a member of the JHipster development team. You can find him online @mraible and raibledesigns.com.
Okta Developer Blog Comment Policy
We welcome relevant and respectful comments. Off-topic comments may be removed.