Build an Angular App with Okta's Sign-In Widget in 15 Minutes
Heads up... this blog post is old!
For an updated version of this blog post, see Build Secure Login for Your Angular App.
AngularJS reigned as king of JavaScript MVC frameworks for several years. However, when the Angular team announced they would not provide backwards compatibility for their next version, there was a bit of a stir in its community, giving opportunities for frameworks like React and Vue.js to flourish. Fast forward a few years and both Angular 2 and Angular 4 have been released. Many developers are trying its TypeScript and finding the experience a pleasant one. According to JAXenter, it’s doing a pretty good job, and holding strong as the third most popular UI framework, behind React and HTML5.
In this article, I’ll show you a quick way to get started with Angular, and add user authentication with Okta’s Sign-In Widget. If you’re just getting started with Angular, you might want to read my Angular tutorial. If you’d like to get the source code used in this article, you can find it on GitHub.
Note: In May 2025, the Okta Integrator Free Plan replaced Okta Developer Edition Accounts, and the Okta CLI was deprecated.
We preserved this post for reference, but the instructions no longer work exactly as written. Replace the Okta CLI commands by manually configuring Okta following the instructions in our Developer Documentation.
Why User Authentication with Okta?
Okta provides an API service that allows developers to create, edit, and securely store user accounts and user account data, and connect them with one or multiple applications. We make user account management easier, more secure, and scalable so you can get to production sooner.
The Okta Sign-in Widget provides an embeddable JavaScript sign-in implementation that can be easily customized. The Sign-in Widget carries the same feature set in the standard Okta sign-in page of every tenant – with the added flexibility to change the look-and-feel. Included in the widget is support for password reset, forgotten password and strong authentication – all of which are driven by policies configured in Okta. Developers don’t have to write a single line of code to trigger these functions from within the widget. For consumer facing sites, social providers are also supported in the widget.
Create an Angular Application
Angular 4 was recently released, as well as Angular CLI 1.4.4. To see how you might use Okta’s Sign-In Widget in a simple Angular application, create a new application with Angular CLI. First, you’ll need to install Angular CLI.
NOTE: This post has been updated to use Angular 10 and Angular CLI 10.
npm install -g @angular/cli@10
After this command completes, you can create a new application.
ng new angular-okta-example --routing --style css
The output from this command should look similar to the following:
CREATE angular-okta-example/README.md (1036 bytes)
CREATE angular-okta-example/.editorconfig (274 bytes)
CREATE angular-okta-example/.gitignore (631 bytes)
CREATE angular-okta-example/angular.json (3678 bytes)
CREATE angular-okta-example/package.json (1272 bytes)
CREATE angular-okta-example/tsconfig.base.json (458 bytes)
CREATE angular-okta-example/tsconfig.json (426 bytes)
CREATE angular-okta-example/tslint.json (3184 bytes)
CREATE angular-okta-example/.browserslistrc (853 bytes)
CREATE angular-okta-example/karma.conf.js (1032 bytes)
CREATE angular-okta-example/tsconfig.app.json (292 bytes)
CREATE angular-okta-example/tsconfig.spec.json (338 bytes)
CREATE angular-okta-example/src/favicon.ico (948 bytes)
CREATE angular-okta-example/src/index.html (304 bytes)
CREATE angular-okta-example/src/main.ts (372 bytes)
CREATE angular-okta-example/src/polyfills.ts (2835 bytes)
CREATE angular-okta-example/src/styles.css (80 bytes)
CREATE angular-okta-example/src/test.ts (753 bytes)
CREATE angular-okta-example/src/assets/.gitkeep (0 bytes)
CREATE angular-okta-example/src/environments/environment.prod.ts (51 bytes)
CREATE angular-okta-example/src/environments/environment.ts (662 bytes)
CREATE angular-okta-example/src/app/app-routing.module.ts (245 bytes)
CREATE angular-okta-example/src/app/app.module.ts (393 bytes)
CREATE angular-okta-example/src/app/app.component.css (0 bytes)
CREATE angular-okta-example/src/app/app.component.html (25757 bytes)
CREATE angular-okta-example/src/app/app.component.spec.ts (1101 bytes)
CREATE angular-okta-example/src/app/app.component.ts (224 bytes)
CREATE angular-okta-example/e2e/protractor.conf.js (869 bytes)
CREATE angular-okta-example/e2e/tsconfig.json (299 bytes)
CREATE angular-okta-example/e2e/src/app.e2e-spec.ts (653 bytes)
CREATE angular-okta-example/e2e/src/app.po.ts (301 bytes)
✔ Packages installed successfully.
    Successfully initialized git.
Execution time: 49 s.
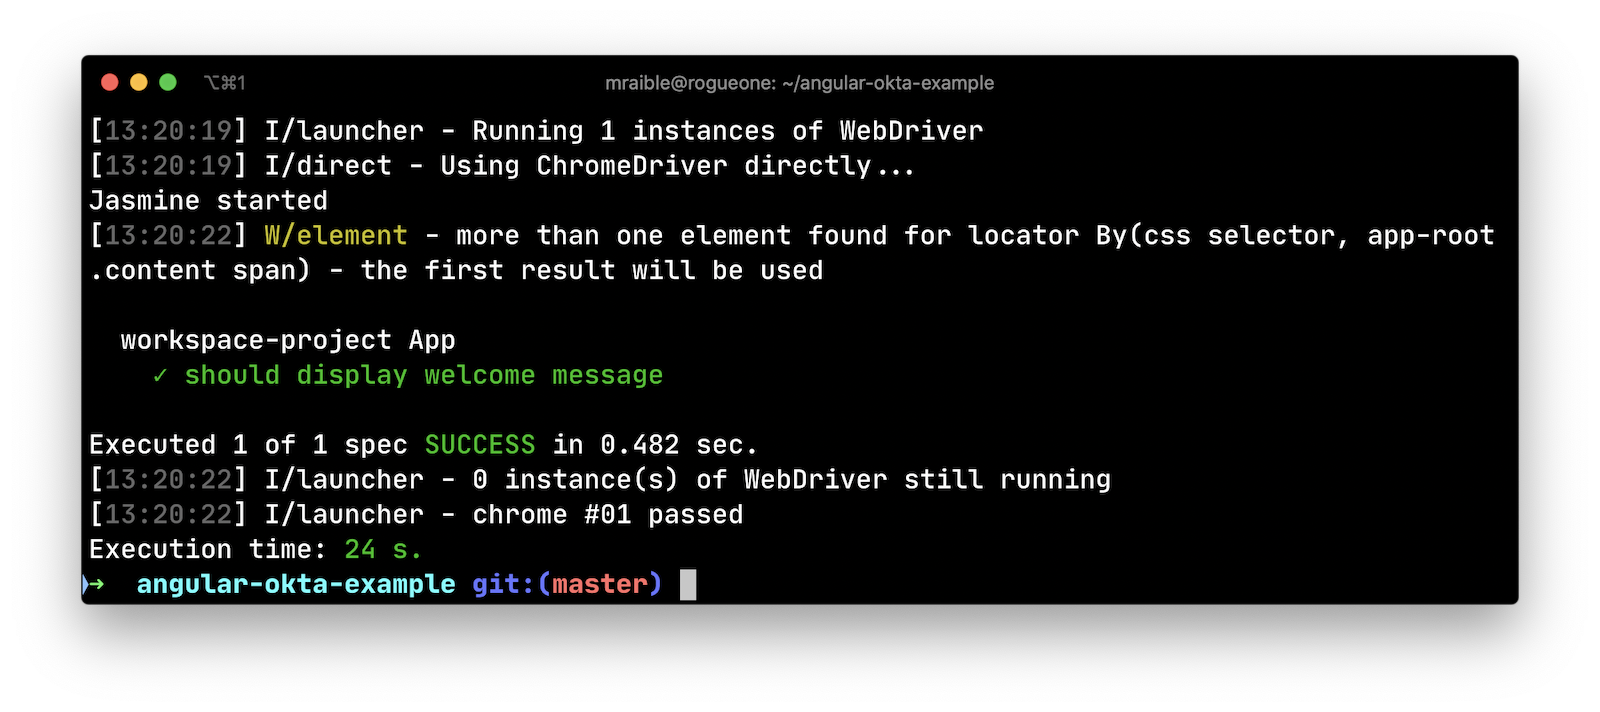
This will create a new angular-okta-example directory and install all the necessary dependencies. To verify everything works, navigate to this directory in a terminal window and run ng e2e. All tests should pass and you should see results like the following.
Integrate Okta’s Sign-In Widget in Angular
Now we’re going to leverage Okta’s Sign-In Widget for an easily customizable login view. To start, install the Okta Sign-In Widget using npm.
npm install -E @okta/okta-signin-widget@4.4.0
Add the widget’s CSS to src/styles.css:
@import '~@okta/okta-signin-widget/dist/css/okta-sign-in.min.css';
Create src/app/shared/okta/okta.service.ts and use it to wrap the widget’s configuration and make it an injectable service.
import { Injectable } from '@angular/core';
import OktaSignIn from '@okta/okta-signin-widget';

@Injectable({
  providedIn: 'root'
})
export class Okta {
  widget;

  constructor() {
    this.widget = new OktaSignIn({
      baseUrl: 'https://{yourOktaDomain}',
      clientId: '{clientId}',
      redirectUri: 'http://localhost:4200'
    });
  }

  getWidget() {
    return this.widget;
  }
}
Before this will work, you’ll need to create an OpenID Connect (OIDC) application in Okta so you can replace the {yourOktaDomain} and {clientId} references when initializing the widget.
Create an OpenID Connect App in Okta
OpenID Connect is built on top of the OAuth 2.0 protocol. It allows clients to verify the identity of the user and, as well as to obtain their basic profile information. To learn more, see http://openid.net/connect.
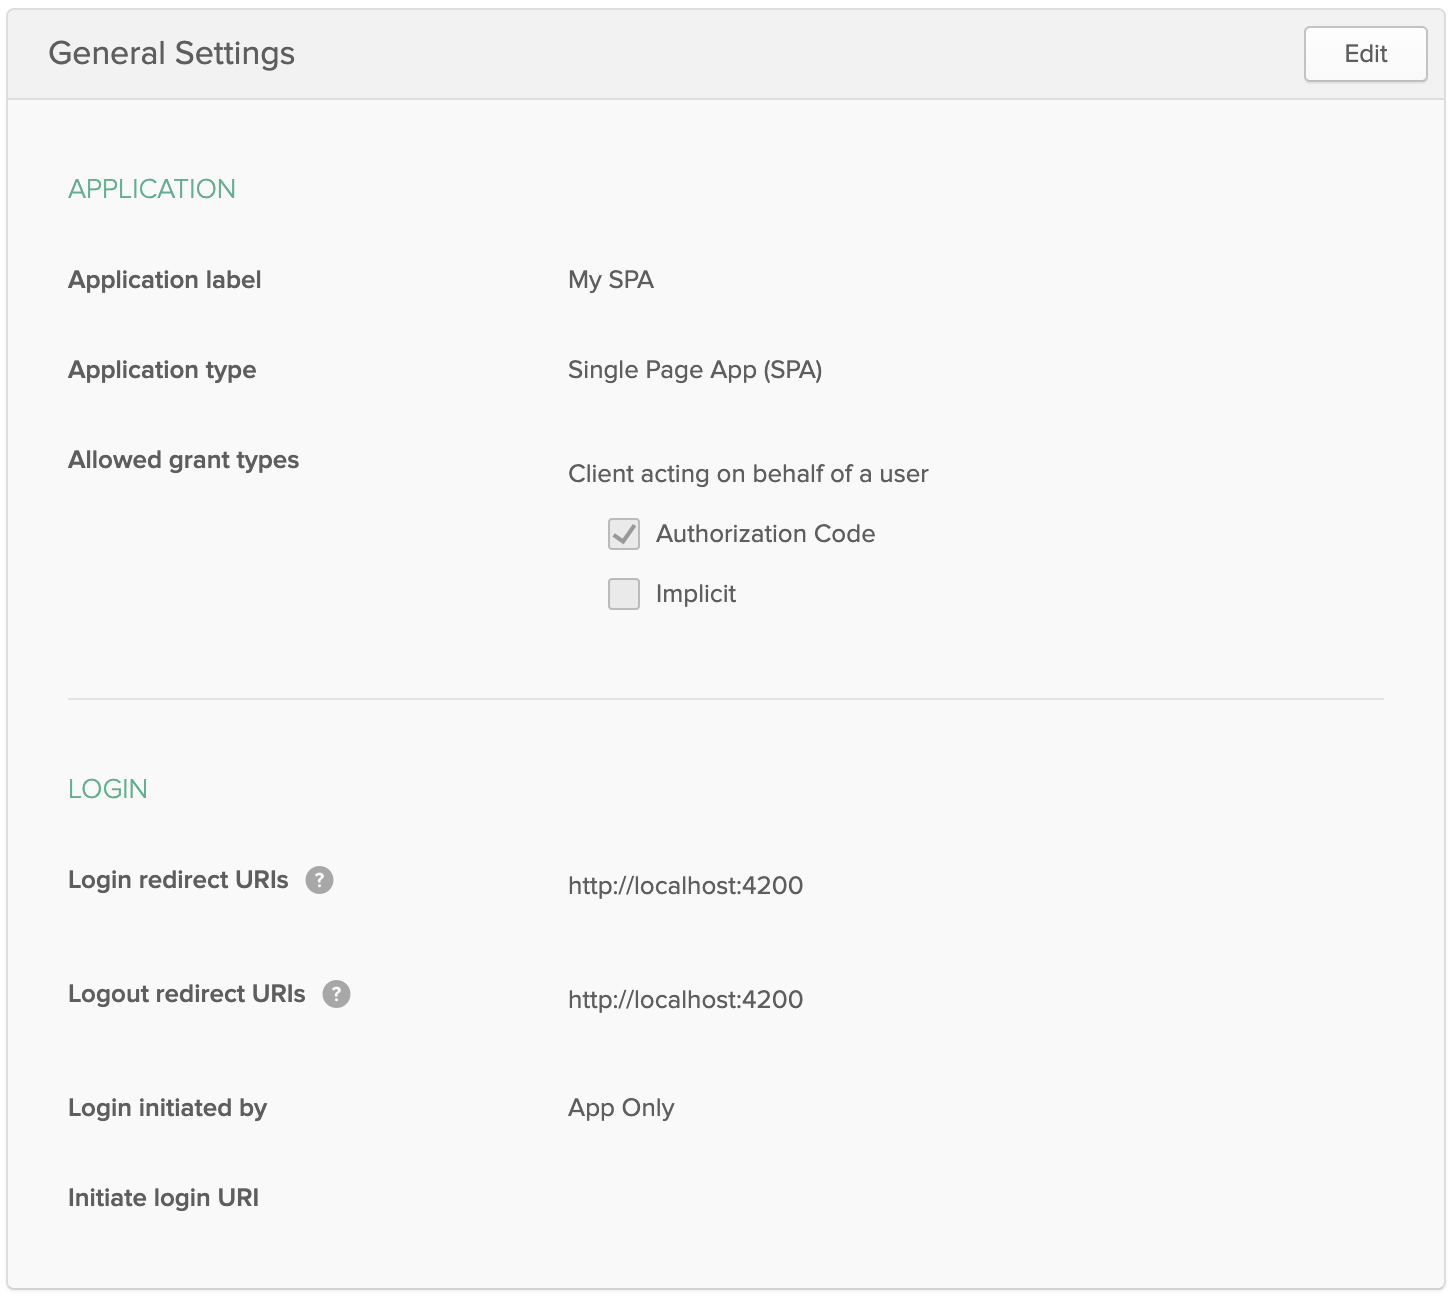
Login to your Okta account, or create one if you don’t have one. Navigate to Applications and click on the Add Application button. Select SPA and click Next. On the next page, specify http://localhost:4200 as a Base URI, Login redirect URI, and Logout redirect URI. Click Done and you should see settings like the following.
Show the Sign-In Widget
After making these changes, copy your client ID and issuer into okta.service.ts. Then modify src/app/app.component.ts to use the Okta service and the widget to login/logout.
import { Component, ChangeDetectorRef, OnInit } from '@angular/core';
import { Okta } from './shared/okta/okta.service';

@Component({
  selector: 'app-root',
  templateUrl: './app.component.html',
  styleUrls: ['./app.component.css']
})
export class AppComponent implements OnInit {
  title = 'app';
  user;
  oktaSignIn;

  constructor(private okta: Okta, private changeDetectorRef: ChangeDetectorRef) {
    this.oktaSignIn = okta.getWidget();
  }

  showLogin(): void {
    this.oktaSignIn.renderEl({el: '#okta-login-container'}, (response) => {
      if (response.status === 'SUCCESS') {
        this.user = response.tokens.idToken.claims.email;
        this.oktaSignIn.remove();
        this.changeDetectorRef.detectChanges();
      }
    });
  }

  async ngOnInit(): Promise<void> {
    try {
      this.user = await this.oktaSignIn.authClient.token.getUserInfo();
    } catch (error) {
      this.showLogin();
    }
  }

  logout(): void {
    this.oktaSignIn.authClient.signOut(() => {
      this.user = undefined;
      this.showLogin();
    });
  }
}
NOTE: Using Angular’s ChangeDetectorRef is necessary to manually trigger the change detector and let the view know that variables have changed. See okta/okta-signin-widget#268 for more information.
And modify src/app/app.component.html to have a <div> with id="okta-login-container" and a place to show the logged in user’s email.
<div *ngIf="!user" id="okta-login-container"></div>

<div *ngIf="user">
  Hello {{user}}

  <button (click)="logout()">Logout</button>
</div>
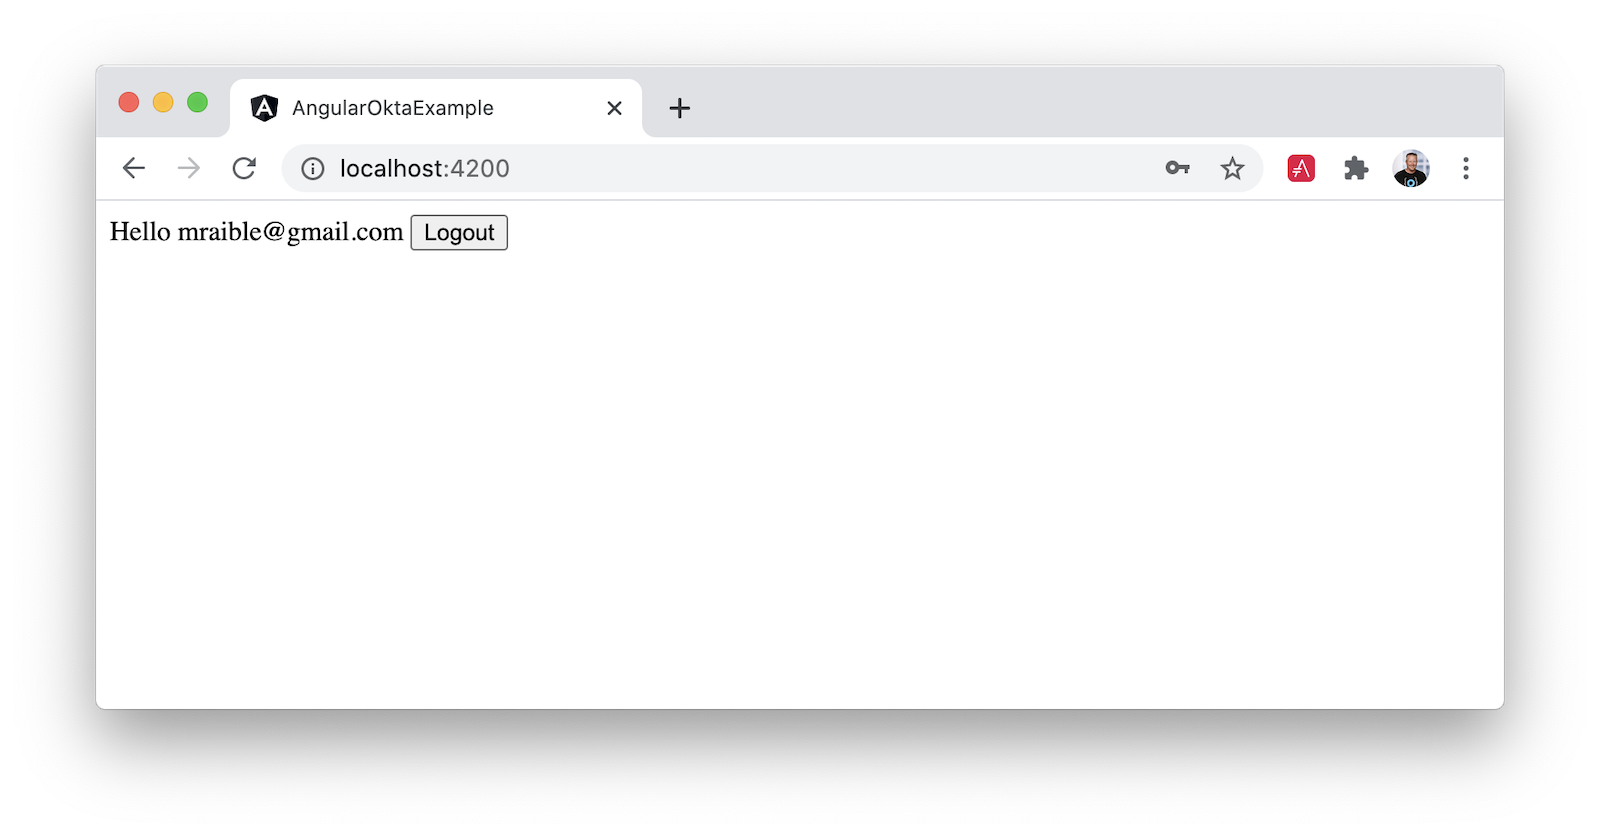
Run ng serve, and open your browser to http://localhost:4200. You should see the sign-in widget. Enter one of
your user’s credentials to login. You should see a “Hello {email}” message with a logout button.
If it works - congrats! If it doesn’t, please post a question to Stack Overflow with an okta tag, or hit me up on Twitter.
Customize the Widget CSS
If you’d like to customize the widget’s CSS, the easiest way is you write your own CSS. Remove the CSS @import statements you added to src/styles.css and install Bootstrap 4.
npm install -E bootstrap@4.5.2
Add an @import for Bootstrap and a few style rules to position elements. Copy the following code into src/styles.css.
@import "~bootstrap/dist/css/bootstrap.css";

#okta-login-container {
  margin: 0 auto;
  max-width: 400px;
  border: 1px solid silver;
  padding: 20px;
  box-shadow: 5px 5px 5px 0 silver;
}

#okta-login-container input {
  margin-bottom: 5px;
  width: 100%;
  padding: 5px;
}

#okta-login-container input[type=checkbox] {
  width: 25px;
}
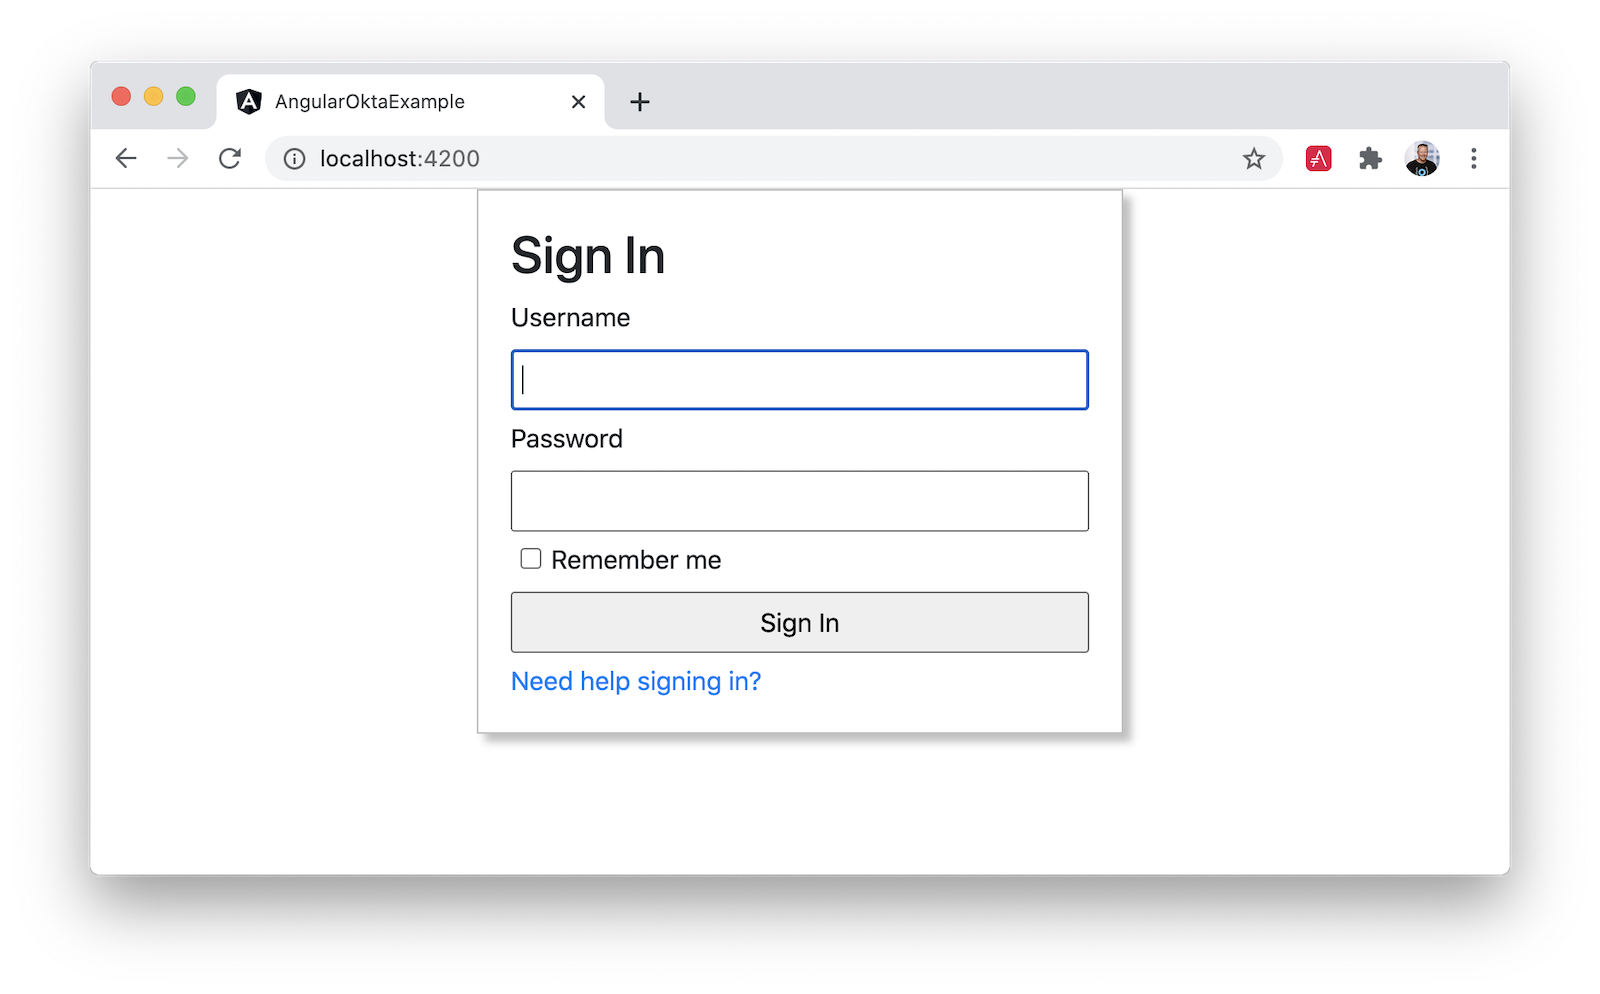
After making these changes, the sign-in widget will look like the following screenshot.
Angular + Okta
You can find a completed version of the application created in this blog post on GitHub. In a future post, I’ll show you how to create a more Angular-native experience, where you control the HTML for the login form.
Building authentication in an application is hard. It’s even less fun to build it over and over again in each application you build. Okta does the hard part for you and makes it a lot more fun to be a developer! Sign up for a forever-free developer account and try Okta today!.
If you’re interested in more Angular content, check out these related blog posts:
- Build a CRUD App with Angular 9 and Spring Boot 2.2
- Build Beautiful Angular Apps with Bootstrap
- Build a Beautiful App + Login with Angular Material
- How to Work with Angular and MySQL
I hope you’ve enjoyed this quick tour of our Angular support. If you have questions about Okta’s features, or what we’re building next, please hit me up on Twitter, post a question to Stack Overflow with an “okta” tag, or open a new issue on GitHub.
Changelog:
- Aug 27, 2020: Updated to use Angular 10 and Okta Sign-In Widget 4.4.0. See the code changes in okta-angular-sign-in-widget-example#19 and the article changes in okta-blog#386.
- May 7, 2018: Updated to use Angular CLI 6.0, Angular 6.0, and Okta Sign-In Widget 2.8.0. See the code changes in okta-angular-sign-in-widget-example#16 and the article changes in okta.github.io#2028.
- Jan 17, 2018:
Updated
AppComponentto use Angular’sChangeDetectionRefto solve issue 268 (hanging issues with the Sign-In Widget). See the code changes in the example app on GitHub. Changes to this article can be viewed in this pull request. - Nov 30, 2017: Updated to use Angular CLI 1.5.5 and Okta Sign-In Widget 2.5.0. See the code changes in the example app on GitHub. Changes to this article can be viewed in this pull request.
- Sep 30, 2017: Updated to use Angular CLI 1.4.4 and Okta Sign-In Widget 2.1.0. See the code changes in the example app on GitHub. Updated "create an OIDC app" instructions for the Okta Developer Console.
Matt Raible is a well-known figure in the Java community and has been building web applications for most of his adult life. For over 20 years, he has helped developers learn and adopt open source frameworks and use them effectively. He's a web developer, Java Champion, and Developer Advocate at Okta. Matt has been a speaker at many conferences worldwide, including Devnexus, Devoxx Belgium, Devoxx France, Jfokus, and JavaOne. He is the author of The Angular Mini-Book, The JHipster Mini-Book, Spring Live, and contributed to Pro JSP. He is a frequent contributor to open source and a member of the JHipster development team. You can find him online @mraible and raibledesigns.com.
Okta Developer Blog Comment Policy
We welcome relevant and respectful comments. Off-topic comments may be removed.