All Developer Edition Orgs will be deactivated starting on July 18, 2025. Sign up for the new Integrator Free Plan to continue building and integrating. Learn more on the
Okta Developer Blog
This guide teaches you how to integrate your federated SSO application with Okta. This guide assumes that you intend to make this app integration public by publishing it in the Okta Integration Network (OIN).
Learning outcome
Create and test an SSO app integration for OIN submission.
Single Sign-On (SSO) is an authentication method that enables end users to sign in to multiple applications (apps) with one set of credentials. If you have customers that use Okta as an Identity Provider, you want to publish your SSO app integration to the OIN. By having your integration in the OIN catalog, your customers can easily configure SSO for your app. See Overview of Single Sign-On in the OIN for all the benefits of having your integration in the OIN catalog.
To create an SSO integration for the OIN, first sign up for a free Integrator Free Plan org(opens new window). Next, select the type of SSO protocol that you want to implement. Okta supports two SSO standards for your integration:
OpenID Connect (OIDC) (preferred)
Security Assertion Markup Language (SAML)
Okta recommends using OIDC for new SSO integrations.
Note: Not all Okta SSO features are supported in the OIN. See OIN limitations.
Deployment models
After you've decided on a protocol, select a deployment model. Okta offers redirect or embedded authentication deploy models. Redirect authentication uses the Okta Sign-In Widget(opens new window) and is the easiest, most secure way to integrate with Okta.
Okta recommends the redirect authentication deployment model if your situation meets the requirements. For more information on deployment models and other authentication considerations, see:
Note: This section assumes that you already built the SSO integration in your app.
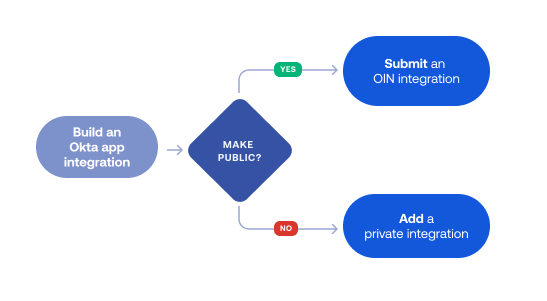
Instructions for adding your SSO integration into Okta depend on if you want to provide a public or private integration:
Submit an OIN integration
If you want to publish your integration in the Okta Integration Network (OIN), follow the instructions in OIN Wizard: Submit an SSO integration. This guide shows you how to use the OIN Wizard to:
Add required integration artifacts and metadata.
Create an app integration instance for testing.
Test your SSO flows.
Submit your integration for OIN verification.
Having your SSO integration public in the OIN catalog provides you with exposure to all Okta customers.
Notes:
Creating an app integration instance doesn't automatically make it available in the OIN(opens new window). After you test your integration, submit it to the OIN team for verification and publication.
The OIN Wizard doesn't support new SSO integrations with more than three app instance variables or advanced SAML features.
Add a private integration
If you want your integration to exist only in your Okta org, follow the instructions in Add a private SSO integration. This guide shows you how to use the Application Integration Wizard (AIW) in the Admin Console to:
Create your app integration instance.
Test your SSO flows.
Your org users can access your app after SSO is configured.
The following are common use cases for adding a private SSO integration:
I want to test my SSO integration in my Integrator Free Plan org. I have no immediate plans to have it publicly available.
I want my SSO integration to only be available in the org I'm using.
I have a SAML integration with more than three instance variables and advanced SAML features that aren't included in the OIN Wizard.
Next steps
If you want to publish your integration, start the submission process to have your SSO integration included in the OIN:
Review the Publish an OIN integration overview to understand the submission process for publishing an integration.