On this page
Custom authenticator integration guide
Enable a mobile app to verify a user identity for an Okta custom authenticator.
Learning outcome
- Create a Custom Authenticator.
- Use the Devices SDK to turn your mobile app into a push authenticator.
What you need
- An Okta developer app
- (Optional) Access to the following APIs:
Sample code
About custom authentication and the Devices SDK
The Devices SDK allows you to embed push notifications and biometrics directly into your mobile app. As a result, you can control the entire authentication experience by keeping users on your mobile app for the entire sign-in process.
The Devices SDK implements the Custom Authenticator. The Custom Authenticator is another authenticator besides Okta Verify you can use for push notifications. In addition, by implementing a custom authentication flow in your app, you also help drive downloads of your app.
Get started
This guide walks you through the two main tasks needed to integrate with the Okta Devices SDK:
Create a Custom Authenticator
- Create an OIDC web authentication client: Set up OAuth for your app.
- Grant the required scopes: Grant the scopes that you need to create a Custom Authenticator.
- Set up notification services: Set up with your Okta org.
- Add a Custom Authenticator: Create and brand a Custom Authenticator.
- Set up a global session policy and app sign-in policy: Control who can access Okta and how.
Install and configure the Okta Devices SDK
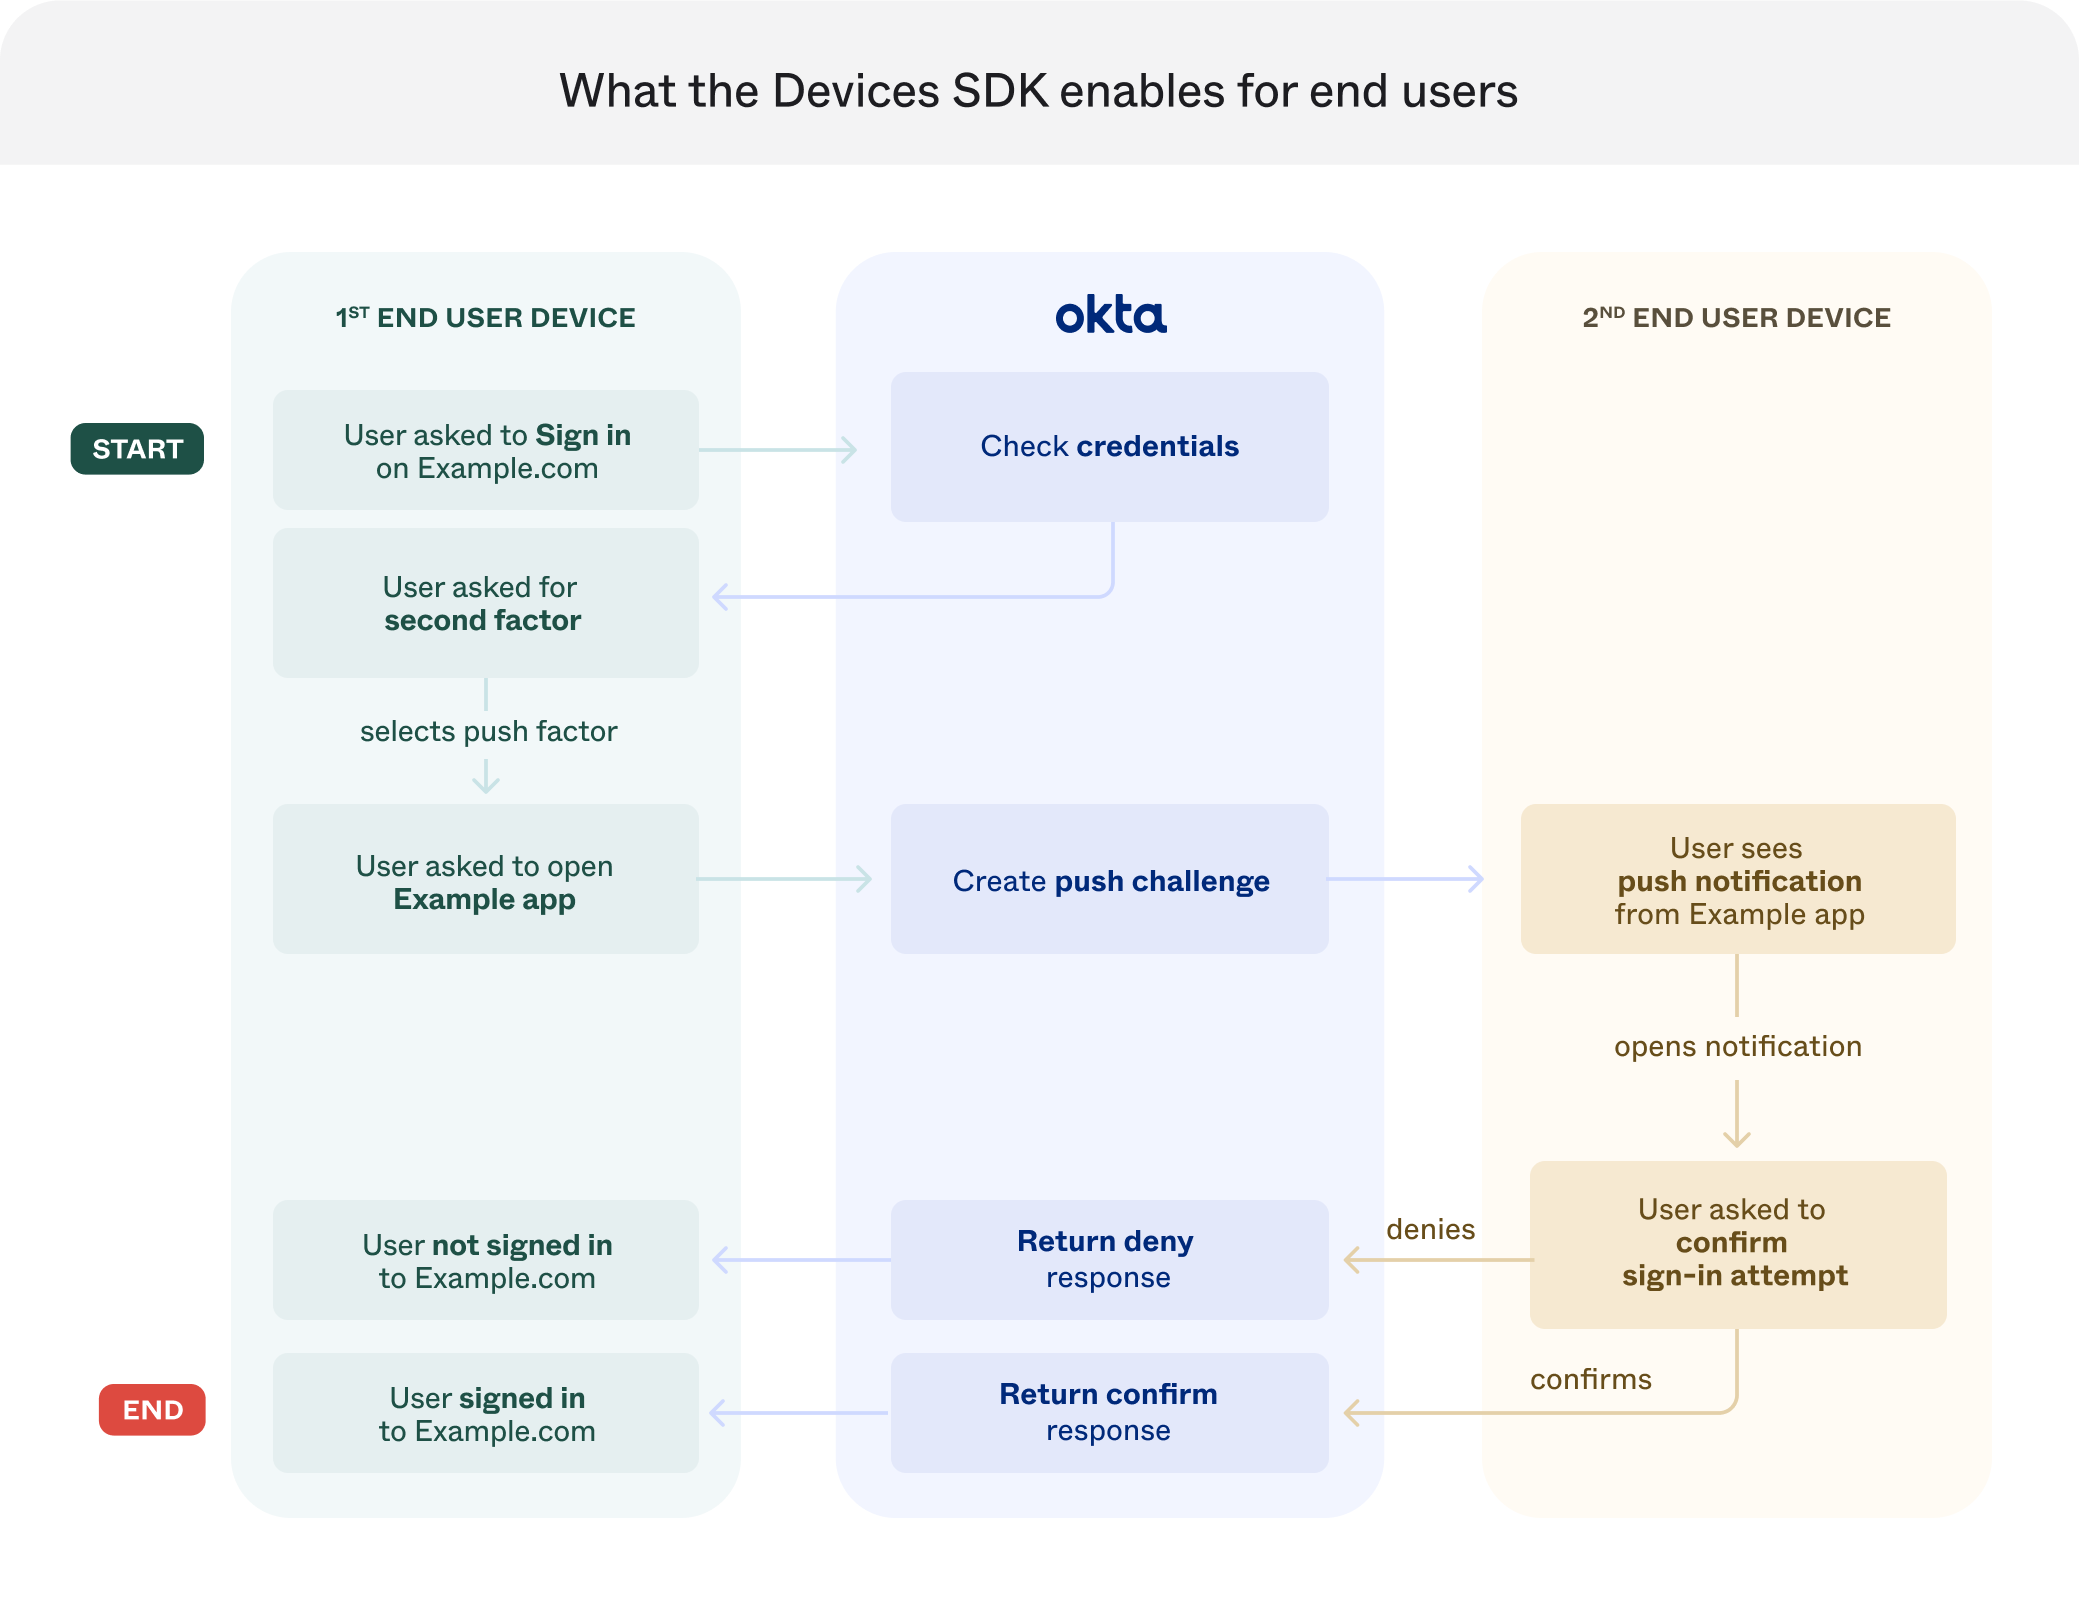
The following image shows what the Devices SDK enables for end users:
Create a Custom Authenticator
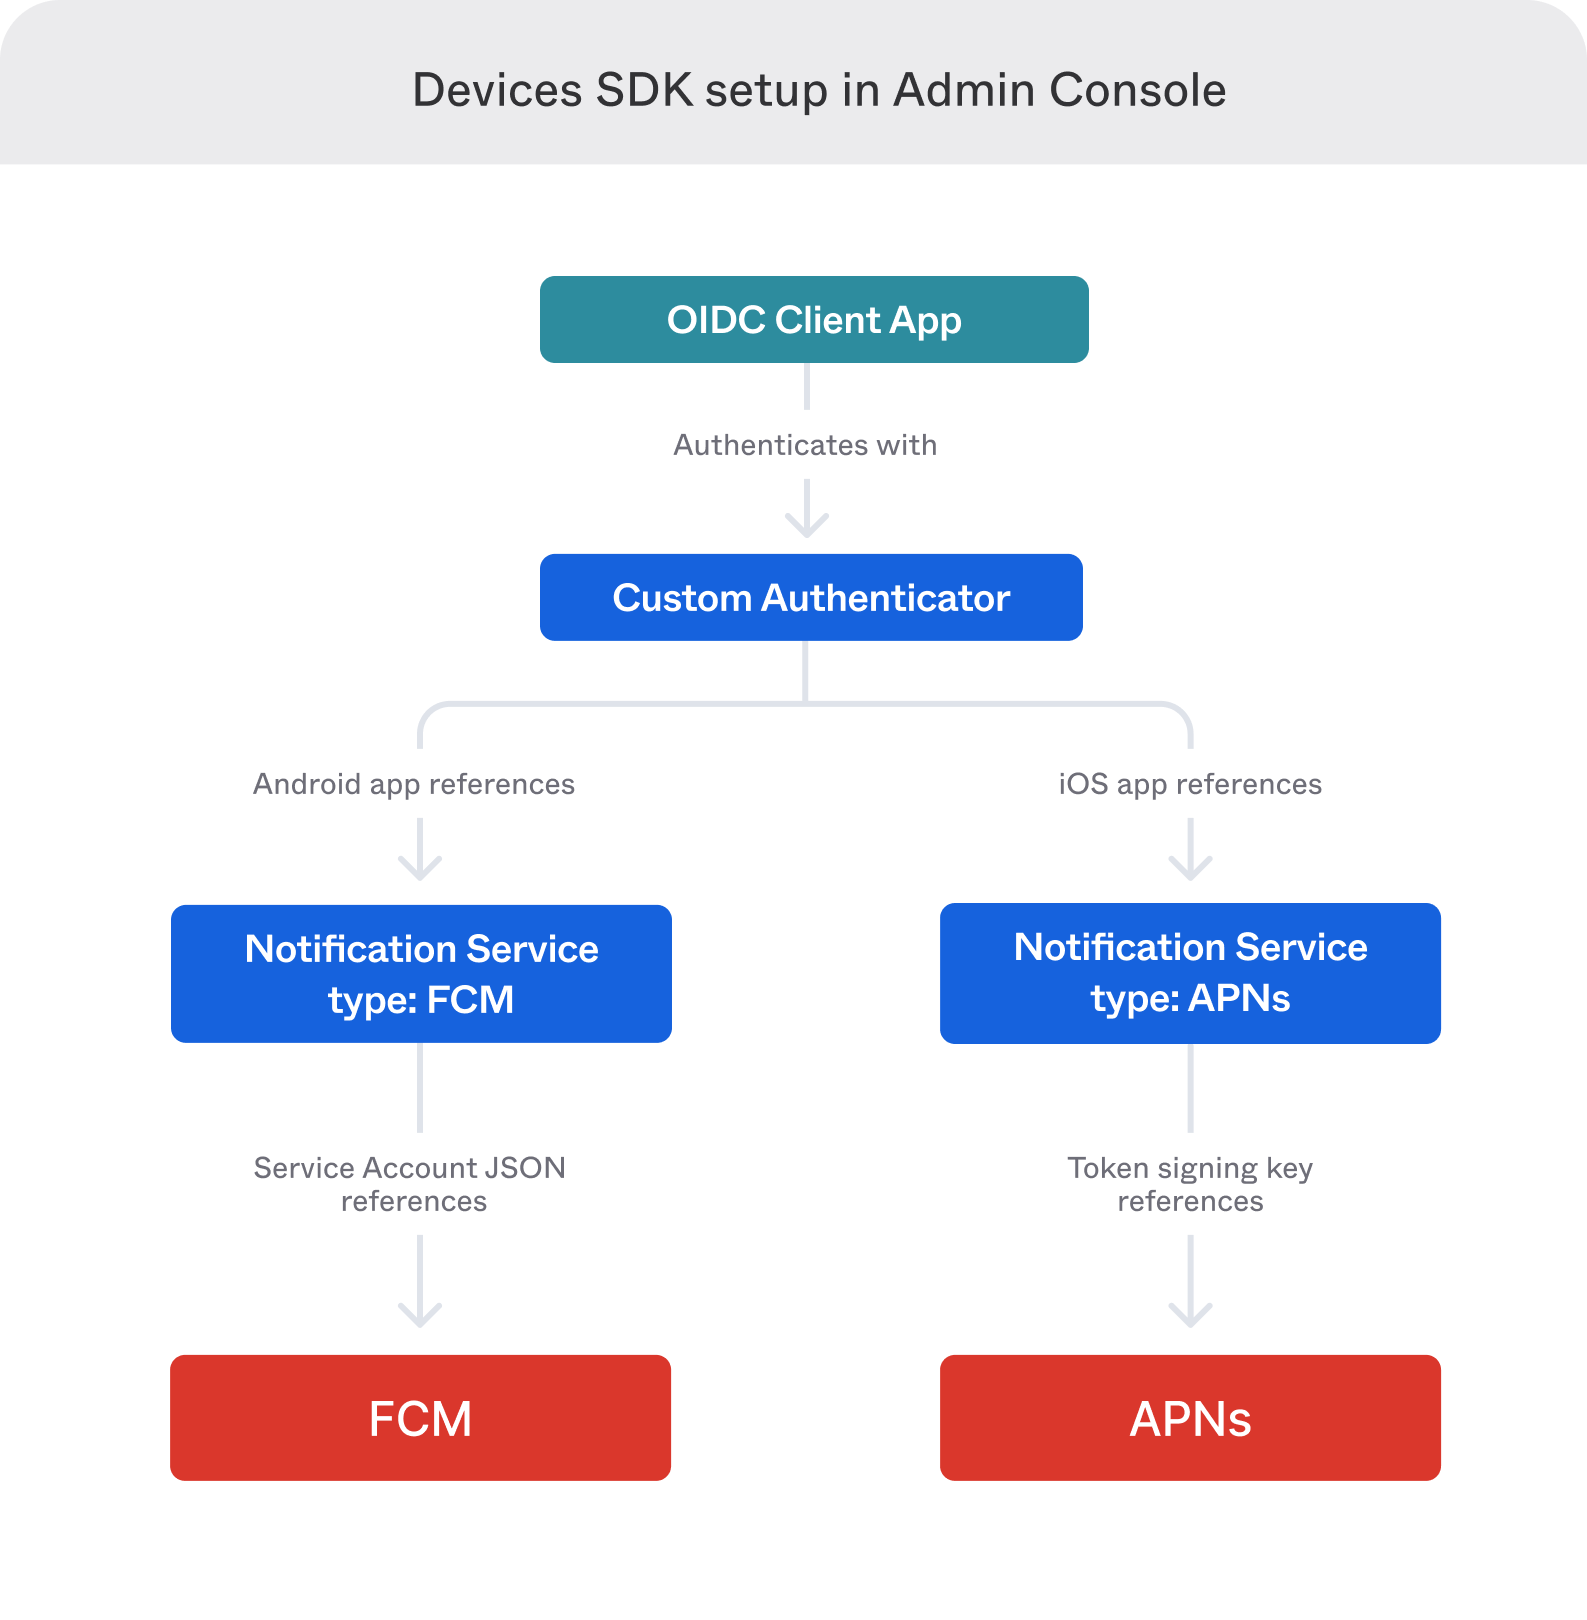
The following image shows the Devices SDK setup in the Admin Console:
Create an OIDC web authentication client
To easily integrate authentication in your app, use the Authorization code flow grant type and implement the OIDC protocol through a web browser. You need an access token to start the enrollment flow for the Devices SDK. For future sign-in attempts, consider using refresh tokens.
Grant the required scopes
When you're ready to grant the required scopes, follow these steps:
- Sign in to your Okta organization with your administrator account.
- Select Applications > Applications to see a list of your app integrations.
- Open your OpenID Connect client app.
- On the Okta API Scopes tab, click Grant for the following scopes:
- For access to both GET and POST/DELETE endpoints:
okta.myAccount.appAuthenticator.manage
- For access to GET endpoints only:
okta.myAccount.appAuthenticator.read
- For access to both GET and POST/DELETE endpoints:
Alternatively, you can grant scopes using the Grant consent to scope for app (opens new window) operation of the Apps API.
Set up notification services
Add a Custom Authenticator
Set up a global session policy and app sign-in policy
Set up a global session policy and an app sign-in policy to integrate with the Devices SDK. See configure a global session policy and app sign-in policy.
Install and configure the Okta Devices SDK
Troubleshoot
If your push notifications aren't delivering:
- Follow the steps to view push notification events (opens new window).
- To narrow your search parameters, enter the following:
eventType eq "device.push.provider.update" and displayMessage eq "Push Provider Configuration verification failed". See Event types. - In the Reason section, locate the error message from your push provider. Consult the push provider documentation, if necessary.
- Verify that your notification services configuration is valid. See Edit a notification service (opens new window).
- Click Save to allow push providers to attempt to send notifications again.
- If your push notifications aren't delivered, repeat steps 1 through 5.