Build a Secure REST Application Using Jersey

REST is one of the most used architectural styles when it comes to developing web services. In Java, we have the JAX-RS specification that defines how to create a RESTful application. To show the power of the spec, Jersey, the reference implementation of JAX-RS was created. Building JAX-RS endpoints only requires adding annotations to your code. Keep reading to see how easy it is!
In this tutorial you’ll create a TODO list service that will perform all four CRUD functions (Create, Retrieve, Update, and Delete), using the Jersey API. In the end, you’ll add security to make sure only authenticated users can call your services.
Note: In May 2025, the Okta Integrator Free Plan replaced Okta Developer Edition Accounts, and the Okta CLI was deprecated.
We preserved this post for reference, but the instructions no longer work exactly as written. Replace the Okta CLI commands by manually configuring Okta following the instructions in our Developer Documentation.
Prerequisites:
-
Java 8+ - Install with SDKMAN or directly from AdoptOpenJDK
-
An Okta account - More on that below
- Create Your Jersey REST Application
- Configure Your REST App to Work with Jersey
- Create the First Entry in Your Jersey REST App
- List All the Entries in Your Jersey REST App
- Update an Entry
- Delete an Entry
- Secure Your Jersey REST Application
- Secure Your Jersey Service
- Generate a Valid Token
- Learn More About Jersey and REST!
Create Your Jersey REST Application
The first step to create your REST application using Jersey is to create the project structure.
You’ll use Spring Initializer to create the application.
Go to https://start.spring.io/ and fill in the following information:
-
Project: Maven Project
-
Language: Java
-
Group:
com.okta -
Artifact:
jersey-rest -
Dependencies:
-
Jersey
-
When you filled all the fields, click Generate. This action will download the project, which you can unzip to your preferred folder.
| This tutorial will use Maven, but if you prefer to use Gradle feel free to do so. |
You can also use the command line to generate the project. If you prefer this method, just go to your terminal and execute the following command:
curl https://start.spring.io/starter.zip -d bootVersion=2.2.0.RELEASE -d language=java \
 -d dependencies=jersey \
 -d packageName=com.okta \
 -d name=jersey-rest \
 -d type=maven-project \
 -o jersey-rest.zip
That’s it! You created a Spring Boot application that imports Jersey as a dependency. With that application, you’ll be able to use Jersey to develop your REST endpoints.
Now that your Java project structure is created, you can start developing your app.
Configure Your REST App to Work with Jersey
Before you can start programming your REST application, you need to specify in which packages you’ll have endpoints.
Inside your project, create a src/main/java/com/okta/jerseyrest/configuration/ directory and the following JerseyConfiguration class:
package com.okta.jerseyrest.configuration;

import org.glassfish.jersey.server.ResourceConfig;
import org.springframework.context.annotation.Configuration;

@Configuration (1)
public class JerseyConfiguration extends ResourceConfig { (2)

    public JerseyConfiguration() {
        packages("com.okta.jerseyrest.resource"); (3)
    }
}| 1 | The class above is annotated with Configuration. This annotation will make sure Spring executes this class when the project starts. |
| 2 | JerseyConfiguration extends from ResourceConfig, a class from Jersey that defines the resource configuration from your web application. |
| 3 | Inform Jersey that it should scan all classes inside the com.okta.jerseyrest.resource package, and look for REST endpoits. |
When using Jersey, a class that contains the REST endpoints is called a resource, hence why the name resource in the package. A resource fulfills a role similar to the Controller in Spring.
Now that you configured Jersey to read your endpoints, let’s create the first one.
Create the First Entry in Your Jersey REST App
Let’s start creating your TODO app. The first endpoint you’re going to develop is to create a task.
In REST applications, you use the POST method to create an entity. Your goal is to make a POST request to the /tasks URI, passing the following payload:
{
    "description" : "buy bread"
}
The result of this request should be an identifier to the task you just created.
Create a class that represents the JSON above. Create the src/main/java/com/okta/jerseyrest/request directory and add the following new TaskRequest class:
package com.okta.jerseyrest.request;

public class TaskRequest {

    private String description;

    public String getDescription() {
        return description;
    }

    public void setDescription(String description) {
        this.description = description;
    }
}
The class above is a simple Plain Old Java Object (POJO), that will receive the JSON payload that the user sends to the API. Jersey uses Jackson, a JSON library that can serialize and deserialize JSON objects to Java classes automatically. All you need to do is declare the class as a parameter in your endpoint and you’ll receive the information already deserialized.
Next, create a class to represent the task inside your application model. Create a new src/main/java/com/okta/jerseyrest/model directory and add the following new Task class:
package com.okta.jerseyrest.model;

import java.util.UUID;

public class Task {

    private UUID id;
    private String description;

    public Task(UUID id, String description) {
        this.id = id;
        this.description = description;
    }

    public UUID getId() {
        return id;
    }

    public void setDescription(String description) {
        this.description = description;
    }

    public String getDescription() {
        return description;
    }
}
In an advanced scenario, this class would represent data saved on a database, for instance. Here you have both the description of the task and the ID that you use to identify which task you’re referring to.
Now that you have both the model and the payload classes, you can start working on your endpoint to create the task itself.
Create the src/main/java/com/okta/jerseyrest/resources directory and create the following TaskResource class:
package com.okta.jerseyrest.resource;

import com.okta.jerseyrest.model.Task;
import com.okta.jerseyrest.request.TaskRequest;

import javax.inject.Singleton;
import javax.ws.rs.*;
import javax.ws.rs.core.MediaType;
import javax.ws.rs.core.Response;
import java.util.*;

@Path("/tasks") (1)
@Singleton (2)
public class TaskResource {

    private Map<UUID, Task> tasks = new LinkedHashMap<>();

    @POST (3)
    @Consumes(MediaType.APPLICATION_JSON) (4)
    public String createTask(TaskRequest request) {
        UUID taskId = UUID.randomUUID();
        tasks.put(taskId, new Task(taskId, request.getDescription()));
        return taskId.toString();
    }
}| 1 | The @Path annotation defines that this class will handle URIs that start with /tasks. You can declare it both in the class and on the method that represents your endpoint. When you declare the annotation in the class it becomes the base URL to every endpoint inside of it. Here, every endpoint URI inside TaskResource will start with /tasks. |
| 2 | The @Singleton annotation makes sure the same instance of TaskResource is used for every request. If you don’t declare this annotation, your application will create a new instance every time your service receives a new request. |
| 3 | To create the endpoint you need to define which HTTP method is going to be handled by your method. In the case of createTask the HTTP method is POST, which is represented by the annotation @POST. |
| 4 | There is also the annotation @Consumes, which specifies what kind of data will come in the request. Since you’re expecting a payload in JSON, you use MediaType.APPLICATION_JSON as the value of the annotation. |
You implemented all the code for your POST endpoint! Let’s call it and see if it works. Start your application by executing the following command inside your project folder:
./mvnw spring-boot:runAfter your application starts, execute the following command in your terminal:
curl -X POST \
  http://localhost:8080/tasks \
  -H 'Content-Type: application/json' \
  -d '{
    "description" : "do the dishes"
}'
The result of the request should be an id, such as the following one:
d7fc8d86-d7fe-47b9-a6ac-f5e8e28e2ea9It worked! Now let’s create an endpoint to list all the tasks you already have created.
List All the Entries in Your Jersey REST App
Go inside the TaskResource class and add the following code:
@GET
@Produces(MediaType.APPLICATION_JSON)
public List<Task> getTasks() {
    return new ArrayList<>(tasks.values());
}
This method is also simple. It is annotated by @GET, which is the HTTP method using to retrieve information from the services.
Since you’re going to return a JSON response, you need to indicate this in the method also. You do this by adding the annotation @Produces and specifying MediaType.APPLICATION_JSON as its value.
The last step is to define the return of the method. Here you declared List<Task>. Jersey will automatically serialize this using Jackson, and transform the content into JSON, which was the type specified in the @Produces annotation.
Start your server with your latest changes. Since you’re not saving the tasks into the disk (using a database, for instance), every time you restart your application the data is lost. Create a new task again, and keep track of the returned ID.
With the task created again, execute the following command in your terminal:
curl -X GET http://localhost:8080/tasksYour response should be an array with all the tasks you created so far. In my case, the result was:
[{"id":"d7fc8d86-d7fe-47b9-a6ac-f5e8e28e2ea9","description":"do the dishes"}]Now that you can both create and list all tasks, the next step is to update an existing task.
Update an Entry
To update the task you are going to create a PUT request to the tasks/<task_id> URI, where <task_id> is the ID of the task you want to update.
Inside the TaskResource, add the following method:
@PUT (1)
@Path("/{taskId}") (2)
public Response updateTask(@PathParam("taskId") UUID taskId, TaskRequest request) { (3)
    if (!tasks.containsKey(taskId)) {
        // return 404
        return Response.status(Response.Status.NOT_FOUND).build(); (4)
    }

    Task task = tasks.get(taskId);
    task.setDescription(request.getDescription());

    // return 204
    return Response.noContent().build();
}| 1 | As happened in the other methods, the @PUT annotation defines which HTTP method is going to be used in the endpoint. |
| 2 | You’re also defining the @Path annotation, which will contain the ID of the task you want to update. Since this is a dynamic value, you want to get it inside a variable. |
| 3 | Jersey allows you to do that by defining an argument in the method and use the annotation @PathParam on it, informing the name of the param you want to retrieve. |
| 4 | The updateTask method will search for a task with the given id inside the current tasks. If it finds, it proceeds to update it with the new description, otherwise, it will return a 404 - Not Found response to the user. |
It’s time to test if the endpoint is working. Start your application again and execute the following code:
curl -X POST \
  http://localhost:8080/tasks \
  -H 'Content-Type: application/json' \
  -d '{
    "description" : "do the dishes"
}'
The command above will create a new task, just like you did before. Now that you have created a task again, you can update its description using the following command:
curl -X PUT \
  http://localhost:8080/tasks/<task_id> \
  -H 'Content-Type: application/json' \
  -d '{
    "description" : "clean the house"
   }'
Replace <task_id> with the ID of one of the tasks you created previously.
Great job! If you list your tasks again you’ll see that the description changed.
You implemented all the CRUD functions, except for the last one. Let’s finish it by implementing the delete endpoint.
Delete an Entry
To delete a task you’re going to make a DELETE request to the URI tasks/<task_id>. This is the same URI that is used to update the task, the only difference is the HTTP method being used to perform the action.
Add the following method to the TaskResource class:
@DELETE (1)
@Path("/{taskId}")
public Response deleteTask(@PathParam("taskId") UUID taskId) { (2)
    tasks.remove(taskId);
    return Response.noContent().build();
}| 1 | As happened in the other endpoints, the @DELETE annotation specifies the HTTP method supported here. |
| 2 | You’re also specifying a @PathParam that will store the ID of the task you want to delete, similar to what you did in the updateTask method. |
To delete the task you’re just removing it from the map, by passing the task ID.
Let’s test it! Run the application with the latest changes, then go to your terminal and type the following command:
curl -X POST \
  http://localhost:8080/tasks \
  -H 'Content-Type: application/json' \
  -d '{
    "description" : "do the dishes"
}'
The command above will create a new task for you, with the description "do the dishes". Copy the ID of the task you just created and replace with <task_id> in the command above:
curl -X DELETE http://localhost:8080/tasks/<task_id>After you execute the command the task is going to be deleted. If you list your tasks again, you’ll notice that the task is not there anymore.
Now that you have a CRUD application up and running, the last step is to make sure only authenticated users can have access to it.
Secure Your Jersey REST Application
Before you begin, you’ll need a free Okta developer account. Install the Okta CLI and run okta register to sign up for a new account. If you already have an account, run okta login.
Then, run okta apps create. Select the default app name, or change it as you see fit.
Choose Web and press Enter.
Select Other.
Then, change the Redirect URI to https://oidcdebugger.com/debug and use https://oidcdebugger.com for the Logout Redirect URI.
What does the Okta CLI do?
The Okta CLI will create an OIDC Web App in your Okta Org. It will add the redirect URIs you specified and grant access to the Everyone group. You will see output like the following when it’s finished:
Okta application configuration has been written to: /path/to/app/.okta.env
Run cat .okta.env (or type .okta.env on Windows) to see the issuer and credentials for your app.
export OKTA_OAUTH2_ISSUER="https://dev-133337.okta.com/oauth2/default"
export OKTA_OAUTH2_CLIENT_ID="0oab8eb55Kb9jdMIr5d6"
export OKTA_OAUTH2_CLIENT_SECRET="NEVER-SHOW-SECRETS"
Your Okta domain is the first part of your issuer, before /oauth2/default.
NOTE: You can also use the Okta Admin Console to create your app. See Create a Web App for more information.
Now that you have your Okta application you can use it to authenticate inside your app.
Secure Your Jersey Service
Let’s start by adding Okta’s library inside your project.
Go to the pom.xml and add the following dependency inside the <dependencies> tag:
<dependency>
    <groupId>com.okta.spring</groupId>
    <artifactId>okta-spring-boot-starter</artifactId>
    <version>1.3.0</version>
</dependency>
This library will integrate with your Okta app you just created. It will also add Spring Security to your current application.
Inside src/main/java/com/okta/jerseyrest/configuration create the following SecurityConfiguration class:
package com.okta.jerseyrest.configuration;

import org.springframework.security.config.annotation.web.builders.HttpSecurity;
import org.springframework.security.config.annotation.web.configuration.EnableWebSecurity;
import org.springframework.security.config.annotation.web.configuration.WebSecurityConfigurerAdapter;

@EnableWebSecurity
public class SecurityConfiguration extends WebSecurityConfigurerAdapter {

    @Override
    protected void configure(HttpSecurity http) throws Exception {
        http.oauth2ResourceServer()
                .and()
                .authorizeRequests()
                .anyRequest()
                .authenticated();
    }
}
The configuration above will ensure all your requests will be authenticated. If you’re using Spring MVC you don’t need to add this configuration, but since you’re developing with Jersey you need to make sure they are also included in the authentication process.
Now that you added the library and the configuration, you can see your Okta configuration in the .okta.env inside your project. Copy your issuer into your project’s src/main/resources/application.properties file.
okta.oauth2.issuer: https://{yourOktaDomain}/oauth2/defaultIf you want to avoid adding this configuration to source control, you can use environment variables:
OKTA_OAUTH2_ISSUER=https://{yourOktaDomain}/oauth2/defaultNow your application is secure!
Let’s try to make a request to one of your endpoints. Run your application with your latest changes, then go to your terminal line and execute the following command:
curl -X GET -I http://localhost:8080/tasksThe result should be similar to this one:
HTTP/1.1 401
Set-Cookie: JSESSIONID=06775BFFBFDB74DA632CB6F4D973ADA4; Path=/; HttpOnly
WWW-Authenticate: Bearer
X-Content-Type-Options: nosniff
X-XSS-Protection: 1; mode=block
Cache-Control: no-cache, no-store, max-age=0, must-revalidate
Pragma: no-cache
Expires: 0
X-Frame-Options: DENY
Content-Type: text/html;charset=utf-8
Content-Language: en
Content-Length: 802
Date: Mon, 30 Dec 2019 12:52:52 GMT
The status code of the response is HTTP 401, which means the request was not authorized to execute. In other words, your application is now secure! You need a valid token to make a request to your endpoints.
Let’s see how you can generate a valid token and how to add it to your request.
Generate a Valid Token
To validate your request you need to add the Authorization header to the request. The header will provide the type of authentication and the token, which will look like the snippet below:
-H 'Authorization: Bearer <token>'An easy way to get an access token is to generate one using OpenID Connect Debugger. Open the site in a new window or tab. Fill in your client ID, and use https://{yourOktaDomain}/oauth2/default/v1/authorize for the Authorize URI. Select code for the response type and Use PKCE.
After you fill in all the fields, click on Send Request. You’ll be redirected to your Okta’s App login page:
Put your username and password, and click on Sign In. You’ll be redirected to the OIDC Debugger again, where you’ll see the generated access token:
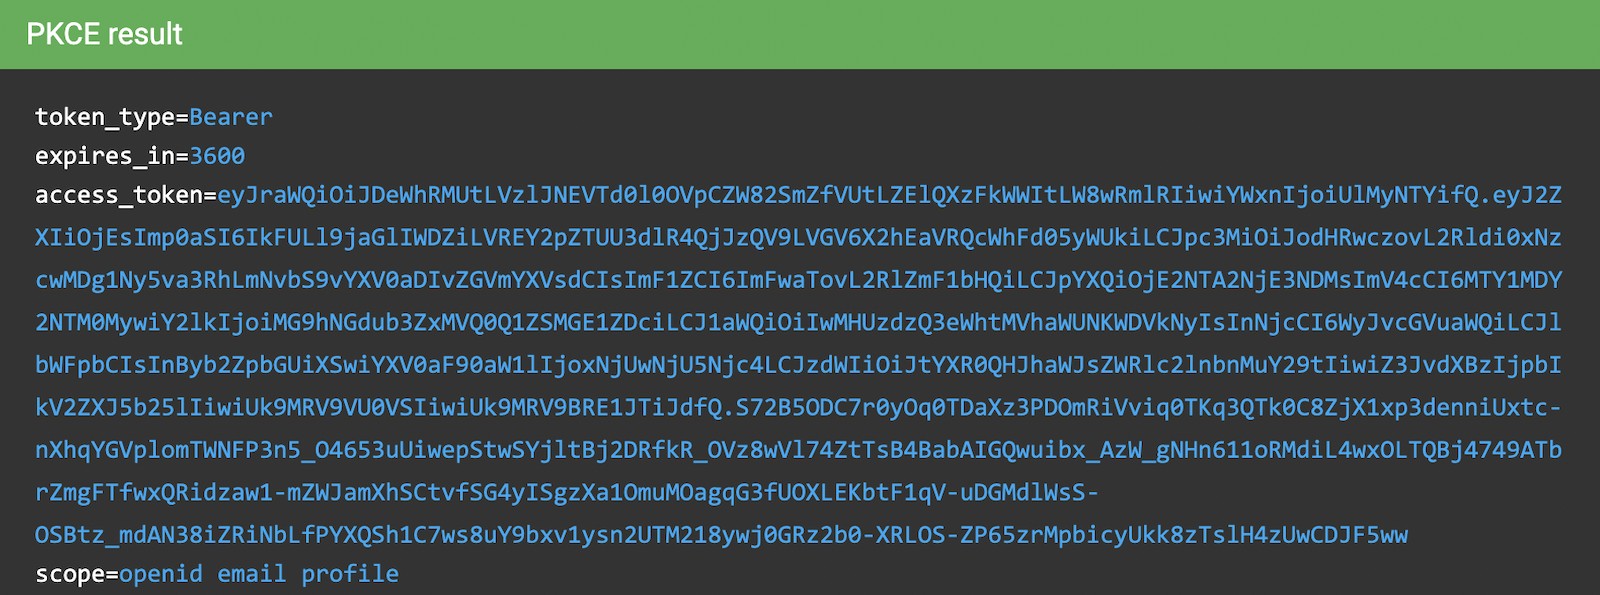
Copy the value and replace with the <token> keyword in the command below:
curl -X GET -o http://localhost:8080/tasks \
  -H 'Authorization: Bearer <token>'
You’ll see that the command now executes successfully:
< HTTP/1.1 200
< X-Content-Type-Options: nosniff
< X-XSS-Protection: 1; mode=block
< Cache-Control: no-cache, no-store, max-age=0, must-revalidate
< Pragma: no-cache
< Expires: 0
< X-Frame-Options: DENY
< Content-Type: application/json
< Content-Length: 2
< Date: Mon, 30 Dec 2019 10:15:36 GMT
<
* Connection #1 to host localhost left intact
[]
Let’s register a task to make sure everything works as it should. Execute the following command into your terminal, replacing <token> by your token:
curl -X POST \
  http://localhost:8080/tasks \
  -H 'Authorization: Bearer <token>' \
  -H 'Content-Type: application/json' \
  -d '{
    "description" : "Test my Jersey App!"
  }'
Now let’s execute the first command again:
curl -X GET http://localhost:8080/tasks \
  -H 'Authorization: Bearer <token>'
It now returns the task you just created!
[{"id":"a44dba4f-d239-441a-925d-d9248aeb4925","description":"Test my Jersey App!"}]Well done! You managed to create a CRUD service using Jersey! Even better, the service is secure and it took you minimal effort to make it happen.
You can view the source code of this tutorial going to its GitHub repository.
Learn More About Jersey and REST!
Do you want to learn more about Java, REST, Jersey, and secure applications? Here are some links you might want to read:
For more posts like this one, follow @oktadev on Twitter, follow us on LinkedIn, or subscribe to our YouTube channel.
Okta Developer Blog Comment Policy
We welcome relevant and respectful comments. Off-topic comments may be removed.