Create a Blockchain Explorer in C#

Blockchain technology is already central to major cryptocurrencies like Bitcoin and its applications are ever growing. A blockchain is simply a list of records, called blocks. Each block contains information about transactions - and also confirms the validity of the previous block with something called a hash function. A hash function calculates a number from all of the data in a block. It works in such a way that if any of the bytes in the block data changes, the result of the hash function will be a different number.
In a blockchain, one cannot change a block without recalculating all hashes from the changed block and to the end of the chain. Together with the fact that a blockchain is distributed to a many computers in a peer-to-peer network, this makes blockchains resistant to modifications of the data and all kinds of fraud.
A great way to learn about the blockchains for a programmer is to dive in and make a Bitcoin Blockchain Explorer - and that’s exactly what you will do right now if you keep reading on!
What you will need:
- A Free Okta Developer Account
- Visual Studio 2019 community edition
- NuGet package Blockchain API v4.0.0
- NuGet package Okta.AspNetCore v1.2.0
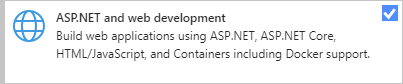
Start by downloading Visual Studio 2019 Community Edition from visualstudio.microsoft.com. Make sure to check the workload “ASP.NET and web development”:
If you forget, no problem. Just open “Visual Studio Installer” from your start menu, select Modify, and then you are back at the screen where you can tick off the workloads you want. You may also use Visual Studio 2017, but it would be wise to update it - to make sure you have the latest version of ASP.NET Core and .NET Core. Start the Visual Studio installer and select Update if that is an option.
Note: In May 2025, the Okta Integrator Free Plan replaced Okta Developer Edition Accounts, and the Okta CLI was deprecated.
We preserved this post for reference, but the instructions no longer work exactly as written. Replace the Okta CLI commands by manually configuring Okta following the instructions in our Developer Documentation.
Scaffold Your C# Blockchain Application
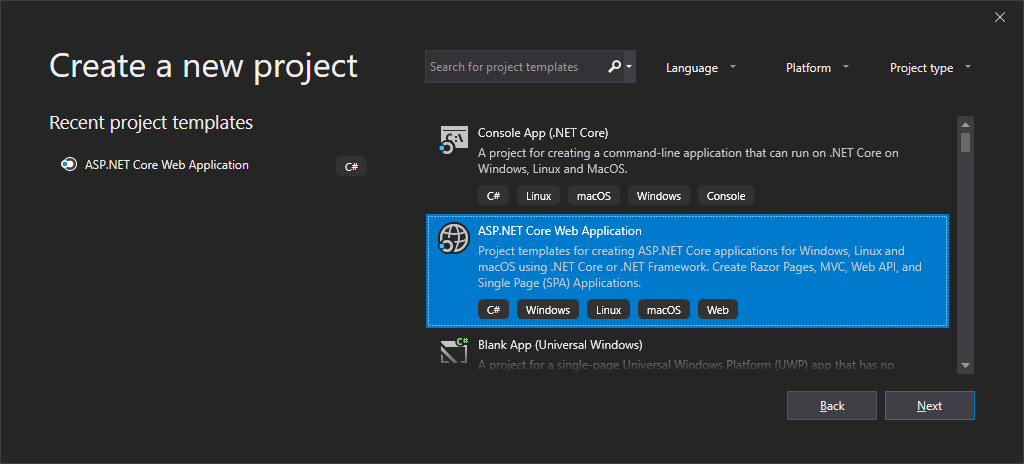
Start Visual Studio, then select Create a new project, and select the template ASP.NET Core Web Application and click Next:
Enter “BlockchainExplorer” for Project name and click Create.
Next, select the template Web Application. Note that another template is named “Web Application (Model-View-Controller)”. That is not the one you want. Select the one that is only Web Application. Make sure the Configure for HTTPS is checked and click Create.
Visual Studio will scaffold some nice code to start out with. Try to run it by pressing Ctrl+F5`. The first time it runs, you should get this warning:
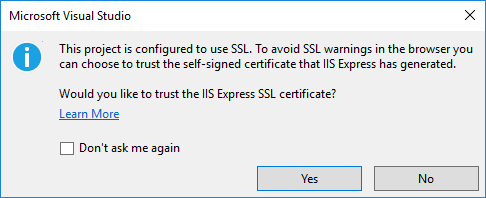
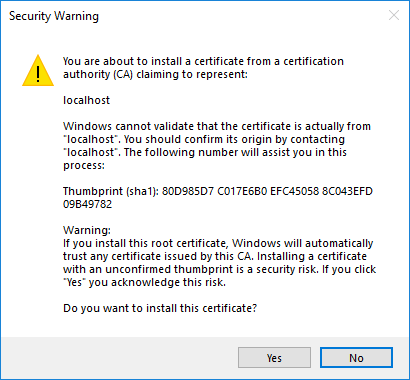
Check Don’t ask me again and click Yes. This enables running the application through HTTPS without a separate SSL certificate. A new dialog will pop up. Answer Yes:
You may get a warning in the browser telling you that “Your connection is not private”. If so, click Advanced in the lower left corner of the page. Then some more text appears, and at the bottom, there will be a link with the text Proceed to localhost (unsafe). Click it.
You are going to call the Blockchain API at www.blockchain.com/no/api, but there is a convenient NuGet package which makes it really easy. Go to the Package Manager Console by selecting the Tools menu, and then NuGet Package Manager, and then Package Manager Console.
Run the following command in the console:
Install-Package BlockchainAPI -Version 4.0.0
The user will select from a menu of different methods in the Blockchain API. You will implement a recent searches function, and it will keep each user’s recent searches in an in-memory database. For this to work, you will need a way for the users to authenticate.
Add Login to Your ASP.NET Core C# Web application
No reason to write the authentication yourself. You can easily integrate Okta to handle the authentication for you:
- Authenticate and authorize your users
- Store data about your users
- Perform password-based and social login
- Secure your application with multi-factor authentication And much more! Check out our product documentation
Sign up for a forever-free developer account (or login if you already have one). Once you have signed up and logged in, you’ll be taken to your dashboard. Make note of your Org URL in the top right corner. It looks something like this: Org URL: https://dev-######.okta.com
You must also register your application in the Okta dashboard. Select Applications at the top, and then click the green button, Add Application. Select Web and click Next.
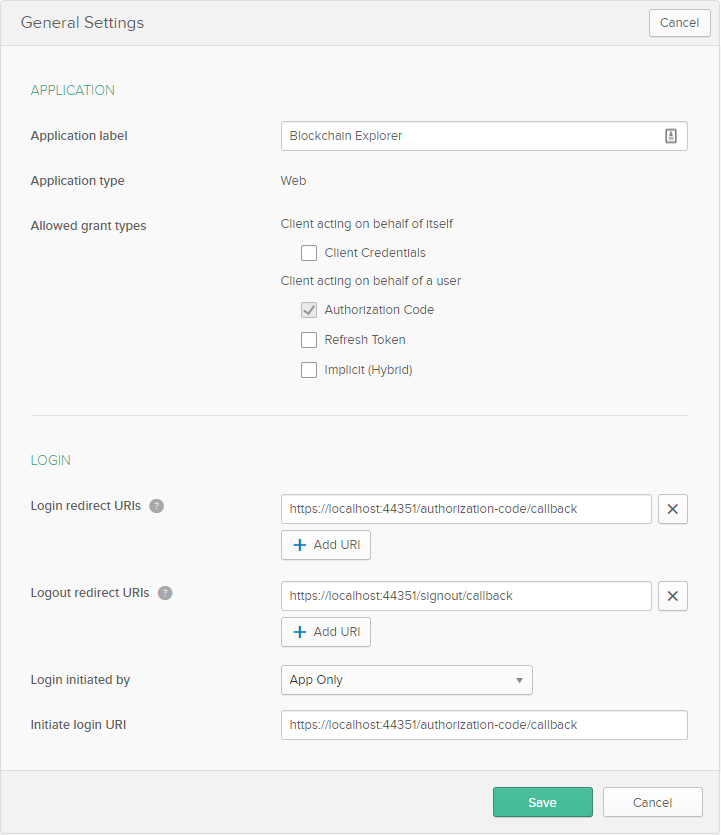
Enter “Blockchain Explorer” for Name, and click Done. Then click Edit to go back to the form, but before we enter some values, go back to Visual Studio. Right-click the solution, BlockchainExplorer and select Properties. Then go to the tab, Debug and observe which port number is used in the URL mentioned after the checkbox Enable SSL. It is usually around 44300.
Back in the Okta Dashboard, change Login redirect URIs to use https and the same port number as above. Do the same for Initiate login URI, and add a Logout redirect URIs with a value like https://localhost:44354/signout/callback, but with the port number you have already used. Click Save.
Also, go to API in the top menu of the dashboard and click Trusted Origins. There should be a table row with a Name containing Blockchain Explorer. Click the edit icon, and change the port number to the same you used above.
Back in the Package Manager Console, also install the package Okta.AspNetCore which will make it easy to add authentication to your application. Use this command:
Install-Package Okta.AspNetCore -Version 1.2.0
Now, open appsettings.json, and add the lines you are missing from the code below:
{
  "Logging": {
    "LogLevel": {
      "Default": "Warning"
    }
  },
  "Okta": {
    "ClientId": "{yourClientId}",
    "ClientSecret": "{yourClientSecret}",
    "OktaDomain": "{yourOktaDomain}",
    "PostLogoutRedirectUri": "https://localhost:5001/"
  },
  "AllowedHosts": "*"
}
Get the values for ClientId and ClientSecret from the Okta Dashboard page that you just visited. Get the value for OktaDomain from the main page on the Okta Dashboard. (Click Dashboard on the top, and you will see your OktaDomain on the top right.)
Open “Startup.cs” and add these using statements:
using Microsoft.AspNetCore.Authentication.Cookies;
using Okta.AspNetCore;
Edit the method ConfigureServices() so that you end up with this:
public void ConfigureServices(IServiceCollection services)
{
    var oktaMvcOptions = new OktaMvcOptions();
    Configuration.GetSection("Okta").Bind(oktaMvcOptions);
    oktaMvcOptions.Scope = new List<string> { "openid", "profile", "email" };
    oktaMvcOptions.GetClaimsFromUserInfoEndpoint = true;

    services.AddAuthentication(options =>
        {
            options.DefaultAuthenticateScheme = CookieAuthenticationDefaults.AuthenticationScheme;
            options.DefaultSignInScheme = CookieAuthenticationDefaults.AuthenticationScheme;
            options.DefaultChallengeScheme = OktaDefaults.MvcAuthenticationScheme;
        })
        .AddCookie()
        .AddOktaMvc(oktaMvcOptions);
    services.Configure<CookiePolicyOptions>(options =>
    {
        options.CheckConsentNeeded = context => true;
        options.MinimumSameSitePolicy = SameSiteMode.None;
    });

    services.AddMvc()
        .AddRazorPagesOptions(options =>
        {
            options.Conventions.AuthorizePage("/Index");
        })
        .SetCompatibilityVersion(CompatibilityVersion.Version_2_2);
}
One important line is options.Conventions.AuthorizePage("/Index");, which declares that the Index page requires the user to login. Okta will automatically redirect any user who is not logged in to the login page, and back to Index after they successfully log in.
In the method Configure(), add app.UseAuthentication(); just before app.UseMvc();.
Now, start the application with Ctrl+F5, and you will be redirected to the Okta Login Page. After logging in, you will be redirected back to the application. Note that you may already be logged in and not see the login page. Try running again in an Incognito browser window and you will definitely see it.
In the Okta Dashboard, you may add more users to the application, but your own Okta user should already be given access to this application.
Explore the Blockchain from C#
Let’s get started exploring the blockchain. You will use the class BlockExplorer to call the Blockchain API - it has a method for each API call. Now you will enable them all for your users with some C# reflection.
Open Index.cshtml.cs, and replace the using statements with:
using System;
using System.Collections;
using System.Collections.Generic;
using System.Linq;
using System.Reflection;
using System.Threading.Tasks;
using BlockchainExplorer.Model;
using Info.Blockchain.API.BlockExplorer;
using Info.Blockchain.API.Models;
using Microsoft.AspNetCore.Mvc.RazorPages;
Add this property to save all the possible actions:
public IEnumerable<MethodInfo> Actions { get; private set; }
Add the methods below to the class:
private void CreateActions()
{
    Actions = typeof(BlockExplorer)
        .GetMethods(BindingFlags.DeclaredOnly | BindingFlags.Public | BindingFlags.Instance)
        .Where(m => m.GetParameters().Length <= 1);
}

public string ShortenName(string s)
{
    if (s == null) return s;
    return s.Replace("Get", "").Replace("Async", "");
}

public string InputTypeFromCsType(Type t)
{
    if (t == typeof(DateTime)) return "date";
    if (t == typeof(long)) return "number";
    return "text";
}
The method CreateActions() gets all the public methods from the BlockExplorer class that has none or one parameter. Those are the interesting ones. Add a call to CreateActions from the method OnGet().
The method ShortenName takes away the words “Get” and “Async” from the names of the actions. It makes the UI prettier.
InputTypeFromCsType() helps to find the correct value for type in <input type="..."> in the UI, so that dates get date inputs, numbers get number inputs and all others get text inputs.
Open Index.cshtml, replace the contents with the following:
@page
@using System.Reflection
@using Microsoft.AspNetCore.Mvc.Rendering
@model IndexModel


<div style="display: flex;flex-direction: row">
    <div>
        <h3>Menu</h3>
        <div style="">
            <select onchange="show(this.value)">
                <option value="blank"></option>
                }
                @foreach (var action in Model.Actions)
                {
                    var actionName = Model.ShortenName(action.Name);
                    <option value="@action.Name">@actionName</option>
                }
            </select>
            @foreach (var action in Model.Actions)
            {
                var actionName = "Get" + Model.ShortenName(action.Name);
                actionName = string.Concat(actionName.Select(x => Char.IsUpper(x) ? " " + x : x.ToString())).TrimStart(' ');
                <form id="@action.Name" style="display: none">
                    @Html.Hidden("actionName", action.Name)
                    @foreach (var param in action.GetParameters())
                    {
                        @param.Name
                        <input name="paramValue" type="@Model.InputTypeFromCsType(@param.ParameterType)" />
                    }
                    <input type="submit" value="@actionName" />
                </form>
            }
        </div>
        <table class="values"></table>
    </div>
</div>

<script>
    function show(actionName) {
        for (var form of document.getElementsByTagName('form')) form.style.display = 'none';
        document.getElementById(actionName).style.display = 'inline';
    }
</script>
This HTML makes a drop down where the user can select which action to do. There is one HTML <form> for each action, but they are all hidden when the page is loaded. When selecting an action, only the corresponding form is made visible. That is done by the JavaScript at the bottom. Run the application, and see for yourself!
Call the Blockchain API from C#
Next, you want to actually call the API and see the results. Add a new folder Model and add a class Search inside it. The contents will be:
using System.Collections.Generic;
using System.ComponentModel.DataAnnotations.Schema;

namespace BlockchainExplorer.Model
{
    public class Search
    {
        public long Id { get; set; }
        public string ActionName { get; set; }
        public string ParamValue { get; set; }
        public string User { get; set; }
        [NotMapped]
        public List<int> Indexes { get; set; }

        public int GetCollectionNo(int index)
        {
            return index >= Indexes.Count ? 1 : Indexes[index] + 1;
        }

        public object GetParamsObj(int delta, int index = 0)
        {
            while (Indexes.Count < index + 1) Indexes.Add(0);
            var indexes = Indexes.ToArray();
            indexes[index] += delta;

            return new
            {
                actionName = ActionName,
                paramValue = ParamValue,
                indexes = indexes
            };
        }
    }
}
The field Id is only used later when these objects are saved in an in-memory database with the help of EntityFramework Core. ActionName is the name of the action, and ParamValue is the parameter value if it needs one. User is used later when recording each user’s recent searches. Indexes is used for paging, when the results contain collections. More about that later.
Go back to Index.cshtml.cs, and add these fields to the class:
private object _object;
public string ActionName { get; private set; }
public PropertyInfo[] SimpleProps { get; private set; }
public PropertyInfo[] CollectionProps { get; private set; }

public ICollection Collection { get; private set; }
public IEnumerable<Search> RecentSearches { get; set; }
public Search CurrentSearch { get; set; }
All of these are set in Index.cshtml.cs but used in the Index.cshtml file, so that it can combine the data with the HTML required for the page.
Add these helper methods to the class:
private async Task<object> DoAction(string paramValue, MethodInfo action)
{
    var explorer = new BlockExplorer();
    var param = action.GetParameters().FirstOrDefault();
    var paramsObj = param == null ? new object[] { } : new[] { ConvertValue(paramValue, param.ParameterType) };
    var task = action.Invoke(explorer, paramsObj) as Task;
    await task.ConfigureAwait(false);
    var resultProperty = task.GetType().GetProperty("Result");
    var obj = resultProperty.GetValue(task);
    obj = IfCollection(obj);
    obj = await IfLatestBlock(obj, explorer);
    return obj;
}

private void Save(object obj)
{
    var type = obj.GetType();
    var allProps = type.GetProperties();
    SimpleProps = allProps.Where(p => !p.PropertyType.Name.Contains("Collection")).ToArray();
    CollectionProps = allProps.Where(p => p.PropertyType.Name.Contains("Collection")).ToArray();
    _object = obj;
}

private object ConvertValue(string value, Type type)
{
    if (type == typeof(long)) return Convert.ToInt64(value);
    if (type != typeof(DateTime)) return value;
    DateTime.TryParse(value, out var result);
    return result;
}

private object IfCollection(object o)
{
    var collection = o as ICollection;
    if (collection == null) return o;
    Collection = collection;
    var enumerator = collection.GetEnumerator();
    if (CurrentSearch.Indexes.Count > 0)
    {
        var skipCount = CurrentSearch.Indexes[0];
        while (skipCount-- > 0) enumerator.MoveNext();
    }
    enumerator.MoveNext();
    return enumerator.Current;
}

private async Task<object> IfLatestBlock(object obj, BlockExplorer explorer)
{
    var latestBlock = obj as LatestBlock;
    if (latestBlock == null) return obj;
    return await explorer.GetBlockByHashAsync(latestBlock.Hash);
}

public object GetCollectionElement(PropertyInfo prop, int collectionIndex)
{
    var collection = prop.GetValue(_object) as IEnumerable<object>;
    if (collection == null) return null;
    var skipCount = CurrentSearch.GetCollectionNo(collectionIndex) - 1;
    return collection.Skip(skipCount).FirstOrDefault();
}

public int GetCollectionCount(PropertyInfo prop, int collectionIndex)
{
    var collection = prop.GetValue(_object) as IEnumerable<object>;
    return collection?.Count() ?? 0;
}

public string GetValue(PropertyInfo prop)
{
    return prop.GetValue(_object).ToString();
}
Then change OnGet() to this:
public async Task OnGet(string actionName, string paramValue, int[] indexes)
{
    CreateActions();
    if (actionName == null) return;
    ActionName = ShortenName(actionName);
    var action = Actions.SingleOrDefault(a => a.Name.Contains(actionName));
    if (action == null) return;
    CurrentSearch = new Search { ActionName = actionName, ParamValue = paramValue, Indexes = new List<int>(indexes) };
    var obj = await DoAction(paramValue, action);
    Save(obj);
}
After creating the actions, the code will check to see if the user wants to do an action. If not, the method is finished - and returns. The property ActionName contains a shortened version of the action name.
Next, the code will look up the correct action -quit if it finds nothing - or continue by setting the CurrentSearch property on an object of Search with the parameters to OnGet() saved. Then it will perform the action and get an object with all the values back. The object is saved and all of its values are shown in the view using reflection.
Go to index.cshtml and switch <table class="values"></table> to this:
<table class="values">
    @foreach (var prop in Model.SimpleProps ?? Enumerable.Empty<PropertyInfo>())
    {
        var value = Model.GetValue(prop);
        <tr>
            <th>@prop.Name</th>
            <td class="content">@value</td>
        </tr>
    }
</table>

@if (Model.CollectionProps != null && Model.CollectionProps.Length > 0)
{
    for (var index = 0; index < Model.CollectionProps.Length; index++)
    {
        var prop = Model.CollectionProps[index];
        <h4>@prop.Name</h4>
        var collectionCount = Model.GetCollectionCount(prop, index);
        var collection = Model.GetCollectionElement(prop, index);

        var props = collection.GetType().GetProperties().Where(p => !p.PropertyType.Name.Contains("Collection"));
        var collectionNo = Model.CurrentSearch?.GetCollectionNo(index + 1);

        <span>Showing #@collectionNo of @collectionCount</span>
        @if (collectionNo > 1)
        {
            @Html.ActionLink("Previous", "", Model.CurrentSearch.GetParamsObj(-1, index + 1));
        }
        <span></span>
        @if (collectionNo < collectionCount)
        {
            @Html.ActionLink("Next", "", Model.CurrentSearch.GetParamsObj(1, index + 1));
        }

        <table class="values">
            @foreach (var collProp in props)
            {
                var value = collProp.GetValue(collection)?.ToString();

                <tr>
                    <td>@collProp.Name</td>
                    <td class="content">@value</td>
                </tr>
            }
        </table>
    }
}
The code will make a simple HTML table with one column for labels and one for values. Collection properties are treated separately. Only one item from each collection is shown, and the int[] indexes property in CurrentSearch specifies which index to show for each collection. The collections all get buttons for next and previous.
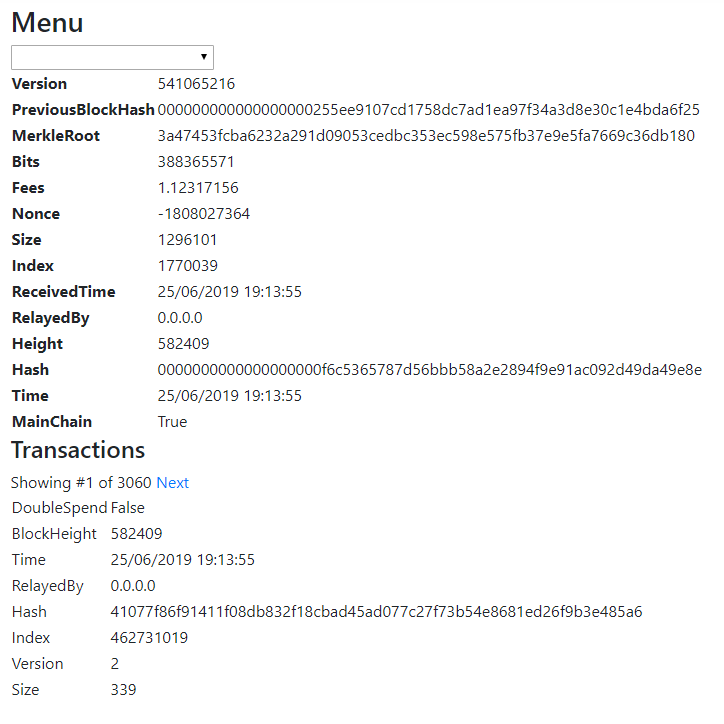
You can now run the application again and start exploring the blockchain API. LatestBlock is nice to start with, since it doesn’t require any parameters. Start the application, open the drop-down below the menu-header, and select LatestBlock. Then click the button that appears, Get Latest Block. After running it, it should look something like this:
Learn More About C# and ASP.NET Core
Interested in learning more about ASP.NET Core, JWTs, or building secure applications with Okta? Check out our Product Documentation or any of these great resources:
- Decode JWTs in C# for Authorization Build a CRUD App with ASP.NET Core and SQL Server
- Add Login to Your ASP.NET Core MVC App
- Use Firebase with Your ASP.NET MVC App
As always, if you have any questions please comment below. Never miss out on any of our awesome content by following us on Twitter and liking us on Facebook!
Okta Developer Blog Comment Policy
We welcome relevant and respectful comments. Off-topic comments may be removed.