On this page
Configure an SSF receiver and publish a SET
Configure security events providers in Okta that represent your third-party providers, enabling continuous sharing of security information with Okta to mitigate security threats.
Learning outcome
Understand how to configure a security events provider in Okta to receive transmitted signals from published security event tokens (SET). Then, create a SET and test sending it to Okta.
What you need
- Okta Integrator Free Plan org (opens new window)
- Your configured Okta org with the Identity Threat Protection feature enabled. Contact your Okta customer support representative to enable this feature.
About third-party security events
Okta uses the Shared Signals Framework (SSF) (opens new window) standard to ingest security-related events and other data-subject signals from third-party provider apps that support the same framework.
You can use the Okta SSF Receiver API (opens new window) to register third-party providers in Okta. This enables Okta to receive security signals from provider apps using the SSF. The SSF helps create a network between your third-party security vendor apps, continuously sharing security information with Okta. This helps prevent security threats to your users.
Security event tokens
Registered third-party providers use the SSF Security Event Tokens API (opens new window) to send security signals to Okta in the form of security event tokens (SET).
Terminology
Third-party vendors that send signals are considered "transmitters." Okta is the "receiver," and the connection between the two entities is referred to as a "stream."
Events
After Okta successfully receives the security events, you can access them from the System Log. These signals are reported as entity risk detection (user.risk.detect) events.
The user.risk.detect event is triggered when Okta detects that a user is associated with risk activity or context. This event is used by the entity risk policy (opens new window) to configure actions using Workflows or Universal Logout. These actions ensure that interactions with threat surfaces outside the scope of identity inform entity risk (opens new window). Threat surfaces outside the scope of identity include activity on a device, on the network, within an app, or with data.
Okta also publishes the received SSF and Continuous Access Evaluation Profile (CAEP) event encapsulated in a System Log event called security.events.provider.receive_event. The System Log event is created when an event provider submits a valid SSF security event. It can help org admins debug and monitor partner SSF event submissions. The System Log event contains debug context data about the event provider's risk report to help admins map threats across systems in real time.
Prepare the environment
As a third-party security vendor, you need to create the JSON Web Key Set (JWKS) and have the public keys accessible from your public URL.
Create and upload the JWKS
When you generate the JWKS, ensure that the protocol you specify in the header is RS256 and that the content-type header is application/json.
Note: This URL (opens new window) provides an example of public keys.
Use this simple JSON Web Key generator (opens new window) to generate a JWKS public/private key pair for testing purposes only with this guide. In production, generate and store private keys in accordance with your security policies.
Specify the following values in the JWKS tool to generate the key pair on the RSA tab:
- Key Size: 2048
- Key Use: Signature
- Algorithm: RS256
- Key ID: SHA-256
- Show X.509: No
Click Generate.
Copy the public and private key pair JSON value to a file. This JSON value is required to sign security event messages.
Copy the public key JSON value to a file.
Serve the public key file from an arbitrary location, and then link to it from a directory listing served at your JWKS URI (a public URL that contains your public keys, for example,
https://example.provider.com/.well-known/ssf-configuration). Ensure that thecontent-typeof the JWKS URI isapplication/json.
JWKS URI content example
{
  "keys": [
    {
        "kty": "RSA",
        "e": "AQAB",
        "use": "sig",
        "kid": "NhIpAobkW_7CfLFA2d1UUB8odnWbZMebCR8dm-O6aMM",
        "alg": "RS256",
        "n": "pqEM9uy9rPs6M8E3zGqnSjdgHRYj9pZ2LCb0sRzpg2r1BItPXknLPmrcVI0K4a84FpDRRoOc5zV-YILYIPA8JdAnazQiiGHfzzrNsTfcT-iD45-4Fb7tyuU2KQdwwZpP0FfWNcILgbdJbYdjfPM7AuKg3zok7xzZnk-wTJkGzdcya-0X5jX4hKl48hm8506CBep6fKhwZbjMXTt3R2bm-zqxYqjC5dXawx0ICniRnZyzNscmO6e3SYd0WDB-etQTHehbj1r0v6NOVZBWwsQEMP7_WZoUUS02mOODYSh-TI-deJ3Aw61iG5rKsQDgOZzGy2ZazyXJGhhfngGgzL4xfw"
    }
  ]
}
Vendors with published well-known URLs
Okta supports two types of stream configurations:
- SSF-compliant providers with published well-known URLs
- Providers that use the issuer and JWKS combination (not SSF-compliant)
Upload a file to the well-known URL
If you want to configure an SSE-compliant provider, you need to have a published well-known URL, such as https://example.provider.com/.well-known/ssf-configuration. Upload a file with the issuer and JWKS URI information to your well-known URL.
Note: Use this well-known URL when you configure the security events provider that represents you in Okta.
Eample JWKS URI parameters
The jwks_uri value is the location of the JWKS Public Key JSON value file that you created. Ensure that the content-type of the file is application/json.
{
  "issuer": "https://issuer.com",
  "jwks_uri": "https://www.issuer.com/jwks"
}
Vendors that use an issuer/JWKS combination
If you don’t have a well-known URL, include your issuer and JWKS URI information in the POST request to configure the security events provider.
Configure the Postman environment
Use the Okta Configure SSF receiver and publish SET Postman Collection to create a security events provider.
Import the Okta Configure SSF receiver and publish SET Postman Collection (opens new window) into your Postman Workspace:
- Click the ellipses next to the collection name in the left panel.
- Click More > Export, and then click Export JSON. You can then import the collection into your Postman Workspace.
Create your test Postman environment with the following variable values:
Note: On the Body tab, you can replace the name parameter with your chosen provider name.
Variable Type Value description apiKey default The API token to secure your requests to Okta. An Okta admin needs to create the API token from your Okta org. See Create an API token. appType default The app type of the security events provider. For example, Google. This value can be any string with a maximum of 255 characters. url default Your Okta org domain. For example: https://dev-60635521.okta.com issuerURL default The issuer string for the provider. For example: https://transmitter.provider.com jwksUrl default The public URL where the JWKS public key was uploaded. For example: https://example.provider.com/jwks wellKnownConfigurationUrl default (Optional) The published well-known URL for SSF-compliant providers. For example: https://example.provider.com/.well-known/ssf-configuration
Configure a security events provider
The Okta SSF Receiver API (opens new window) provides operations to manage the stream configurations of your third-party security vendors (transmitter) and Okta (receiver).
As an Okta admin, use this API to configure Okta as a shared signal receiver, by creating a security events provider object in Okta. This allows Okta to receive security-related events from a security vendor’s apps.
Security events providers configured in Okta specify the secure endpoints from where Okta can receive signals. Okta supports SSE-compliant providers with published well-known URLs, and non-SSE-compliant providers who can provide their issuer and JWKS information.
Set up this integration by gathering either the published well-known URL or an issuer-and-JWKS combination from the vendor that sends the signals to Okta. After you configure the stream using the API, Okta can ingest the risk signals as events.
Create the security events provider
Note: Before you perform the operation requests in this section, ensure that you've followed the steps in the Configure the Postman environment section.
Use the APIs in the Okta admin tasks - SSF Receiver API folder of the Postman Collection to perform the following provider operation.
Note: To use the Admin Console to configure a security events provider, see Configure a Shared Signal Receiver (opens new window).
The following is an example of the POST request to create a security events provider:
POST /api/v1/security-events-providers
- For non-SSF-compliant providers, use the Create a security events provider (Issuer/JWKS) Postman request.
- For SSF-compliant providers, use the Create a security events provider (well-known URL) Postman request.
Note: The parameters in the request body are different for these two Postman requests.
The created provider JSON properties are returned in the response. Save the provider id property value as the providerId variable in your Postman environment. The value is used in other operations.
Other SSF Receiver API lifecycle tasks
Use the other Postman requests in the Okta admin tasks - SSF Receiver API folder to perform the following operations:
| API operation | Request action | Comments |
|---|---|---|
| List all security events providers | Lists all the providers | |
| Retrieve the security events provider | Retrieve a specific provider using the | |
| Update a security events provider | Updates provider properties | The PUT operation replaces all the editable properties for the object, therefore, you must specify all the object properties in the body parameter JSON. Suggestion: Make a request to retrieve the security events provider first and copy the JSON body response to use in your PUT request. |
| Deactivate a security events provider | Deactivates the provider with the ability to receive security events | In this state, the provider exists in the org, but Okta accepts no security events sent from the associated third-party provider. |
| Delete a security events provider | Deletes the security events provider object using the | Verify that the object is deleted by making a Retrieve security events providers request. Check that the object isn’t returned in the response. |
Send security events
The SSF Security Event Tokens API allows you, the third-party security vendor, to send risk signals to the Okta Risk Engine for aggregated notification. Risk signals are ingested as security event tokens (SETs), a type of JSON Web Token (JWT) that must comply with the SET standard: RFC 8417 - Security Event Token (SET) (opens new window).
As a vendor, use the Third-party security vendor tasks - SSF Security Events Token API Postman folder to test sending security events to your Okta org. The following process shows you how to create a sample SET (to indicate an IP change signal), and then send that SET to Okta.
Create a SET for testing
Use the jwt.io (opens new window) tool to create the sample identifier-changed SET in the form of a JWT.
Note: Use jwt.io (opens new window) for testing purposes only. Don’t use this tool in a production environment.
Go to jwt.io (opens new window).
Select RS256 from the Algorithm dropdown menu.
In the Decoded section, specify the following JSON value in the HEADER field:
{
  "kid": "_iJ225CYSuXQpgL3v2jmJJHPtYwZ9EKhIbpx4DGksVU",
  "typ": "secevent+jwt",
  "alg": "RS256"
}
Replace the
kidvalue with the value that you created in Create and upload the JWKS.Specify a JSON value, similar to the following in the PAYLOAD field:
Example: user risk change
{
  "iss": "https://issuer.com",
  "jti": "24c63fb56e5a2d77a6b512616ca9fa24",
  "iat": 1615305159,
  "aud": "https://customer.okta.com/",
  "https://schemas.okta.com/secevent/okta/event-type/user-risk-change": {
    "subject": {
      "user": {
        "format": "email",
        "email": "user@issuer.com"
      }
    },
    "event_timestamp": 1750980770,
    "initiating_entity": "admin",
    "reason_admin": {
      "en": "critical security activity detected"
    },
    "reason_user": {
      "en": "critical security activity detected"
    },
    "previous_level": "low",
    "current_level": "high"
  }
}
Example: identifier changed
{
    "iss": "https://issuer.com",
    "jti": "24c63fb56e5a2d77a6b512616ca9fa24",
    "iat": 1615305159,
    "aud": "https://customer.okta.com/",
    "events": {   "https://schemas.openid.net/secevent/risc/event-type/identifier-changed": {
            "subject": {
                "user": {
                    "format": "email",
                    "email": "john@doe.net"
                }
            },
            "new-value": "john.roe@example.com",
            "event_timestamp": 1615304991643
        }
    }
}
Payload claim details:
- The
audvalue must be your Okta org. For example,https://customer.okta.com. - The
emailin theusersection must match a valid user sign-in email in the Okta org. If the email isn’t valid, then the accepted event is silently ignored and doesn't appear in the System Log. - The
issvalue must be the same issuer used to create the Security Events Provider object in Okta. - The
jtivalue must be unique to the current message. If you send two messages with the samejtivalue, then the second message is ignored and doesn't in the System Log.
Note: See the SSF Security Event Tokens API (opens new window) for more details about allowed events and claims.
In the VERIFY SIGNATURE section:
- Paste the public key in the first text field. This is the Public Key JSON value you created and saved in Create and upload the JWKS.
- Paste the public-private key pair in the second text field. This is the Public and Private Key Pair JSON value you created and saved in Create and upload the JWKS.
The encoded 64-bit token appears in the Encoded section. The following example is truncated:
eyJraWQiOiJfaUoyMjVDWVN1WFFwZ0wzdjJqbUpKSFB0WXdaOUVLaElicHg0REdrc1ZVIiwidHlwIjoic2VjZXZlbnQrand<br> 0IiwiYWxnIjoiUlMyNTYifQ.eyJpc3MiOiJodHRwczovL3RyYW5zbWl0dGVyLnByb3ZpZGVyLmNvbSIsImp. . . . .zYItKd<br> stUUgaVNHOl5tew3KborjZRKYoTNDrz46Y3mwXNsZeUttSTuPSObi5ZdEIuiUfbmMYALwJwbk58ZNUoCmhzVYmixRlE6zG<br> rF-oVtshwHU2vWg5X2MaMiNqurZJeBgn2xcIj5Npjnarz7aEUgYYmSYldkE2lAXE9-Ezrm2hOsQYVDo2mvVQ7D6Dow6sSxROe<br> obH9GnZeC_a13IpZxmiqInqnfdyBrA
- Save the encoded JWT (the SET) in the Encoded section for testing in Postman.
Send a Security Event Token to Okta
Use the SSF Security Event Tokens API to test sending a SET to your org.
From Postman, use the following request to send a SET to your org:
Send Security Events
POST /security/api/v1/security-eventsIn the request Body tab, select
raw.Paste the SET (encoded JWT format) that you created previously from Create a SET for testing.
Click Send.
If the SET message is valid, an HTTP 202 (accepted) code is returned. From the Admin Console, you can see security events in the System Log details as
Partner reported risk.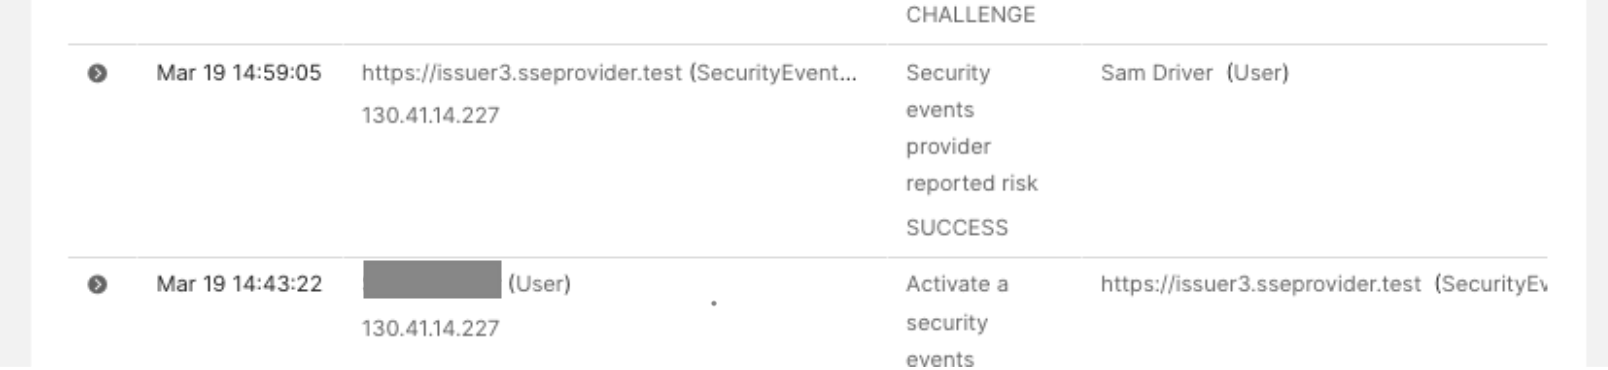
Next steps
Now that you understand how to share signals, you can add signal sending for relevant events to your automation.
A production implementation of the process in this guide differs in the following ways:
- Keypairs are generated with local tooling and private keys are stored in secrets management.
- SETs are created with an appropriate library for the language you're building in, not jwt.io.
- Automation that sends SETs checks the response code and handles errors appropriately.