On this page
Set up Okta app authentication for the MCP server
Create an Okta admin app integration and configure authentication credentials to authorize the Model Context Protocol (MCP) server.
Learning outcomes
- Implement a device authorization grant or private key JWT to authorize the Okta MCP server.
- Get the client ID and security keys for server configuration.
What you need
- An Okta Integrator Free Plan org (opens new window) with admin permissions.
- An Okta admin role with the appropriate permissions. See Learn about administrators (opens new window).
Overview
This guide explains how to create an Okta admin app integration and generate the authentication credentials for the Okta MCP server to interact with your Okta org.
Authenticate and authorize the Okta MCP server
To connect the Okta MCP server to an Okta org, create an Okta app integration and grant the required API scopes. Choose the method that fits your use case:
- Device authorization grant (browser-based): Use for interactive tasks and local development.
- Private key JWT (browserless): Use for automation, CI/CD pipelines, and headless environments.
Method 1: Device authorization grant (browser-based)
Create the native app integration
- Sign in to the Okta Integrator Free Plan org (opens new window).
- In the Admin Console, go to Applications > Applications.
- Click Create App Integration.
- Select OIDC - OpenID Connect as the sign-in method.
- Select Native Application as the app type.
- Click Next.
- Enter an App integration name, such as "Okta MCP Server".
- In Grant type, select Device Authorization.
- Configure the redirect URIs:
- Sign-in redirect URIs:
com.oktapreview.{yourOktaDomain}:/callback - Sign-out redirect URIs:
com.okta.{yourOktaDomain}:/
- Sign-in redirect URIs:
- Select Allow everyone in your organization to access in the Assignments section. For this use case, grant everyone access to the app.
- Click Save.
Now that you've configured the app integration, grant the required API scopes.
Grant Okta API scopes for native app
After you create the app, follow these steps to grant the required API scopes:
In the Admin Console, go to Applications > Applications and locate the MCP server app.
Select the Okta API Scopes tab.
Click Grant for the required API scopes based on requirements, such as
okta.users.read,okta.groups.manage, orokta.logs.read.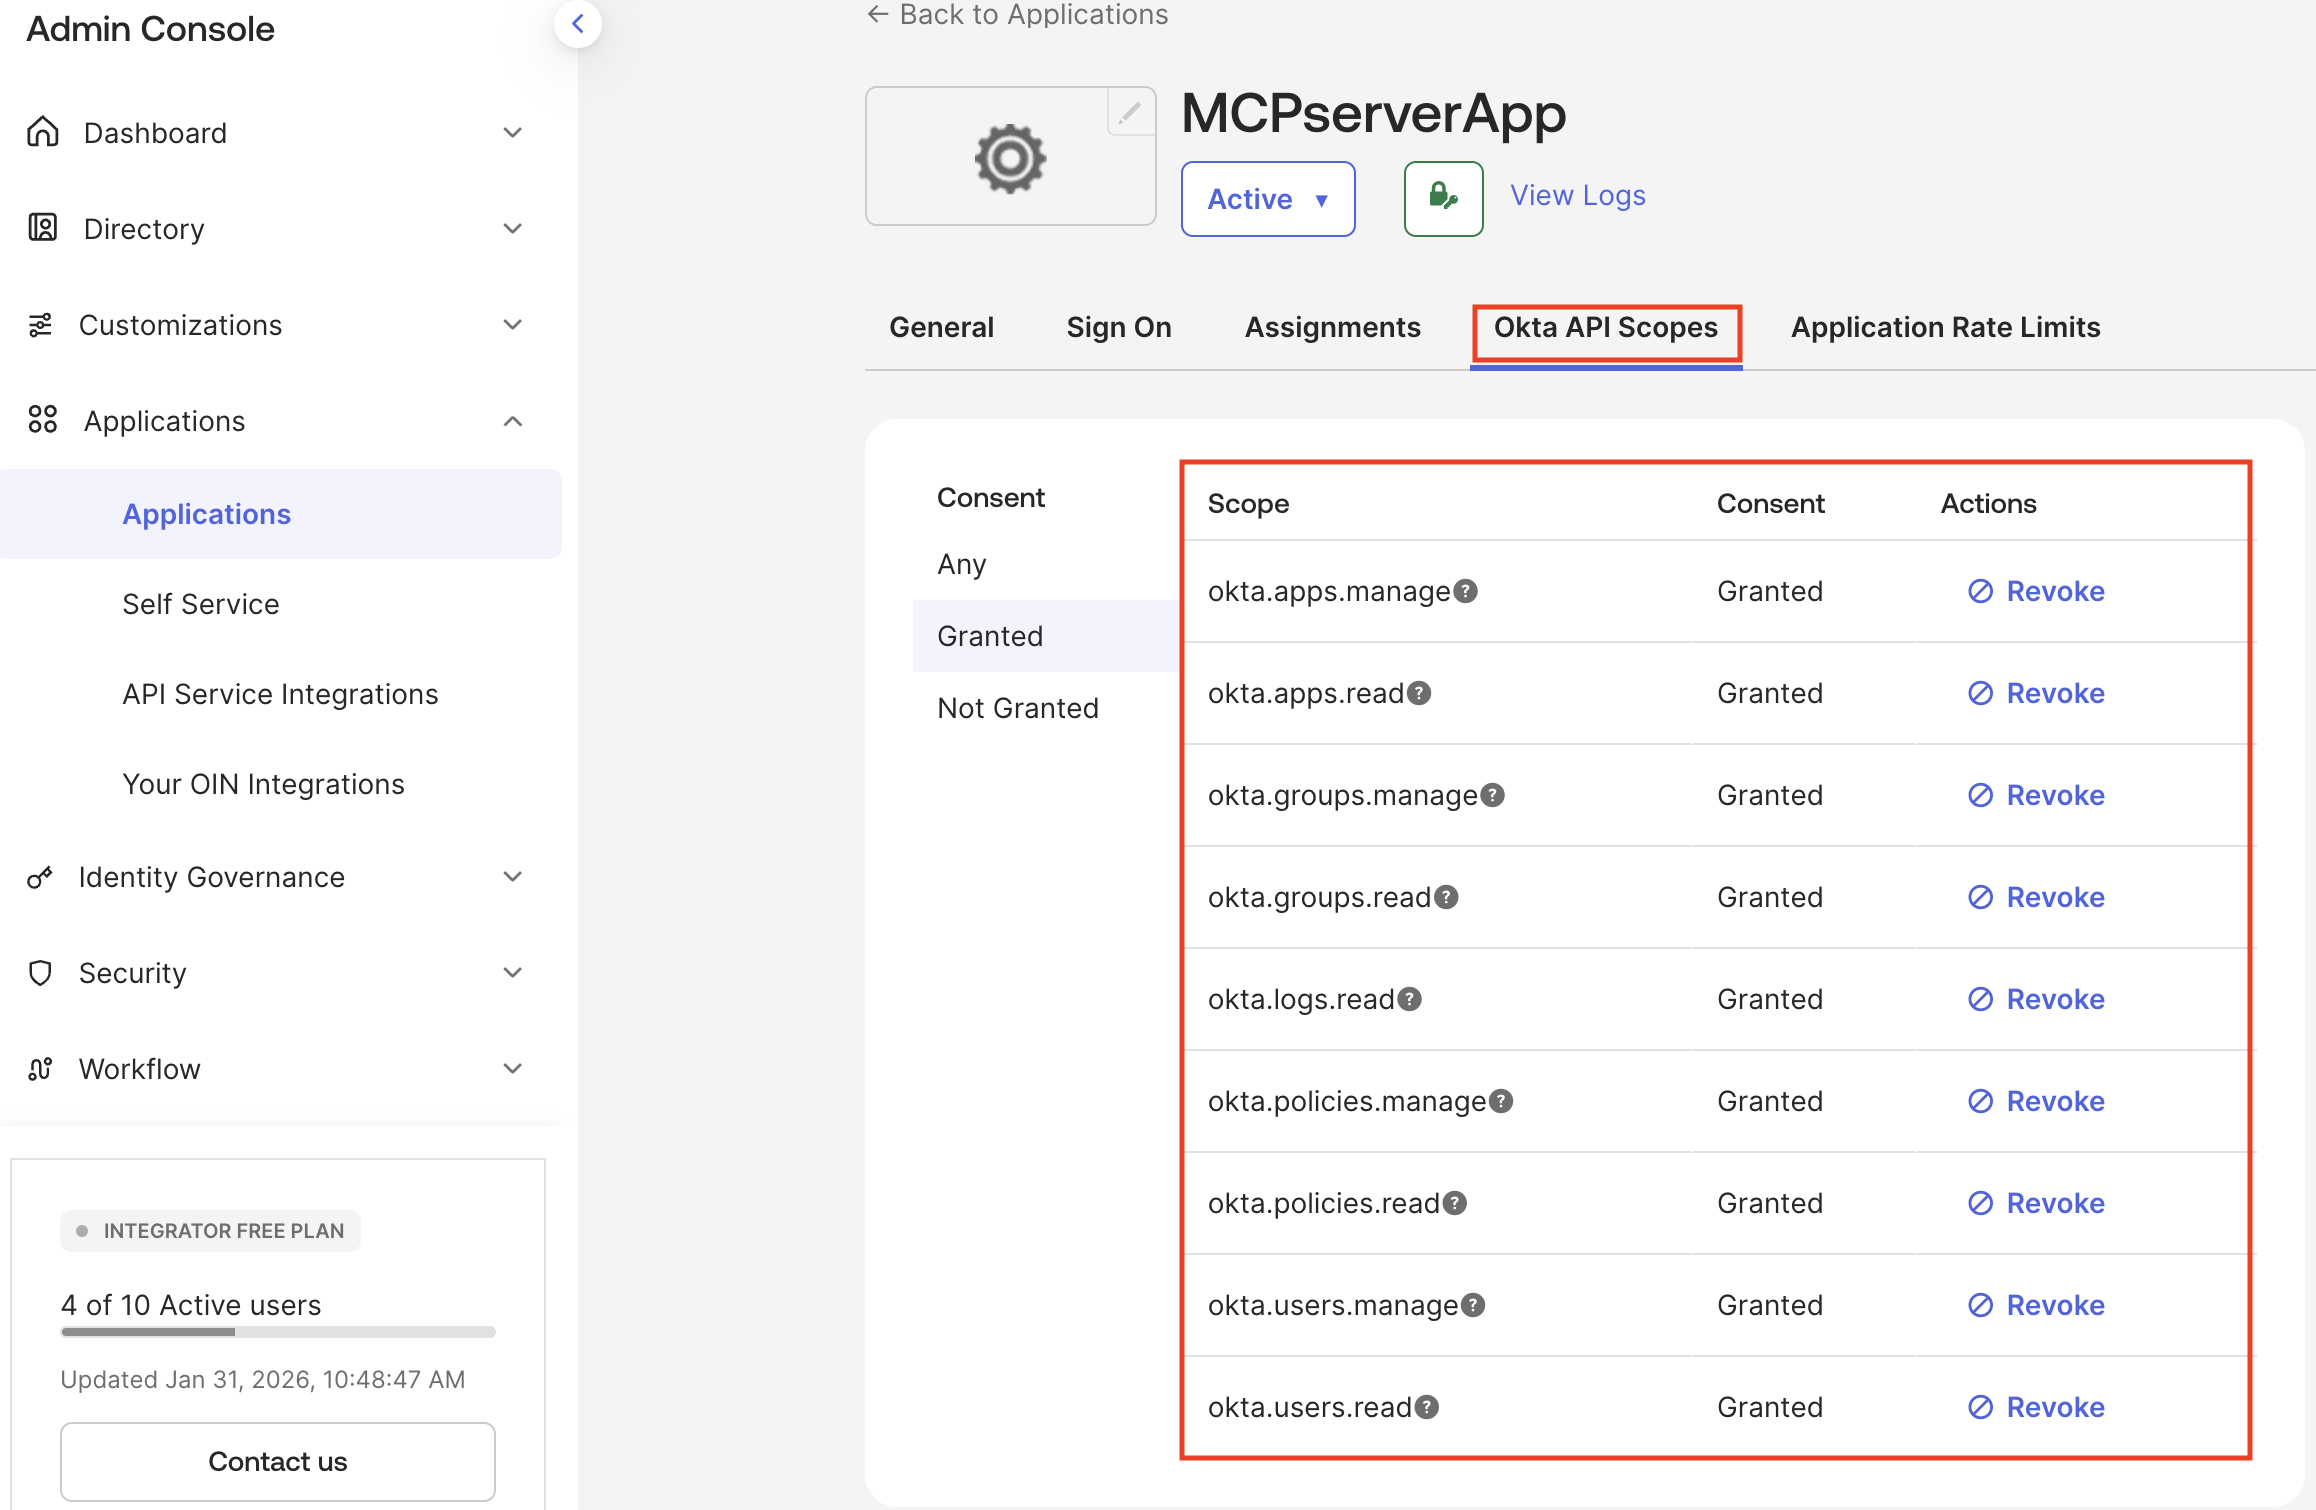
Go to the General tab and copy the Client ID and Sign-in redirect URIs.
Note: Save these values to configure your Okta MCP server (See Okta Device Authorization Grant Guide).
Method 2: Private key JWT (browserless)
The private key JWT flow allows the Okta MCP server to run without human intervention, which is effective for CI/CD pipelines or backend services. The server authenticates using a cryptographic key pair instead of a browser-based login.
Create an API service app integration
- Sign in to the Okta Integrator Free Plan org (opens new window).
- In the Admin Console, go to Applications > Applications.
- Click Create App Integration.
- Select API Services as the Sign-in method.
- Click Next.
- Enter an App integration name, such as "Okta MCP server automation".
- Click Save.
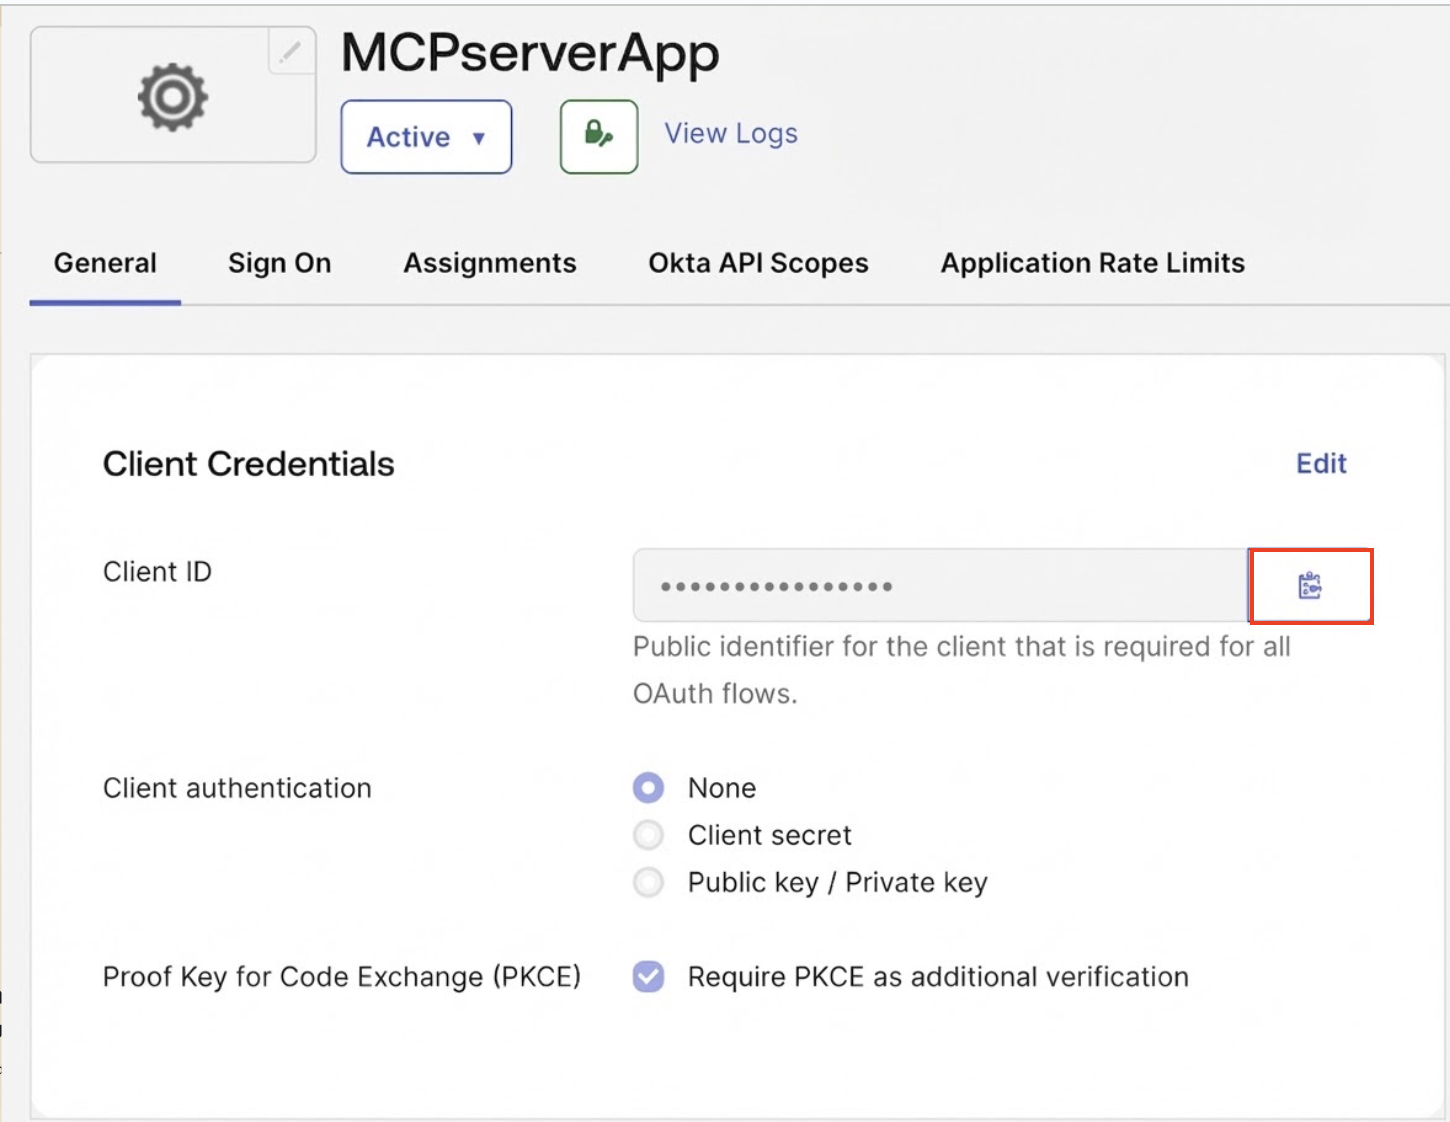
Configure client authentication
- In the Client Credentials section, click Edit.
- Select Public key / Private key.
- In the Public keys section, click Edit.
- In Public keys > Configuration, select Save keys in Okta.
- Click Add key.
- In the Public Keys section, click Add Key. The Add a public key dialog opens.
Generate or add a public key
You can either generate the key in Okta (recommended) and copy it in PEM format, or upload your own keys:
Option A: Generate a key in Okta (recommended)
In the Public Keys section, click Add key.
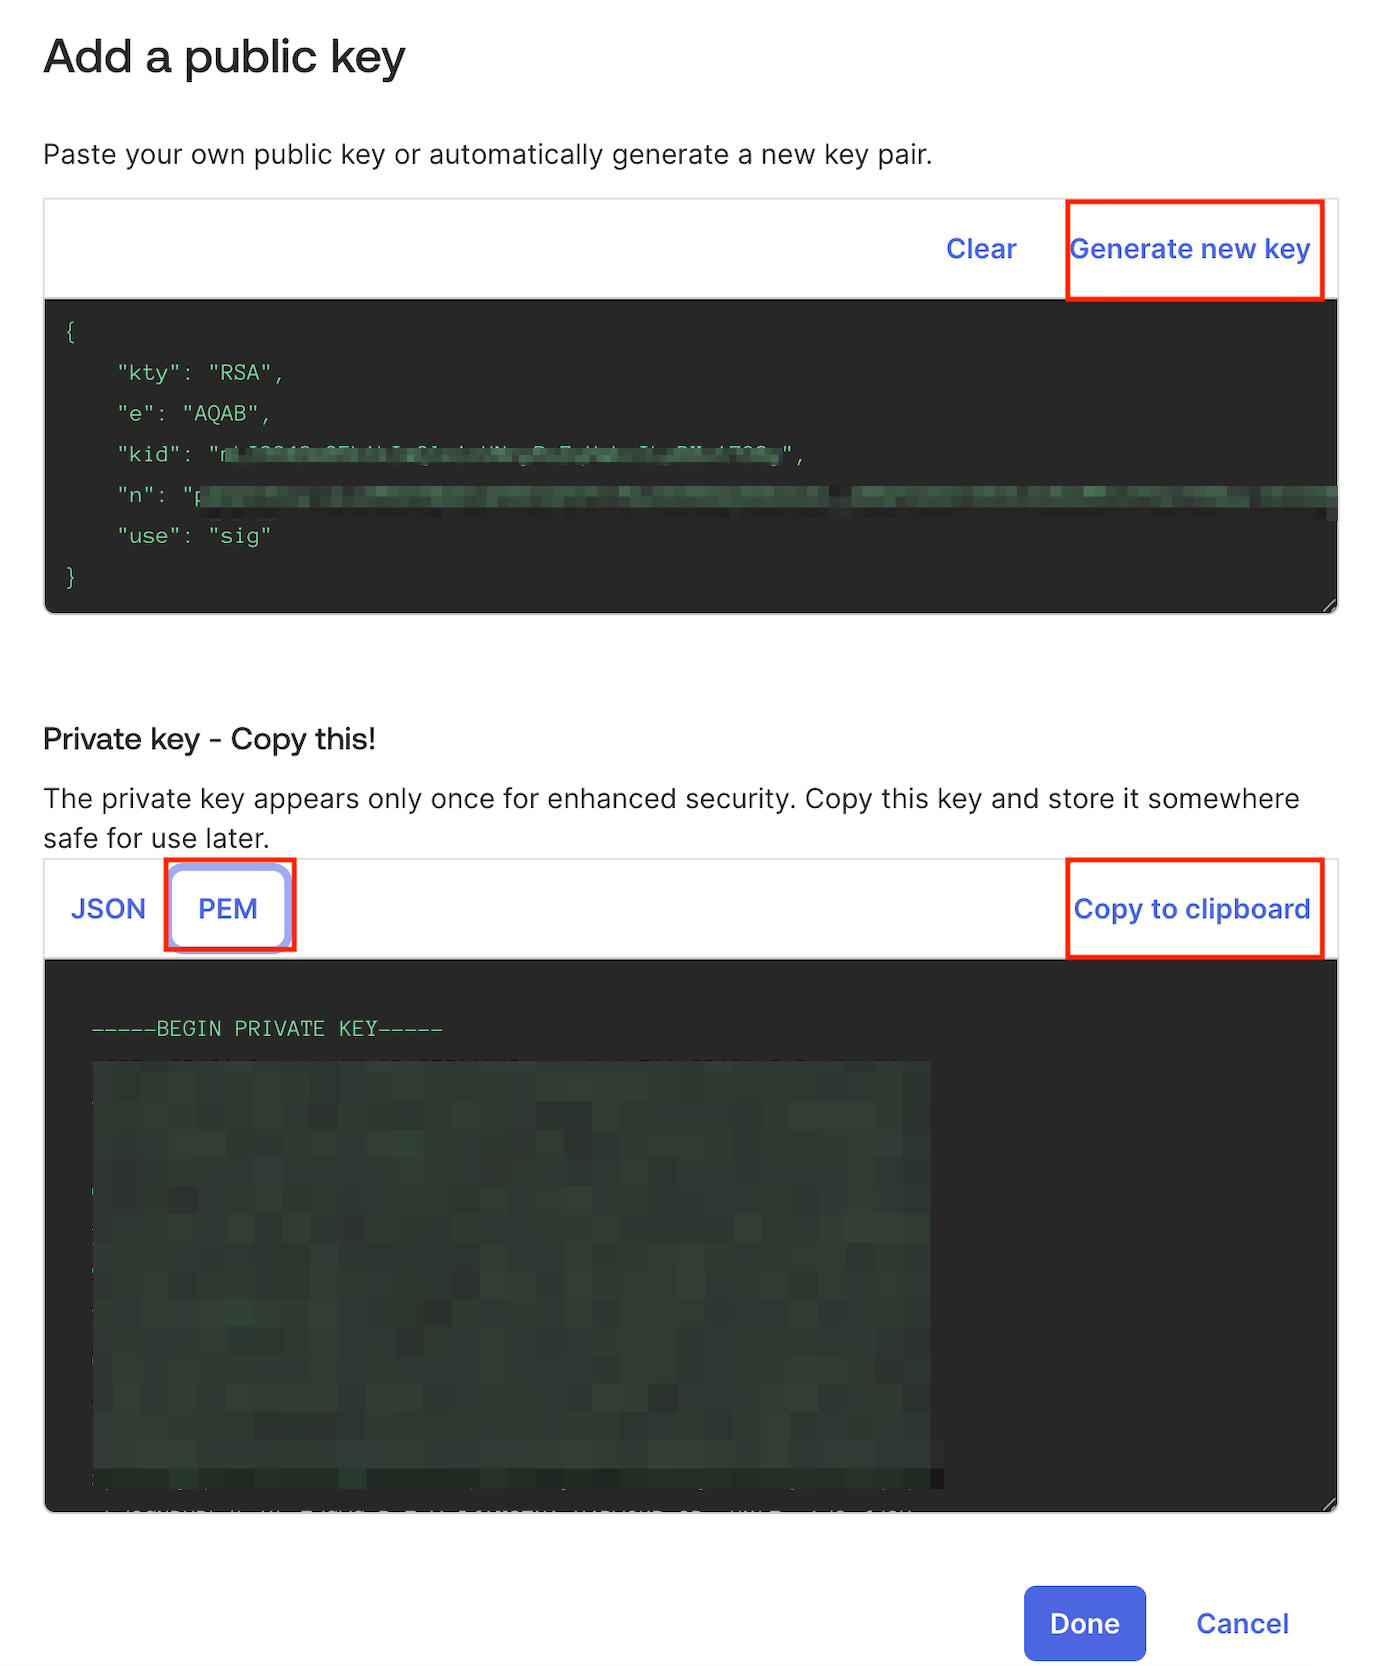
In the dialog, select Generate new key.
Select the PEM format and click Copy to clipboard.
Click Done.
In Client Credentials, copy the Client ID.
In Public keys, copy the Key ID (KID) displayed.
Click Save.
Important: Store the private key securely as you cannot retrieve it later.
In General Settings, click Edit.
Disable Require Demonstrating Proof of Possession (DPoP) header in token requests.
Click Save.
Option B: Use a local key
Generate a 2048-bit RSA private key locally:
openssl genpkey -algorithm RSA -out private.pem -pkeyopt rsa_keygen_bits:2048Extract the public key from the private key:
openssl rsa -in private.pem -pubout -out public.pemIn the Public Keys section, click Add key and paste the contents of your public key (
public.pem) into the dialog.Click Save.
Copy the Key ID (KID) displayed for the added key.
Okta API scopes and admin role
- Go to the Okta API Scopes tab and grant the required API scopes.
- Go to the Admin roles tab, and click Edit assignments.
- Select an admin role (see Learn about administrators (opens new window)) and click Save changes.
- Go to the General tab and copy the Client ID.
You've created an app integration, configured the authentication flow, and granted the required API scopes for your Okta MCP server.
Next Steps
Configure, start, and test the Okta MCP server to connect the local environment to your org.