On this page
Spring Security SAML
This guide describes how to use Spring Security SAML to add support for Okta to Java applications that use Spring Boot.
DeprecatedNote: Okta strongly recommends that you use OpenID Connect rather than SAML. See What's the difference between OAuth, OpenID Connect, and SAML (opens new window).
Learning outcomes
- Install and configure an Okta SAML application
What you need
- SDKMAN (opens new window) installed (for Java 17)
Create an Okta app integration for your SAML app
An application integration represents your app in your Okta org. To create an app integration for a SAML app:
- Open the Admin Console for your org.
- Choose Applications > Applications.
- Click Create App Integration.
- Select SAML 2.0 as the Sign-in method, and then click Next.
- Give your application name, for example "Spring Boot SAML", and then click Next.
- On the Configure SAML page
- Set Single sign-on URL to a URL that is appropriate for your app. For example
http://localhost:8080/login/saml2/sso/okta - Verify that Use this for Recipient URLs and Destination URLs is checked.
- Set Audience URI to a URL that is appropriate for your app. For example
http://localhost:8080/saml2/service-provider-metadata/okta
- Set Single sign-on URL to a URL that is appropriate for your app. For example
- Click Next.
- Set Are you a customer or a partner? to I'm an Okta customer adding an internal app.
- Set App type to This is an internal app that we have created.
- Click Finish.
Okta will create your app and redirect you to its Sign On tab. Continue the required setup:
- Locate the SAML Signing Certificates section.
- Locate the entry for SHA-2, and then select Actions > View IdP metadata.
- Copy the URL for the resulting link to your clipboard. It will look like
https://${yourOktaDomain}/app/<random-characters>/sso/saml/metadata. - Choose the Assignments tab, and then select Assign > Assign to Groups.
- Locate the entry for Everyone and click Assign.
- Click Done.
Create a Spring Boot app with SAML support
Spring Boot 3 requires Java 17. Install it with SDKMAN:
sdk install java 17-openCreate a brand-new Spring Boot app using start.spring.io (opens new window). Select the following options:
- Project: Gradle
- Spring Boot: 3.0.0 (SNAPSHOT)
- Dependencies: Spring Web, Spring Security, Thymeleaf
You can also use this URL (opens new window)
Or use HTTPie (opens new window):
https start.spring.io/starter.zip bootVersion==3.0.0-SNAPSHOT \
  dependencies==web,security,thymeleaf type==gradle-project \
  baseDir==spring-boot-saml | tar -xzvf -
Open the project in your favorite IDE and complete the following steps.
Add
src/main/java/com/example/demo/HomeController.javato populate the authenticated user's information.package com.example.demo; import org.springframework.security.core.annotation.AuthenticationPrincipal; import org.springframework.security.saml2.provider.service.authentication.Saml2AuthenticatedPrincipal; import org.springframework.stereotype.Controller; import org.springframework.ui.Model; import org.springframework.web.bind.annotation.RequestMapping; @Controller public class HomeController { @RequestMapping("/") public String home(@AuthenticationPrincipal Saml2AuthenticatedPrincipal principal, Model model) { model.addAttribute("name", principal.getName()); model.addAttribute("emailAddress", principal.getFirstAttribute("email")); model.addAttribute("userAttributes", principal.getAttributes()); return "home"; } }Create a
src/main/resources/templates/home.htmlfile to render the user's information.<!DOCTYPE html> <html xmlns="http://www.w3.org/1999/xhtml" xmlns:th="https://www.thymeleaf.org" xmlns:sec="https://www.thymeleaf.org/thymeleaf-extras-springsecurity6"> <head> <title>Spring Boot and SAML</title> <meta http-equiv="Content-Type" content="text/html; charset=UTF-8"/> </head> <body> <h1>Welcome</h1> <p>You are successfully signed in as <span sec:authentication="name"></span></p> <p>Your email address is <span th:text="${emailAddress}"></span>.</p> <p>Your authorities are <span sec:authentication="authorities"></span>.</p> <h2>All Your Attributes</h2> <dl th:each="userAttribute : ${userAttributes}"> <dt th:text="${userAttribute.key}"></dt> <dd th:text="${userAttribute.value}"></dd> </dl> <form th:action="@{/logout}" method="post"> <button id="signout" type="submit">Sign out</button> </form> </body> </html>Create a
src/main/resources/application.ymlfile to contain the metadata URI you copied to your clipboard earlier.spring: security: saml2: relyingparty: registration: okta: assertingparty: metadata-uri: <your-metadata-uri>
Run the app and authenticate
Run your Spring Boot app. You can do this from your IDE, or as follows using the command line:
./gradlew bootRunOpen
http://localhost:8080in your favorite browser and sign in with a user account set up in your org. You should see a successful result in your browser.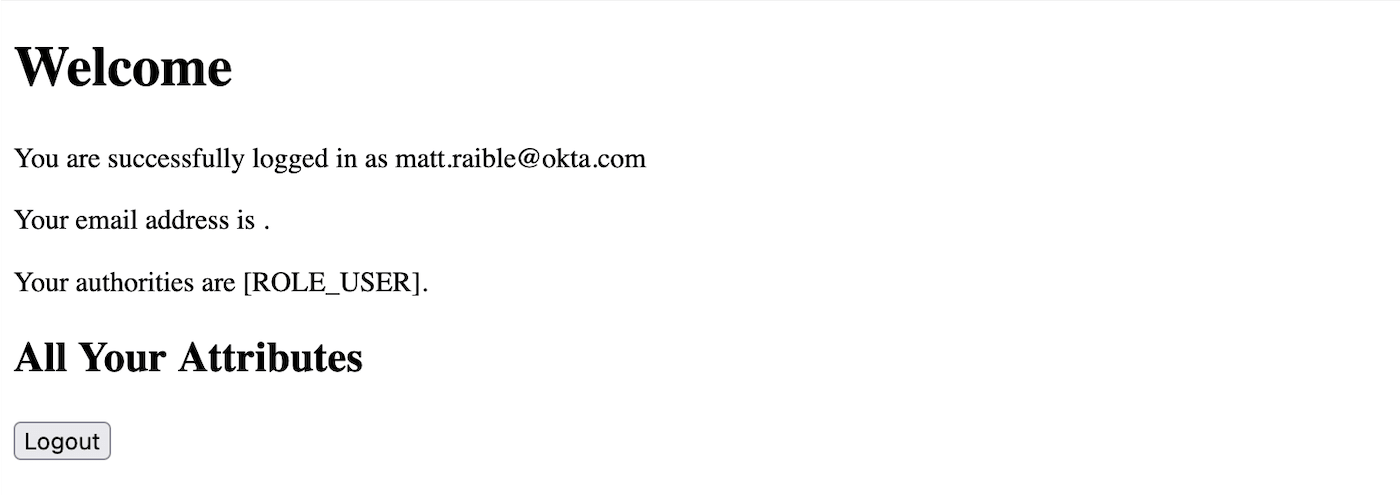
If you try to sign out, it won't work. You'll fix that in the next section.
Add a sign-out feature
Spring Security's SAML support has a sign-out feature (opens new window) that requires a private key and certificate. To use it, you'll need to:
Create a private key and certificate to sign the outgoing sign-out request using OpenSSL.
openssl req -newkey rsa:2048 -nodes -keyout local.key -x509 -days 365 -out local.crtCopy the generated
local.crtandlocal.keyfiles to your app'ssrc/main/resourcesdirectory.Update the
signingandsinglelogoutfields inapplication.ymlto refer to the new certificate files:spring: security: saml2: relyingparty: registration: okta: signing: credentials: - private-key-location: classpath:local.key certificate-location: classpath:local.crt singlelogout: binding: POST response-url: "{baseUrl}/logout/saml2/slo" assertingparty: metadata-uri: <your-metadata-uri>Add this certificate to your app integration.
- Open the Admin Console for your org.
- Choose Applications > Applications.
- Click on the name of your SAML app integration.
- Choose the General tab, locate the SAML Settings section, and click Edit.
- Click Next.
- In the SAML Settings section:
- Click Show Advanced Settings.
- Select Allow application to initiate Single Logout for Enable Single Logout.
- Set Single Logout URL to to a URL that is appropriate for your app. For example
http://localhost:8080/logout/saml2/slo - Set SP Issuer to a URL that is appropriate for your app. For example
http://localhost:8080/saml2/service-provider-metadata/okta - Click the Browse button for Signature Certificate, locate the
local.crtfile you created in step 1, and click Upload Certificate. - Click Next.
- Click Finish.
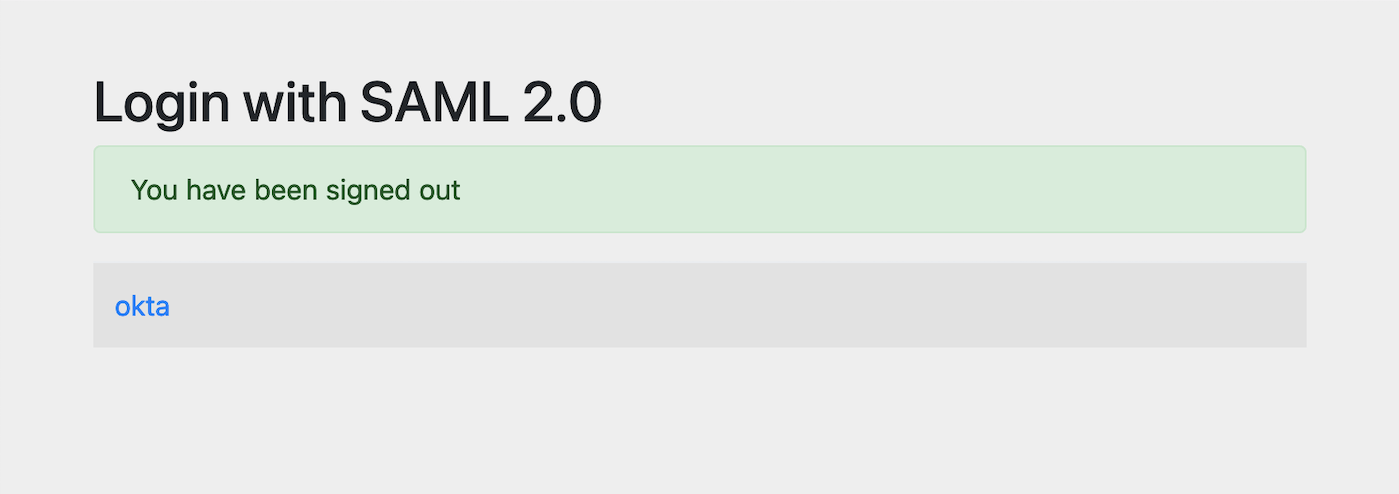
Restart your Spring Boot app, and the button should work.
Customize authorities with Spring Security SAML
When you sign in, the resulting page shows that you have a ROLE_USER authority. However, when you assigned users to the app, you gave access to Everyone. You can configure your SAML app on Okta to send a user's groups as an attribute, and add other attributes like name and email.
Edit your Okta app's SAML settings and fill in the Group Attribute Statements section.
- Name:
groups - Name format:
Unspecified - Filter:
Matches regexand use.*for the value
Just above, you can add other attribute statements. For instance:
Name Name format Value emailUnspecifieduser.emailfirstNameUnspecifieduser.firstNamelastNameUnspecifieduser.lastName- Name:
Save these changes.
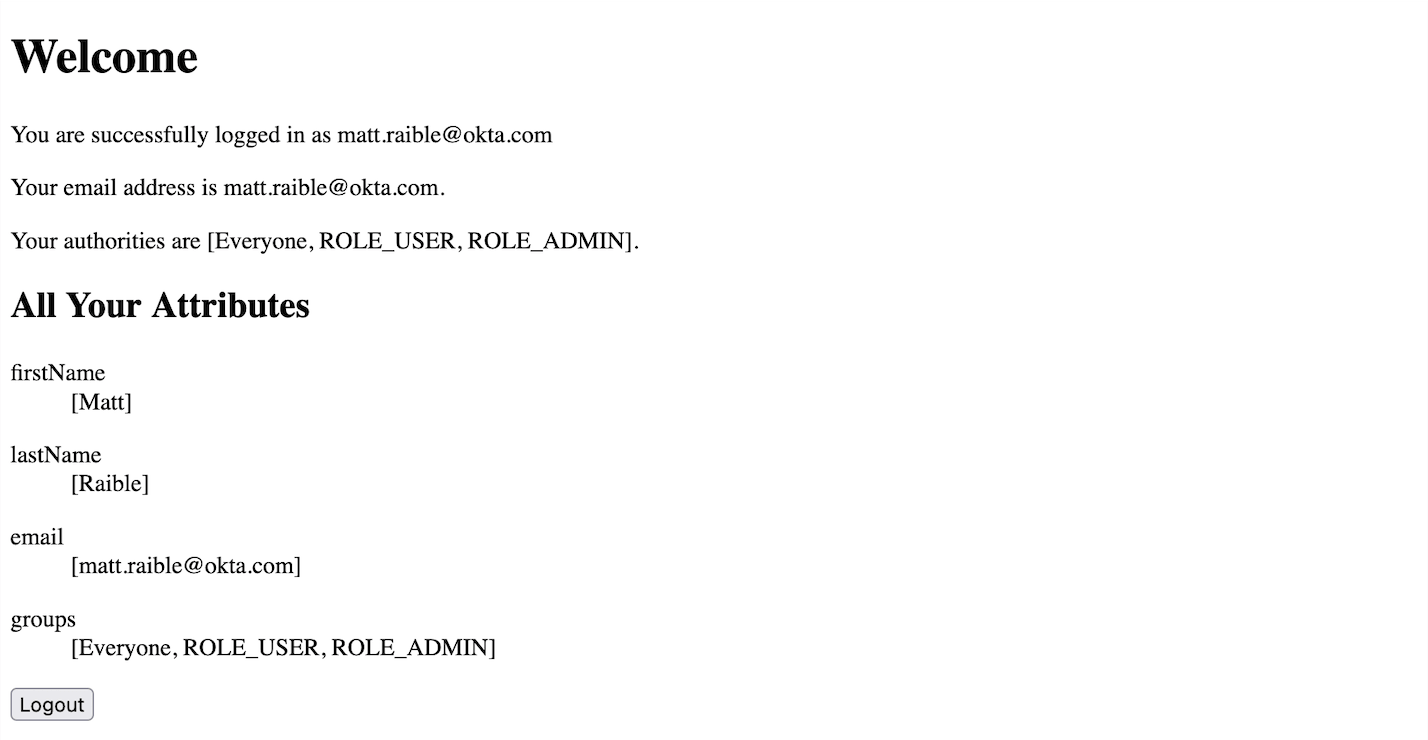
If you cloned the repo earlier, restart your app and sign in to see your user's groups as authorities.
If you created a Spring Boot app from scratch, create a
SecurityConfigurationclass that overrides the default configuration and uses a converter to translate the values in thegroupsattribute into Spring Security authorities.package com.example.demo; import java.util.HashSet; import java.util.List; import java.util.Set; import org.springframework.context.annotation.Bean; import org.springframework.context.annotation.Configuration; import org.springframework.core.convert.converter.Converter; import org.springframework.security.authentication.ProviderManager; import org.springframework.security.config.annotation.web.builders.HttpSecurity; import org.springframework.security.core.GrantedAuthority; import org.springframework.security.core.authority.SimpleGrantedAuthority; import org.springframework.security.saml2.provider.service.authentication.OpenSaml4AuthenticationProvider; import org.springframework.security.saml2.provider.service.authentication.OpenSaml4AuthenticationProvider.ResponseToken; import org.springframework.security.saml2.provider.service.authentication.Saml2AuthenticatedPrincipal; import org.springframework.security.saml2.provider.service.authentication.Saml2Authentication; import org.springframework.security.web.SecurityFilterChain; import static org.springframework.security.config.Customizer.withDefaults; @Configuration public class SecurityConfiguration { @Bean SecurityFilterChain configure(HttpSecurity http) throws Exception { OpenSaml4AuthenticationProvider authenticationProvider = new OpenSaml4AuthenticationProvider(); authenticationProvider.setResponseAuthenticationConverter(groupsConverter()); // @formatter:off http .authorizeHttpRequests(authorize -> authorize .mvcMatchers("/favicon.ico").permitAll() .anyRequest().authenticated() ) .saml2Login(saml2 -> saml2 .authenticationManager(new ProviderManager(authenticationProvider)) ) .saml2Logout(withDefaults()); // @formatter:on return http.build(); } private Converter<OpenSaml4AuthenticationProvider.ResponseToken, Saml2Authentication> groupsConverter() { Converter<ResponseToken, Saml2Authentication> delegate = OpenSaml4AuthenticationProvider.createDefaultResponseAuthenticationConverter(); return (responseToken) -> { Saml2Authentication authentication = delegate.convert(responseToken); Saml2AuthenticatedPrincipal principal = (Saml2AuthenticatedPrincipal) authentication.getPrincipal(); List<String> groups = principal.getAttribute("groups"); Set<GrantedAuthority> authorities = new HashSet<>(); if (groups != null) { groups.stream().map(SimpleGrantedAuthority::new).forEach(authorities::add); } else { authorities.addAll(authentication.getAuthorities()); } return new Saml2Authentication(principal, authentication.getSaml2Response(), authorities); }; } }Modify your
build.gradlefile to force the latest version of Open SAML that works with Spring Security 6.repositories { ... maven { url "https://build.shibboleth.net/nexus/content/repositories/releases/" } } dependencies { constraints { implementation "org.opensaml:opensaml-core:4.1.1" implementation "org.opensaml:opensaml-saml-api:4.1.1" implementation "org.opensaml:opensaml-saml-impl:4.1.1" } ... }Restart your app and sign in. You should see your user's groups listed as authorities.
Deploy with Heroku
After you have Okta working with the generated Spring Security SAML application, the next step is to take the example code and move it to your production environment. The specifics of how this works are different depending on how your application is set up.
One quick way to see this app working in a production environment is to deploy it to Heroku. Install the Heroku CLI (opens new window) and create an account to begin. Then, follow the steps below to prepare and deploy your app.
Create a new app on Heroku using
heroku create.Create a
system.propertiesfile in the root directory of your app to force Java 17:java.runtime.version=17Create a
Procfilethat specifies how to run your app:web: java -Xmx256m -jar build/libs/*.jar --server.port=$PORTCommit your changes:
git add .
git commit -m "Add Heroku configuration"
Set the Gradle task to build your app:
heroku config:set GRADLE_TASK="bootJar"Deploy to production using Git:
git push heroku main
For authentication to work with SAML, you'll need to update your Okta app to use your Heroku app's URL in place of http://localhost:8080, wherever applicable.
Learn More
At this point, you should be familiar with setting up SAML-enabled applications to work with an Okta organization, how to configure Spring Security SAML to work with Okta, and how to deploy the sample app you built on Heroku.
If you want to learn more about configuring SAML and what to consider when writing a SAML application, see the in-depth Okta SAML guidance (opens new window) documentation, which is great place to learn more.