Build an iOS App with Secure Authentication in 20 Minutes
What does it take to build a successful mobile application in today’s ever-changing market? There are (what seems like an infinite) number of design, build, and test cycles performed, just to release your app into the hands of a user.
In essence:
  while Users.love != true {
    Product.design()
    Product.rebuild()
  }
Once completed, the real challenge begins – retaining those users. Mostly that means getting users to log in to your app easily, and then never have to do it again. With Okta, you can effortlessly integrate authentication into your iOS application with the Okta AppAuth SDK.
This post will show you how to add OpenID Connect for user Authentication into your native iOS application, using Swift.
This post also assumes you have the latest version of XCode, along with Swift 3.x+.
- Create a new Xcode project
- Sign-up for a free Okta Developer Edition account
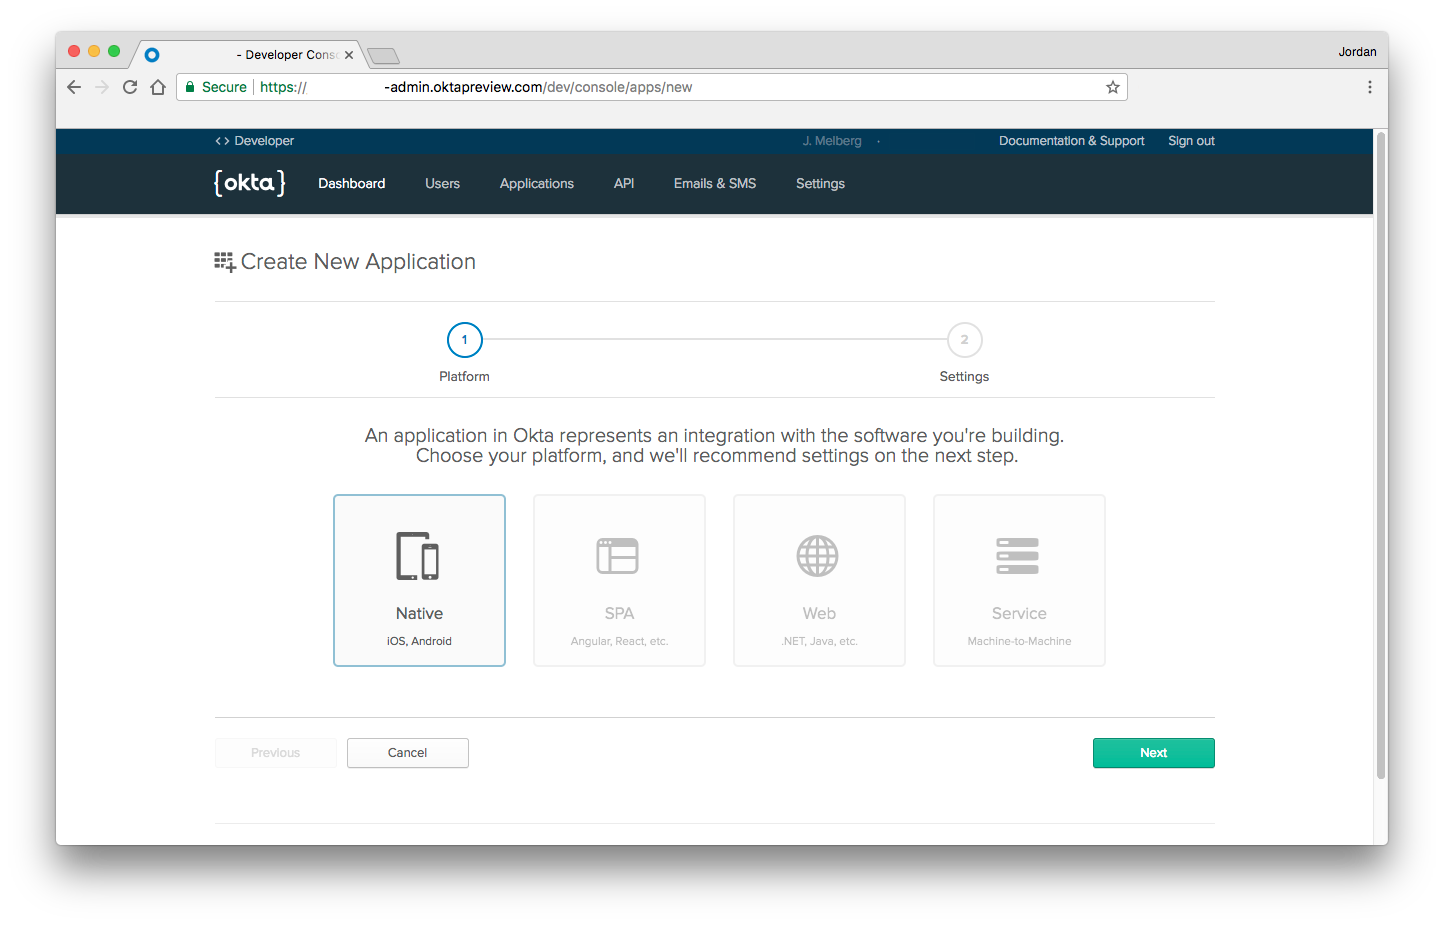
- Log in to your Okta account and select Applications > Add Application > Native
- Update the Grant type allowed to include Refresh Token
- Click Done
- Copy the Login redirect URI and Client ID, as you will need to insert these into your native app configuration
Install the Okta AppAuth SDK
The Okta AppAuth SDK is available through Cocoapods. For instructions on installing Cocoapods, see their getting started guide.
From a terminal window, navigate into your iOS application’s directory to create a Podfile, where 'MyApp' is the name of your new Xcode project.
platform :ios, '9.0'
use_frameworks!

target 'MyApp' do
  pod 'OktaAuth', '~> 0.1'
end
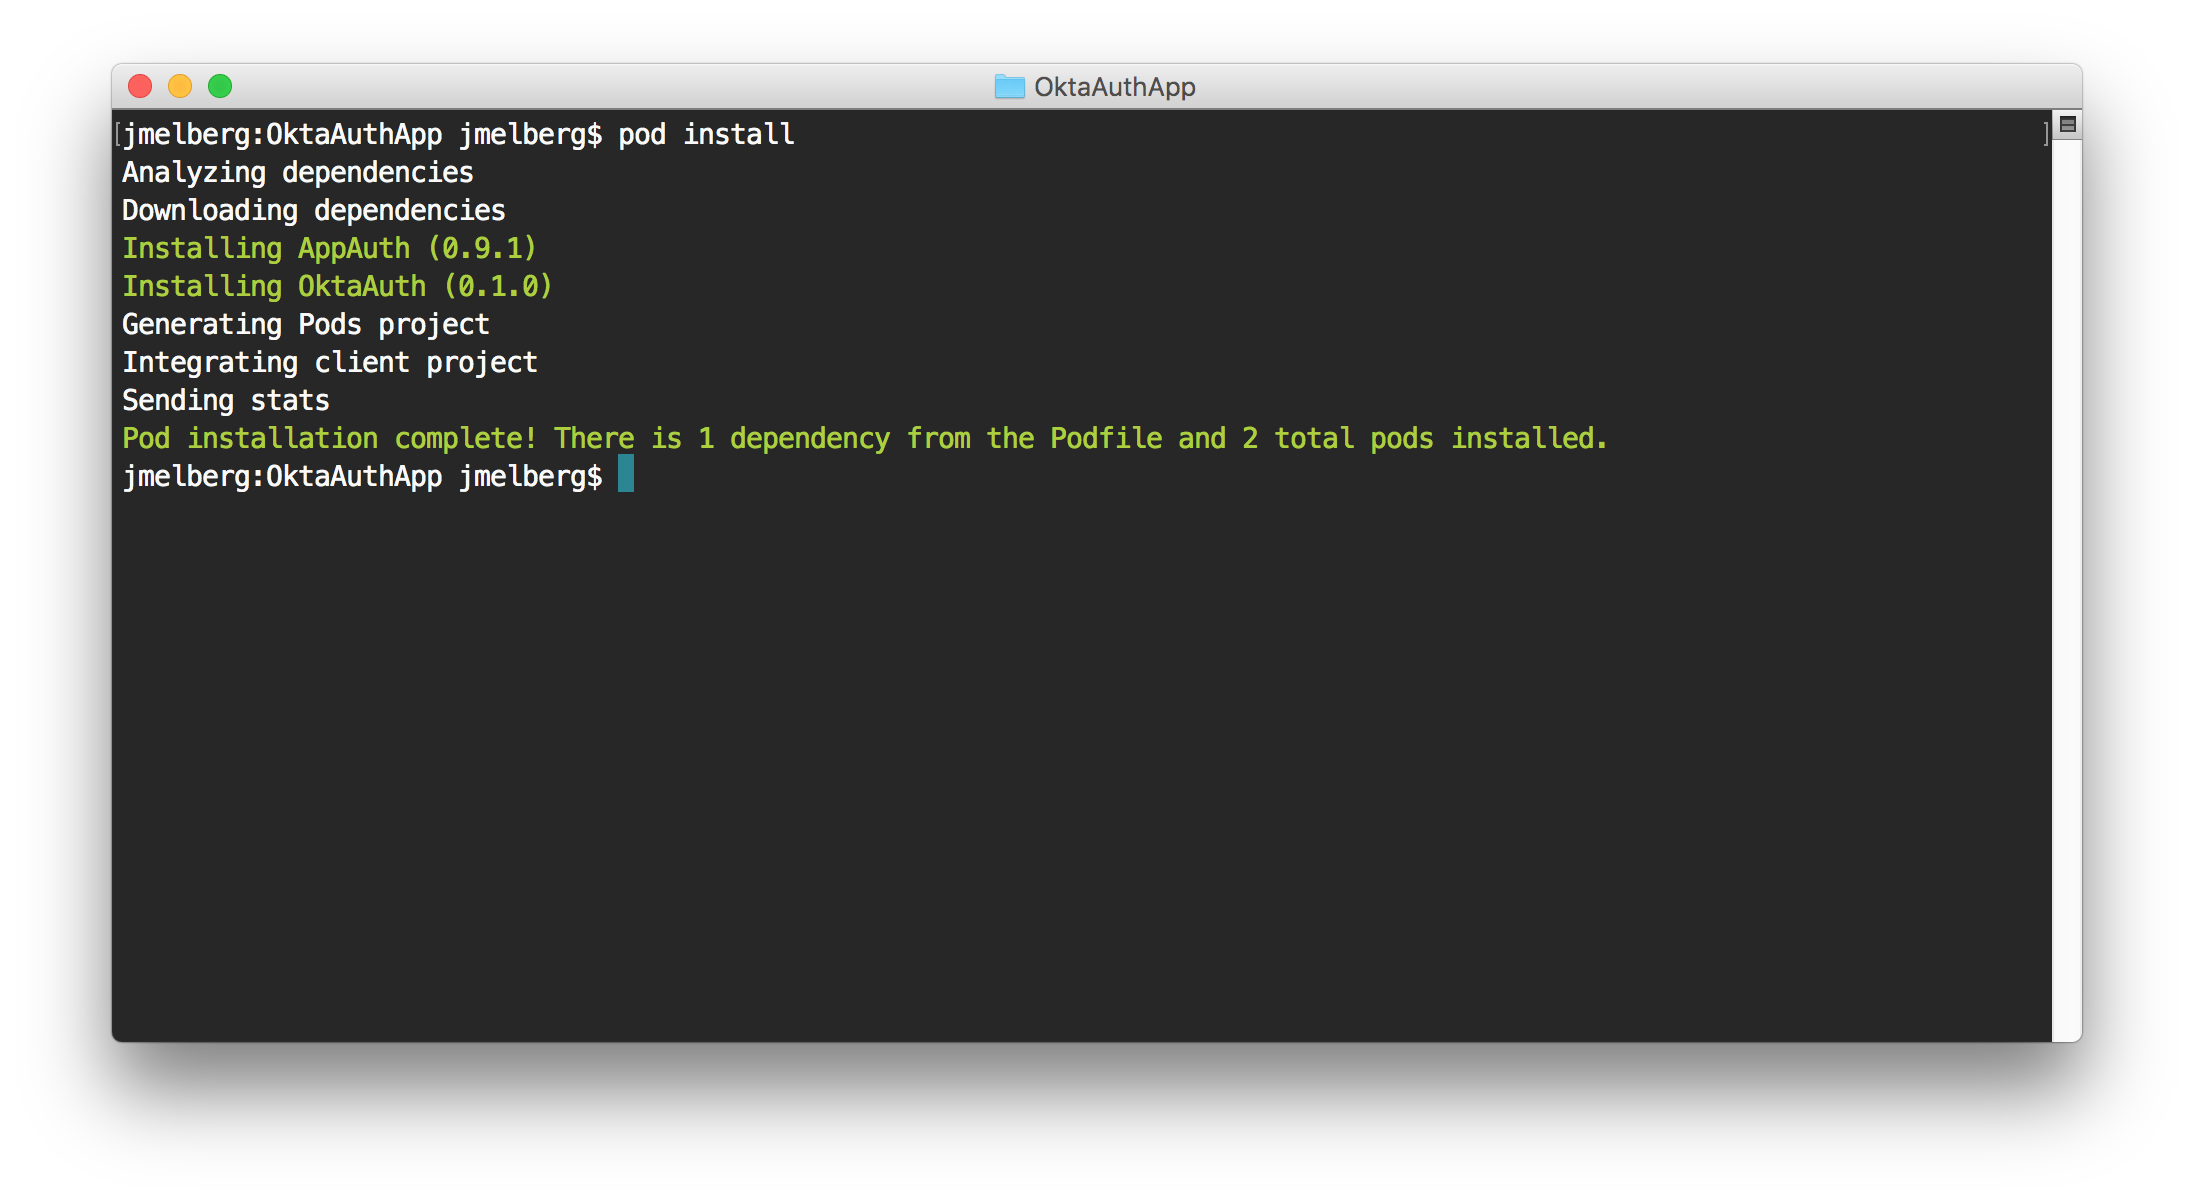
Next, install the SDK by running pod install. You should see the following message appear once the installation is completed:
Open up the newly generated .xcworkspace file by running the following in your terminal:
# Replace 'MyApp' with the name of your iOS application
open MyApp.xcworkspace/
Configure your iOS App
The SDK uses a Property List (.plist) file to bootstrap the login flow. We will need to create an Okta.plist file in your application’s bundle, using your newly created Okta application’s attributes:
<?xml version="1.0" encoding="UTF-8"?>
<!DOCTYPE plist PUBLIC "-//Apple//DTD PLIST 1.0//EN" "http://www.apple.com/DTDs/PropertyList-1.0.dtd">
<plist version="1.0">
<dict>
	<key>issuer</key>
	<string>https://{yourOktaDomain}/oauth2/default</string>
	<key>clientId</key>
	<string>{clientIdValue}</string>
	<key>redirectUri</key>
	<string>{redirectUrlValue}</string>
        <key>scopes</key>
	<array>
		<string>offline_access</string>
		<string>openid</string>
		<string>profile</string>
	</array>
</dict>
</plist>
OpenID Connect Terminology
| Setting | Value | Description |
|---|---|---|
issuer |
https://{yourOktaDomain}/oauth2/default | Your organization’s URL, appended with your default authorization server. |
clientId |
0oac123.. |
Client ID copied from the Client Credentials section on your Okta Application’s page. |
redirectUri |
{yourOktaScheme}:/callback |
Login redirect URI copied from the General Settings section on your Okta Application’s page. |
scopes |
offline_access, openid, and profile |
Enables your application to receive basic user information via an ID Token. |
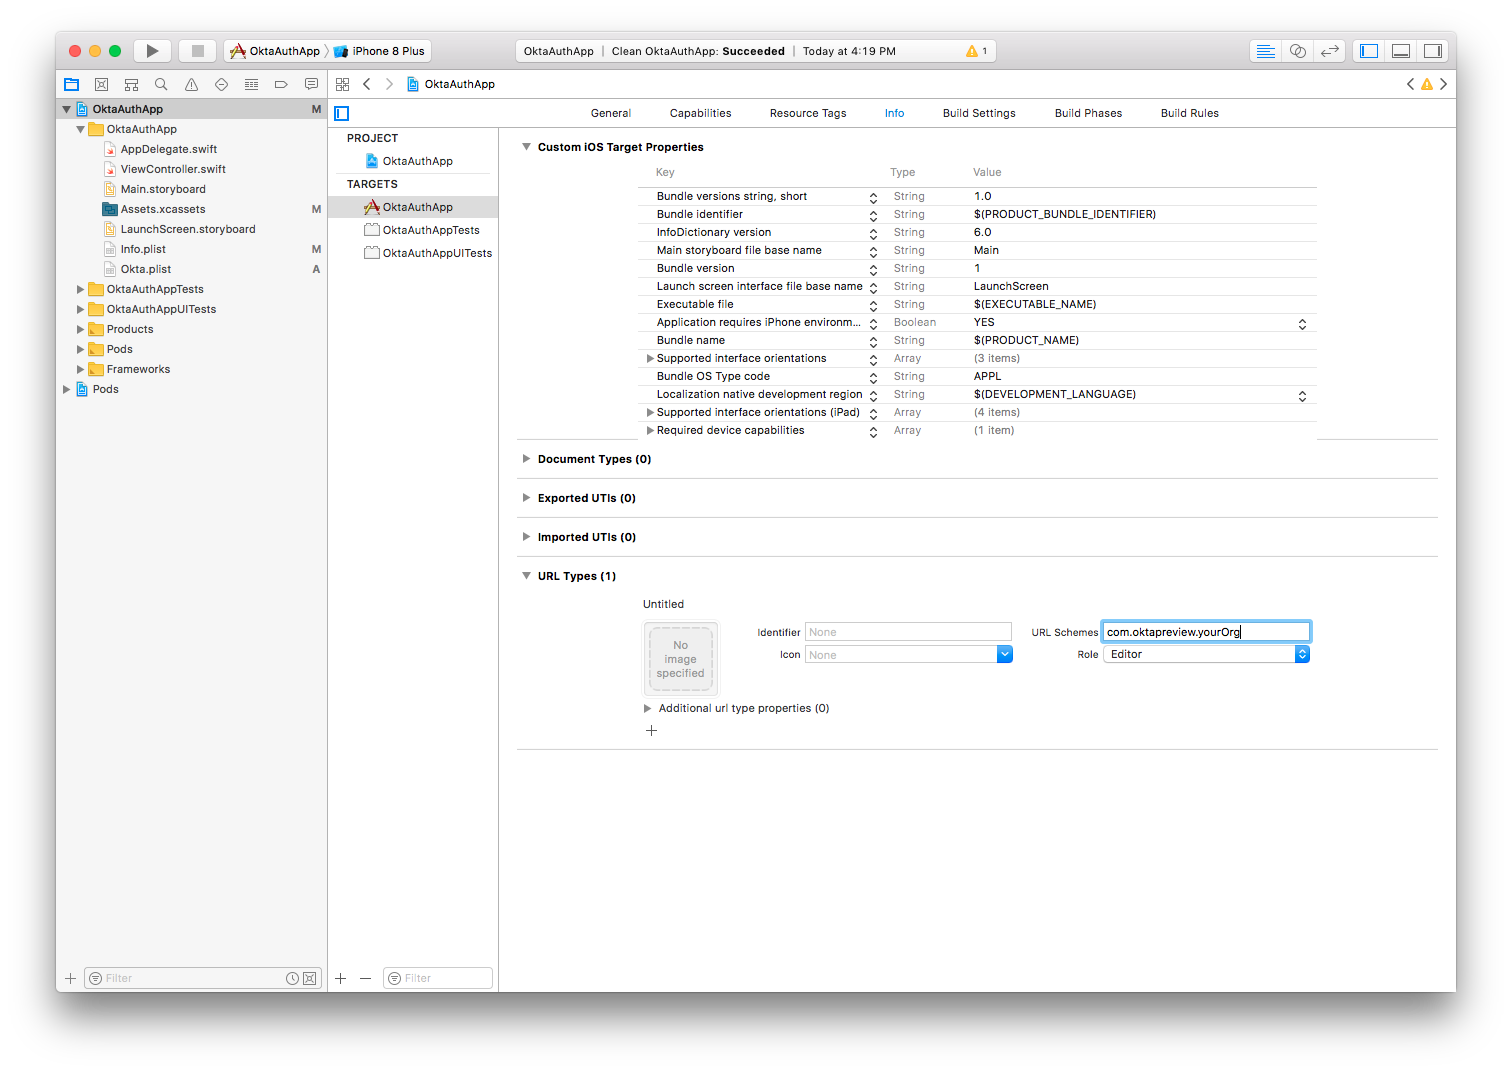
Update the Private-use URI Scheme
To allow apps to communicate with one another on an iOS device, we need to register a URI Scheme.
The easiest way to set this up is to navigate to the Info tab under your Application’s target. Specify a URL Scheme to be your redirectUri, excluding the path.
Add User Authentication
First, we need to handle the inter-app communication between the device’s native browser and your application. Open AppDelegate.swift and add the following:
// AppDelegate.swift
import OktaAuth

func application(_ app: UIApplication, open url: URL, options: [UIApplicationOpenURLOptionsKey : Any]) -> Bool {
    return OktaAuth.resume(url, options: options)
}
Next, lets add the login code! You can trigger a login event a number of ways. For this article, we will simply add the login action to run during our initial viewDidLoad. Open your ViewController.swift file and add the following to start the auth flow:
import OktaAuth

class ViewController: UIViewController {
    override func viewDidLoad() {
        super.viewDidLoad()
        OktaAuth
            .login()
            .start(self) { response, error in
                if error != nil { print(error!) }

                // Success
                if let tokenResponse = response {
                    OktaAuth.tokens?.set(value: tokenResponse.accessToken!, forKey: "accessToken")
                    OktaAuth.tokens?.set(value: tokenResponse.idToken!, forKey: "idToken")
                    print("Success! Received accessToken: \(tokenResponse.accessToken!)")
                    print("Success! Received idToken: \(tokenResponse.idToken!)")
                }
        }
    }
What’s Happening?
Once your application loads, it will trigger the OktaAuth.login() event. Best current practice for native applications suggest initiating the login flow via an in-app browser, instead of an embeddable WebView.
After the user authenticates using the Okta Sign-In Page, some magic happens behind the scenes. Primarily, handling the Authorization Code Flow with Proof Key for Code Exchange (PKCE). This handshake is abstracted from us by the Okta AppAuth SDK, and allows us to securely receive the requested tokens.
If there is a successful login event, our application is bounced back to the main page, where we store the accessToken and the idToken to the device’s Keychain to ensure the tokens are encrypted.
Now, let’s see it in action!
Run your App in the Simulator
To build and run your iOS application, use the Xcode Simulator.
- Click the ▶️ button on the top-left of your editor.
- Alternatively, select Run under the Product toolbar to launch the default simulator.
In a few moments, you should see the Okta Login Page.
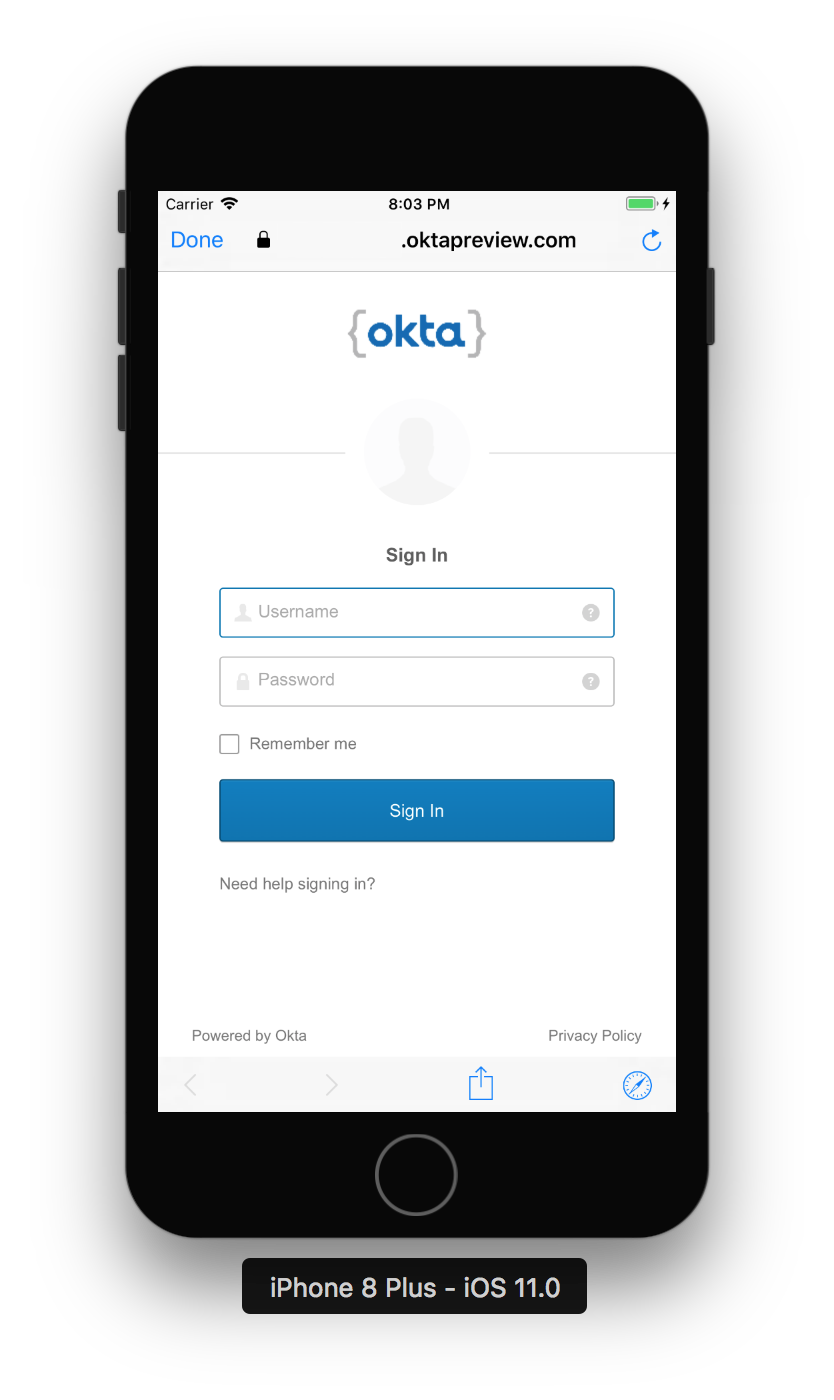
Enter your username and password, then click Sign In. Upon successful authentication, you’ll be redirected back to your application. Check your debugger to see the following message:
Success! Received idToken:
eyJhbGciOiJSUzI1NiIsImtpZCI6IkdOMlBlRU5seEFISGNjLVJmM0pXcktodGFrT3...
Success! Received accessToken:
eyJhbGc...
Copy the idToken response and paste it into jsonwebtoken.io to see the information contained within the identity token!
Request User Information
Courtesy of the OpenID Connect API, we have access to a protected userinfo endpoint. During our initial authentication request, we received an accessToken and an idToken, where an idToken is a Json Web Token (JWT) that represents an authenticated user. The accessToken is usually an opaque token used specifically for calling and protected API endpoints.
Using the newly minted accessToken, lets request more information about the user by calling the userinfo() method:
OktaAuth
    .login()
    .start(self) { response, error in
        if error != nil { print(error!) }

        // Success
        if let tokenResponse = response {
            OktaAuth.tokens?.set(value: tokenResponse.accessToken!, forKey: "accessToken")
            OktaAuth.tokens?.set(value: tokenResponse.idToken!, forKey: "idToken")

            OktaAuth.userinfo() { response, error in
                if error != nil { print("Error: \(error!)") }

                if let userinfo = response {
                    userinfo.forEach { print("\($0): \($1)") }
                }
            }
        }
}
▶️ the application again to see what was returned!
What’s Next
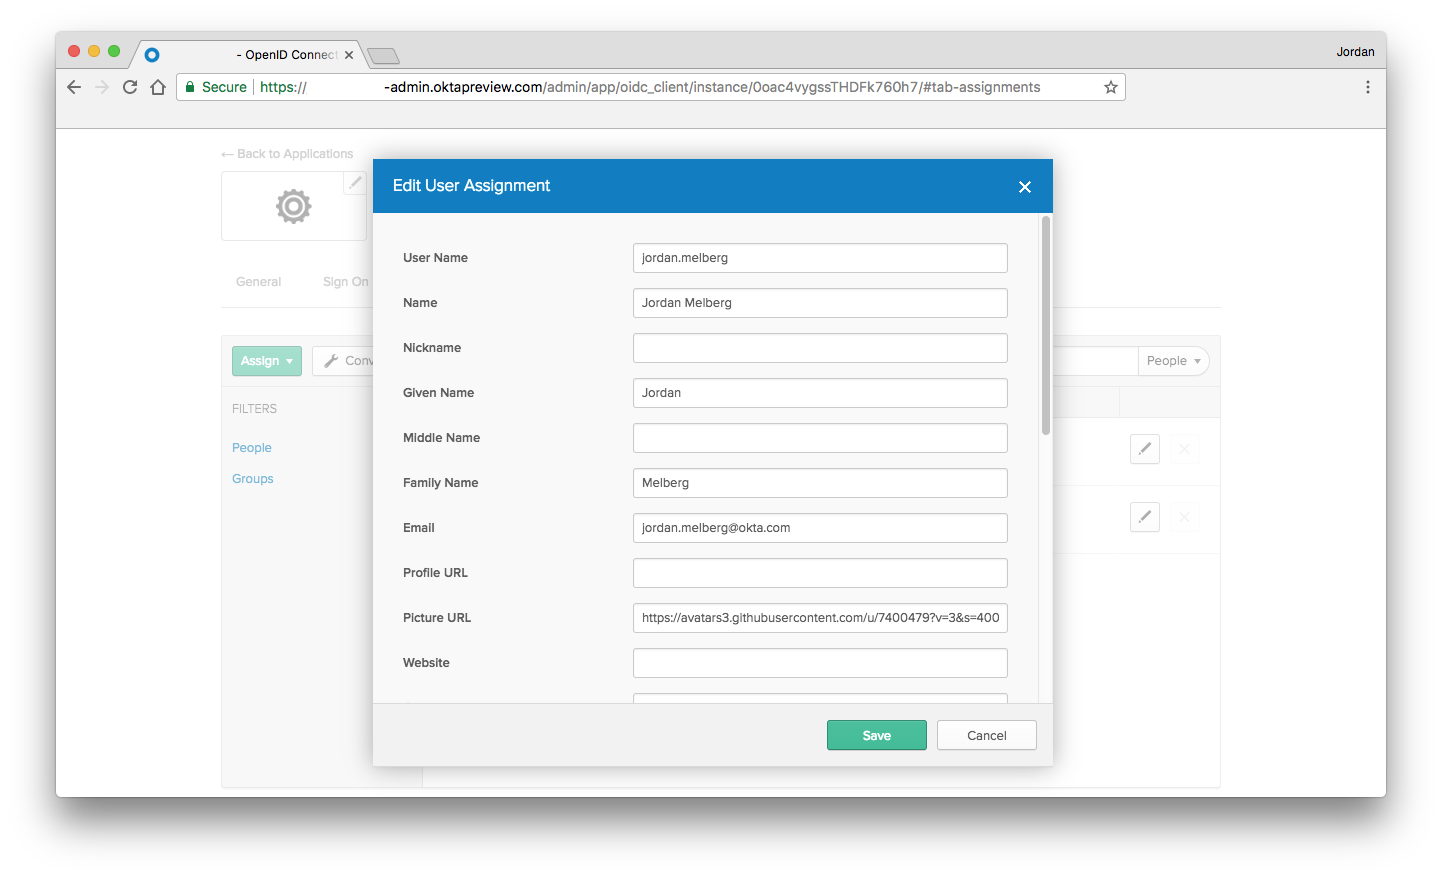
Now that you have additional user information, you can store the user’s email address, profile image, and more into your application - or use it for personalization. Using Okta’s Universal Directory, you can modify user attributes by navigating to Applications in your Okta Developer Console. Select your new native application, then click on the Assignments tab.
Edit the user’s profile directly by selecting the pencil icon, which will display a modal similar to:
▶️ the application one last time to see your updated user!
picture: https://avatars3.githubusercontent.com/u/7400479?v=3&s=400
family_name: Melberg
name: Jordan Melberg
updated_at: 1506444347
email: jordan.melberg@okta.com
sub: 00u...
zoneinfo: America/Los_Angeles
given_name: Jordan
preferred_username: jordan.melberg@okta.com
locale: en-US
email_verified: 1
You did it! You’ve successfully added Authentication into your mobile app with as little as 20 lines of code!
Okta Developer Blog Comment Policy
We welcome relevant and respectful comments. Off-topic comments may be removed.