On this page
Sign users up with a self-hosted sign-up form
Learn how to implement a self-hosted sign-up experience using the Okta Auth JavaScript SDK and the Okta embedded Sign-In Widget.
Learning outcome
- Understand how to set up a basic Vue project.
- Understand how to use the Okta Auth JavaScript SDK (opens new window) and Okta Sign-In Widget (opens new window) libraries in a JavaScript web app.
- Understand how Okta app integrations, access policies, and trusted origins work.
What you need
- Node JS LTS (opens new window) installed
- An IDE of your choice, like JetBrains or VSCode, installed
- Okta Integrator Free Plan org (opens new window)
- Familiarity with the Okta Auth JavaScript SDK (opens new window)
- The Interaction Code grant type enabled for your org
Okta Setup
Before writing any code, you must configure your Okta org to recognize and manage your Vue app. This section walks you through three essential backend configurations:
Create an app integration: Establishes your Vue app's identity within Okta. You define its redirect URIs and obtain a Client ID, which is crucial for connecting your front end to Okta.
Configure an access policy: Grants your new app permission to request authentication tokens from an Okta authorization server. It acts as a security checkpoint for your API.
Enable Self-Service Registration (SSR): Sets up a policy that allows new users to create their own accounts directly from the Okta Sign-In Widget, a key feature for public-facing apps.
Create the app integration for Vue
The Okta app integration represents your Vue app in your Okta org and lets you configure how it interacts with Okta services.
Complete the steps in this Create an Okta app integration (opens new window) section. While you complete these steps, there are a few differences:
- In the Grant type section, expand Advanced and select the Interaction Code checkbox in the Other grants section.
- Add the local development URI of
http://localhost:5173/login/callbackfor Sign-in redirect URIs. - Add
http://localhost:5173for Logout redirect URIs in the LOGOUT section and for Base URIs in the Trusted Origins section.
Configure an access policy
Access policies control which client apps can request access tokens for specific APIs. They also define rules for those tokens, such as scopes, lifetimes, and grant types. Configure an access policy for your app:
- Go to Security > API.
- Click default for the Okta default custom authorization server.
- Click the Access Policies tab, and then click Add New Access Policy or Add Policy if you haven't added any policies yet.
- Give the policy a name, such as Vue Policy and add a simple description.
- Select The following clients in the Assign to field, type the name of your app, and then select it from the list.
- Click Create Policy.
Add a rule
Add a simple rule to your policy.
- Select your policy on the left.
- Click Add rule.
- Enter a name for the rule.
- Expand Advanced and select the Interaction Code checkbox in the Other grants section.
- Leave the default settings for the rest, and click Create rule.
Set up a user profile policy
Set up a user profile policy to allow your users to perform Self-Service Registration (SSR). This enables the user to sign up for your app using the Okta Sign-In Widget.
Go to Security > User Profile Policies.
Click Add user profile policy and enter a policy name, such as Self-Service Registration*.
Click Save.
Click pencil icon next to your policy to make edits.
In the Profile Enrollment section of the Enrollment tab, click Edit.
Verify that Self-service registration is set to Allowed.
Clear the Required before access is granted checkbox for Email verification.
Note: In this example, you want to test with fake emails during development. After your app is live, turn this back on.
Click Save.
Select the Apps tab, and then click Add an App to This Policy.
Locate your app, click Apply next to it, and click Close.
Note: See Enable and configure a sign-up form for more detailed information on configuring SSR.
Create the Vue project
To set up your Vue app, you need to first set up the Vue (opens new window) project:
Create a directory for your project, and then open it in your IDE.
In your IDE's integrated terminal, run the Vue project creation script:
npm create vue@latest .. The.argument instructs the script to create the project in the current directory.Note: Your IDE may create hidden configuration files, which can trigger a warning that the directory isn't empty. It's safe to continue.
The script guides you through a series of prompts to configure the project. Use the following settings:
Prompt Selection Project name vue-appAdd TypeScript?Yes Add Vue Routerfor Single Page Application development?Yes Skip example code and start with a blank project? Yes Decline any offers for other features like Pinia for state management or Vitest for testing. After the script finishes, your base Vue project is ready.
Integrate Okta and set up the app
Install the necessary Okta SDK and configure your Vue app to support it. This involves setting up placeholder pages, configuring the router, and creating a helper module to manage Okta authentication logic.
Install dependencies
Install the Okta Auth JavaScript SDK library (opens new window) for authentication and the Okta Sign-In Widget library (opens new window), along with Sass for styling.
npm install @okta/okta-auth-js @okta/okta-signin-widget
Configure TypeScript
To ensure compatibility with the Okta libraries, enable allowSyntheticDefaultImports in your TypeScript configuration.
Open the
tsconfig.app.jsonfile in the project's root directory.Add the
allowSyntheticDefaultImportsproperty to thecompilerOptionsobject:{ ... "compilerOptions": { "allowSyntheticDefaultImports": true, ... } }Run
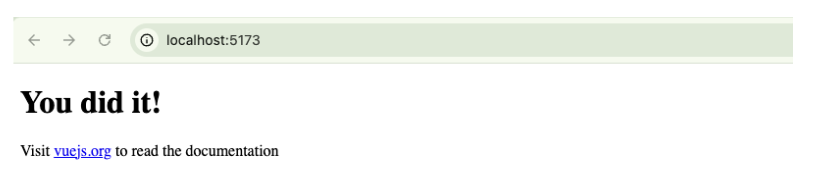
npm run devto start the development server athttp://localhost:5173. This is the same base URL that you added during the Vue app configuration.Click the URL. A page similar to this example appears:
Run
npm install -D sass-embeddedto install Syntactically Awesome Style Sheets (Sass). Sass is a superset of CSS that enhances CSS.
Create page components
Create basic page components that serve as the destinations for your router.
- In the
srcdirectory, create a folder namedviews. - Inside
src/views, create the following three files:
Home.vue example
  <script lang="ts">
  import { defineComponent } from 'vue'

  export default defineComponent({
   name: "Home"
  })
</script>

<template>
 <h1>This is the home page</h1>
</template>

<style scoped>

</style>
About.vue example
<script lang="ts">
import { defineComponent } from 'vue'

export default defineComponent({
 name: "About"
})
</script>

<template>
 <h1>This is the about page.</h1>
</template>

<style scoped>

</style>
Contact.vue example
<script lang="ts">
import { defineComponent } from 'vue'

export default defineComponent({
 name: "Contact"
})
</script>

<template>
 <h1>This is the contact page</h1>
</template>

<style scoped>

</style>
Configure the Vue router
Next, configure the Vue router to recognize the new page components and ensure that it loads correctly before the app mounts.
Go to
src/router/index.tsand update it to import and use the new Vue components.import { createRouter, createWebHistory } from 'vue-router' import Home from "@/views/Home.vue"; import About from "@/views/About.vue"; import Contact from "@/views/Contact.vue"; const router = createRouter({ history: createWebHistory(import.meta.env.BASE_URL), routes: [ { path: "/", component: Home }, { path: "/about", component: About }, { path: "/contact", component: Contact }, ], }) export default routerThis is a simple router instance with all of your pages in the
routes[]array.Go to the main app entry point at
src/main.ts.Modify it to wait for the router to be ready before mounting the app. This prevents race conditions with route-dependent logic:
Router logic example
router.isReady()
 .then(() => app.mount('#app'))
Complete example
import { createApp } from 'vue'
import App from './App.vue'
import router from './router'

const app = createApp(App)

app.use(router)

// Ensure that the router is ready before mounting the app.
router.isReady()
 .then(() => app.mount('#app'))
Create the Okta helper file
To keep your authentication logic organized and reusable, create a dedicated helper module. This module encapsulates all interactions with the Okta SDK.
In the
srcdirectory, create a folder structure:lib/okta.Note In a production app, you might use a more extensible folder structure like
providers/iam/okta. This approach allows you to add other Identity and Access Management (IAM) providers in the future by having each provider implement a standardized IAMProvider interface.Inside
srce/lib/okta, create two files:config.tsandindex.ts.Add the following configuration to
config.ts. This file stores your app's specific Okta settings. Replace the placeholder values with your own. See the comments in the example for more details on the configuration.export default { // Your Okta org URL issuer: `https://${yourOktaDomain}/oauth2/default`, baseUrl: `https://${yourOktaDomain}`, // The Client ID of the Okta app that you created clientId: `${yourClientID}`, // The access scopes being requested scopes: ['openid','email', 'profile'], storage: 'sessionStorage', // The URL to redirect to after a user signs in redirectUri: 'http://localhost:5173', useInteractionCodeFlow: true, requireUserSession: 'true', authMethod: 'form', startService: false, useDynamicForm: false, uniq: Date.now() + Math.round(Math.random() * 1000), // to guarantee a unique state };Add the core authentication logic to
src/lib/okta/index.ts. This file initializes the Okta SDK and exports functions for handling registration, user sessions, and user logout. See the comments in the example for more details on the core authentication logic.import type { AccessToken, IDToken, TokenManagerInterface, UserClaims } from "@okta/okta-auth-js"; import { OktaAuth } from "@okta/okta-auth-js"; import config from "@/lib/okta/config.ts"; import OktaSignIn from "@okta/okta-signin-widget"; const oktaConfig = { url: config.baseUrl, issuer: config.issuer, clientId: config.clientId, redirectUri: config.redirectUri, scopes: config.scopes, } as Record<any, any>; // Initialize the core Okta authentication client & Okta Sign-In Widget const authClient = new OktaAuth(oktaConfig); const oktaSignIn = new OktaSignIn({ ...oktaConfig, redirectUri: `${config.redirectUri}/login/callback`, flow: 'signup', }); // Checks for and processes tokens in the URL after a redirect from Okta const handleCallback = async () => { if (!authClient.isLoginRedirect()) return; const { tokens } = await authClient.token.parseFromUrl(); authClient.tokenManager.setTokens(tokens); } // Retrieves the current authenticated user's claims. Returns a promise that resolves to the user claims object or null if not authenticated. async function user(): Promise<null | UserClaims> { const tokenManager: TokenManagerInterface = authClient.tokenManager; const accessToken: AccessToken = await tokenManager.get('accessToken') as AccessToken; if (!accessToken) { return null; } try { const idToken: IDToken = await tokenManager.get('idToken') as IDToken; return await authClient.token.getUserInfo(accessToken, idToken); } catch (e) { // Unable to retrieve user info, likely due to an expired session return null; } } //Signs the user out of their Okta session. const logout = async () => await authClient.signOut(); // Renders the Okta Sign-In Widget for registration and handles the redirect. // The DOM element selector where the widget should be rendered. const register = async (el: string) => { // The remove() call ensures that any existing widget instance is cleaned up before rendering a new one. oktaSignIn.remove(); await oktaSignIn.showSignInAndRedirect({ el }); } export default { user, logout, register, handleCallback }
Build the main app layout
With the foundational routing in place, you can now build the main app component, App.vue. This component serves as the root layout that contains the primary navigation bar and the rendering area for your page views.
Open the src/App.vue file and clear its contents. Then, you build the file in three parts: Component logic, HTML structure, and the styles.
Add the Component logic
First, add the <script> block. This section is responsible for managing the app's state, retrieving the authenticated user's information, and controlling when the navigation bar is visible. See the comments in the code for more details.
<script lang="ts">
import { defineComponent } from 'vue'
import provider from "@/lib/okta";
import type { UserClaims } from "@okta/okta-auth-js";
// An array of routes where the main navigation bar should be hidden.
// This is useful for pages like registration or login callbacks.
const excludedFromNav = [ '/register', '/login/callback' ];

export default defineComponent({
 name: "App",
 data: () => ({
  // The auth object holds the authentication state,
  // including the Okta helper object and the currently authenticated user's claims.
  // Also contains the user object in its initial state, which is null.
   auth: {
     user: null as UserClaims | null,
     provider: provider
   },
 }),
 computed: {
  // A computed property that determines whether to show the main navigation.
  // It returns true if the current route isn't in the excluded list (`excludedFromNav[]`).
   showNav() {
     return !excludedFromNav.includes(this.$route.path)
   }
 },
 //When the component mounts, it calls the user() function from the Okta
// helper to retrieve and set the current user's information using the saved token.
// Returns null if the user doesn't exist or there's no token.
 async mounted() {
   this.auth.user = await provider.user();
 },
})
</script>
Define the HTML structure
Next, add the <template> block below the script. This defines the visual structure of your app's layout. It includes the navigation bar that conditionally displays links based on the user's authentication status. It also includes the <RouterView> component that renders the current page. See the comments in the code example for more details.
<template>
 <nav v-if="showNav">
   <RouterLink to="/" class="logo">Vue APP</RouterLink>
   <ul class="nav">
     <li>
       <RouterLink to="/about">About Me</RouterLink>
     </li>
     <li>
       <RouterLink to="/contact">Contact Me</RouterLink>
     </li>
   </ul>
   <div class="auth">
   // If a user is authenticated, show their name and a logout button
     <div v-if="auth.user" class="user">
       <p>Welcome {{ auth.user.name }}</p>
       <button @click="auth.provider.logout" class="btn btn-danger btn-plain">Logout</button>
     </div>
   // Otherwise, show a link to the registration page
     <RouterLink v-else to="/register" class="login-btn btn">Register</RouterLink>
   </div>
 </nav>
 // THe main content for the current route is rendered here
 <RouterView/>
</template>
Apply the styles
Finally, add the <style> block to provide the visual design for the layout. This SCSS code styles the navigation bar, buttons, and overall typography to create a clean and modern user interface.
Add the following SCSS code:
<style lang="scss">
* {
 font-family: 'Roboto', sans-serif;
}

.logo {
 margin: auto 5px;
 text-transform: uppercase;
 text-decoration: none;
 font-style: italic;
 font-size: 2rem;
 font-weight: bold;
 font-family: 'Montserrat', serif;
}

nav {
 display: flex;
 justify-content: space-evenly;
 width: 100vw;
 border-bottom: 1px solid #c7b8b8;

 ul {
   display: flex;
   list-style: none;

   li {
     margin: 10px;

     a {
       text-decoration: none;
       color: #000;
       text-transform: uppercase;

       &:hover {
         text-decoration: underline;
       }
     }
   }
 }
}

.btn {
 cursor: pointer;
 color: #fff;
 background: #0d6efd;
 border: 1px solid transparent;
 text-decoration: none;
 font-weight: 400;
 line-height: 1.5;
 text-align: center;
 padding: 6px 12px;
 font-size: 16px;
 border-radius: .25rem;
 transition: color .15s ease-in-out, background-color .15s ease-in-out, border-color .15s ease-in-out, box-shadow .15s ease-in-out;

 &:hover {
   background-color: #0b5ed7;
   border-color: #0a58ca;
 }

 &-plain {
   color: #0d6efd;
   background: transparent;
   border: 1px solid #0d6efd;

   &:hover {
     color: #fff;
     background: #0d6efd;
   }
 }

 &-danger {
   padding: 6px 12px;
   color: #d70b0b;
   border-color: #d70b0b;
   margin: auto 10px;
 }
}

.login-btn {
 display: block;
 margin-top: 10px;
}

.user {
 display: flex;
 margin-top: 10px;
}
</style>
After adding all three sections to
src/App.vue, save the file. Your app running athttp://localhost:5173now displays the fully styled layout, ready for the final registration flow implementation.Go to your page. It should look something like the following example:

Click Register. A 401 (a Vue blank page) should appear, because you haven't created that page yet.
Implement the Okta registration flow
The final step is to create the components that handle user registration and the sign-in callback from Okta.
Create the registration view
This component renders the Okta Sign-In Widget.
- In the
src/viewsfolder, create aRegister.vuefile. - Add the following code. This component imports the necessary CSS for the Widget and uses the
register()function from your Okta helper to render it. See the comments in the code example for more details.
<script lang="ts">
// Import the Okta Sign-In Widget CSS for styling.
import '@okta/okta-signin-widget/css/okta-sign-in.min.css';
import { defineComponent } from 'vue'
import  provider from "@/lib/okta";


export default defineComponent({
 name: "Register",
 // When the component mounts, call the register() function from the Okta helper,
 // passing in the DOM element selector where the Widget is rendered.
 async mounted() {
   provider.register('#osw-container');
 }
})
</script>

<template>
// This empty div is the container for the Sign-In Widget
 <div id="osw-container"></div>
</template>

<style scoped>

</style>
Create the sign-in callback view
After a user signs up, Okta redirects them back to your app. This component is responsible for handling that redirect, processing the tokens, and navigating the user to the home page.
- Go to
src/viewsand create aLoginCallback.vuefile. - Add the following code:
<script lang="ts">
import { defineComponent } from 'vue';
import provider from "@/lib/okta";


export default defineComponent({
 name: "LoginCallback",
 // When the component mounts, it processes the redirect from Okta.
 async mounted() {
  // Exchange the authorization code for tokens.
   await provider.handleCallback();
   // Redirect the user to the home page after they sign in.
   window.location.href = '/';
 },
})
</script>
<template></template>
Note: For more complex apps, you might replace
window.location.hrefwith logic that redirects the user to their intended destination using route parameters.
Add registration routes
Finally, update the Vue router to include the new registration and callback views.
Open
src/router/index.tsand add the new routes to theroutesarray.import { createRouter, createWebHistory } from 'vue-router' import Home from "@/views/Home.vue"; import About from "@/views/About.vue"; import Contact from "@/views/Contact.vue"; import LoginCallback from "@/views/LoginCallback.vue"; import Register from "@/views/Register.vue"; const router = createRouter({ history: createWebHistory(import.meta.env.BASE_URL), routes: [ { path: "/", component: Home }, { path: "/about", component: About }, { path: "/contact", component: Contact }, { path: "/login/callback", component: LoginCallback }, { path: "/register", component: Register }, ], }) export default routerSave the file. You can now test the full registration flow.
Go to your Vue app home (
http://localhost:5173).Click Register. The page should look similar to the following example:
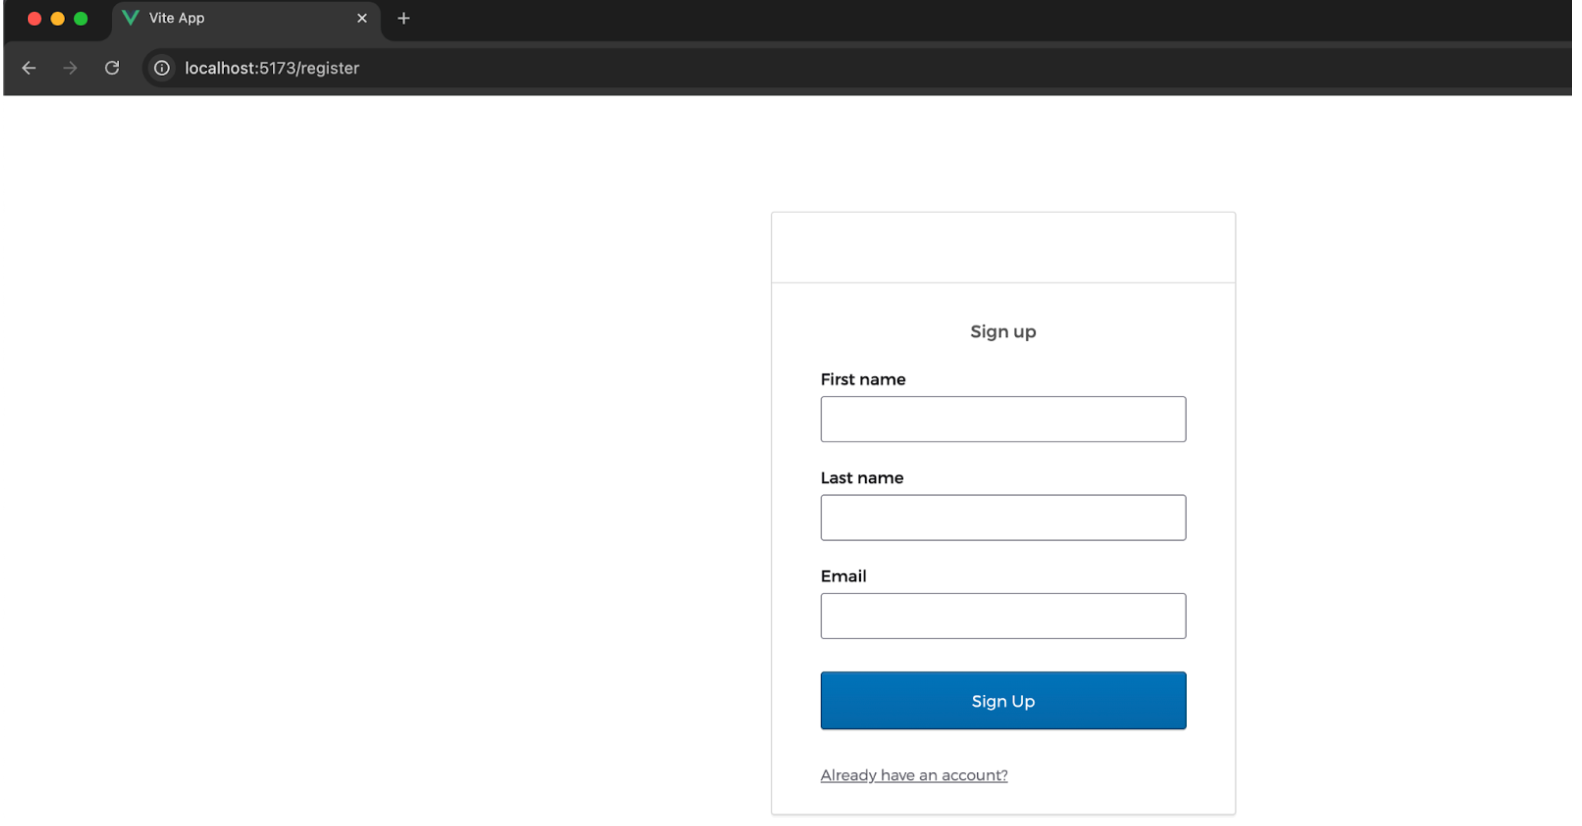
Note: You can customize this page with your logos, loaders, and backgrounds using Sign-In Widget customizations (opens new window), and in Vue.
After you register, you’re redirected to a page similar to this example:
