On this page
SAML-enable your Python application
Note: This guide works only with Python 2, a version of Python that is no longer supported. We strongly recommend that you use OpenID Connect rather than SAML. See What's the difference between OAuth, OpenID Connect, and SAML (opens new window).
This guide describes how to use PySAML2 (opens new window) to add support for Okta (through SAML) to applications written in Python.
Note: While the example in this guide uses Flask (opens new window), the concepts presented here are general enough to use in other Python frameworks.
This guide describes how to install and configure an example application that demonstrates how to use PySAML2 in a Flask application. After you have Okta working with the example application, adapt the example code for your production environment.
Note: The library isn't Okta's and isn't supported by Okta.
This guide assumes that you are familiar with the basics of Python software development: using the command line, editing text files, using virtualenv (opens new window), and using pip (opens new window).
If you're already familiar with Okta, you can skip to the section titled "Configuring PySAML2 to work with Okta."
Configuring Okta to work with PySAML2
Before you can configure your application and PySAML2, set up an Okta application icon that enables an Okta user to sign in to your application with SAML and PySAML2.
To set up Okta to connect to your application, follow the Build a Single Sign-On Integration guide. As noted in the Create your integration instructions, there are two steps to change:
In step #9: Use PySAML2 Example instead of Example SAML application.
In step #10: When entering the URL:
http://example.com/saml/sso/example-okta-comuse the following:
http://localhost:5000/saml/sso/example-okta-comNote:
5000is the port that Flask uses by default. If you're using a different port number, change5000to appropriate one.
Configure PySAML2 to work with Okta
Now that you have configured the PySAML2 Example application icon in your Okta organization, you are ready to configure PySAML2 to work with your Okta organization. In this section we use the Identity Provider metadata link from the section above to configure PySAML2. After you complete the following steps, you have a working example of connecting Okta to a sample Python application using PySAML2.
Install platform-dependent prerequisites:
Note: These instructions assume that you are running on a recent version of your operating system.
For Mac OS X:
brew install libffi libxmlsec1For RHEL:
sudo yum install libffi-devel xmlsec1 xmlsec1-opensslDownload the example application for Python:
$ git clone git@github.com:jpf/okta-pysaml2-example.gitcdto theokta-pysaml2-exampledirectory.$ cd okta-pysaml2-exampleOpen the
app.pyfile in your favorite text editor.$ $EDITOR app.pyIn the
app.pyfile, modify the contents of themetadata_url_fordictionary as shown below.metadata_url_for = { 'example-okta-com': '${metadataUrl}' }Replace the contents of
${metadataUrl}with the link that you copied in step #10 of the Setting up a SAML application in Okta instructions.Note: The contents of
${metadataUrl}should look similar to:https://${yourOktaDomain}/app/a0b1c2deFGHIJKLMNOPQ/sso/saml/metadataInstall the dependencies; for example, Python SAML SP:
$ virtualenv venv
$ source venv/bin/activate
$ pip install -r requirements.txt
Start the Python example:
$ python app.py
Test the SAML integration
Now that you have set up an application in your Okta organization and have configured PySAML2 to work with your Okta organization, it's ready to test. There are two ways to test a SAML application:
- Start from the example Python application (SP-initiated).
- Start from Okta (IdP-initiated).
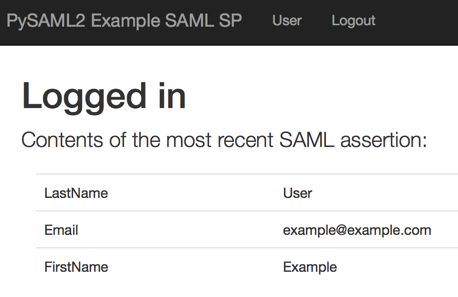
Use both methods to test your application. In each case, you know if the test worked when you see a page that looks like the one below:

Sign in from the Okta PySAML2 example application (This is known as an SP-initiated sign-in.)
Start the example application from the command line:
$ source venv/bin/activate
$ python app.py
-   Open the example application in your browser:
    `http://localhost:5000/`

-   Click the link for your Okta IdP.
Sign in from Okta (This is known as an IdP-initiated sign-in.)
- Start the example application from the command line:
    $ source venv/bin/activate
$ python app.py
Sign in to your Okta organization.
Click the button for the application that you created earlier in the "Configuring Okta to work with PySAML2" section above:

If you can to get to the "Logged in" page using both of the methods above, the tests are successful.
Congratulations on getting Okta working with PySAML2!
Next Steps
At this point, you should be familiar with setting up a SAML enabled application to work with an Okta organization and how to configure PySAML2 to work with Okta.
After you have your Okta organization working with the example Python application, the next step is to take the example code and move it to your production application. The specifics of how this works is different depending on how your application is set up. Pay special attention to the notes in the app.py file. For example, on a production system, you can't hard code the contents of the metadata_url_for dictionary. They should come from a dynamic datastore.
If you want to learn more about SAML and what to consider when writing a SAML implementation, Okta's in-depth SAML guidance (opens new window) is a great place to learn more.