Angular Authentication with OpenID Connect and Okta in 20 Minutes
Heads up... this blog post is old!
For an updated version of this blog post, see Build Secure Login for Your Angular App.
Angular (formerly called Angular 2.0) is quickly becoming one of the most powerful ways to build a modern single-page app. A core strength is Angular’s focus on building reusable components, which help you decouple the various concerns in your application. Take authentication, for example: it can be painful to build, but once you wrap it in a component, the authentication logic can be reused throughout your application.
The Angular CLI makes it easy to scaffold new components, and even entire projects. If you haven’t used the Angular CLI to quickly generate Angular code, you’re in for a treat!
In this example, you’ll build a simple web application with Angular CLI, a tool for Angular development. You’ll create an application with search and edit features, then add authentication.
Create an Angular Application
TIP: If you’d like to skip building the Angular application and get right to adding authentication, you can clone my ng-demo project, then skip to the Create an OpenID Connect App in Okta section.
git clone -b v6.0 https://github.com/mraible/ng-demo.git --depth 1
What You’ll Need
- About 20 minutes
- A favorite text editor or IDE. I recommend IntelliJ IDEA
- Node.js and npm installed. I recommend using nvm
- Angular CLI installed. If you don’t have Angular CLI installed, install it using
npm install -g @angular/cli@1.7.3
Create a new project using the ng new command:
ng new ng-demo
This will create a ng-demo project and run npm install in it. It should take about a minute to complete, but that could vary depending on your connection speed.
$ ng new ng-demo
CREATE ng-demo/README.md (1023 bytes)
CREATE ng-demo/angular.json (3408 bytes)
CREATE ng-demo/package.json (1311 bytes)
CREATE ng-demo/tsconfig.json (384 bytes)
CREATE ng-demo/tslint.json (2805 bytes)
CREATE ng-demo/.editorconfig (245 bytes)
CREATE ng-demo/.gitignore (503 bytes)
CREATE ng-demo/src/environments/environment.prod.ts (51 bytes)
CREATE ng-demo/src/environments/environment.ts (631 bytes)
CREATE ng-demo/src/favicon.ico (5430 bytes)
CREATE ng-demo/src/index.html (293 bytes)
CREATE ng-demo/src/main.ts (370 bytes)
CREATE ng-demo/src/polyfills.ts (3194 bytes)
CREATE ng-demo/src/test.ts (642 bytes)
CREATE ng-demo/src/assets/.gitkeep (0 bytes)
CREATE ng-demo/src/styles.css (80 bytes)
CREATE ng-demo/src/browserslist (375 bytes)
CREATE ng-demo/src/karma.conf.js (964 bytes)
CREATE ng-demo/src/tsconfig.app.json (194 bytes)
CREATE ng-demo/src/tsconfig.spec.json (282 bytes)
CREATE ng-demo/src/tslint.json (314 bytes)
CREATE ng-demo/src/app/app.module.ts (314 bytes)
CREATE ng-demo/src/app/app.component.css (0 bytes)
CREATE ng-demo/src/app/app.component.html (1141 bytes)
CREATE ng-demo/src/app/app.component.spec.ts (986 bytes)
CREATE ng-demo/src/app/app.component.ts (207 bytes)
CREATE ng-demo/e2e/protractor.conf.js (752 bytes)
CREATE ng-demo/e2e/src/app.e2e-spec.ts (299 bytes)
CREATE ng-demo/e2e/src/app.po.ts (208 bytes)
CREATE ng-demo/e2e/tsconfig.e2e.json (213 bytes)
...
added 1147 packages from 1269 contributors in 43.48s
    Successfully initialized git.
Execution time: 48 sec
You can see the what version of Angular CLI you’re using with ng --version.
$ ng --version

     _                      _                 ____ _     ___
    / \   _ __   __ _ _   _| | __ _ _ __     / ___| |   |_ _|
   / △ \ | '_ \ / _` | | | | |/ _` | '__|   | |   | |    | |
  / ___ \| | | | (_| | |_| | | (_| | |      | |___| |___ | |
 /_/   \_\_| |_|\__, |\__,_|_|\__,_|_|       \____|_____|___|
                |___/


Angular CLI: 6.0.0
Node: 9.8.0
OS: darwin x64
Run Your Angular Application
The project is configured with webpack dev server. To start it, make sure you’re in the ng-demo directory, then run:
ng serve
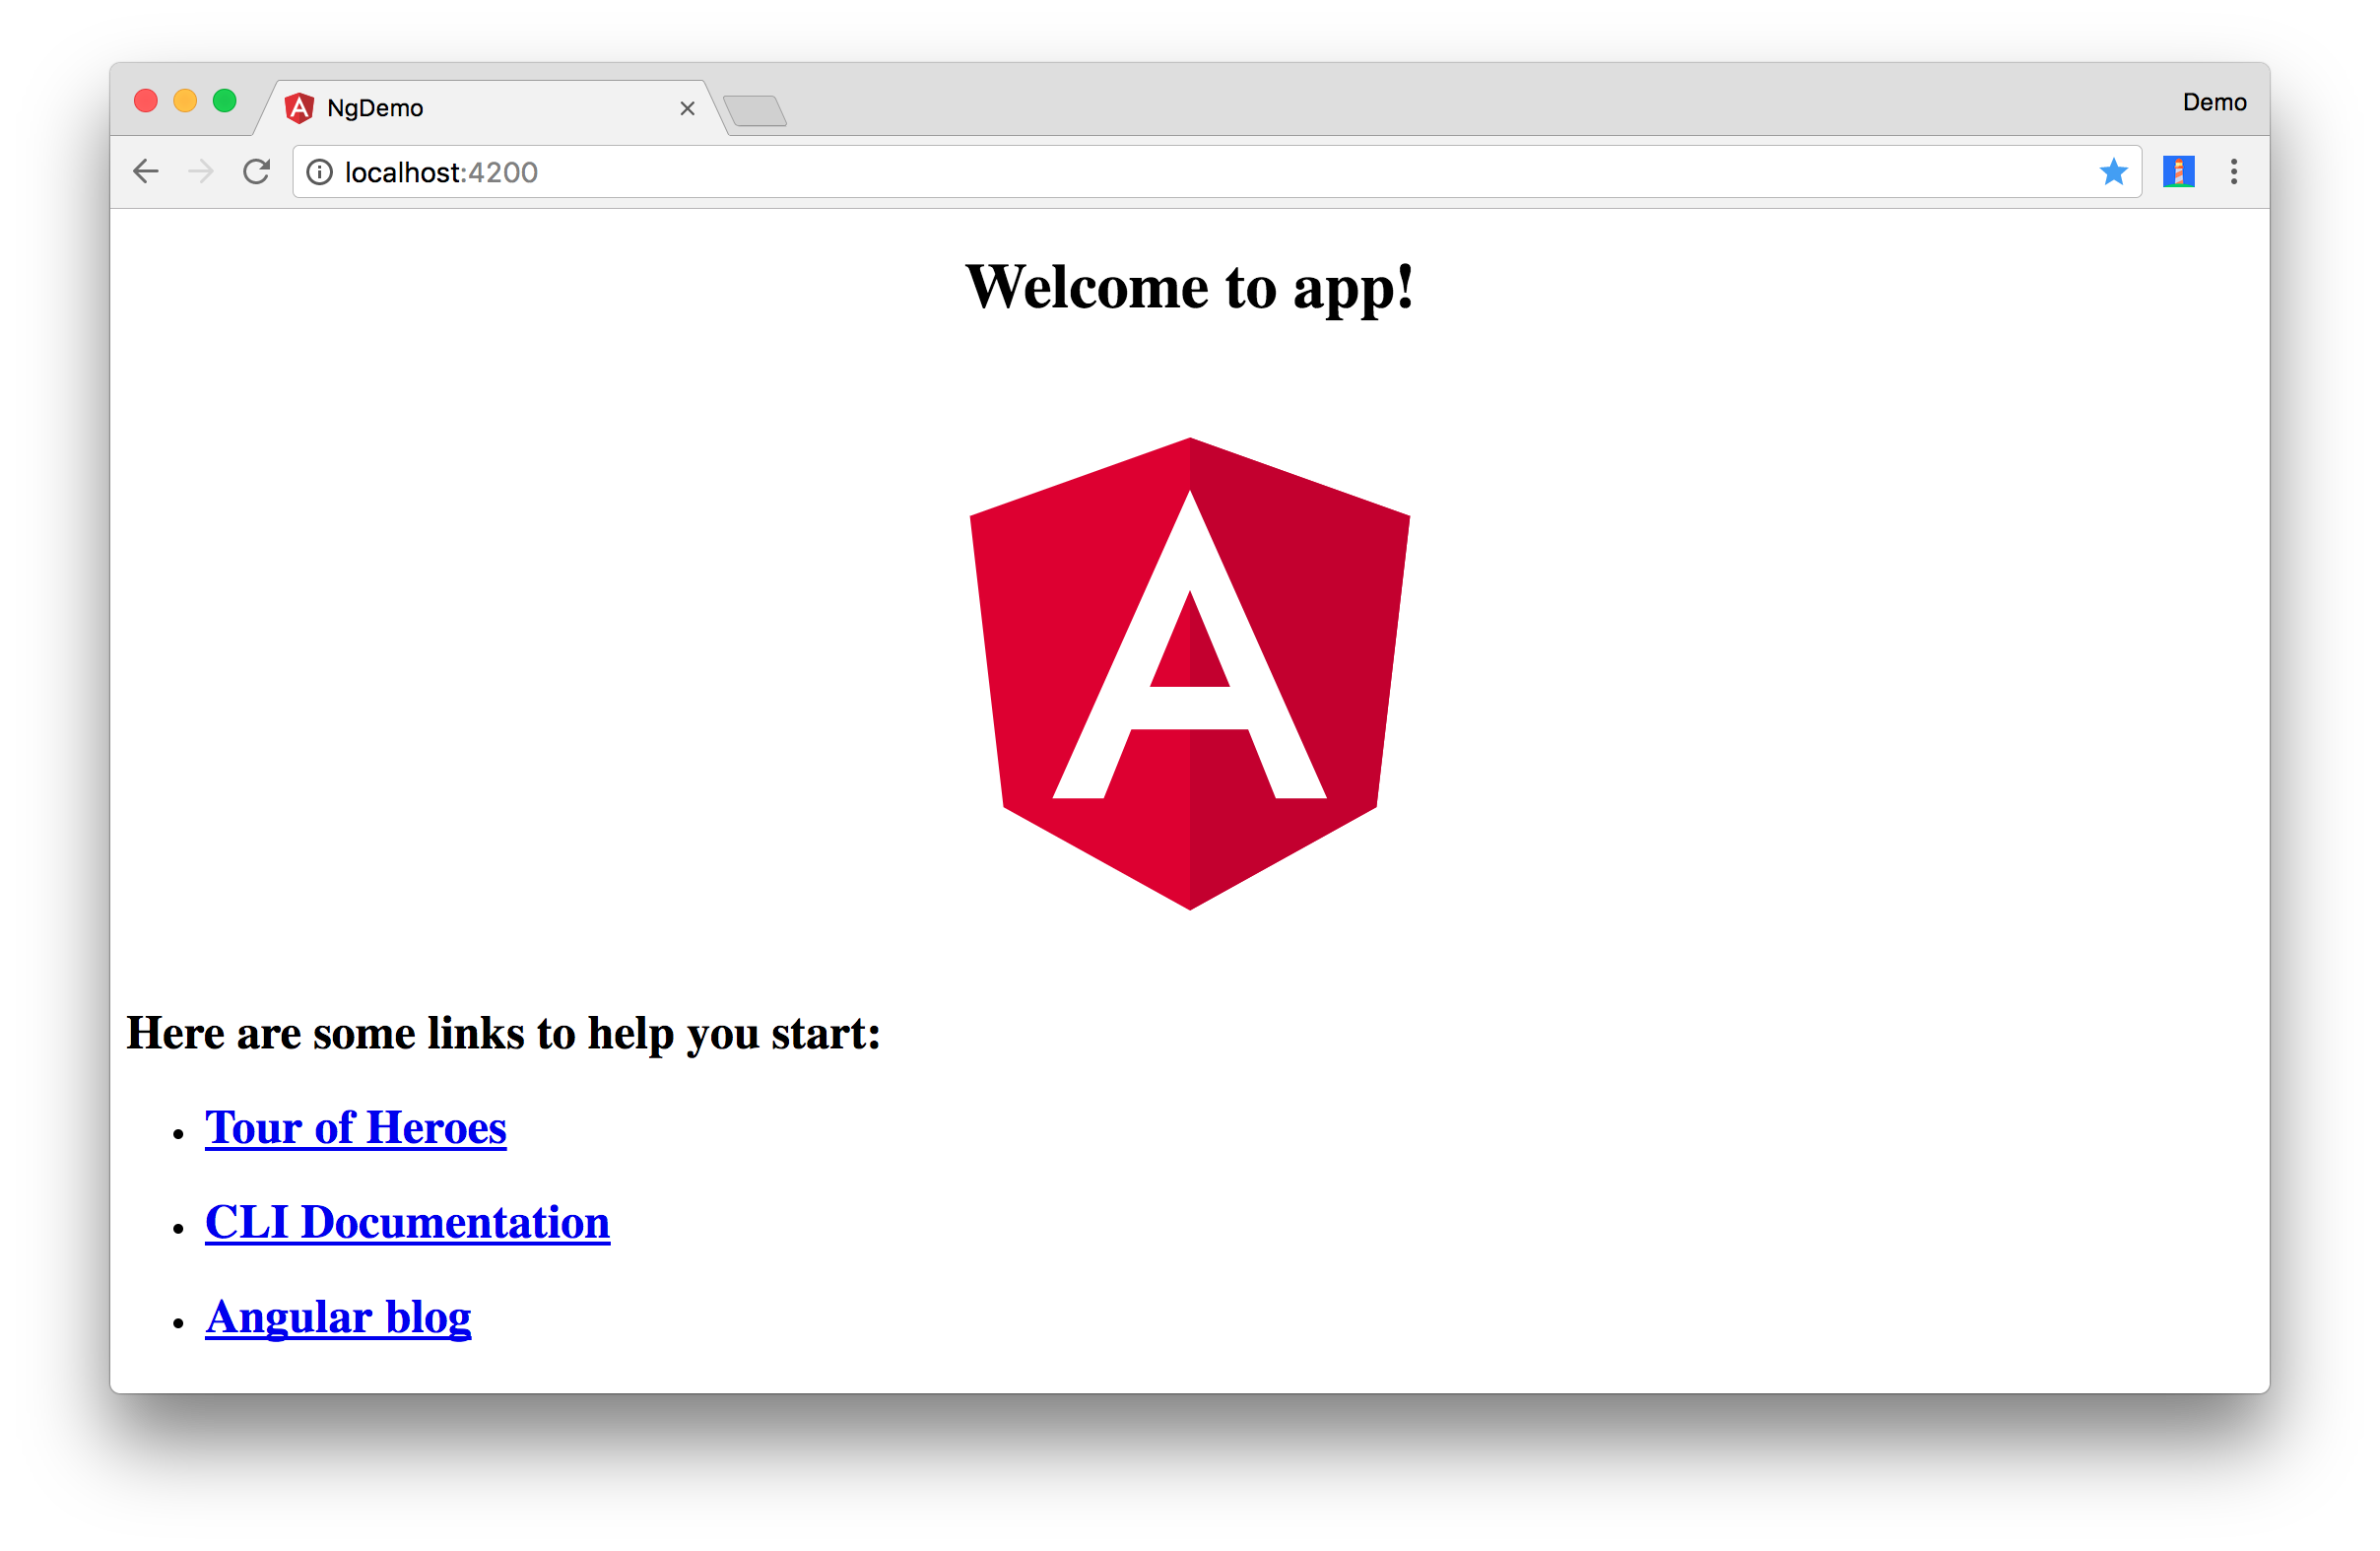
You should see a screen like the one below at http://localhost:4200.
You can make sure your new project’s tests pass, run ng test:
$ ng test
...
Chrome 66.0.3359 (Mac OS X 10.13.4): Executed 3 of 3 SUCCESS (0.205 secs / 0.184 secs)
Add a Search Feature
To add a search feature, open the project in an IDE or your favorite text editor. For IntelliJ IDEA, use File > New Project > Static Web and point to the ng-demo directory.
In a terminal window, cd into your project’s directory and run the following command. This will create a search component.
$ ng g component search
CREATE src/app/search/search.component.css (0 bytes)
CREATE src/app/search/search.component.html (25 bytes)
CREATE src/app/search/search.component.spec.ts (628 bytes)
CREATE src/app/search/search.component.ts (269 bytes)
UPDATE src/app/app.module.ts (396 bytes)
Open src/app/search/search.component.html and replace its default HTML with the following:
<h2>Search</h2>
<form>
  <input type="search" name="query" [(ngModel)]="query" (keyup.enter)="search()">
  <button type="button" (click)="search()">Search</button>
</form>
<pre>{{searchResults | json}}</pre>
The Router documentation for Angular provides the information you need to setup a route to the SearchComponent you just generated. Here’s a quick summary:
In src/app/app.module.ts, add an appRoutes constant and import it in @NgModule:
import { Routes, RouterModule } from '@angular/router';

const appRoutes: Routes = [
  {path: 'search', component: SearchComponent},
  {path: '', redirectTo: '/search', pathMatch: 'full'}
];

@NgModule({
  ...
  imports: [
    ...
    RouterModule.forRoot(appRoutes)
  ]
  ...
})
export class AppModule { }
In src/app/app.component.html, adjust the placeholder content and add a <router-outlet> tag to display routes.
<h1>Welcome to !</h1>
<!-- Routed views go here -->
<router-outlet></router-outlet>
Now that you have routing setup, you can continue writing the search feature.
If you still have ng serve running, your browser should refresh automatically. If not, navigate to http://localhost:4200. You will likely see a blank screen. Open your JavaScript console and you’ll see the problem.

To solve this, open src/app/app.module.ts and add FormsModule as an import in @NgModule:
import { FormsModule } from '@angular/forms';

@NgModule({
  ...
  imports: [
    ...
    FormsModule
  ]
  ...
})
export class AppModule { }
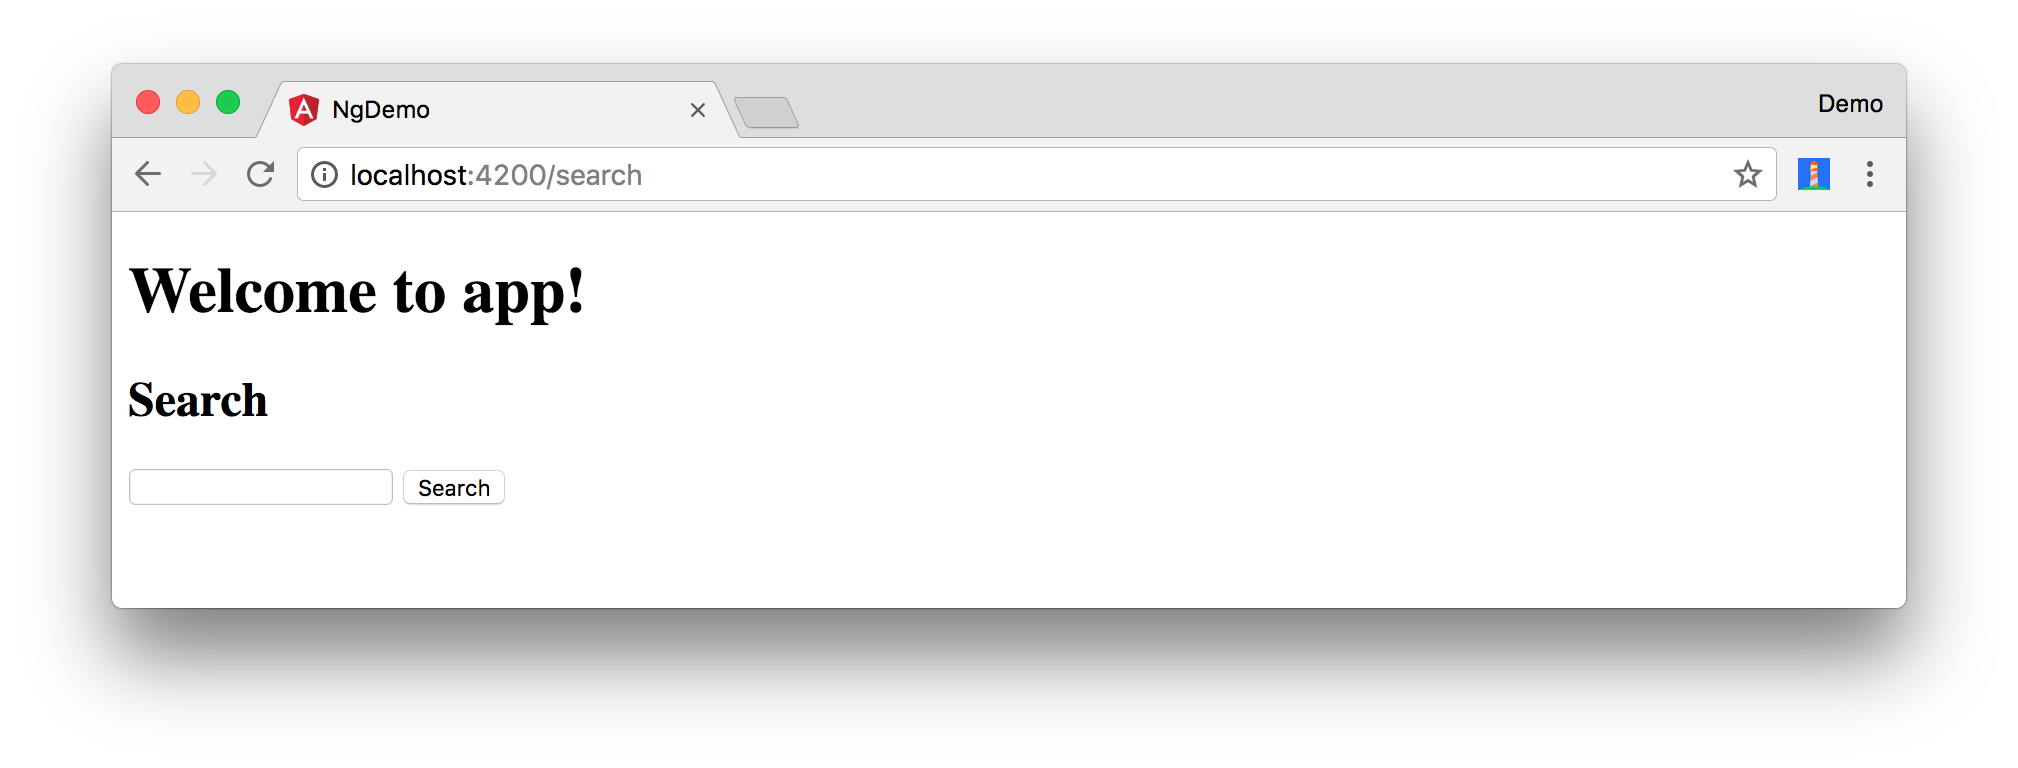
Now you should see the search form.
If you want to add CSS for this components, open src/app/search/search.component.css and add some CSS. For example:
:host {
  display: block;
  padding: 0 20px;
}
This section has shown you how to generate a new component to a basic Angular application with Angular CLI. The next section will show you how to create a use a JSON file and localStorage to create a fake API.
To get search results, create a SearchService that makes HTTP requests to a JSON file. Start by generating a new service.
$ ng g service search
CREATE src/app/search.service.spec.ts (374 bytes)
CREATE src/app/search.service.ts (135 bytes)
Move the generated search.service.ts and its test to app/shared/search. You’ll need to create this directory.
mkdir -p src/app/shared/search
mv src/app/search.service.* src/app/shared/search/.
Create src/assets/data/people.json to hold your data.
[
  {
    "id": 1,
    "name": "Peyton Manning",
    "phone": "(303) 567-8910",
    "address": {
      "street": "1234 Main Street",
      "city": "Greenwood Village",
      "state": "CO",
      "zip": "80111"
    }
  },
  {
    "id": 2,
    "name": "Demaryius Thomas",
    "phone": "(720) 213-9876",
    "address": {
      "street": "5555 Marion Street",
      "city": "Denver",
      "state": "CO",
      "zip": "80202"
    }
  },
  {
    "id": 3,
    "name": "Von Miller",
    "phone": "(917) 323-2333",
    "address": {
      "street": "14 Mountain Way",
      "city": "Vail",
      "state": "CO",
      "zip": "81657"
    }
  }
]
Modify src/app/shared/search/search.service.ts and provide HttpClient as a dependency in its constructor. In this same file, create a getAll() method to gather all the people. Also, define the Address and Person classes that JSON will be marshalled to.
import { Injectable } from '@angular/core';
import { HttpClient } from '@angular/common/http';

@Injectable({
  providedIn: 'root'
})
export class SearchService {

  constructor(private http: HttpClient) { }

  getAll() {
    return this.http.get('assets/data/people.json');
  }
}

export class Address {
  street: string;
  city: string;
  state: string;
  zip: string;

  constructor(obj?: any) {
    this.street = obj && obj.street || null;
    this.city = obj && obj.city || null;
    this.state = obj && obj.state || null;
    this.zip = obj && obj.zip || null;
  }
}

export class Person {
  id: number;
  name: string;
  phone: string;
  address: Address;

  constructor(obj?: any) {
    this.id = obj && Number(obj.id) || null;
    this.name = obj && obj.name || null;
    this.phone = obj && obj.phone || null;
    this.address = obj && obj.address || null;
  }
}
To make these classes available for consumption by your components, create src/app/shared/index.ts and add the following:
export * from './search/search.service';
The reason for creating this file is so you can import multiple classes on a single line rather than having to import each individual class on separate lines.
In src/app/search/search.component.ts, add imports for these classes.
import { Person, SearchService } from '../shared';
You can now add query and searchResults variables. While you’re there, modify the constructor to inject the SearchService.
export class SearchComponent implements OnInit {
  query: string;
  searchResults: Array<Person>;

  constructor(private searchService: SearchService) { }
Then implement a search() method to call the service’s getAll() method.
search(): void {
  this.searchService.getAll().subscribe(
    (data: any) => { this.searchResults = data; },
    error => console.log(error)
  );
}
At this point, you’ll likely see the following message in your browser’s console.
NullInjectorError: No provider for HttpClient!
To fix the “No provider” error from above, update src/app/app.module.ts to import HttpClientModule.
import { HttpClientModule } from '@angular/common/http';

@NgModule({
  ...
  imports: [
    ...
    HttpClientModule
  ],
  providers: [],
  bootstrap: [AppComponent]
})
Now clicking the search button should work. To make the results look better, remove the <pre> tag and replace it with a <table> in src/app/search/search.component.html.
<table *ngIf="searchResults">
  <thead>
  <tr>
    <th>Name</th>
    <th>Phone</th>
    <th>Address</th>
  </tr>
  </thead>
  <tbody>
  <tr *ngFor="let person of searchResults; let i=index">
    <td>{{person.name}}</td>
    <td>{{person.phone}}</td>
    <td>{{person.address.street}}<br/>
      {{person.address.city}}, {{person.address.state}} {{person.address.zip}}
    </td>
  </tr>
  </tbody>
</table>
Then add some additional CSS in src/app/search/search.component.css to improve its table layout.
table {
  margin-top: 10px;
  border-collapse: collapse;
}

th {
  text-align: left;
  border-bottom: 2px solid #ddd;
  padding: 8px;
}

td {
  border-top: 1px solid #ddd;
  padding: 8px;
}
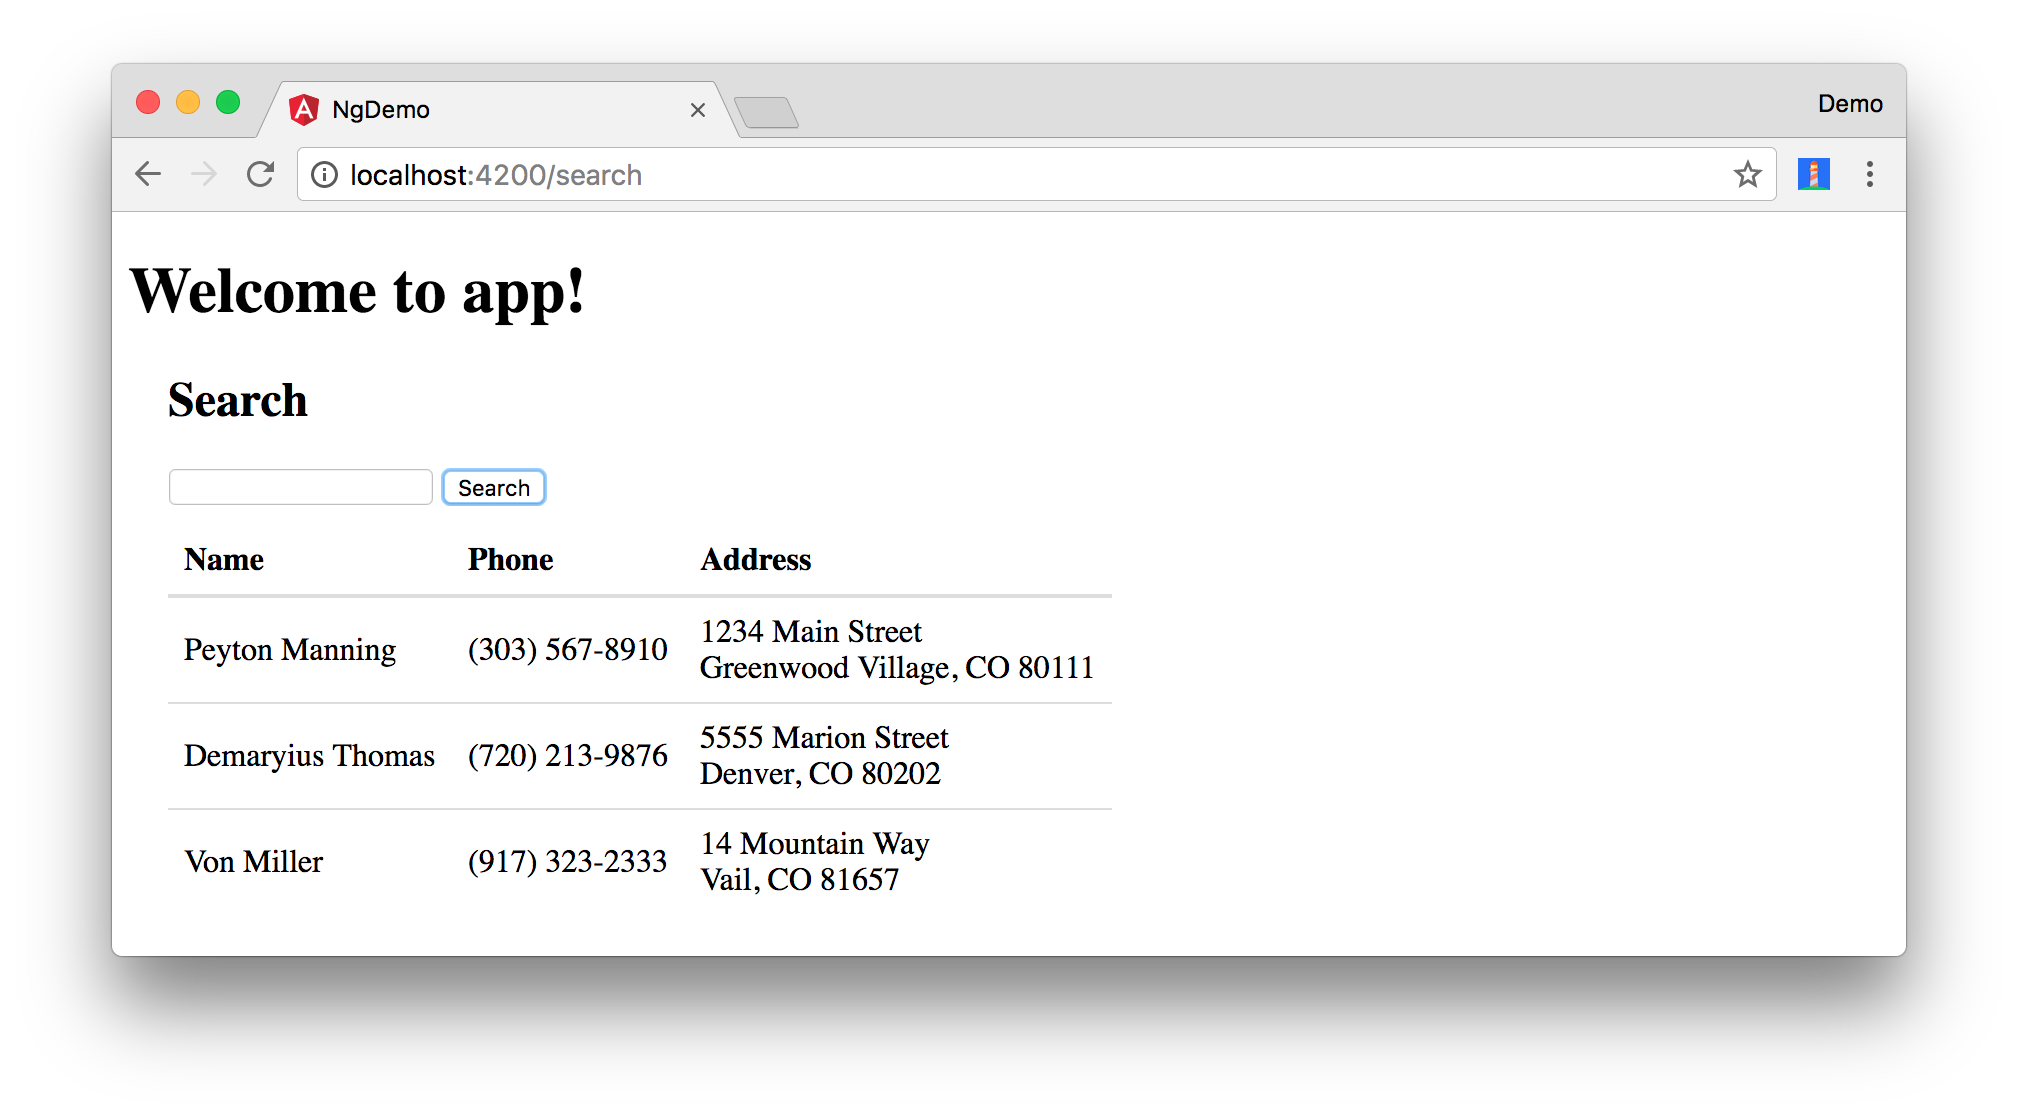
Now the search results look better.
But wait, you still don’t have search functionality! To add a search feature, add a search() method to SearchService.
import { Observable } from 'rxjs';
import { map } from 'rxjs/operators';
...

  search(q: string): Observable<any> {
    if (!q || q === '*') {
      q = '';
    } else {
      q = q.toLowerCase();
    }
    return this.getAll().pipe(
      map((data: any) => data
        .filter(item => JSON.stringify(item).toLowerCase().includes(q)))
    );
  }
Then refactor SearchComponent to call this method with its query variable.
search(): void {
  this.searchService.search(this.query).subscribe(
    (data: any) => { this.searchResults = data; },
    error => console.log(error)
  );
}
Now search results will be filtered by the query value you type in.
This section showed you how to fetch and display search results. The next section builds on this and shows how to edit and save a record.
Add an Edit Feature
Modify src/app/search/search.component.html to add a link for editing a person.
<td><a [routerLink]="['/edit', person.id]">{{person.name}}</a></td>
Run the following command to generate an EditComponent.
$ ng g component edit
CREATE src/app/edit/edit.component.css (0 bytes)
CREATE src/app/edit/edit.component.html (23 bytes)
CREATE src/app/edit/edit.component.spec.ts (614 bytes)
CREATE src/app/edit/edit.component.ts (261 bytes)
UPDATE src/app/app.module.ts (840 bytes)
Add a route for this component in src/app/app.module.ts:
const appRoutes: Routes = [
  { path: 'search', component: SearchComponent },
  { path: 'edit/:id', component: EditComponent },
  { path: '', redirectTo: '/search', pathMatch: 'full' }
];
Update src/app/edit/edit.component.html to display an editable form. You might notice I’ve added id attributes to most elements. This is to make things easier when writing integration tests with Protractor.
<div *ngIf="person">
  <h3>{{editName}}</h3>
  <div>
    <label>Id:</label>
    {{person.id}}
  </div>
  <div>
    <label>Name:</label>
    <input [(ngModel)]="editName" name="name" id="name" placeholder="name"/>
  </div>
  <div>
    <label>Phone:</label>
    <input [(ngModel)]="editPhone" name="phone" id="phone" placeholder="Phone"/>
  </div>
  <fieldset>
    <legend>Address:</legend>
    <address>
      <input [(ngModel)]="editAddress.street" id="street"><br/>
      <input [(ngModel)]="editAddress.city" id="city">,
      <input [(ngModel)]="editAddress.state" id="state" size="2">
      <input [(ngModel)]="editAddress.zip" id="zip" size="5">
    </address>
  </fieldset>
  <button (click)="save()" id="save">Save</button>
  <button (click)="cancel()" id="cancel">Cancel</button>
</div>
Modify EditComponent to import model and service classes and to use the SearchService to get data.
import { Component, OnInit, OnDestroy } from '@angular/core';
import { Address, Person, SearchService } from '../shared';
import { Subscription } from 'rxjs';
import { ActivatedRoute, Router } from '@angular/router';

@Component({
  selector: 'app-edit',
  templateUrl: './edit.component.html',
  styleUrls: ['./edit.component.css']
})
export class EditComponent implements OnInit, OnDestroy {
  person: Person;
  editName: string;
  editPhone: string;
  editAddress: Address;

  sub: Subscription;

  constructor(private route: ActivatedRoute,
              private router: Router,
              private service: SearchService) {
  }

  ngOnInit() {
    this.sub = this.route.params.subscribe(params => {
      const id = + params['id']; // (+) converts string 'id' to a number
      this.service.get(id).subscribe(person => {
        if (person) {
          this.editName = person.name;
          this.editPhone = person.phone;
          this.editAddress = person.address;
          this.person = person;
        } else {
          this.gotoList();
        }
      });
    });
  }

  ngOnDestroy() {
    this.sub.unsubscribe();
  }

  cancel() {
    this.router.navigate(['/search']);
  }

  save() {
    this.person.name = this.editName;
    this.person.phone = this.editPhone;
    this.person.address = this.editAddress;
    this.service.save(this.person);
    this.gotoList();
  }

  gotoList() {
    if (this.person) {
      this.router.navigate(['/search', {term: this.person.name} ]);
    } else {
      this.router.navigate(['/search']);
    }
  }
}
Modify SearchService to contain functions for finding a person by their id, and saving them. While you’re in there, modify the search() method to be aware of updated objects in localStorage.
search(q: string): Observable<any> {
  if (!q || q === '*') {
    q = '';
  } else {
    q = q.toLowerCase();
  }
  return this.getAll().pipe(
    map((data: any) => data
        .map(item => !!localStorage['person' + item.id] ?
          JSON.parse(localStorage['person' + item.id]) : item)
        .filter(item => JSON.stringify(item).toLowerCase().includes(q))
    ));
}

get(id: number) {
  return this.getAll().pipe(map((all: any) => {
    if (localStorage['person' + id]) {
      return JSON.parse(localStorage['person' + id]);
    }
    return all.find(e => e.id === id);
  }));
}

save(person: Person) {
  localStorage['person' + person.id] = JSON.stringify(person);
}
You can add CSS to src/app/edit/edit.component.css if you want to make the form look a bit better.
:host {
  display: block;
  padding: 0 20px;
}

button {
  margin-top: 10px;
}
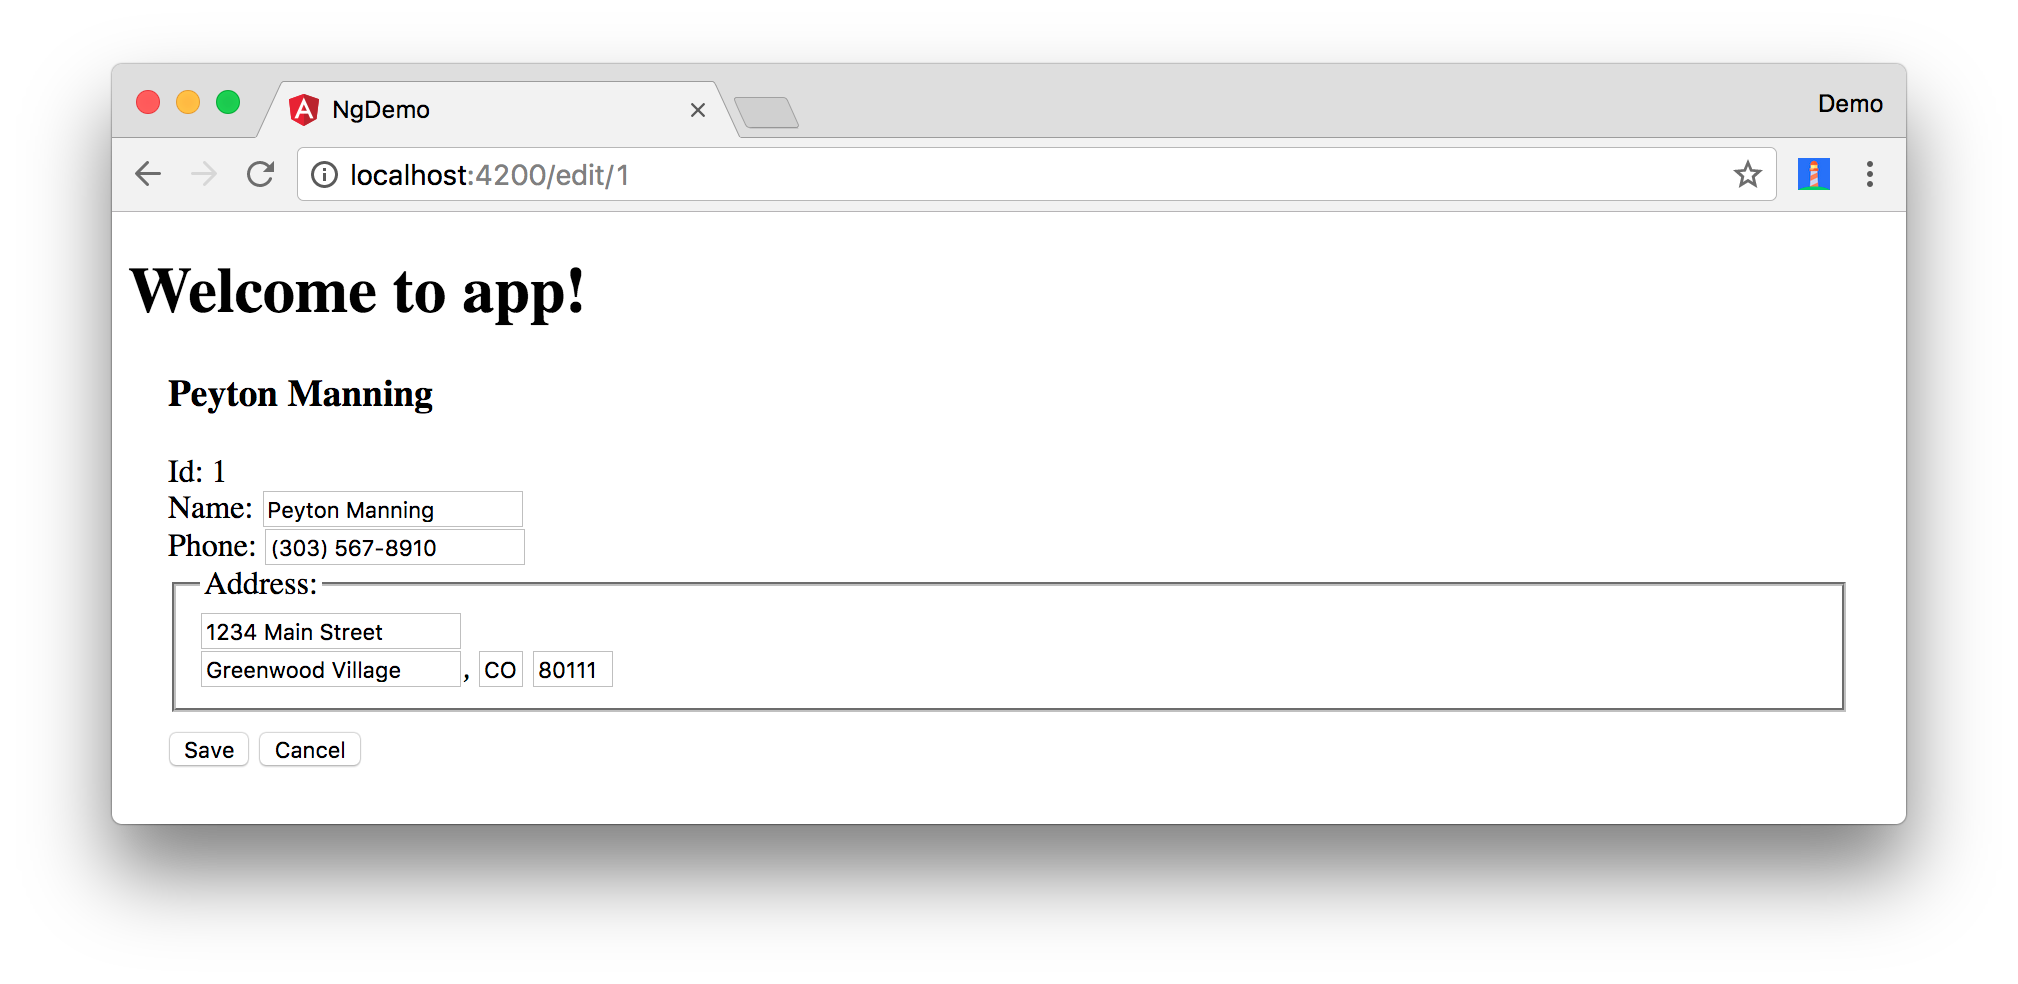
At this point, you should be able to search for a person and update their information.
The <form> in src/app/edit/edit.component.html calls a save() function to update a person’s data. You already implemented this above.
The function calls a gotoList() function that appends the person’s name to the URL when sending the user back to the search screen.
gotoList() {
  if (this.person) {
    this.router.navigate(['/search', {term: this.person.name} ]);
  } else {
    this.router.navigate(['/search']);
  }
}
Since the SearchComponent doesn’t execute a search automatically when you execute this URL, add the following logic to do so in its ngOnInit method.
import { ActivatedRoute } from '@angular/router';
import { Subscription } from 'rxjs';
...

sub: Subscription;

constructor(private searchService: SearchService, private route: ActivatedRoute) { }

ngOnInit() {
  this.sub = this.route.params.subscribe(params => {
    if (params['term']) {
      this.query = decodeURIComponent(params['term']);
      this.search();
    }
  });
}
You’ll want to implement OnDestroy and define the ngOnDestroy method to clean up this subscription.
import { Component, OnInit, OnDestroy } from '@angular/core';

export class SearchComponent implements OnInit, OnDestroy {
...
  ngOnDestroy() {
    if (this.sub) {
      this.sub.unsubscribe();
    }
  }
}
After making all these changes, you should be able to search/edit/update a person’s information. If it works - nice job!
Form Validation
One thing you might notice is you can clear any input element in the form and save it. At the very least, the name field should be required. Otherwise, there’s nothing to click on in the search results.
To make name required, modify edit.component.html to add a required attribute to the name <input>.
<input [(ngModel)]="editName" name="name" id="name" placeholder="name" required/>
You’ll also need to wrap everything in a <form> element. Add <form> after the <h3> tag and close it before the last </div>. You’ll also need to add an (ngSubmit) handler to the form and change the save button to be a regular submit button.
<h3>{{editName}}</h3>
<form (ngSubmit)="save()" ngNativeValidate>
  ...
  <button type="submit" id="save">Save</button>
  <button (click)="cancel()" id="cancel">Cancel</button>
</form>
After making these changes, any field with a required attribute will be required.
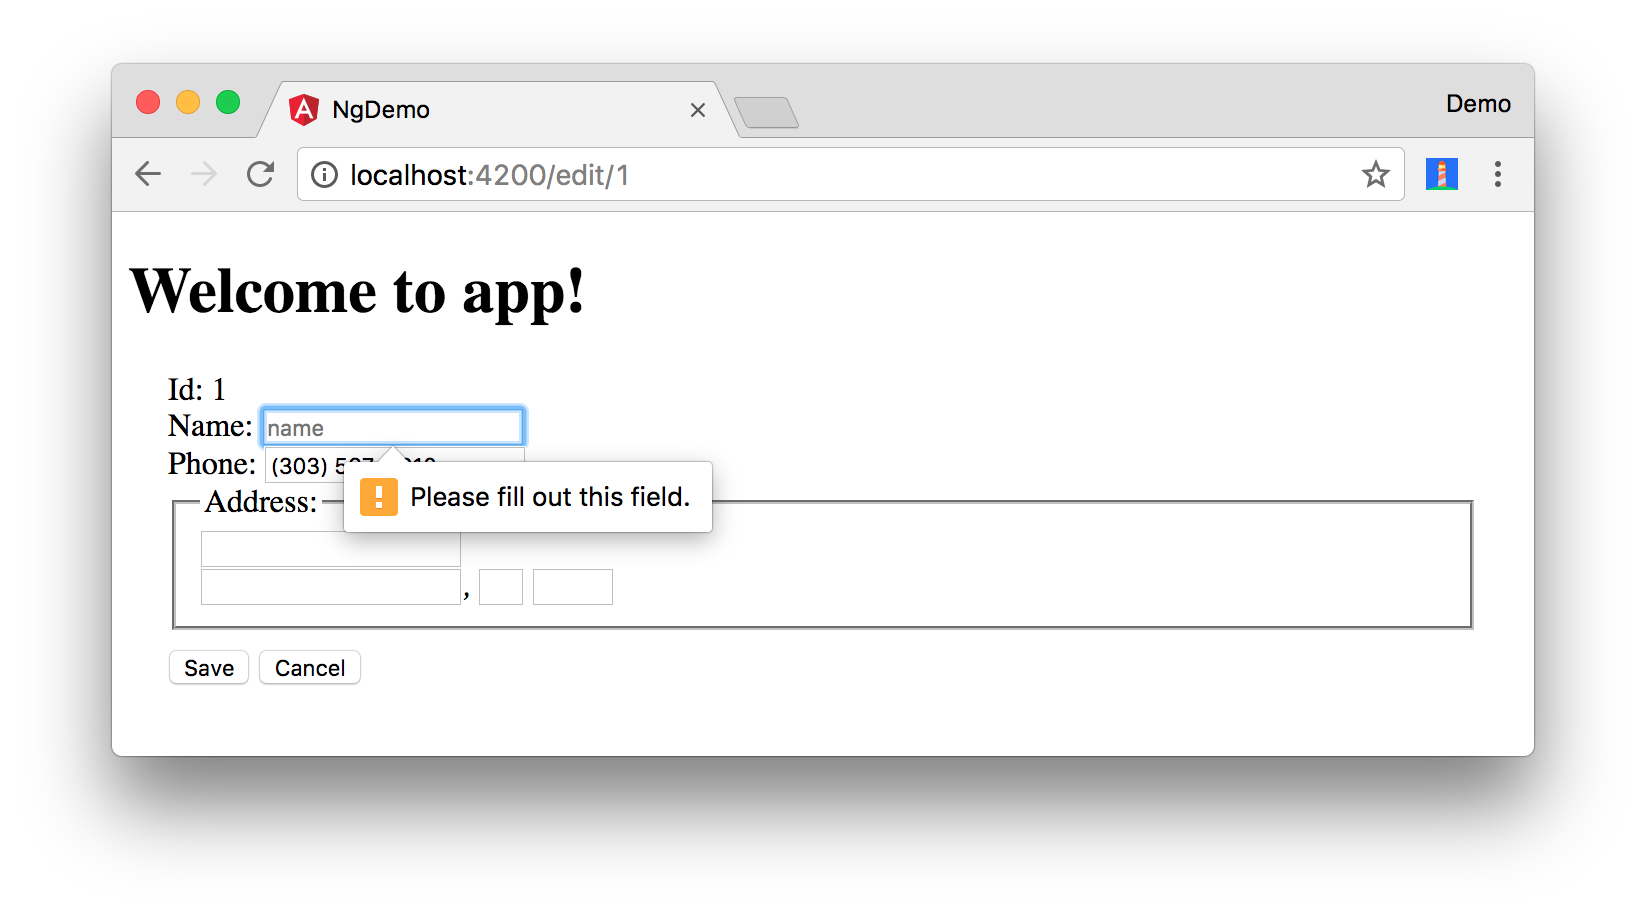
In this screenshot, you might notice the address fields are blank. This is explained by the error in your console.
If ngModel is used within a form tag, either the name attribute must be set or the form
control must be defined as 'standalone' in ngModelOptions.

Example 1: <input [(ngModel)]="person.firstName" name="first">
Example 2: <input [(ngModel)]="person.firstName" [ngModelOptions]="{standalone: true}">
To fix, add a name attribute to all the address fields. For example:
<address>
  <input [(ngModel)]="editAddress.street" name="street" id="street"><br/>
  <input [(ngModel)]="editAddress.city" name="city" id="city">,
  <input [(ngModel)]="editAddress.state" name="state" id="state" size="2">
  <input [(ngModel)]="editAddress.zip" name="zip" id="zip" size="5">
</address>
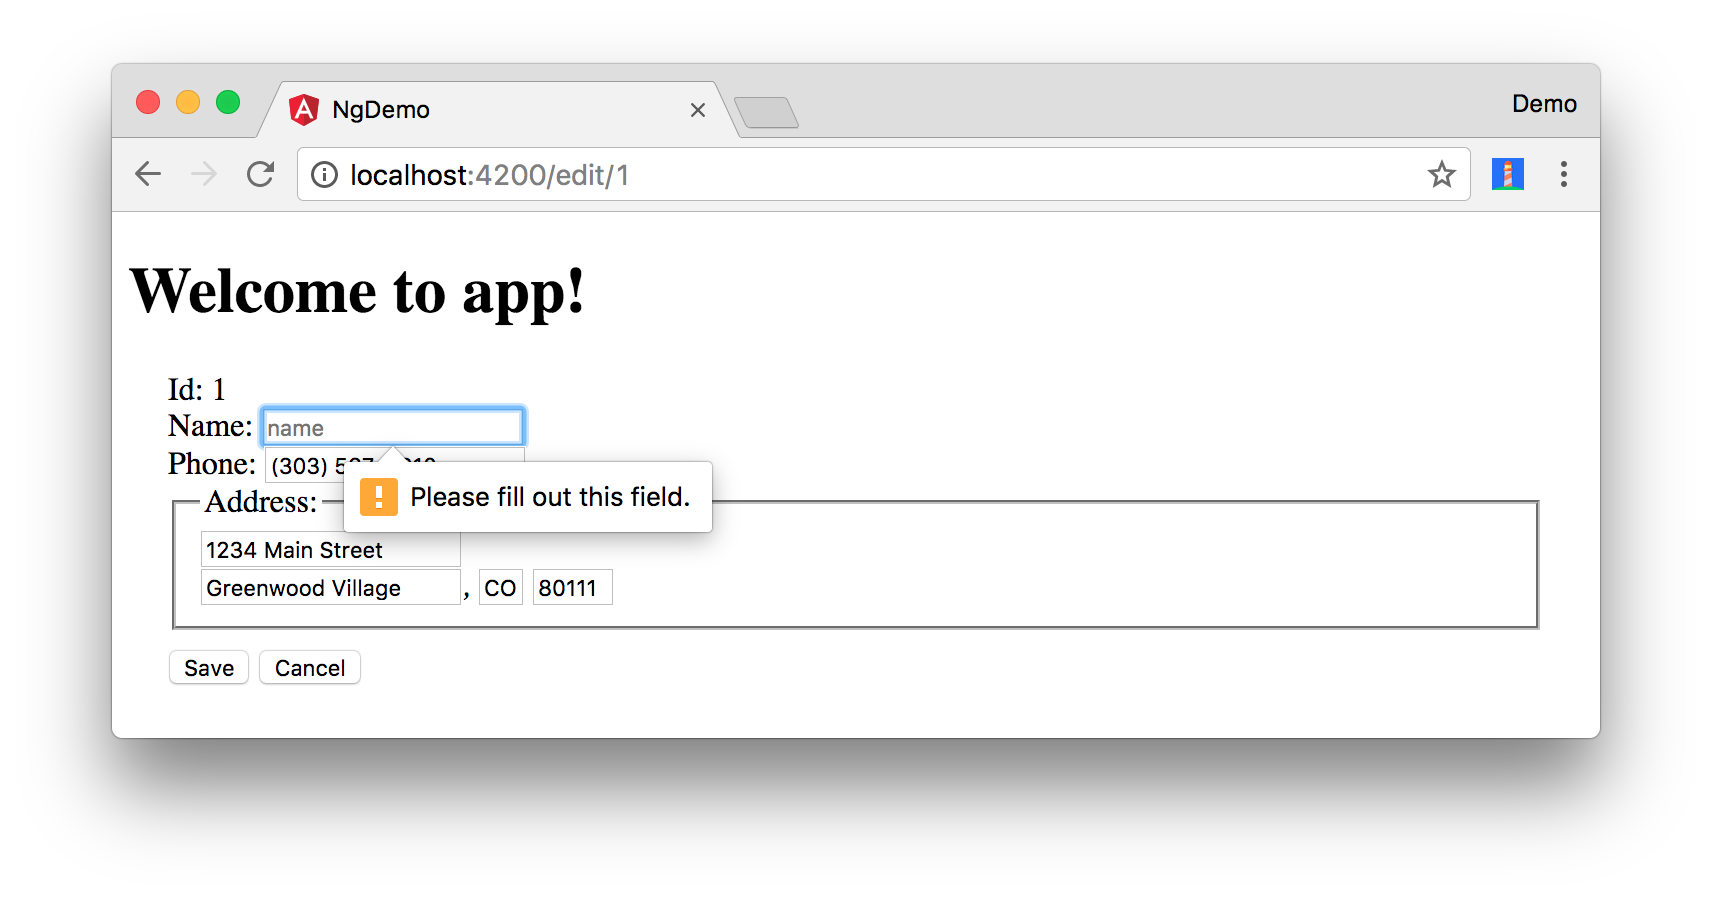
Now values should display in all fields and name should be required.
If you want to provide your own validation messages instead of relying on the browser’s, complete the following steps:
- Remove
ngNativeValidateand add#editForm="ngForm"to the<form>element. - Add
#name="ngModel"to the<input id="name">element. - Add
[disabled]="!editForm.form.valid"to the Save button. - Add the following under the
namefield to display a validation error.
<div [hidden]="name.valid || name.pristine" style="color: red">
  Name is required
</div>
To learn more about forms and validation, see Angular forms documentation.
Create an OpenID Connect App in Okta
OpenID Connect (OIDC) is built on top of the OAuth 2.0 protocol. It allows clients to verify the identity of the user and, as well as to obtain their basic profile information. To learn more, see https://openid.net/connect.
To integrate Okta for user authentication, you’ll first need to register and create an OIDC application.
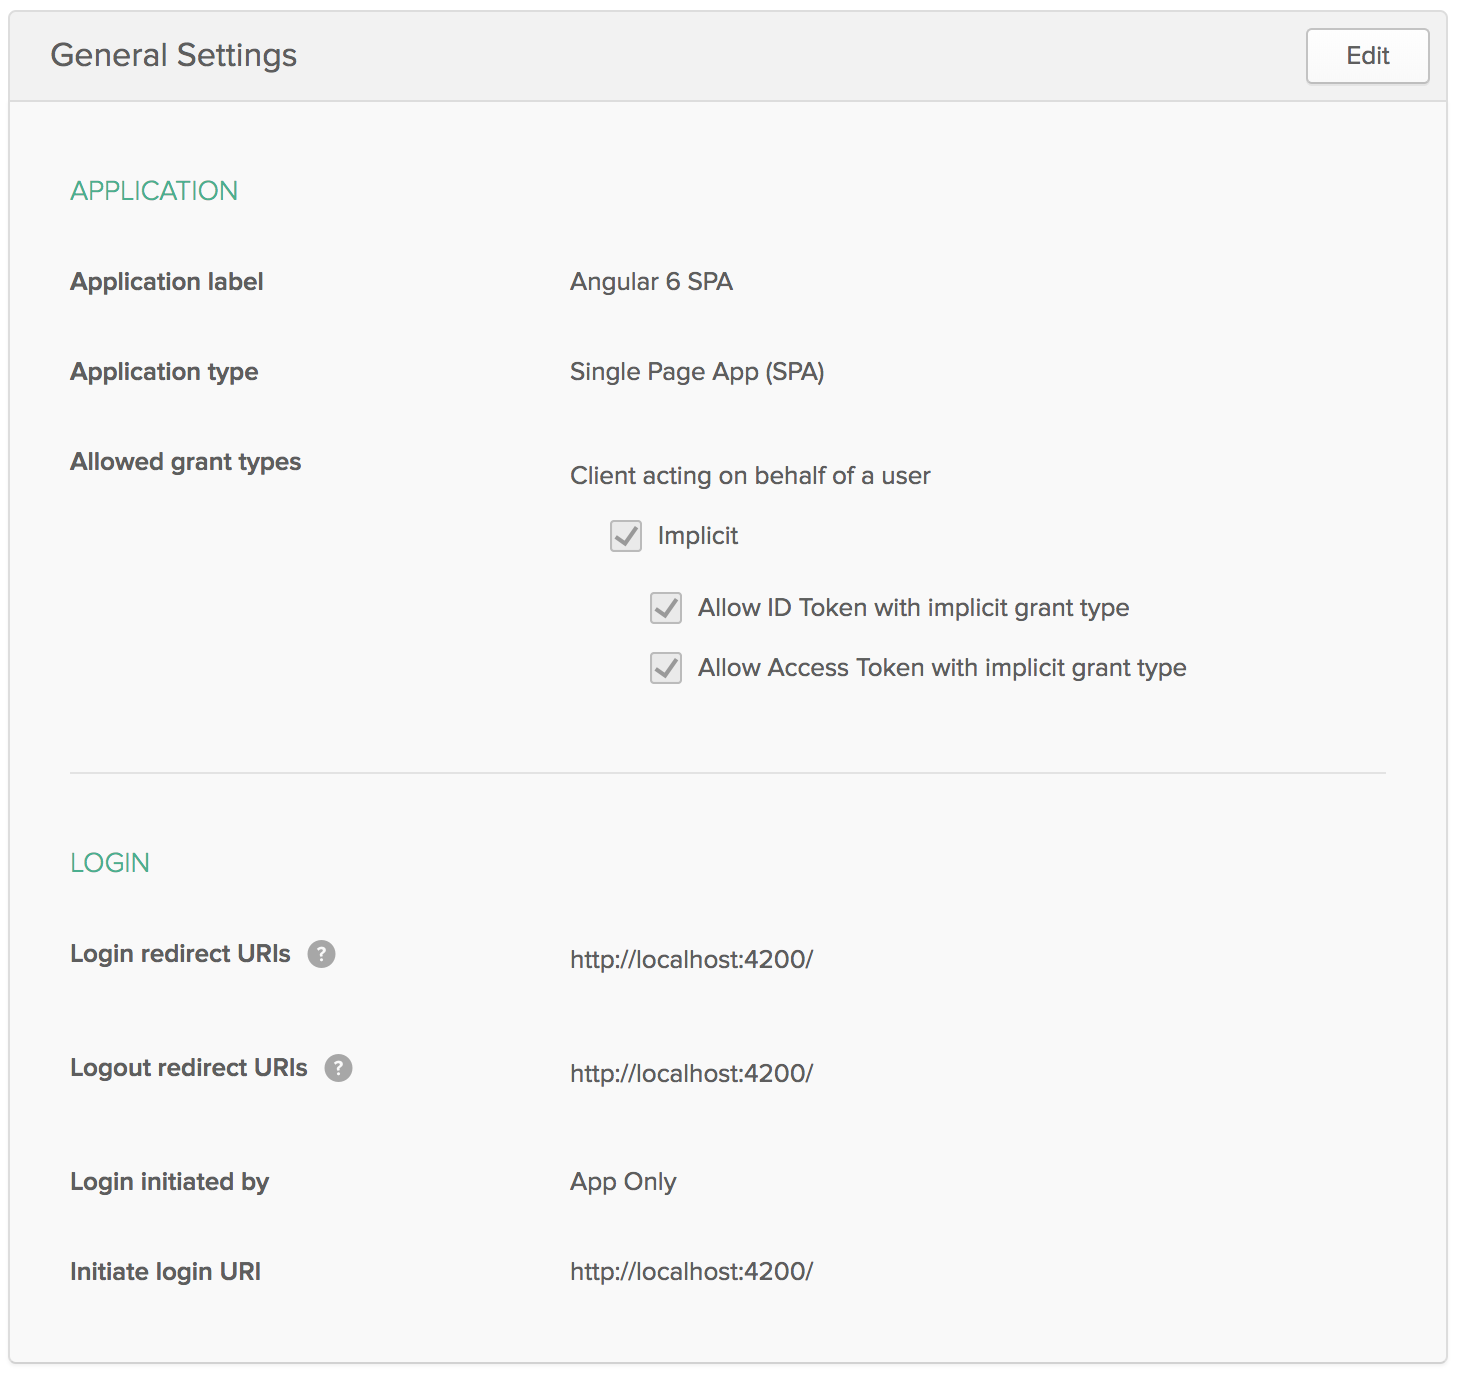
Login to your Okta account, or create one if you don’t have one. Navigate to Applications and click on the Add Application button. Select SPA and click Next. On the next page, specify http://localhost:4200 as a Base URI, Login redirect URI, and Logout redirect URI. Click Done and you should see settings like the following.
Install Manfred Steyer’s project to add OAuth 2 and OpenID Connect support using npm. You’ll also need rxjs-compat since this library has not been upgraded to RxJS 6.
npm install angular-oauth2-oidc@3.1.4 rxjs-compat@6.1.0
Modify src/app/app.component.ts to import OAuthService and configure your app to use your Okta application’s settings.
import { OAuthService, JwksValidationHandler } from 'angular-oauth2-oidc';

...

  constructor(private oauthService: OAuthService) {
    this.oauthService.redirectUri = window.location.origin;
    this.oauthService.clientId = '{clientId}';
    this.oauthService.scope = 'openid profile email';
    this.oauthService.issuer = 'https://{yourOktaDomain}/oauth2/default';
    this.oauthService.tokenValidationHandler = new JwksValidationHandler();

    // Load Discovery Document and then try to login the user
    this.oauthService.loadDiscoveryDocumentAndTryLogin();
  }
...
TIP: If you’d like to use angular-oauth2-oidc v5, see Angular 7: What’s New and Noteworthy + OIDC Goodness for instructions.
Create src/app/home/home.component.ts and configure it to have Login and Logout buttons.
import { Component } from '@angular/core';
import { OAuthService } from 'angular-oauth2-oidc';

@Component({
  template: `
    <div *ngIf="givenName">
      <h2>Welcome, {{givenName}}!</h2>
      <button (click)="logout()">Logout</button>
      <p><a routerLink="/search" routerLinkActive="active">Search</a></p>
    </div>

    <div *ngIf="!givenName">
      <button (click)="login()">Login</button>
    </div>`
})
export class HomeComponent {

  constructor(private oauthService: OAuthService) {
  }

  login() {
    this.oauthService.initImplicitFlow();
  }

  logout() {
    this.oauthService.logOut();
  }

  get givenName() {
    const claims = this.oauthService.getIdentityClaims();
    if (!claims) {
      return null;
    }
    return claims['name'];
  }
}
Create src/app/shared/auth/auth.guard.service.ts to navigate to the HomeComponent if the user is not authenticated.
import { Injectable } from '@angular/core';
import { ActivatedRouteSnapshot, CanActivate, Router, RouterStateSnapshot } from '@angular/router';
import { OAuthService } from 'angular-oauth2-oidc';

@Injectable({
  providedIn: 'root'
})
export class AuthGuard implements CanActivate {

  constructor(private oauthService: OAuthService, private router: Router) {}

  canActivate(route: ActivatedRouteSnapshot, state: RouterStateSnapshot): boolean {
    if (this.oauthService.hasValidIdToken()) {
      return true;
    }

    this.router.navigate(['/home']);
    return false;
  }
}
Export AuthGuard in src/shared/index.ts:
export * from './auth/auth.guard.service';
Import the OAuthModule in src/app/app.module.ts, configure the new HomeComponent, and lock the /search and /edit routes down with the AuthGuard.
import { OAuthModule } from 'angular-oauth2-oidc';
import { HomeComponent } from './home/home.component';
import { AuthGuard } from './shared';

const appRoutes: Routes = [
  { path: 'search', component: SearchComponent, canActivate: [AuthGuard] },
  { path: 'edit/:id', component: EditComponent, canActivate: [AuthGuard] },
  { path: 'home', component: HomeComponent },
  { path: '', redirectTo: 'home', pathMatch: 'full' },
  { path: '**', redirectTo: 'home' }
];

@NgModule({
  declarations: [
    ...
    HomeComponent
  ],
  imports: [
    ...
    OAuthModule.forRoot()
  ],
  providers: [],
  bootstrap: [AppComponent]
})
export class AppModule { }
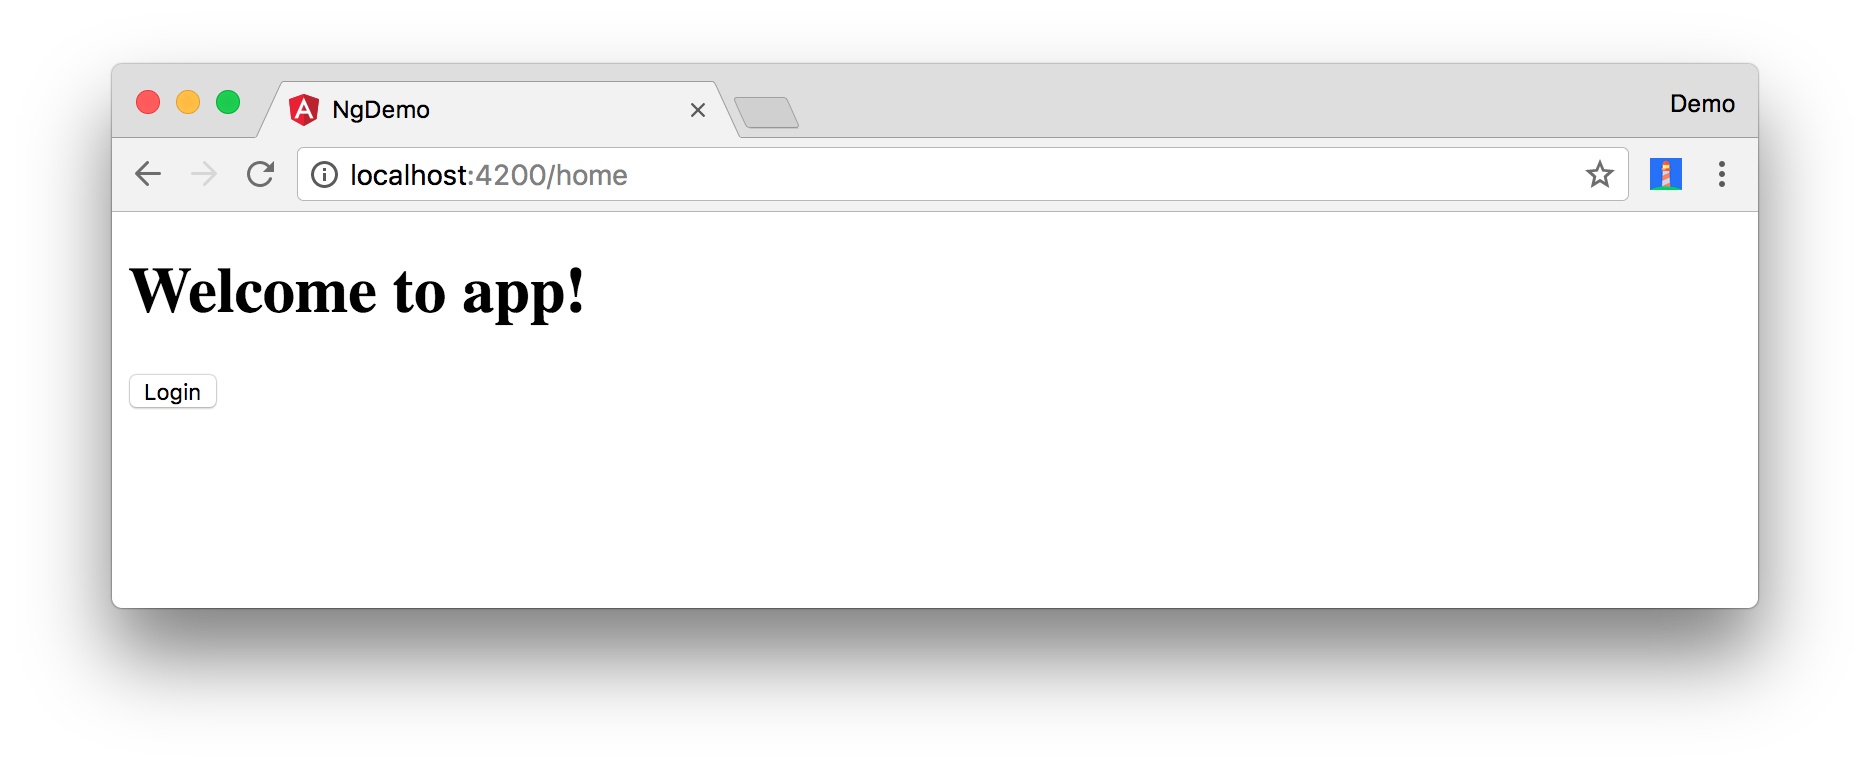
After making these changes, you should be able to run ng serve and see a login button.
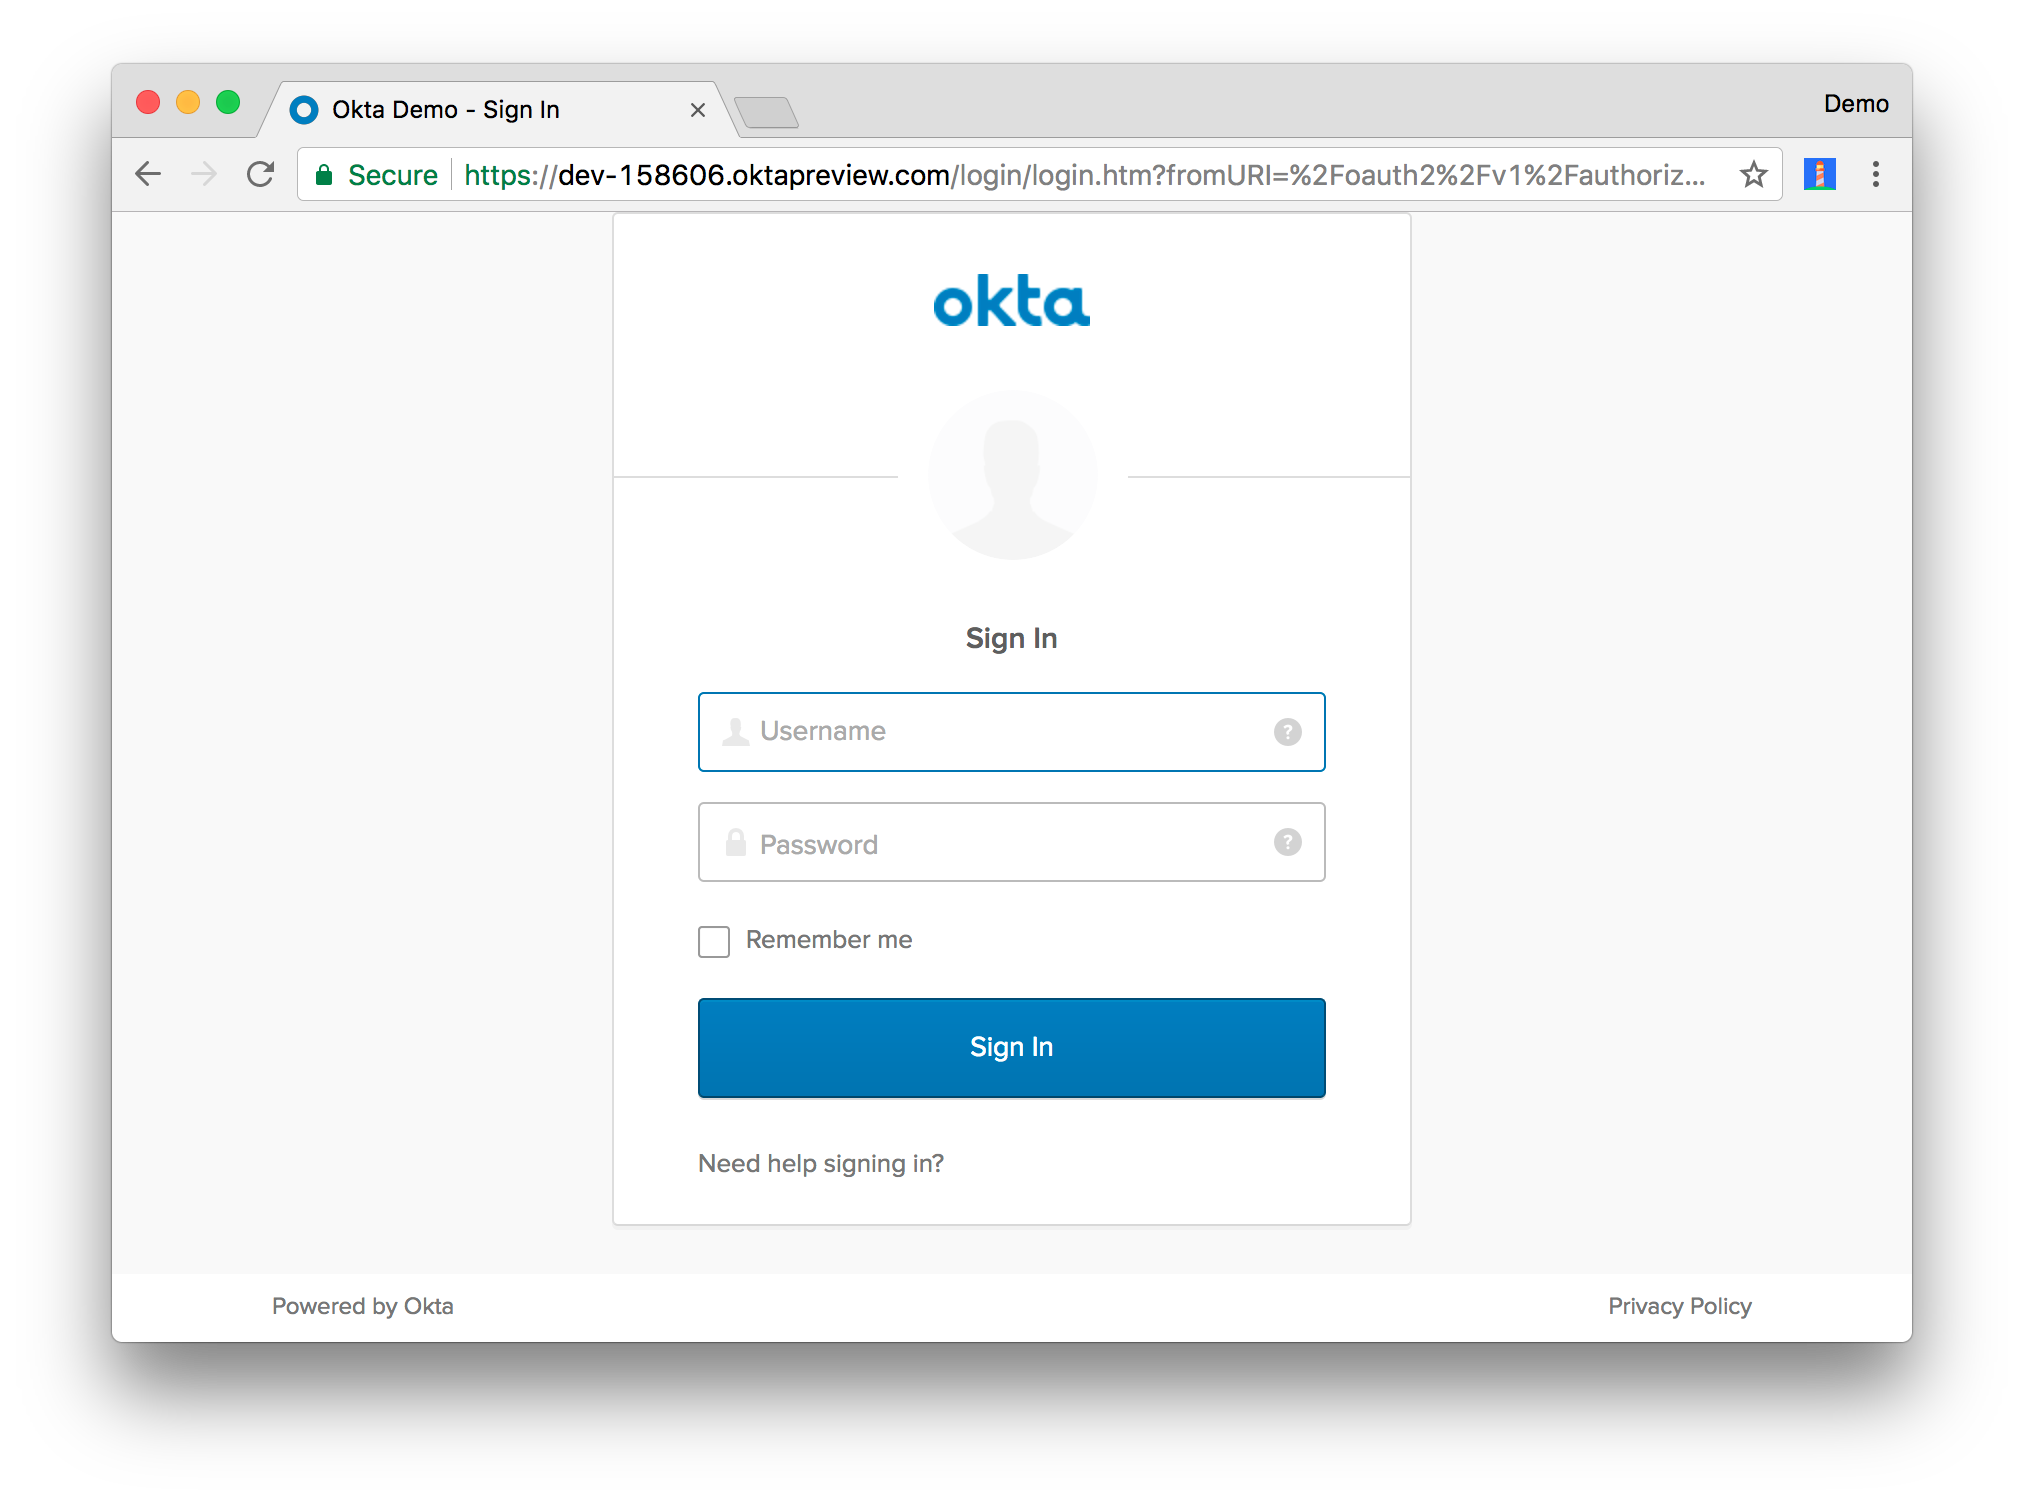
Click the Login button and sign-in with one of the people that’s configured in your Okta application.
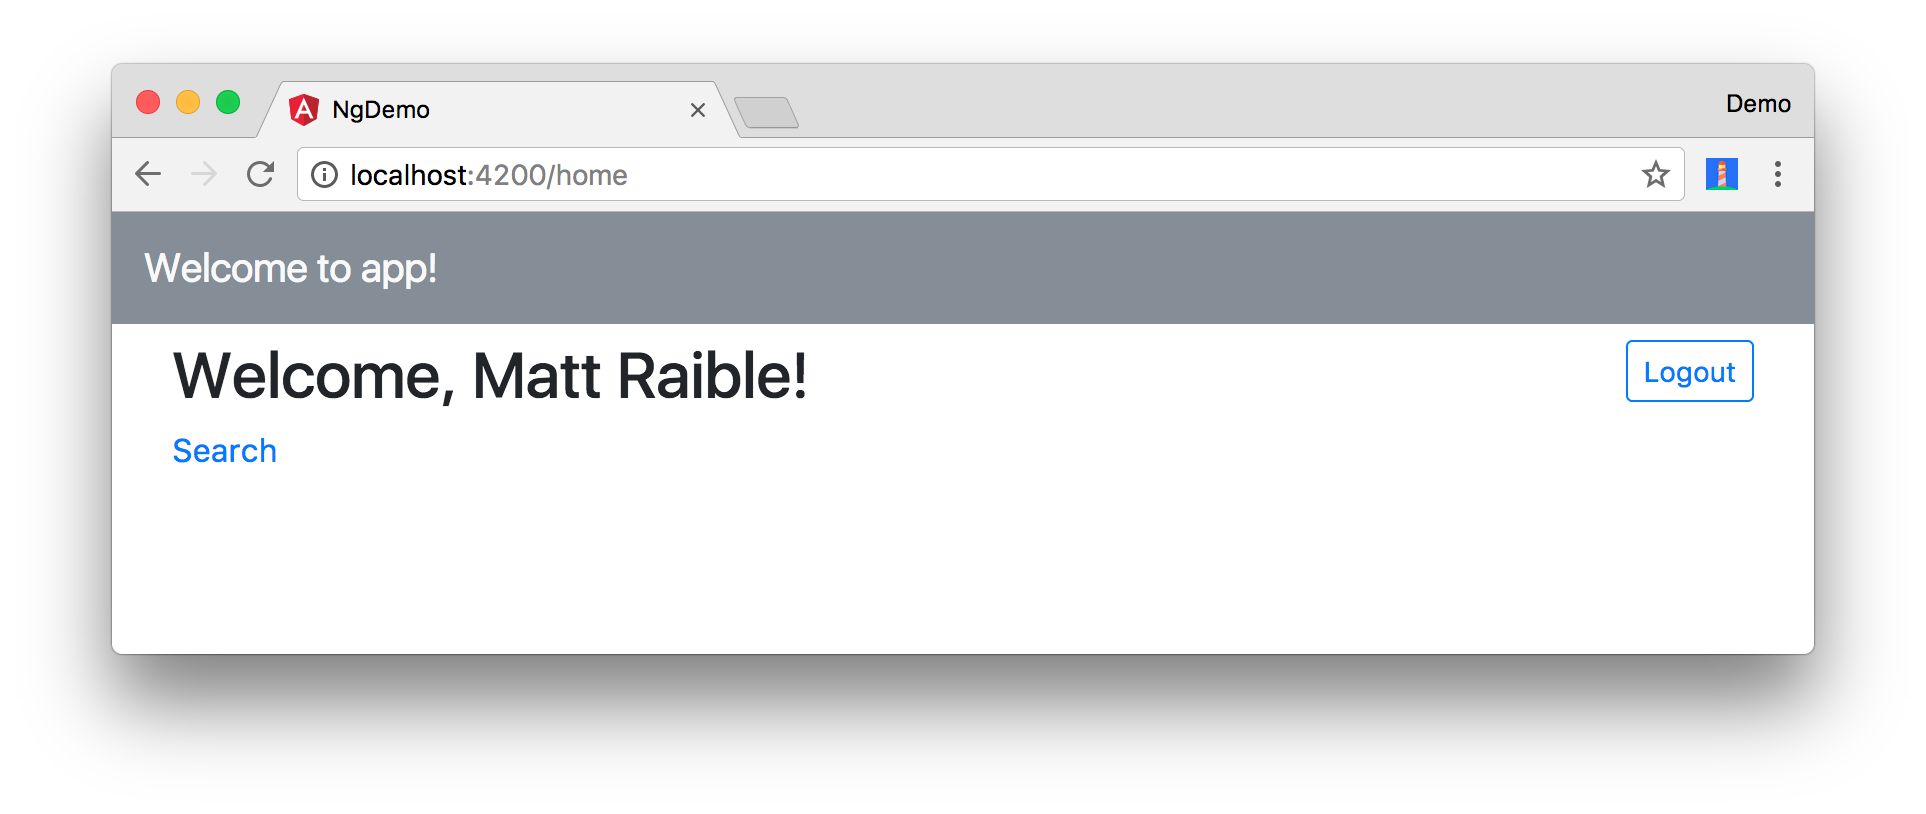
After logging in, you’ll be able to click Search and view people’s information.

If it works - great! If you want to build your own login form in your app, continue reading to learn how to use the Okta Auth SDK with OAuthService.
Authentication with the Okta Auth SDK
The Okta Auth SDK builds on top of Okta’s Authentication API and OAuth 2.0 API to enable you to create a fully branded sign-in experience using JavaScript.
Install it using npm:
npm install @okta/okta-auth-js@1.17.0
The components in this section use Bootstrap CSS classes. Install Bootstrap 4.
npm install bootstrap@4.1.1
Modify src/styles.css to add a reference to Bootstrap’s CSS file.
@import "~bootstrap/dist/css/bootstrap.css";
Update src/app/app.component.html to use Bootstrap classes for its navbar and grid system.
<nav class="navbar navbar-light bg-secondary">
  <a class="navbar-brand text-light" href="#">Welcome to {{title}}!</a>
</nav>
<div class="container-fluid">
  <router-outlet></router-outlet>
</div>
Create src/app/shared/auth/okta.auth.wrapper.ts to wrap the Okta Auth SDK and integrate it with OAuthService. Its
login() method uses OktaAuth to get a session token and exchange it for ID and access tokens.
import { OAuthService } from 'angular-oauth2-oidc';
import { Injectable } from '@angular/core';
import * as OktaAuth from '@okta/okta-auth-js';

@Injectable({
  providedIn: 'root'
})
export class OktaAuthWrapper {

  private authClient: any;

  constructor(private oauthService: OAuthService) {
    this.authClient = new OktaAuth({
      url: 'https://{yourOktaDomain}',
      issuer: 'default'
    });
  }

  login(username: string, password: string): Promise<any> {
    return this.oauthService.createAndSaveNonce().then(nonce => {
      return this.authClient.signIn({
        username: username,
        password: password
      }).then((response) => {
        if (response.status === 'SUCCESS') {
          return this.authClient.token.getWithoutPrompt({
            clientId: this.oauthService.clientId,
            responseType: ['id_token', 'token'],
            scopes: ['openid', 'profile', 'email'],
            sessionToken: response.sessionToken,
            nonce: nonce,
            redirectUri: window.location.origin
          })
            .then((tokens) => {
              const idToken = tokens[0].idToken;
              const accessToken = tokens[1].accessToken;
              const keyValuePair = `#id_token=${encodeURIComponent(idToken)}&access_token=${encodeURIComponent(accessToken)}`;
              return this.oauthService.tryLogin({
                customHashFragment: keyValuePair,
                disableOAuth2StateCheck: true
              });
            });
        } else {
          return Promise.reject('We cannot handle the ' + response.status + ' status');
        }
      });
    });
  }
}
In the above code, oauthService.tryLogin() parses and stores the idToken and accessToken so they can be retrieved
using OAuthService.getIdToken() and OAuthService.getAccessToken().
Export OktaAuthWrapper in src/shared/index.ts:
export * from './auth/okta.auth.wrapper';
Change HomeComponent to modify its template so it has a button to login, as well as a sign-in form.
@Component({
  template: `
    <div *ngIf="givenName" class="col-12 mt-2">
      <button (click)="logout()" class="btn btn-sm btn-outline-primary float-right">Logout</button>
      <h2>Welcome, {{givenName}}!</h2>
      <p><a routerLink="/search" routerLinkActive="active">Search</a></p>
    </div>

    <div class="card mt-2" *ngIf="!givenName">
      <div class="card-body">
        <h4 class="card-title">Login with Authorization Server</h4>
        <button class="btn btn-primary" (click)="login()">Login</button>
      </div>
    </div>

    <div class="card mt-2" *ngIf="!givenName">
      <div class="card-body">
        <h4 class="card-title">Login with Username/Password</h4>

        <p class="alert alert-error" *ngIf="loginFailed">
          Login wasn't successful.
        </p>

        <div class="form-group">
          <label>Username</label>
          <input class="form-control" [(ngModel)]="username">
        </div>
        <div class="form-group">
          <label>Password</label>
          <input class="form-control" type="password" [(ngModel)]="password">
        </div>
        <div class="form-group">
          <button class="btn btn-primary" (click)="loginWithPassword()">Login</button>
        </div>
      </div>
    </div>`
})
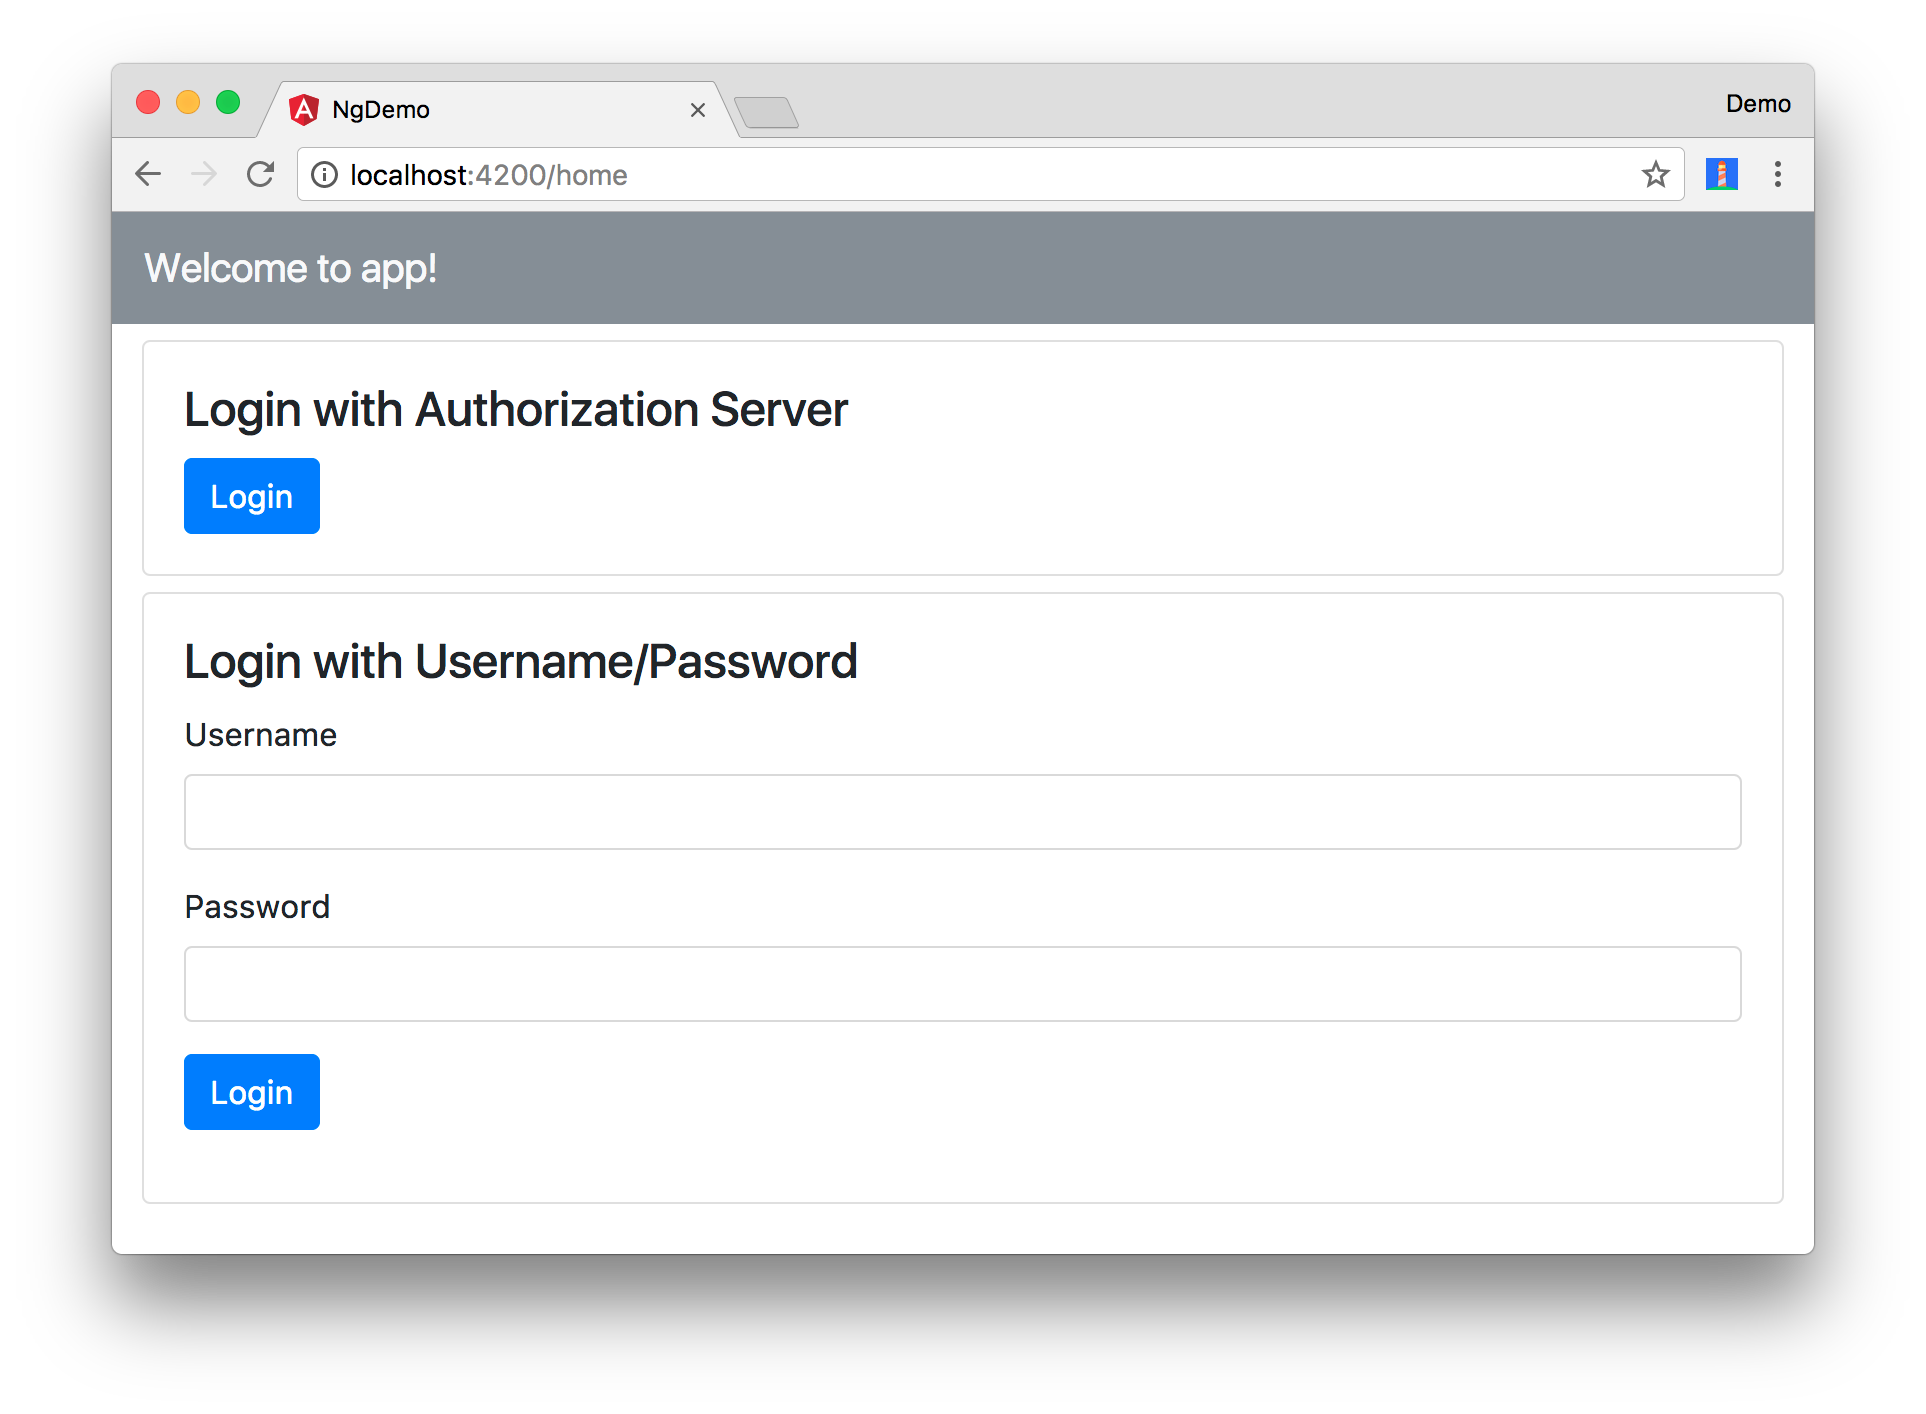
After making these changes, the HomeComponent should render as follows.
Add local variables for the username and password fields, import OktaAuthWrapper, and implement a loginWithPassword() method in HomeComponent.
import { OktaAuthWrapper } from '../shared';
...

username;
password;

constructor(private oauthService: OAuthService,
            private oktaAuthWrapper: OktaAuthWrapper) {
}

loginWithPassword() {
  this.oktaAuthWrapper.login(this.username, this.password)
    .catch(err => console.error('error logging in', err));
}
You should be able to sign in using the form, using one of your app’s registered users. After logging in, you’ll be able to click the Search link and view people’s information.
Angular + Okta
If everything works - congrats! If you encountered issues, please post a question to Stack Overflow with an okta tag, or hit me up on Twitter @mraible.
You can find a complete version of the application created in this blog post on GitHub. You might enjoy the following Angular tutorials too:
- Build a Basic CRUD App with Angular 7.0 and Spring Boot 2.1
- Angular 7: What’s New and Noteworthy + OIDC Goodness
- Build a Basic CRUD App with Angular and Node
To learn more about security in Angular, see Angular’s Security documentation. If you’d like to learn more about OpenID Connect, I’d recommend watching the soothing video below.
Changelog:
- Jan 7, 2018: Updated to lock down the version numbers and provide a link for those wanting to use Angular 7. See the article changes in okta.github.io#2628.
- May 8, 2018: Updated to use Angular CLI 6.0, Angular 6.0, and Okta Sign-In Widget 2.8.0. See the code changes in okta-angular-openid-connect-example#5 and the article changes in okta.github.io#2030.
- Nov 30, 2017: Updated to use Angular CLI 1.5.5 and angular-oauth2-oidc 3.0.1. See the code changes in the example app on GitHub. Changes to this article can be viewed in this pull request.
- Sep 28, 2017: Updated "create an OIDC app" instructions for the Okta Developer Console.
- Aug 31, 2017: Updated to use Angular CLI 1.3.2 and angular-oauth2-oidc 2.0.12. See the code changes in the example app on GitHub.
Matt Raible is a well-known figure in the Java community and has been building web applications for most of his adult life. For over 20 years, he has helped developers learn and adopt open source frameworks and use them effectively. He's a web developer, Java Champion, and Developer Advocate at Okta. Matt has been a speaker at many conferences worldwide, including Devnexus, Devoxx Belgium, Devoxx France, Jfokus, and JavaOne. He is the author of The Angular Mini-Book, The JHipster Mini-Book, Spring Live, and contributed to Pro JSP. He is a frequent contributor to open source and a member of the JHipster development team. You can find him online @mraible and raibledesigns.com.
Okta Developer Blog Comment Policy
We welcome relevant and respectful comments. Off-topic comments may be removed.