How to Authenticate an AWS Lambda Function in C#

Serverless was only first coined as a concept 8 years ago in 2012 by Ken Fromm in The future of the world is serverless. Even with the rise of cloud computing, the world still revolves around servers. That won’t last, though. Cloud apps are moving into a serverless world, and that will bring big implications for the creation and distribution of software and applications. If you come from traditional service architecture roots of on-premises or even early cloud computing where you were basically just renting VM’s you might wonder what all the fuss is about.
Speed-to-delivery is the name of the game. In the modern development world, ideas are plentiful as are the number of people to fulfill those ideas. Companies are competing for a finite pool of customers and often it has felt like the winner takes all. Your organization’s ability to rapidly get ideas to market has a huge impact on your ability to find new customers, retain existing customers, and lower your bottom line.
While managing your own infrastructure can be beneficial and rewarding, it often comes with a large number of logistical complications. Cloud functions allow you to rapidly get new functionality delivered and scale to burst traffic.
This is great for businesses large and small. For small businesses, there is a good chance you’ll have a small enough amount of traffic that your costs will be incredibly low or free. For businesses with lots of traffic, it gives the ability to rapidly test ideas without having to commit to a lot of resources upfront, yet flexible enough to deal with bursts of traffic as they occur.
The Challenges of Serverless with C# Lambda Functions + Auth
While serverless can be awesome, it also comes with some challenges. The first is cognitive load. For purely functional serverless offerings, there is a sort of ‘tax’ in the form of managing hundreds of individual endpoints - which sounds fine until you have to do it in a production environment. Not much fun.
Secondly, managing security can be difficult. Figuring out how to integrate users, enable Single Sign-On (SSO), and restricting access to only those that should be able to view your sensitive content. These common necessities can often be challenging with a serverless system, especially if you have already made investments in an identity management strategy.
I like to use Okta as my personal preference for Authorization and Authentication because it makes my life a lot easier as a developer. Okta takes care of my auth, and I take care of providing business value to my customers.
The AWS offering for serverless functions comes in the form of their Lambda service. Lambda lets you serve up HTTP content as a service and you can trigger it off of various inputs. One of those inputs is the API Gateway. This combination lets us rapidly stand up a full service .NET Core application without actually having to manage any of the service cruft that comes with it. You can successfully make a secured Lambda website that works with Okta’s single sign-on service using .NET Core 3.1 and Razor templates. Follow the tutorial below to learn how!
Before we get started you’ll need:
- Basic knowledge of .NET/C#
- Visual Studio Code or Visual Studio 2019
- Your Okta Developer Account (free forever, to handle your OAuth needs)
- An AWS account (we’ll be using a free tier product)
- AWS Toolkit for Visual Studio installed and ready to go
How to Create a Secure C# AWS Lambda Function
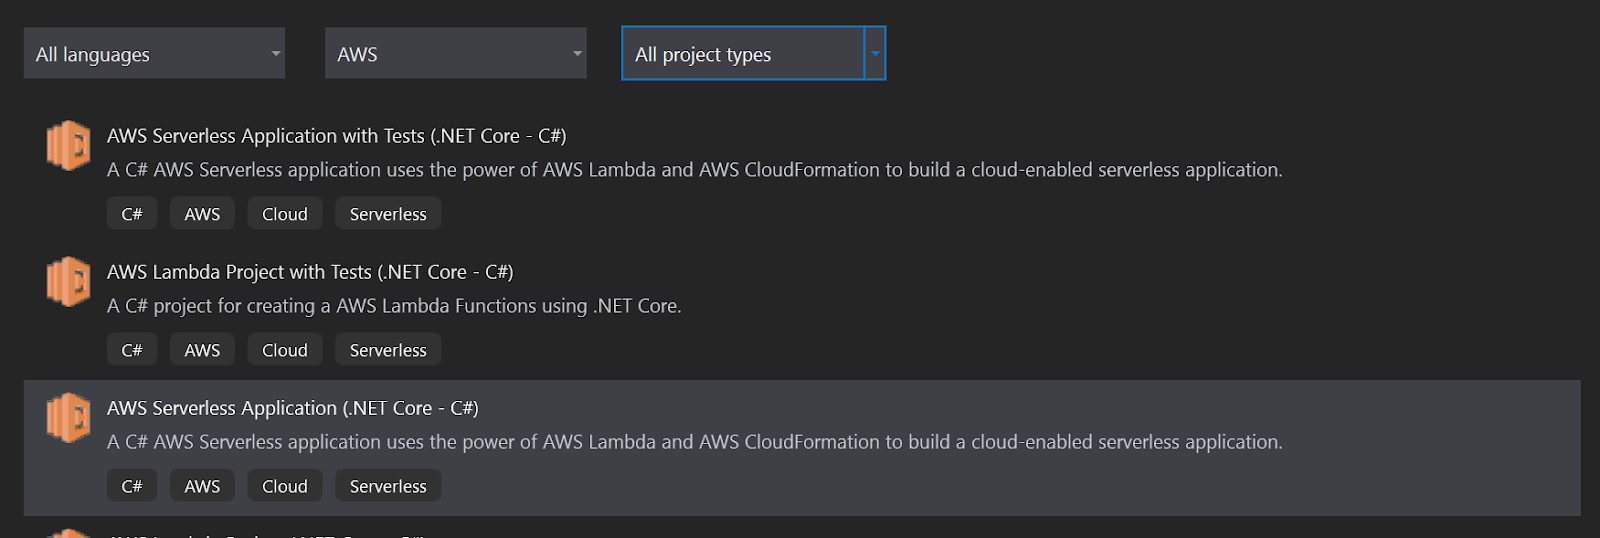
First, create a new project in Visual Studio. Select AWS Serverless Application (.NET Core-C#).
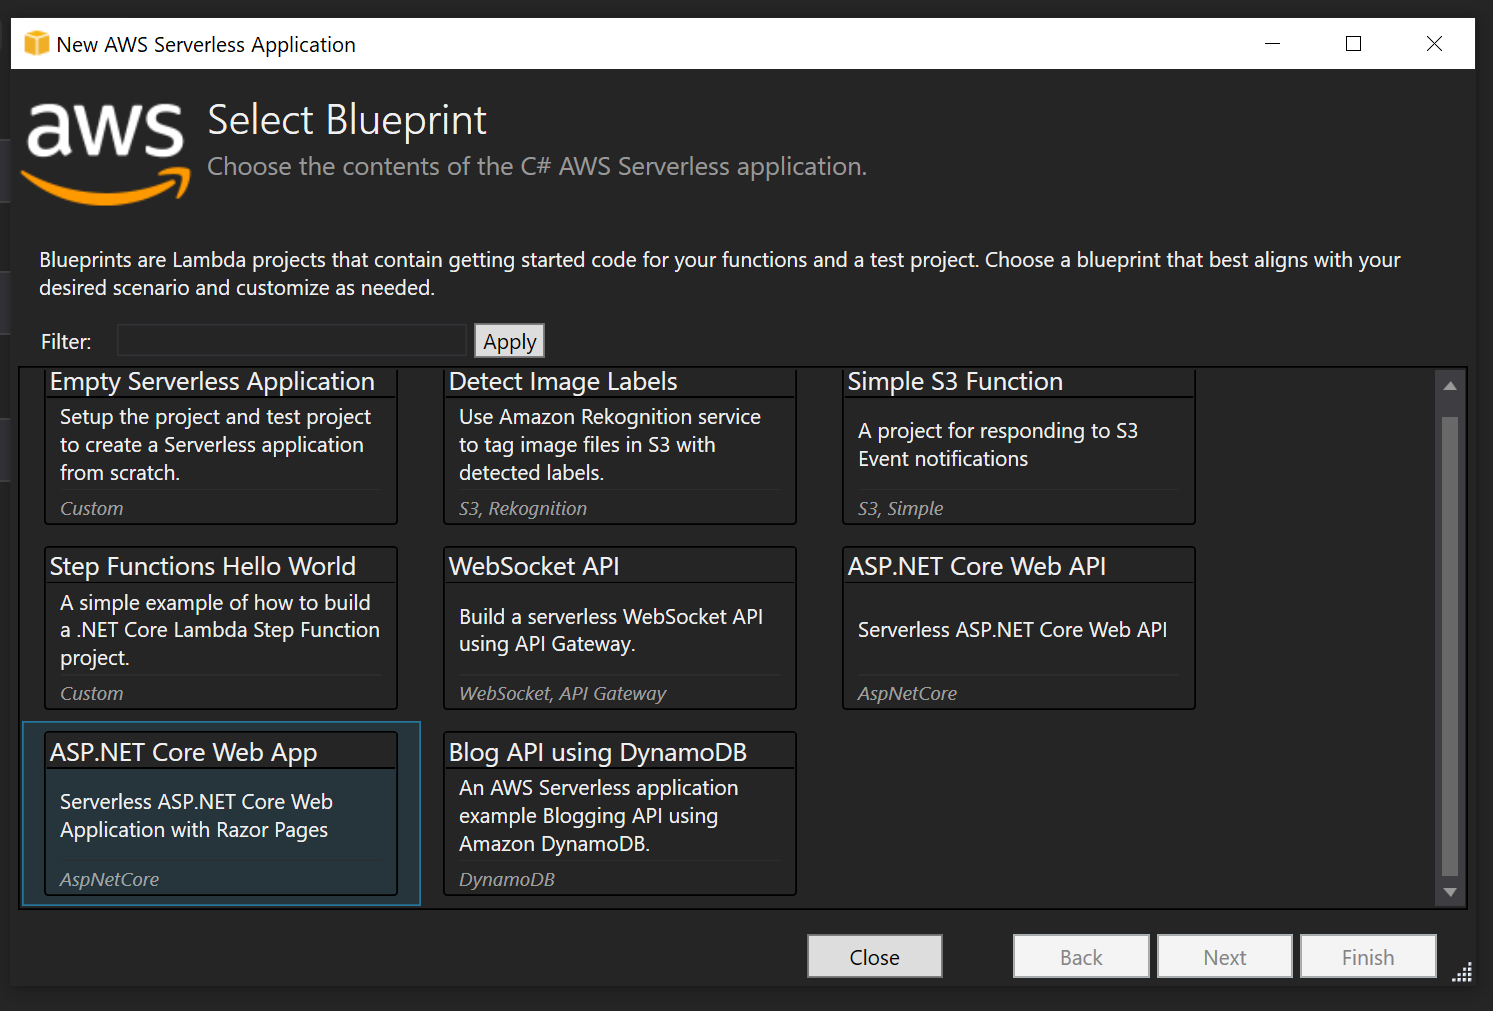
Name it “Okta.Blog.Lambda” and select the blueprint ASP.NET Core Web App. This will give you a full web app experience and handle all of the setups of our lambda service and gateway when you are ready to deploy in a nice neat bundle called a Cloud Stack. This also gives a unit of disposal - so when you decide to deprecate it you can get rid of all the assets together.
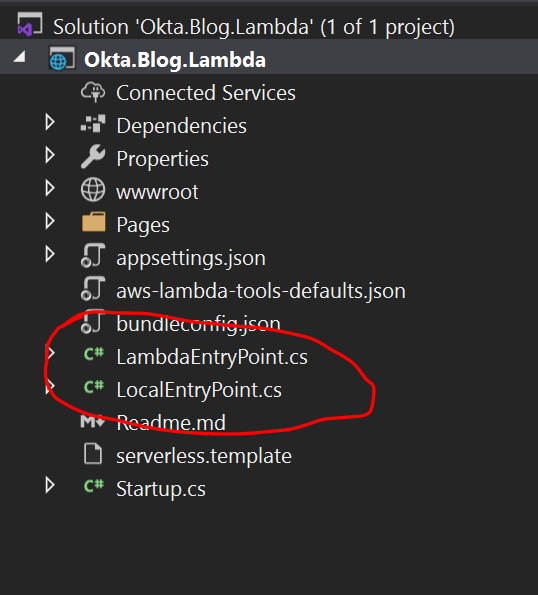
If you take a look at the solution structure you’ll notice two files of note: LambdaEntryPoint, and LocalEntryPoint. When you deploy the application it will start from LambdaEntryPoint, and when you run locally on your dev machine it will run from LocalEntryPoint.
Press F5 in Visual Studio to start debugging and take it for a test spin.

You’ll notice that it is basically just a normal .NET Web App. Some people are surprised by this because they have been under the assumption that the only way to do Lambda is a pure function approach. What is nice about this is it lets you deliver sites or service in discreet bundles of functionality without managing hundreds of individual deployments. You also get all the scale-up benefits of being on a serverless platform.
Adding Security to Your C# Lambda Site
At this point, you have an app but need it to be secure. Fortunately, Okta makes that incredibly easy.
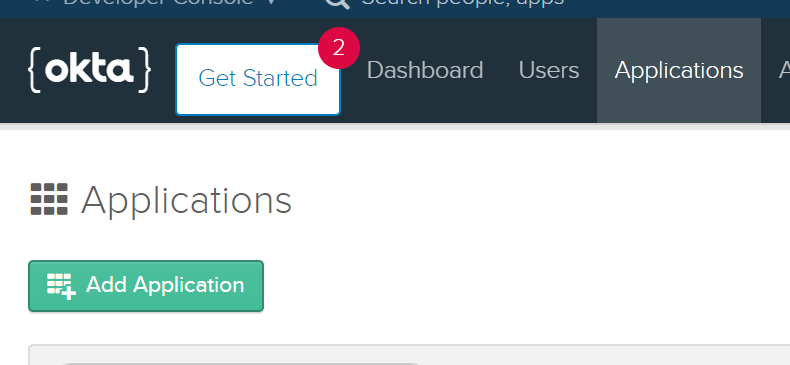
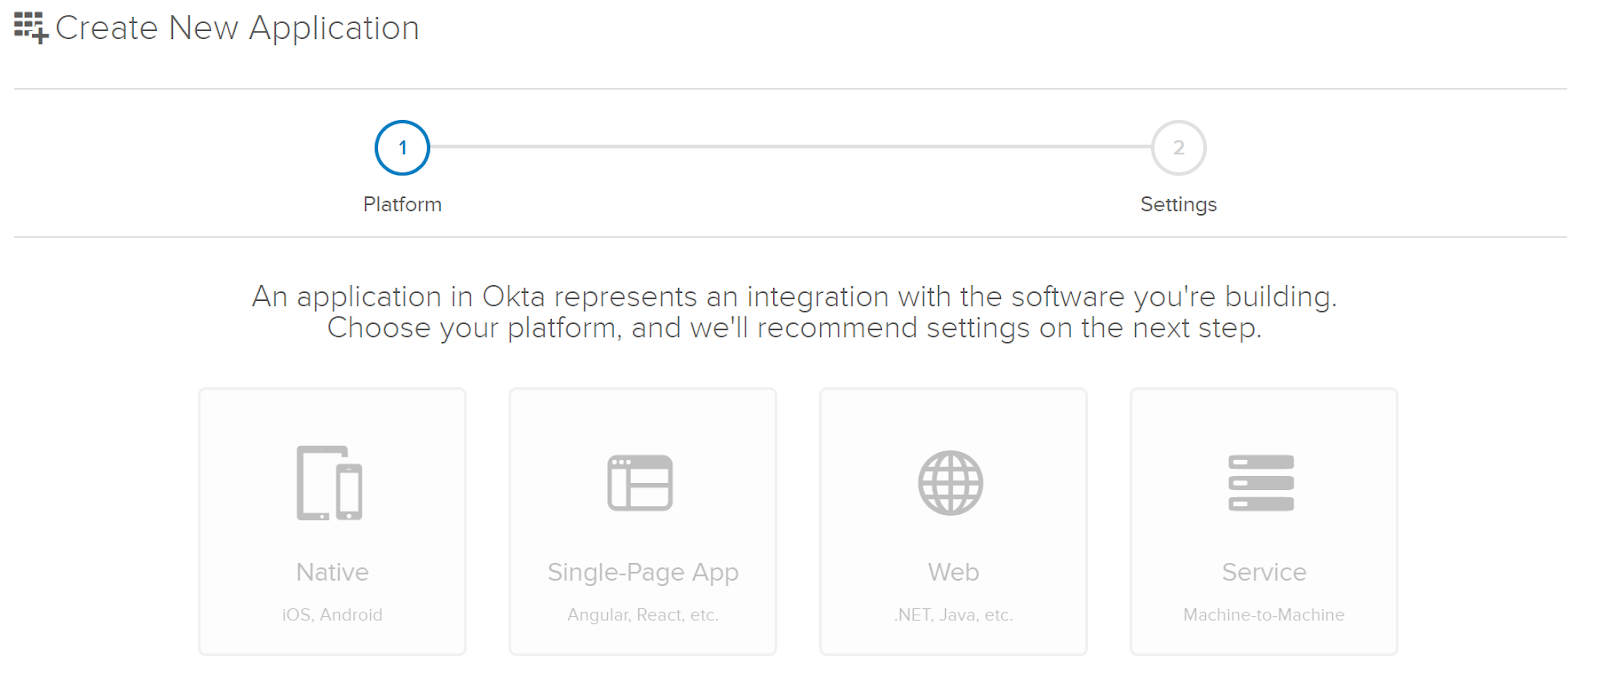
If you don’t already have one, signup for a developer account at https://developer.okta.com - sign-up is easy and non-intrusive. Once you have your Okta org (account) URL sent to your email, log in to the developer portal. Click on Applications and from the applications screen click Add Application.
For your platform select Web.
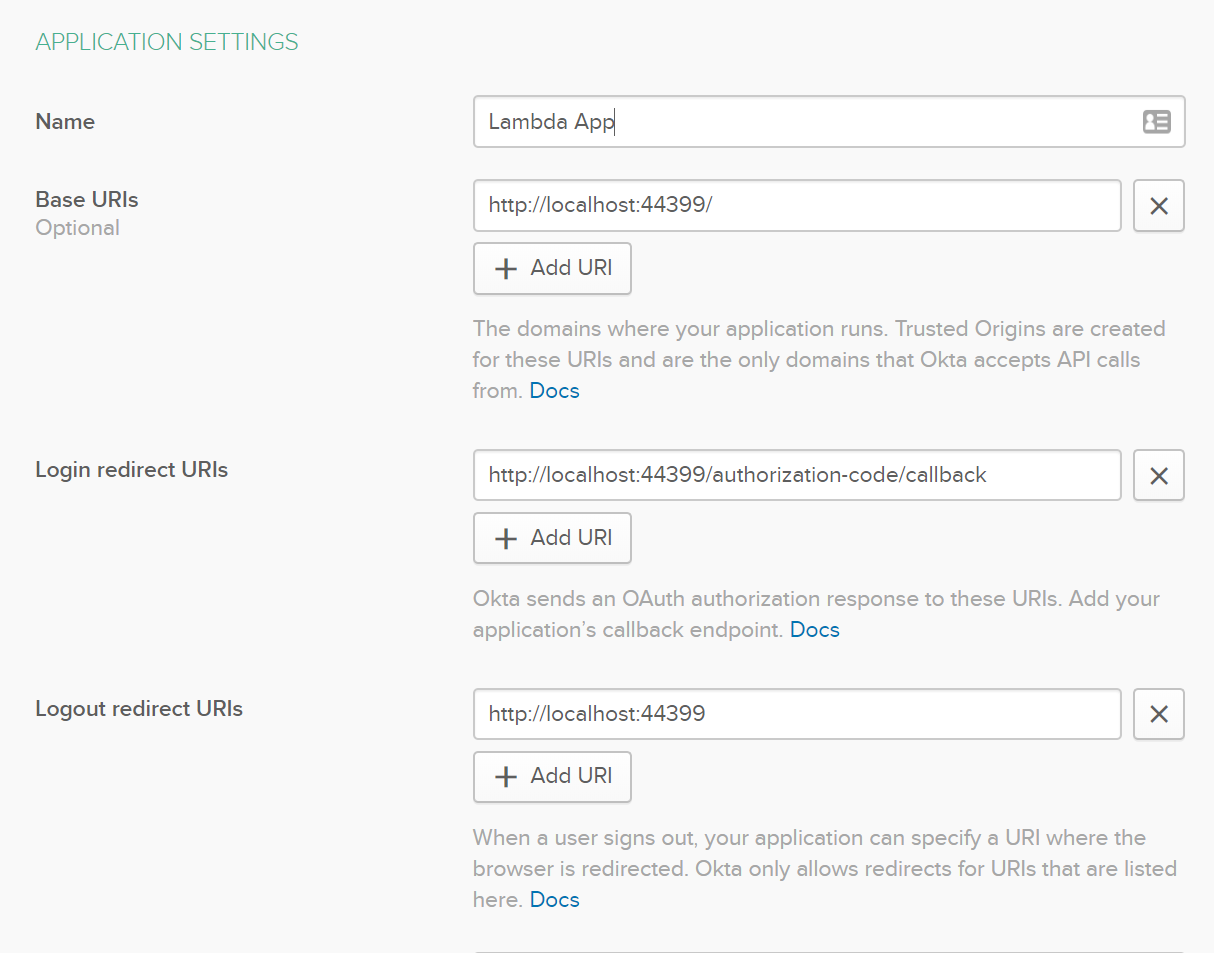
You’ll need your port number from your local test. In my case it was 44399, yours will likely be different. Replace the port number in appropriate places in your app settings, replacing port 8080. Also, be mindful of the address on your local environment. If it is HTTPS the URL here needs to also be HTTPS or you will get a 400 error later.
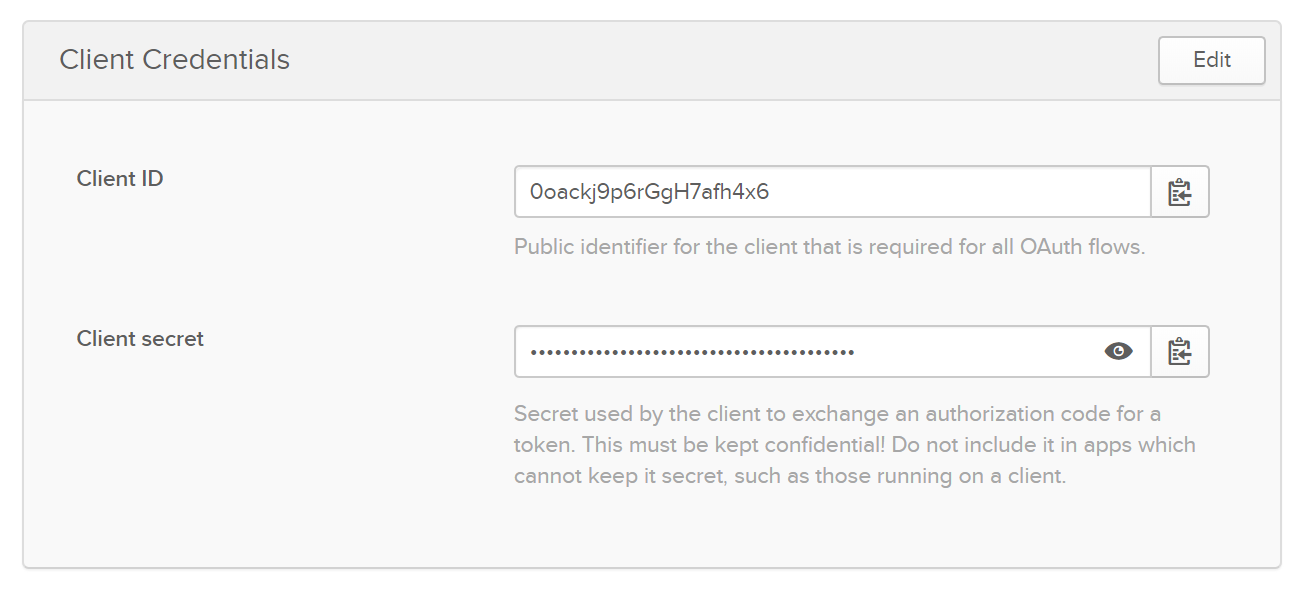
Now you’ll need to take note of your application credentials. You’ll need this for your .NET App, so make sure you take note of it for later.
Update Your .NET Serverless App with Authentication
Now that you have everything in place with a security provider, let’s make your app secure with your Okta information.
Right-click Dependencies under your project in Visual Studio, click Manage NuGet Packages and search for Okta.AspNetCore and then click Install.

Now open your appsettings.json file and add the following:
"Okta": {
"ClientId": "{ClientId}",
"ClientSecret": "{ClientSecret}",
"Domain": "{ClientSecret}"
}
ClientId and ClientSecret are the values on the credentials panel in your developer portal for your app. Domain will be https://{yourOktaDomain}.okta.com.
Next you need to add auth to your application Startup.cs file. Under Services replace what is there with the following:
var oktaMvcOptions = new OktaMvcOptions()
{
OktaDomain = Configuration["Okta:Domain"],
ClientId = Configuration["Okta:ClientId"],
ClientSecret = Configuration["Okta:ClientSecret"],
Scope = new List<string> { "openid", "profile", "email" },
};

services.AddAuthentication(options =>
{
options.DefaultAuthenticateScheme = CookieAuthenticationDefaults.AuthenticationScheme;
options.DefaultSignInScheme = CookieAuthenticationDefaults.AuthenticationScheme;
options.DefaultChallengeScheme = OktaDefaults.MvcAuthenticationScheme;
})
.AddCookie()
.AddOktaMvc(oktaMvcOptions);

services.AddRazorPages()
.AddRazorPagesOptions(options =>
{
    options.Conventions.AuthorizePage("/Help");
});
Now, in your Configure(IApplicationBuilder app, IWebHostEnvironment env) method add app.UseAuthentication(); - it should look like this:
if (env.IsDevelopment())
{
app.UseDeveloperExceptionPage();
}
else
{
app.UseExceptionHandler("/Home/Error");
// The default HSTS value is 30 days. You may want to change this for production scenarios, see https://aka.ms/aspnetcore-hsts.
app.UseHsts();
}
app.UseHttpsRedirection();
app.UseStaticFiles();

app.UseRouting();

app.UseAuthentication();
app.UseAuthorization();

app.UseEndpoints(endpoints =>
{
endpoints.MapRazorPages();
});
At this point, if you press F5 again in Visual Studio your Lambda Application will be ready to go. Click on the Help link in the menu. It should redirect to Okta and since you are already logged in using that browser, it will direct back to the site and you’ll be fully authenticated!
Hint: To try this out as an end-user that is presented a sign-in screen, be sure to log out from the developer portal first, or use a different browser to test your site with.
Deploying the C# Lambda Function to AWS
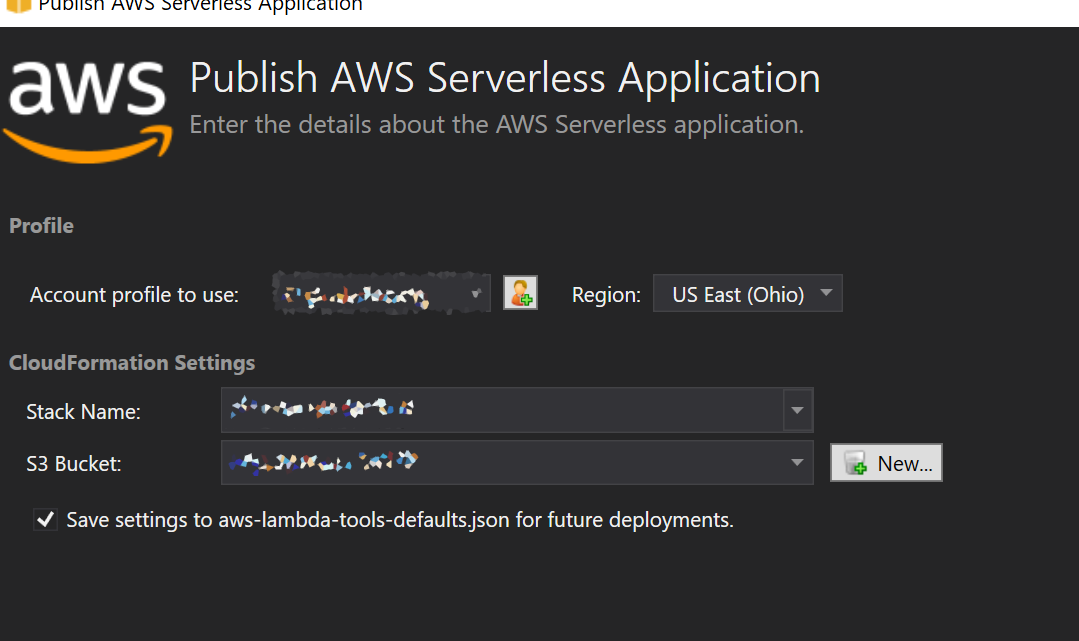
The serverless stack makes deploying Lambda applications a breeze. Right-click the app in Visual Studio and click Publish to AWS Lambda. Name your stack and assign a name for a bucket as well where you want to store your deployment zips then click Publish.
You can get your URL from the deployment screen where it says AWS Serverless URL.
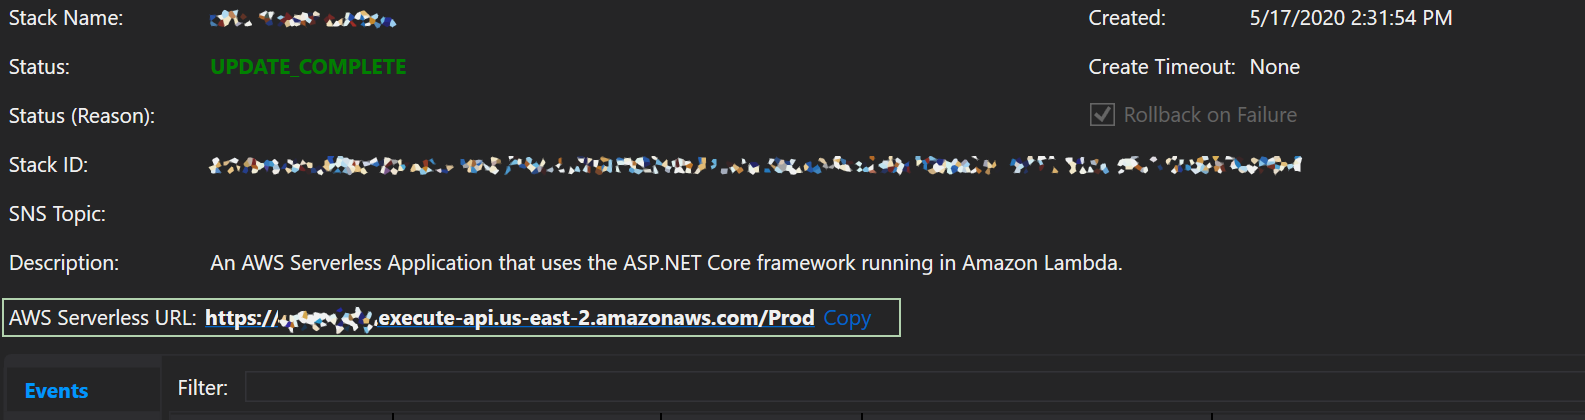
If you click on it you’ll notice a 500 error.
You can go to CloudWatch in your AWS account and click on Log Groups to find the logs for this application.
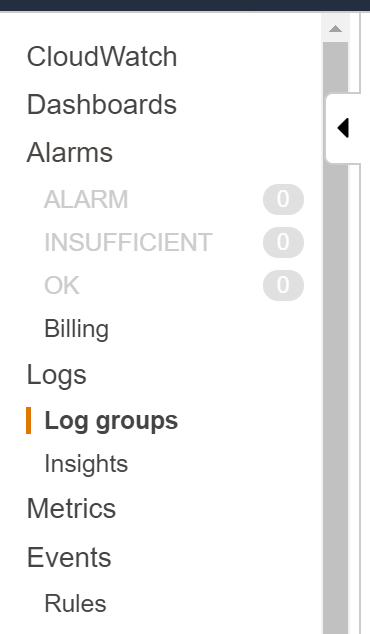
Here you can see that the project is missing a dependency. The reason for this is the runtime that ships with Lambda doesn’t have all the core SDK libraries - but that is totally okay because they are all available as NuGet packages (which has single-handedly been my favorite part about the transition to .NET Core).

Add a new dependency in your NuGet Manager called Microsoft.AspNetCore.DataProtection.Abstractions. Note the version though, the missing assembly is for 3.1.1. Install the package then re-deploy.

Now if you go to your Serverless URL you’ll see your application is working - but there is still one last thing to do. Go to your Okta Developer portal, click Applications, and select the app that you created earlier. Go to the application settings to gather the information you’ll need to add two endpoints:
https://{yourapp}.execute-api.us-east-2.amazonaws.com/Stage
https://{yourapp}.execute-api.us-east-2.amazonaws.com/Prod
These two environments are set up for you automatically by the serverless framework.
Now, for Base URIs, Login redirect URIs, and Logout redirect URIs click Add URI and use the same endpoints as earlier but replace https://localhost:44399 with the above endpoints, including the environment path (“Stage” and “Prod”).

If you navigate back to your deployed app, you now have a serverless application that can scale to meet the demands of your business growth. Excellent!
Recap
Hopefully you’ve discovered how easy it can be to host a web-based application with rates that scale to the usage of your application without having to manage servers or hundreds of individual functions! You’ve also learned how to make it secure - and honestly with security this easy there is no reason to have an insecure website or feel the need to create your own.
You can find the source code for this tutorial on GitHub.
Learn More About C#, AWS and .NET Core
If you are interested in learning more about security and .NET check out these other great articles:
- The Most Exciting Promise of .NET 5
- ASP.NET Core 3.0 MVC Secure Authentication
- 5 Minute Serverless Functions Without an IDE
- Create Login and Registration in Your ASP.NET Core App
- Build Secure Microservices with AWS Lambda and ASP.NET Core
- Build a CRUD App with ASP.NET Core and Typescript
- Build a GraphQL API with ASP.NET Core
Want to be notified when we publish more awesome developer content? Follow @oktadev on Twitter, subscribe to our YouTube channel, or follow us on LinkedIn. If you have a question, please leave a comment below!
Okta Developer Blog Comment Policy
We welcome relevant and respectful comments. Off-topic comments may be removed.