Use Azure Cosmos DB with Your ASP.NET App

Cosmos DB is a planet-scale database capable of holding billions of records (“documents” using Cosmos jargon) without significant detriment to performance. In this article, you will learn how to use Azure Cosmos DB - a key-value store solution - your ASP.NET app instead of a relational database.
To demonstrate their differences, check out a simple example query using both a relational database and Cosmos DB. When you query a relational database you get back a set of rows. All rows have the same columns and some may have relationships to other rows. Take a look:
SELECT * FROM Items WHERE Name = 'WebForm'
Record Found

When you query Azure Cosmos DB, you get back a CLOB - a character large object - in this case, a JSON file. In the example below c refers to the collection, determined by the URL being queried.
SELECT * FROM c WHERE c.Name = ''
Record Found
{
    "name": "Netflix",
    "amount": 16,
    "frequency": "m",
    "startDate": "2019-06-01T00:00:00",
    ...
}
While Cosmos is powerful, data with complex relationships may be better off in a relational database than in a key-value store like Azure Cosmos DB. Relationships get tricky with Cosmos and often result in multiple transactions to get the data you need.
What you’ll need for this post:
- A free Okta Developer account
- Visual Studio 2019
- A free Azure account
Scaffold Your ASP.NET Web Project
Let’s get started! Open Visual Studio and add a new ASP.NET Web Application (.NET Framework) project. Give your new project a name that is meaningful to you, I’m calling mine ExpenseWebApp. Then select MVC as the ASP.NET 4.6.1 Template.
Define Object Models for Your ASP.NET + Cosmos DB App
Let’s define our model objects. The following objects will be used to send data through the layers of the app.
Right click on Models and add a new class named Expense.cs. Paste the following code into the new file.
using System;
using Newtonsoft.Json;

namespace ExpenseWebApp.Models
{
  public class Expense
  {
    [JsonProperty(PropertyName = "name")]
    public string Name { get; set; }

    [JsonProperty(PropertyName = "amount")]
    public double Amount { get; set; }

    [JsonProperty(PropertyName = "frequency")]
    public string Frequency { get; set; }

    [JsonProperty(PropertyName = "startDate")]
    public DateTime StartDate { get; set; }

    [JsonProperty(PropertyName = "monthlyCost")]
    public double MonthlyCost { get; set; }
  }
}
Right click on Models and add a new class named Payment.cs. Paste the following code into the new file.
using System;

namespace ExpenseWebApp.Models
{
  public class Payment
  {
    public DateTime DueDate { get; set; }
    public double Amount { get; set; }
  }
}
Create Cosmos DB in Azure
Cosmos DB is where we’ll be storing the data used by your application. The Cosmos portion of this project is divided into two parts - first creating the Cosmos DB, and second programming our ASP.NET App to connect to it.
Login to your Microsoft Azure Portal and go to Azure Cosmos DB under All resources. Click the Add button, then make sure to specify the following settings:
Account Name = expense-cosmos-db
API = Core (SQL)
Next click Review + create. Then on the subsequent screen click Create. You will be taken to a screen showing the status of your new Azure Cosmos DB - this may take a few minutes.
When your Cosmos DB is ready to go, click Go to resource which will take you to the Quick start guide. For this tutorial, we’ll use the Items container that Azure creates for you automatically, so go ahead and click Create ‘Items’ container.
Finally, select a resource group. If you don’t already have a resource group you want to put Cosmos DB into, feel free to create a new one.
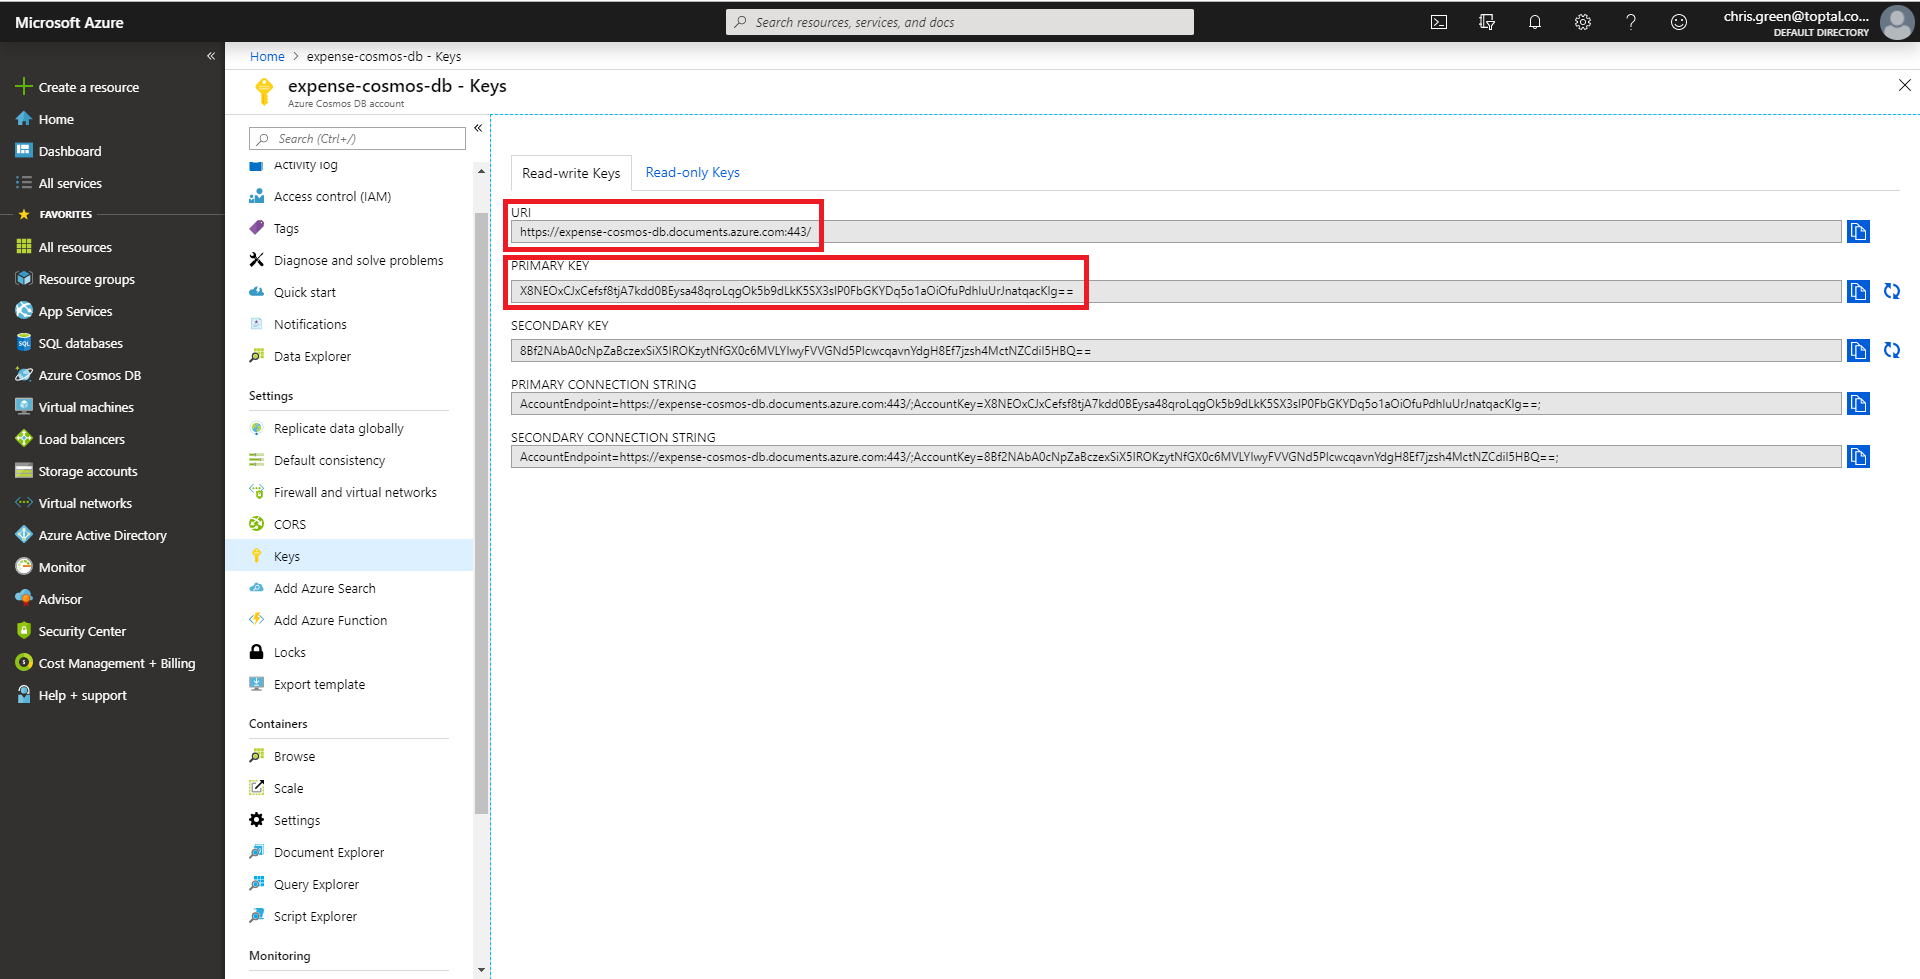
Before navigating away from Azure, you’ll want to copy some values to your web.config under AppSettings.
Go to to Keys under your new expense–cosmos-db and copy the value from URI to Cosmos.EndPointUrl in your web.config. Then copy the value from PRIMARY KEY to Cosmos.AuthorizationKey in your web.config.
<add key="Cosmos.EndPointUrl" value="****" />
<add key="Cosmos.AuthorizationKey" value="****" />
<add key="Cosmos.DatabaseId" value="ToDoList" />
<add key="Cosmos.ExpenseCollectionId" value="Items" />
Side note: Data Explorer is where you would go if you want to browse the data in your containers. Although not utilized in this article, you will probably end up using it frequently to examine your data in the future!
Connect Your ASP.NET App to Azure Cosmos DB
Add the following Nuget Package to your project:
Microsoft.Azure.DocumentDB v2.4.0
Right click on Models and add a new class named CosmosConfig.cs. This class will be used to store the Cosmos DB configuration settings. Paste the following code into the new file.
using System;

namespace ExpenseWebApp.Models
{
  public class CosmosConfig
  {
    public string EndPointUrl { get; set; }
    public string AuthorizationKey { get; set; }

    public string DatabaseId { get; set; }
    public string ExpenseCollectionId { get; set; }
  }
}
Right click on Global.asax and select View Code. Overwrite the code that’s currently in the file with the following.
using System.Configuration;
using System.Web;
using System.Web.Mvc;
using System.Web.Optimization;
using System.Web.Routing;
using System.Web.Helpers;

using ExpenseWebApp.Models;

namespace ExpenseWebApp
{
  public class MvcApplication : HttpApplication
  {
    protected void Application_Start()
    {
      AreaRegistration.RegisterAllAreas();
      FilterConfig.RegisterGlobalFilters(GlobalFilters.Filters);
      RouteConfig.RegisterRoutes(RouteTable.Routes);
      BundleConfig.RegisterBundles(BundleTable.Bundles);

      MvcApplication.InitCosmosConfig();
    }

    public static CosmosConfig CosmosConfig { get; set; }

    private static void InitCosmosConfig()
    {
      AntiForgeryConfig.UniqueClaimTypeIdentifier = "name";
      MvcApplication.CosmosConfig = new CosmosConfig()
      {
        DatabaseId = ConfigurationManager.AppSettings["Cosmos.DatabaseId"],
        EndPointUrl = ConfigurationManager.AppSettings["Cosmos.EndPointUrl"],
        AuthorizationKey = ConfigurationManager.AppSettings["Cosmos.AuthorizationKey"],
        ExpenseCollectionId = ConfigurationManager.AppSettings["Cosmos.ExpenseCollectionId"]
      };
    }
  }
}
This new code creates the static CosmosConfig property of MvcApplication to store your Cosmos configuration settings. It also defines InitCosmosConfig() and calls it when the application starts.
The HomeController will do the bulk of the work. Right click on HomeController.cs and select View Code. Overwrite the code in the file with the following.
using System;
using System.Collections.Generic;
using System.Threading.Tasks;
using System.Web.Mvc;

using Microsoft.Azure.Documents.Client;
using Microsoft.Azure.Documents.Linq;

using ExpenseWebApp.Models;

namespace ExpenseWebApp.Controllers
{
  public class HomeController : Controller
  {
    public async Task<ActionResult> Index()
    {
      ViewBag.Title = "Expenses";

      //get expenses from Cosmos DB
      var expenses = await this.GetExpenses();

      var monthStart = new DateTime(DateTime.Today.Year, DateTime.Today.Month, 1);

      //calculate payments that will take place over 2 months from the start of this month
      var payments = this.GetPayments(expenses, monthStart, monthStart.AddMonths(2));

      //calculate how much is owed over specific time periods
      ViewBag.AlreadyPaid = this.OwedDuring(payments, monthStart, DateTime.Today - new TimeSpan(1, 0, 0, 0));
      ViewBag.DueToday = this.OwedDuring(payments, DateTime.Today, DateTime.Today);
      ViewBag.StillComing = this.OwedDuring(payments, DateTime.Today.AddDays(1), monthStart.AddMonths(1) - new TimeSpan(1, 0, 0, 0));

      ViewBag.Next1Week = this.OwedDuring(payments, DateTime.Today, DateTime.Today.AddDays(7));
      ViewBag.Next2Weeks = this.OwedDuring(payments, DateTime.Today, DateTime.Today.AddDays(14));
      ViewBag.Next1Month = this.OwedDuring(payments, DateTime.Today, DateTime.Today.AddMonths(1));
      ViewBag.Next2Months = this.OwedDuring(payments, DateTime.Today, DateTime.Today.AddMonths(2));

      return View(expenses);
    }

    [HttpPost]
    [ActionName("Create")]
    [ValidateAntiForgeryToken]
    public async Task<ActionResult> CreateAsync([Bind(Include = "Name,Amount,Frequency,StartDate")] Expense input)
    {
      if (ModelState.IsValid)
        using (var client = new DocumentClient(new Uri(MvcApplication.CosmosConfig.EndPointUrl), MvcApplication.CosmosConfig.AuthorizationKey))
        {
          await client.CreateDocumentAsync(UriFactory.CreateDocumentCollectionUri(MvcApplication.CosmosConfig.DatabaseId, MvcApplication.CosmosConfig.ExpenseCollectionId), input);
          return RedirectToAction("Index");
        }

      return View(input);
    }


    private List<Payment> GetPayments(List<Expense> expenses, DateTime start, DateTime finish)
    {
      var ret = new List<Payment>();

      //get all payments between specified start and finish dates
      foreach (var e in expenses)
        for (var x = e.StartDate; x <= finish;)
        {
          if (x >= start)
            ret.Add(new Payment() { Amount = e.Amount, DueDate = x });
          x = this.GetNextDueDate(x, e.Frequency);
        }

      return ret;
    }
    private DateTime GetNextDueDate(DateTime lastDueDate, string frequency)
    {
      if (frequency == "w")
        return lastDueDate.AddDays(7);
      else if (frequency == "m")
        return lastDueDate.AddMonths(1);
      else if (frequency == "q")
        return lastDueDate.AddMonths(3);
      else if (frequency == "y")
        return lastDueDate.AddYears(1);

      throw new Exception("Invalid expense frequency - unable to get the next due date");
    }
    private double OwedDuring(List<Payment> payments, DateTime start, DateTime finish)
    {
      double ret = 0;

      for (var i = 0; i < payments.Count; i++)
        if (payments[i].DueDate >= start && payments[i].DueDate <= finish)
          ret += payments[i].Amount;

      return ret;
    }

    private async Task<List<Expense>> GetExpenses()
    {
      var ret = new List<Expense>();

      using (var client = new DocumentClient(new Uri(MvcApplication.CosmosConfig.EndPointUrl), MvcApplication.CosmosConfig.AuthorizationKey))
      {
        IDocumentQuery<Expense> query = client.CreateDocumentQuery<Expense>(
          UriFactory.CreateDocumentCollectionUri(MvcApplication.CosmosConfig.DatabaseId, MvcApplication.CosmosConfig.ExpenseCollectionId),
          new FeedOptions { MaxItemCount = -1 })
          .AsDocumentQuery();

        while (query.HasMoreResults)
          ret.AddRange(await query.ExecuteNextAsync<Expense>());

        for (var i = 0; i < ret.Count; i++)
          ret[i].MonthlyCost = CalculateMonthlyCost(ret[i]);
      }

      return ret;
    }
    private double CalculateMonthlyCost(Expense input)
    {
      if (input.Frequency == "w")
        return input.Amount * 52 / 12;

      else if (input.Frequency == "m")
        return input.Amount;

      else if (input.Frequency == "q")
        return input.Amount / 3;

      else if (input.Frequency == "y")
        return input.Amount / 12;

      throw new Exception("Invalid expense frequency - unable to calculate the monthly cost");
    }
  }
}
The Index() action will now pass a list of expenses as the model. It also calculates several values passed via the ViewBag such as Next1Week and Next2Weeks which reflect the amount that will be owed over the next week, and next 2 weeks respectively.
Refer to GetExpenses() to see how data is pulled from Azure Cosmos DB.
Refer to GetPayments() to see the algorithm for calculating how many payments will occur over a specified period of time, based on the expenses and how often they recur (IE: weekly, monthly, quarterly, or yearly).
Get Your Cosmos DB Data to the ASP.NET App UI
First things first on the UI, you need to throw together some markup! Open up Views\Home\Index.cshtml and overwrite the code that’s currently in the file with the following.
<!-- Summary of Upcoming Expenses -->
<div class="jumbotron">
  <h1>@ViewBag.Title</h1>
  <div class="left">
    <h3>This month...</h3>
    <label>Already paid</label>
    <input type="text" readonly="readonly" class="highlight"
    value="@string.Format("{0:C}", ViewBag.AlreadyPaid)" />
    <label>Due today</label>
    <input type="text" readonly="readonly" class="highlight"
    value="@string.Format("{0:C}", ViewBag.DueToday)" />
    <label>Still coming</label>
    <input type="text" readonly="readonly" class="highlight"
    value="@string.Format("{0:C}", ViewBag.StillComing)" />
  </div>
  <div class="right">
    <h3>Next...</h3>
    <label>1 week</label>
    <input type="text" readonly="readonly" class="highlight"
    value="@string.Format("{0:C}", ViewBag.Next1Week)" />
    <label>2 weeks</label>
    <input type="text" readonly="readonly" class="highlight"
    value="@string.Format("{0:C}", ViewBag.Next2Weeks)" />
    <label>1 month</label>
    <input type="text" readonly="readonly" class="highlight"
    value="@string.Format("{0:C}", ViewBag.Next1Month)" />
    <label>2 months</label>
    <input type="text" readonly="readonly" class="highlight"
    value="@string.Format("{0:C}", ViewBag.Next2Months)" />
  </div>
</div>

<div class="row">
  <!-- List of Expenses -->
  <h2>List of Expenses</h2>
  <table>
    <tr class="header">
      @*
      <td class="empty"></td>
      *@
      <td>Name</td>
      <td>Monthly Cost</td>
    </tr>
    @if (Model != null) { var total = 0; foreach (var e in Model) { total +=
    e.MonthlyCost;
    <tr>
      <td>@e.Name</td>
      <td class="money">@string.Format("{0:C}", e.MonthlyCost)</td>
    </tr>
    }
    <tr>
      <td class="total">Total</td>
      <td class="money total">@string.Format("{0:C}", total)</td>
    </tr>
    }
  </table>

  <!-- Add Expense Form -->
  @using (Html.BeginForm("Create", "Home")) { @Html.AntiForgeryToken()

  <h3>Add Expense</h3>

  <label>Name</label>
  <input type="text" name="Name" />

  <label>Amount</label>
  <input type="number" min="0.00" step="1" name="Amount" pattern="[0-9]*" />

  <label>Frequency</label>
  <select name="Frequency">
    <option value="w">Weekly</option>
    <option value="m">Monthly</option>
    <option value="q">Quarterly</option>
    <option value="y">Yearly</option>
  </select>

  <label>Start Date</label>
  <input type="date" name="StartDate" />

  <input type="submit" value="Add Expense" />
  }
</div>
This code adds:
- A summary of upcoming expenses at the top of the page
- A list of expenses and their monthly costs
- A form to add new expenses
At this point, you’ll be able to run your app with all the functionality in place, but no styling other than what comes out of the box.
Of course we want more styling, so open up Site.css - located in the Content folder. Overwrite everything from line 19 down, with the following, then re-run your app to see the changes.
/* Set width on the form input elements since they're 100% wide by default */
input,
label,
select,
textarea {
  display: block;
  margin: 0px 0px 0px 0px;
}
label {
  margin-top: 5px;
}

input[type='submit'] {
  margin-top: 20px;
  display: block;
  margin: auto;
}

/* Custom styling */
div.left {
  float: left;
  width: 45%;
  overflow: hidden;
}
div.right {
  overflow: hidden;
}

div.jumbotron input[readonly='readonly'] {
  margin: 0px 0px 0px 0px;
  padding: 0px 0px 0px 0px;
  background-color: transparent;
  border-style: none;
}
input.highlight {
  font-weight: bold;
  color: darkgreen;
}

tr.header td {
  border-style: solid;
  border-width: 1px;
  border-color: #000000;
  padding: 4px 15px 4px 15px;
  text-align: center;
}
tr.header td.empty {
  border-style: none;
}

tr td {
  padding: 4px 4px 4px 4px;
}
tr td.money {
  text-align: right;
  color: darkgreen;
}
tr td.total {
  text-align: right;
  font-weight: bold;
  font-style: italic;
}
Implement Authentication in ASP.NET with Okta
Okta is a developer API service with SDKs and tooling that make it easy to store user accounts and add registration, login, multi-factor auth and more to your app. If you don’t already have one, you’ll need to create a free Okta developer account.
After creating an account, Okta will provide a URL for your organization called an “Okta domain”. Be sure to check your email for instructions to complete your registration.
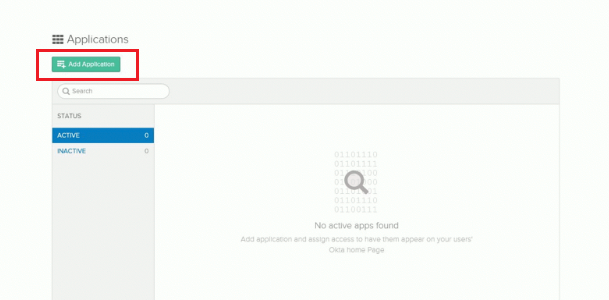
Once you have logged in, on your administrator dashboard, click Applications in the main menu and on the Application screen, click Add Application.
Select Web then click Next.
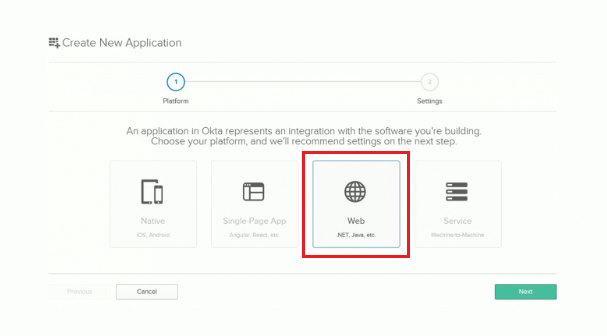
On the Create New Application screen, set the values I have shown below, but make sure the port is set correctly. Visual Studio will assign a random port to new applications to make it easy for you to have multiple running at the same time. To see what port your app is using, click Run in visual studio, and replace 59601 in the URLs below, with the port your app is running on.
- Base URIs:
http://localhost:59601/ - Login redirect URIs:
http://localhost:59601/authorization-code/callback - Initiate login URI:
http://localhost:59601/authorization-code/callback - Allow grant types:
- Authorization Code
- Implicit (Hybrid)
After you save your settings, click Edit by General Settings, then check the following two checkboxes as shown in the screenshot below:
- Allow ID Token with implicit grant type
- Allow Access Token with implicit grant type
Next, scroll to the bottom and copy your Client ID and Client secret. Paste Client ID into the okta:ClientId appSetting in your web.config. Paste Client secret into the okta.ClientSecret appSetting in your web.config. Also make sure the ports are set correctly for the okta:RedirectUri and okta:PostLogoutRedirectUri appSetting records.
<add key="okta:ClientId" value="{yourClientId}" />
<add key="okta:ClientSecret" value="{yourClientSecret}" />
<add key="okta:OktaDomain" value="{yourOktaDomain}" />
<add key="okta:RedirectUri" value="http://localhost:59601/authorization-code/callback" />
<add key="okta:PostLogoutRedirectUri" value="http://localhost:59601/Account/PostLogout" />
Your Okta account is now setup and ready to go. Now we just have to code it into our app to make it secure.
Secure Your ASP.NET App
To secure your web app with Okta you’ll need to install the following Nuget Packages:
- Microsoft.Owin.Host.SystemWeb v4.0.1
- Microsoft.Owin.Security.Cookies v4.0.1
- Okta.AspNet v1.1.5
Right click on your project and add a new class called Startup.cs. In that file paste the following code:
using System;
using System.Threading.Tasks;
using Microsoft.Owin;
using Owin;
using Microsoft.Owin.Security;
using Microsoft.Owin.Security.Cookies;
using Okta.AspNet;
using System.Collections.Generic;
using System.Configuration;

[assembly: OwinStartup(typeof(ExpenseWebApp.Startup))]

namespace ExpenseWebApp
{
  public class Startup
  {
    public void Configuration(IAppBuilder app)
    {
      app.SetDefaultSignInAsAuthenticationType(CookieAuthenticationDefaults.AuthenticationType);

      app.UseCookieAuthentication(new CookieAuthenticationOptions());

      app.UseOktaMvc(new OktaMvcOptions()
      {
        OktaDomain = ConfigurationManager.AppSettings["okta:OktaDomain"],
        ClientId = ConfigurationManager.AppSettings["okta:ClientId"],
        ClientSecret = ConfigurationManager.AppSettings["okta:ClientSecret"],
        RedirectUri = ConfigurationManager.AppSettings["okta:RedirectUri"],
        PostLogoutRedirectUri = ConfigurationManager.AppSettings["okta:PostLogoutRedirectUri"],
        GetClaimsFromUserInfoEndpoint = true,
        Scope = new List<string> { "openid", "profile", "email" },
      });
    }
  }
}
Next we’ll need to create the Account controller to handle login and logout events. Add a new file to Controllers called AccountController.cs. In that file paste the following code:
using System;
using System.Collections.Generic;
using System.Linq;
using System.Web;
using System.Web.Mvc;
using Microsoft.Owin.Security.Cookies;
using Okta.AspNet;

namespace ExpenseWebApp.Controllers
{
  public class AccountController : Controller
  {
    public ActionResult Login()
    {
      if (!HttpContext.User.Identity.IsAuthenticated)
      {
        HttpContext.GetOwinContext().Authentication.Challenge(
          OktaDefaults.MvcAuthenticationType);
        return new HttpUnauthorizedResult();
      }

      return RedirectToAction("Index", "Expense");
    }

    [HttpPost]
    public ActionResult Logout()
    {
      if (HttpContext.User.Identity.IsAuthenticated)
      {
        HttpContext.GetOwinContext().Authentication.SignOut(
          CookieAuthenticationDefaults.AuthenticationType,
          OktaDefaults.MvcAuthenticationType);
      }

      return RedirectToAction("Index", "Home");
    }

    public ActionResult PostLogout()
    {
      return RedirectToAction("Index", "Home");
    }
  }
}
Once complete, your security settings are in place and we just need to tell our App which pages to apply the security to. We’ll do this by placing the [Authorize] attribute on the controller we want to be secured. Open up HomeController.cs and paste the following [Authorize] attribute just above the class declaration on line 13, as shown below:
  [Authorize]
  public class HomeController : Controller
  {
    ...
Update Template with User Authentication Status
Open up Views\Shared\_Layout.cshtml and overwrite the contents of lines 22 through 26 with the following:
@if (Context.User.Identity.IsAuthenticated) {
<ul class="nav navbar-nav navbar-right">
  <li>
    <p class="navbar-text">Hello, <b>@Context.User.Identity.Name</b></p>
  </li>
  <li>
    <a
      onclick="document.getElementById('logout_form').submit();"
      style="cursor: pointer;"
      >Log out</a
    >
  </li>
</ul>
<form action="/Account/Logout" method="post" id="logout_form"></form>
} else {
<ul class="nav navbar-nav navbar-right">
  <li>@Html.ActionLink("Log in", "Login", "Account")</li>
</ul>
}
Run Your ASP.NET MVC App
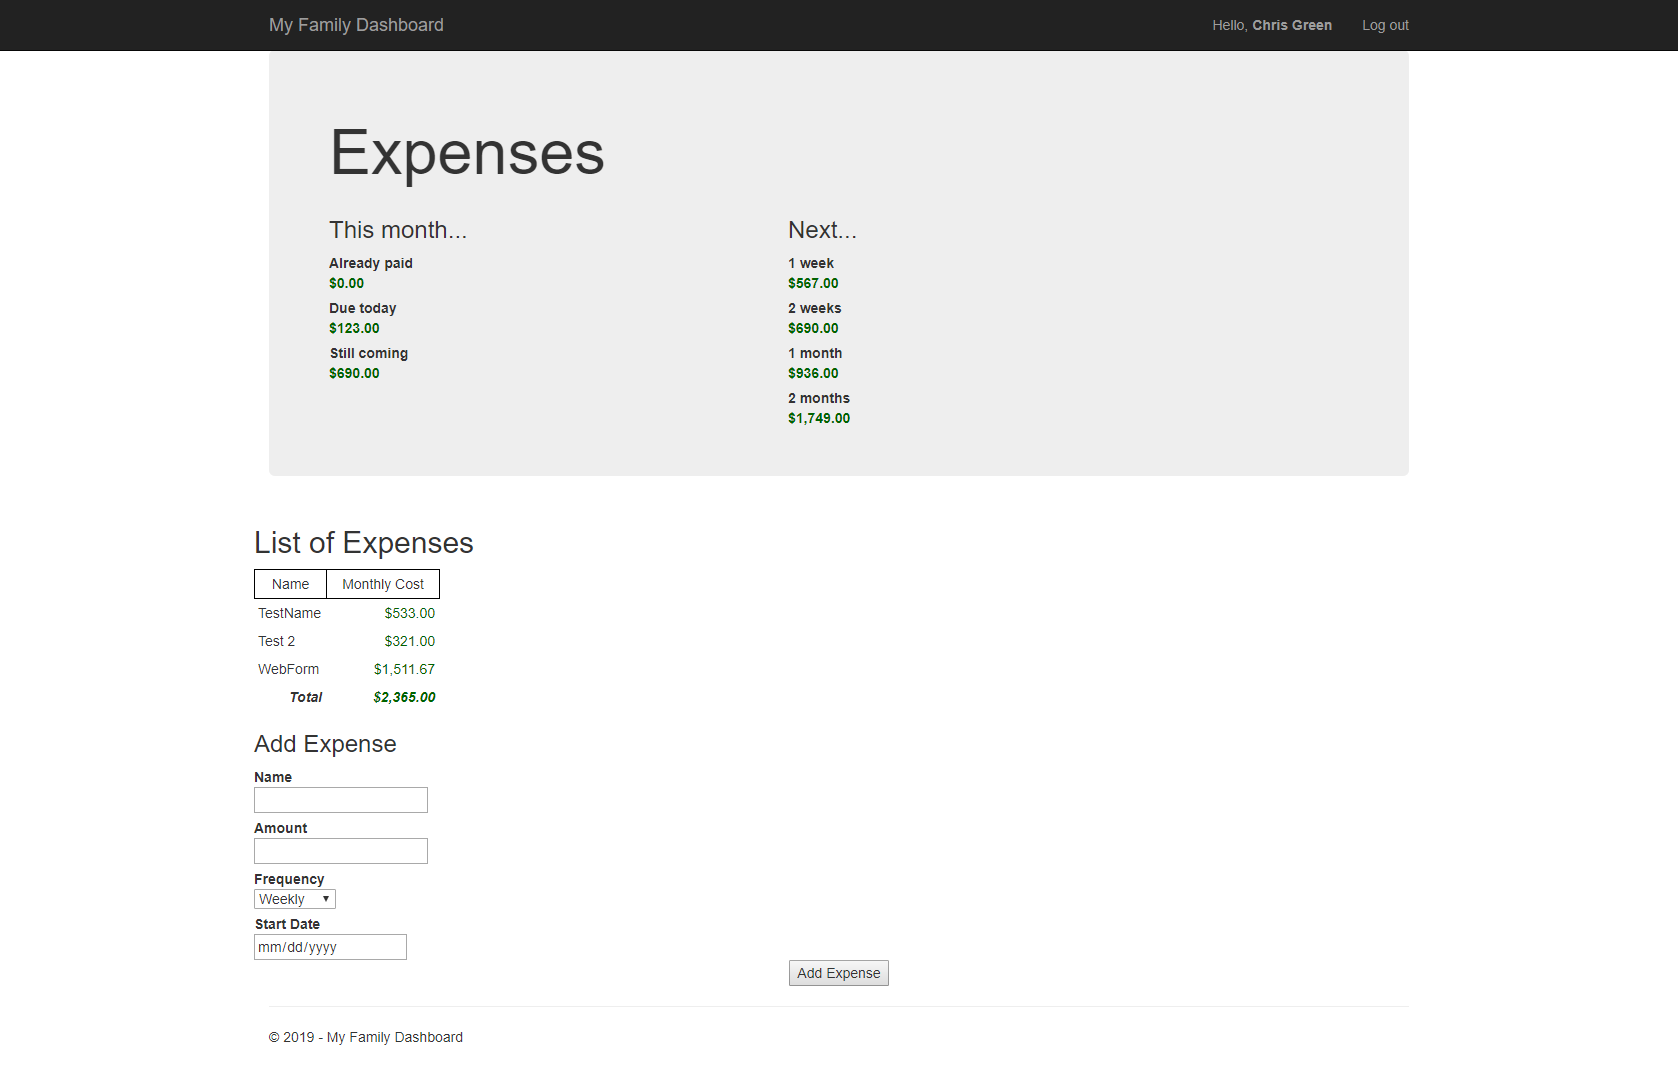
To run your App, simply click Run in Visual Studio. You will be taken to the Okta login page and then to the Expenses screen after successfully logging in. Your new app is very simple and provides plenty of room for you to continue building out the feature set.
Learn More About Azure Cosmos DB + ASP.NET MVC + Okta
You can find the complete source code on GitHub. Fail early. Keep it simple. Write clean code. Refactor, refactor, refactor. Test, test, test. Have fun coding!
For further reading on the technologies covered in this tutorial, check out the following links:
- Build a CRUD App with ASP.NET MVC and Entity Framework by Heather Downing
- Build a Basic Website with ASP.NET MVC and Angular by Ibrahim Šuta
- Okta ASP.NET 4.x Quickstart
As always, if you have comments or questions about this post, please comment below. Don’t miss out on any of our great content by following us on Twitter and YouTube.
Okta Developer Blog Comment Policy
We welcome relevant and respectful comments. Off-topic comments may be removed.