Build Reactive APIs with Spring WebFlux
Spring Boot 2.0 was a long-awaited release from the good folks at Pivotal. One of its new features is reactive web programming support with Spring WebFlux. Spring WebFlux is a web framework that’s built on top of Project Reactor, to give you asynchronous I/O, and allow your application to perform better. If you’re familiar with Spring MVC and building REST APIs, you’ll enjoy Spring WebFlux. There’s just a few basic concepts that are different. Once you know these, you’ll be well on your way to building reactive APIs!
Reactive web programming is great for applications that have streaming data, and clients that consume it and stream it to their users. It ain’t great for developing CRUD apps. If you want to develop a CRUD API, stick with Spring MVC and be happy about it. However, if you’re developing the next Facebook or Twitter with lots of data, a reactive API might be just what you’re looking for.
If you’re not familiar with reactive programming, or just want to see how you can use it with Spring, see the first post in this series: Get Started with Reactive Programming in Spring.
Spring Boot 2.1 is just around the corner, and with it comes Spring Security 5.1 (released this week!). There’s excellent OpenID Connect (OIDC) support in Spring Security 5.1, so we’ll highlight how to use it near the end of this article.
 I joined forced with Josh Long to write this post. Josh is a fellow Java Champion, Spring Developer Advocate, and all around fun guy at Pivotal. Josh and I’ve been good friends for a while now, sharing the same passion for Java, developers, and building bleeding-edge applications. We hope you like what we’ve put together for you!
Josh (a.k.a. @starbuxman) authored the Java code in this post, I added the part about securing your API with OIDC. Even though I show how to do it with Okta, it should work with any OIDC provider.
In this post, we’ll show you how to build a REST API using Spring WebFlux. We’ll also show you how you can use WebSockets to provide a stream of real time data from your application.
Get Started with Reactive Programming and Spring WebFlux
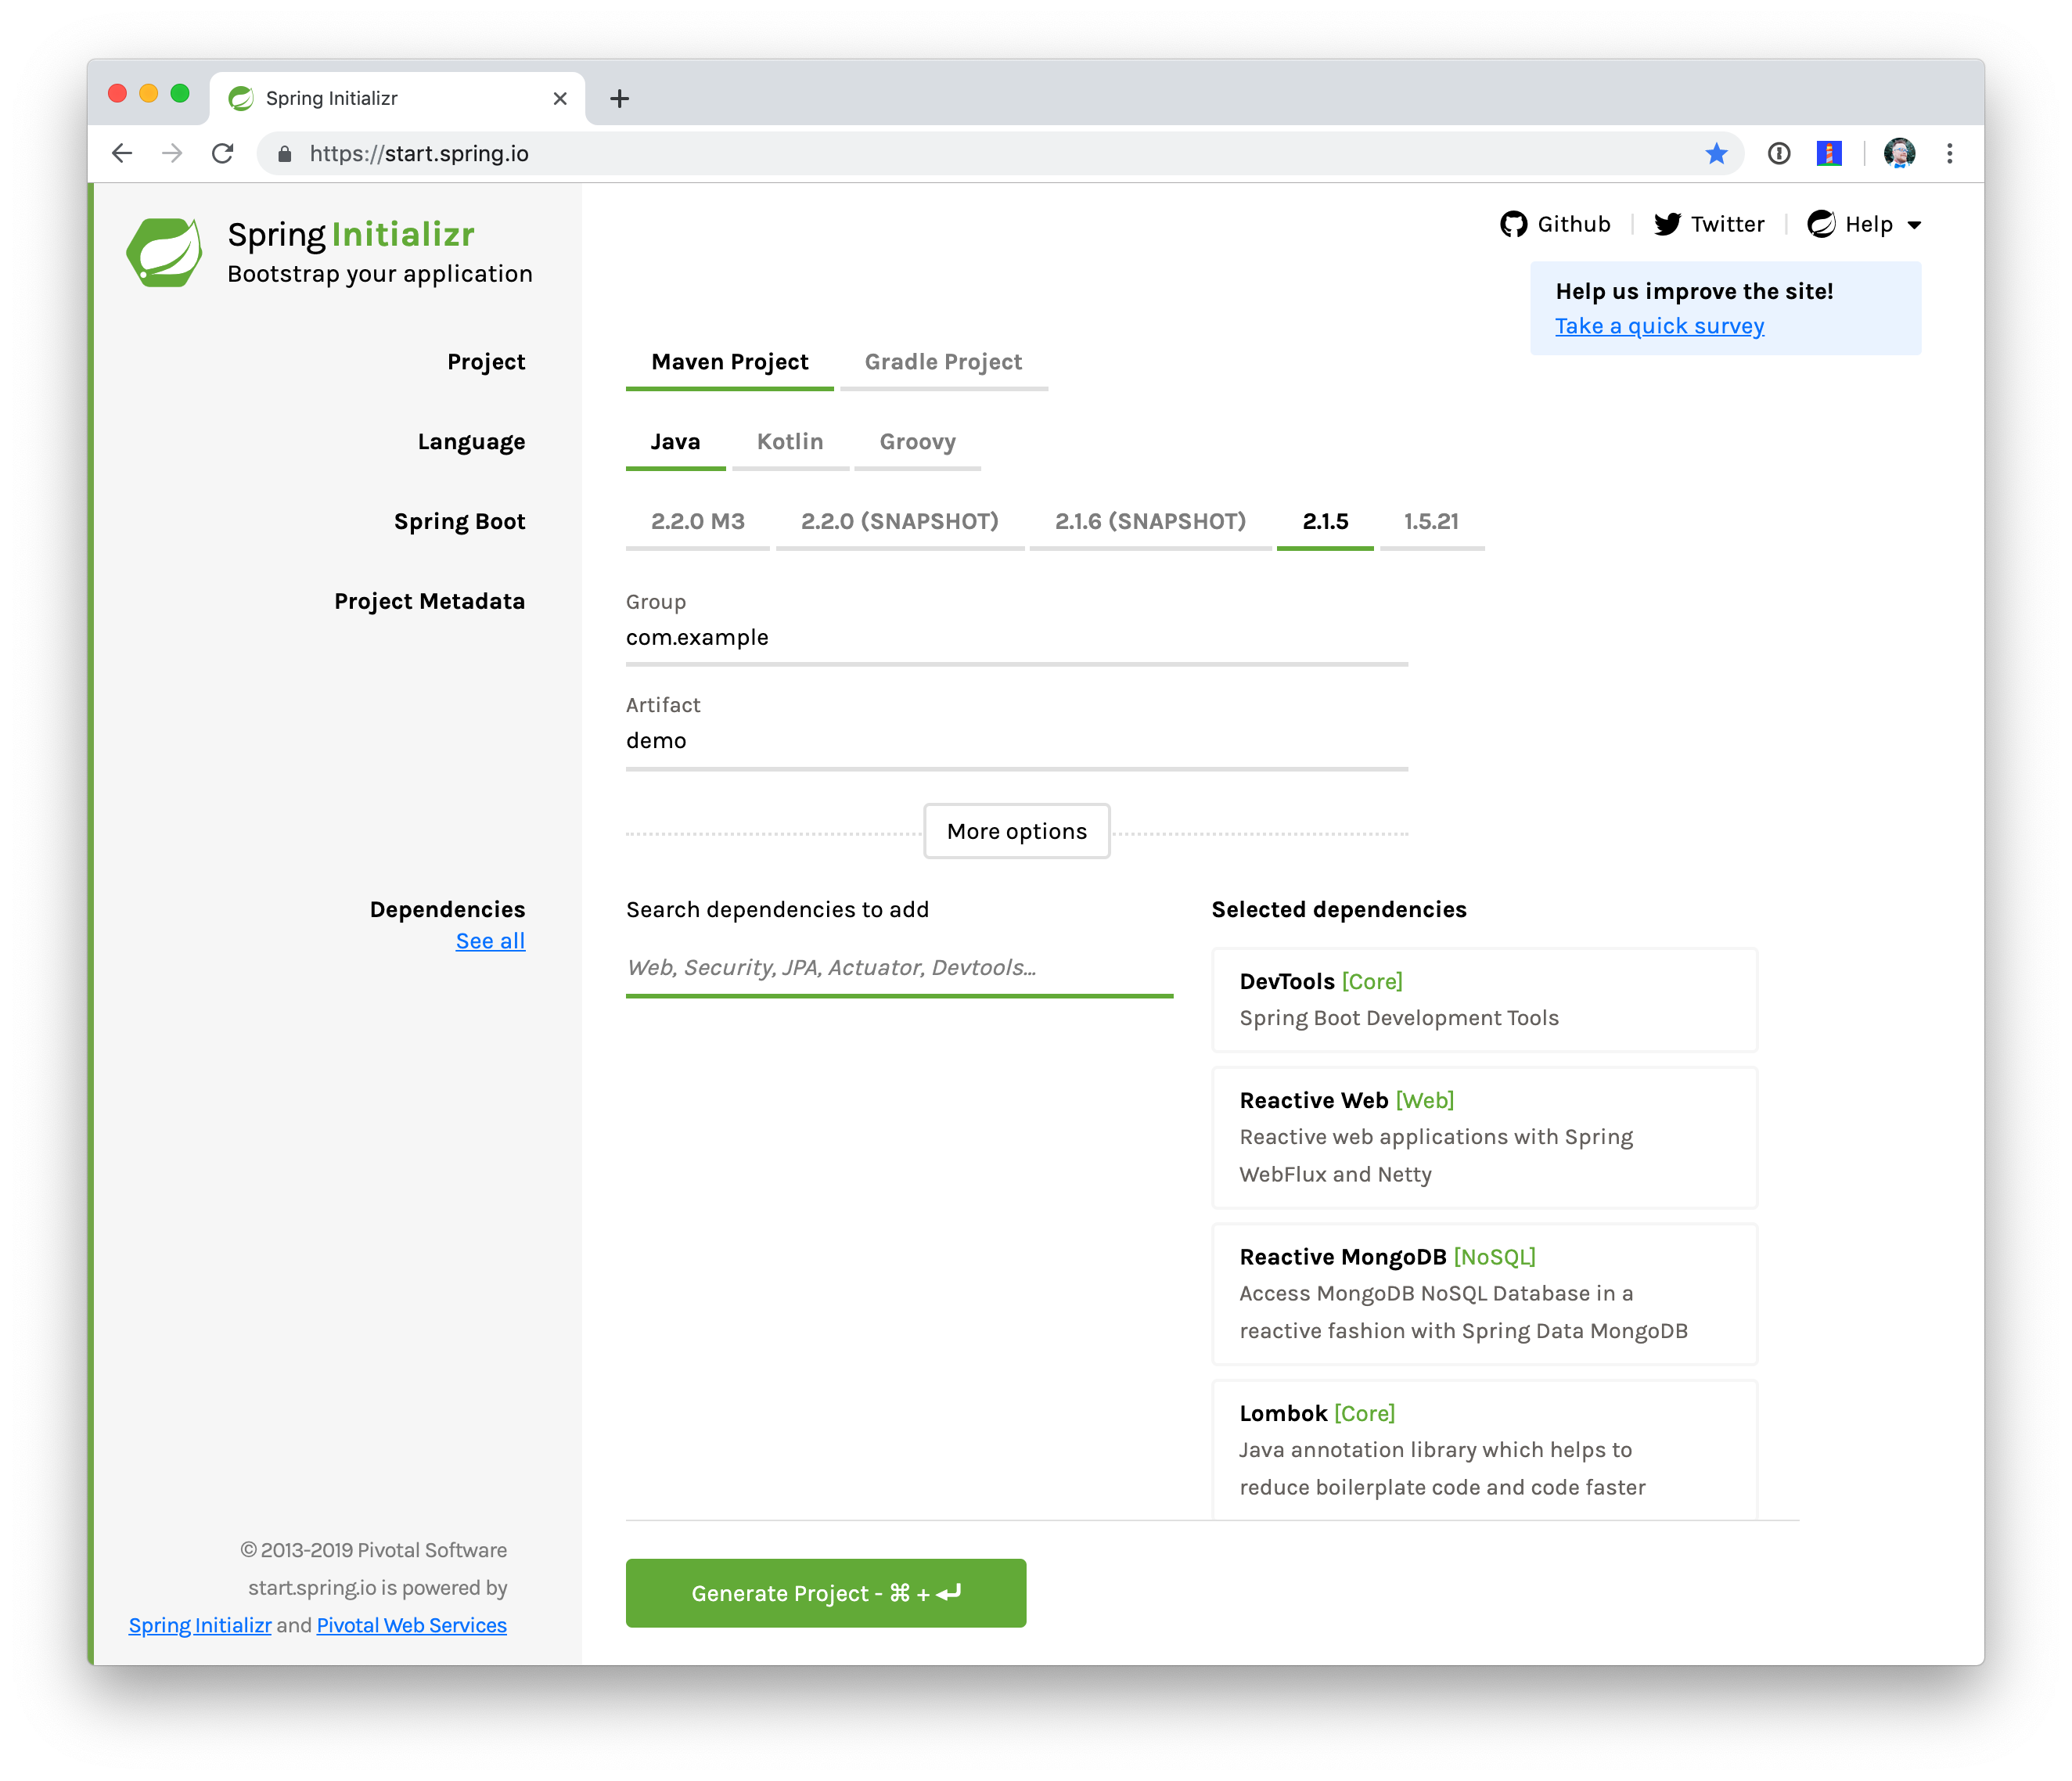
Let’s build something! We’ll begin our journey, as usual, at my second favorite place on the internet, the Spring Initializr - start.spring.io. The goal here is to build a new reactive web application that supports reactive data access, and then secure it (reactively!). Select the following dependencies either by using the combo box on the bottom right of the page or by selecting See all and then choosing DevTools, Reactive Web, Reactive MongoDB. and Lombok.
This will give you a new project with the following layout.
.
├── HELP.md
├── mvnw
├── mvnw.cmd
├── pom.xml
└── src
    ├── main
    │   ├── java
    │   │   └── com
    │   │       └── example
    │   │           └── demo
    │   │               └── DemoApplication.java
    │   └── resources
    │       └── application.properties
    └── test
        └── java
            └── com
                └── example
                    └── demo
                        └── DemoApplicationTests.java

12 directories, 7 files
The Maven build file, pom.xml, is pretty plain, but it assumes we’re going to use JUnit 4. Let’s upgrade JUnit to use JUnit 5, which is a more modern testing framework that’s well supported by Spring Framework 5 and beyond. This owes in no small part to the fact that the most prolific committer of JUnit 5, Sam Brannen, is also the lead of the Spring Test framework.
Add the following dependencies to your new application’s build file, pom.xml: org.junit.jupiter:junit-jupiter-engine and give it a scope of test. Then, exclude the junit:junit dependency from the spring-boot-starter-test dependency. While you’re in there, add a dependency on embedded MongoDB. This is the resulting pom.xml:
pom.xml<?xml version="1.0" encoding="UTF-8"?>
<project xmlns="http://maven.apache.org/POM/4.0.0" xmlns:xsi="http://www.w3.org/2001/XMLSchema-instance"
xsi:schemaLocation="http://maven.apache.org/POM/4.0.0 http://maven.apache.org/xsd/maven-4.0.0.xsd">
<modelVersion>4.0.0</modelVersion>
<parent>
<groupId>org.springframework.boot</groupId>
<artifactId>spring-boot-starter-parent</artifactId>
<version>2.1.5.RELEASE</version>
<relativePath/> <!-- lookup parent from repository -->
</parent>
<groupId>com.example</groupId>
<artifactId>reactive-web</artifactId>
<version>0.0.1-SNAPSHOT</version>
<name>demo</name>
<description>Demo project for Spring Boot</description>
<properties>
<java.version>1.8</java.version>
</properties>
<dependencies>
<dependency>
<groupId>org.springframework.boot</groupId>
<artifactId>spring-boot-starter-data-mongodb-reactive</artifactId>
</dependency>
<dependency>
<groupId>org.springframework.boot</groupId>
<artifactId>spring-boot-starter-webflux</artifactId>
</dependency>
<dependency>
<groupId>de.flapdoodle.embed</groupId>
<artifactId>de.flapdoodle.embed.mongo</artifactId>
<scope>test</scope>
</dependency>
<dependency>
<groupId>org.springframework.boot</groupId>
<artifactId>spring-boot-devtools</artifactId>
<scope>runtime</scope>
</dependency>
<dependency>
<groupId>org.projectlombok</groupId>
<artifactId>lombok</artifactId>
<optional>true</optional>
</dependency>
<dependency>
<groupId>org.junit.jupiter</groupId>
<artifactId>junit-jupiter-engine</artifactId>
<scope>test</scope>
</dependency>
<dependency>
<groupId>org.springframework.boot</groupId>
<artifactId>spring-boot-starter-test</artifactId>
<scope>test</scope>
<exclusions>
<exclusion>
<groupId>junit</groupId>
<artifactId>junit</artifactId>
</exclusion>
</exclusions>
</dependency>
<dependency>
<groupId>io.projectreactor</groupId>
<artifactId>reactor-test</artifactId>
<scope>test</scope>
</dependency>
</dependencies>
<build>
<defaultGoal>spring-boot:run</defaultGoal>
<plugins>
<plugin>
<groupId>org.springframework.boot</groupId>
<artifactId>spring-boot-maven-plugin</artifactId>
</plugin>
</plugins>
</build>
</project>This is a stock-standard Spring Boot application with a public static void main(String [] args) entry-point class, DemoApplication.java:
src/main/java/com/example/demo/DemoApplication.javapackage com.example.demo;
import org.springframework.boot.SpringApplication;
import org.springframework.boot.autoconfigure.SpringBootApplication;
@SpringBootApplication
public class DemoApplication {
public static void main(String[] args) {
SpringApplication.run(DemoApplication.class, args);
}
}This class has a test at src/test/java/com/example/demo/DemoApplicationTests.java that you’ll need to update for JUnit 5.
src/test/java/com/example/demo/DemoApplication.javapackage com.example.demo;
import org.junit.jupiter.api.Test;
import org.springframework.boot.test.context.SpringBootTest;
@SpringBootTest
public class DemoApplicationTests {
@Test
public void contextLoads() {
}
}There’s also an empty configuration file, src/main/resources/application.properties.
We’re ready to get started! Let’s turn to the first concern, data access.
Add Reactive Data Access with Spring Data
We want to talk to a natively reactive data store. That is, the driver for the database needs to itself support asynchronous I/O, otherwise we won’t be able to scale out reads without scaling out threads, which defeats the point.
Spring Data, an umbrella data access framework, supports a number of reactive data access options including reactive Cassandra, reactive MongoDB, reactive Couchbase and reactive Redis. We’ve chosen MongoDB, so make sure you have a MongoDB database instance running on your local machine on the default host, port, and accessible with the default username and password. If you’re on a Mac, you can use brew install mongodb. If you’re on Debian-based Linux distributions, you can use apt install mongodb.
On a Mac, you’ll need to run the following commands before MongoDB will start.
sudo mkdir -p /data/db
sudo chown -R `id -un` /data/db
Then you can start it by running mongod in a terminal window.
MongoDB is a document database, so the unit of interaction is a sparse document - think of it as a JSON stanza that gets persisted and is retrievable by a key (a.k.a., the document ID).
Our application will support manipulating Profile objects. We’re going to persist Profile entities (reactively) using a reactive Spring Data repository, as documents in MongoDB.
If you’d rather see the completed code from this tutorial, you can clone its GitHub repo using the following command:
git clone git@github.com:oktadeveloper/okta-spring-webflux-react-example.git reactive-app
The code in this tutorial is in the reactive-web directory.
To follow along, create a Profile entity class in the com.example.demo package. Give it a single field, email, and another field that will act as the document ID. This entity will be persisted in MongoDB.
src/main/java/com/example/demo/Profile.javapackage com.example.demo;
import lombok.AllArgsConstructor;
import lombok.Data;
import lombok.NoArgsConstructor;
import org.springframework.data.annotation.Id;
import org.springframework.data.mongodb.core.mapping.Document;
@Document (1)
@Data (2)
@AllArgsConstructor
@NoArgsConstructor
class Profile {
@Id (3)
private String id;
(4)
private String email;
}| 1 | @Document identifies the entity as a document to be persisted in MongoDB |
| 2 | @Data, @AllArgsConstructor, and @NoArgsConstructor are all from Lombok. They’re compile-time annotations that tell Lombok to generate getters/setters, constructors, a toString() method and an equals method. |
| 3 | @Id is a Spring Data annotation that identifies the document ID for this document |
| 4 | …and finally, this field email is the thing that we want to store and retrieve later |
In order to persist documents of type Profile, we declaratively define a repository. A repository, a design pattern from Eric Evans' seminal tome, Domain Driven Design, is a way of encapsulating object persistence.
Repositories are responsible for persisting entities and value types. They present clients with a simple model for obtaining persistent objects and managing their life cycle. They decouple application and domain design from persistence technology and strategy choices. They also communicate design decisions about object access. And, finally, they allow easy substitution of implementation with a dummy implementation, ideal in testing. Spring Data’s repositories support all these goals with interface definitions whose implementations are created by the framework at startup time.
Create a Spring Data repository, src/main/java/com/example/demo/ProfileRepository.java.
src/main/java/com/example/demo/ProfileRepository.javapackage com.example.demo;
import org.springframework.data.mongodb.repository.ReactiveMongoRepository;
interface ProfileRepository extends ReactiveMongoRepository<Profile, String> {
}This repository extends the Spring Data-provided ReactiveMongoRepository interface which in turn provides a number of data access methods supporting reads, writes, deletes and searches, almost all in terms of method signatures accepting or returning Publisher<T> types.
org.springframework.data.mongodb.repository.ReactiveMongoRepositorypackage org.springframework.data.mongodb.repository;
import reactor.core.publisher.Flux;
import reactor.core.publisher.Mono;
import org.reactivestreams.Publisher;
import org.springframework.data.domain.Example;
import org.springframework.data.domain.Sort;
import org.springframework.data.repository.NoRepositoryBean;
import org.springframework.data.repository.query.ReactiveQueryByExampleExecutor;
import org.springframework.data.repository.reactive.ReactiveSortingRepository;
@NoRepositoryBean
public interface ReactiveMongoRepository<T, ID> extends ReactiveSortingRepository<T, ID>, ReactiveQueryByExampleExecutor<T> {
<S extends T> Mono<S> insert(S entity);
<S extends T> Flux<S> insert(Iterable<S> entities);
<S extends T> Flux<S> insert(Publisher<S> entities);
<S extends T> Flux<S> findAll(Example<S> example);
<S extends T> Flux<S> findAll(Example<S> example, Sort sort);
}Spring Data will create an object that implements all these methods. It will provide an object for us that we can inject into into other objects to handle persistence. If you define an empty repository, as we have, then there’s little reason to test the repository implementation. It’ll "just work."
Spring Data repositories also supports custom queries. We could, for example, define a custom finder method, of the form Flux<Profile> findByEmail(String email), in our ProfileRepository. This would result in a method being defined that looks for all documents in MongoDB with a predicate that matches the email attribute in the document to the parameter, email, in the method name. If you define custom queries, then this might be an appropriate thing to test.
This is a sample application, of course, so we need some sample data with which to work. Let’s run some initialization logic when the application starts up. We can define a bean of type ApplicationListener<ApplicationReadyEvent> when the application starts us. This will be an enviable opportunity for us to write some sample data into the database once the application’s started up.
Create a SampleDataInitializer.java class to popular the database on startup.
src/main/java/com/example/demo/SampleDataInitializer.javapackage com.example.demo;
import lombok.extern.log4j.Log4j2;
import org.springframework.boot.context.event.ApplicationReadyEvent;
import org.springframework.context.ApplicationListener;
import org.springframework.stereotype.Component;
import reactor.core.publisher.Flux;
import java.util.UUID;
@Log4j2 (1)
@Component
@org.springframework.context.annotation.Profile("demo") (2)
class SampleDataInitializer
implements ApplicationListener<ApplicationReadyEvent> {
private final ProfileRepository repository; (3)
public SampleDataInitializer(ProfileRepository repository) {
this.repository = repository;
}
@Override
public void onApplicationEvent(ApplicationReadyEvent event) {
repository
.deleteAll() (4)
.thenMany(
Flux
.just("A", "B", "C", "D")(5)
.map(name -> new Profile(UUID.randomUUID().toString(), name + "@email.com")) (6)
.flatMap(repository::save) (7)
)
.thenMany(repository.findAll()) (8)
.subscribe(profile -> log.info("saving " + profile.toString())); (9)
}
}| 1 | a Lombok annotation that results in the creation of a log field that is a Log4J logger being added to the class |
| 2 | this bean initializes sample data that is only useful for a demo. We don’t want this sample data being initialized every time. Spring’s Profile annotation tags an object for initialization only when the profile that matches the profile specified in the annotation is specifically activated. |
| 3 | we’ll use the ProfileRepository to handle persistence |
| 4 | here we start a reactive pipeline by first deleting everything in the database. This operation returns a Mono<T>. Both Mono<T> and Flux<T> support chaining processing with the thenMany(Publisher<T>) method. So, after the deleteAll() method completes, we then want to process the writes of new data to the database. |
| 5 | we use Reactor’s Flux<T>.just(T…) factory method to create a new Publisher with a static list of String records, in-memory… |
| 6 | …and we transform each record in turn into a Profile object… |
| 7 | …that we then persist to the database using our repository |
| 8 | after all the data has been written to the database, we want to fetch all the records from the database to confirm what we have there |
| 9 | if we’d stopped at the previous line, the save operation, and run this program then we would see… nothing! Publisher<T> instances are lazy — you need to subscribe() to them to trigger their execution. This last line is where the rubber meets the road. In this case, we’re using the subscribe(Consumer<T>) variant that lets us visit every record returned from the repository.findAll() operation and print out the record. |
You can activate a Spring profile with a command line switch, -Dspring.profiles.active=foo where foo is the name of the profile you’d like to activate. You can also set an environment variable, export SPRING_PROFILES_ACTIVE=foo before running the java process for your Spring Boot application.
|
You’ll note that in the previous example we use two methods, map(T) and flatMap(T). Map should be familiar if you’ve ever used the Java 8 Stream API. Map visits each record in a publisher and passes it through a lambda function which must transform it. The output of that transformation is then returned and accumulated into a new Publisher. So, the intermediate type after we return from our map operation is a Publisher<Profile>.
In the next line we then call flatMap. flatMap is just like map, except that it unpacks the return value of the lambda given if the value is itself contained in a Publisher<T>. In our case, the repository.save(T) method returns a Mono<T>. If we’d used .map instead of flatMap(T), we’d have a Flux<Mono<T>>, when what we really want is a Flux<T>. We can cleanly solve this problem using flatMap.
Add a Reactive Service
We’re going to use the repository to implement a service that will contain any course grained business logic. In the beginning a lot of the business logic will be pass through logic delegating to the repository, but we can add things like validation and integration with other systems at this layer. Create a ProfileService.java class.
src/main/java/com/example/demo/ProfileService.javapackage com.example.demo;
import lombok.extern.log4j.Log4j2;
import org.springframework.context.ApplicationEventPublisher;
import org.springframework.stereotype.Service;
import reactor.core.publisher.Flux;
import reactor.core.publisher.Mono;
@Log4j2
@Service
class ProfileService {
private final ApplicationEventPublisher publisher; (1)
private final ProfileRepository profileRepository; (2)
ProfileService(ApplicationEventPublisher publisher, ProfileRepository profileRepository) {
this.publisher = publisher;
this.profileRepository = profileRepository;
}
public Flux<Profile> all() { (3)
return this.profileRepository.findAll();
}
public Mono<Profile> get(String id) { (4)
return this.profileRepository.findById(id);
}
public Mono<Profile> update(String id, String email) { (5)
return this.profileRepository
.findById(id)
.map(p -> new Profile(p.getId(), email))
.flatMap(this.profileRepository::save);
}
public Mono<Profile> delete(String id) { (6)
return this.profileRepository
.findById(id)
.flatMap(p -> this.profileRepository.deleteById(p.getId()).thenReturn(p));
}
public Mono<Profile> create(String email) { (7)
return this.profileRepository
.save(new Profile(null, email))
.doOnSuccess(profile -> this.publisher.publishEvent(new ProfileCreatedEvent(profile)));
}
}| 1 | we’ll want to publish events to other beans managed in the Spring ApplicationContext. Earlier, we defined an ApplicationListener<ApplicationReadyEvent> that listened for an event that was published in the ApplicationContext. Now, we’re going to publish an event for consumption of other beans of our devices in the ApplicationContext. |
| 2 | we defer to our repository to… |
| 3 | …find all documents or… |
| 4 | …find a document by its ID… |
| 5 | …update a Profile and give it a new email… |
| 6 | …delete a record by its id… |
| 7 | …or create a new Profile in the database and publish an ApplicationContextEvent, one of our own creation called ProfileCreatedEvent, on successful write to the database. The doOnSuccess callback takes a Consumer<T> that gets invoked after the data in the reactive pipeline has been written to the database. We’ll see later why this event is so useful. |
The ProfileCreatedEvent is just like any other Spring ApplicationEvent.
src/main/java/com/example/demo/ProfileCreatedEvent.javapackage com.example.demo;
import org.springframework.context.ApplicationEvent;
public class ProfileCreatedEvent extends ApplicationEvent {
public ProfileCreatedEvent(Profile source) {
super(source);
}
}That wasn’t so bad, was it? Our service was pretty straightforward. The only novelty was the publishing of an event. Everything should be working just fine now. But, of course, we can’t possibly know that unless we test it.
Test Your Reactive Service
Reactive code presents some subtle issues when testing. Remember, our code is asynchronous. It’s possibly concurrent. Each Subscriber<T> could execute on a different thread because the pipeline is managed by a Scheduler. You can change which scheduler is to be used by calling (Flux,Mono).subscribeOn(Scheduler). There’s a convenient factory, Schedulers.\*, that lets you build a new Scheduler from, for example, a java.util.concurrent.Executor. You don’t normally need to override the Scheduler, though. By default there’s one thread per core and the scheduler will just work. You only really need to worry about it when the thing to which you’re subscribing could end up blocking. If, for example, you end up making a call to a blocking JDBC datastore in your Publisher<T>, then you should scale up interactions with that datastore with more threads using a Scheduler.
You need to understand that the Scheduler is present because it implies asynchronicity. This asynchronicity and concurrency is deterministic if you use the operators in the Reactor API: things will execute as they should. It’s only ever problematic, or inscrutable, when attempting to poke at the state of the reactive pipeline from outside.
Then things get a bit twisted. Reactor ships with some very convenient testing support that allow you to assert things about reactive Publisher<T> instances - what is going to be created and when - without having to worry about the schedulers. Let’s look at some tests using the StepVerifier facility.
In order for us to appreciate what’s happening here, we need to take a moment and step back and revisit test slices. Test slices are a feature in Spring Boot that allow the client to load the types in a Spring ApplicationContext that are adjacent to the thing under test.
In this case, we’re interested in testing the data access logic in the service. We are not interested in testing the web functionality. We haven’t even written the web functionality yet, for a start! A test slice lets us tell Spring Boot to load nothing by default and then we can bring pieces back in iteratively.
When Spring Boot starts up it runs a slew of auto-configuration classes. Classes that produce objects that Spring in turn manages for us. The objects are provided by default assuming certain conditions are met. These conditions can include all sorts of things, like the presence of certain types on the classpath, properties in Spring’s Environment, and more. When a Spring Boot application starts up, it is the sum of all the auto-configurations and user configuration given to it. It will be, for our application, database connectivity, object-record mapping (ORM), a webserver, and so much more.
We only need the machinery related to MongoDB and our ProfileService, in isolation. We’ll use the @DataMongoTest annotation to tell Spring Boot to autoconfigure all the things that could be implied in our MongoDB logic, while ignoring things like the web server, runtime and web components.
This results in focused, faster test code that has the benefit of being easier to reproduce. The @DataMongoTest annotation is what’s called a test slice in the Spring Boot world. It supports testing a slice of our application’s functionality in isolation. There are numerous other test slices and you can easily create your own, too.
Test slices can also contribute new auto-configuration supporting tests, specifically. The @DataMongoTest does this. It can even run an embedded MongoDB instance using the Flapdoodle library!
Create ProfileServiceTest to test the logic in your ProfileService.
src/test/java/com/example/demo/ProfileServiceTest.javapackage com.example.demo;
import lombok.extern.log4j.Log4j2;
import org.junit.jupiter.api.Test;
import org.springframework.beans.factory.annotation.Autowired;
import org.springframework.boot.test.autoconfigure.data.mongo.DataMongoTest;
import org.springframework.context.annotation.Import;
import org.springframework.util.StringUtils;
import reactor.core.publisher.Flux;
import reactor.core.publisher.Mono;
import reactor.test.StepVerifier;
import java.util.UUID;
import java.util.function.Predicate;
@Log4j2
@DataMongoTest (1)
@Import(ProfileService.class) (2)
public class ProfileServiceTest {
private final ProfileService service;
private final ProfileRepository repository;
public ProfileServiceTest(@Autowired ProfileService service, (3)
@Autowired ProfileRepository repository) {
this.service = service;
this.repository = repository;
}
@Test (4)
public void getAll() {
Flux<Profile> saved = repository.saveAll(Flux.just(new Profile(null, "Josh"), new Profile(null, "Matt"), new Profile(null, "Jane")));
Flux<Profile> composite = service.all().thenMany(saved);
Predicate<Profile> match = profile -> saved.any(saveItem -> saveItem.equals(profile)).block();
StepVerifier
.create(composite) (5)
.expectNextMatches(match) (6)
.expectNextMatches(match)
.expectNextMatches(match)
.verifyComplete(); (7)
}
@Test
public void save() {
Mono<Profile> profileMono = this.service.create("email@email.com");
StepVerifier
.create(profileMono)
.expectNextMatches(saved -> StringUtils.hasText(saved.getId()))
.verifyComplete();
}
@Test
public void delete() {
String test = "test";
Mono<Profile> deleted = this.service
.create(test)
.flatMap(saved -> this.service.delete(saved.getId()));
StepVerifier
.create(deleted)
.expectNextMatches(profile -> profile.getEmail().equalsIgnoreCase(test))
.verifyComplete();
}
@Test
public void update() throws Exception {
Mono<Profile> saved = this.service
.create("test")
.flatMap(p -> this.service.update(p.getId(), "test1"));
StepVerifier
.create(saved)
.expectNextMatches(p -> p.getEmail().equalsIgnoreCase("test1"))
.verifyComplete();
}
@Test
public void getById() {
String test = UUID.randomUUID().toString();
Mono<Profile> deleted = this.service
.create(test)
.flatMap(saved -> this.service.get(saved.getId()));
StepVerifier
.create(deleted)
.expectNextMatches(profile -> StringUtils.hasText(profile.getId()) && test.equalsIgnoreCase(profile.getEmail()))
.verifyComplete();
}
}| 1 | the Spring Boot test slice for MongoDB testing |
| 2 | we want to add, in addition to all the MongoDB functionality, our custom service for testing |
| 3 | Look ma! Constructor injection in a unit test! |
| 4 | Make sure you’re using the new org.junit.jupiter.api.Test annotation from JUnit 5. |
| 5 | In this unit test we setup state in one publisher (saved). |
| 6 | …and then assert things about that state in the various expectNextMatches calls |
| 7 | Make sure to call verifyComplete! Otherwise, nothing will happen… and that makes me sad. |
We only walked through one test because the rest are unremarkable and similar. You can run mvn test to confirm that the tests work as expected.
The StepVerifier is central to testing all things reactive. It gives us a way to assert that what we think is going to come next in the publisher is in fact going to come next in the publisher. The StepVerifier provides several variants on the expect* theme. Think of this as the reactive equivalent to Assert*.
JUnit 5 supports the same lifecycle methods and annotations (like @Before) as JUnit 4. This is great because it gives you a single place to set up all tests in a class, or to tear down the machinery between tests. That said, I wouldn’t subscribe to any reactive initialization pipelines in the setUp method. Instead, you might define a Flux<T> in the setup, and then compose it in the body of the test methods. This way, you don’t have to wonder if the setup has concluded before the tests themselves execute.
The Web: The Final Frontier
We’ve got a data tier and a service. Let’s stand up RESTful HTTP endpoints to facilitate access to the data. Spring has long had Spring MVC, a web framework that builds upon the Servlet specification. Spring MVC has this concept of a controller - a class that has logic defined in handler methods that process incoming requests and then stages a response - usually a view or a representation of some server-side resource.
In the Spring MVC architecture, requests come in to the web container, they’re routed to the right Servlet (in this case, the Spring MVC DispatcherServlet). The DispatcherServlet then forwards the request to the right handler method in the right controller based on any of a number of configuration details. Those details are typically annotations on the handler methods which themselves live on controller object instances.
Below is the code for a classic Spring MVC style controller that supports manipulating our Profile entities.
src/main/java/com/example/demo/ProfileRestController.javapackage com.example.demo;
import org.reactivestreams.Publisher;
import org.springframework.http.MediaType;
import org.springframework.http.ResponseEntity;
import org.springframework.web.bind.annotation.*;
import reactor.core.publisher.Mono;
import java.net.URI;
@RestController (1)
@RequestMapping(value = "/profiles", produces = MediaType.APPLICATION_JSON_VALUE) (2)
@org.springframework.context.annotation.Profile("classic")
class ProfileRestController {
private final MediaType mediaType = MediaType.APPLICATION_JSON_UTF8;
private final ProfileService profileRepository;
ProfileRestController(ProfileService profileRepository) {
this.profileRepository = profileRepository;
}
(3)
@GetMapping
Publisher<Profile> getAll() {
return this.profileRepository.all();
}
(4)
@GetMapping("/{id}")
Publisher<Profile> getById(@PathVariable("id") String id) {
return this.profileRepository.get(id);
}
(5)
@PostMapping
Publisher<ResponseEntity<Profile>> create(@RequestBody Profile profile) {
return this.profileRepository
.create(profile.getEmail())
.map(p -> ResponseEntity.created(URI.create("/profiles/" + p.getId()))
.contentType(mediaType)
.build());
}
@DeleteMapping("/{id}")
Publisher<Profile> deleteById(@PathVariable String id) {
return this.profileRepository.delete(id);
}
@PutMapping("/{id}")
Publisher<ResponseEntity<Profile>> updateById(@PathVariable String id, @RequestBody Profile profile) {
return Mono
.just(profile)
.flatMap(p -> this.profileRepository.update(id, p.getEmail()))
.map(p -> ResponseEntity
.ok()
.contentType(this.mediaType)
.build());
}
}| 1 | this is yet another stereotype annotation that tells Spring WebFlux that this class provides HTTP handler methods |
| 2 | There are some attributes that are common to all the HTTP endpoints, like the root URI, and the default content-type of all responses produced. You can use @RequestMapping to spell this out at the class level and the configuration is inherited for each subordinate handler method |
| 3 | There are specializations of @RequestMapping, one for each HTTP verb, that you can use. This annotation says, "this endpoint is identical to that specified in the root. @RequestMapping except that it is limited to HTTP GET endpoints" |
| 4 | This endpoint uses a path variable — a part of the URI that is matched against the incoming request and used to extract a parameter. In this case, it extracts the id parameter and makes it available as a method parameter in the handler method. |
| 5 | This method supports creating a new Profile with an HTTP POST action. In this handler method we expect incoming requests to have a JSON body that the framework then marshals into a Java object, Profile. This happens automatically based on the content-type of the incoming request and the configured, acceptable, convertible payloads supported by Spring WebFlux. |
This approach is great if you have a lot of related endpoints that share common dependencies. You can collocate, for example, the GET, PUT, POST, etc., handler logic for a particular resource in one controller class so they can all use the same injected service or validation logic.
The controller approach is not new; Java web frameworks have been using something like it for decades now. The older among us will remember using Apache Struts in the dawn of the 00’s. This approach works well if you have a finite set of HTTP endpoints whose configuration is known a priori. It works well if you want to collocate related endpoints. It also works well if the request matching logic can be described declaratively using Spring’s various annotations.
This approach is also likely to be a perennial favorite for those coming from Spring MVC, as its familiar. Those annotations are exactly the same annotations from Spring MVC. But, this is not Spring MVC. And this isn’t, at least by default, the Servlet API. It’s a brand new web runtime, Spring WebFlux, running - in this instance - on Netty.
Spring Framework 5 changes things, though. Spring Framework 5 assumes a Java 8 baseline and with it lambdas and endless, functional, possibilities!
A lot of what we’re doing in a reactive web application lends itself to the functional programming style. Spring Framework 5 debuts a new functional reactive programming model that mirrors the controller-style programming model in Spring WebFlux. This new programming model is available exclusively in Spring WebFlux. Let’s see an example.
src/main/java/com/example/demo/ProfileEndpointConfiguration.javapackage com.example.demo;
import org.springframework.context.annotation.Bean;
import org.springframework.context.annotation.Configuration;
import org.springframework.web.reactive.function.server.RequestPredicate;
import org.springframework.web.reactive.function.server.RouterFunction;
import org.springframework.web.reactive.function.server.ServerResponse;
import static org.springframework.web.reactive.function.server.RequestPredicates.*;
import static org.springframework.web.reactive.function.server.RouterFunctions.route;
@Configuration
class ProfileEndpointConfiguration {
@Bean
RouterFunction<ServerResponse> routes(ProfileHandler handler) { (1)
return route(i(GET("/profiles")), handler::all) (2)
.andRoute(i(GET("/profiles/{id}")), handler::getById)
.andRoute(i(DELETE("/profiles/{id}")), handler::deleteById) (3)
.andRoute(i(POST("/profiles")), handler::create)
.andRoute(i(PUT("/profiles/{id}")), handler::updateById);
}
(4)
private static RequestPredicate i(RequestPredicate target) {
return new CaseInsensitiveRequestPredicate(target);
}
}| 1 | This is a Spring bean that describes routes and their handlers to the framework. The handler methods themselves are Java 8 references to methods on another injected bean. They could just as easily have been inline lambdas. |
| 2 | Each route has a RequestPredicate (the object produced by GET(..) in this line) and a HandlerFunction<ServerResponse>. |
| 3 | This route uses a path variable, {id}, which the framework will use to capture a parameter in the URI string. |
We make judicious use of static imports in this example to make things as concise as possible. RouterFunction<ServerResponse> is a builder API. You can store the result of each call to route or andRoute in an intermediate variable if you like. You could loop through records in a for-loop from records in a database and contribute new endpoints dynamically, if you wanted.
Spring WebFlux provides a DSL for describing how to match incoming requests. GET("/profiles") results in a RequestPredicate that matches incoming HTTP GET-method requests that are routed to the URI /profiles. You can compose RequestPredicate instances using .and(RequestPredicate), .not(RequestPredicate), or .or(RequestPredicate). In this example, I also provide a fairly trivial adapter - CaseInsensitiveRequestPredicate - that lower-cases all incoming URLs and matches it against the configured (and lower-cased) URI in the RequestPredicate. The result is that if you type http://localhost:8080/profiles or http://localhost:8080/PROfiLEs they’ll both work.
src/main/java/com/example/demo/CaseInsensitiveRequestPredicate.javapackage com.example.demo;
import org.springframework.http.server.PathContainer;
import org.springframework.web.reactive.function.server.RequestPredicate;
import org.springframework.web.reactive.function.server.ServerRequest;
import org.springframework.web.reactive.function.server.support.ServerRequestWrapper;
import java.net.URI;
public class CaseInsensitiveRequestPredicate implements RequestPredicate {
private final RequestPredicate target;
CaseInsensitiveRequestPredicate(RequestPredicate target) {
this.target = target;
}
@Override
public boolean test(ServerRequest request) { (1)
return this.target.test(new LowerCaseUriServerRequestWrapper(request));
}
@Override
public String toString() {
return this.target.toString();
}
}
(2)
class LowerCaseUriServerRequestWrapper extends ServerRequestWrapper {
LowerCaseUriServerRequestWrapper(ServerRequest delegate) {
super(delegate);
}
@Override
public URI uri() {
return URI.create(super.uri().toString().toLowerCase());
}
@Override
public String path() {
return uri().getRawPath();
}
@Override
public PathContainer pathContainer() {
return PathContainer.parsePath(path());
}
}| 1 | The meat of a RequestPredicate implementation is in the test(ServerRequest) method. |
| 2 | My implementation wraps the incoming ServerRequest, a common enough task that Spring WebFlux even provides a ServerRequestWrapper |
Once a request is matched, the HandlerFunction<ServerResponse> is invoked to produce a response. Let’s examine our handler object.
src/main/java/com/example/demo/ProfileHandler.javapackage com.example.demo;
import org.reactivestreams.Publisher;
import org.springframework.http.MediaType;
import org.springframework.stereotype.Component;
import org.springframework.web.reactive.function.server.ServerRequest;
import org.springframework.web.reactive.function.server.ServerResponse;
import reactor.core.publisher.Flux;
import reactor.core.publisher.Mono;
import java.net.URI;
@Component
class ProfileHandler {
(1)
private final ProfileService profileService;
ProfileHandler(ProfileService profileService) {
this.profileService = profileService;
}
(2)
Mono<ServerResponse> getById(ServerRequest r) {
return defaultReadResponse(this.profileService.get(id(r)));
}
Mono<ServerResponse> all(ServerRequest r) {
return defaultReadResponse(this.profileService.all());
}
Mono<ServerResponse> deleteById(ServerRequest r) {
return defaultReadResponse(this.profileService.delete(id(r)));
}
Mono<ServerResponse> updateById(ServerRequest r) {
Flux<Profile> id = r.bodyToFlux(Profile.class)
.flatMap(p -> this.profileService.update(id(r), p.getEmail()));
return defaultReadResponse(id);
}
Mono<ServerResponse> create(ServerRequest request) {
Flux<Profile> flux = request
.bodyToFlux(Profile.class)
.flatMap(toWrite -> this.profileService.create(toWrite.getEmail()));
return defaultWriteResponse(flux);
}
(3)
private static Mono<ServerResponse> defaultWriteResponse(Publisher<Profile> profiles) {
return Mono
.from(profiles)
.flatMap(p -> ServerResponse
.created(URI.create("/profiles/" + p.getId()))
.contentType(MediaType.APPLICATION_JSON_UTF8)
.build()
);
}
(4)
private static Mono<ServerResponse> defaultReadResponse(Publisher<Profile> profiles) {
return ServerResponse
.ok()
.contentType(MediaType.APPLICATION_JSON_UTF8)
.body(profiles, Profile.class);
}
private static String id(ServerRequest r) {
return r.pathVariable("id");
}
}| 1 | as before, we’re going to make use of our ProfileService to do the heavy lifting |
| 2 | Each handler method has an identical signature: ServerRequest is the request parameter and Mono<ServerResponse> is the return value. |
| 3 | We can centralize common logic in, yep! - you guessed it! — functions. This function creates a Mono<ServerResponse> from a Publisher<Profile> for any incoming request. Each request uses the ServerResponse builder object to create a response that has a Location header, a Content-Type header, and no payload. (You don’t need to send a payload in the response for PUT or POST, for example). |
| 4 | this method centralizes all configuration for replies to read requests (for instance, those coming from GET verbs) |
Straightforward, right? I like this approach - the handler object centralizes processing for related resources into a single class, just like with the controller-style arrangement. We’re also able to centralize routing logic in the @Configuration class.
This means it’s easier to see at a glance what routes have been configured. It’s easier to refactor routing. Routing is also now more dynamic. We can change how requests are matched, and we can dynamically contribute endpoints.
The only drawback to this style is that your code is inextricably tied to the Spring WebFlux component model. Your handler methods in the ProfileHandler are, no question at all, tied to Spring WebFlux. From where I sit, that’s OK.
A controller is supposed to be a thin adapter layer on top of your service. Most of the business logic lives in the service layer, or below. As we’ve already seen, we can easily unit test my service. And anyway, testing my HTTP endpoints requires something altogether different.
Test the HTTP Endpoints
We’ve seen two implementations of the same HTTP endpoints in this application. The classic endpoints are annotated with @Profile("classic") where as the functional reactive endpoints are annotated with @Profile("default"). If no other profile is active, any bean tagged with the default profile will be active. So, if you don’t specify classic, the default bean will activate.
We should test both, even if they’re just for demonstration purposes. I’ve extracted all the tests into a base class that I’ll extend twice, activating each of the two profiles to test in isolation each of the HTTP endpoint styles. See ClassicProfileEndpointsTest.java and FunctionalProfileEndpointsTest.java to see how each profile is activated.
The abstract base class contains the most important aspects for testing our HTTP endpoints.
.src/test/java/com/example/demo/AbstractBaseProfileEndpoints.java
package com.example.demo;

import lombok.extern.log4j.Log4j2;
import org.junit.jupiter.api.Test;
import org.mockito.Mockito;
import org.springframework.boot.test.autoconfigure.web.reactive.WebFluxTest;
import org.springframework.boot.test.mock.mockito.MockBean;
import org.springframework.http.MediaType;
import org.springframework.test.web.reactive.server.WebTestClient;
import reactor.core.publisher.Flux;
import reactor.core.publisher.Mono;

import java.util.UUID;

@Log4j2
@WebFluxTest (1)
public abstract class AbstractBaseProfileEndpoints {

    private final WebTestClient client; (2)

    @MockBean  (3)
    private ProfileRepository repository;

    public AbstractBaseProfileEndpoints(WebTestClient client) {
        this.client = client;
    }

    @Test
    public void getAll() {

        log.info("running  " + this.getClass().getName());

        (4)
        Mockito
            .when(this.repository.findAll())
            .thenReturn(Flux.just(new Profile("1", "A"), new Profile("2", "B")));

        (5)
        this.client
            .get()
            .uri("/profiles")
            .accept(MediaType.APPLICATION_JSON_UTF8)
            .exchange()
            .expectStatus().isOk()
            .expectHeader().contentType(MediaType.APPLICATION_JSON_UTF8)
            .expectBody()
            .jsonPath("$.[0].id").isEqualTo("1")
            .jsonPath("$.[0].email").isEqualTo("A")
            .jsonPath("$.[1].id").isEqualTo("2")
            .jsonPath("$.[1].email").isEqualTo("B");
    }

    @Test
    public void save() {
        Profile data = new Profile("123", UUID.randomUUID().toString() + "@email.com");
        Mockito
            .when(this.repository.save(Mockito.any(Profile.class)))
            .thenReturn(Mono.just(data));
        MediaType jsonUtf8 = MediaType.APPLICATION_JSON_UTF8;
        this
            .client
            .post()
            .uri("/profiles")
            .contentType(jsonUtf8)
            .body(Mono.just(data), Profile.class)
            .exchange()
            .expectStatus().isCreated()
            .expectHeader().contentType(jsonUtf8);
    }

    @Test
    public void delete() {
        Profile data = new Profile("123", UUID.randomUUID().toString() + "@email.com");
        Mockito
            .when(this.repository.findById(data.getId()))
            .thenReturn(Mono.just(data));
        Mockito
            .when(this.repository.deleteById(data.getId()))
            .thenReturn(Mono.empty());
        this
            .client
            .delete()
            .uri("/profiles/" + data.getId())
            .exchange()
            .expectStatus().isOk();
    }

    @Test
    public void update() {
        Profile data = new Profile("123", UUID.randomUUID().toString() + "@email.com");

        Mockito
            .when(this.repository.findById(data.getId()))
            .thenReturn(Mono.just(data));

        Mockito
            .when(this.repository.save(data))
            .thenReturn(Mono.just(data));

        this
            .client
            .put()
            .uri("/profiles/" + data.getId())
            .contentType(MediaType.APPLICATION_JSON_UTF8)
            .body(Mono.just(data), Profile.class)
            .exchange()
            .expectStatus().isOk();
    }

    @Test
    public void getById() {

        Profile data = new Profile("1", "A");

        Mockito
            .when(this.repository.findById(data.getId()))
            .thenReturn(Mono.just(data));

        this.client
            .get()
            .uri("/profiles/" + data.getId())
            .accept(MediaType.APPLICATION_JSON_UTF8)
            .exchange()
            .expectStatus().isOk()
            .expectHeader().contentType(MediaType.APPLICATION_JSON_UTF8)
            .expectBody()
            .jsonPath("$.id").isEqualTo(data.getId())
            .jsonPath("$.email").isEqualTo(data.getEmail());
    }
}| 1 | This is a another test slice. This one will test only the web tier, ignoring all the data tier functionality. |
| 2 | This will also contribute a mock HTTP client, the WebTestClient, that we can use to exercise the HTTP endpoints. This is a mock client - it will not actually issue HTTP requests over the wire. The network stack is virtual. It’ll exercise our HTTP endpoints, and all the Spring machinery, without connecting a server socket. |
| 3 | As this is a test slice, focused only on the HTTP components in Spring, we’re going to run into a problem. Our HTTP controllers depend on our service, and our service in turn depends on the reactive Spring Data MongoDB repository. The repository is part of the data tier. We use the Spring Boot annotation, @MockBean, to tell Spring Boot to create a Mockito-backed mock of the same type and - most importantly - to either contribute the mock to the Spring ApplicationContext if a bean of the same type doesn’t already exist or to replace any bean of the same type with the mock in the Spring ApplicationContext. |
| 4 | Since it’s just a Mockito-backed mock, we use Mockito to preprogram the stub so that it’ll return the pre-programmed responses. |
| 5 | Finally, we can use the WebTestClient. The WebTestClient lets us issue requests to our HTTP endpoints and then assert certain things about the response. |
The WebTestClient is quite powerful. It’s a test-centric alternative to the reactive WebClient in Spring WebFlux which is an honest-to-goodness reactive HTTP client. In this example, we make an HTTP request to an endpoint, confirm that the returned status code and headers line up with expectations, and then use JSON Path to poke at the structure of the returned result.
| JSON Path is like XPath, a query language for declaratively traversing nodes in an XML document. It allows easy traversal of JSON stanzas. It also provides a predicate language which we can use to match. |
HTTP is great for a request-reply centric interaction with a service. It makes it easy to interrogate the HTTP service and get a response. But what if we’re interested in listening to events?
We don’t want to constantly poll - we’d rather the service tell us when something is happening. Our service supports creating and updating records. As a client to such a service, it’d be nice to have a firehose endpoint - but don’t tell Twitter that!
We could subscribe to such an endpoint and update the client state whenever there’s a new record. We need a fully duplexed protocol to maintain a connection to the client and push data to the client from the service.
Add Reactive WebSockets to Spring WebFlux
Remember those ApplicationEvent instances that we published when a new record was created? Our goal now is to connect those events to websockets so that whenever a new event is published, a client gets a websocket notification.
Websockets are a compelling option. They enable two-way communication - client-to-service and service-to-client - on a connection. The protocol is particularly relevant for our use case because it’s well supported in browsers.
A client connects to a server, sending an HTTP GET request to upgrade the connection to a WebSocket from a simple HTTP request. This is known as handshaking. Once the handshake is done, clients communicate in an encoded fashion over a different protocol. It’s often used in web applications because it implies HTTP to initiate the discussion.
Modern HTTP browsers like Google Chrome and Mozilla’s Firefox also support the protocol well, making it a snap to write a trivial JavaScript client that runs in an HTML page. (We’ll get to the HTML client in a bit!)
It’s trivial to speak Websockets in Spring. So far, we’ve used Publisher<T> instances to communicate HTTP requests and responses back and forth. When we use websockets, which is an asynchronous, bi-directional protocol - we’ll use… (you guessed it!): Publisher<T> instances!
This is one of the nice things about Spring WebFlux. It’s easy to figure out where to go next and how to do it. When in doubt, use a Publisher<T>! If you want to send finite payloads to the client as JSON payloads in a REST endpoint, use a Publisher<T>! Want to do asynchronous, server-side push using server-sent events (text/event-stream)? Use a Publisher<T>! Want to communicate using websockets in a bi-directional fashion? Use a Publisher<T>!
It’s much easier to simulate synchronous and blocking I/O with an asynchronous API like the reactive streams types than it is to simulate asynchronous APIs with synchronous and blocking types. This is why enterprise application integration is typically done in terms of messaging systems, not RPC.
In Spring MVC you have a more two-sided system: some interactions with the client were synchronous and blocking, and that was the happy path. If you wanted to break out of that arrangement and do something that needs asynchronous I/O, like websockets or server-sent events, then the programming model changed profoundly. You’d end up quickly mired in threads or at least thread pools and Executor instances, managing threading manually. In Spring WebFlux, you have one kind of stuff.
We need to wire up a few objects to get Spring to work well with websockets. This is fairly boilerplate but it’s also trivial. We need a HandlerMapping, a WebSocketHandler, and a WebSocketHandlerAdapter.
Let’s look at the skeletal configuration in a configuration class, WebSocketConfiguration.
src/main/java/com/example/demo/WebSocketConfiguration.javapackage com.example.demo;
import com.fasterxml.jackson.core.JsonProcessingException;
import com.fasterxml.jackson.databind.ObjectMapper;
import lombok.extern.log4j.Log4j2;
import org.springframework.context.annotation.Bean;
import org.springframework.context.annotation.Configuration;
import org.springframework.web.reactive.HandlerMapping;
import org.springframework.web.reactive.handler.SimpleUrlHandlerMapping;
import org.springframework.web.reactive.socket.WebSocketHandler;
import org.springframework.web.reactive.socket.WebSocketMessage;
import org.springframework.web.reactive.socket.server.support.WebSocketHandlerAdapter;
import reactor.core.publisher.Flux;
import java.util.Collections;
import java.util.concurrent.Executor;
import java.util.concurrent.Executors;
@Log4j2
@Configuration
class WebSocketConfiguration {
(1)
@Bean
Executor executor() {
return Executors.newSingleThreadExecutor();
}
(2)
@Bean
HandlerMapping handlerMapping(WebSocketHandler wsh) {
return new SimpleUrlHandlerMapping() {
{
(3)
setUrlMap(Collections.singletonMap("/ws/profiles", wsh));
setOrder(10);
}
};
}
(4)
@Bean
WebSocketHandlerAdapter webSocketHandlerAdapter() {
return new WebSocketHandlerAdapter();
}
@Bean
WebSocketHandler webSocketHandler(
ObjectMapper objectMapper, (5)
ProfileCreatedEventPublisher eventPublisher (6)
) {
Flux<ProfileCreatedEvent> publish = Flux
.create(eventPublisher)
.share(); (7)
return session -> {
Flux<WebSocketMessage> messageFlux = publish
.map(evt -> {
try {
(8)
return objectMapper.writeValueAsString(evt.getSource());
}
catch (JsonProcessingException e) {
throw new RuntimeException(e);
}
})
.map(str -> {
log.info("sending " + str);
return session.textMessage(str);
});
return session.send(messageFlux); (9)
};
}
}| 1 | we’ll use the custom Executor in a bit when we bridge our events to the reactive websocket stream |
| 2 | The HandlerMapping object tells Spring about what handlers are available and what their URLs should be. It sits below the annotation-centric component model that we’ve looked at before. |
| 3 | here, we’re telling Spring WebFlux to map our WebSocketHandler to a particular URI, /ws/profiles |
| 4 | the WebSocketHandlerAdapter bridges the websocket support in Spring WebFlux with Spring WebFlux’s general routing machinery |
| 5 | we’re going to manually marshal some objects and turn them into JSON to send back to the client |
| 6 | This dependency is where the rubber meets the road. We’ll revisit this in a bit. This is the thing that consumes our application events and forwards them to the reactive websocket stream. We’re using a special factory method, Flux#create(Consumer<? super FluxSink<T>> emitter), to create and publish items from our Pubisher<T> manually. |
| 7 | The .share() method is another operator in Reactor. Keep in mind, we’re going to have a potentially large number of clients listening to our websocket stream. Each one will need updates when there’s new data. We don’t want one client consuming the data in one publisher to deprive the other clients of seeing the same data. So, we want to broadcast all the events to multiple subscribers. There’s no reason multiple Subscriber<T> instances can’t subscribe to the same Publisher<T>, but without this operator they’d end up exclusively consuming records. |
| 8 | We’re almost there! The interesting code is in our eventPublisher. The resulting Publisher<ProfileCreatedEvent> will be shared and from there each subscriber needs to transform the data into a Publisher<WebSocketMessage> that Spring WebFlux will in turn transform into messages over the websocket protocol. |
| 9 | Don’t forget to call session.send(Publisher<WebSocketMessage)! Otherwise none of this will work. :-) Or at least, that’s what I’m told. :cough: Not saying it happened to me, or anything.. 'course not… |
All that was fairly straightforward, one hopes. Let’s look at the most important bit - the ProfileCreatedEventPublisher. This code was harder for me to write than it is for you to read.
This component needs to act as a bridge; it needs to consume ProfileCreatedEvent events and then put them in an in-memory BlockingQueue<ProfileCreatedEvent> which our Publisher<WebSocketMessage> will drain in another thread. There’s really not that much to it; what you need to understand is the java.util.concurrent.BlockingQueue<T> collection, more than anything. A BlockingQueue<T> is an interesting beast.
If a consumer tries to drain an item from the queue, but the queue is empty, the queue will block until such time as a new item has been offered to the queue. This means we can simply loop forever, waiting for the next item to be added to the queue, and when it’s available our code will return and we can publish the event on the FluxSink<ProfileCreatedEvent> sink pointer we’ve been given when the Flux is first created.
The Consumer<T>.accept(FluxSink<ProfileCreatedEvent> sink) method, in this case, is only called once when the application starts up and we try to create the Flux for the first time. In that callback we begin the while loop that will constantly try to drain the BlockingQueue<T>. This infinite, and un-ending while-loop blocks! Naturally. That’s the whole point. So, we manage that ourselves using the previously configured java.util.concurrent.Executor instance.
src/main/java/com/example/demo/ProfileCreatedEventPublisher.javapackage com.example.demo;
import org.springframework.context.ApplicationListener;
import org.springframework.stereotype.Component;
import org.springframework.util.ReflectionUtils;
import reactor.core.publisher.FluxSink;
import java.util.concurrent.BlockingQueue;
import java.util.concurrent.Executor;
import java.util.concurrent.LinkedBlockingQueue;
import java.util.function.Consumer;
@Component
class ProfileCreatedEventPublisher implements
ApplicationListener<ProfileCreatedEvent>, (1)
Consumer<FluxSink<ProfileCreatedEvent>> { (2)
private final Executor executor;
private final BlockingQueue<ProfileCreatedEvent> queue =
new LinkedBlockingQueue<>(); (3)
ProfileCreatedEventPublisher(Executor executor) {
this.executor = executor;
}
(4)
@Override
public void onApplicationEvent(ProfileCreatedEvent event) {
this.queue.offer(event);
}
@Override
public void accept(FluxSink<ProfileCreatedEvent> sink) {
this.executor.execute(() -> {
while (true)
try {
ProfileCreatedEvent event = queue.take(); (5)
sink.next(event); (6)
}
catch (InterruptedException e) {
ReflectionUtils.rethrowRuntimeException(e);
}
});
}
}| 1 | The ApplicationListener<ApplicationEvent> interface is a Spring Framework construction. It tells the framework that we want to be notified, via the onApplicationEvent(ProfileCreatedEvent) method, of any new events published when a new Profile is created. |
| 2 | The Consumer<FluxSink<ProfileCreatedEvent>> construction is used when we create the Flux<T> with Flux.create. This bean is a Java 8 Consumer<T> that accepts an instance of a FluxSink<T>. A FluxSink<T> is a thing into which we can publish new items, however we may arrive at them. If you want to integrate the reactive world with non-reactive code in the outside world, use this construction. I can capture that reference and use it in another thread. For example, I could use it to capture events from Spring Integration, or from some messaging technology, or from anything else, in any other thread. I need only call sink.next(T) and the Subscriber<T> instances subscribed to this Publisher<T> will get the item T. |
| 3 | The LinkedBlockingQueue<T> is a marvel of the collections classes in the JDK. Thank you, Josh Bloch, Neal Gafter, and Doug Lea! <3 |
| 4 | when an event is published in our service, it is disseminated to any and all interested listeners, including this component which then offers the item into the Queue<T> |
| 5 | The event loop couldn’t be simpler. We wait for new entries to appear in the BlockingQueue<T>… |
| 6 | …and as soon as they are, we tell our reactive stream about them by calling FluxSink<T>.next(T) |
Whew! There are a few moving pieces here, but ultimately all we’re trying to do is get the Publisher<T> lined up in such a way that Spring WebFlux can connect it to the websocket protocol and to our clients. Speaking of…
You don’t really need much JavaScript to connect an HTML 5 client to a browser. As a stopgap, just to prove that things are working, create the simplest of possible clients, a static ws.html page with some barebones JavaScript code.
src/main/resources/static/ws.html<!DOCTYPE html>
<html lang="en">
<head>
<meta charset="utf-8">
<title>Profile notification client
</title>
</head>
<body>
<script>
(1)
var socket = new WebSocket('ws://localhost:8080/ws/profiles');
(2)
socket.addEventListener('message', function (event) {
window.alert('message from server: ' + event.data);
});
</script>
</body>
</html>| 1 | we use an WebSocket object in JavaScript, connecting to the /ws/profiles endpoint in our Spring Boot application |
| 2 | …and whenever a new message arrives we show the JSON in an alert dialog |
Couldn’t be simpler! You can drive new results into the system using the following curl incantation:
create.sh#!/bin/bash
port=${1:-8080}
curl -H "content-type: application/json" -d '{"email":"random"}' http://localhost:${port}/profiles (1)| 1 | this will POST a new record into the API which will then trigger a websocket notification if you have the browser client open. |
Start your app, open http://localhost:8080/ws.html in your browser and then run that create.sh in your shell. I’m assuming you have curl. This is a trivial end-to-end and it’s satisfying to see it all come together. That said, we should definitely test this. You know. Just in case.
Test Your Spring WebFlux WebSockets
We just did an end-to-end test. And that’s satisfying! But, it’s not substitute for automation. Let’s write a test. This time, we want to exercise all the moving parts - the database, the HTTP endpoints, and the websocket support. We’re going to write more of an integration test than a unit test.
src/test/java/com/example/demo/WebSocketConfigurationTest.javapackage com.example.demo;
import lombok.extern.log4j.Log4j2;
import org.assertj.core.api.Assertions;
import org.junit.jupiter.api.Test;
import org.reactivestreams.Publisher;
import org.springframework.boot.test.context.SpringBootTest;
import org.springframework.web.reactive.function.BodyInserters;
import org.springframework.web.reactive.function.client.WebClient;
import org.springframework.web.reactive.socket.WebSocketMessage;
import org.springframework.web.reactive.socket.WebSocketSession;
import org.springframework.web.reactive.socket.client.ReactorNettyWebSocketClient;
import org.springframework.web.reactive.socket.client.WebSocketClient;
import reactor.core.publisher.Flux;
import reactor.core.publisher.Mono;
import java.net.URI;
import java.util.UUID;
import java.util.concurrent.atomic.AtomicLong;
@Log4j2
@SpringBootTest(webEnvironment = SpringBootTest.WebEnvironment.DEFINED_PORT) (1)
class WebSocketConfigurationTest {
(2)
private final WebSocketClient socketClient = new ReactorNettyWebSocketClient();
(3)
private final WebClient webClient = WebClient.builder().build();
(4)
private Profile generateRandomProfile() {
return new Profile(UUID.randomUUID().toString(), UUID.randomUUID().toString() + "@email.com");
}
@Test
public void testNotificationsOnUpdates() throws Exception {
int count = 10; (5)
AtomicLong counter = new AtomicLong(); (6)
URI uri = URI.create("ws://localhost:8080/ws/profiles"); (7)
(8)
socketClient.execute(uri, (WebSocketSession session) -> {
(9)
Mono<WebSocketMessage> out = Mono.just(session.textMessage("test"));
(10)
Flux<String> in = session
.receive()
.map(WebSocketMessage::getPayloadAsText);
(11)
return session
.send(out)
.thenMany(in)
.doOnNext(str -> counter.incrementAndGet())
.then();
}).subscribe();
(12)
Flux
.<Profile>generate(sink -> sink.next(generateRandomProfile()))
.take(count)
.flatMap(this::write)
.blockLast();
Thread.sleep(1000);
Assertions.assertThat(counter.get()).isEqualTo(count); (13)
}
private Publisher<Profile> write(Profile p) {
return
this.webClient
.post()
.uri("http://localhost:8080/profiles")
.body(BodyInserters.fromObject(p))
.retrieve()
.bodyToMono(String.class)
.thenReturn(p);
}
}| 1 | There are no slices in this test. We’re starting up the whole application. Spring Boot lets us still exercise some control over things like the port to which the application binds when it starts. |
| 2 | Spring WebFlux provides a reactive WebSocketClient that we’ll use to consume messages coming off of the websocket stream. |
| 3 | Spring WebFlux also provides a reactive HTTP client, perfect for talking to other microservices. |
| 4 | We’re going to generate some random data and have it written to our MongoDB repository. |
| 5 | The plan is to write ten items using the POST endpoint in our API. We’ll first subscribe to the websocket endpoint and then we’ll start consuming and confirm that we’ve got ten records. |
| 6 | The websocket notifications will come in asynchronously, so we will use a Java AtomicLong to capture the count in a thread-safe manner. |
| 7 | Note that we’re talking to a ws:// endpoint, not an http:// endpoint. |
| 8 | The socketClient lets us subscribe to the websocket endpoint. It returns a Publisher<T> which this test promptly then subscribes to. |
| 9 | We send a throw away message to get the conversation started… |
| 10 | Then we setup a reactive pipeline to subscribe to any incoming messages coming in from the websocket endpoint as a WebSocketMessage endpoint whose String contents we unpack. |
| 11 | We use the WebSocketSession to write and receive data. For each item that’s returned we increment our AtomicLong. |
| 12 | Now that the websocket subscriber is up and running, we create a pipeline of elements that gets limited to count elements (10) and then issue count HTTP POST writes to the API using the reactive WebClient. We use blockLast() to force the writes to happen before we proceed to the next line where we compare consumed records. |
| 13 | Finally, after all the writes have occured and another second of padding to spare has elapsed, we confirm that we’ve seen count notifications for our count writes. |
All green! Nothing better than a green test suite, I always say. It looks like things are on the up and up.
Next Steps
We’ve looked at the need for asynchronous I/O, the missing computational metaphor, the reactive streams specification, Pivotal’s Reactor project, Spring’s new reactive groove, Spring Data Kay and reactive MongoDB, Spring MVC-style HTTP endpoints, functional programming with Java 8 and functional reactive HTTP endpoints, reactive websockets, integration with non-reactive event sources and - through it all - testing!
But this is just the beginning. We’re missing security and a slick HTML client and security, after all…
Secure Your Spring WebFlux Reactive API with OIDC
OIDC is an extension on top of OAuth 2.0 that allows you to have authentication as part of your flow. If you use OAuth 2.0 without OIDC, you will only know that a person is allowed to access your API. You won’t know who they are. OIDC adds a ID Token in addition to an access token, and it also provides a number of other niceties that make it easier to use OAuth 2.0.
Using OIDC to secure your Spring WebFlux API is as simple as adding the Spring Security starter and a couple of its friends to your pom.xml.
<?xml version="1.0" encoding="UTF-8"?>
<project>
    ...
    <dependencies>
        ...
        <dependency>
            <groupId>org.springframework.boot</groupId>
            <artifactId>spring-boot-starter-security</artifactId>
        </dependency>
        <dependency>
            <groupId>org.springframework.security</groupId>
            <artifactId>spring-security-oauth2-client</artifactId>
        </dependency>
        <dependency>
            <groupId>org.springframework.security</groupId>
            <artifactId>spring-security-oauth2-resource-server</artifactId>
        </dependency>
        <dependency>
            <groupId>org.springframework.security</groupId>
            <artifactId>spring-security-oauth2-jose</artifactId>
        </dependency>
    ...
</project>
Add Authentication with Okta to Spring WebFlux
OIDC requires an identity provider (or IdP). You can use many well-known ones like Google or Facebook, but those services don’t allow you to manage your users like you would in Active Directory. Okta allows this, and you can use Okta’s API for OIDC.
At Okta, our goal is to make identity management a lot easier, more secure, and more scalable than what you’re used to. Okta is a cloud service that allows developers to create, edit, and securely store user accounts and user account data, and connect them with one or multiple applications.
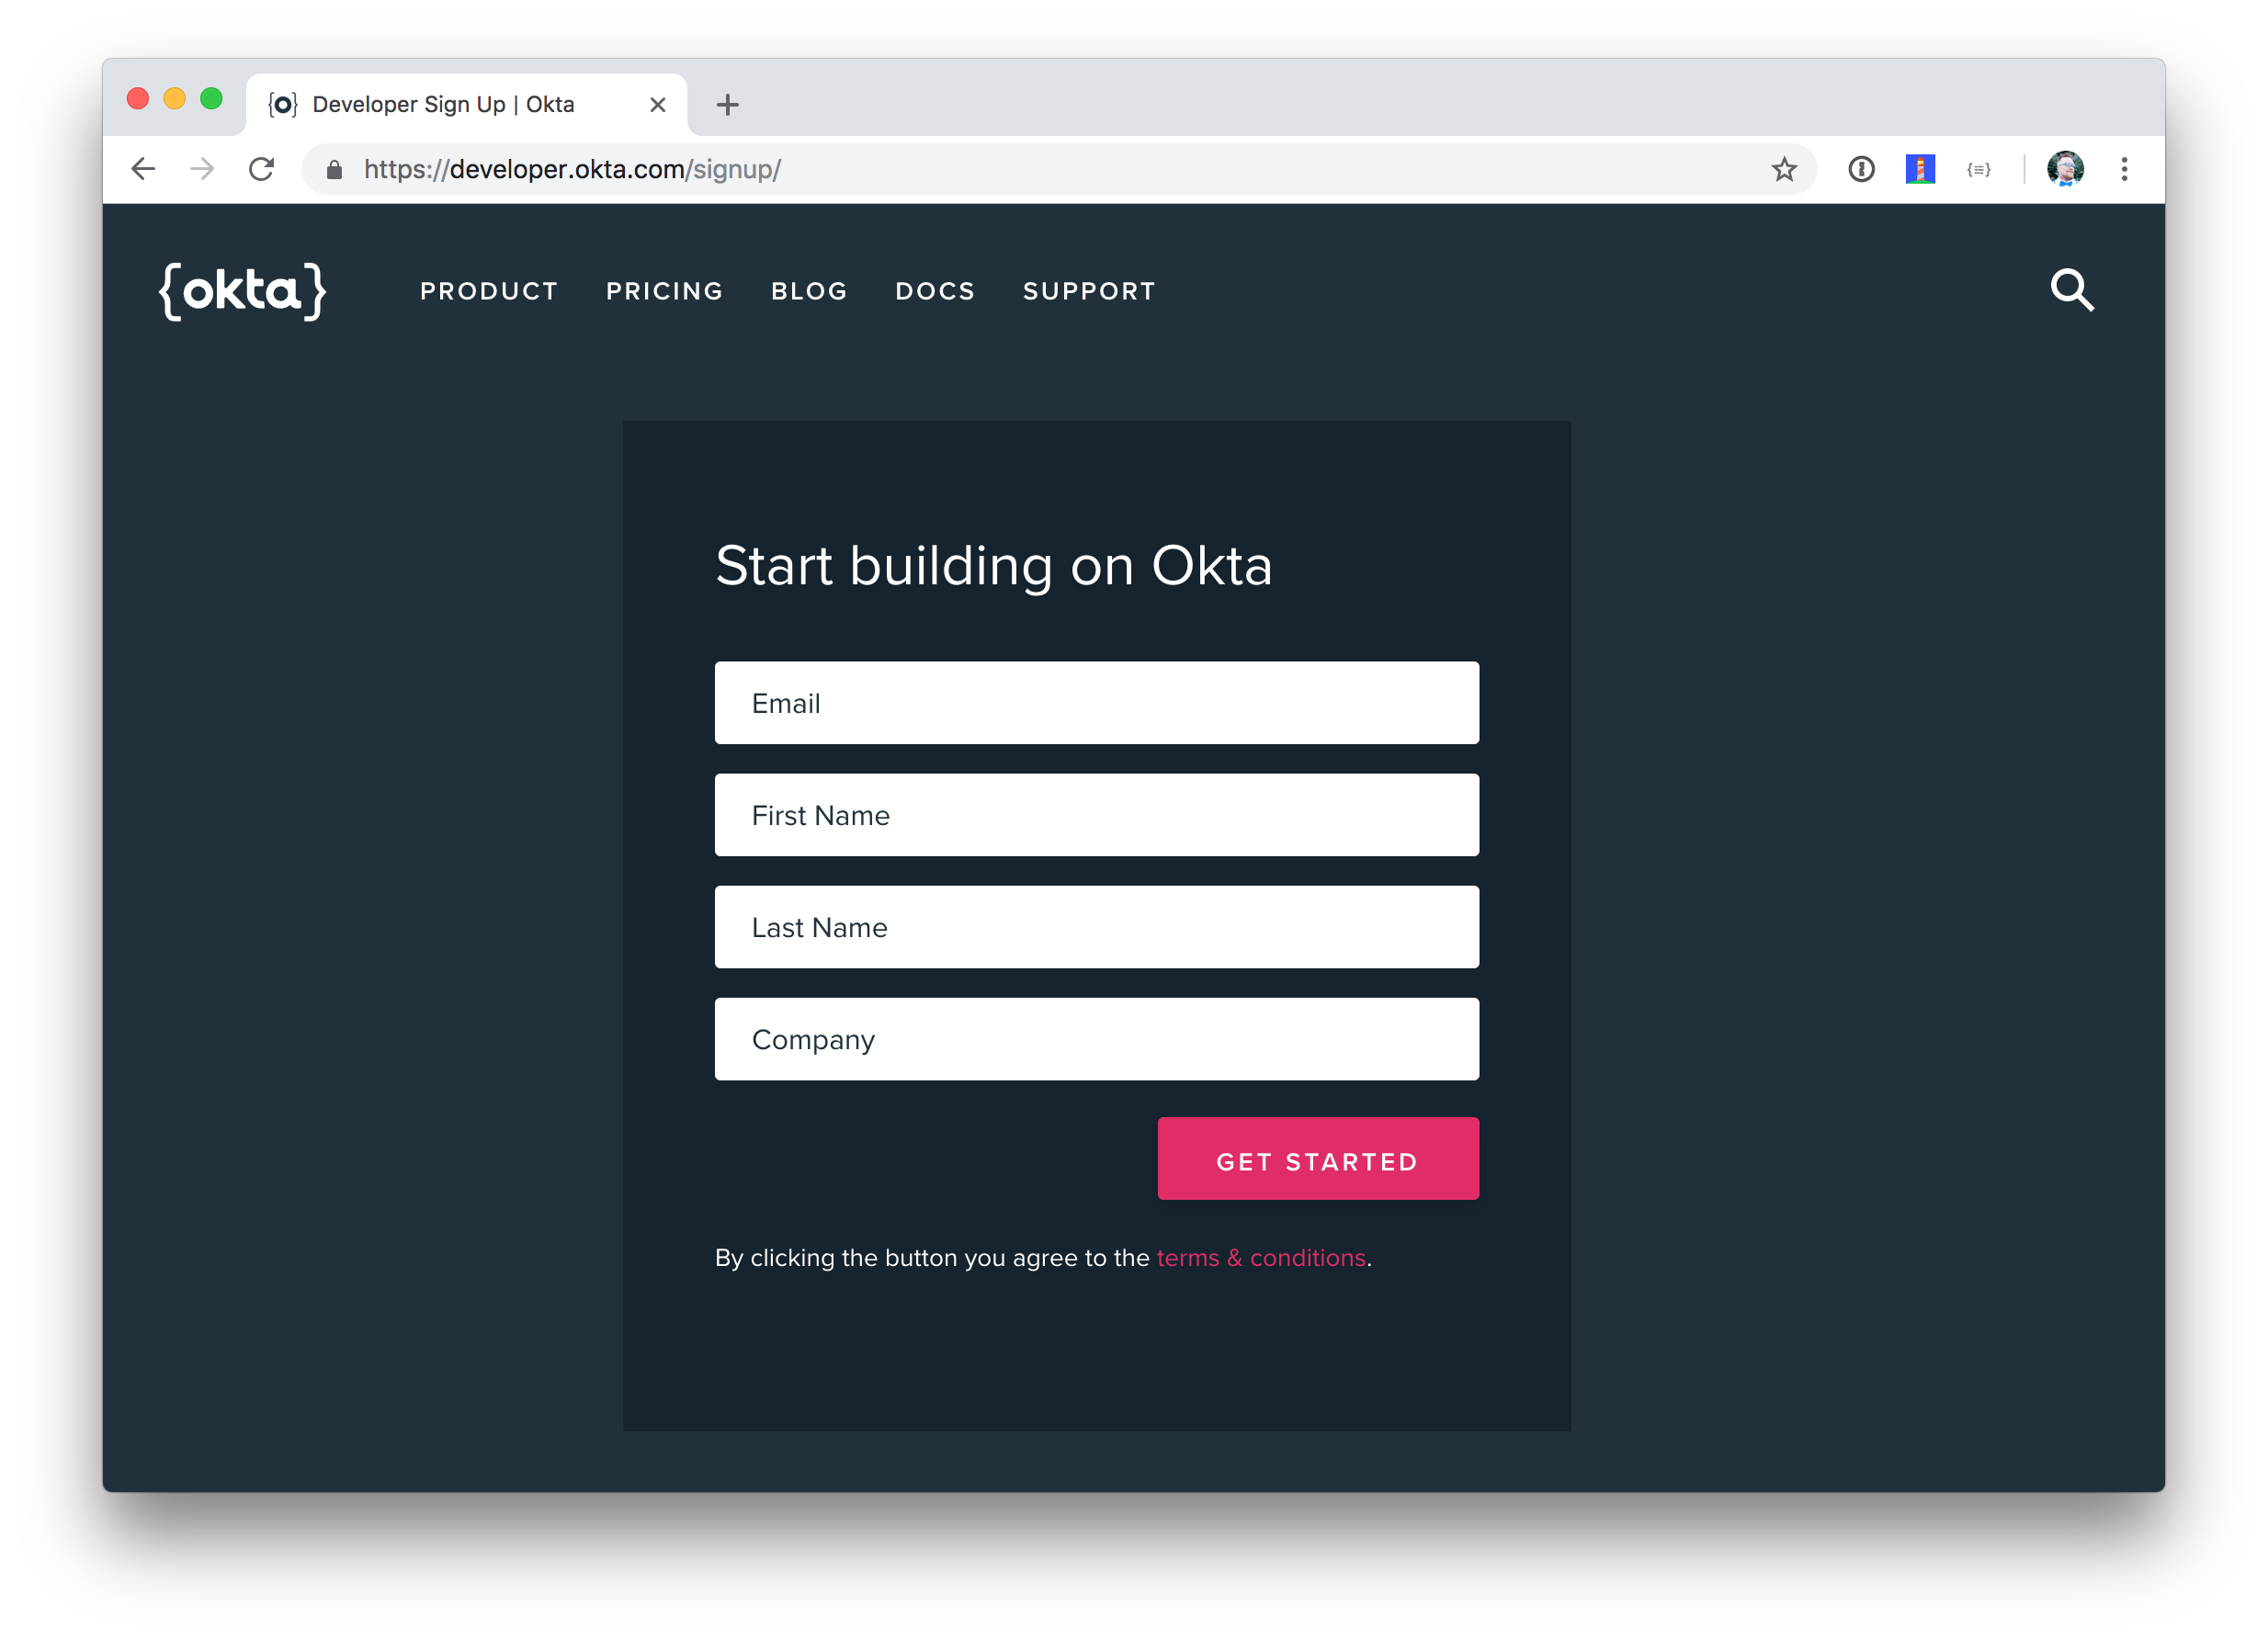
Giddyup! Register for a forever-free developer account, and when you’re done, come on back so you can learn more about how to secure your reactive API!
Create an OIDC App in Okta
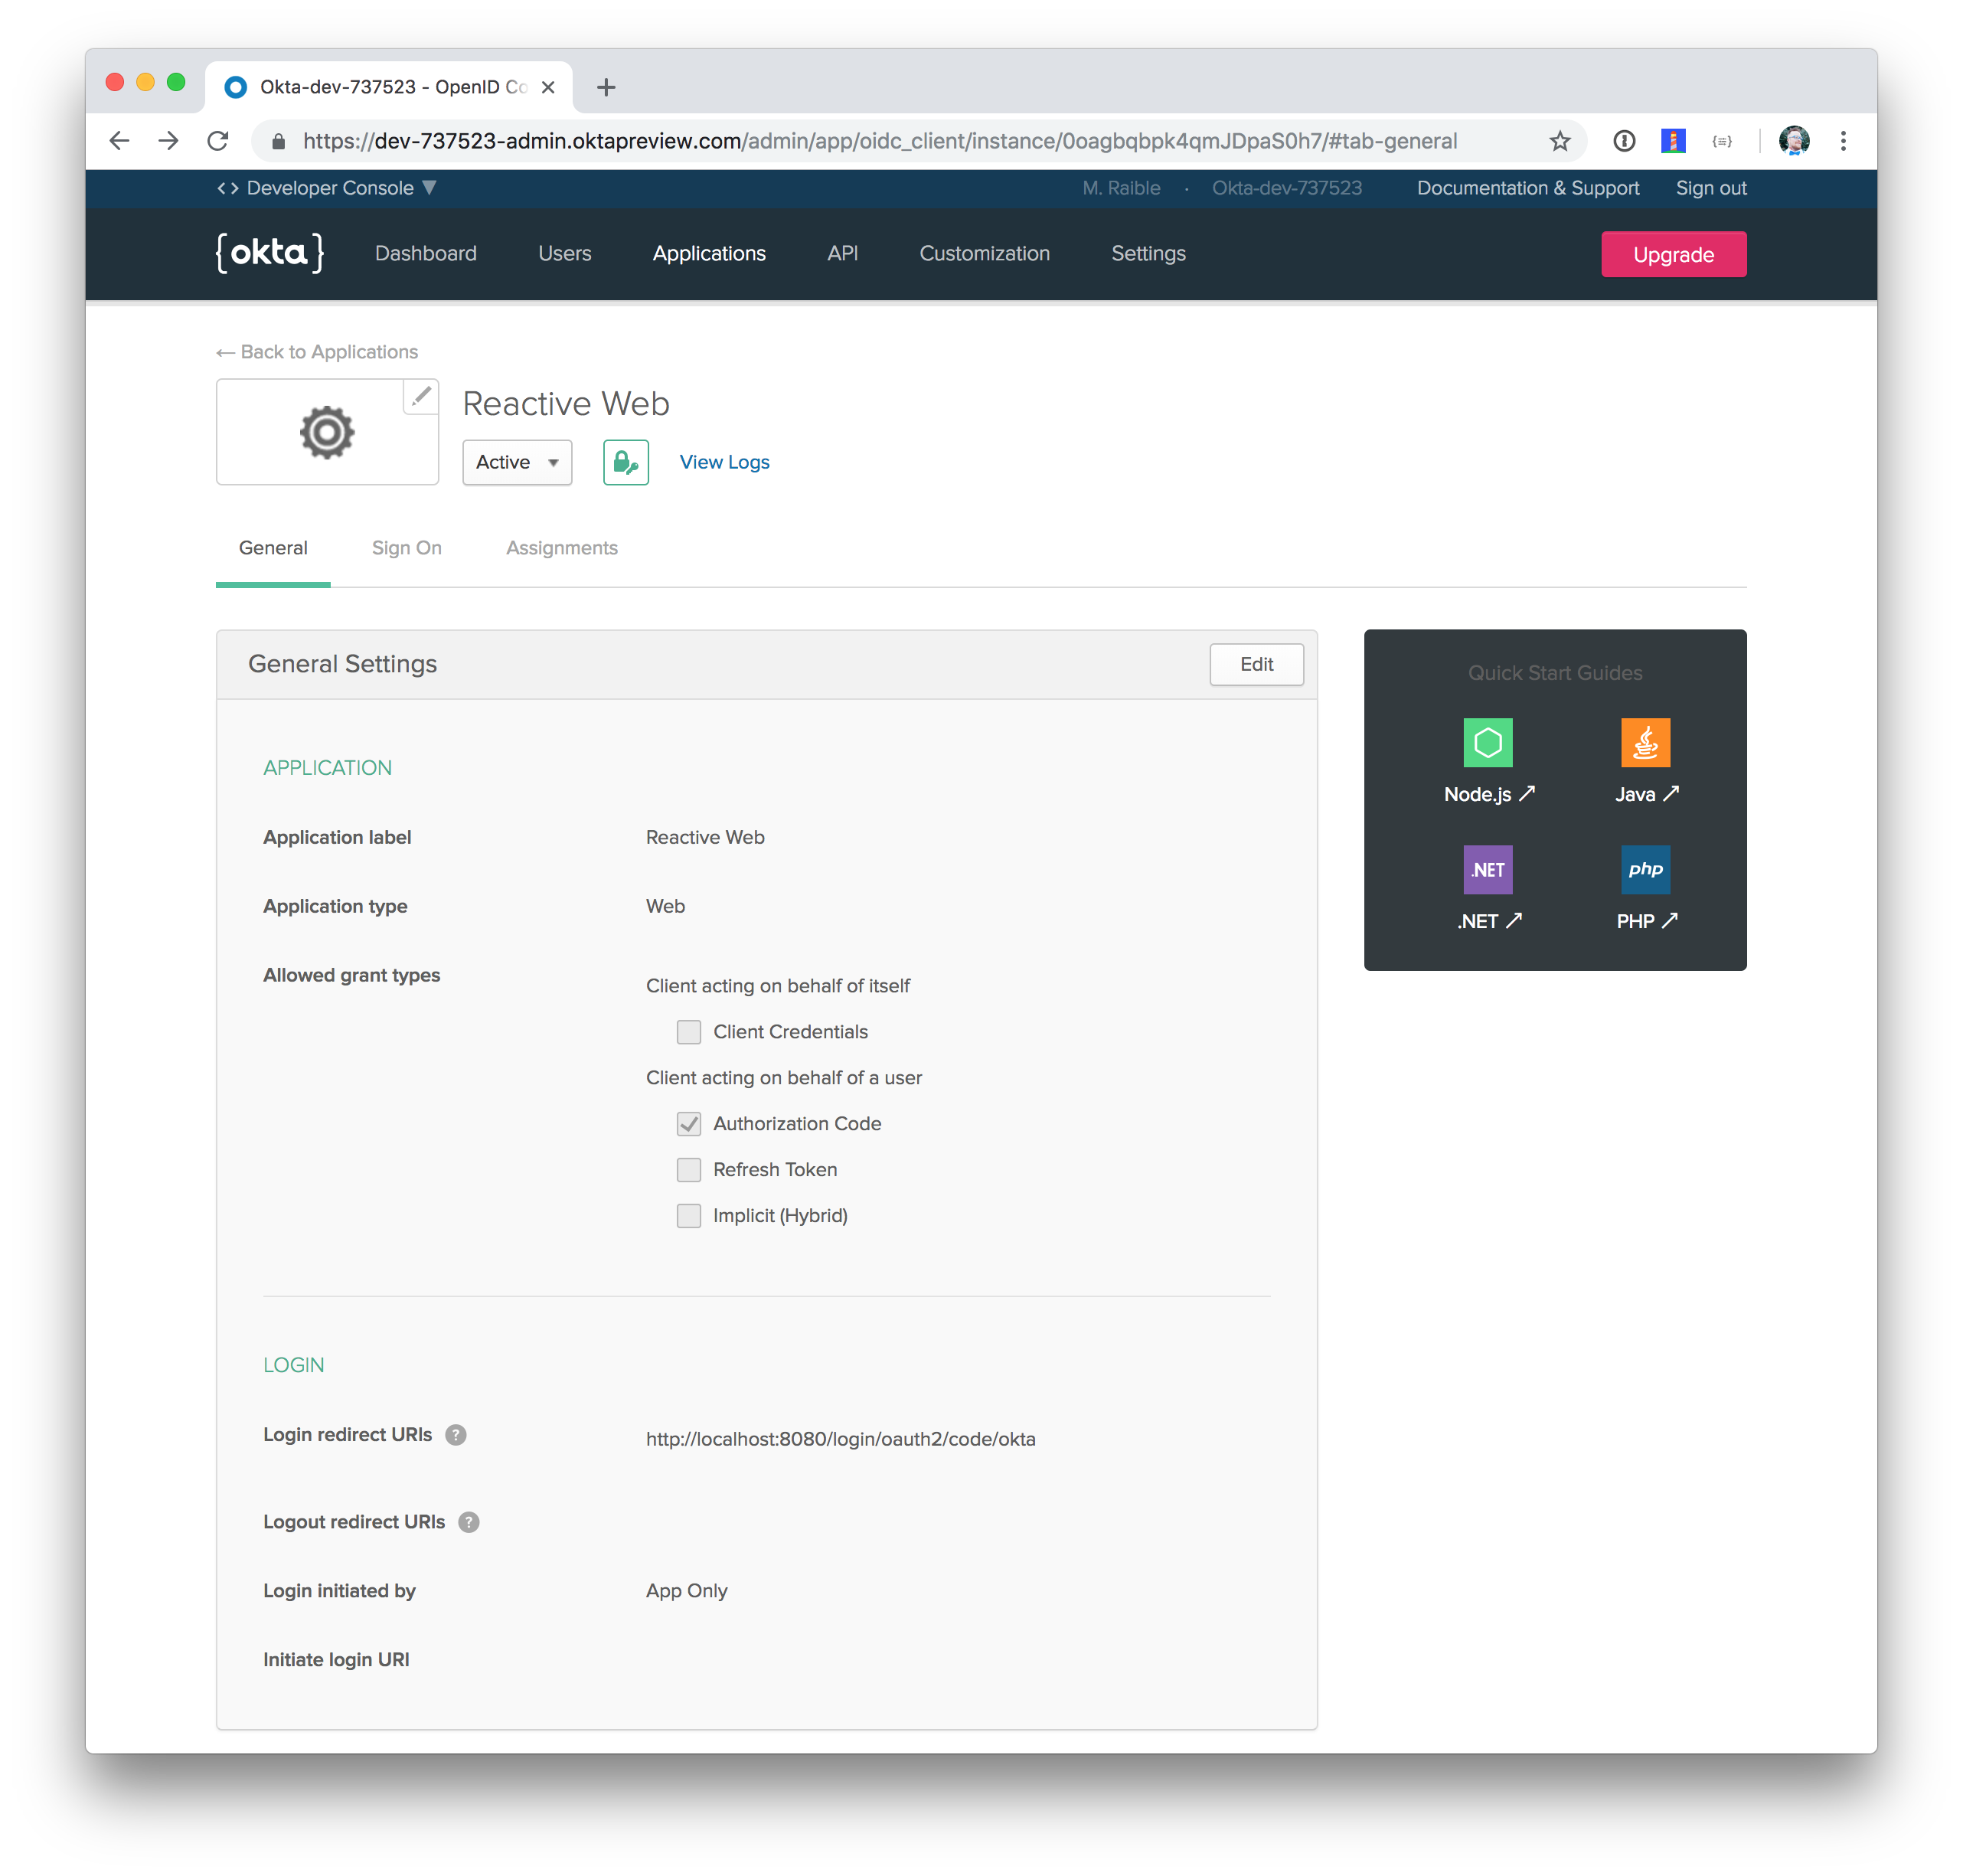
Log in to your Okta Developer account and navigate to Applications > Add Application. Click Web and click Next. Give the app a name you’ll remember, and specify http://localhost:8080/login/oauth2/code/okta as a Login redirect URI. Click Done. The result should look something like the screenshot below.
Copy and paste the URI of your default authorization server, client ID, and the client secret into src/main/resources/application.yml. Create this file, and you can delete the application.properties file in the same directory.
spring:
  security:
    oauth2:
      client:
        provider:
          okta:
            issuer-uri: https://{yourOktaDomain}/oauth2/default
        registration:
          okta:
            client-id: {clientId}
            client-secret: {clientSecret}
Restart your Spring Boot app, and try to access http://localhost:8080/profiles. You’ll be redirected to Okta to login.
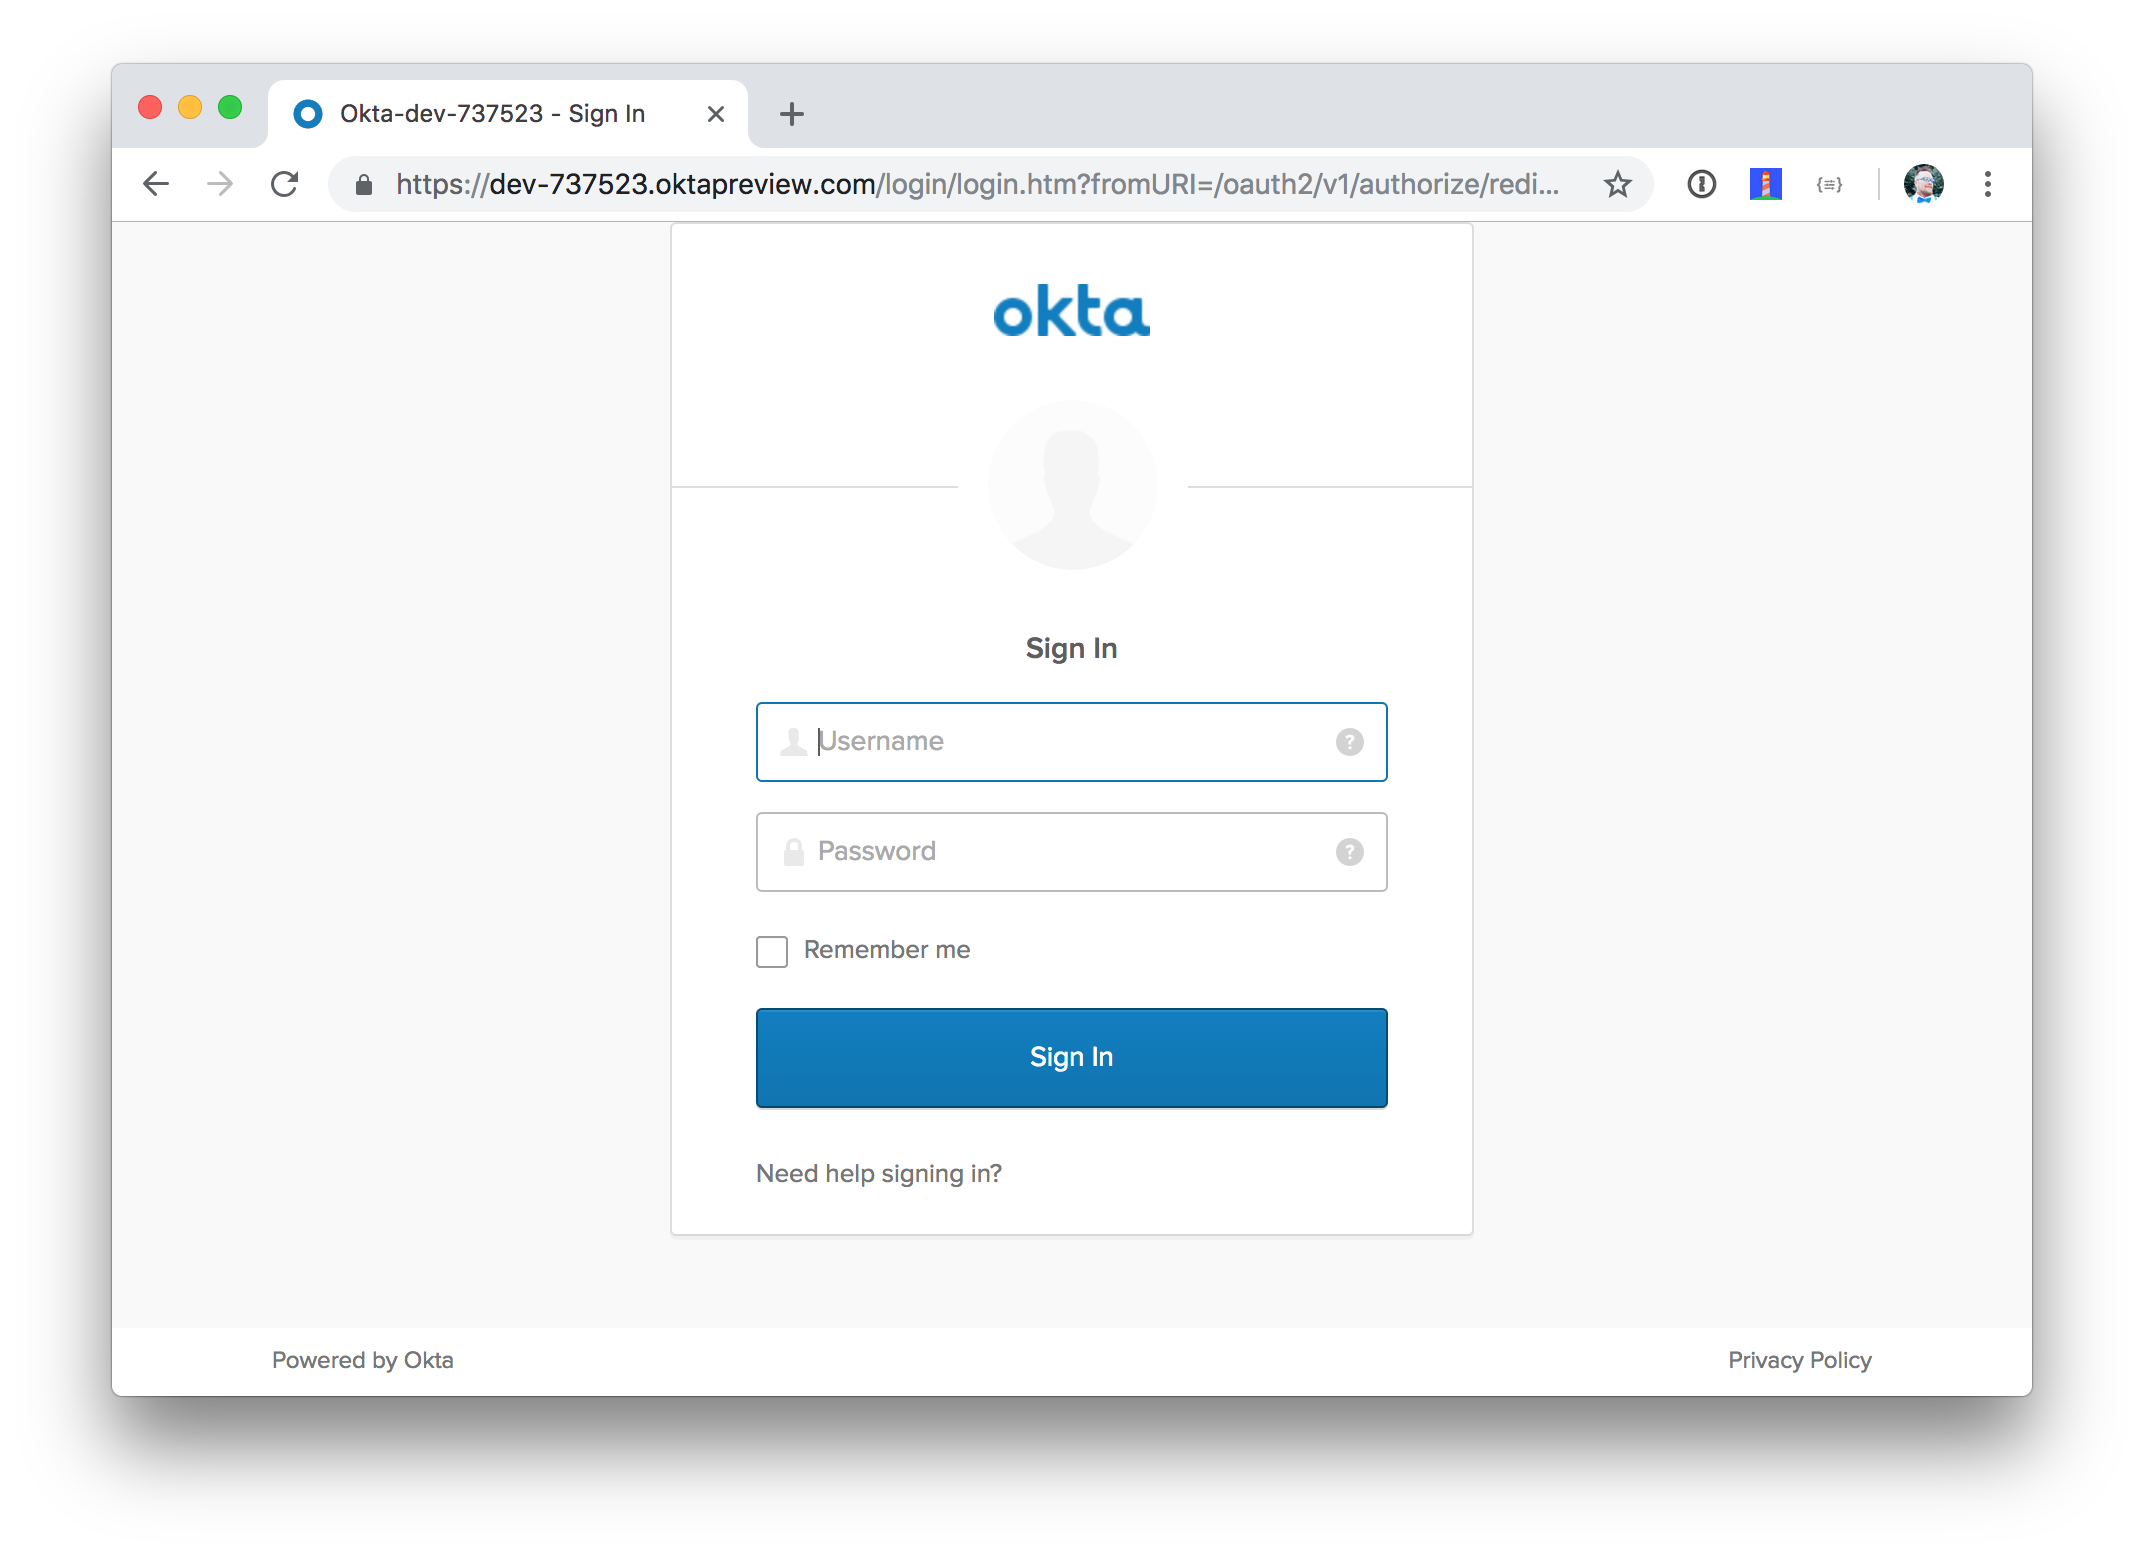
After entering your credentials, you’ll be redirected back to the app and see any profiles you entered.

Call Your Reactive Spring WebFlux API with an Access Token
To turn your API into a resource server, that can be accessed with an access token, you’ll need to add a resourceserver configuration to your application.yml. Modify your application.yml to look as follows:
oidc:
  issuer-uri: https://{yourOktaDomain}/oauth2/default
  client-id: {clientId}
  client-secret: {clientSecret}

spring:
  security:
    oauth2:
      client:
        provider:
          okta:
            issuer-uri: ${oidc.issuer-uri}
        registration:
          okta:
            client-id: ${oidc.client-id}
            client-secret: ${oidc.client-secret}
      resourceserver:
        jwt:
          issuer-uri: ${oidc.issuer-uri}
Then create a SecurityConfiguration.java class to configure the resource server.
src/main/java/com/example/demo/SecurityConfiguration.javapackage com.example.demo;
import org.springframework.context.annotation.Bean;
import org.springframework.security.config.annotation.web.reactive.EnableWebFluxSecurity;
import org.springframework.security.config.web.server.ServerHttpSecurity;
import org.springframework.security.web.server.SecurityWebFilterChain;
@EnableWebFluxSecurity
public class SecurityConfiguration {
@Bean
public SecurityWebFilterChain securityWebFilterChain(ServerHttpSecurity http) {
return http
.authorizeExchange()
.anyExchange().authenticated()
.and()
.oauth2Login()
.and()
.oauth2ResourceServer()
.jwt().and().and().build();
}
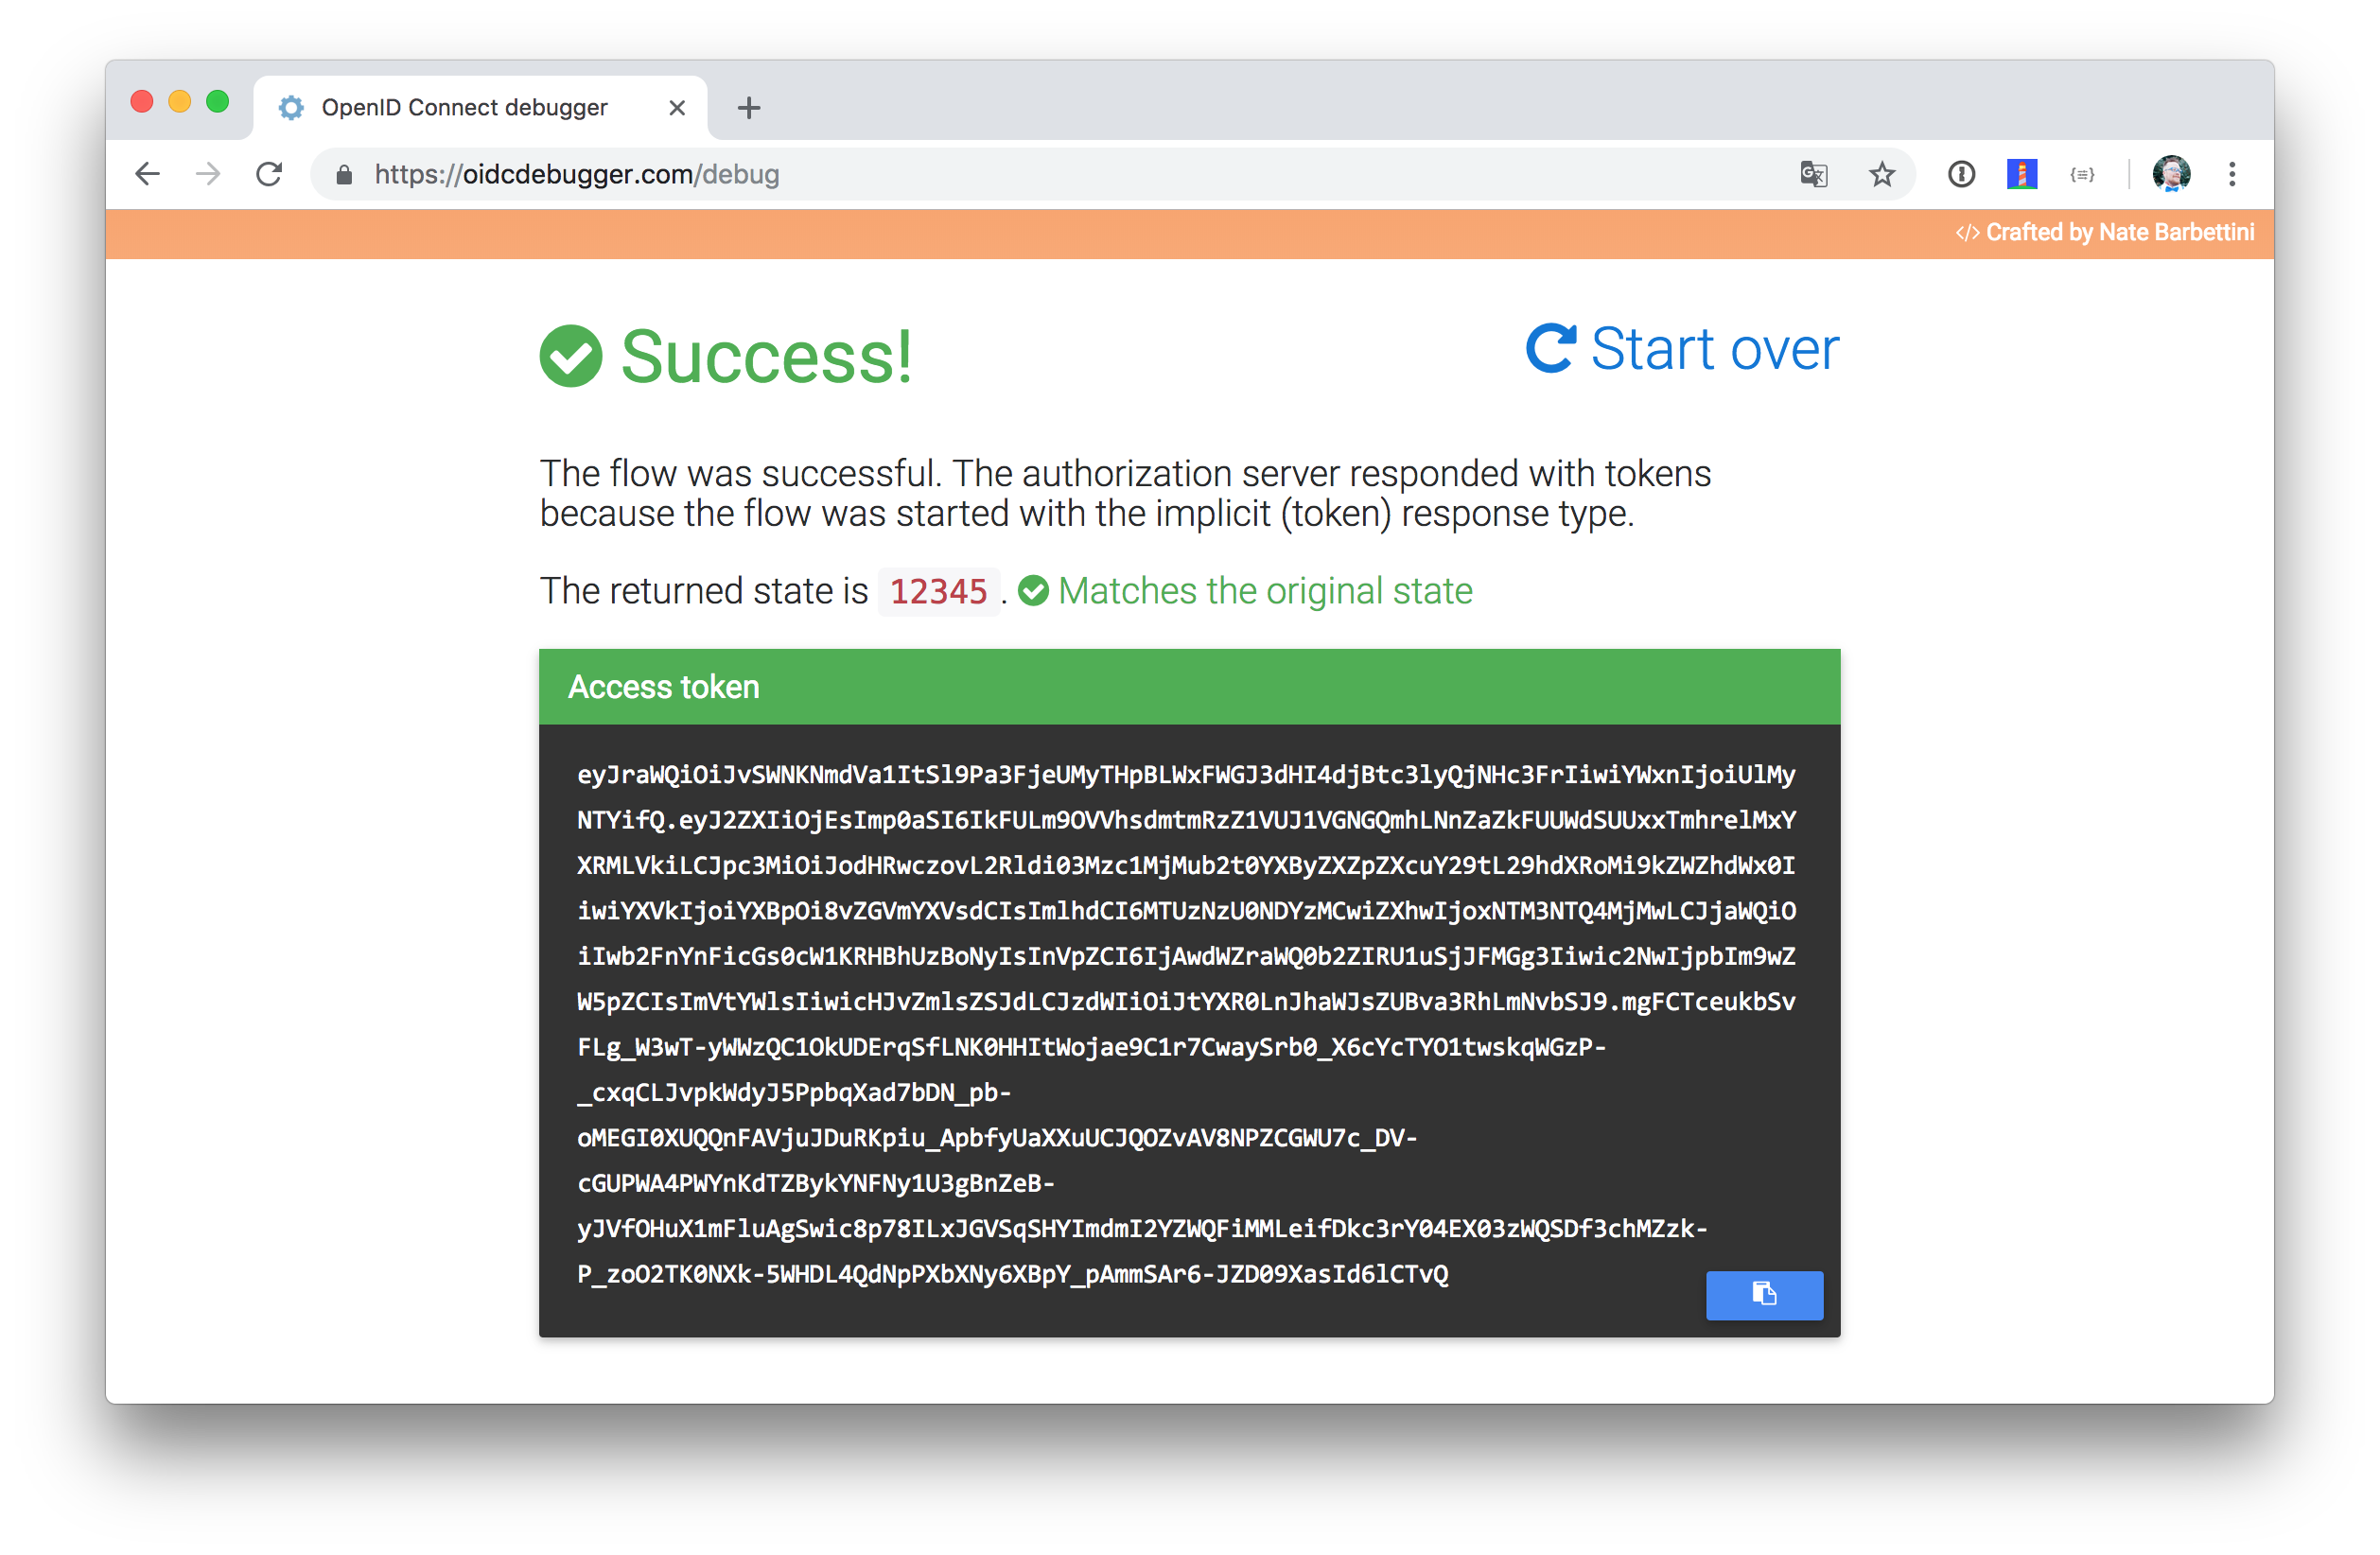
}Now you should be able to call your application from the command line. You can use OpenID Connect <debugger/> to get an access token. This website was written by Okta’s own Nate Barbettini.
To use it, I had to tweak my application to allow Implicit flow with an access token, add https://oidcdebugger.com/debug as a login redirect URI, and manually enter a state variable, but otherwise, it was pretty easy! The screenshot below shows my success. Your authorization URI should look as follows:
https://{yourOktaDomain}/oauth2/default/v1/authorize
You can get this value from your OIDC configuration .well-known endpoint.
https://{yourOktaDomain}/oauth2/default/.well-known/openid-configuration
Once you have an access token, you can modify create.sh to use it.
create.sh#!/bin/bash
port=${1:-8080}
accessToken=<your access token>
curl -H "content-type: application/json" -H "authorization: Bearer ${accessToken}" -d '{"email":"random"}' http://localhost:${port}/profilesLearn More About Reactive Programming, Spring WebFlux, and OIDC
This article showed you how to develop a reactive API with Spring WebFlux and secure it using Spring Security’s excellent OIDC support. In a future post, we’ll show you how to create a React UI for this API and provide you with techniques for handling streaming data in your browser.
In the meantime, here’s some good articles you can read on reactive programming, Spring WebFlux, and OIDC.
The source code contained in this post is available in the okta-spring-webflux-react-example repo on GitHub.
Have questions? Please leave a comment below, hit up @starbuxman or @mraible on Twitter, or post a question on our Developer Forums.
Like what you learned today? Follow @oktadev, like us on Facebook, follow us on LinkedIn, and subscribe to our YouTube channel. We publish lots of interesting information for developers!
Changelog:
- May 24, 2019: Updated to use Spring Boot 2.1.5 and, fix typos, and update Spring Security’s resource server configuration. You can see the example app changes in okta-spring-webflux-react-example#13; changes to this post can be viewed in okta.github.io#2897.
- Nov 6, 2018:
Updated to remove the
@ExtendWith(SpringExtension.class)annotation. It’s no longer necessary if you’re a Spring Boot testing annotation. You can see the example app changes in okta-spring-webflux-react-example#7; changes to this post can be viewed in okta.github.io#2463. - Nov 5, 2018: Updated to use Spring Boot 2.1 GA release. You can see the example app changes in okta-spring-webflux-react-example#5; changes to this post can be viewed in okta.github.io#2458.
Matt Raible is a well-known figure in the Java community and has been building web applications for most of his adult life. For over 20 years, he has helped developers learn and adopt open source frameworks and use them effectively. He's a web developer, Java Champion, and Developer Advocate at Okta. Matt has been a speaker at many conferences worldwide, including Devnexus, Devoxx Belgium, Devoxx France, Jfokus, and JavaOne. He is the author of The Angular Mini-Book, The JHipster Mini-Book, Spring Live, and contributed to Pro JSP. He is a frequent contributor to open source and a member of the JHipster development team. You can find him online @mraible and raibledesigns.com.
Okta Developer Blog Comment Policy
We welcome relevant and respectful comments. Off-topic comments may be removed.